
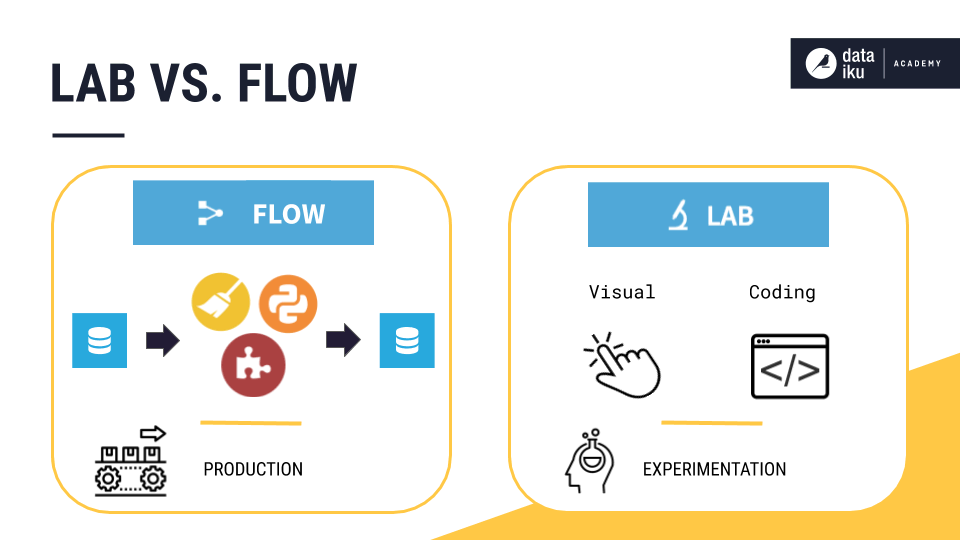
Concept | The Lab#
You can experiment with data preparation and machine learning models in the Lab.
Keeping experimentation in the Lab helps avoid overcrowding the Flow with unnecessary items that you won’t use in production. The Flow is mostly meant to keep the work that’s stable and ready for use.
The Lab is especially useful when an existing workflow is already in production, or when colleagues are simultaneously working alongside you, experimenting with their own ideas.
When you are satisfied with data preparation or models built in the Lab, you can deploy that work to the Flow.
Using the Lab#
A Lab environment is attached to a dataset in the Flow. You can access the Lab either from within a dataset or with the dataset selected in the Flow:
In the Actions (
 ) tab of the right panel, select the Lab button.
In the right panel, select the Lab (
 ) tab.
Then, you can chose to create:
A visual ML task such as prediction models or image classification
A visual analysis script for interactive data preparation, or
A code notebook in a variety of programming languages, such as Python, R, and SQL.
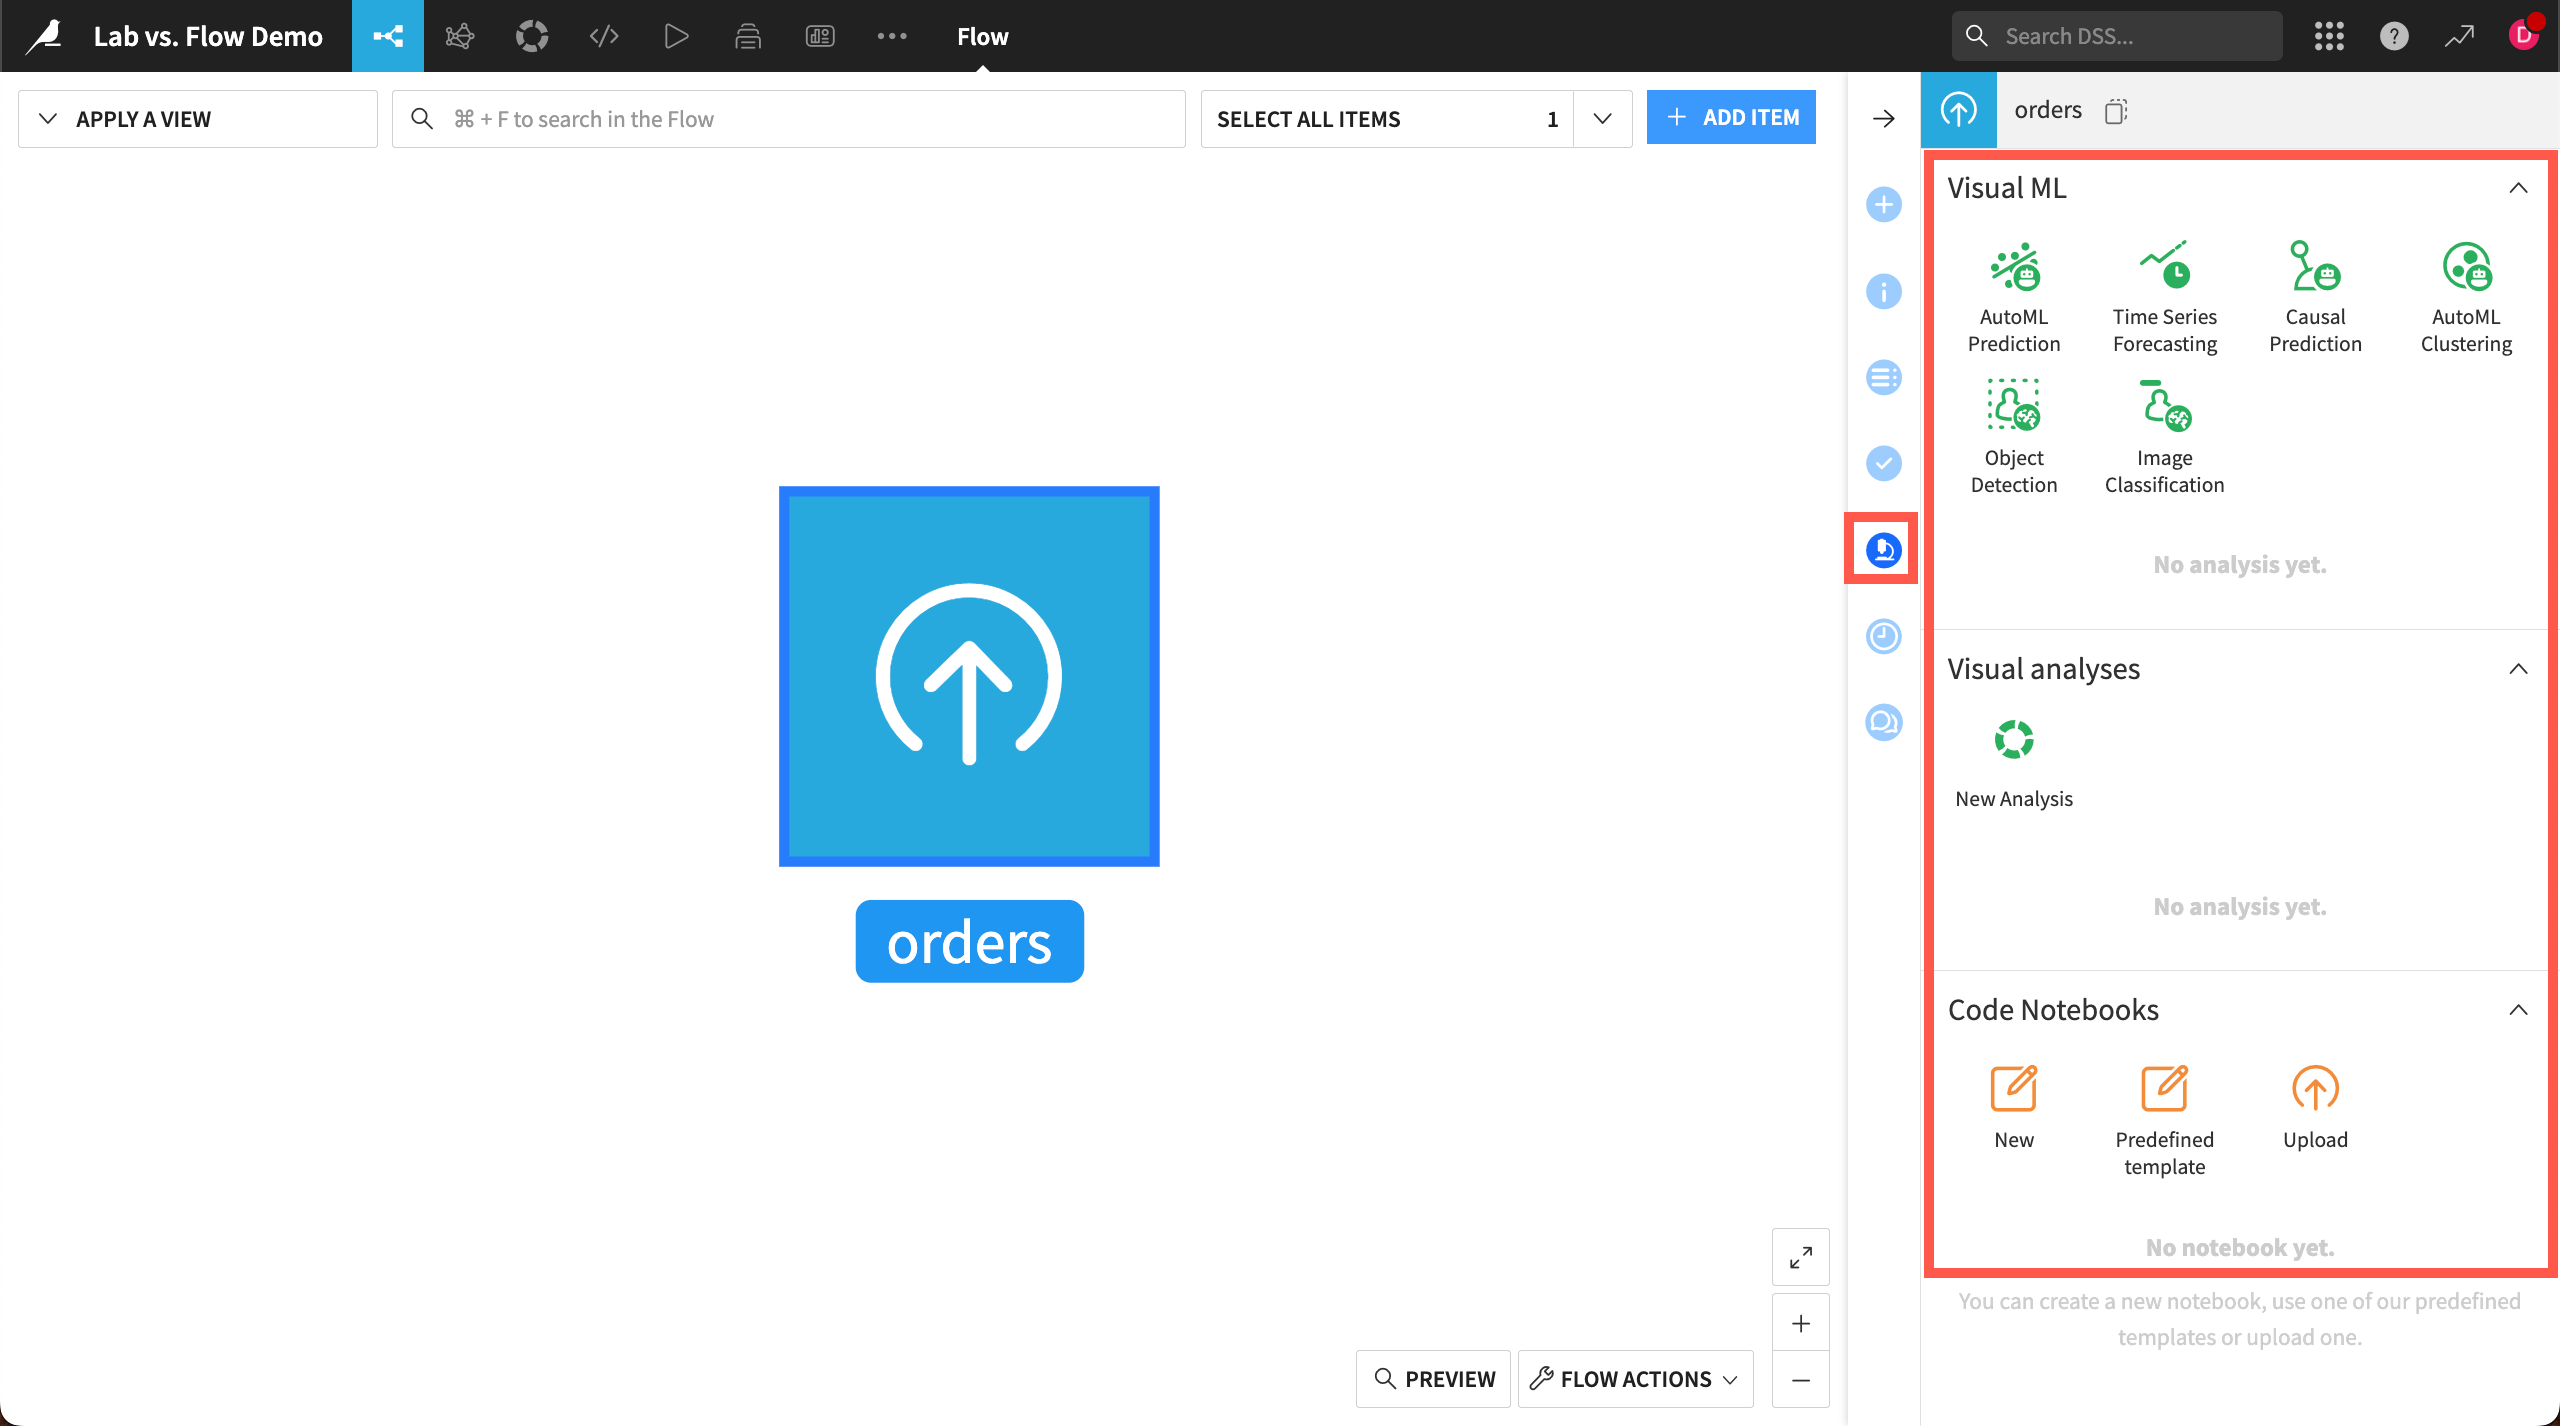
Any work completed in the Lab doesn’t affect datasets in the Flow until you deploy it. You can access saved work in the Lab tab of the right panel, and in other relevant places such as the ML (![]() ) and Code (
) and Code (![]() ) menus.
) menus.
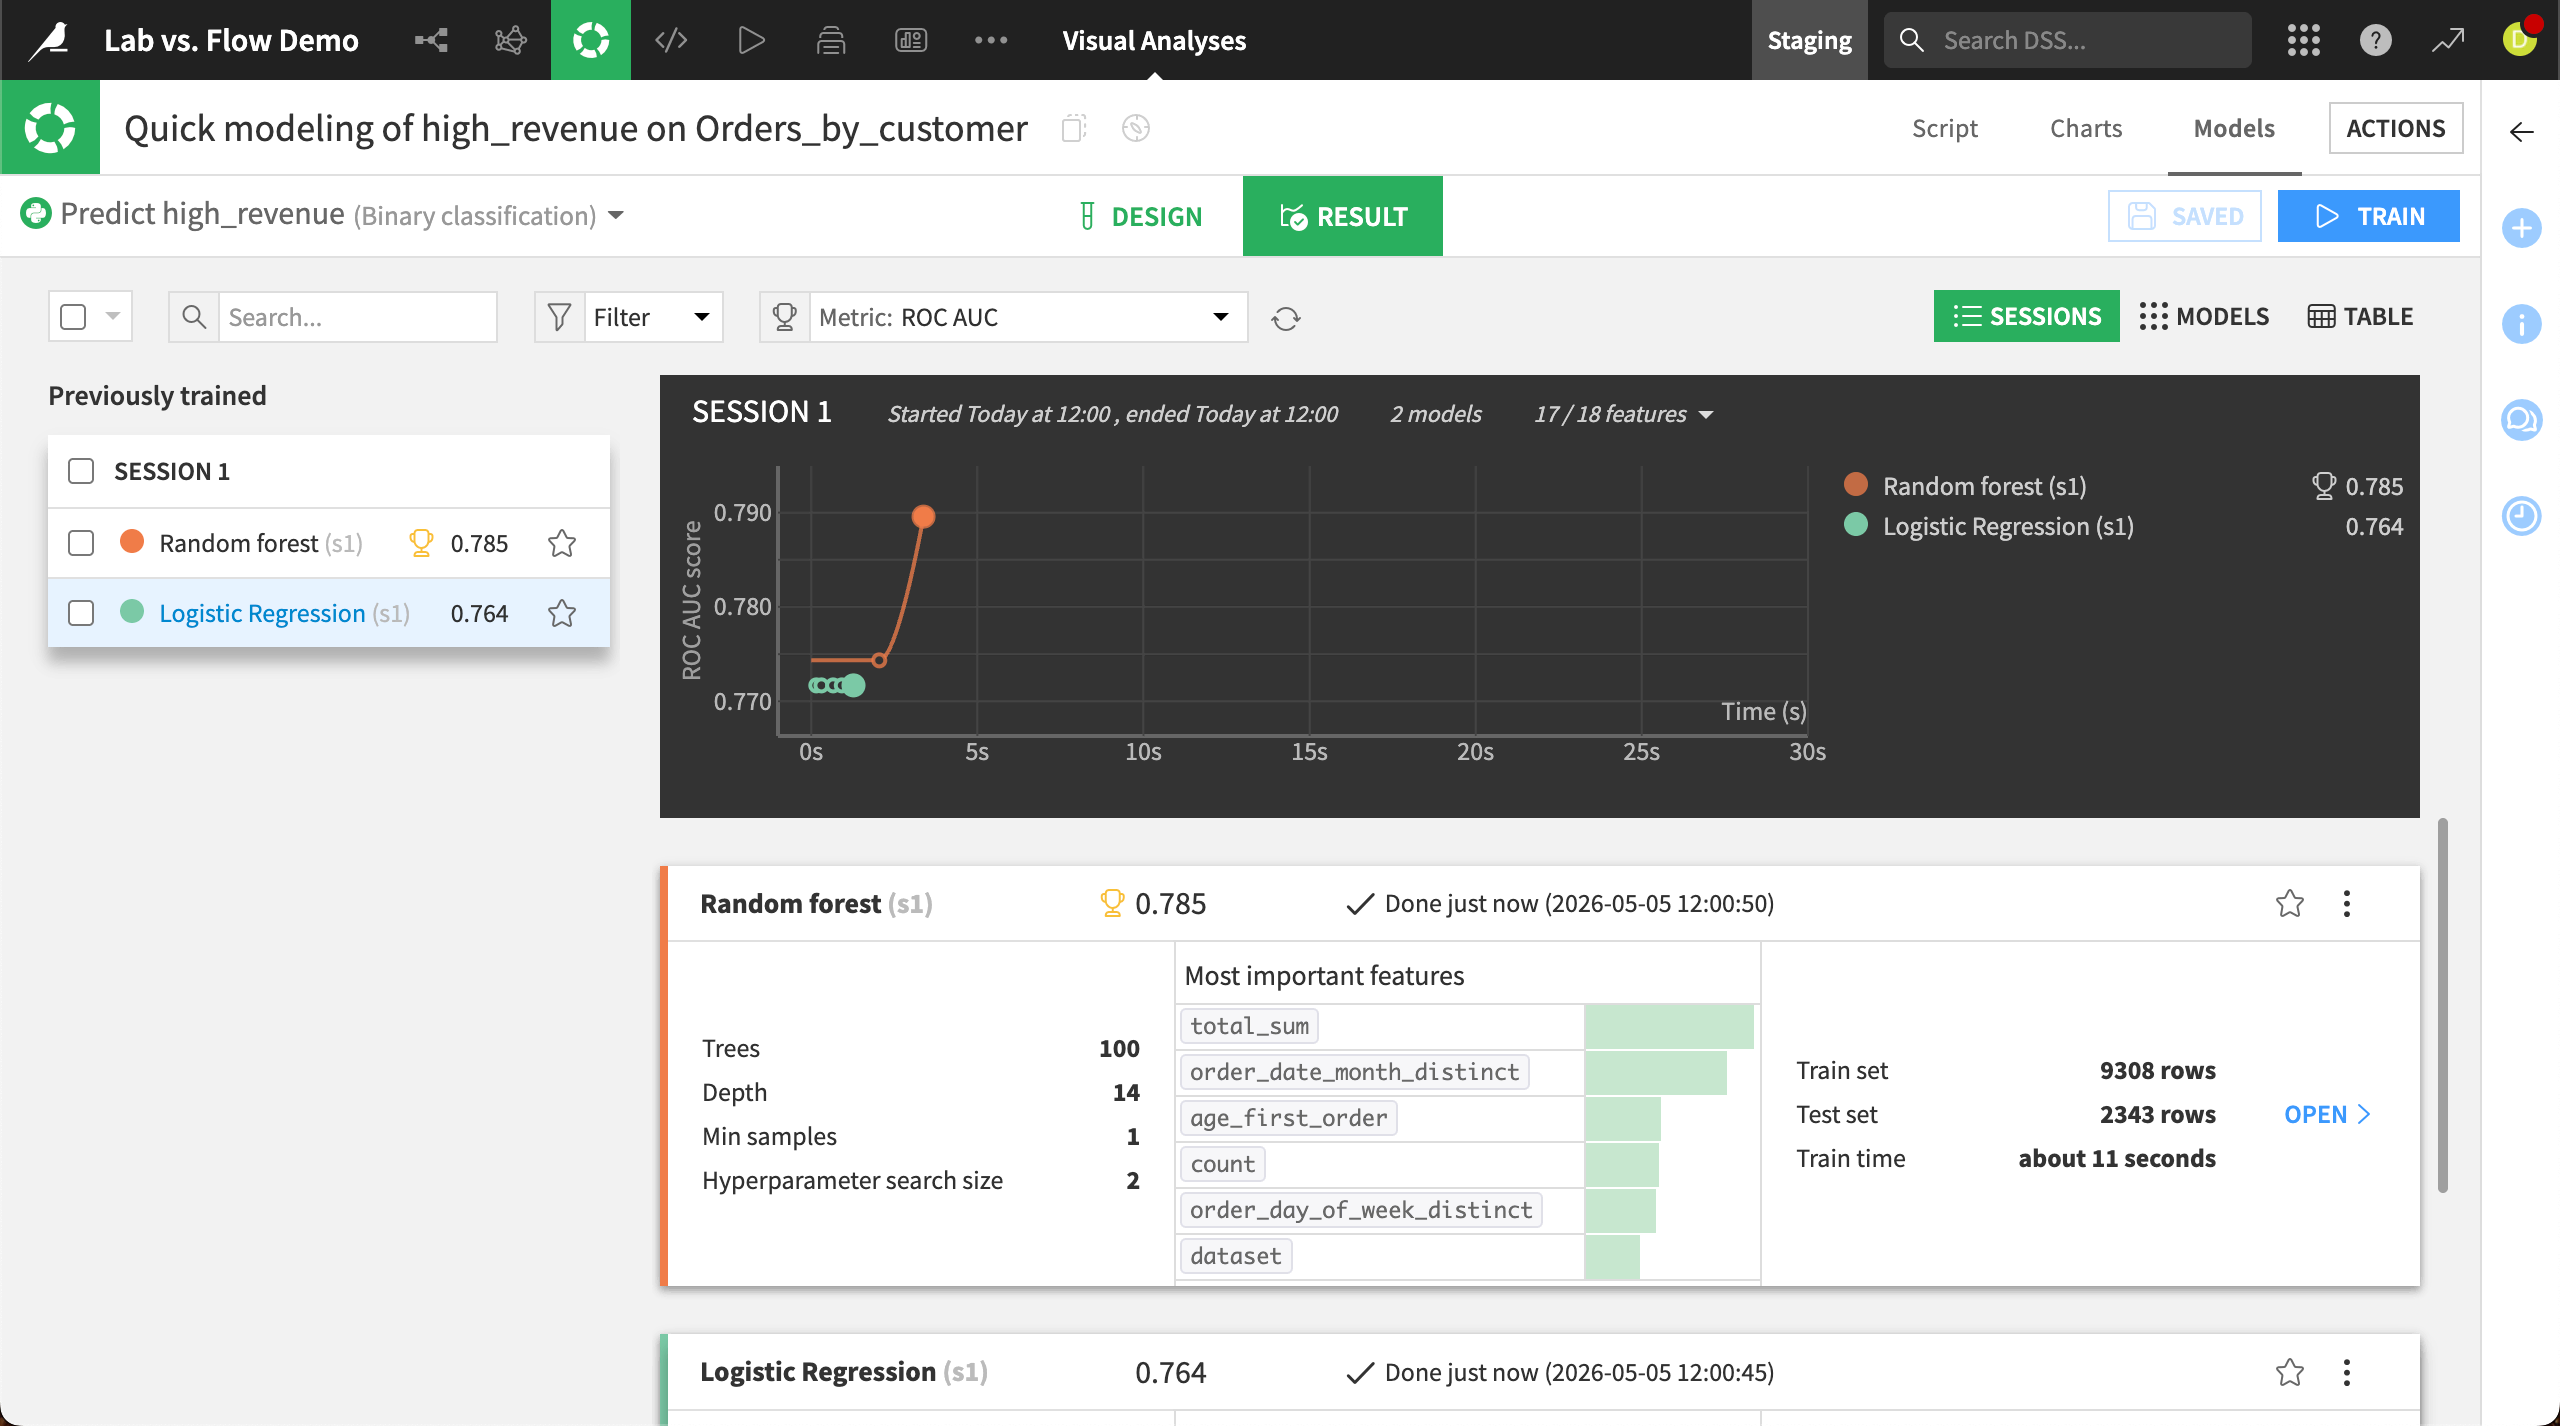
Visual ML#
In Visual ML tasks, you can train machine learning models for various use cases, iterate on the models, and compare their performance.
You can create models for tasks such as prediction, clustering, time series forecasting, object detection, and image classification.
In the Design tab, you can choose from among various algorithms, select features to include in the model, and make many other changes to the model design. Then, you can analyze performance in the Result tab.
When you are satisfied with the performance of a model, you can select it and click Deploy to add it to the Flow.
See also
See AutoML Model Design to get started training models in Dataiku.
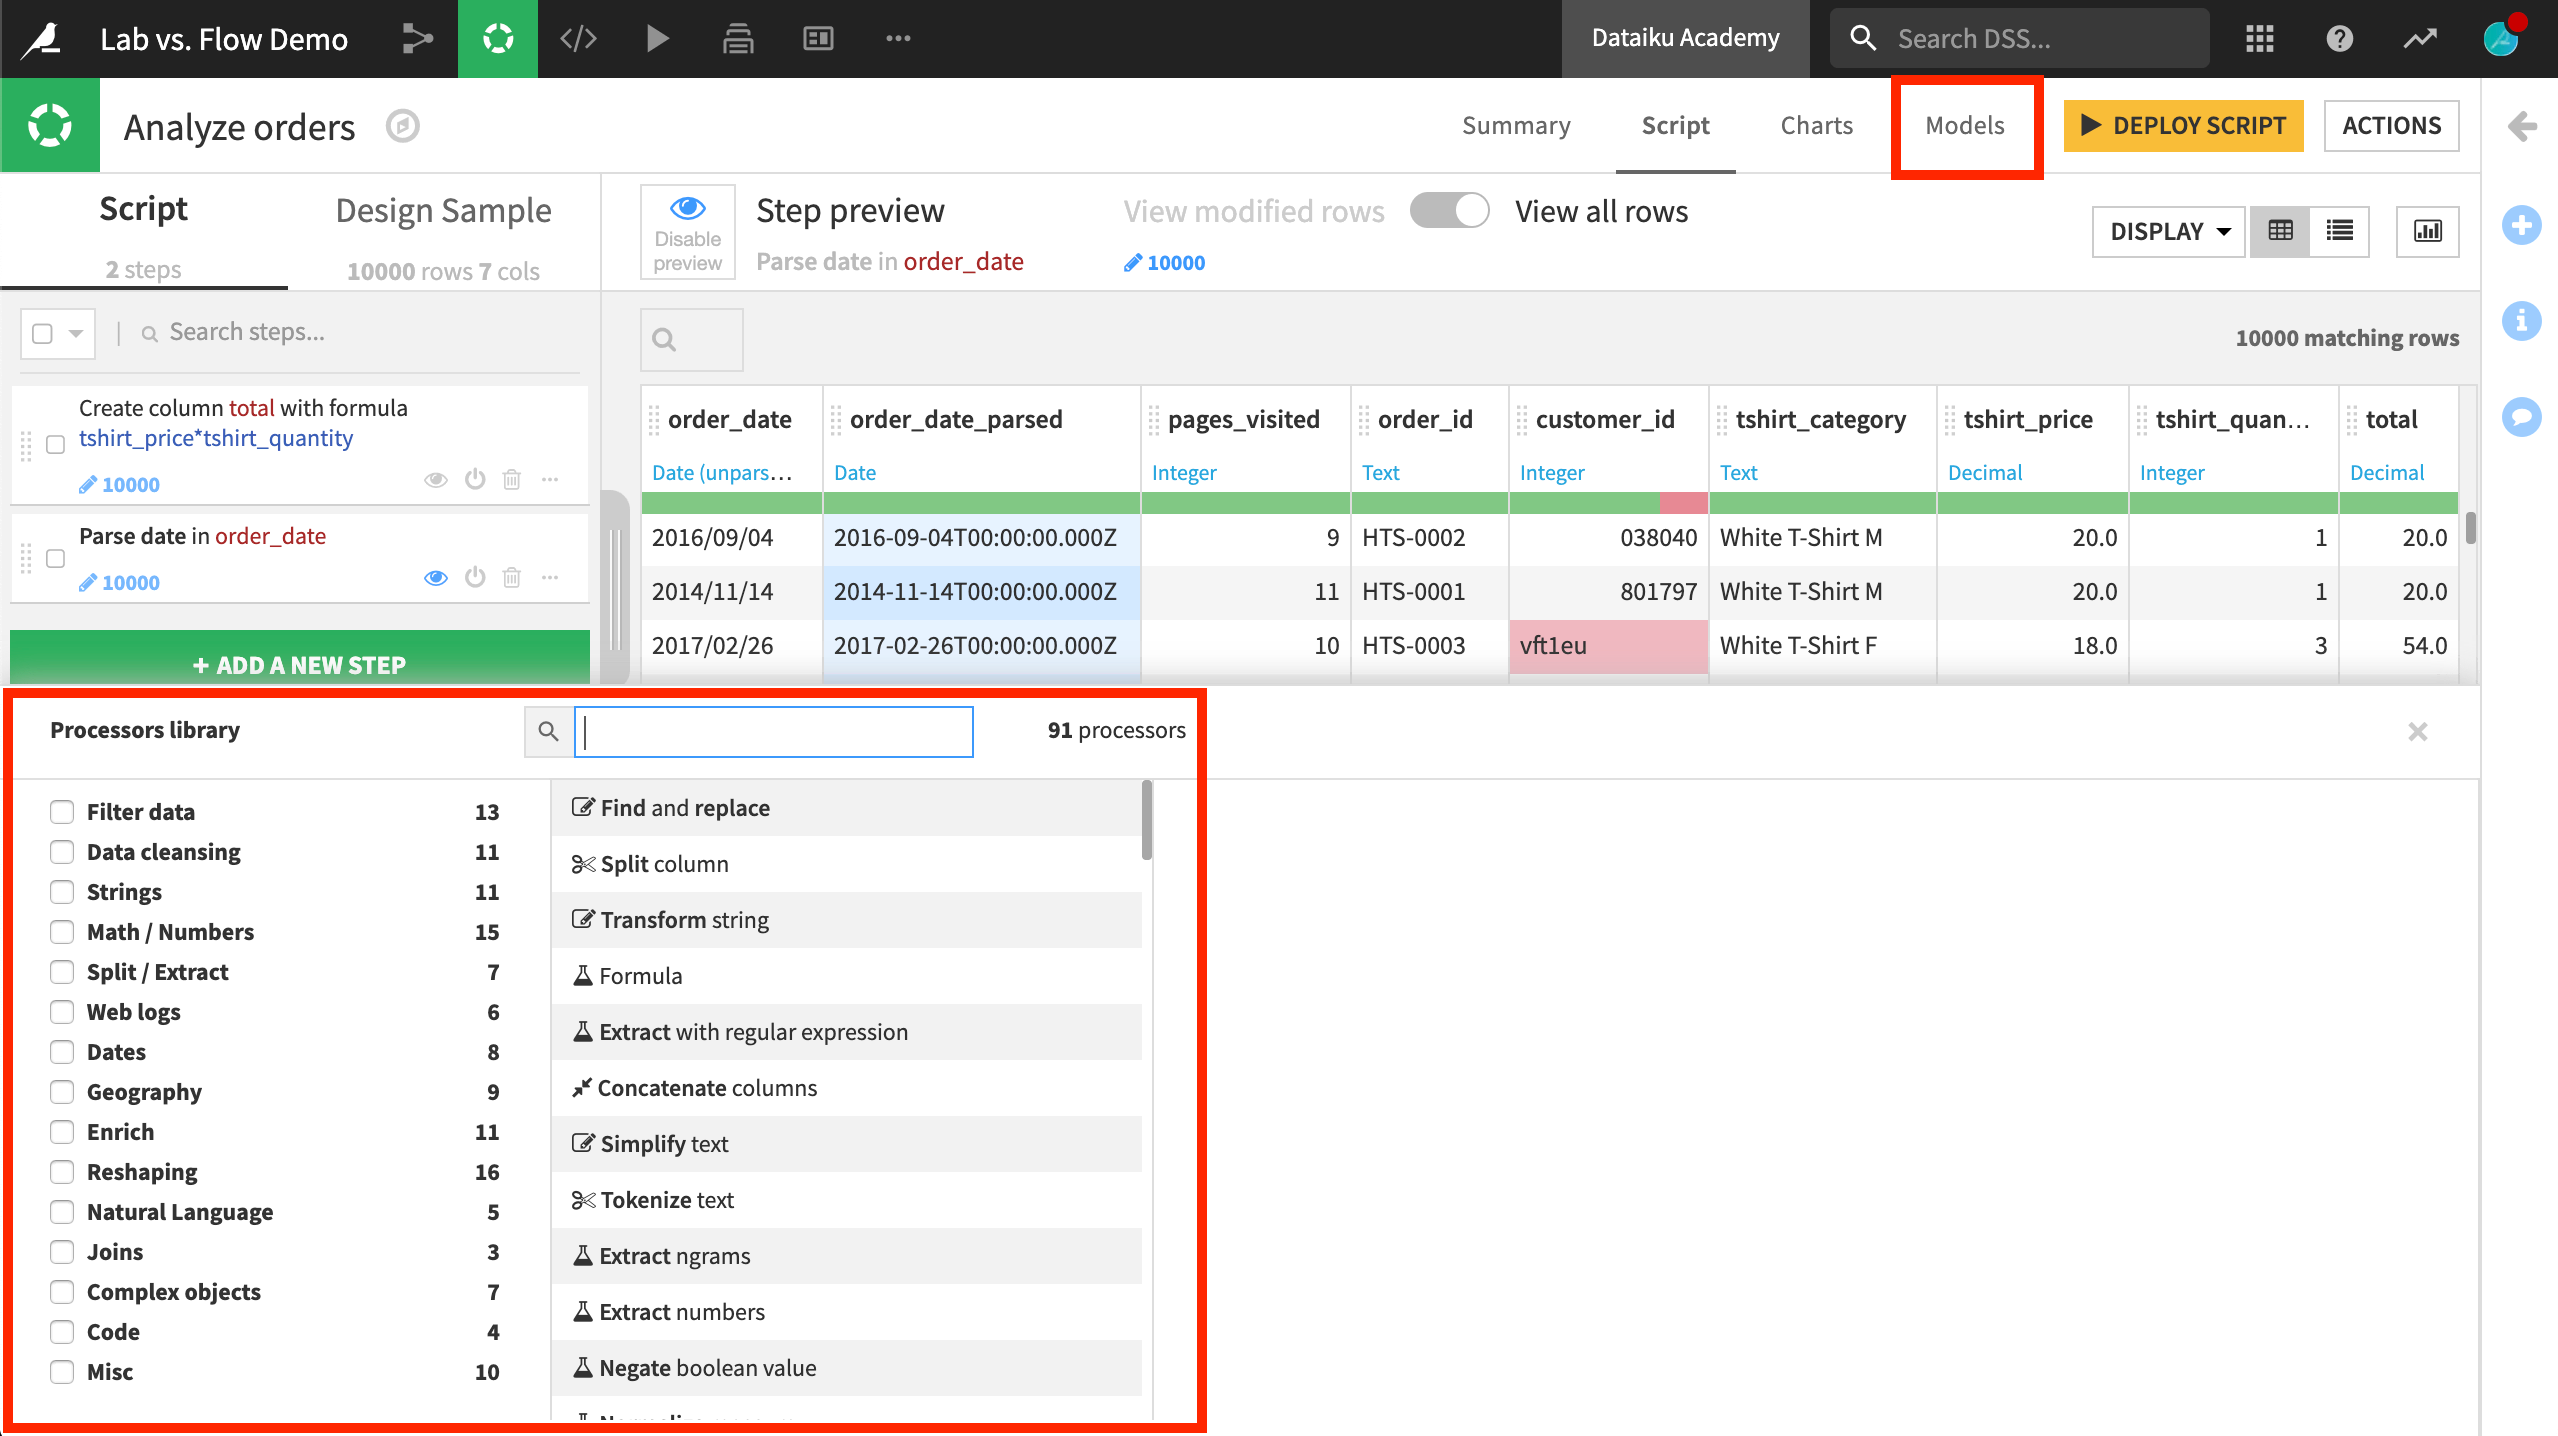
Visual analyses#
When you create a new visual analysis, you will find a script that appears similar to a Prepare recipe.
Just as in the Prepare recipe, you can add steps from the processor library to prepare the data as needed. This provides immediate visual feedback on a sample of the dataset.
You can deploy the visual analysis to the Flow as a Prepare recipe by clicking Deploy Script. Then run the Prepare recipe to apply the steps to the dataset.
Tip
You can also navigate between the visual analysis and visual ML tasks for a dataset in the Lab using the Script and Models tabs in the top right. This is useful for experimenting with feature engineering in the Script tab and iterating on models in the Models tab.
See also
Complete Tutorial | Visual analyses in the Lab to see how this works hands-on.
Code notebooks#
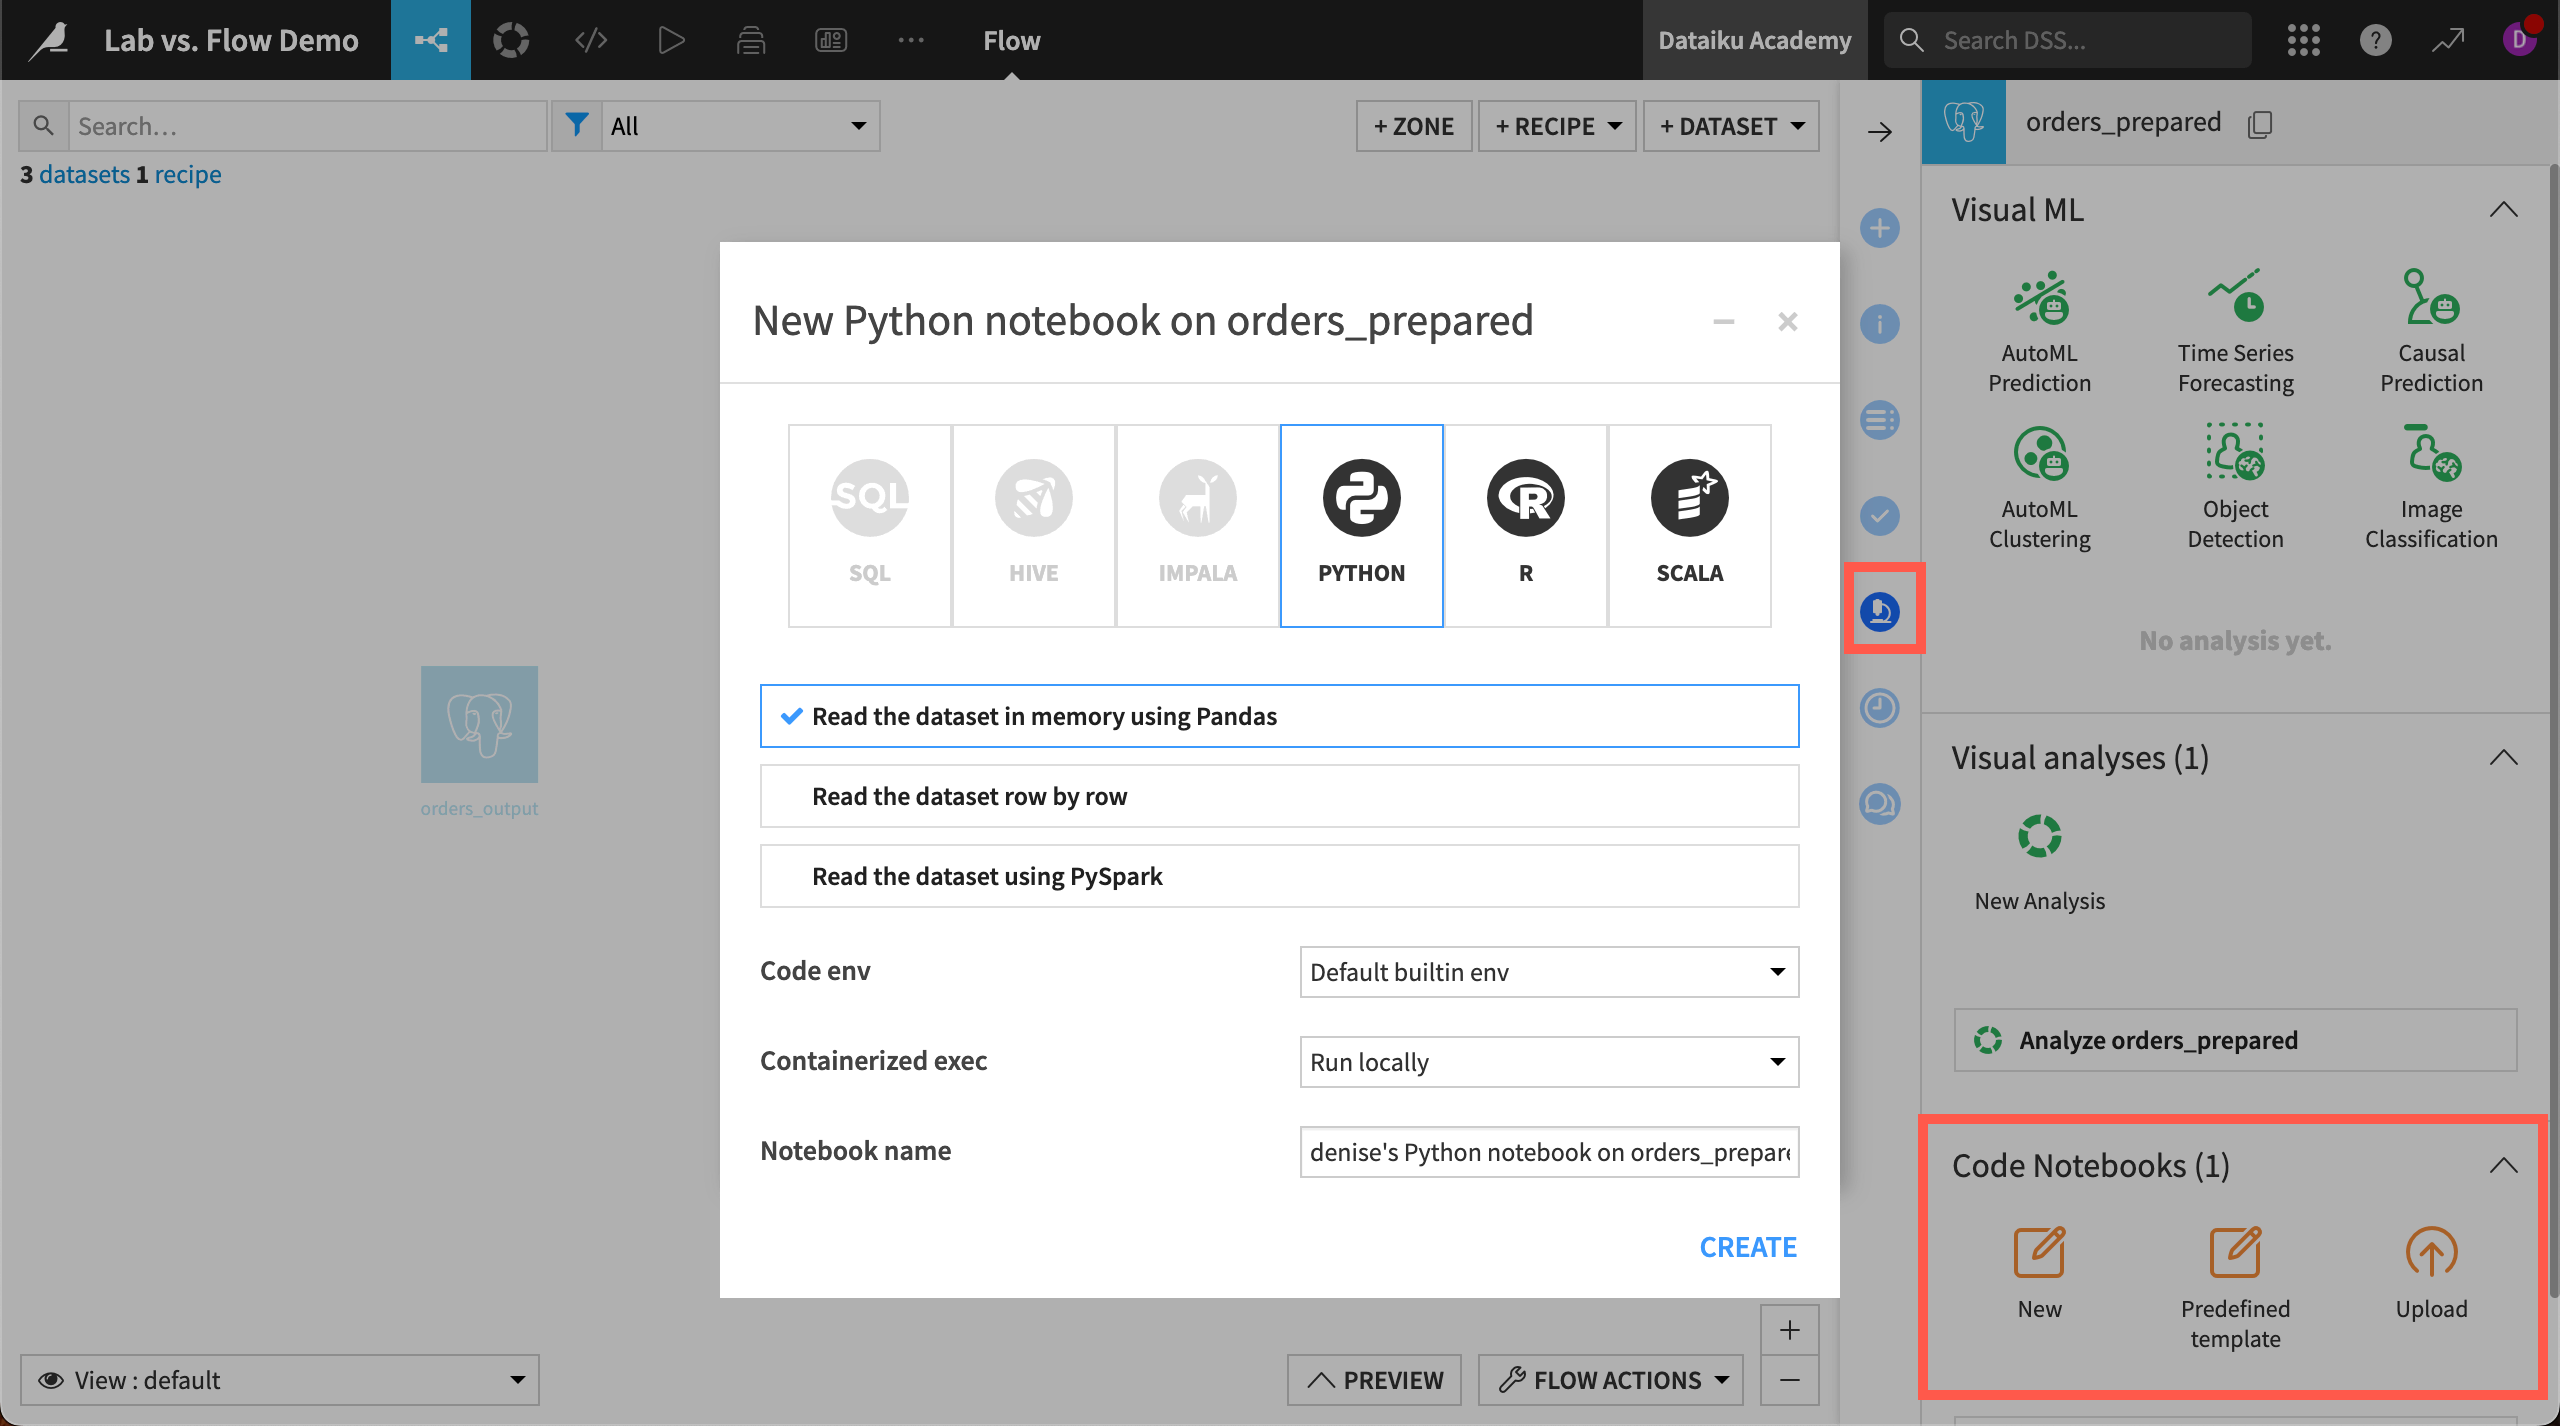
In the Lab, coders can find blank or pre-defined notebooks in a variety of languages, depending on the type of dataset.
When creating a notebook, you have options for reading in the dataset in different ways, which provide the relevant starter code. You can also specify the code environment and/or container for the notebook.
You can deploy a notebook to the Flow as a code recipe by clicking the + Create Recipe button.
See also
See Code to get started with code notebooks in Dataiku.