Hands-On Tutorial: Image Classification with the Deep Learning on Images Plugin
Introduction
Deep learning models are powerful tools for image classification, but are difficult and expensive to create from scratch.
Dataiku provides a plugin, Deep learning on images, that supplies a number of pre-trained deep learning models that you can use to classify images. You can also re-train a model to specialize it on a particular set of images, a process known as transfer learning.
Let’s Get Started
In this tutorial, you will:
classify images of lions and tigers using a pre-trained model.
retrain the pre-trained model with additional labeled images and use it for image classification (transfer learning)
analyze the model’s architecture with a TensorBoard webapp.
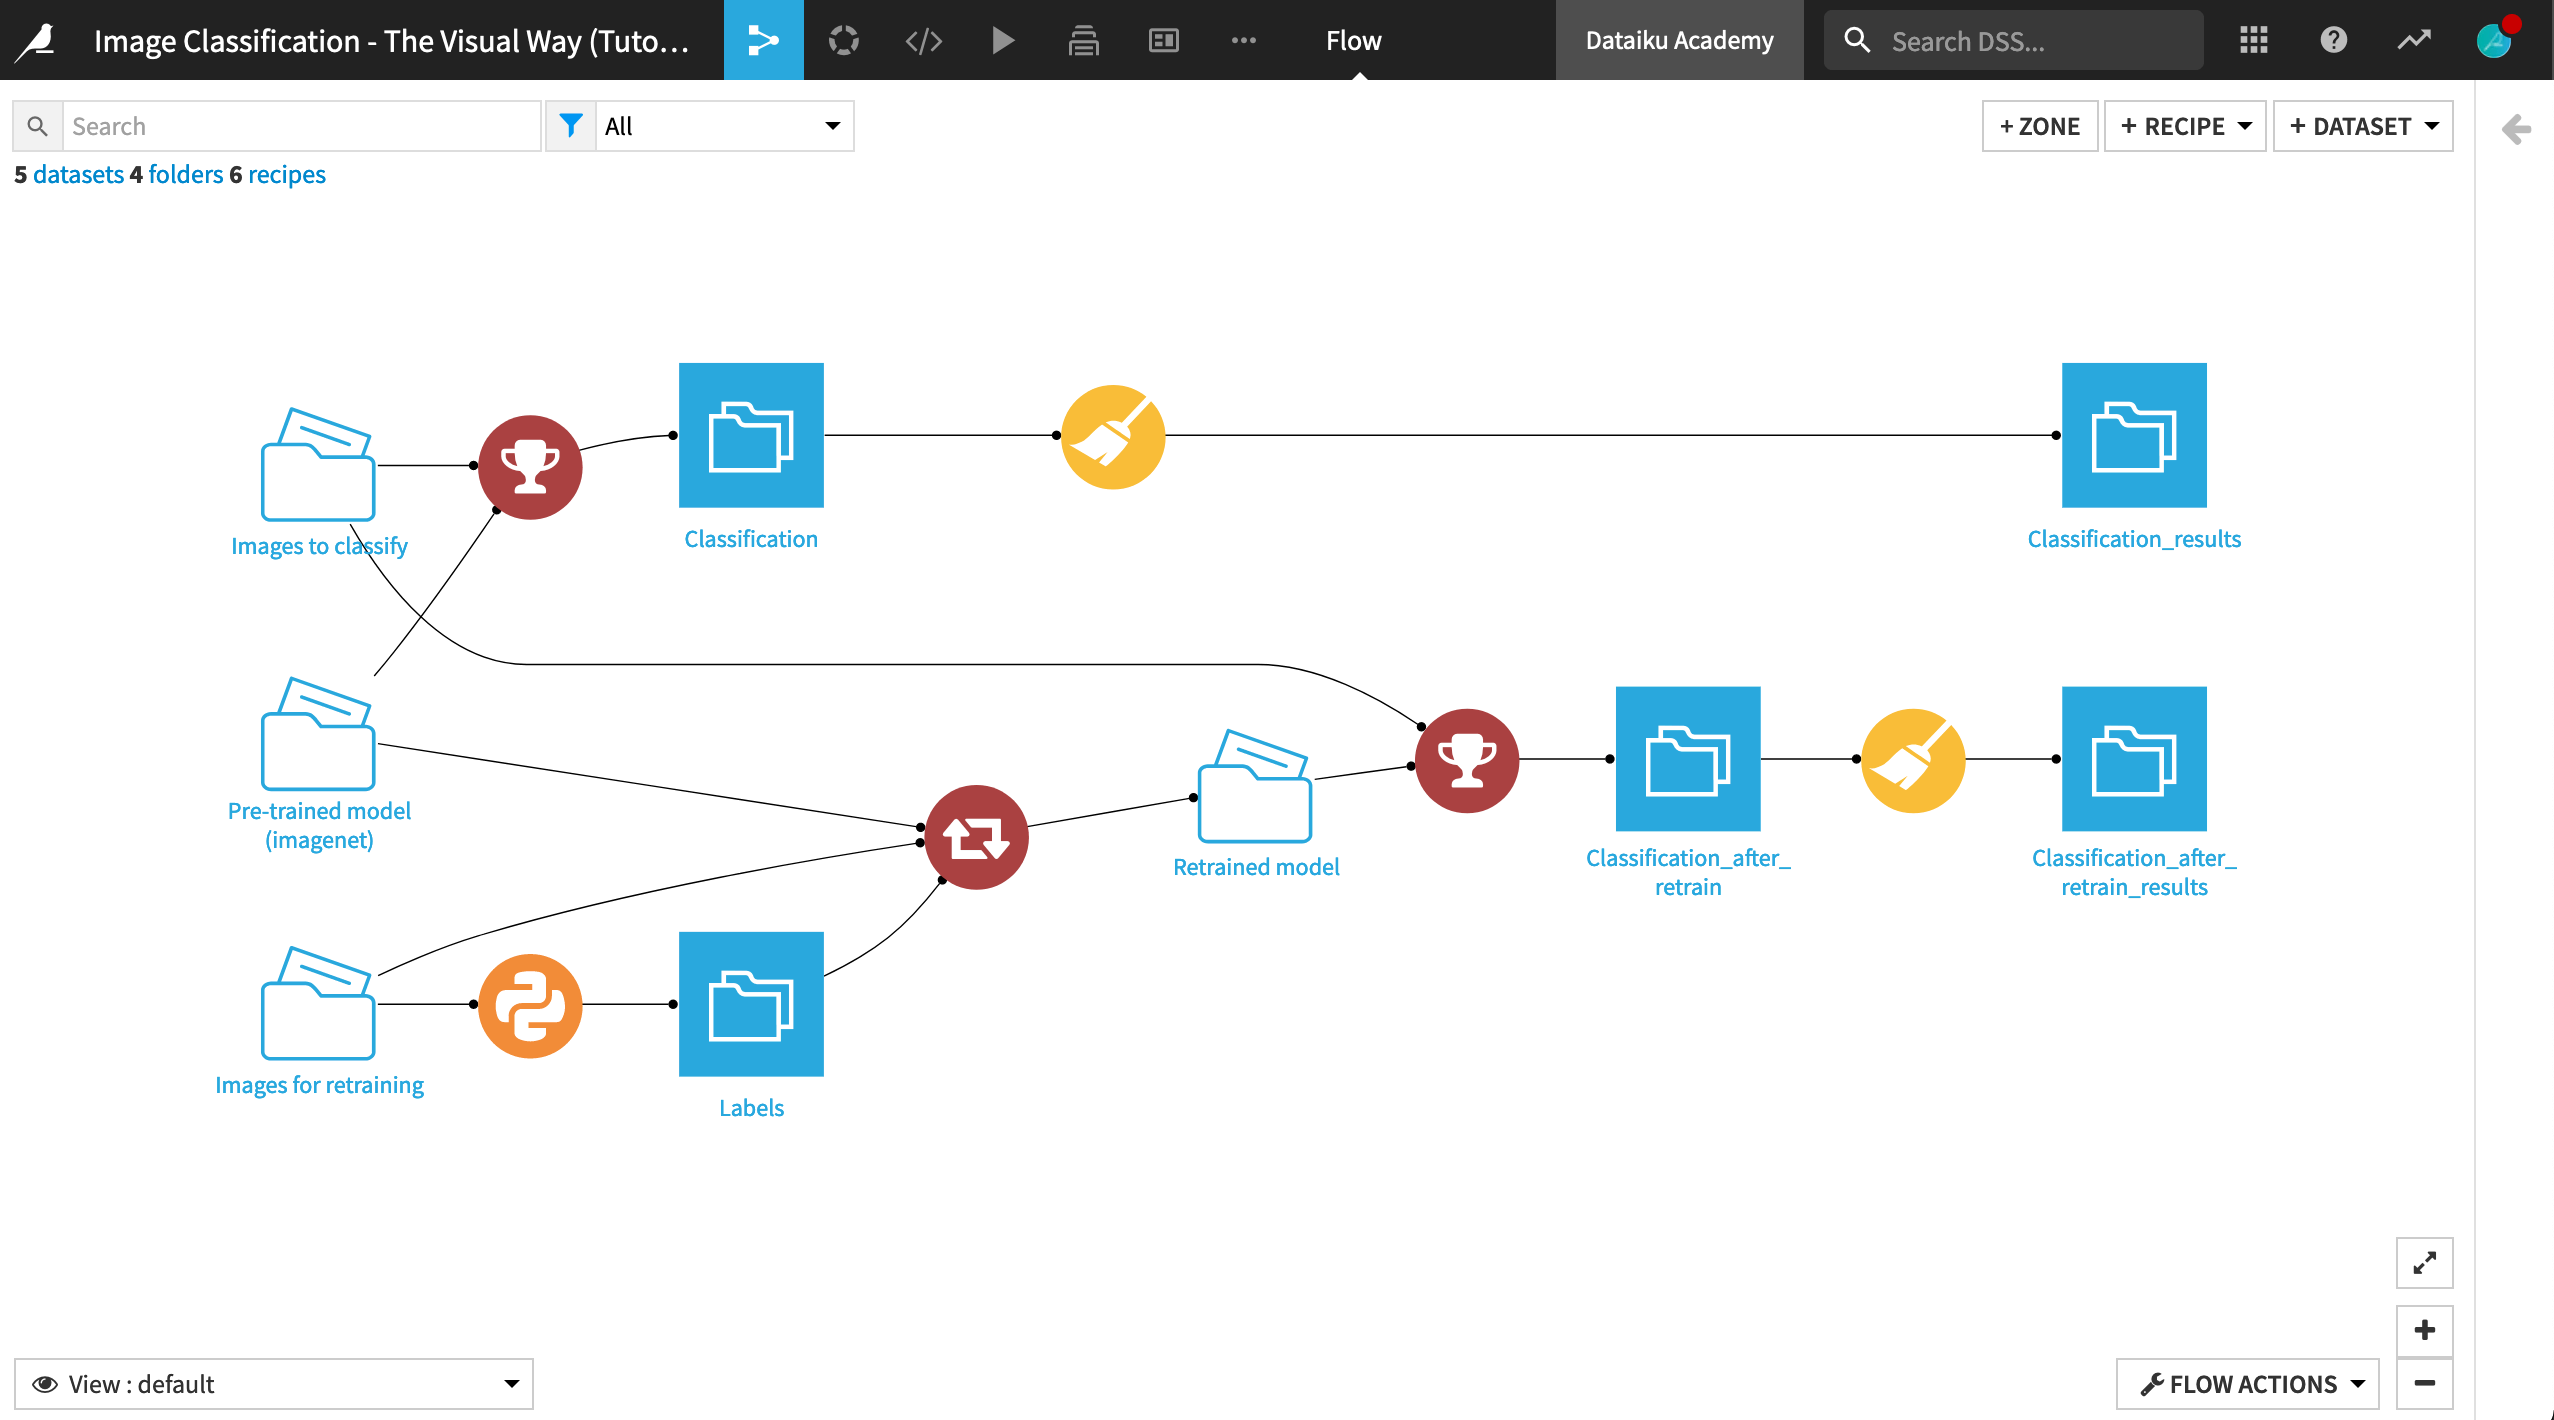
When finished you’ll have built the Flow below.
Note
You can also visit the Dataiku gallery project to see a completed version of a very similar project.
Prerequisites
a Dataiku instance (version 10.0 or above)
the Deep Learning on Images plugin (version 2.0.2 or above)
Note
You can find the instructions for installing plugins in the product documentation. To check whether the plugin is already installed on your instance, go to the Installed tab in the Plugin Store to see a list of all installed plugins.
Note that this plugin is not available for Dataiku Online.
Create the Project
From the Dataiku homepage, click +New Project > DSS Tutorials > ML Practitioner > Image Classification - The Visual Way (Tutorial).
Note
You can also download the starter project from this website and import it as a zip file.
Explore the Data
In the Flow, you can see two folders of images, Images to classify and Images for retraining, as well as a Python recipe and output dataset Labels, which we’ll discuss later.
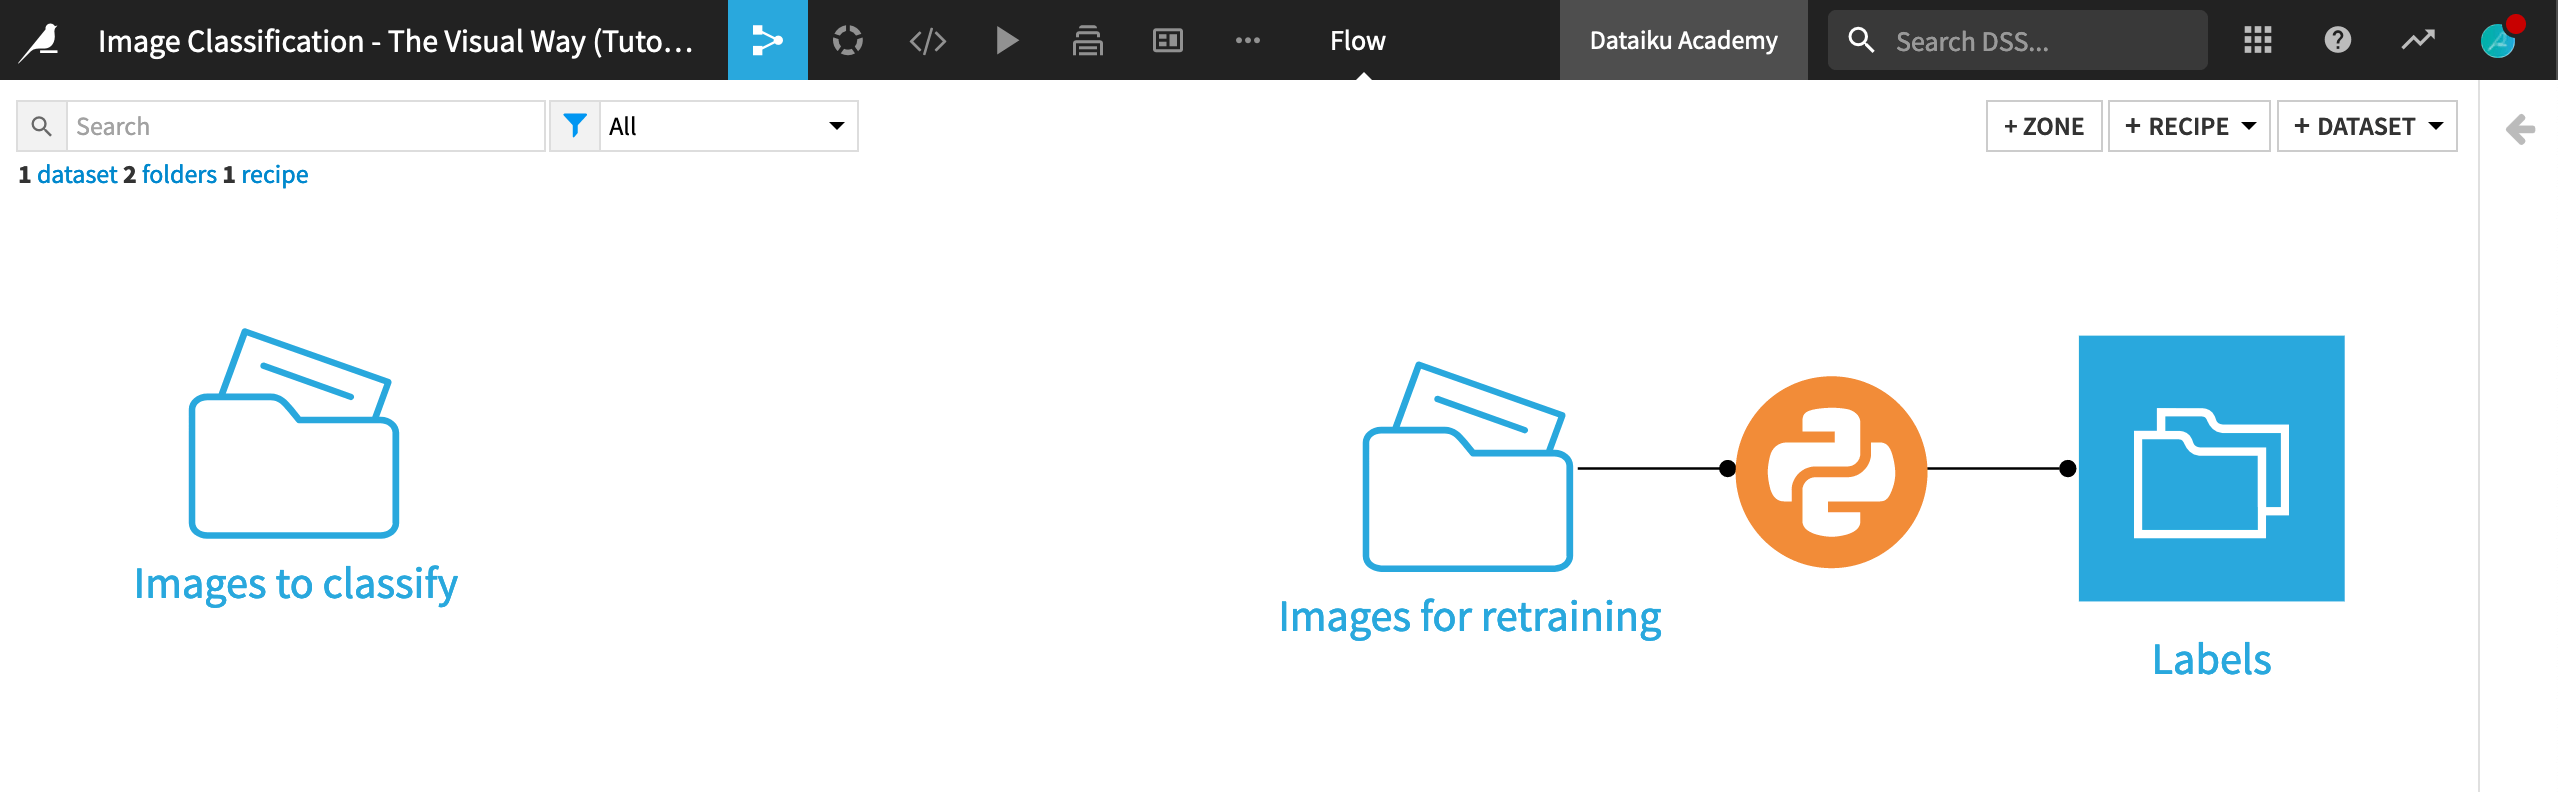
Take a moment to browse the images in the Images to classify folder to get a sense of the images we’ll be classifying.
Concept: Pre-Trained Models
What are pre-trained models?
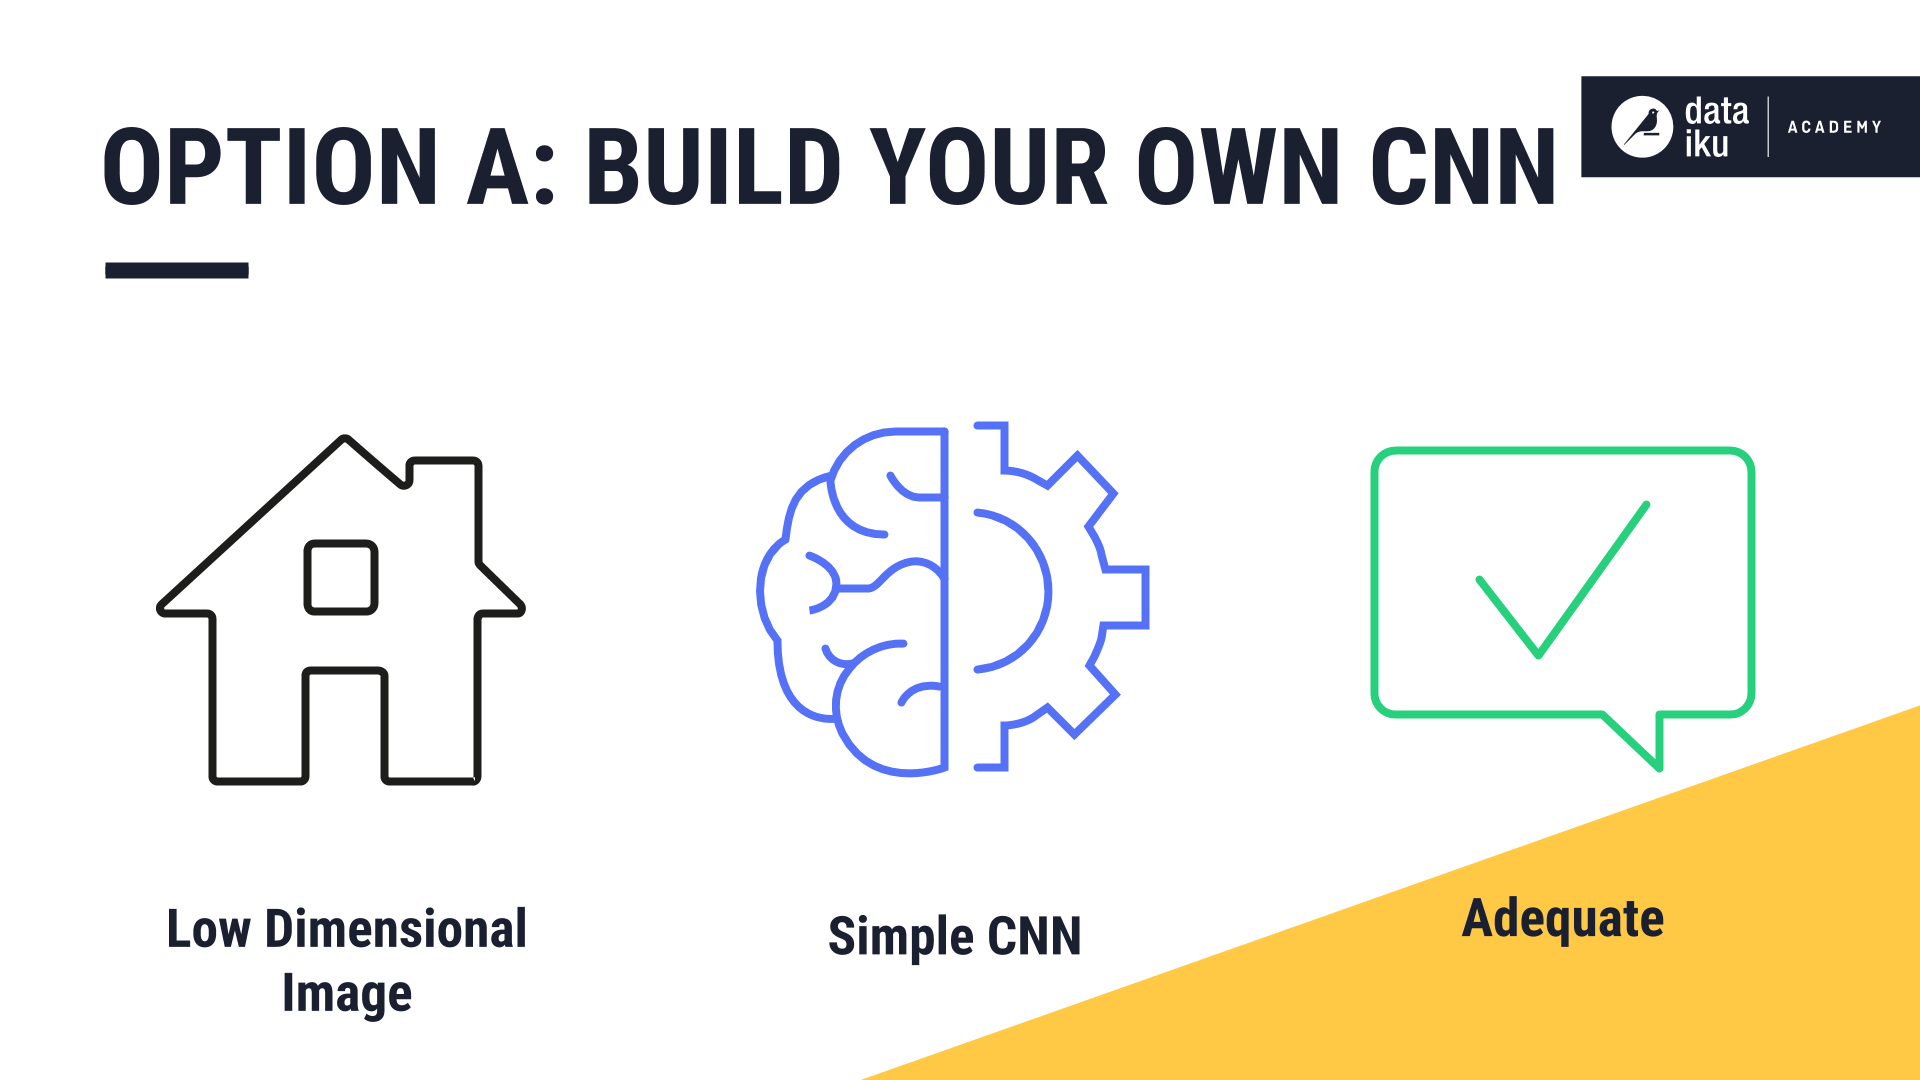
In many computer vision tasks, you will come across pre-trained models. Pre-trained models are useful for dealing with classification tasks, among others. Perhaps you’ve already tried to build your own convolutional neural network (or CNN) to classify lower-dimensional images, letters, or digits. For lower-dimensional images, a simple CNN architecture will suffice.
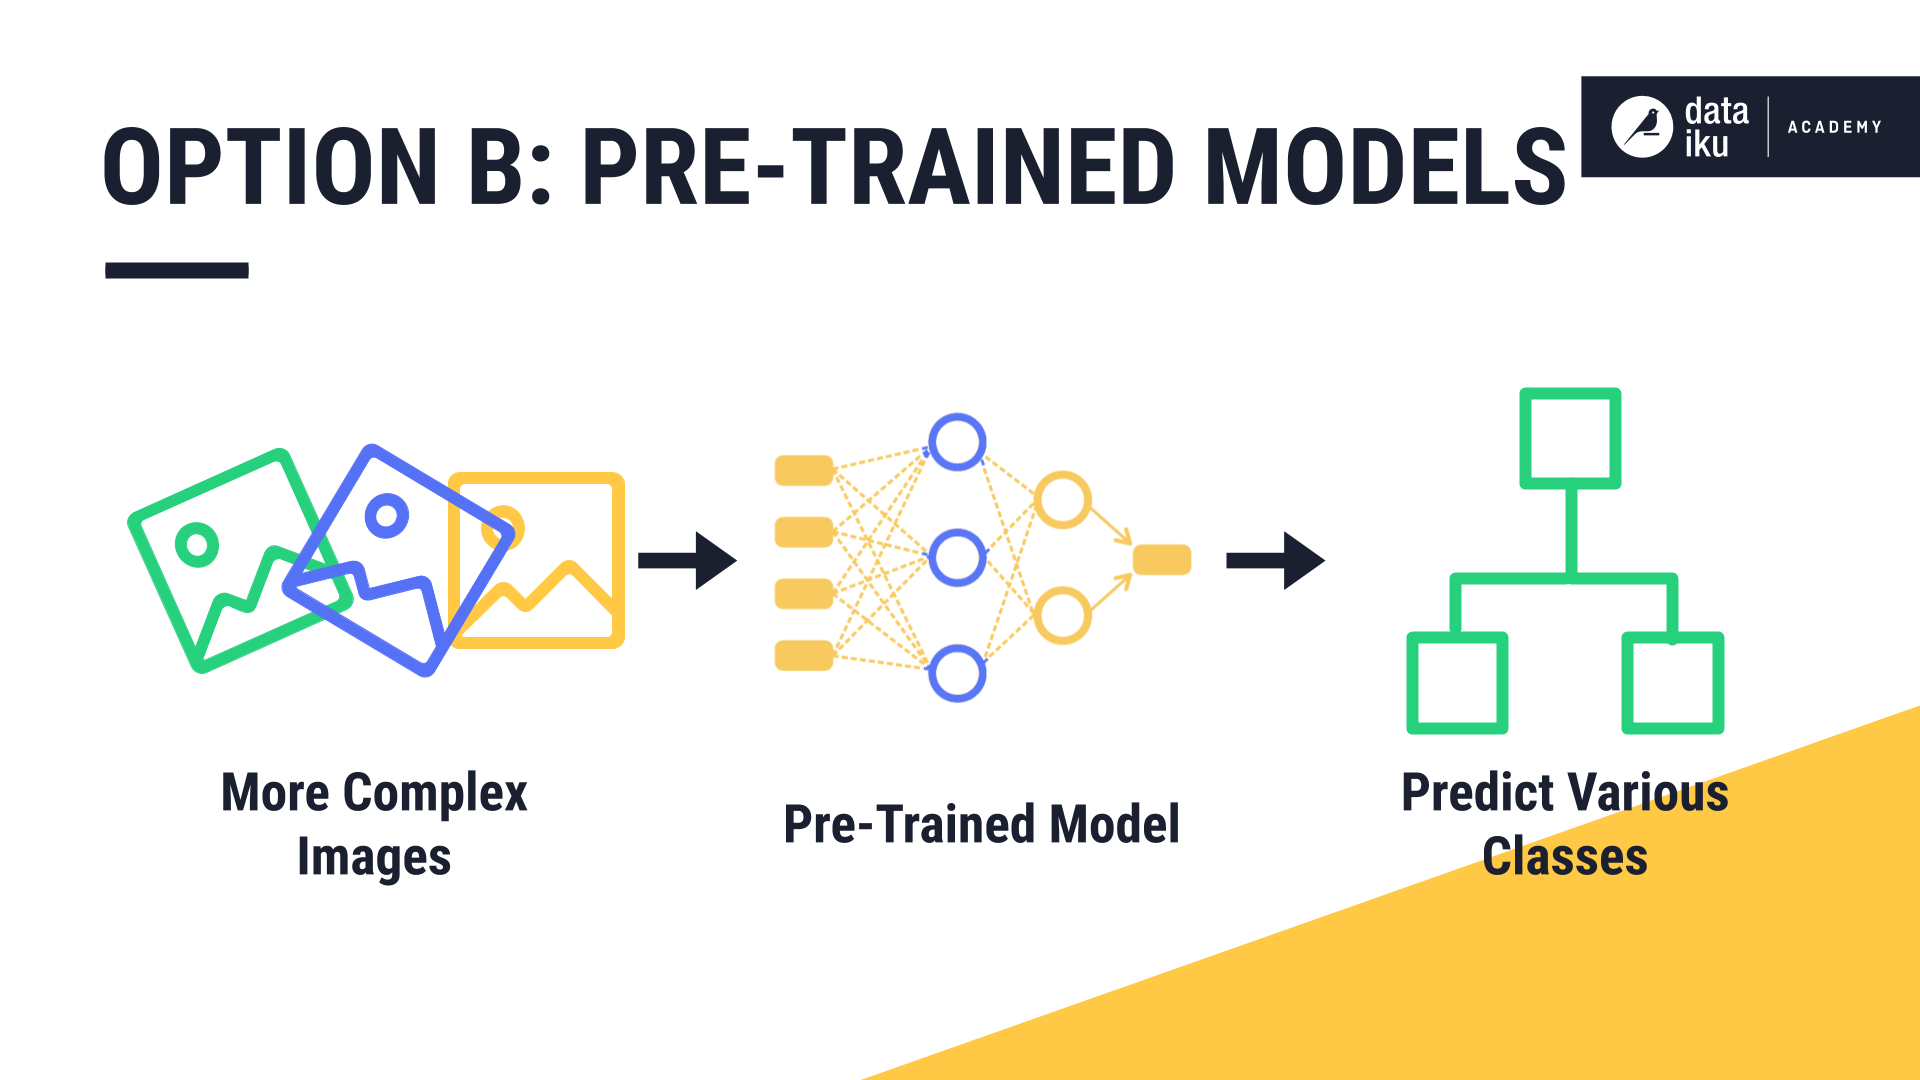
Now let’s say you are trying to classify more complex images, which are made up of many colors, oriented in different positions, or which exhibit other novel behavior. At this point, you might not want to build a model from scratch, as doing so would require a lot of data, resources, and a complex architecture.
Instead, you could begin with a pre-trained model (a CNN) that has been trained on huge datasets and can predict various classes. You can re-train this pre-trained model on your data, by identifying the layers of the neural network that need to be re-trained on your data.
Pre-trained networks such as Resnet50, Xception, Inception V3, and VGG16, are all trained on the ImageNet dataset. The ImageNet dataset consists of more than 14 million images, falling into more than 20,000 categories. These complex, pre-trained models are ready for use in many classification and object detection use cases, and they can recognize up to 20,000 different object categories with high accuracy.
You can leverage these pre-trained models for a variety of tasks such as feature extraction, and to prepare for transfer learning.
Pre-trained models in Dataiku
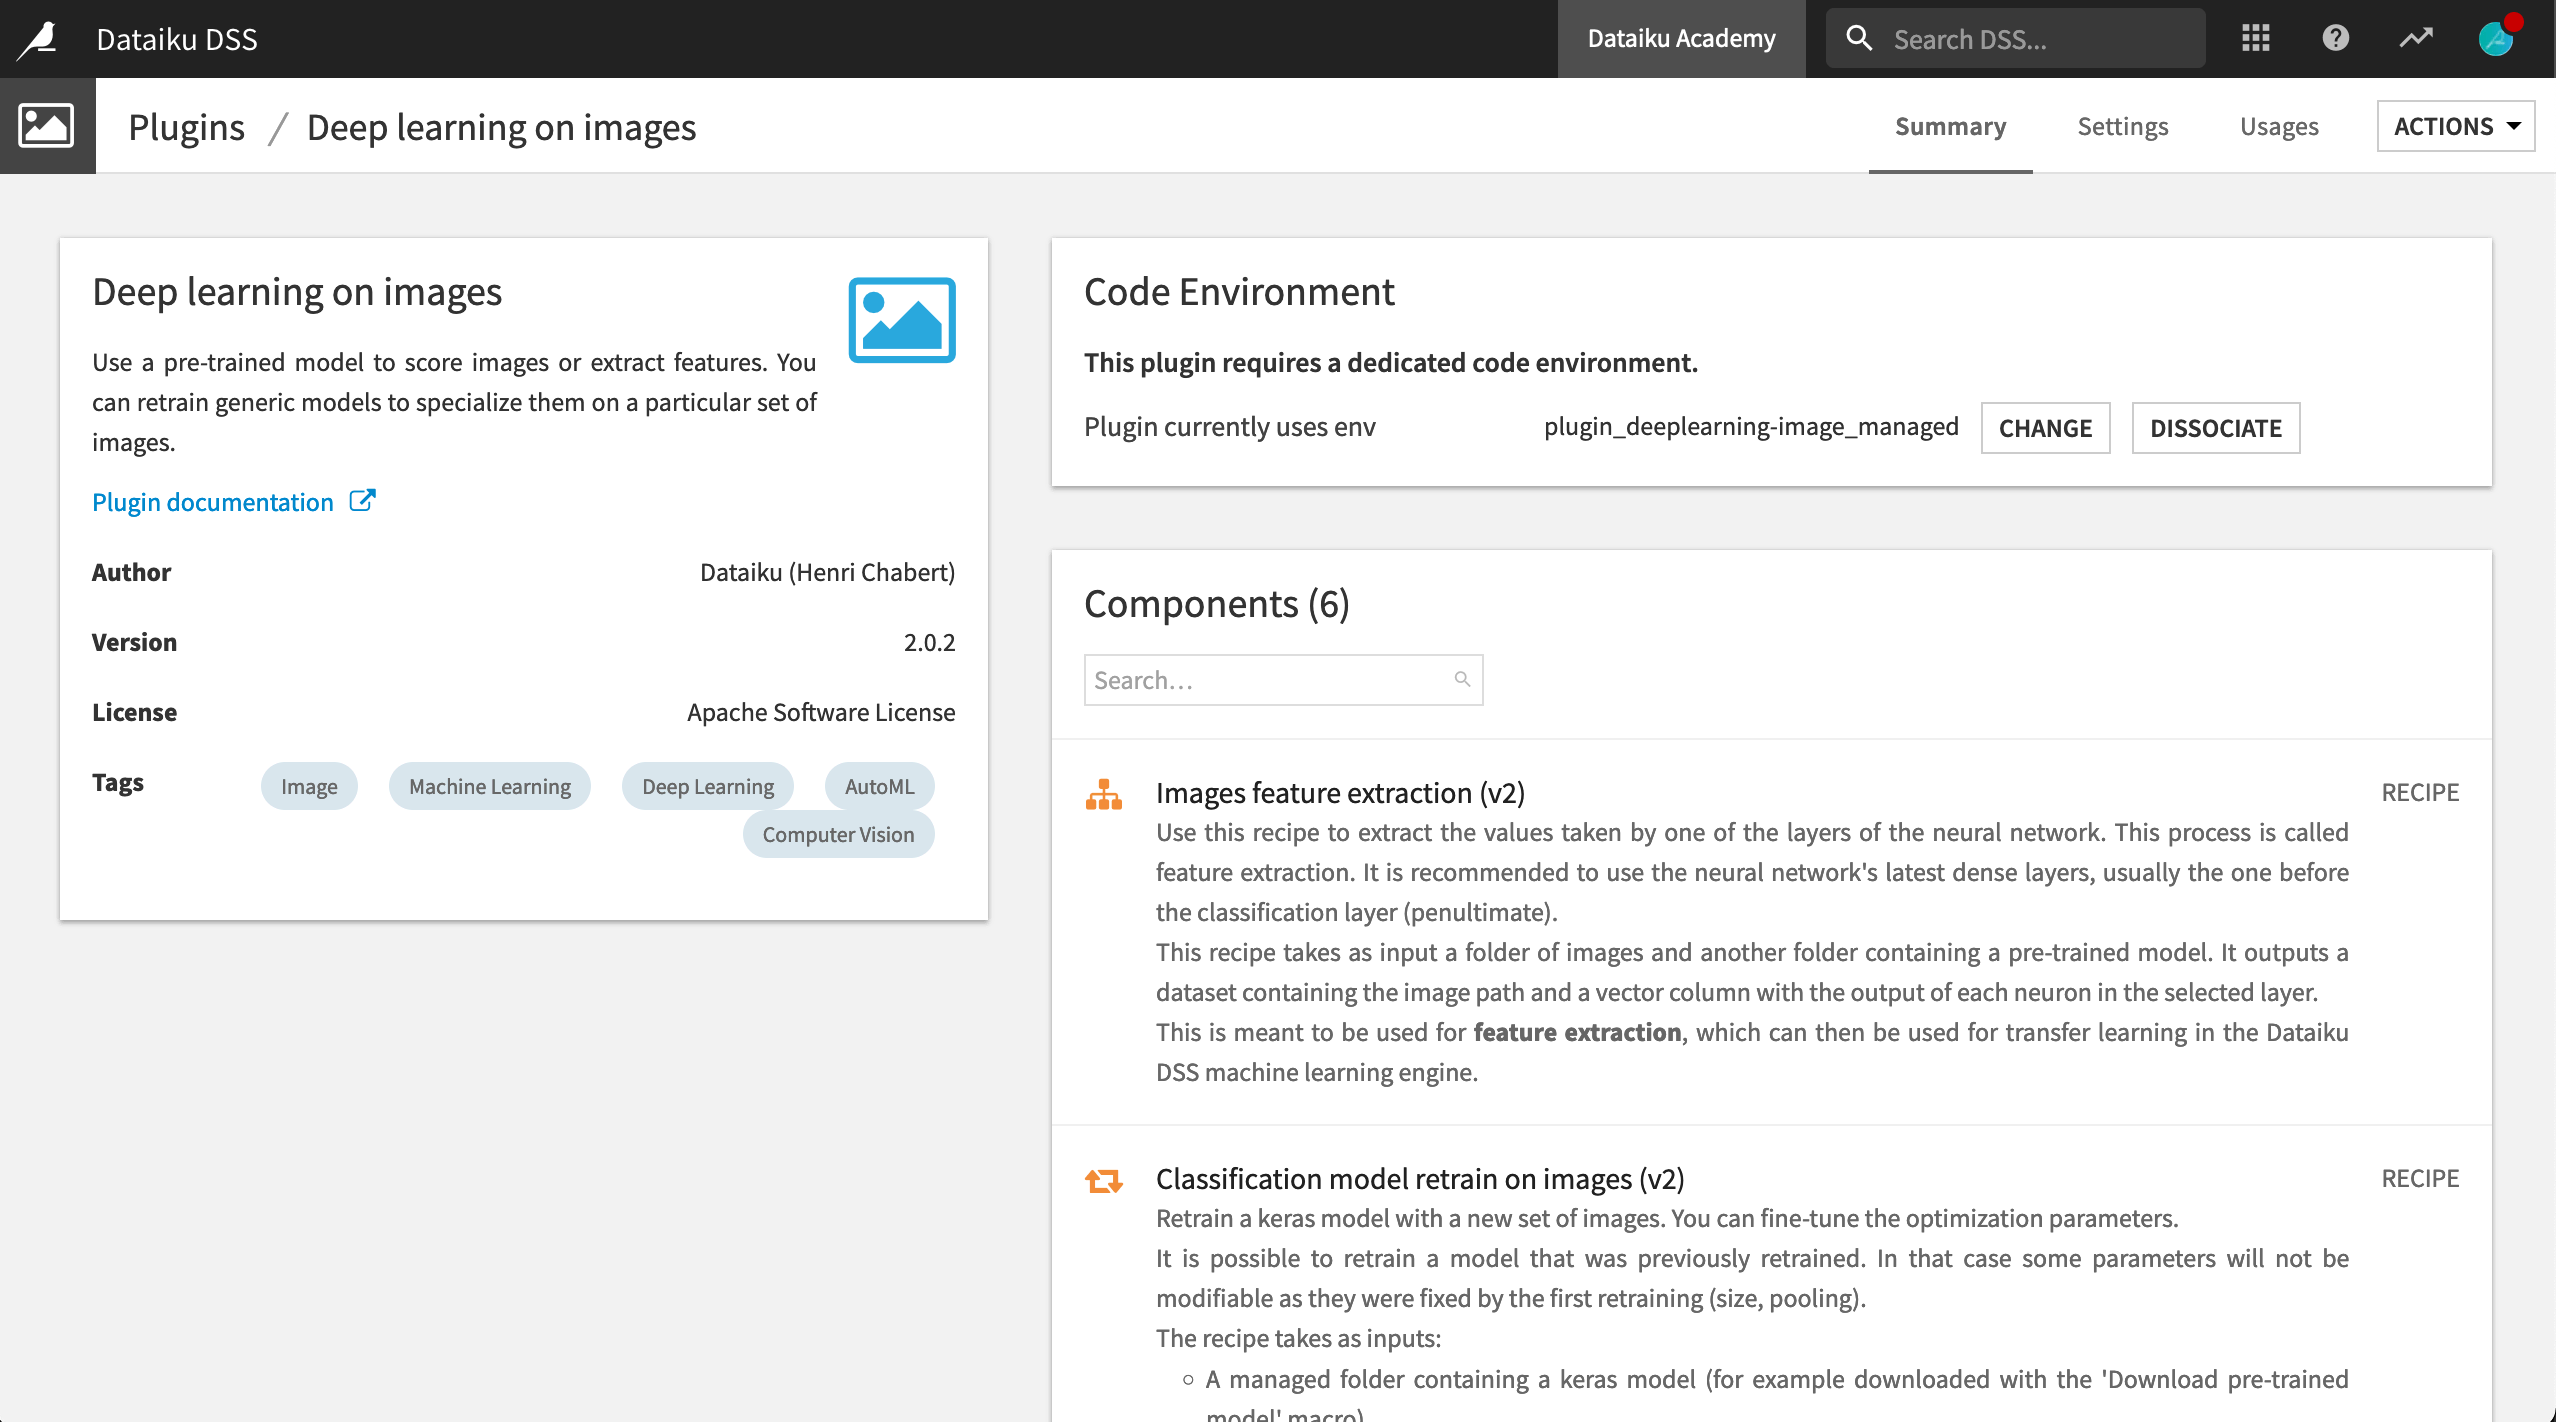
To leverage pre-trained models in Dataiku, you can use the Deep Learning on Images plugin. To download the plugin, search for it in the Dataiku plugin store inside your instance.
Warning
Be sure not to use the CPU and/or GPU legacy versions of this plugin if starting a new project.
During the installation, Dataiku will inform you that the plugin requires a dedicated code environment. Click Build New Environment so that Dataiku can install all the required packages and create the environment. Once installed, you can see that the plugin includes the following recipes:
Image classification (v2). Use this recipe to classify images by providing two folders as input: one that contains your images and another that contains your model.
Classification model retrain on images (v2). Use this recipe to re-train an existing model on your own images.
Images feature extraction (v2). Use this recipe to extract vectorized data from a layer of your neural network.
In addition, the plugin includes macros so that you can easily install pre-trained models. Also included is a webapp template where you can leverage TensorBoard to analyze the performance of your model.
Other articles dive deeper into the plugin and its recipes, and demonstrate the use of the plugin:
as an input for image classification, without retraining your model (to use your model as is),
as an input to retrain a model, and
to perform image feature extraction.
Add a Pre-Trained Model to the Flow
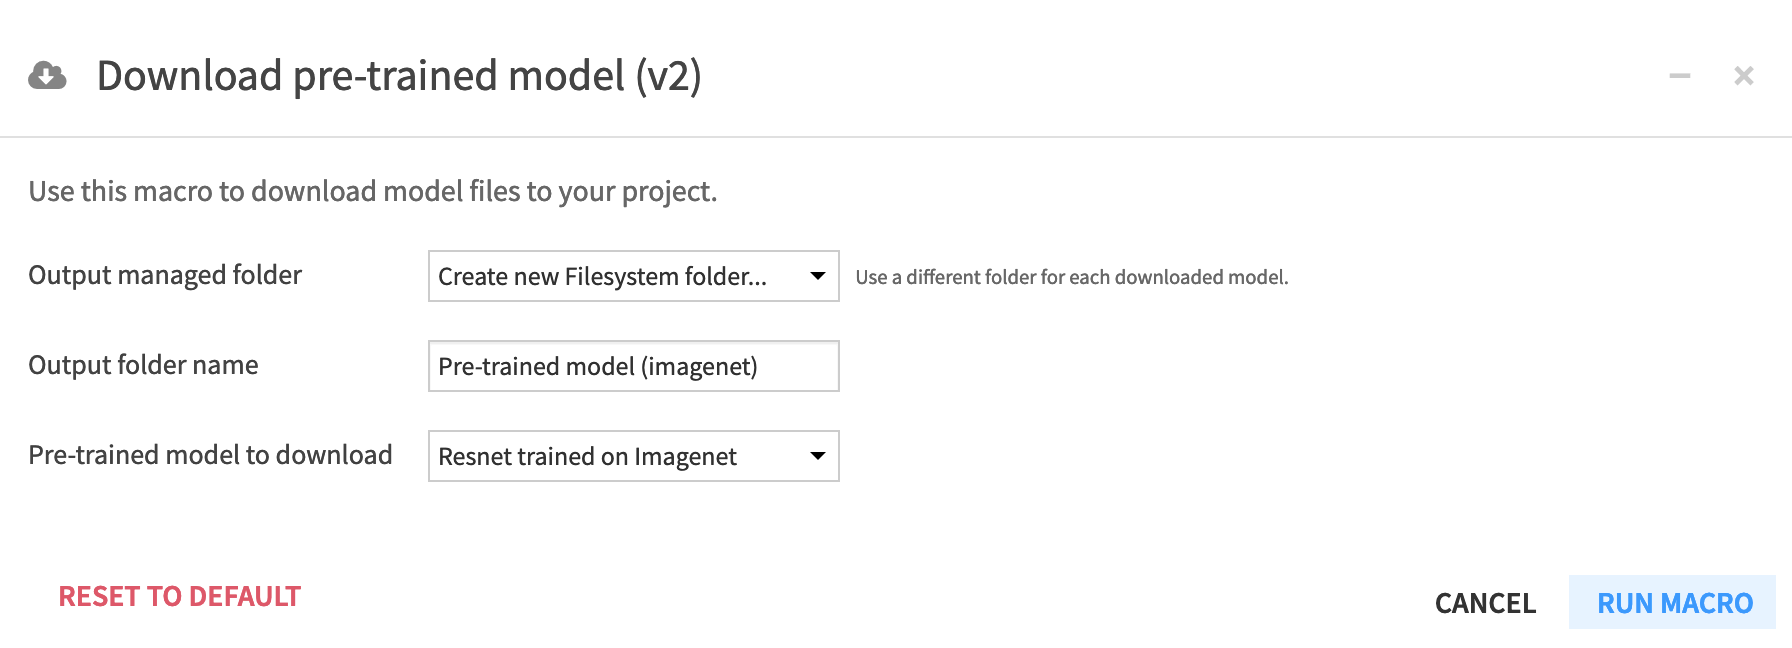
The Deep learning on images plugin includes a macro for downloading a pre-trained deep learning model into a project Flow.
From your project, navigate to Macros in the “More Options” menu of the top navigation bar.
Click Download pre-trained model (v2).
For “Output managed folder”, create a new Filesystem folder, and name it
Pre-trained model (imagenet).Select Resnet trained on Imagenet as the “Pre-trained model to download”.
Click Run Macro.
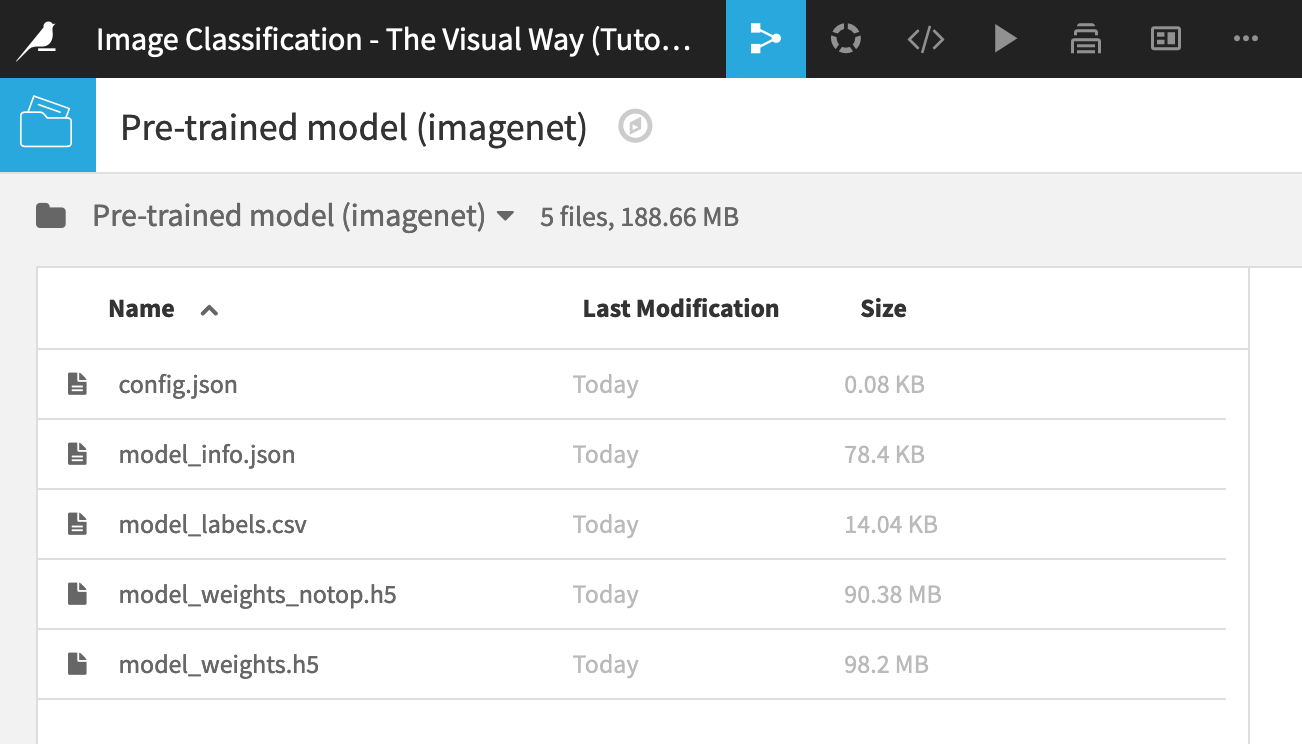
When the process completes, you can see in the Flow that the macro has downloaded the pre-trained model files into to an output folder. These Resnet model files have been trained on the Imagenet dataset which contains millions of images trained to recognize images in thousands of categories.
Open the pre-trained model folder, and take note of several files:
Config.json contains information on the pre-trained model used, the dataset it has been previously trained on and the layer used to do feature extraction;
Model_info.json reveals the model architecture;
Model_labels.csv gathers all the labels to predict in this pre-trained model, among them, “tiger” and “lion”; and
two “h5” formatted files that contain your pre-trained model. The file suffixed with “notop” indicates it does not contain the last fully connected layer whereas the other file does.
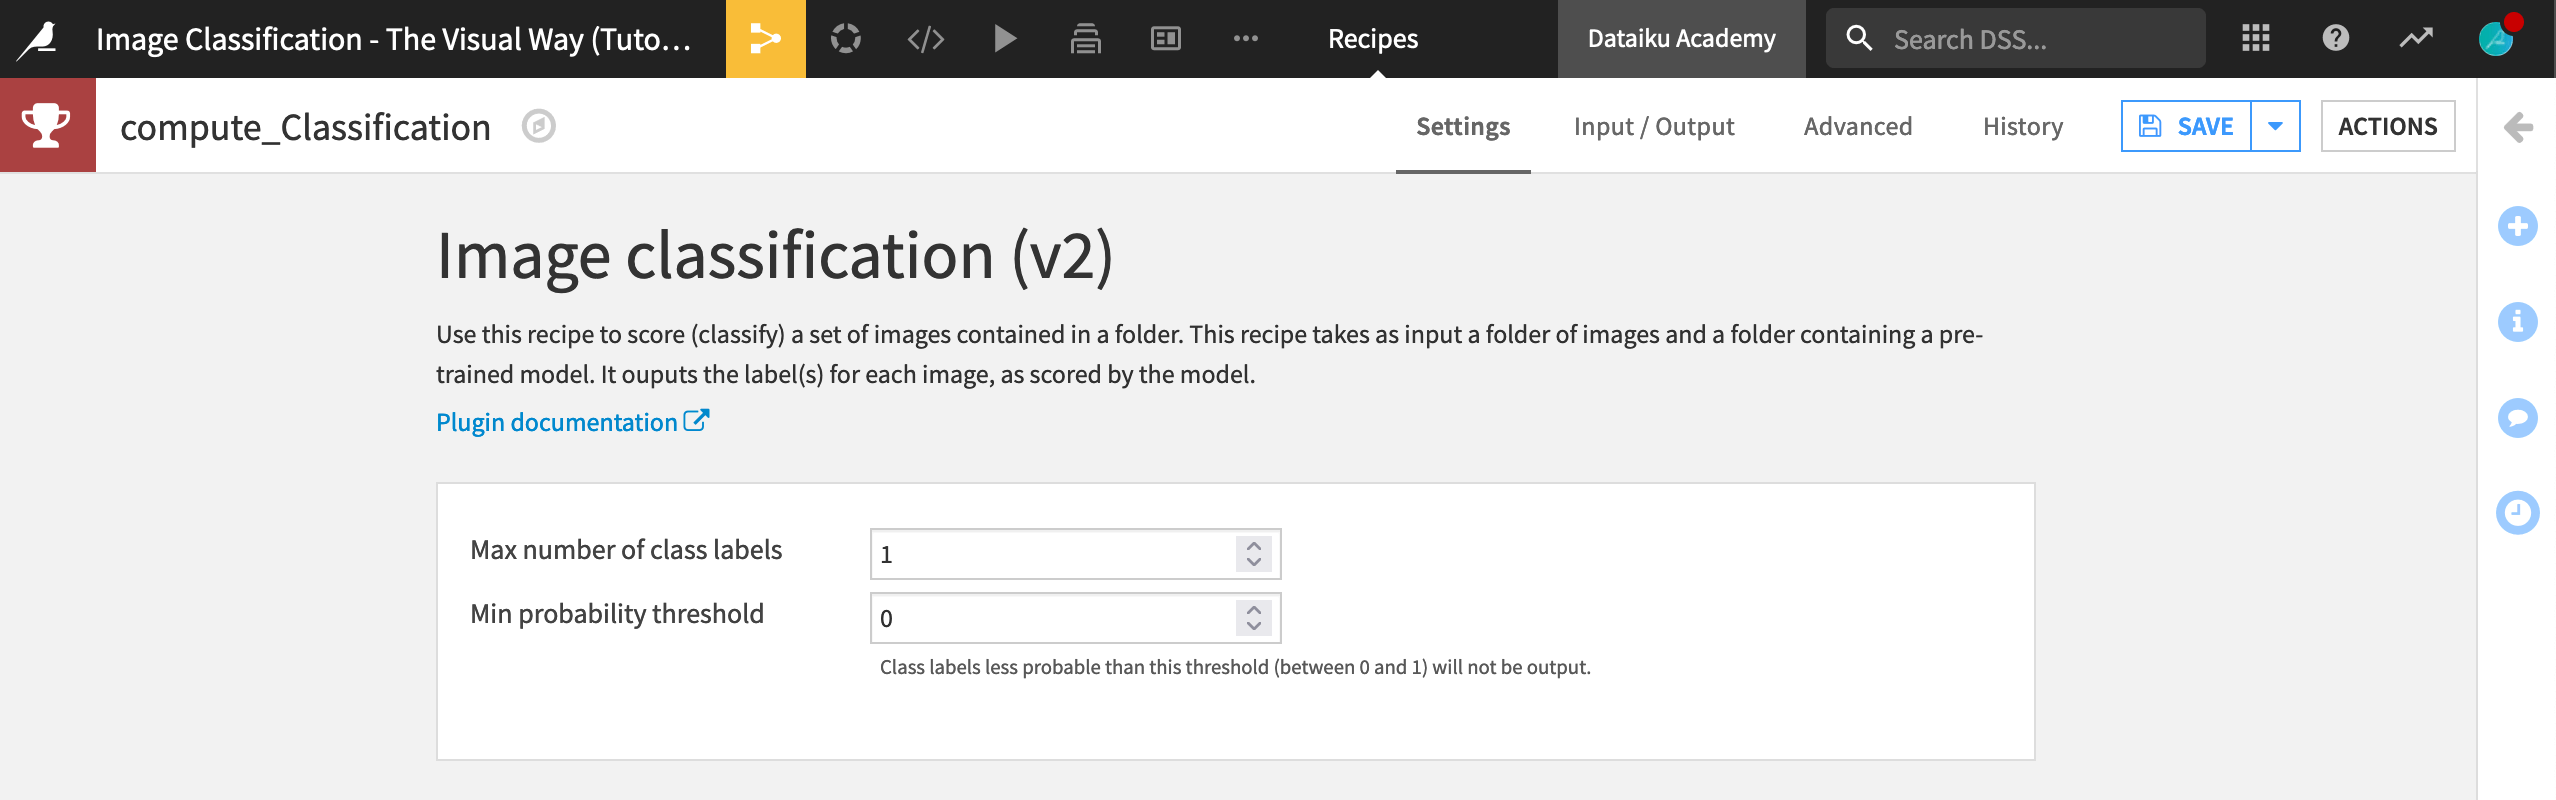
Classify Images with the Pre-Trained Model
Let’s use the pre-trained model we just downloaded to classify the images in the Images to classify folder.
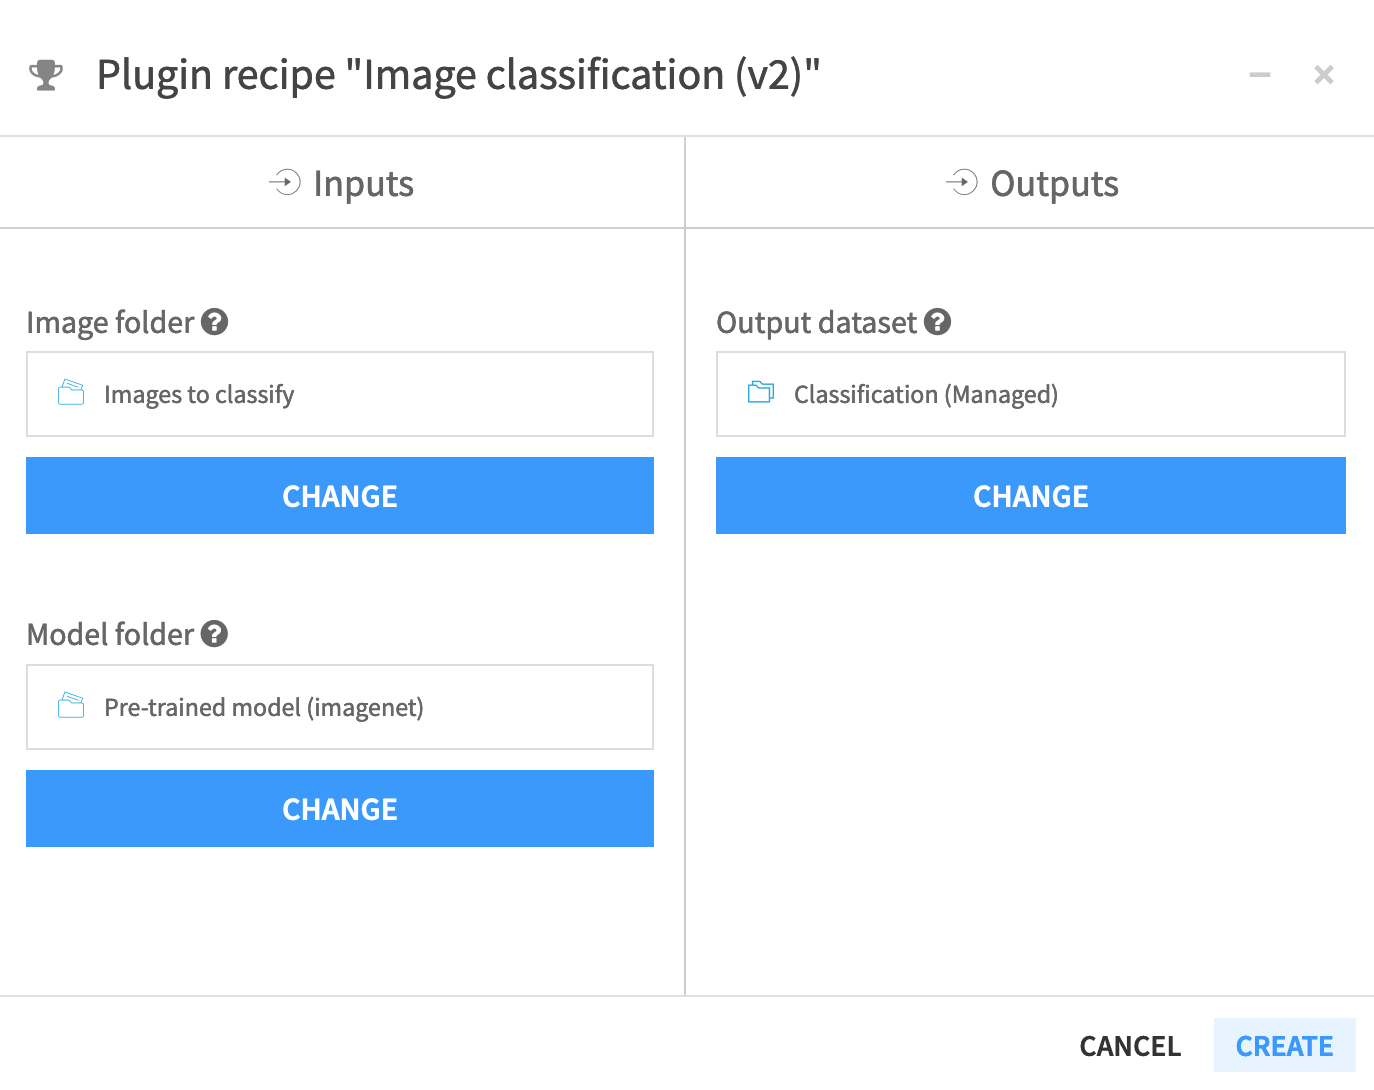
With the Images to classify folder selected, click Deep learning on images from the plugin recipe section of the Actions menu.
Choose Image classification (v2).
Set Images to classify as the “Image folder” and Pre-trained model (imagenet) as the “Model folder”.
Create a new output dataset
Classification.Click Create Dataset, and then click Create.
Now to adjust the settings.
In the Image classification dialog, set the “Max number of class labels” to
1since we want the model to make a single prediction for each image.Run the recipe.
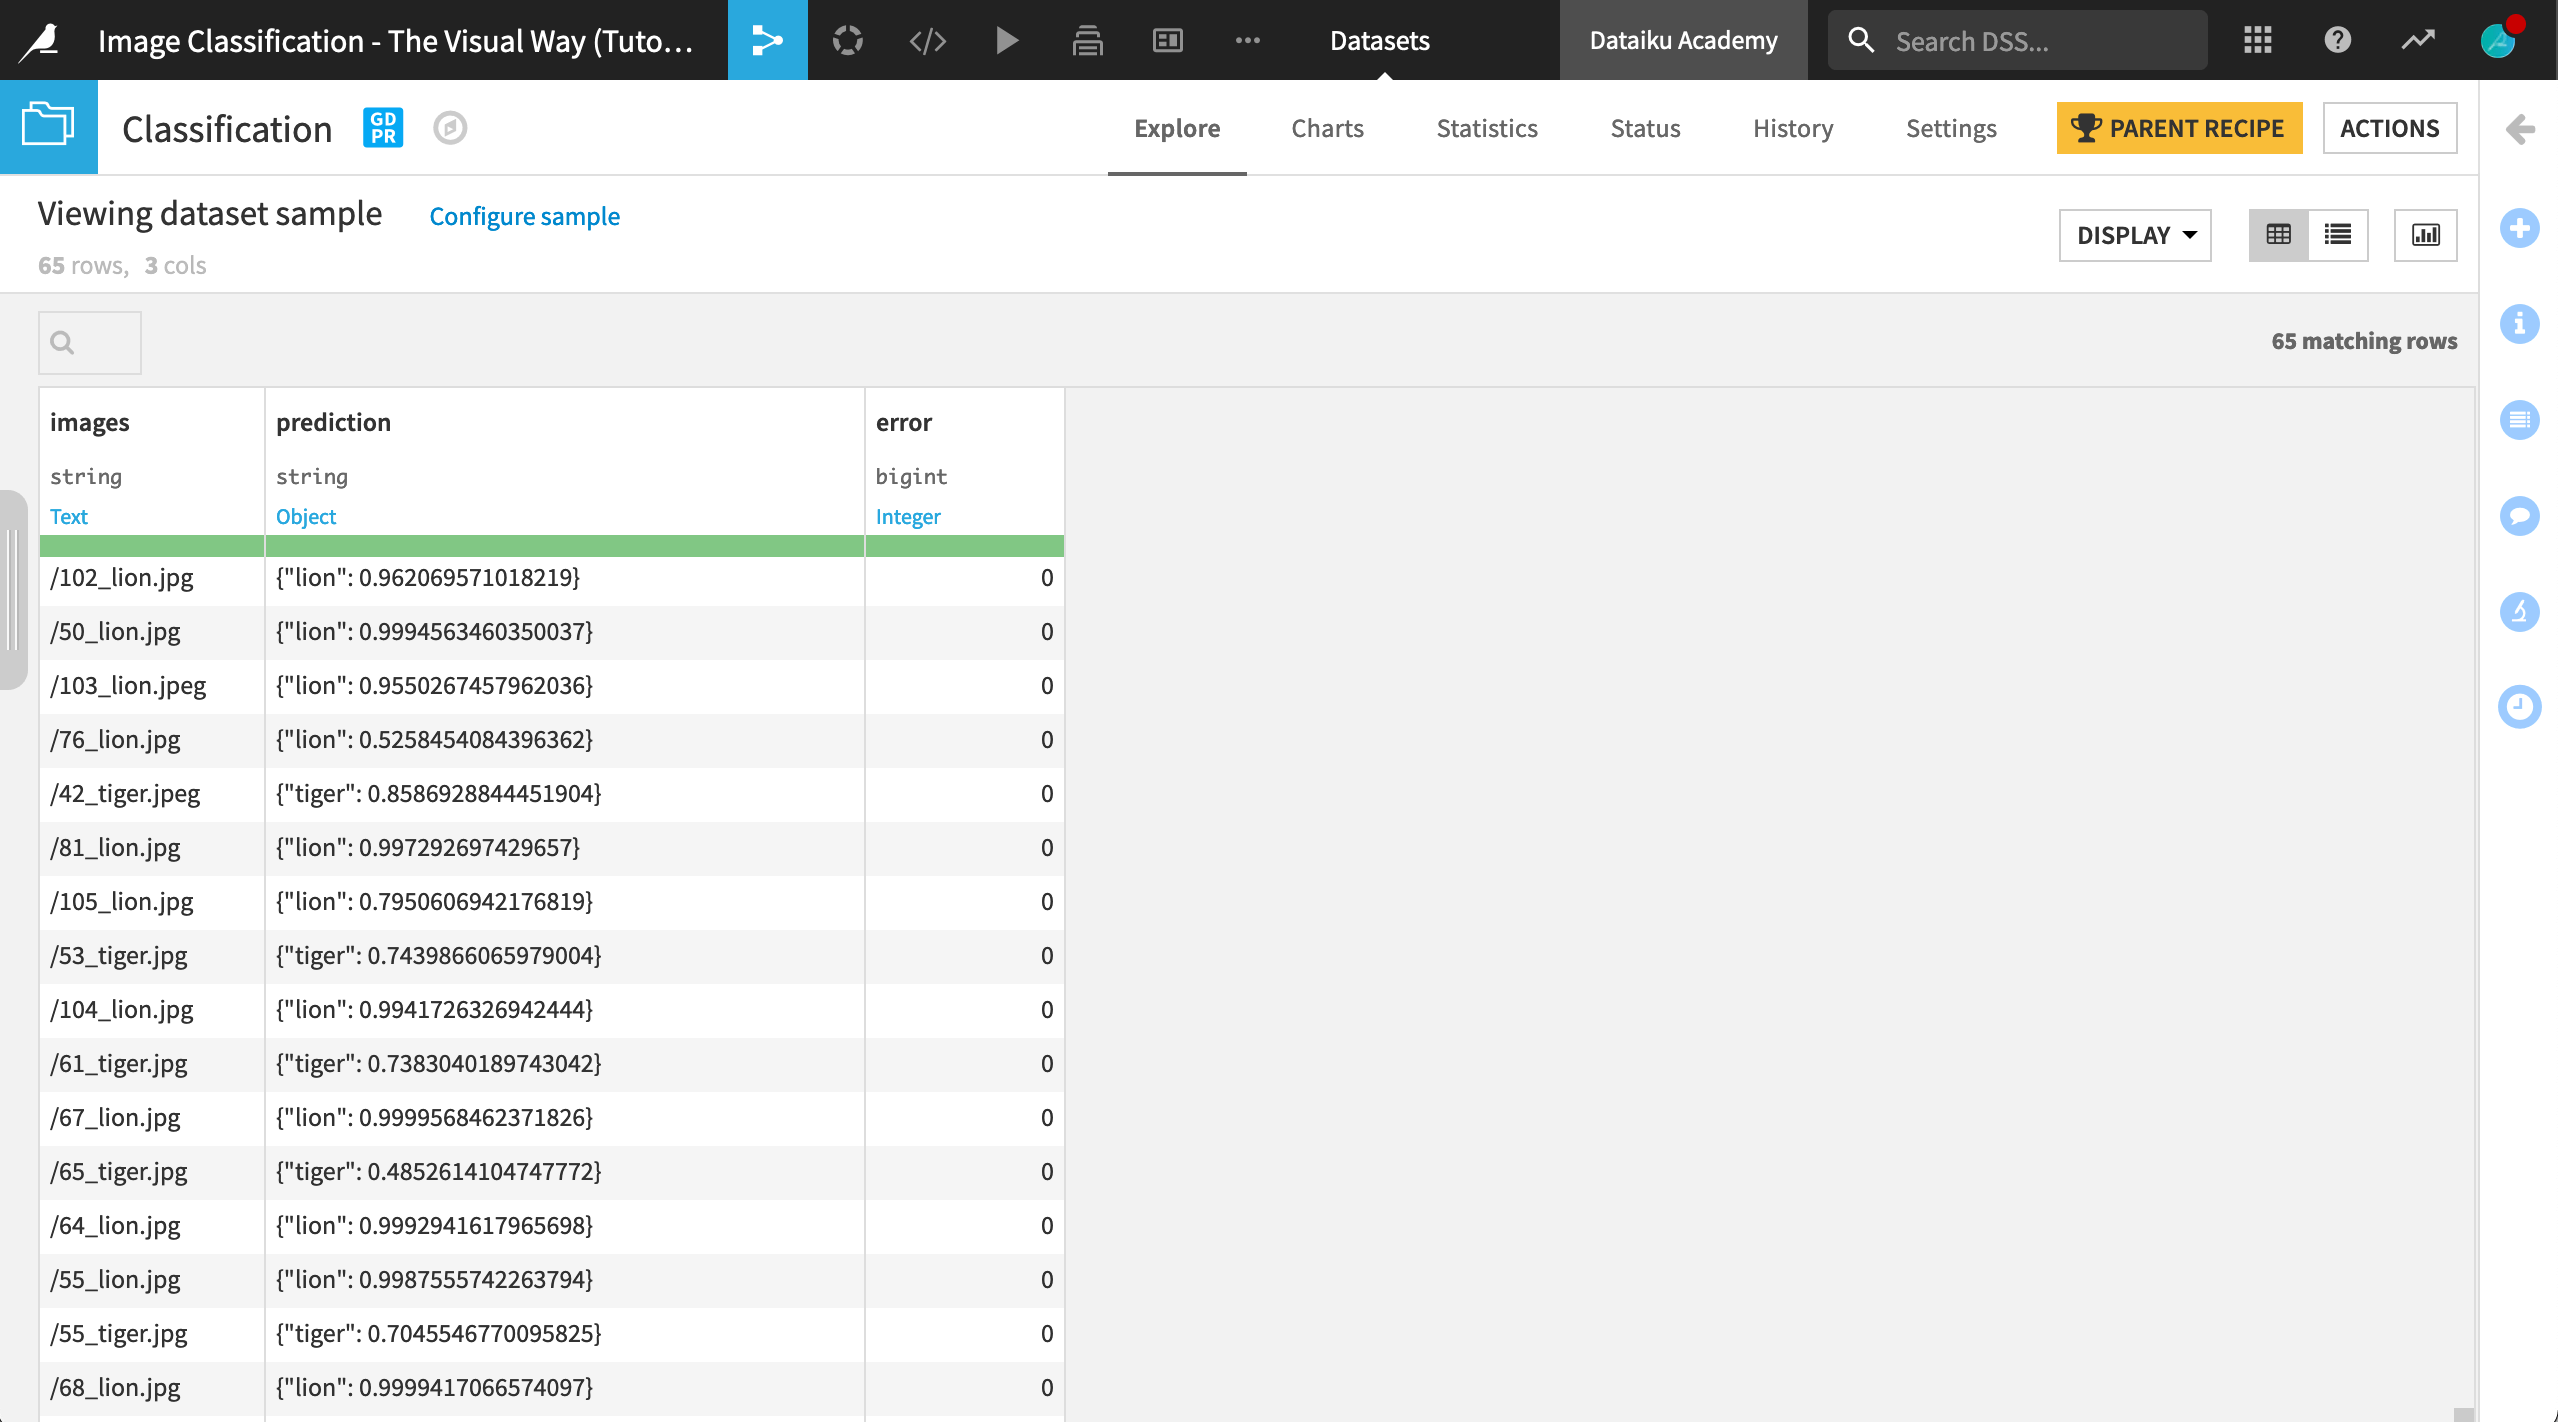
The resulting dataset contains a column with the predictions. Each prediction is a simple JSON with the predicted label and the model-predicted probability that the label is correct.
Prepare the Output from the Pre-trained Model
Manually scanning the predictions to see which are correct is time-consuming and error-prone, so we’ll use a Prepare recipe to find the correct and incorrect classifications.
From the Actions menu of the Classification dataset, select the Prepare recipe.
In the recipe creation dialog, rename the output dataset
Classification_results, and then click Create Recipe.
Extract the labels from the filenames.
From the images column dropdown, select More actions > Find and replace….
Type
labelsas the output column name.With “Regular expression” as the matching mode, copy-paste
.*_(.*)\..*as the regular expression and$1as the replacement value.
Extract the prediction from the JSON.
From the prediction column dropdown, select More actions > Find and replace….
With Regular expression as the matching mode, copy-paste
.*"(.*)".*as the regular expression and$1as the replacement value.
And one more step:
Click Add a New Step and choose Formula from the processors library.
Type
good_predictionas the name of the output column.Copy-paste
if(labels==prediction,1,0)as the expression.Sort the new good_prediction column in ascending order.
Right out of the box, the pre-trained model can classify most of our images of lions and tigers! Only three animals were misclassified as other animals in this case.
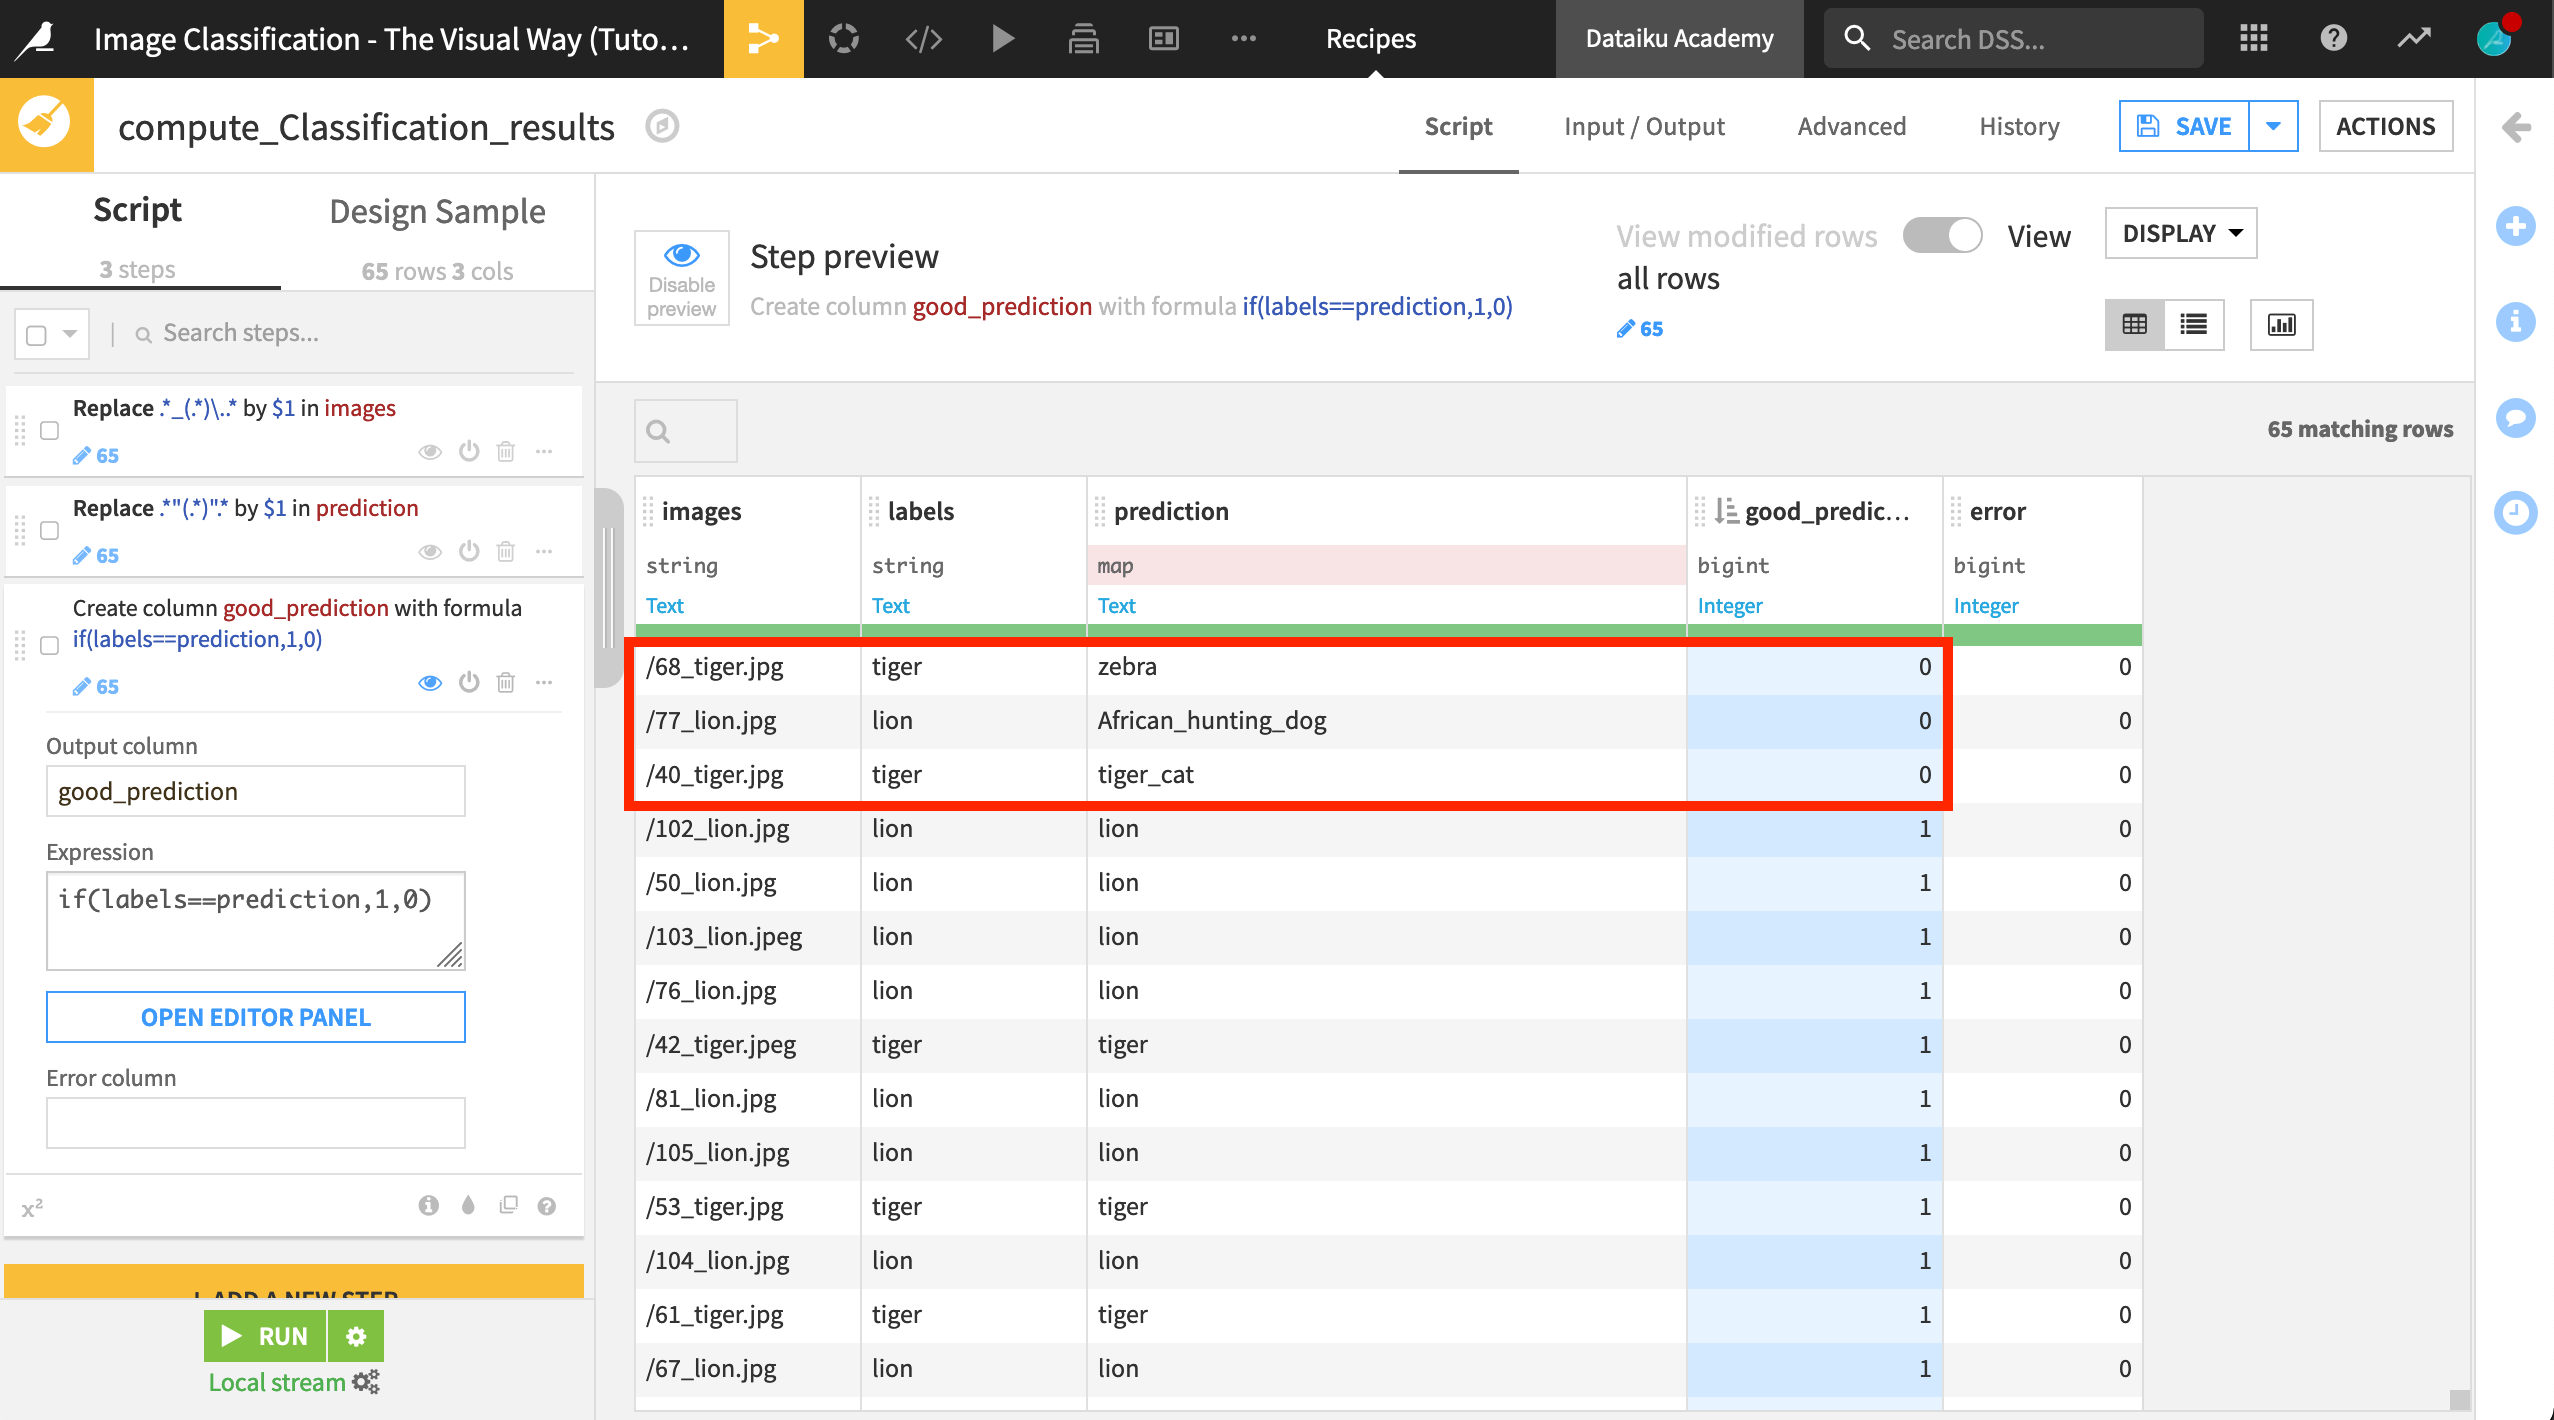
Finally, click Run to create the output dataset and return to the Flow.
Tip
Check the misclassified images to see why the model may have struggled with them!
Transfer Learning to Retrain the Model
At this point, we classified a set of images using only a pre-trained model. Let’s improve the pre-trained model with transfer learning.
To do this, we’ll use the folder containing our training images, Images for retraining. This folder contains more labelled images of lions and tigers. A simple Python recipe has also been created to extract the label (“lion” or “tiger”) from the filename into the Labels dataset.
With the Images for retraining folder selected, click on the Deep learning on images recipe in the Actions menu.
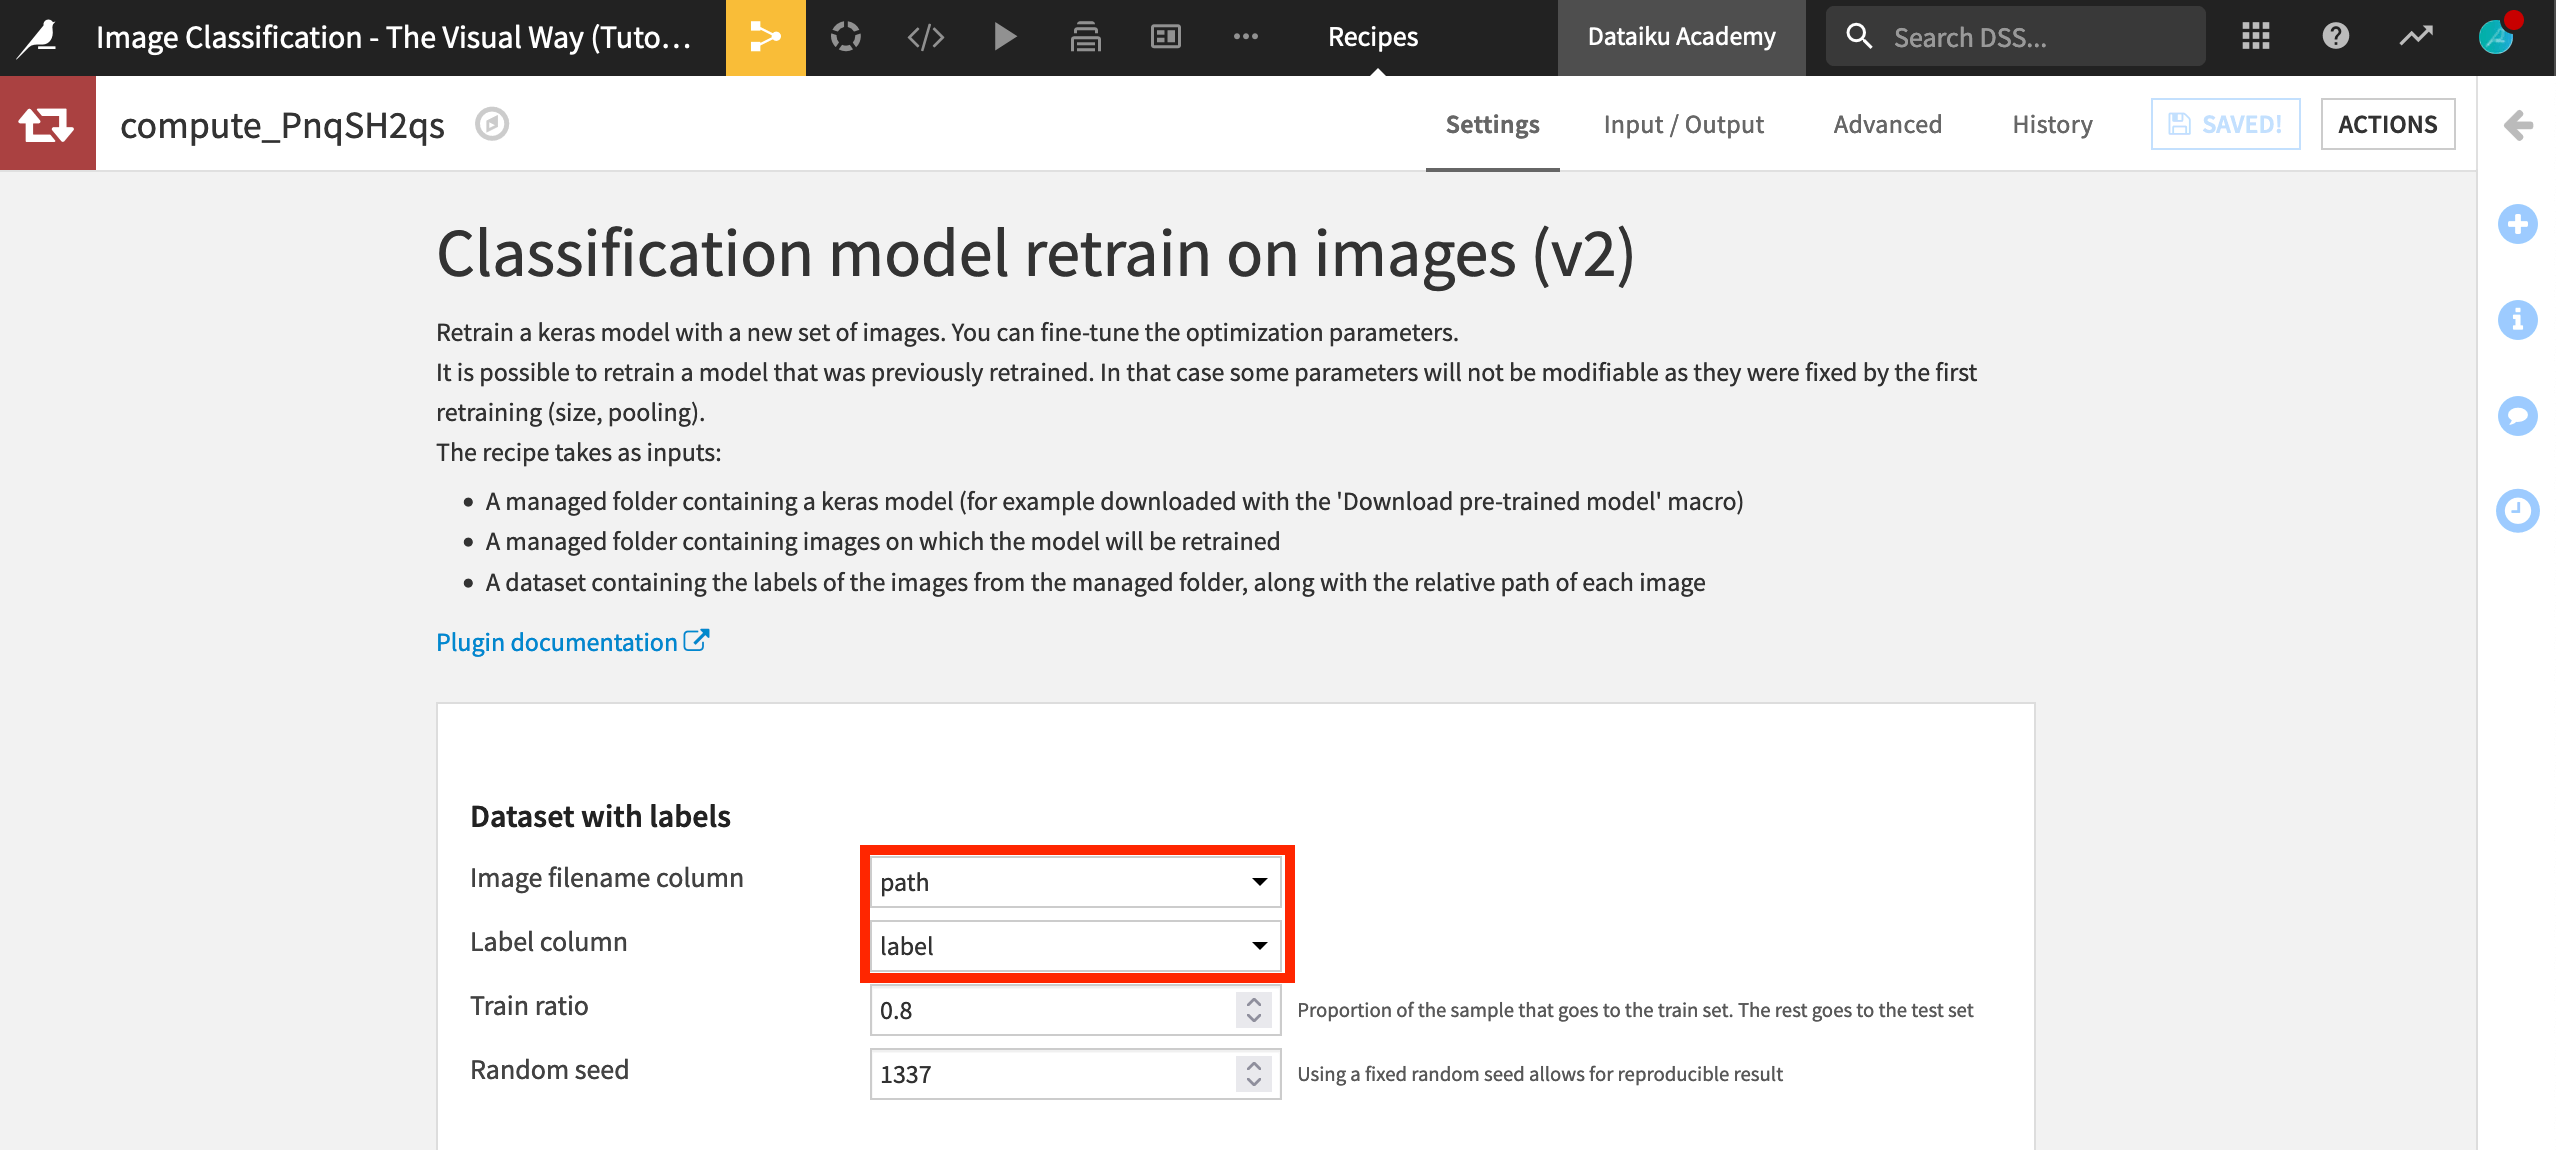
Choose Classification model retrain on images (v2).
Set Labels as the “Label dataset”, Images for retraining as the “Image folder”, Pre-trained model (imagenet) as the “Model folder”.
Name the newly-retrained “Model folder” output
Retrained model, and click Create.
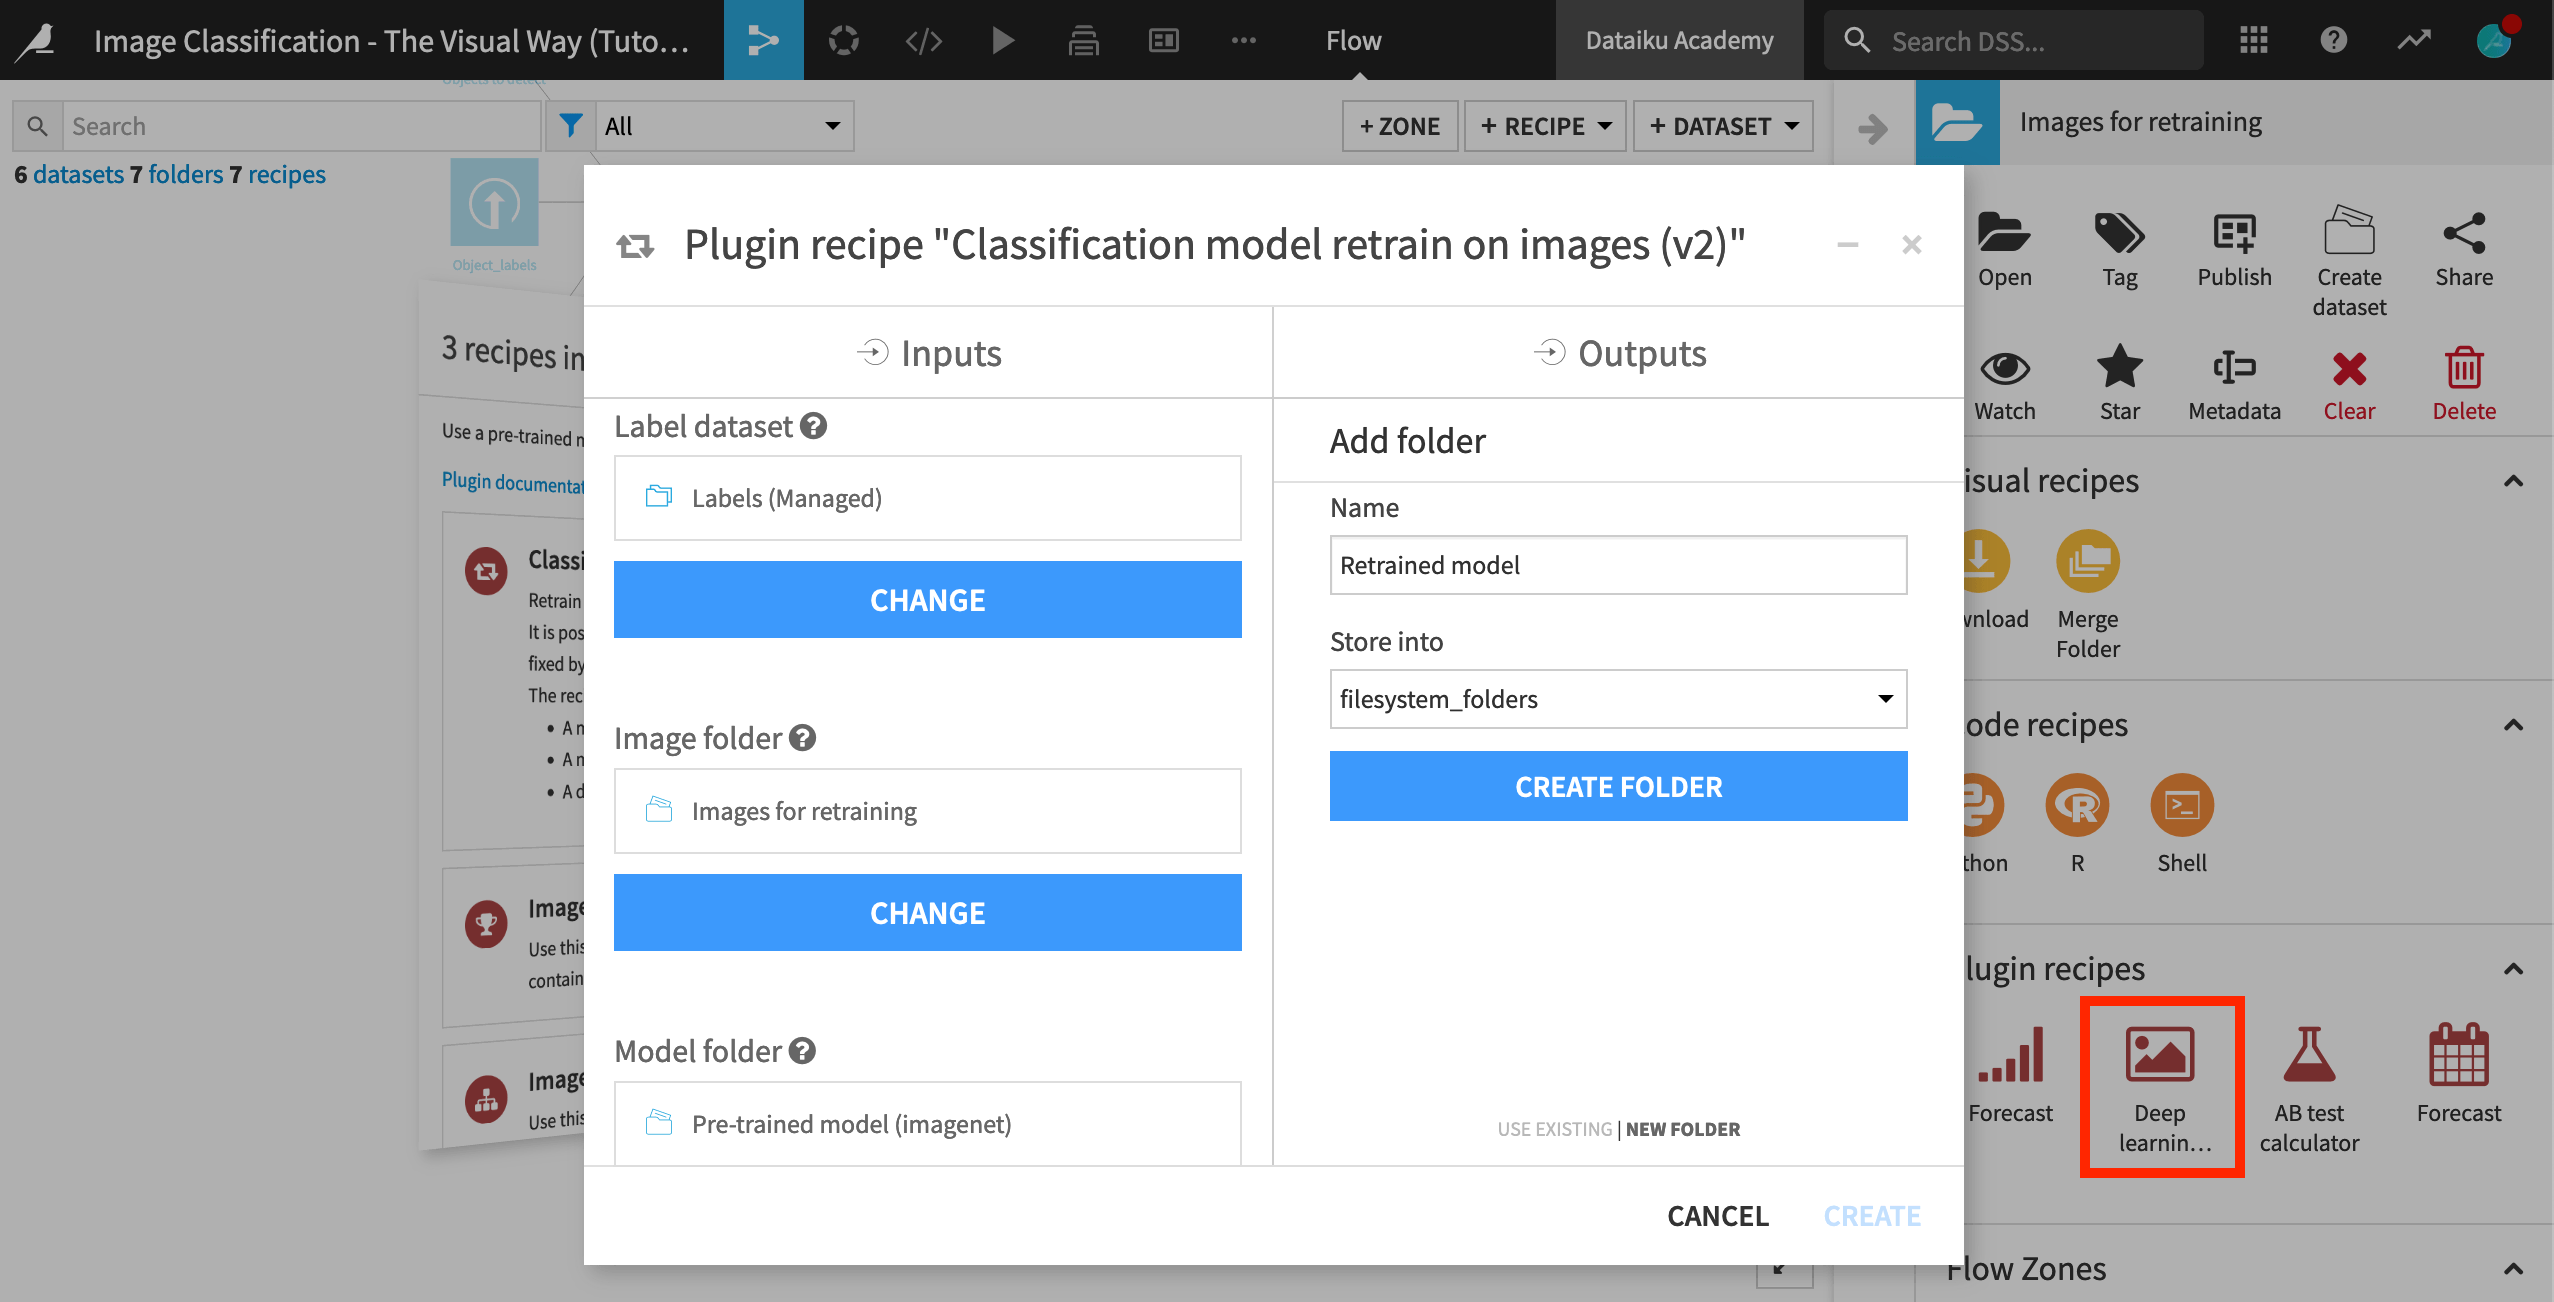
Now just a few settings to adjust:
Under Dataset with labels, set the “Image filename column” to path and the “Label column” to label.
Under Training, reduce “Batch Size” to
10, “Steps per epoch” to10, and “Number of validation steps” to5in order to speed up re-training.Be sure the checkbox “Use TensorBoard” is selected so that you can access tensorboard via a DSS webapp.
Run the recipe.
Classification after Transfer Learning
Now let’s classify the original test set images once more, but using the model that was retrained on the additional images instead of the purely pretrained model.
Select the compute_Classification recipe, and click Copy from the Actions menu.
Change the “Model folder” to Retrained model.
Create a new output dataset
Classification_after_retrain.Click Create Dataset, and then click Create.
The copied recipe is already set to 1 “Max number of class labels” so Run the recipe.
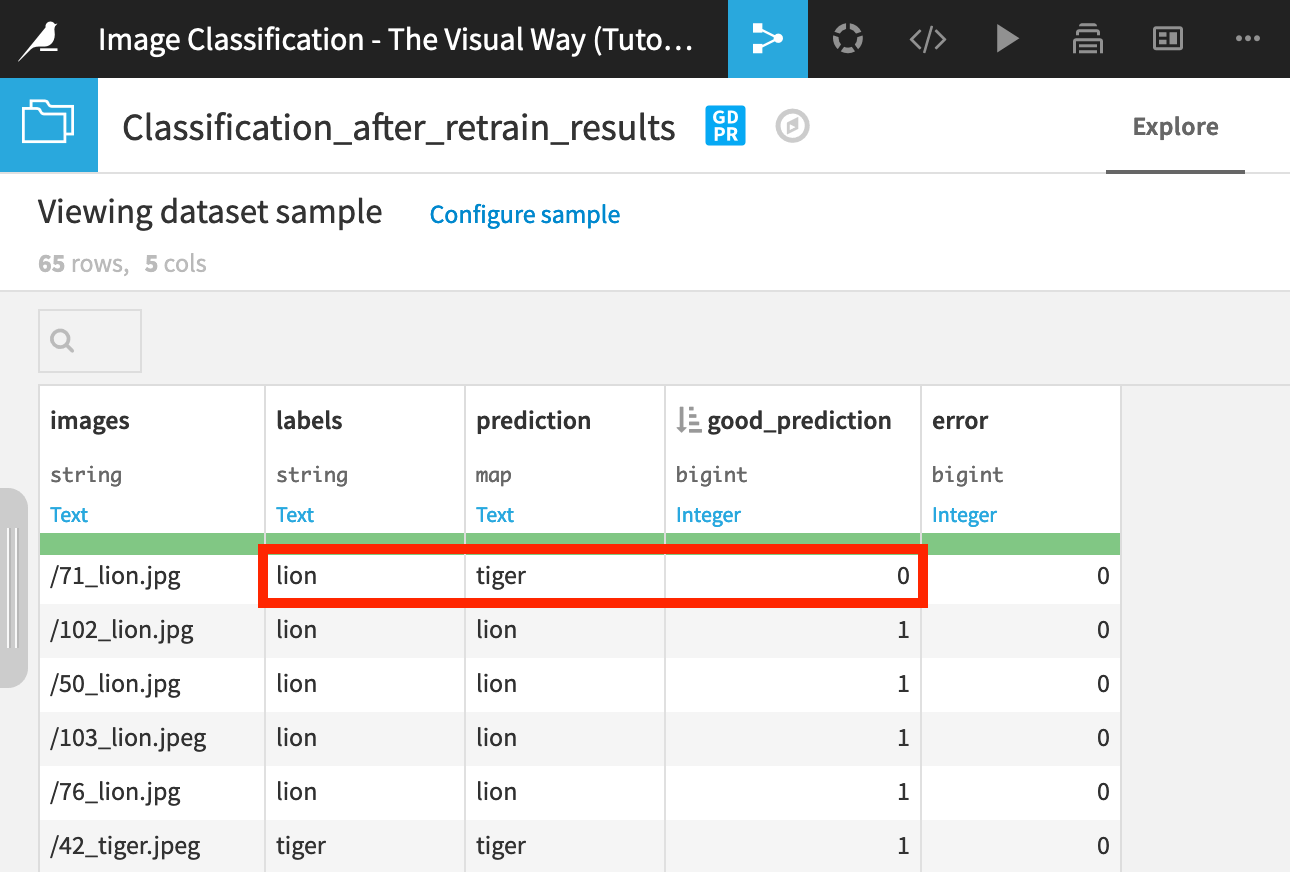
Prepare the Output from the Retrained Model
Did the retrained model do any better? Let’s apply the same Prepare recipe steps as the first classification to know.
Select the compute_Classification_results recipe, and click Copy from the Actions menu.
Change the Input dataset to Classification_after_retrain.
Name the new output dataset
Classification_after_retrain_results.Click Create Recipe.
Results will vary each time you re-train the model. For example, the retrained model might misclassify some of the images. The small retraining dataset and the settings we reduced in order to decrease the retraining time could have caused this.
In this case, the retrained model only missed one image instead of three!
Analyze and Understand Your Model with TensorBoard
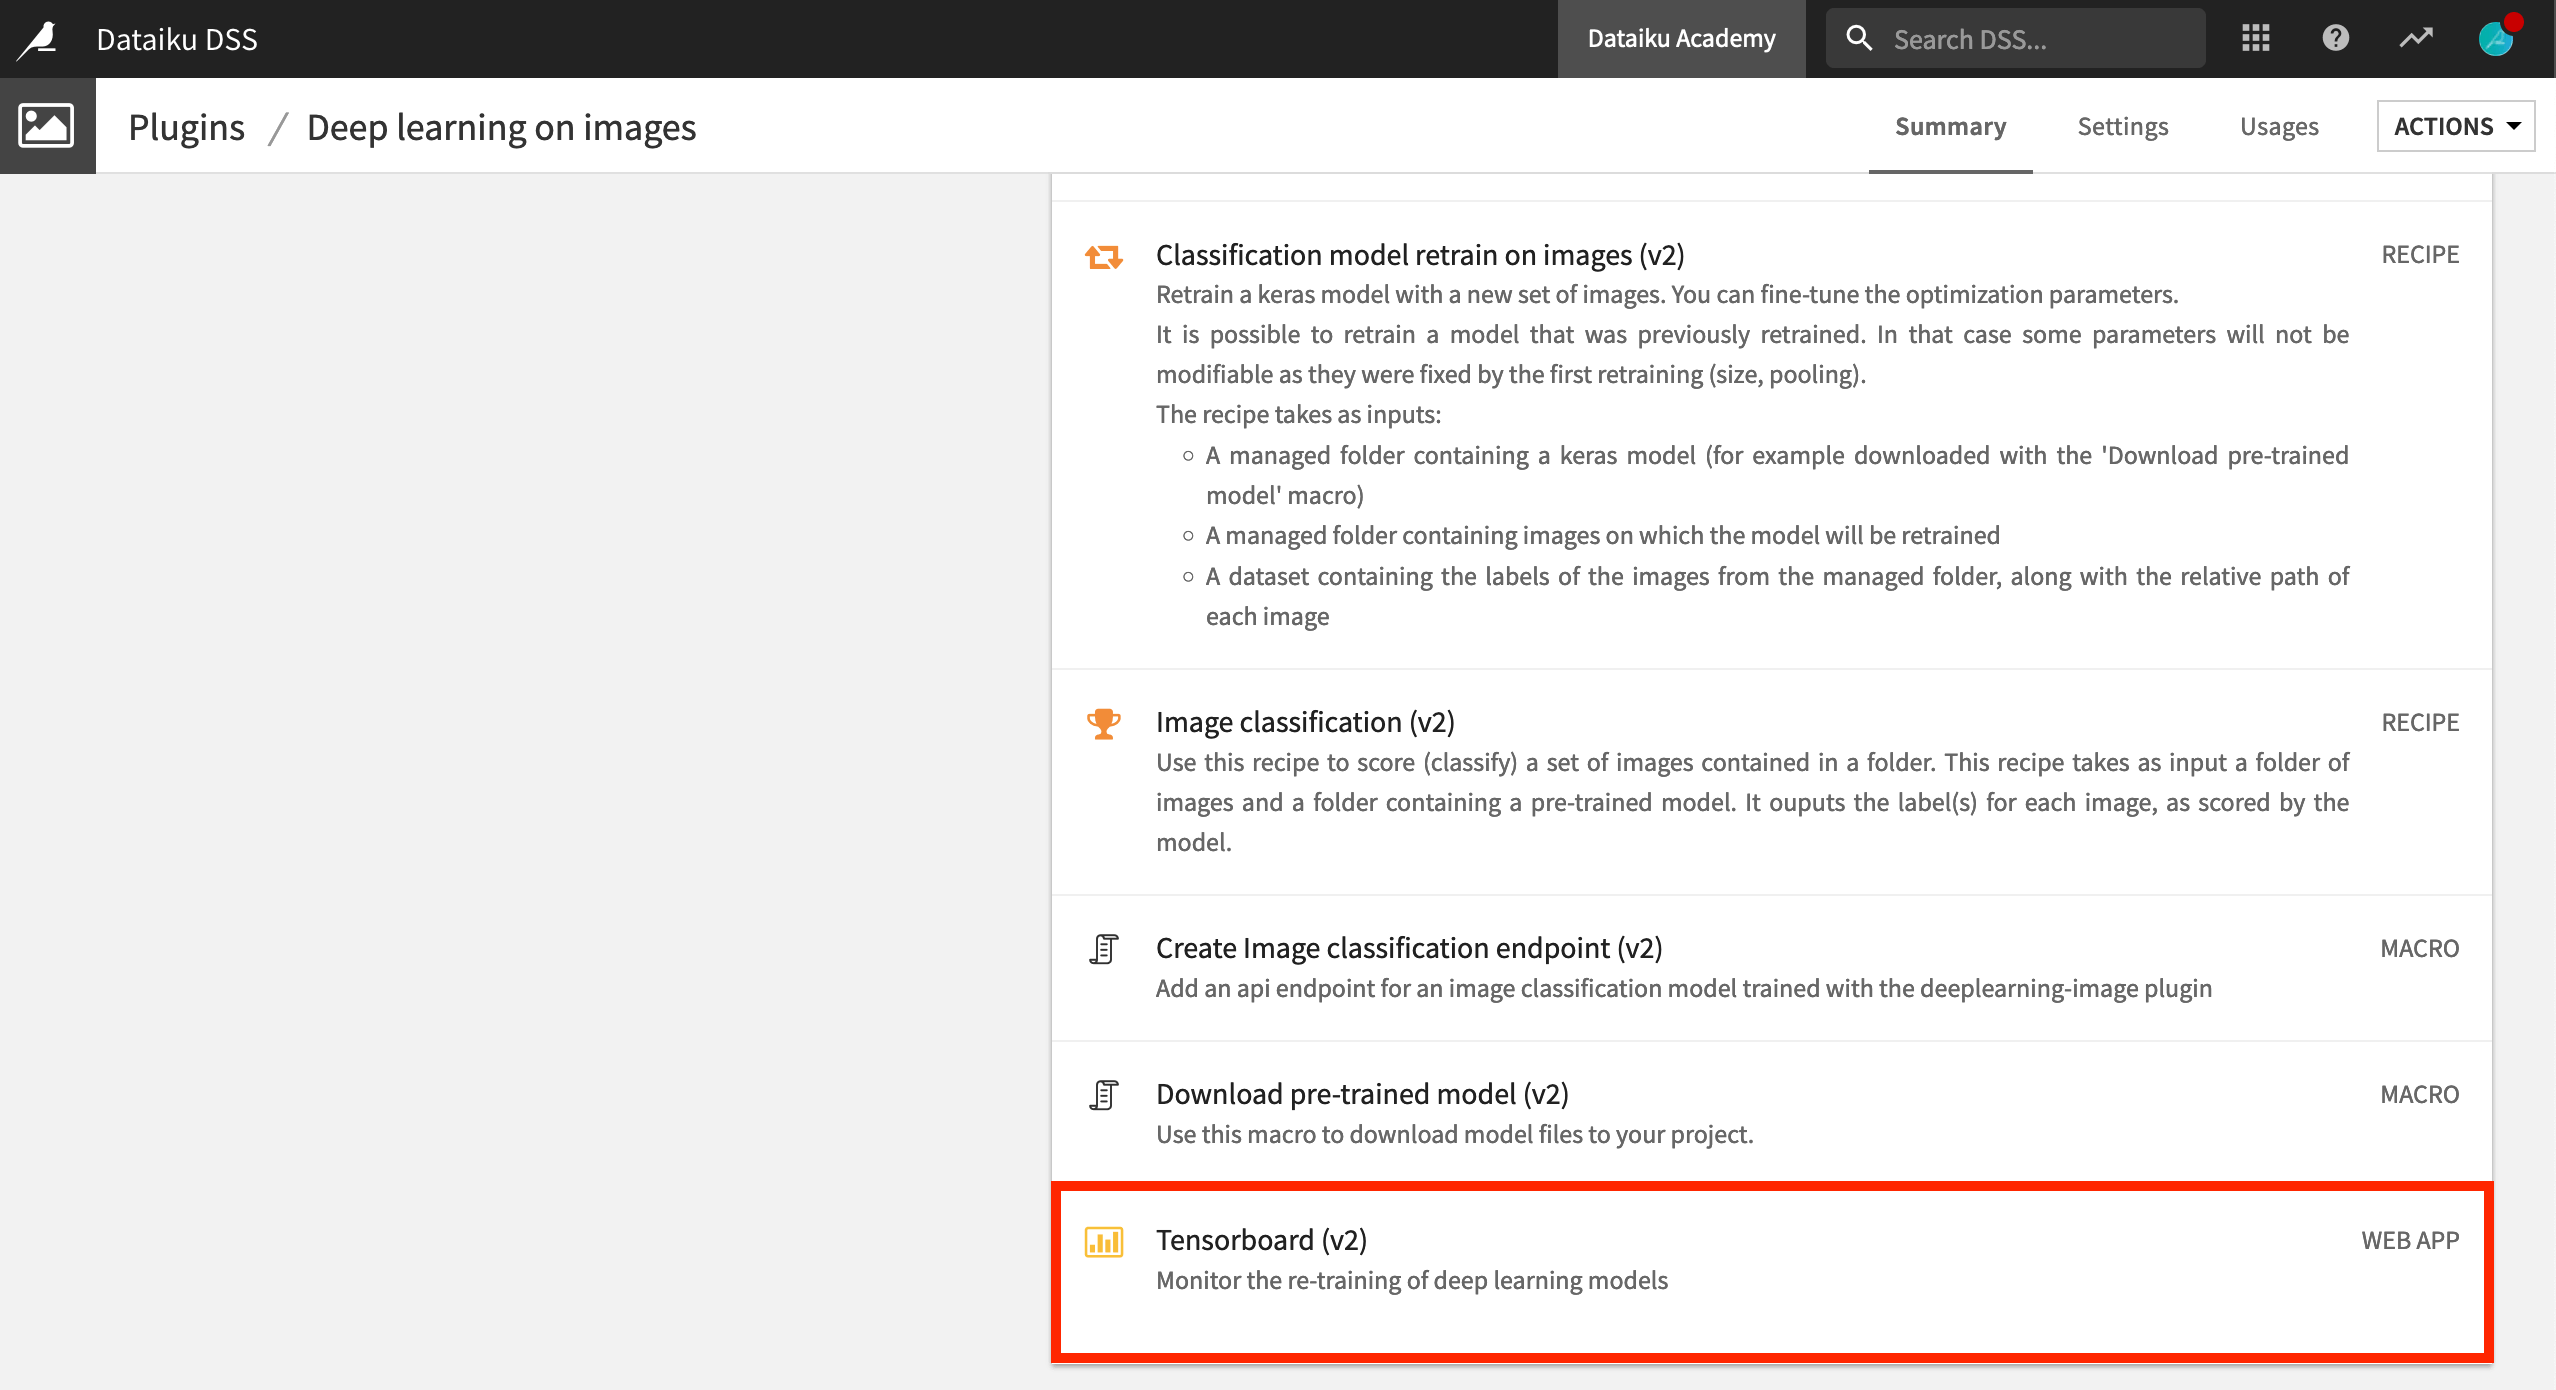
The Deep Learning on images plugin includes a webapp component, Tensorboard (v2), for monitoring the retraining of deep learning models.
While re-training your model, you can use TensorBoard to view the performance of your model in real time, across epochs, along with the model’s architecture. The goal is to understand the architecture of your model and check the evolution of the most useful metrics over epochs, like the loss, and the Area Under the Curve (AUC).
Note
One epoch is equal to one complete pass of the entire training dataset by the model.
Create the Webapp
Let’s create the webapp.
Note
If you have difficulty with this step, return to the recipe that retrained the model and ensure the checkbox for “Use TensorBoard” was selected.
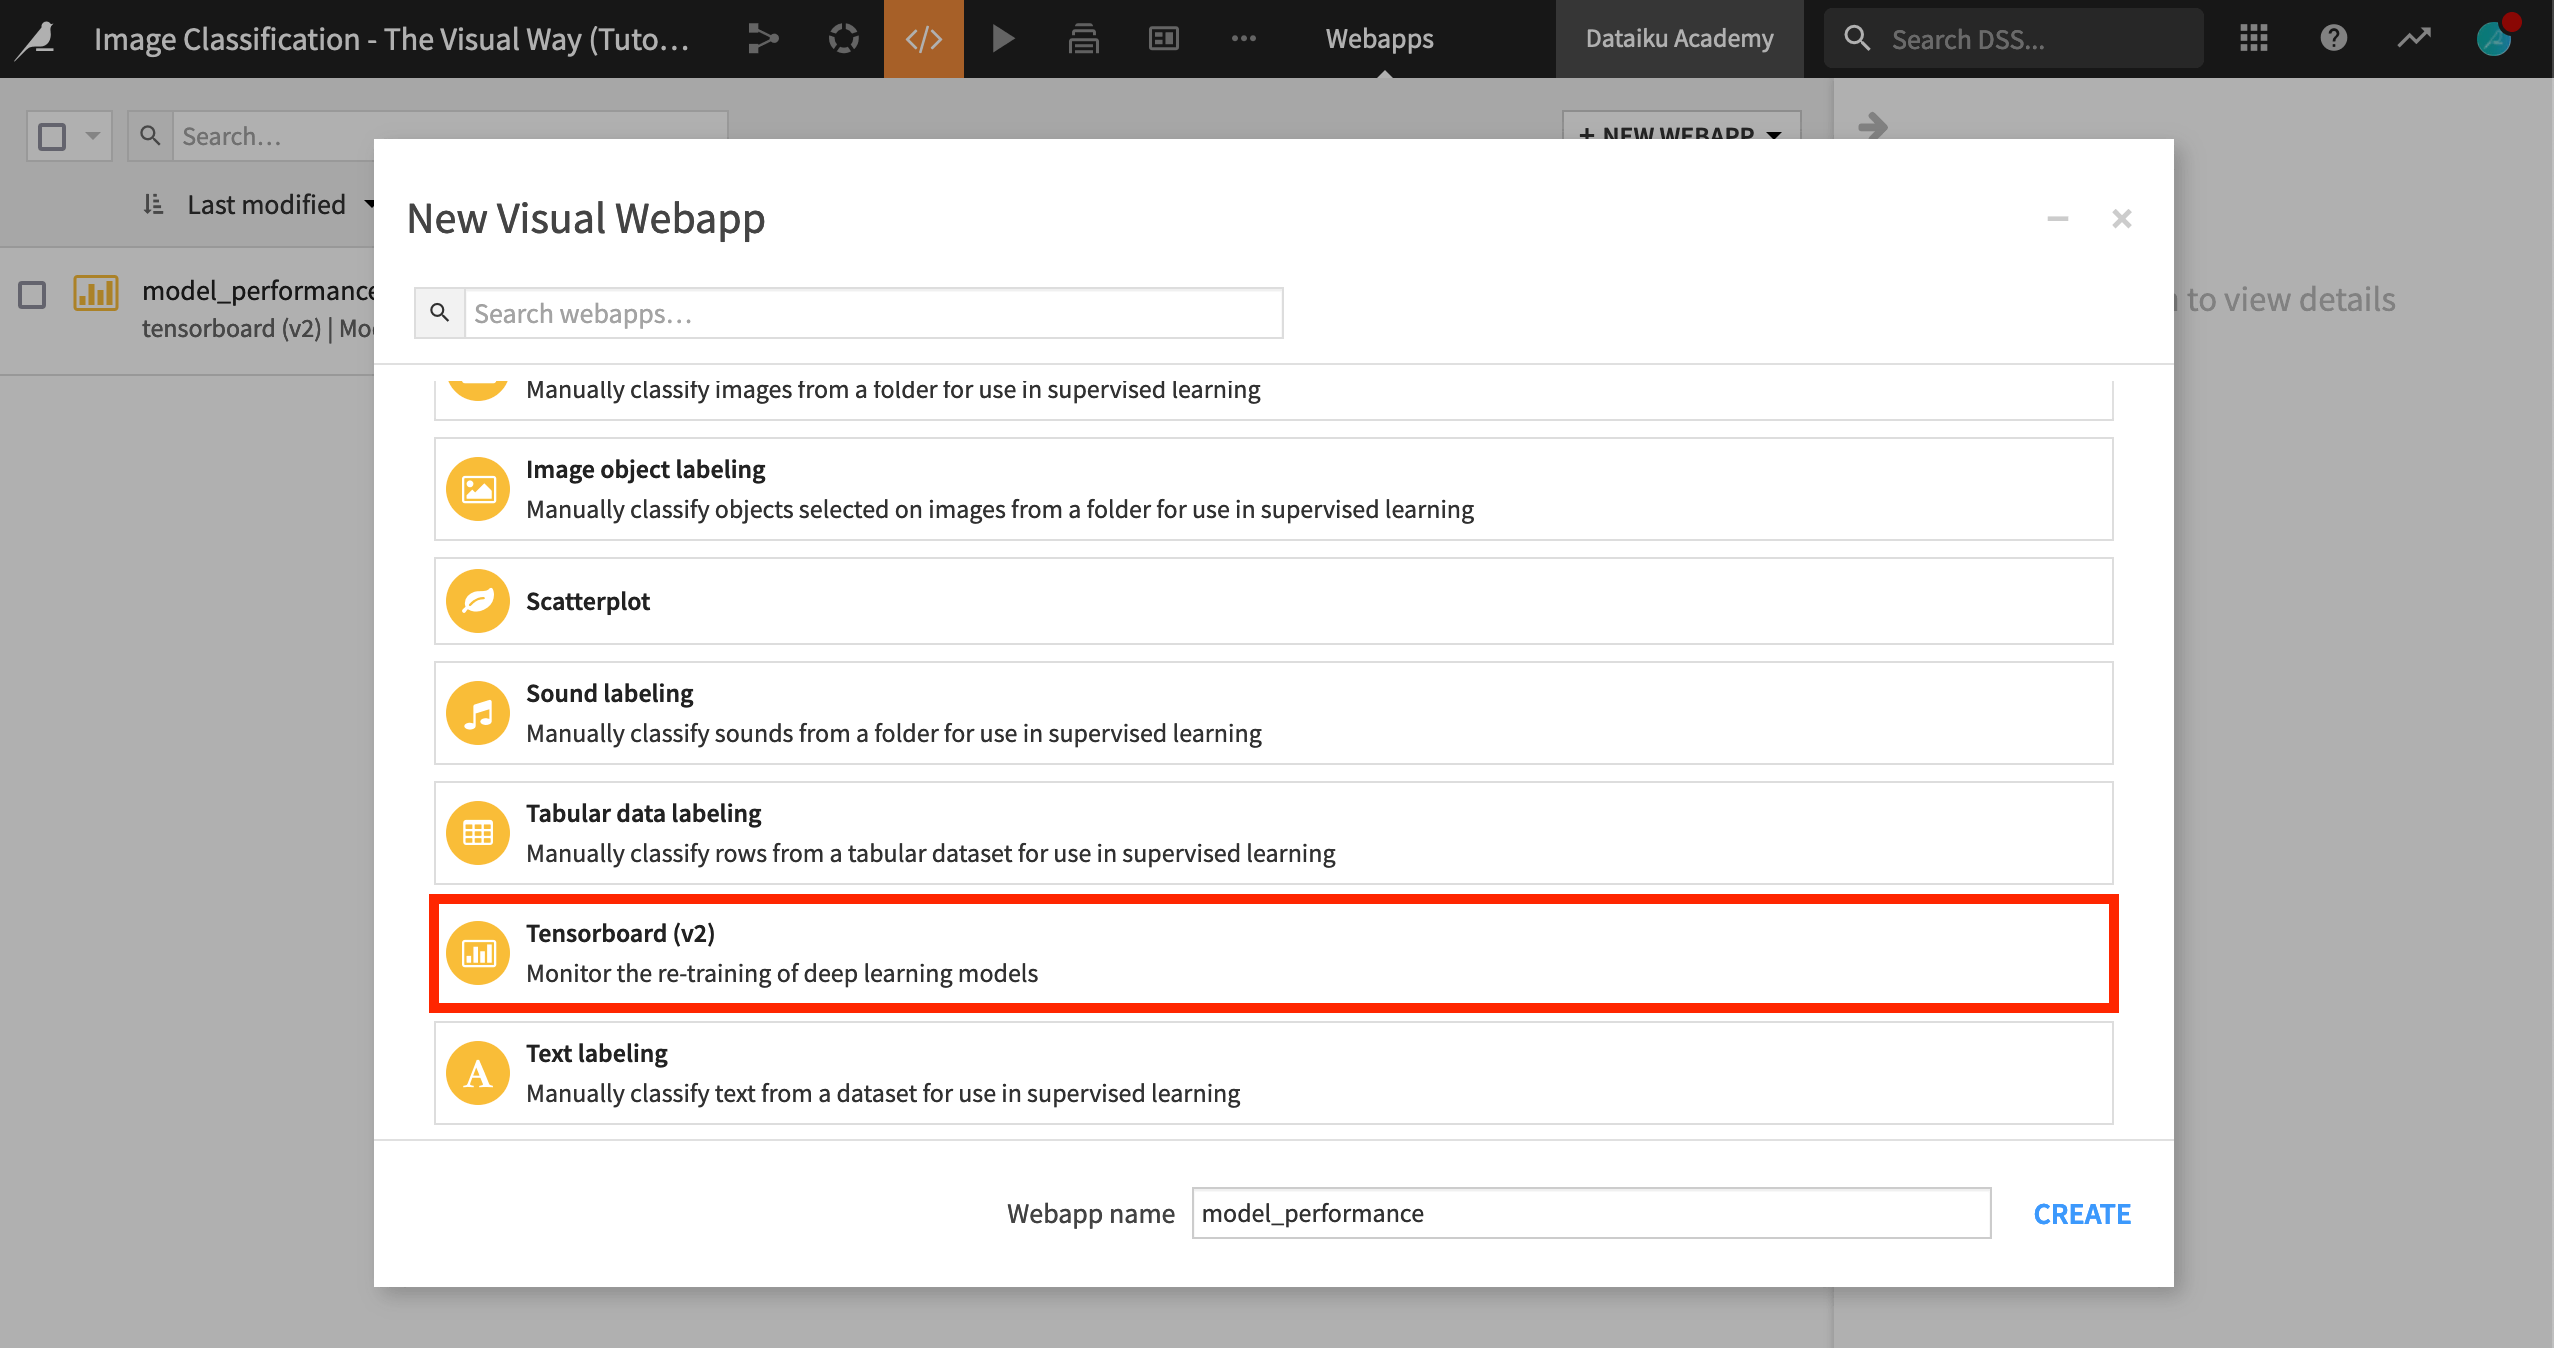
From the Code menu of the top navigation bar, select Webapps > + New Webapp > Visual Webapp > Tensorboard (v2).
Name the webapp
model_performance, and click Create.
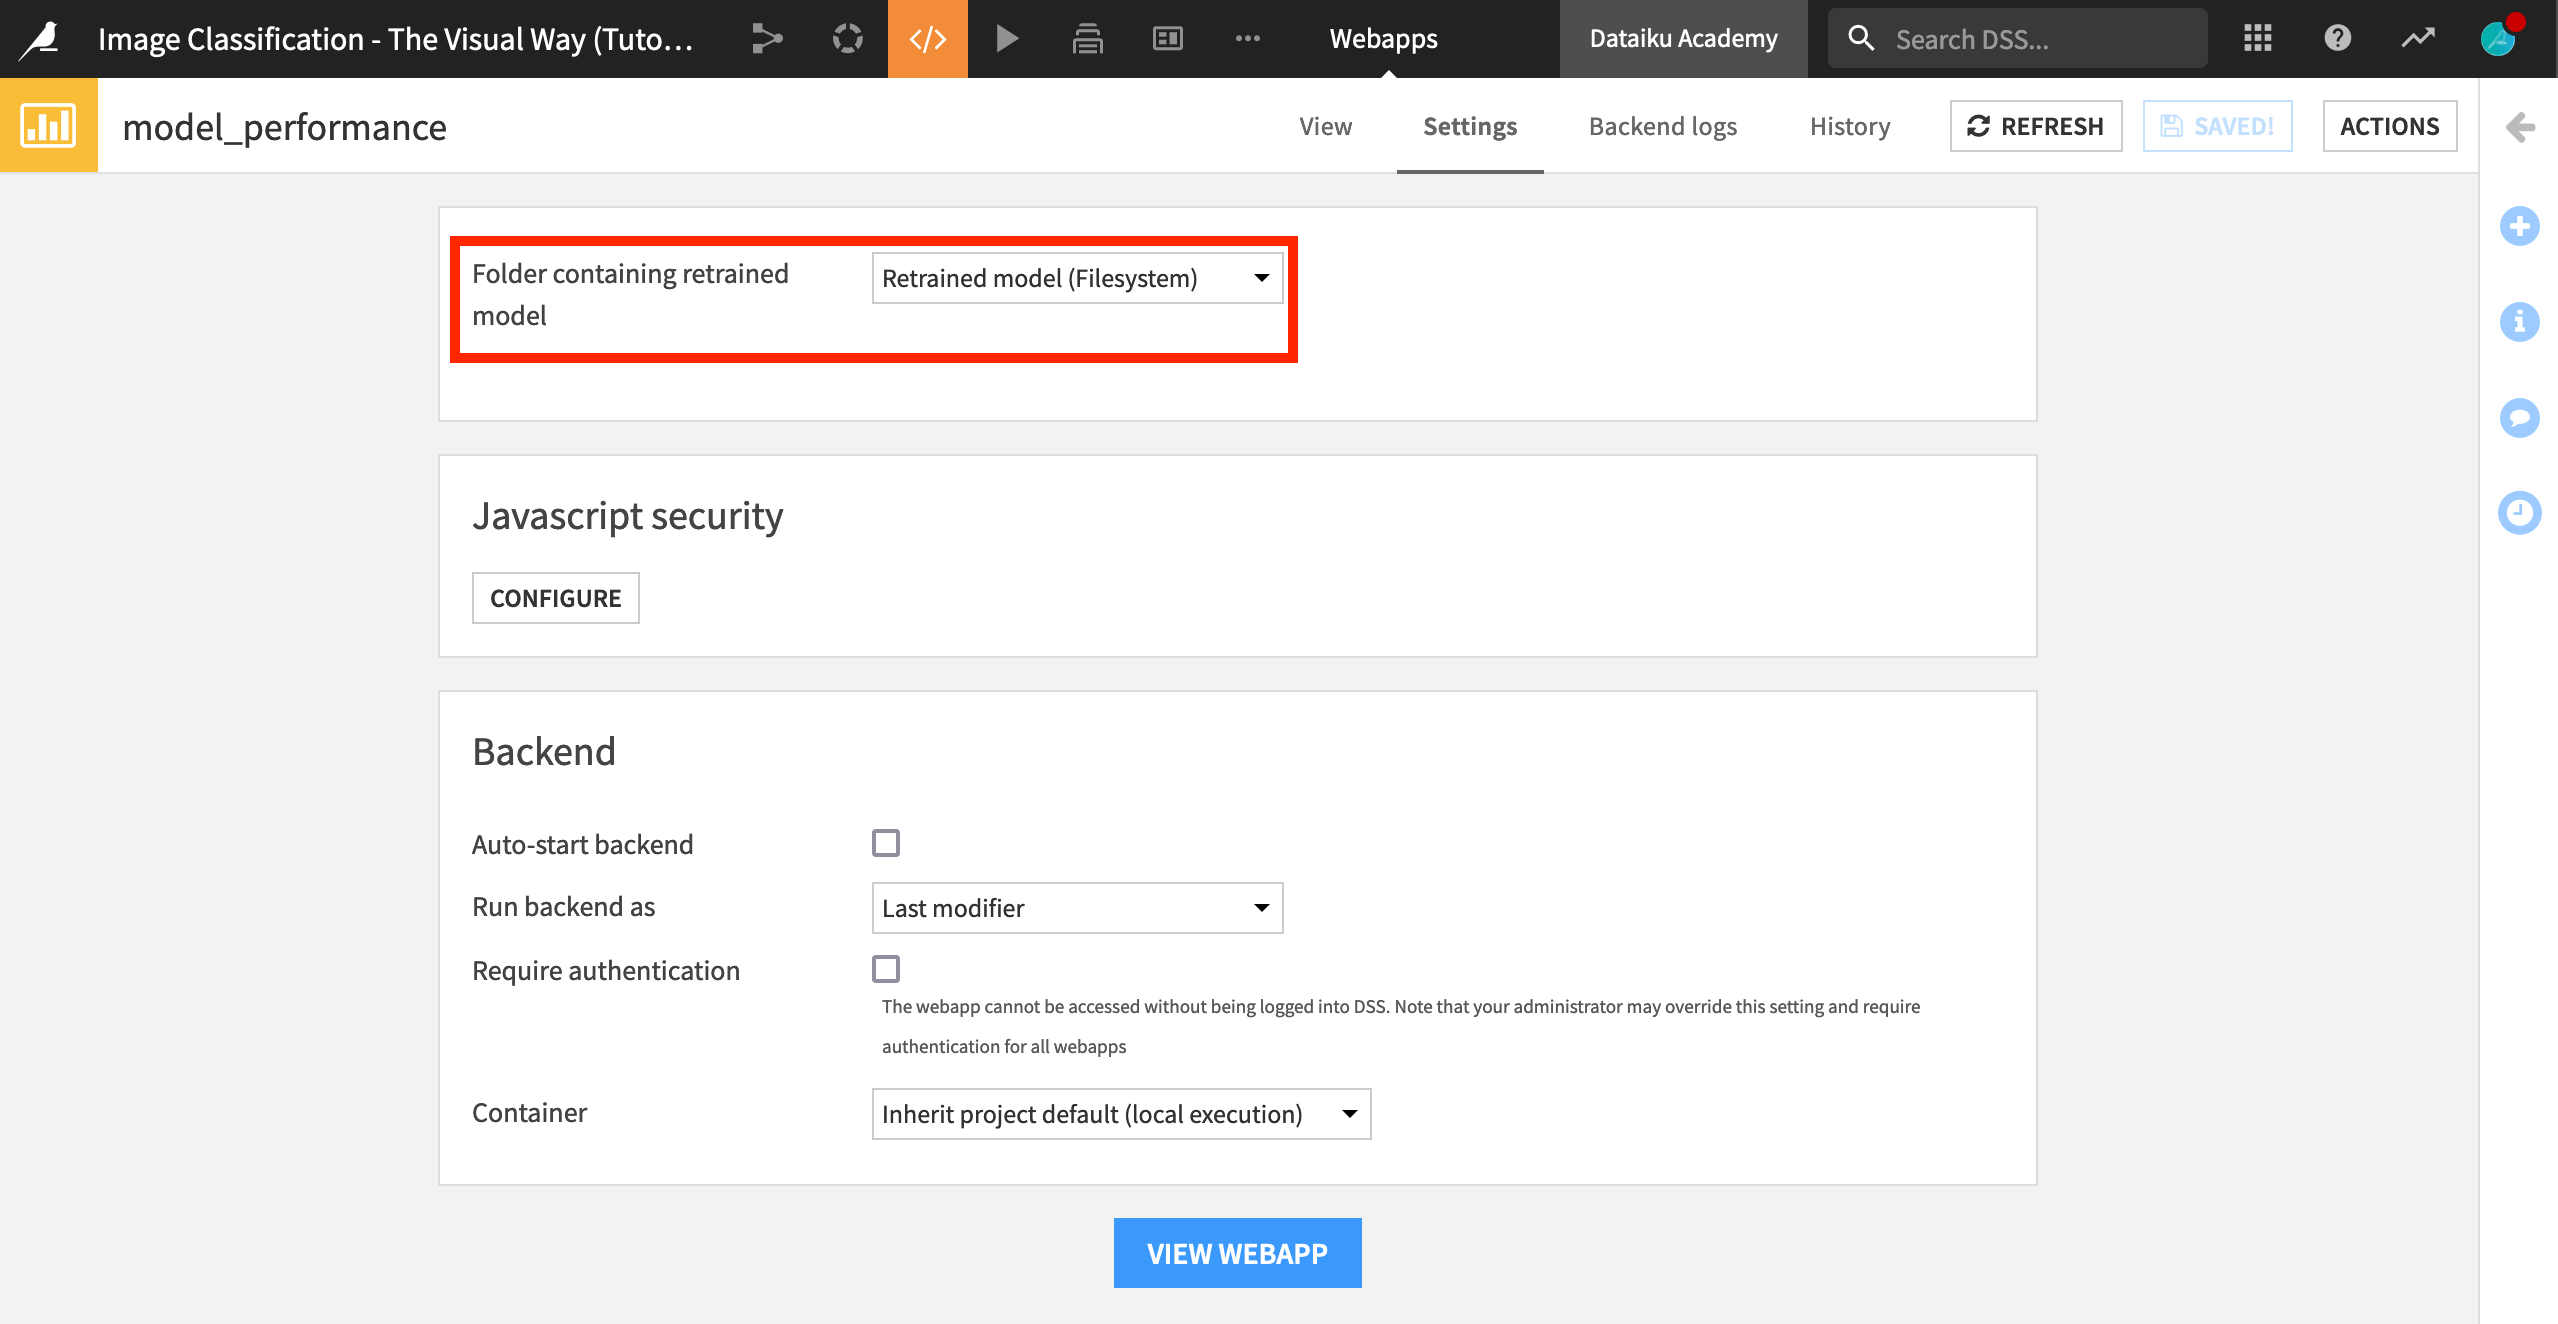
Configure the Webapp
Dataiku lets you know the webapp requires a backend and that it is not running.
On the Settings tab of the webapp, choose Retrained model as the “Folder containing retrained model”.
Then click Save and View Webapp.
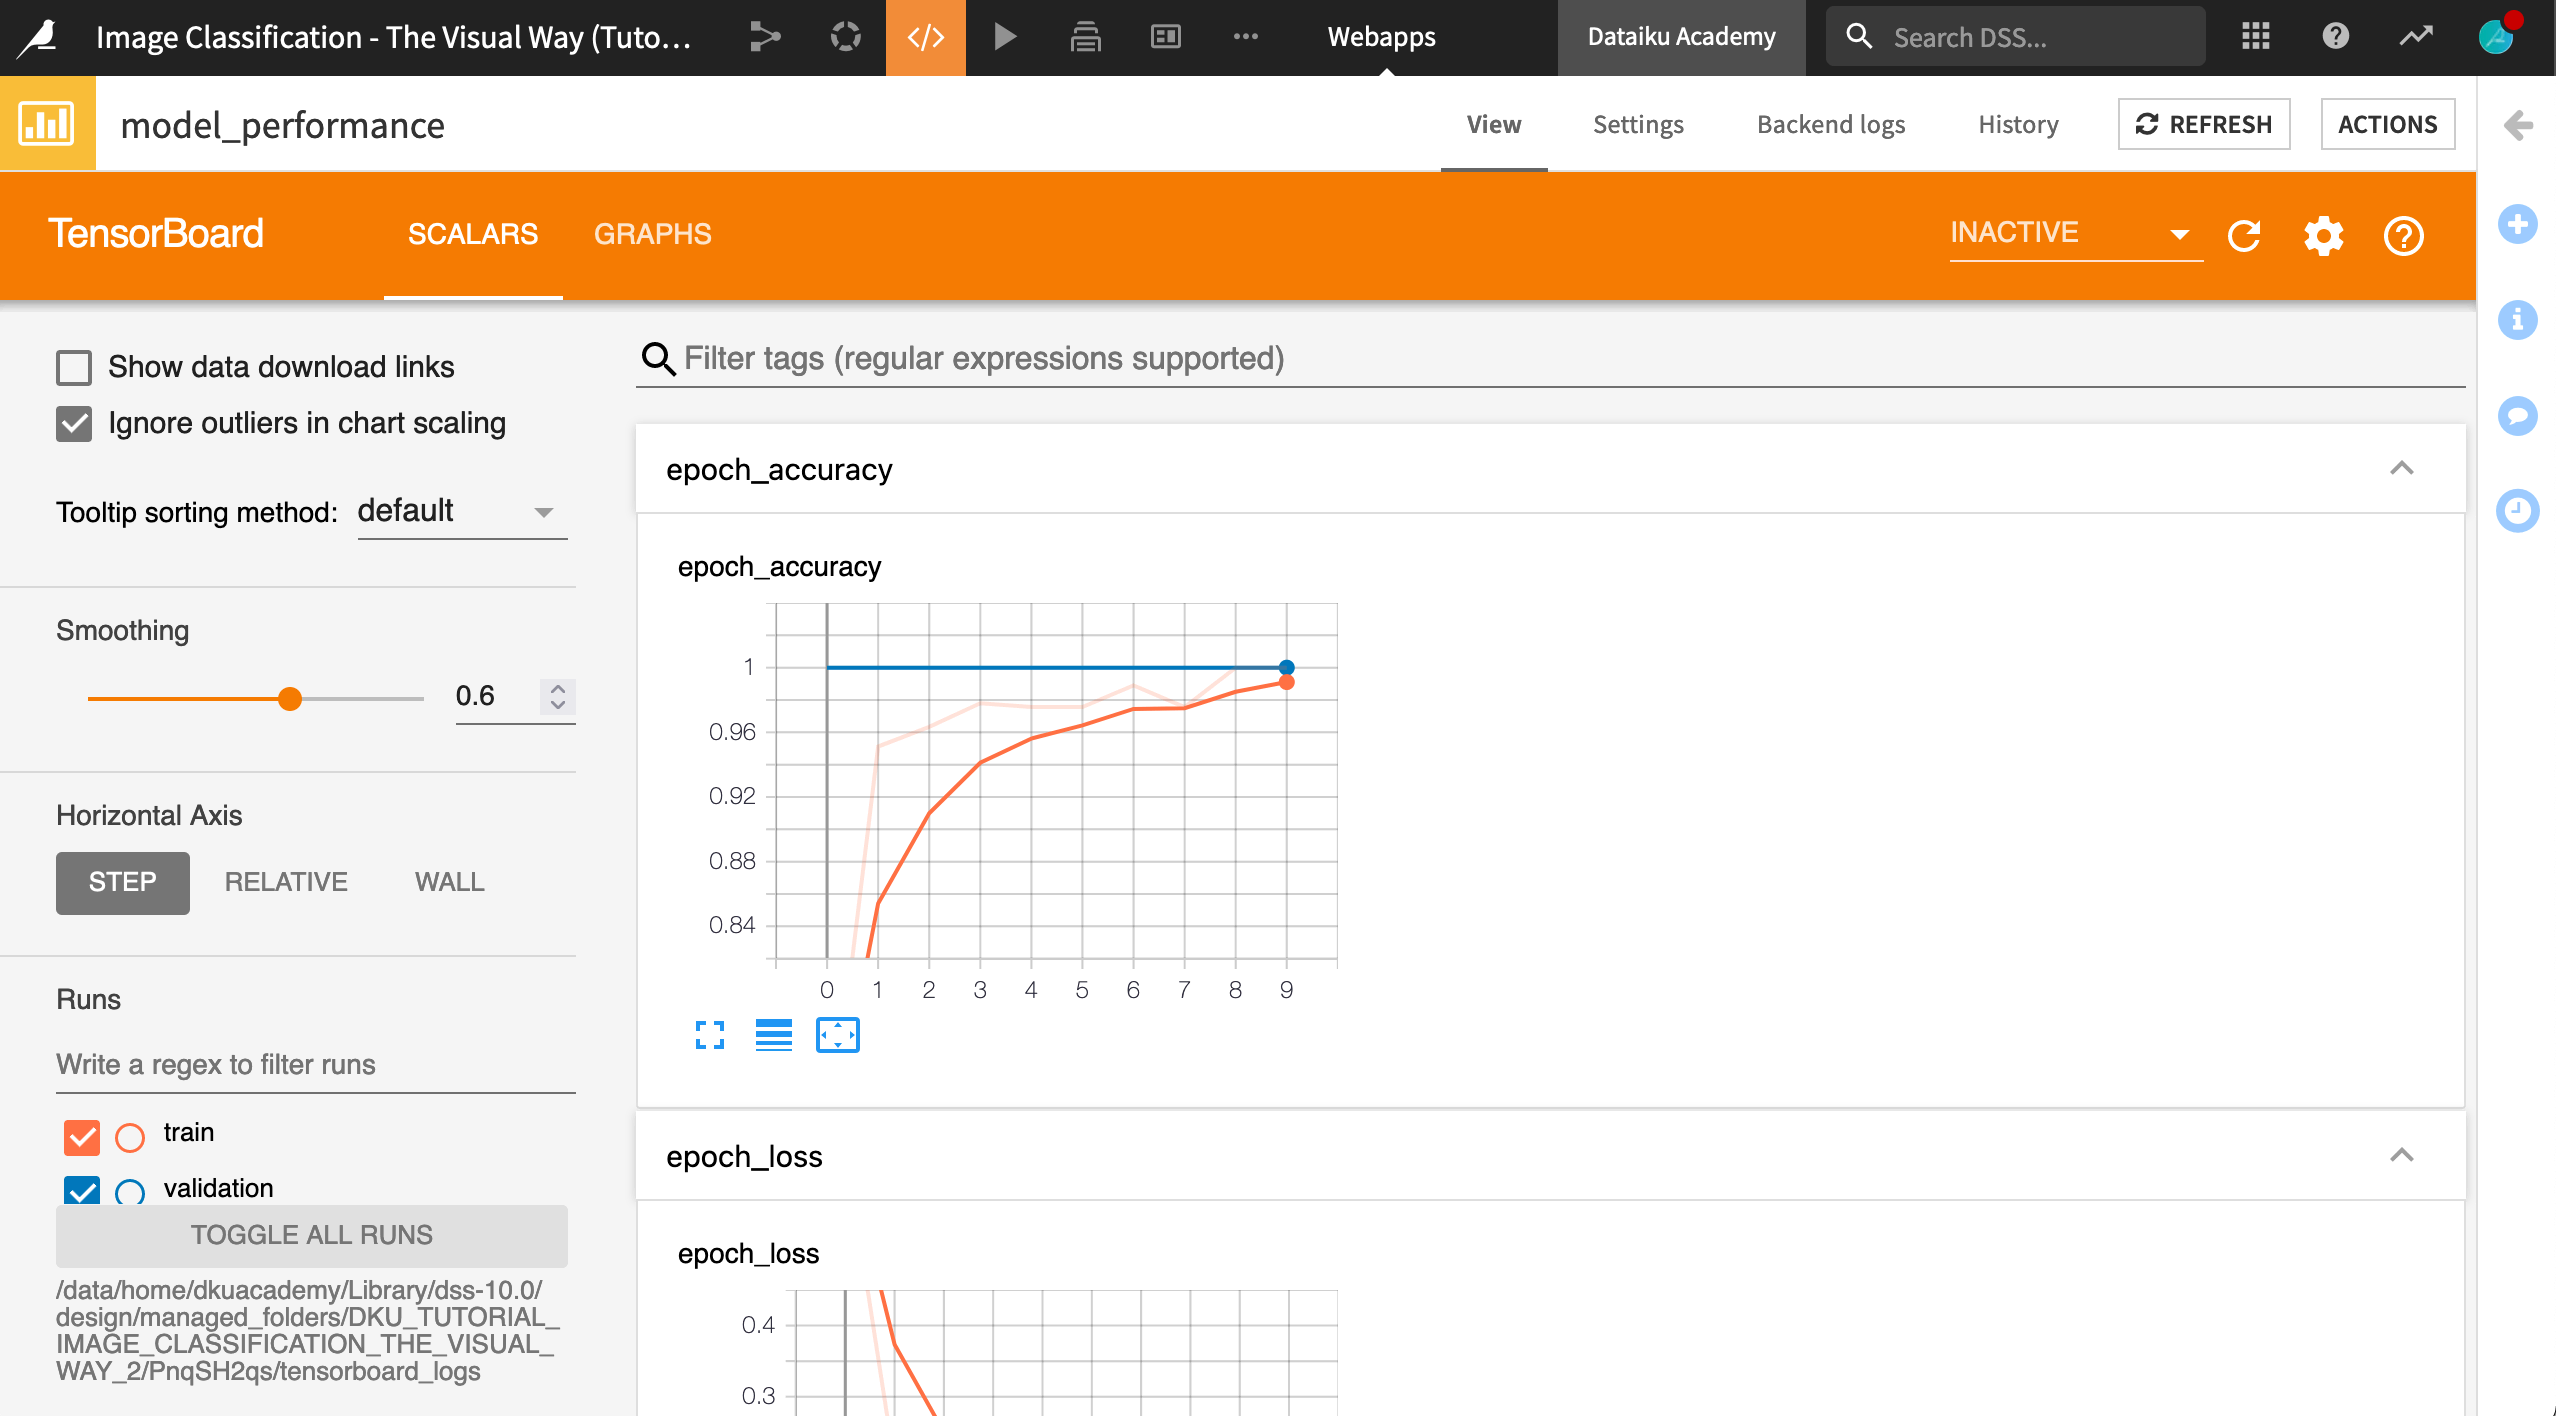
Congratulations! You can now monitor your model during re-training in the Scalars tab of your webapp.
Access the TensorBoard to Monitor Your Model
TensorBoard gathers all the metrics you need to interpret the results of your model both on the training set and the test set. Specifically, you can monitor the following:
The accuracy, acc. This is the accuracy on the train set towards steps. Likewise, val_acc is the accuracy on the test set.
The loss, loss in Tensorboard. This is the evolution of loss on the train set towards steps. Likewise, val_loss is the loss on the test set.
Analyze Your Model’s Architecture
Understanding your model’s architecture is useful particularly when using your own model. Here, we have used a pre-trained model where the last layer is being retrained. In the Graphs tab of the TensorBoard, you can visually access the model’s infrastructure. The graphs display the visual structure of the model.
Within the View tab of the webapp, navigate to the Graphs tab.
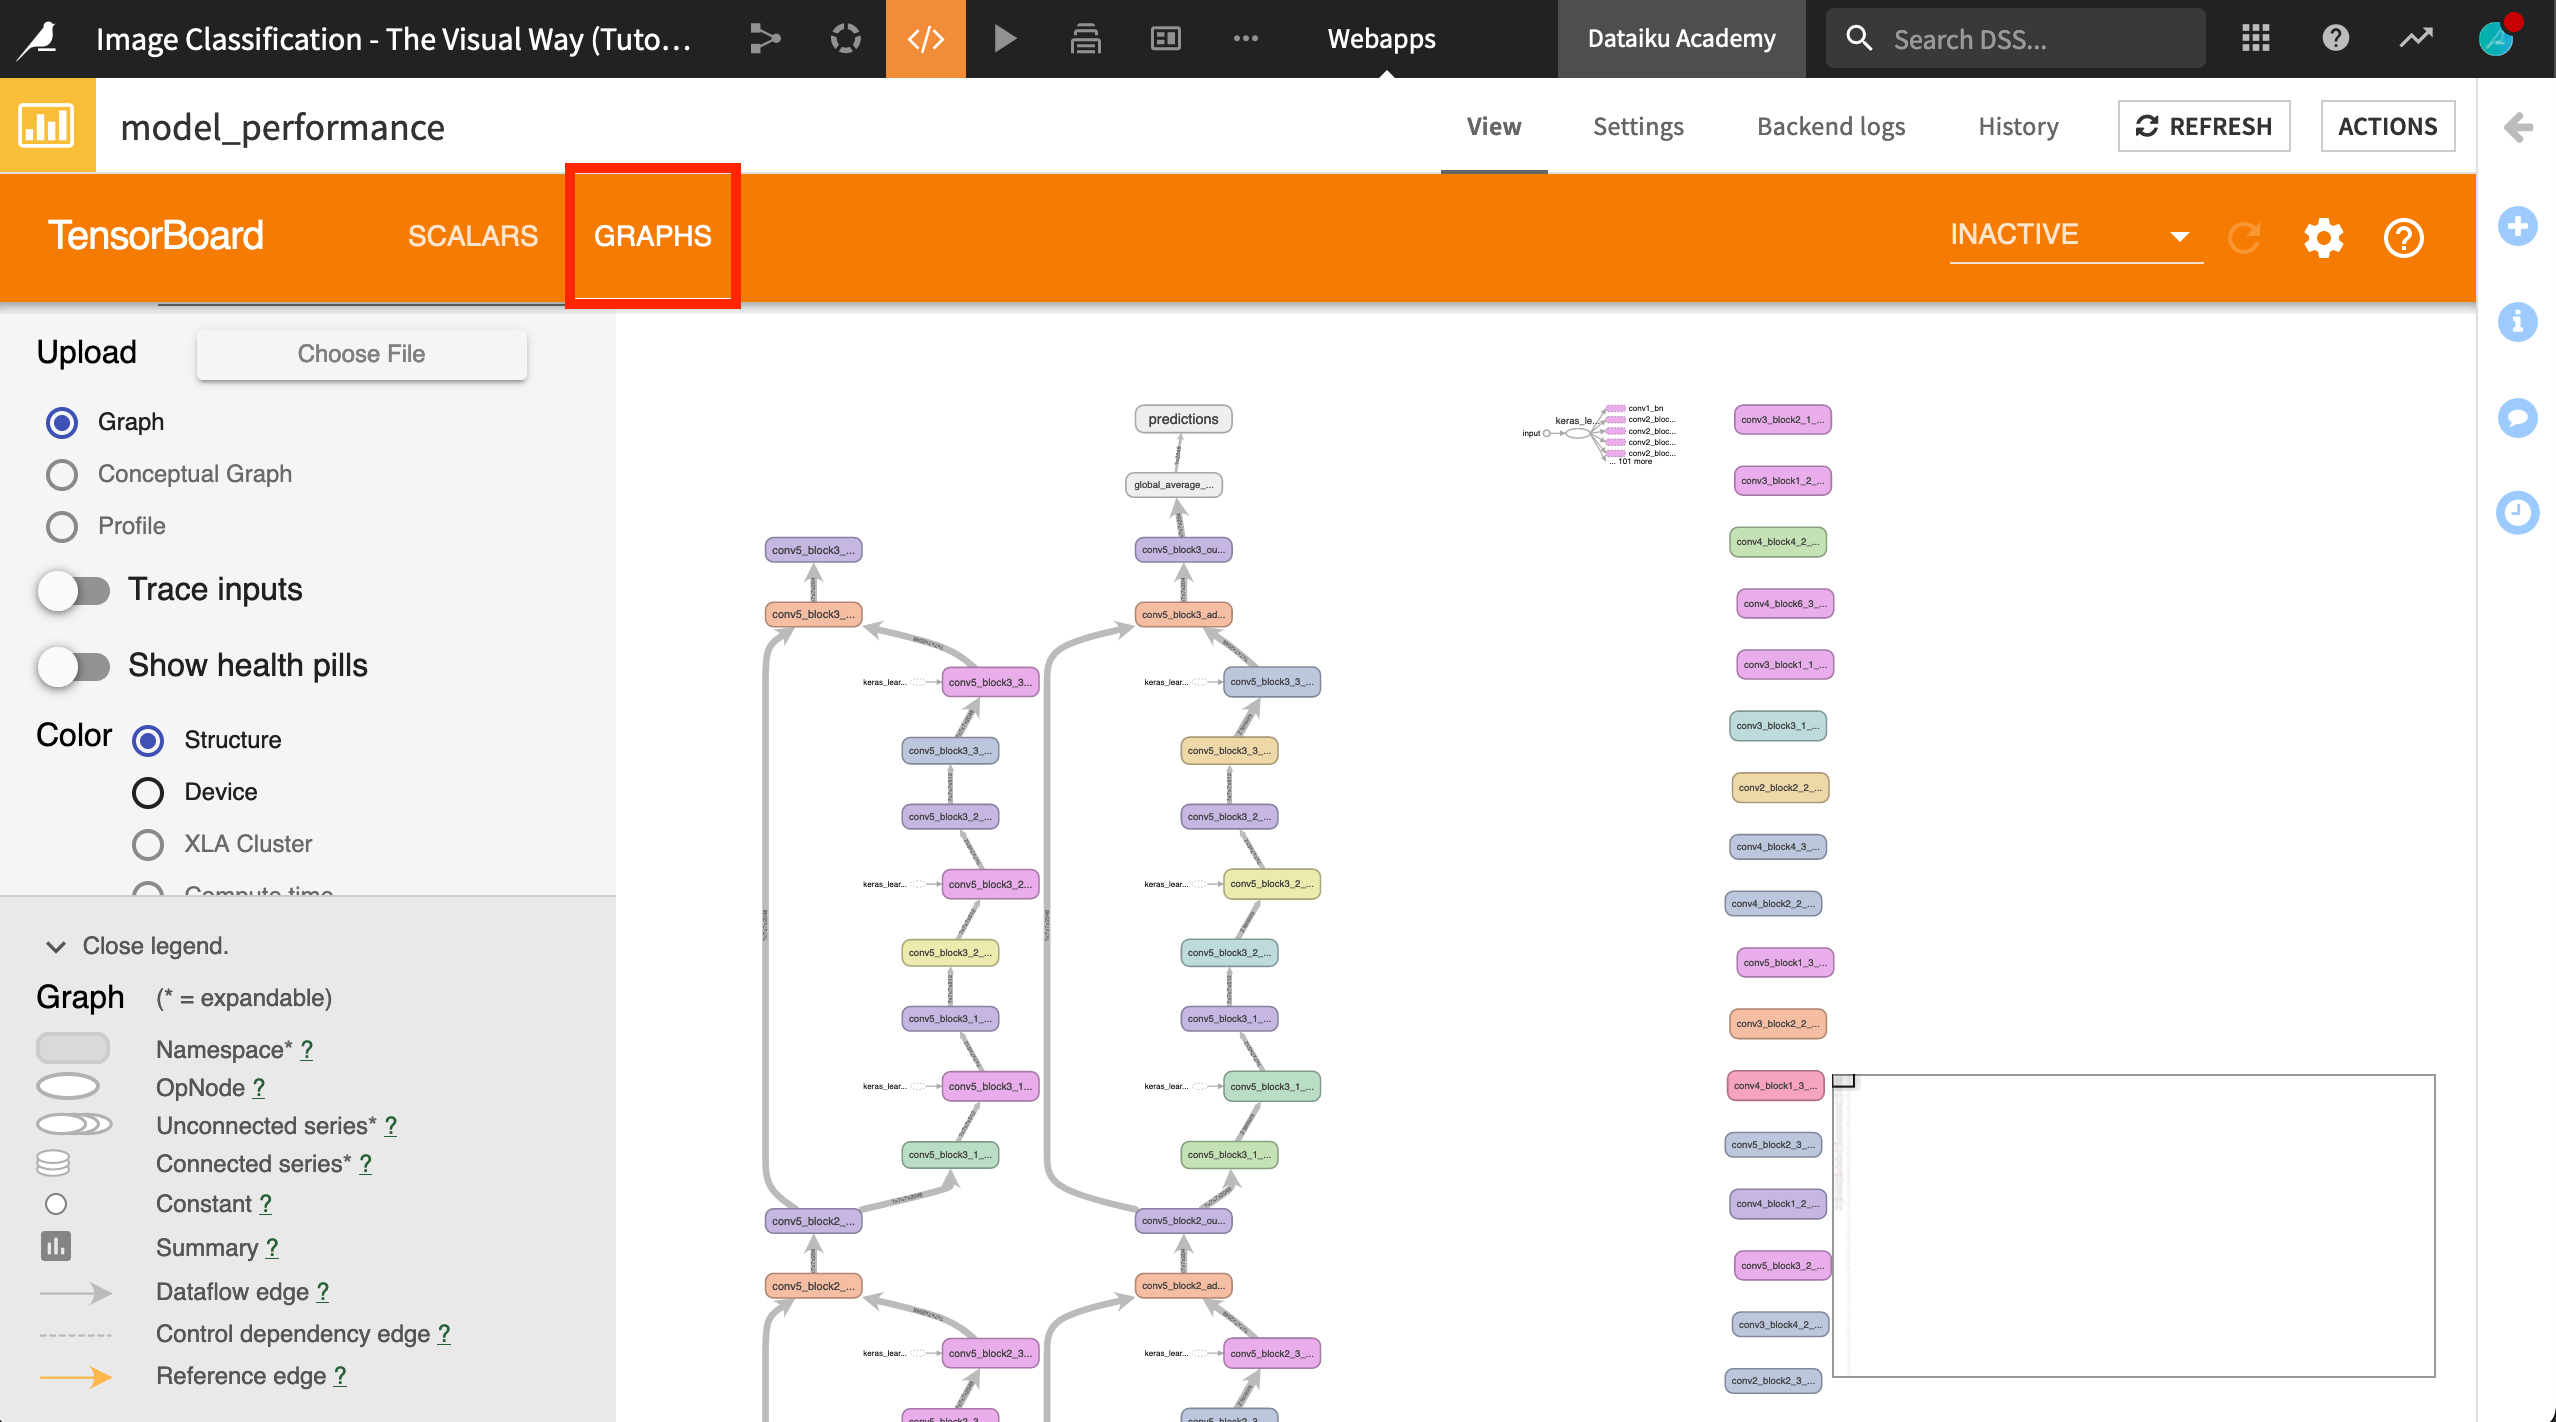
You can scan your graph, and fold and unfold your nodes. Each layer will have a color corresponding to its structure. For example, all activation layers will have the same color.
You can change the color code by changing the selection. Selecting a color code per device instead of per instance can help you distinguish between devices, particularly if you are using different devices, such as different GPUs.
Note
The “Trace inputs” option displays all of the dependencies for a node in the whole graph.
On your own, you can also publish this webapp to a dashboard, as done in the Gallery version of this project.
Wrap Up
Congratulations on completing this tutorial on image classification using the Deep Learning on Images plugin!
The plugin also allows you to extract features from images for use in building predictive models; for example, the goal of the Two Sigma Connect Kaggle competition was to predict how popular an apartment rental listing would be, based on various characteristics, including pictures of the apartment. Using the Deep learning on images plugin, you can extract features that can be used in the model.
Next, you may be interested in trying object detection!
Note
You can also build your own deep learning models for image classification using Keras and Tensorflow in Dataiku. For more information on deep learning, please see the product documentation.