Hands-On Tutorial: Automatically Updating Project Deployments
As your MLOps setup becomes more sophisticated, you can rely on automation to do more. For example, you can run scenarios that not only monitor model performance or data drift, but also actually retrain and redeploy new models when certain conditions are met.
This level of automation may become necessary when deploying very large numbers of models in many projects. To do this successfully though, you need to have mastered the fundamentals—i.e. good metrics/checks to know if the model you are redeploying is truly better than the existing one.
Let’s Get Started!
In this tutorial, you will:
create a scenario that automatically creates a bundle and updates an existing project deployment.
Prerequisites
This tutorial assumes that you satisfy all of the technical prerequisites for the MLOps Practitioner learning path.
In addition to the technical prerequisites above, this tutorial assumes that you have an active deployment of the “DKU_TUT_MLOPS” project running on an Automation node. If you don’t have this, follow the Batch Deployment tutorial to create one.
Include New Training Data
Return to the MLOps project on your Design node to pick up where we left off.
Consider a situation in which we have been diligently monitoring input data and model performance in the model evaluation store for a significant period of time. We are confident that our model will produce better results if we periodically retrain the model on more recent data. However, we no longer want to manually retrain and redeploy the model.
Let’s demonstrate the bare bones of a scenario that could automatically accomplish this objective. First, let’s allow more data to travel into the dataset used to train the model. In this case, let’s take all of the labeled data.
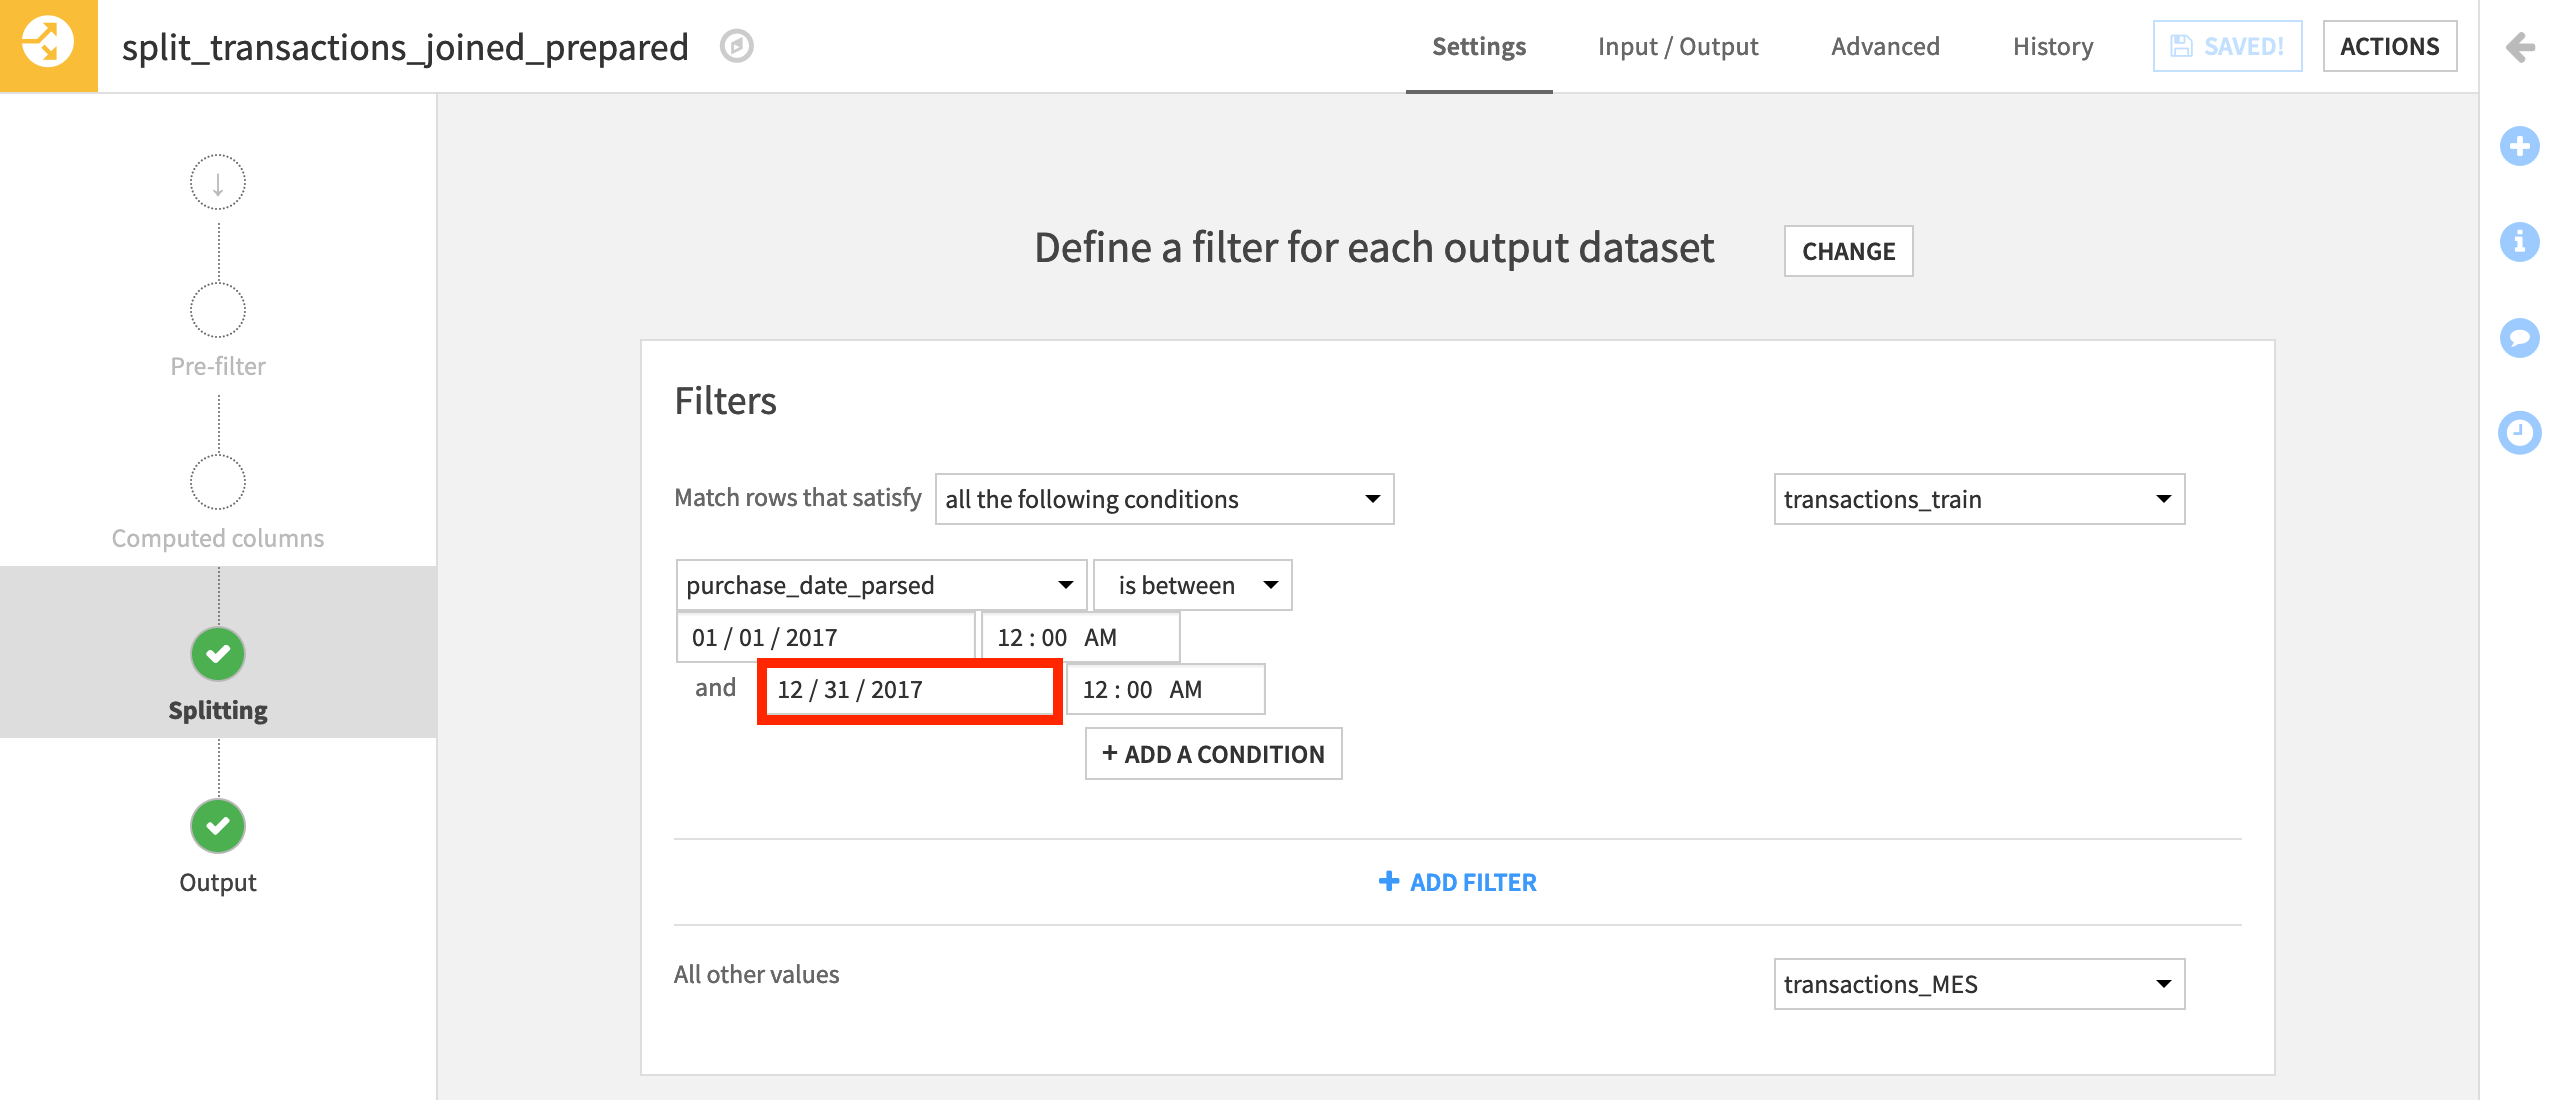
From the Flow, open the Split recipe.
In the filter for the transactions_train dataset, change the end date to “2017-12-31” (adjusted based on your date formatting).
Then Run the recipe to rebuild the training data.
Note
The original transactions_train dataset had close to 40,000 rows. After changing the Split recipe, it should now have over 250,000 rows.
Create the Scenario
Now that we have a training dataset that includes more recent records, we are ready to build a scenario to retrain the model and update the deployment.
Navigate to the Scenarios page from the top navigation bar, and click + New Scenario.
Name it
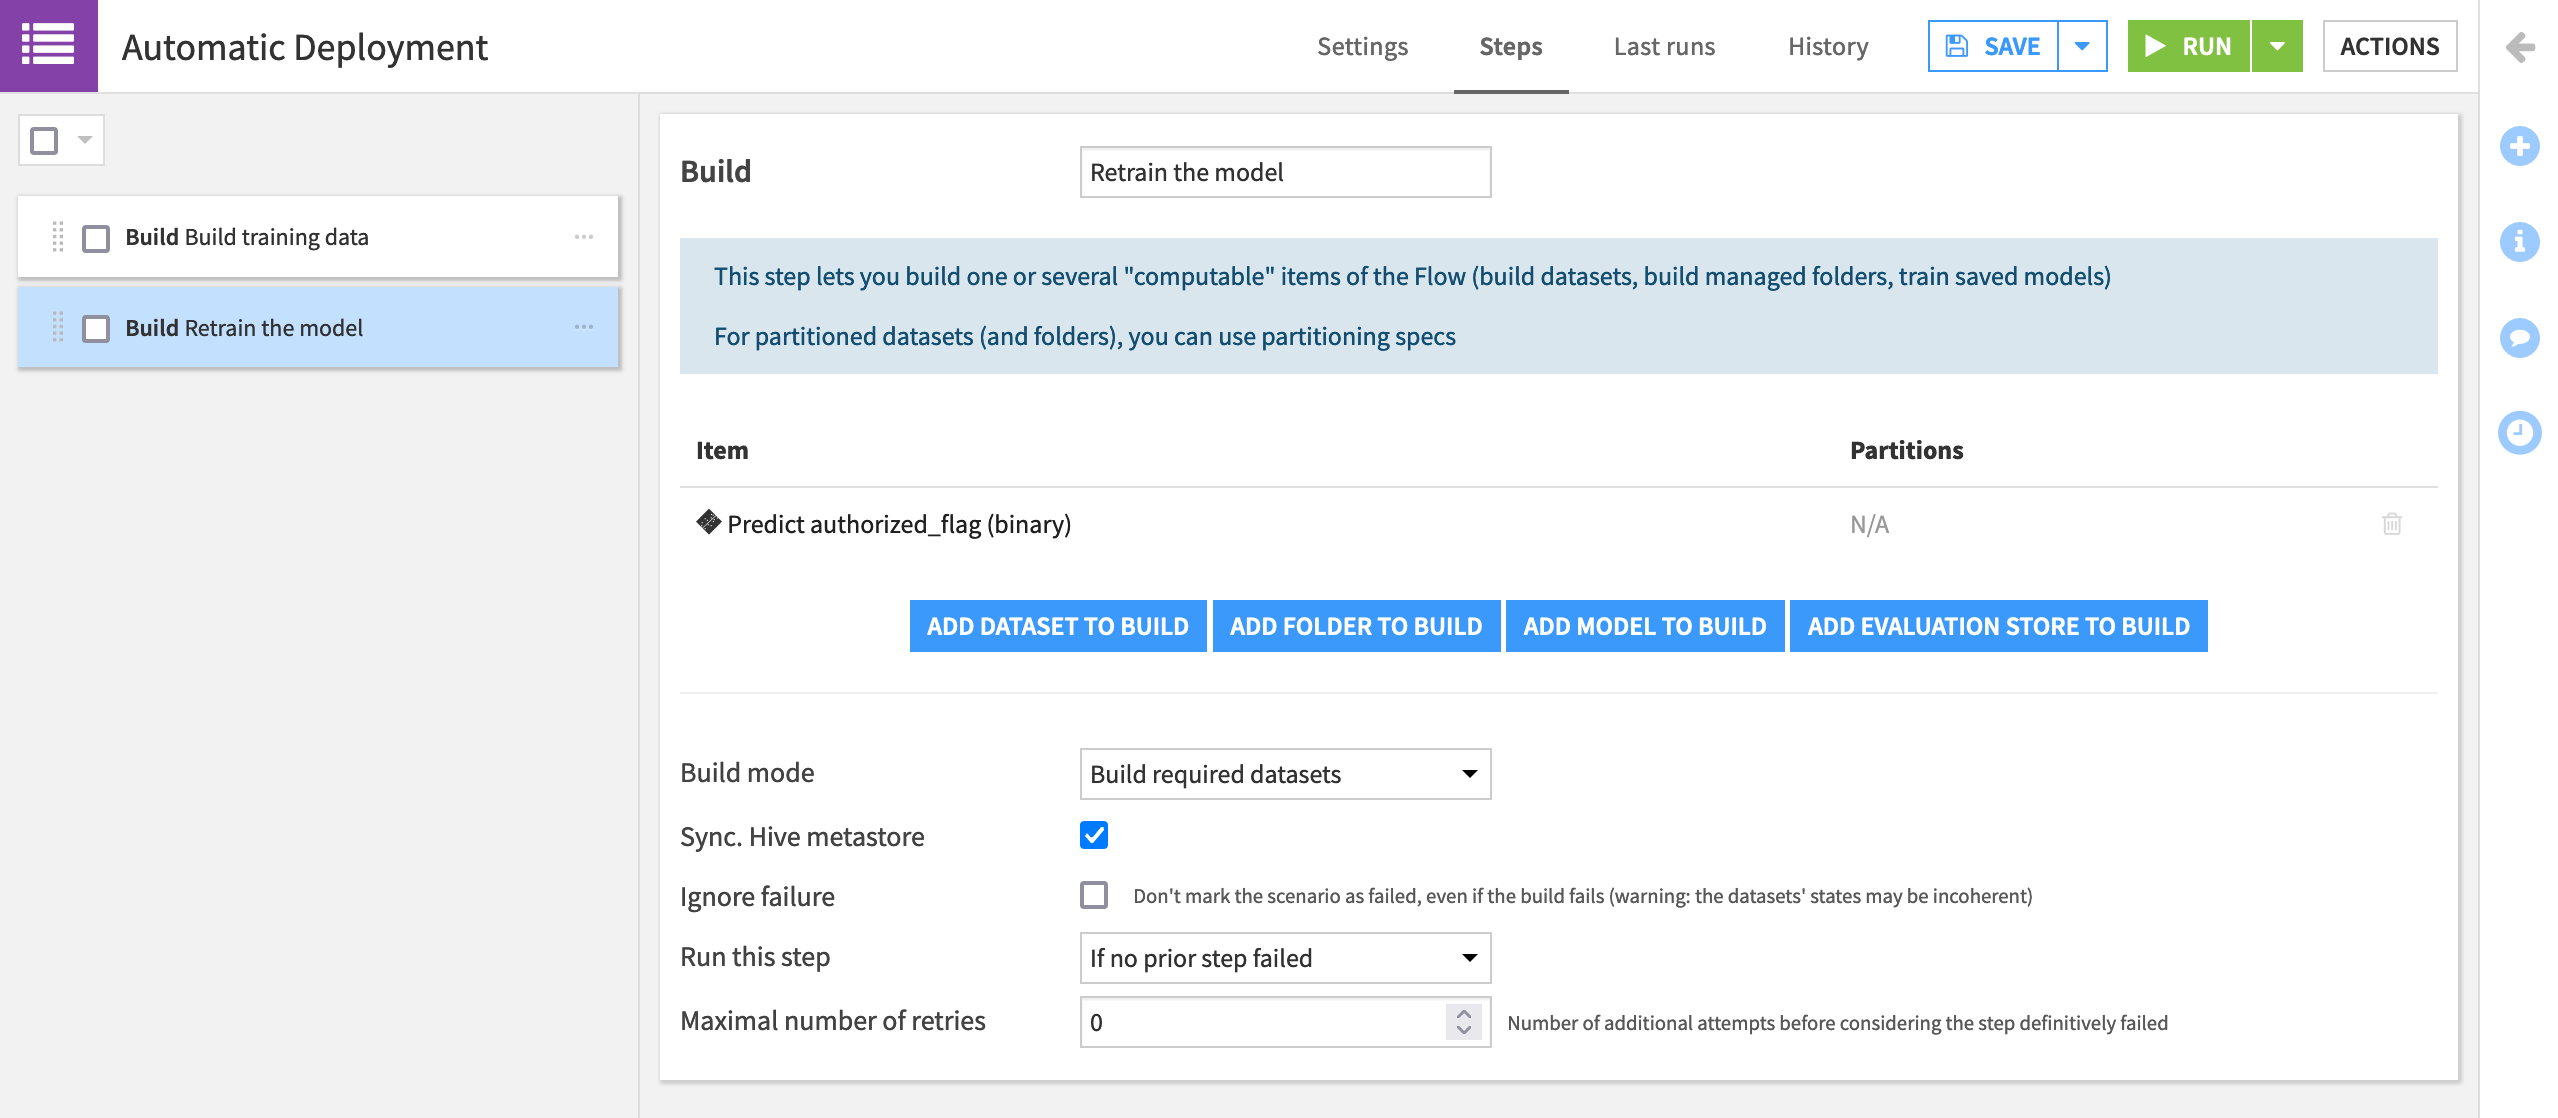
Automatic Deployment.Add a “Build/Train” step that builds the transactions_train dataset. Name it
Build training data.Add a second “Build/Train” step that builds the model deployed to the Flow (Predict authorized_flag (binary)). Name it
Retrain the model.
Note
Be aware that the second step in the scenario here replaces the active version of the saved model with the newly trained model. The history of model versions still remains.
Create Bundle Step
Building datasets and training models with a scenario should be a familiar practice. For our objectives though, we’ll need two new scenario steps. The first is for creating the new bundle.
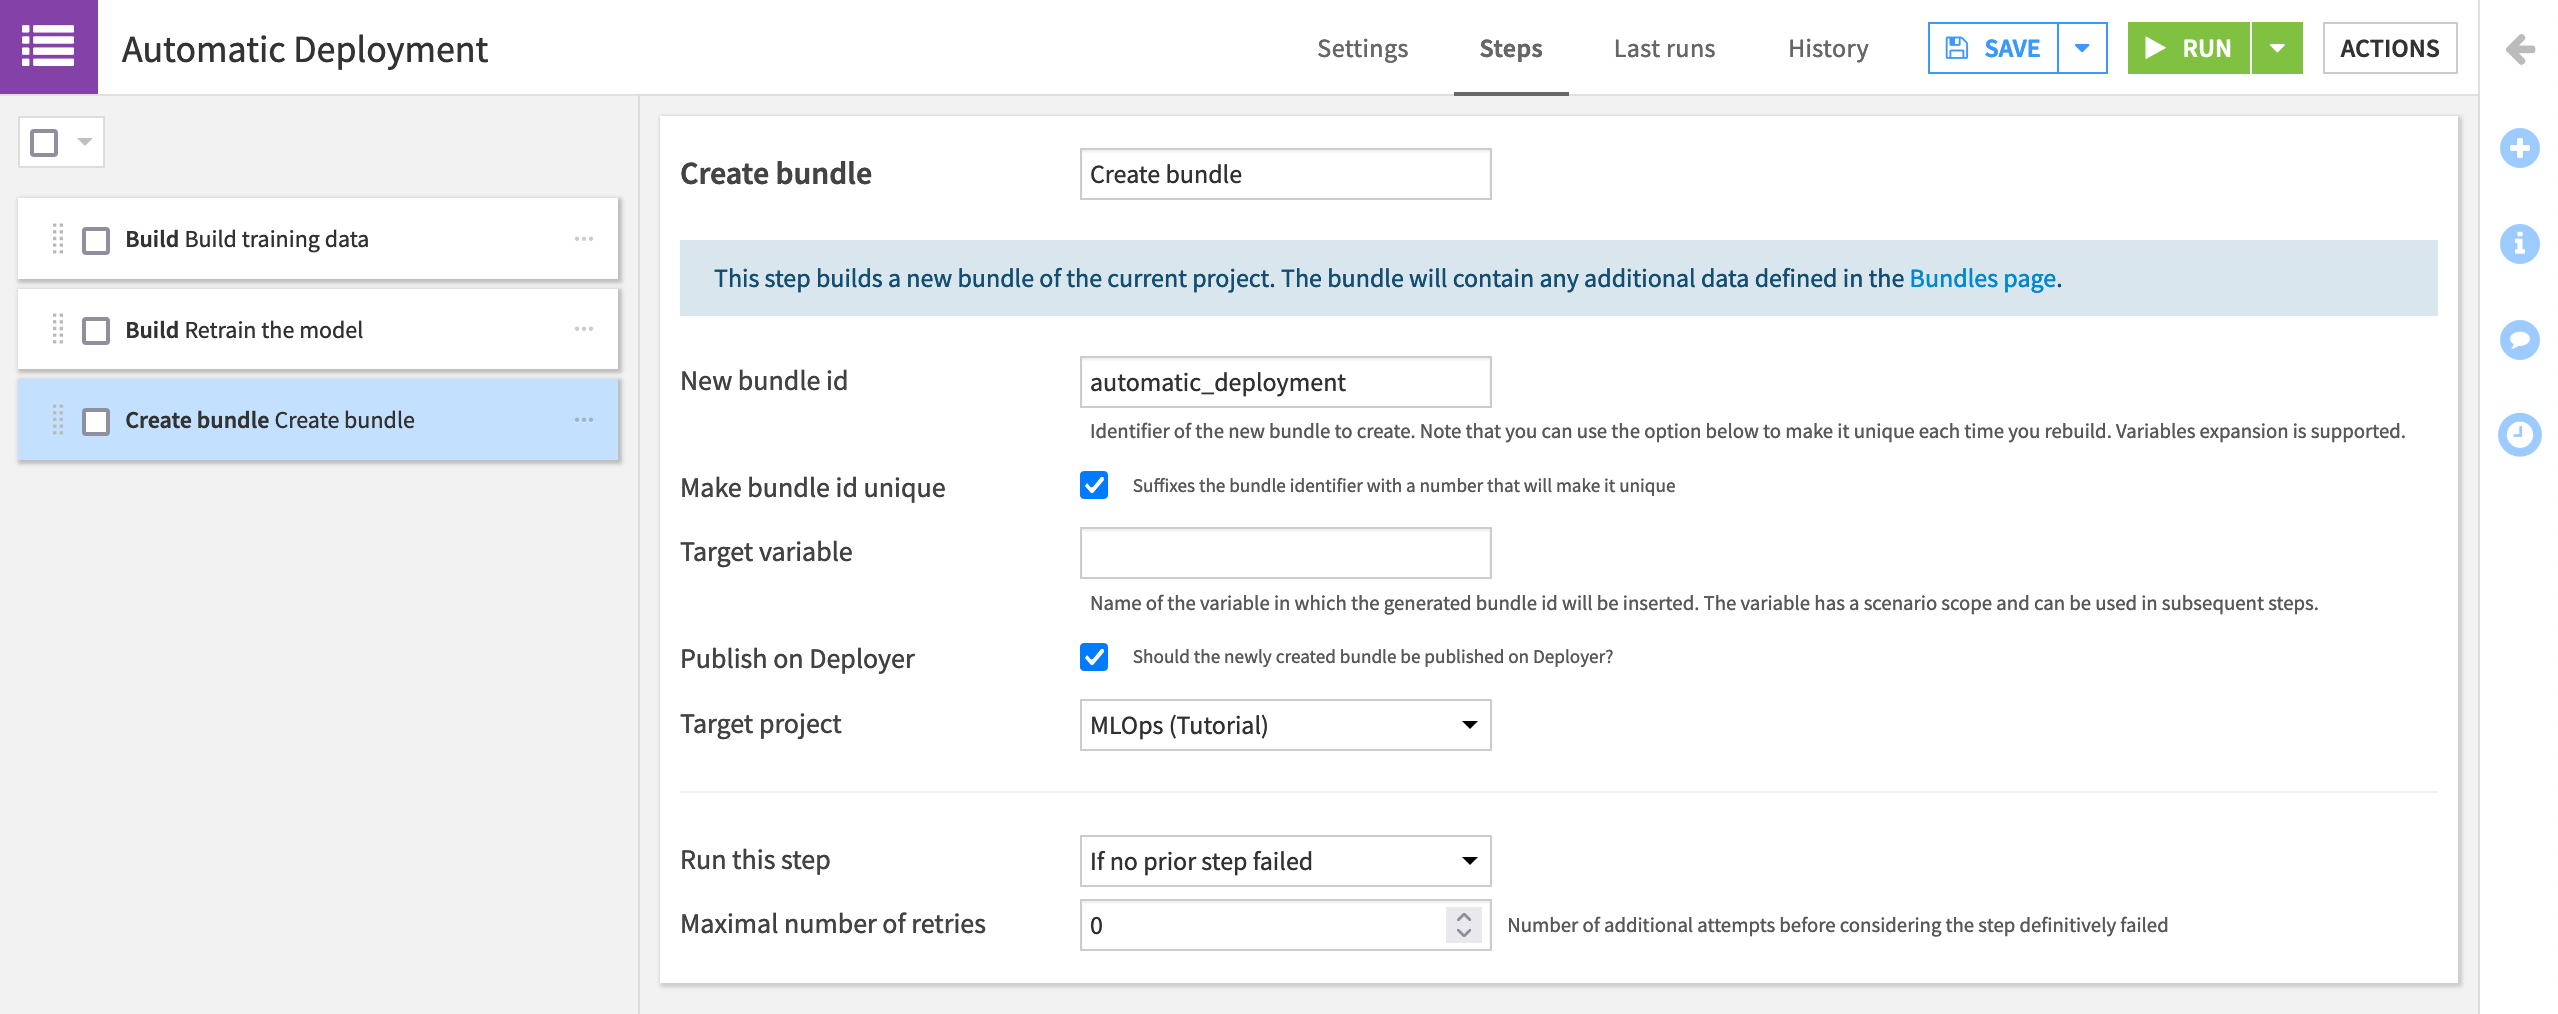
In the Automatic Deployment scenario, add a “Create bundle” step, and name it
Create bundle.Provide the bundle id
automatic_deployment.Check the box to make the bundle id unique. Instead of v1, v2, etc, as we previously chose manually, our bundle ids will be “automatic_deployment”, “automatic_deployment_1”, etc.
Check the box to Publish on Deployer, and choose the present project from the existing deployments as the “Target project”.
Note
The help note at the top of this step indicates that the new bundle will include any additional data defined in the Bundles page. If you navigate to the Bundles page, click Configure Content to see what data will be included in the automatically-created bundles.
Update Deployment Step
As we have seen in the process for batch deployment, once we have a bundle, we need to deploy it. There’s a scenario step for this too!
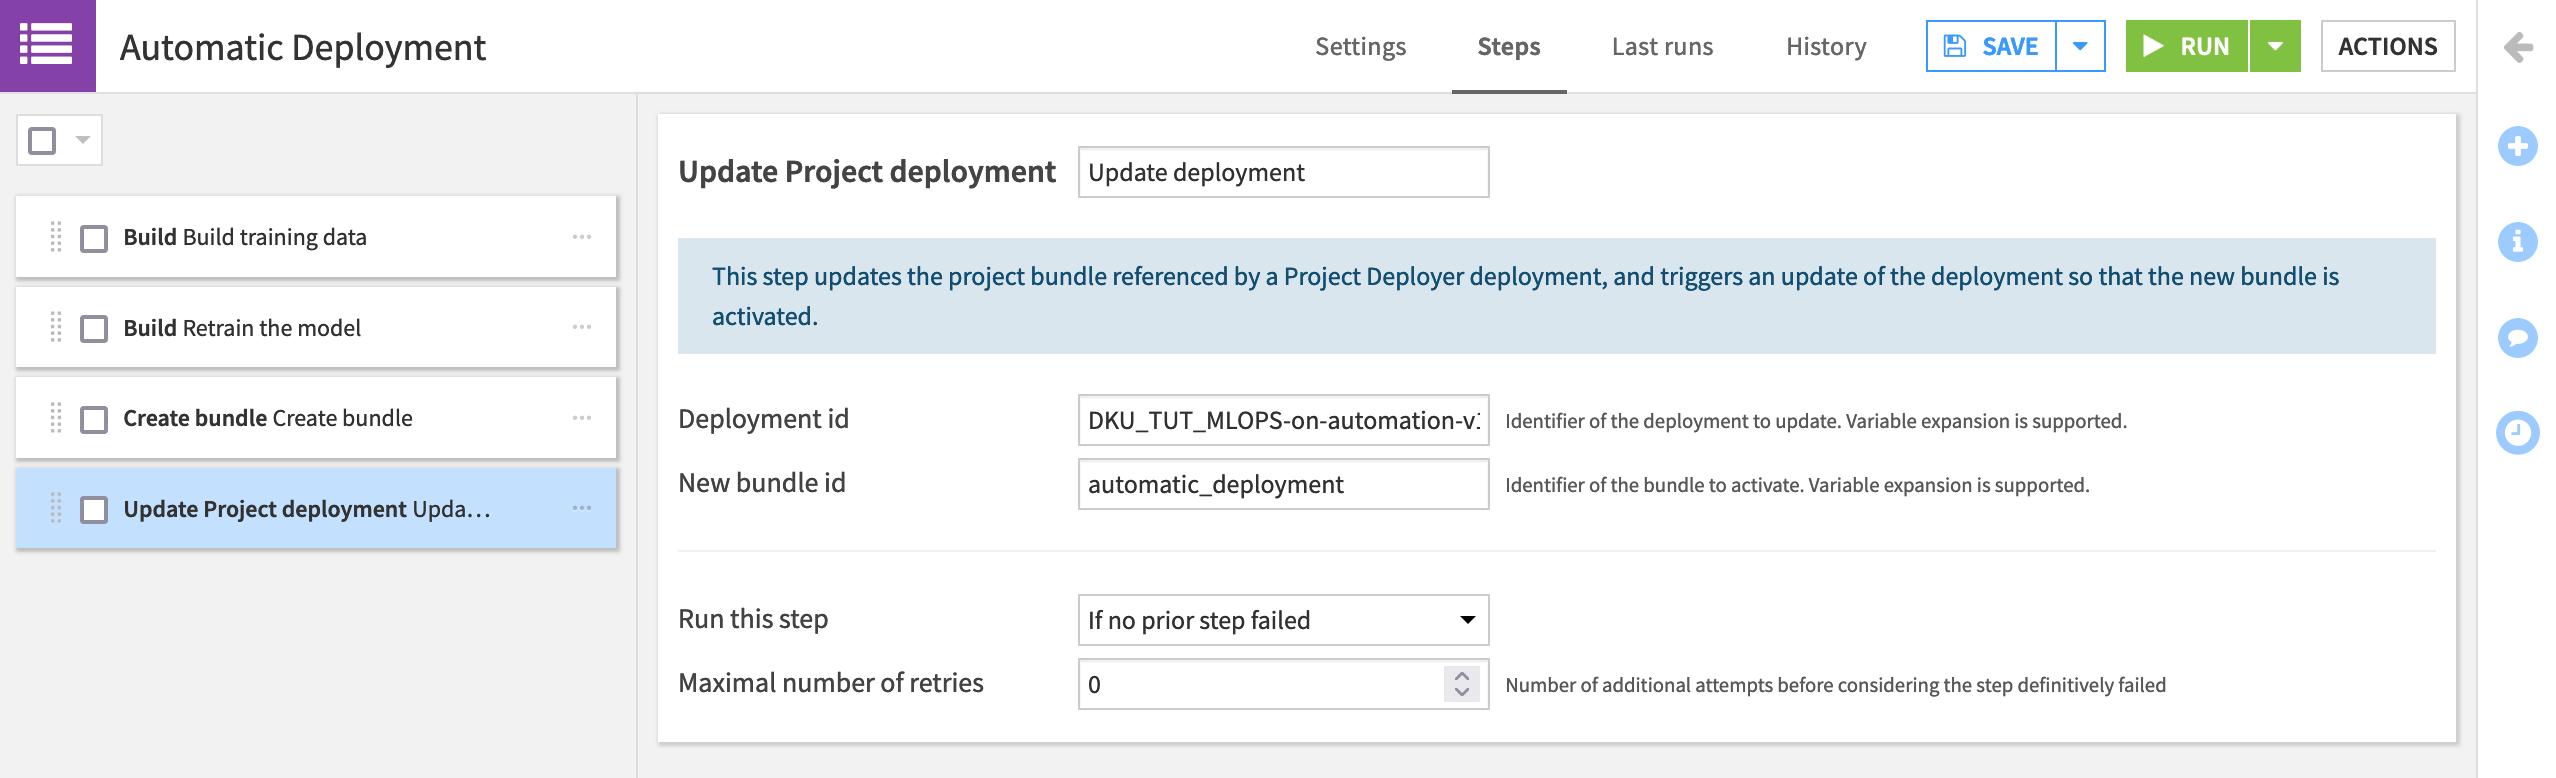
In the Automatic Deployment scenario, add an “Update project deployment” step.
Name it
Update deployment.Provide the “Deployment id”, which takes the form of “PROJECTKEY-on-INFRASTRUCTURE”, or
DKU_TUT_MLOPS-on-automation-v10in this case, but may differ depending on the name of your project key and infrastructure. Click on the field or start typing to see available options.Provide the “New bundle id” (It’s
automatic_deploymentif following the step above).
Run the Scenario
Reporters and triggers are not required for this demonstration, and so we’ll ignore them for now.
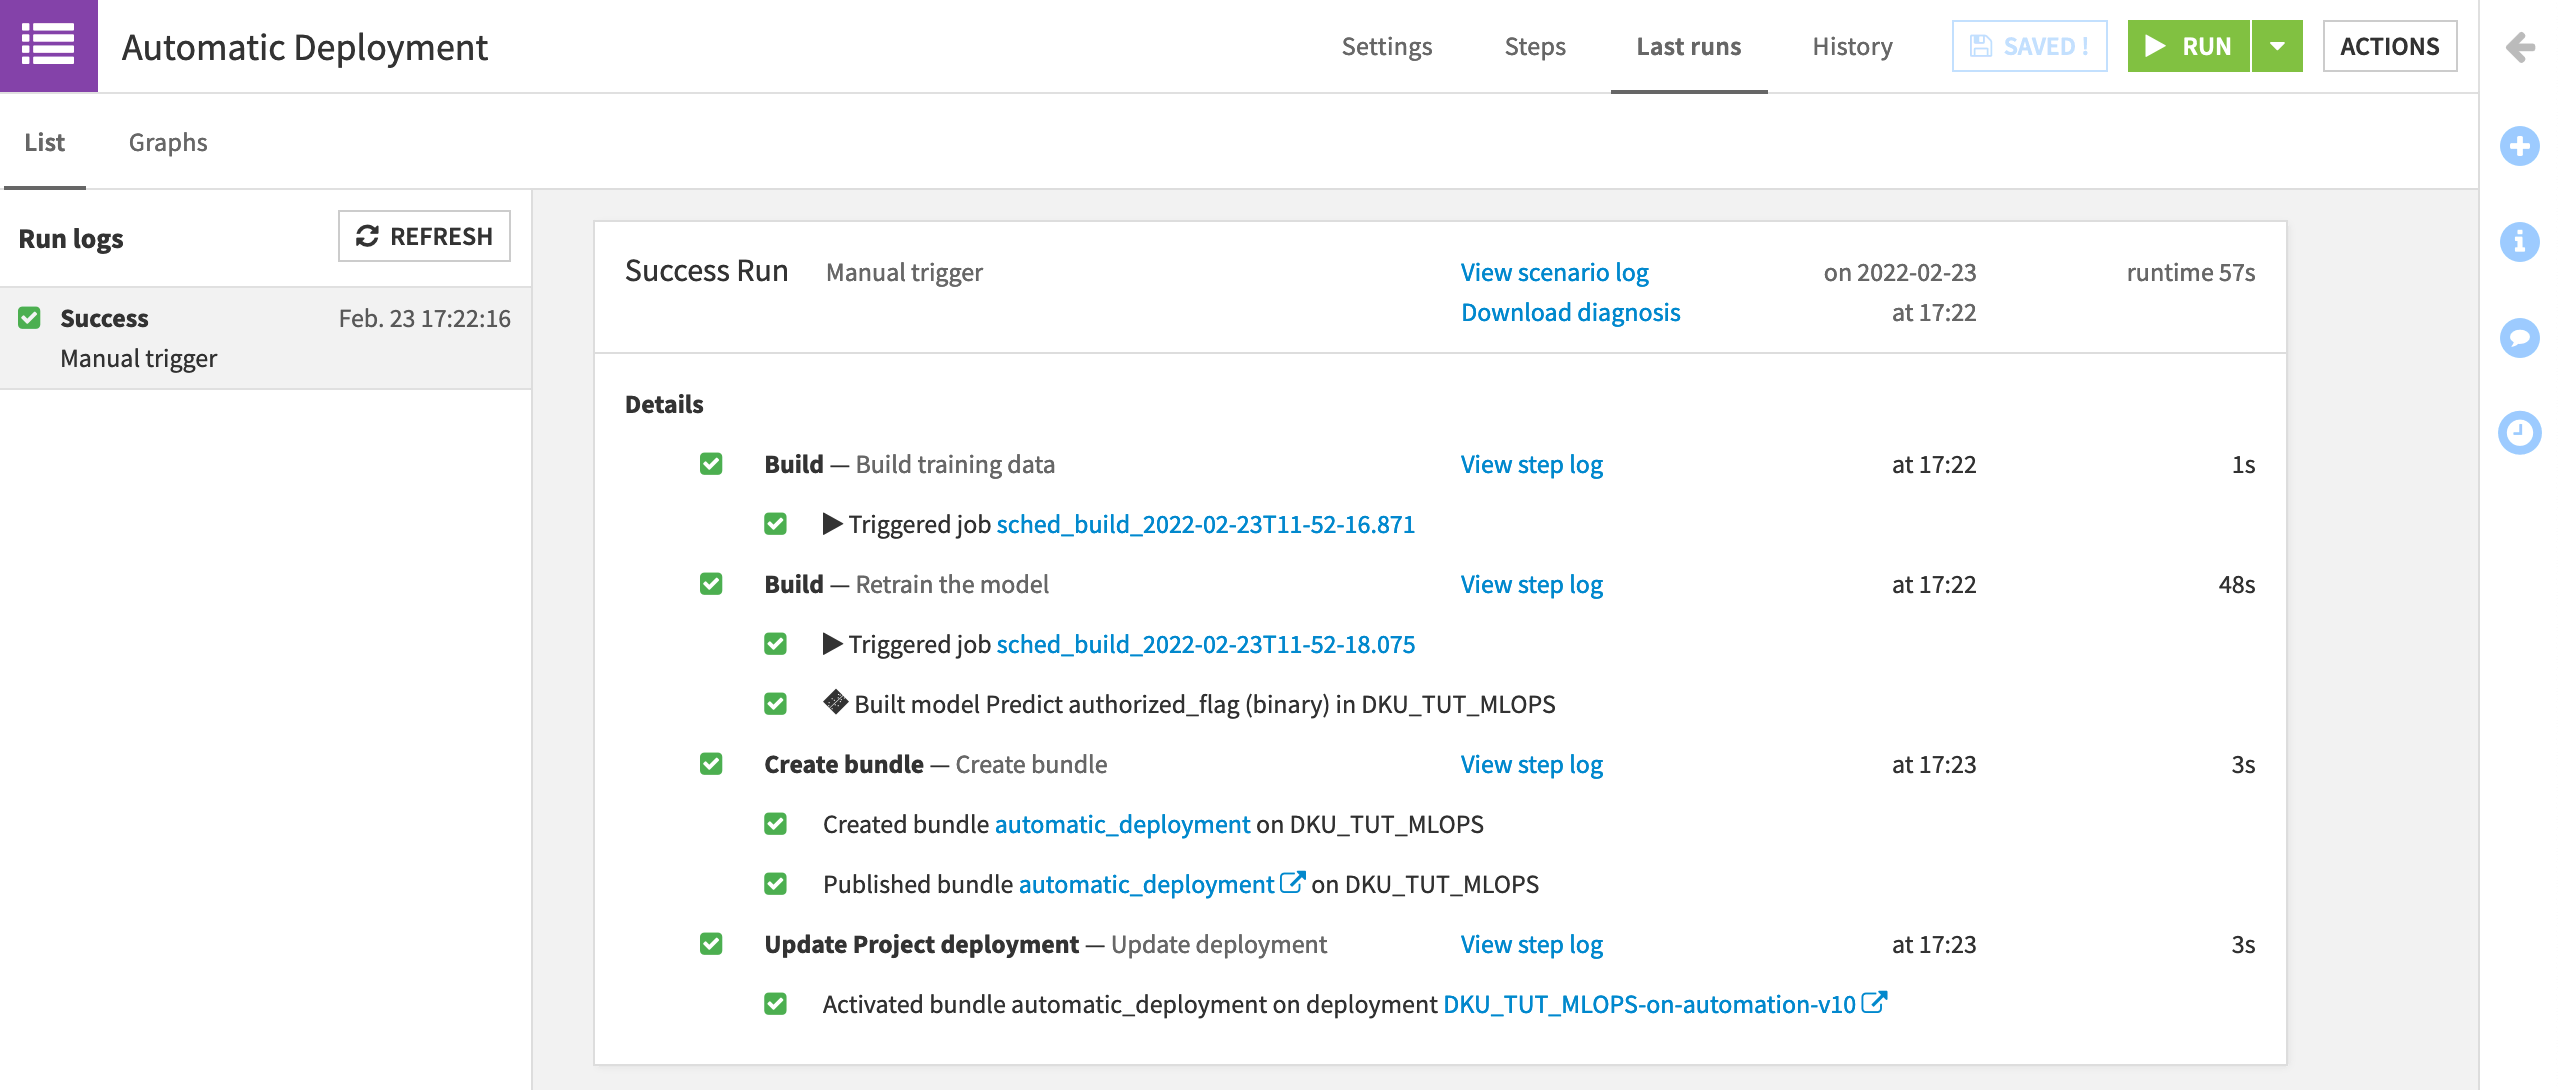
From the project on the Design node, click to manually Run the “Automatic Deployment” scenario.
You can observe its progress in the “Last Runs” tab of the scenario.
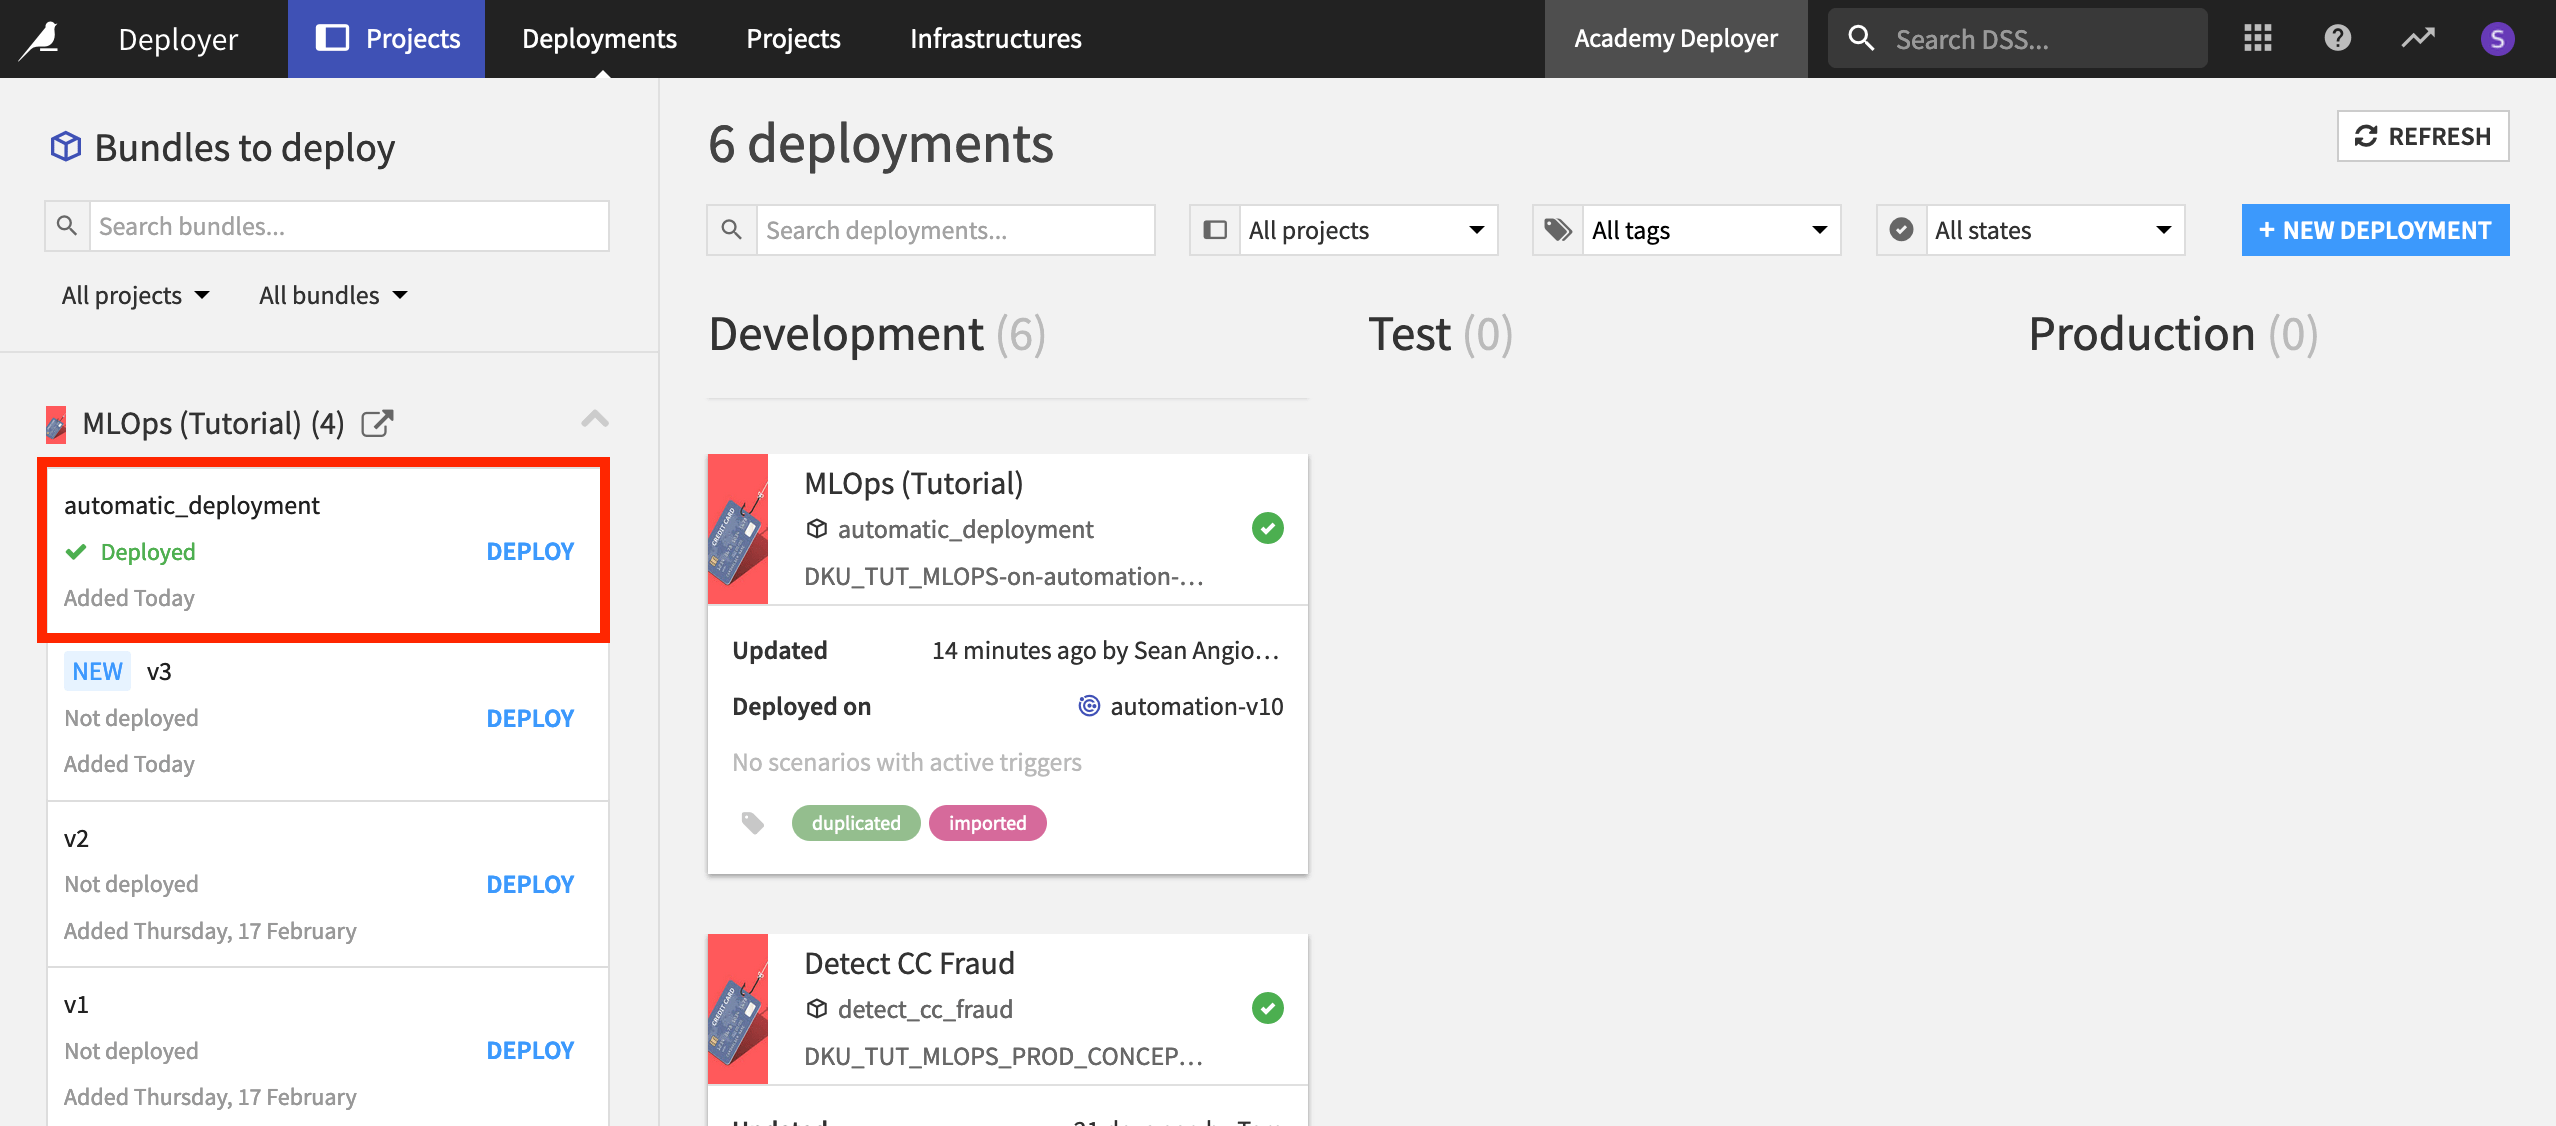
If you check the Project Deployer, you should see “automatic_deployment” as the new active bundle.
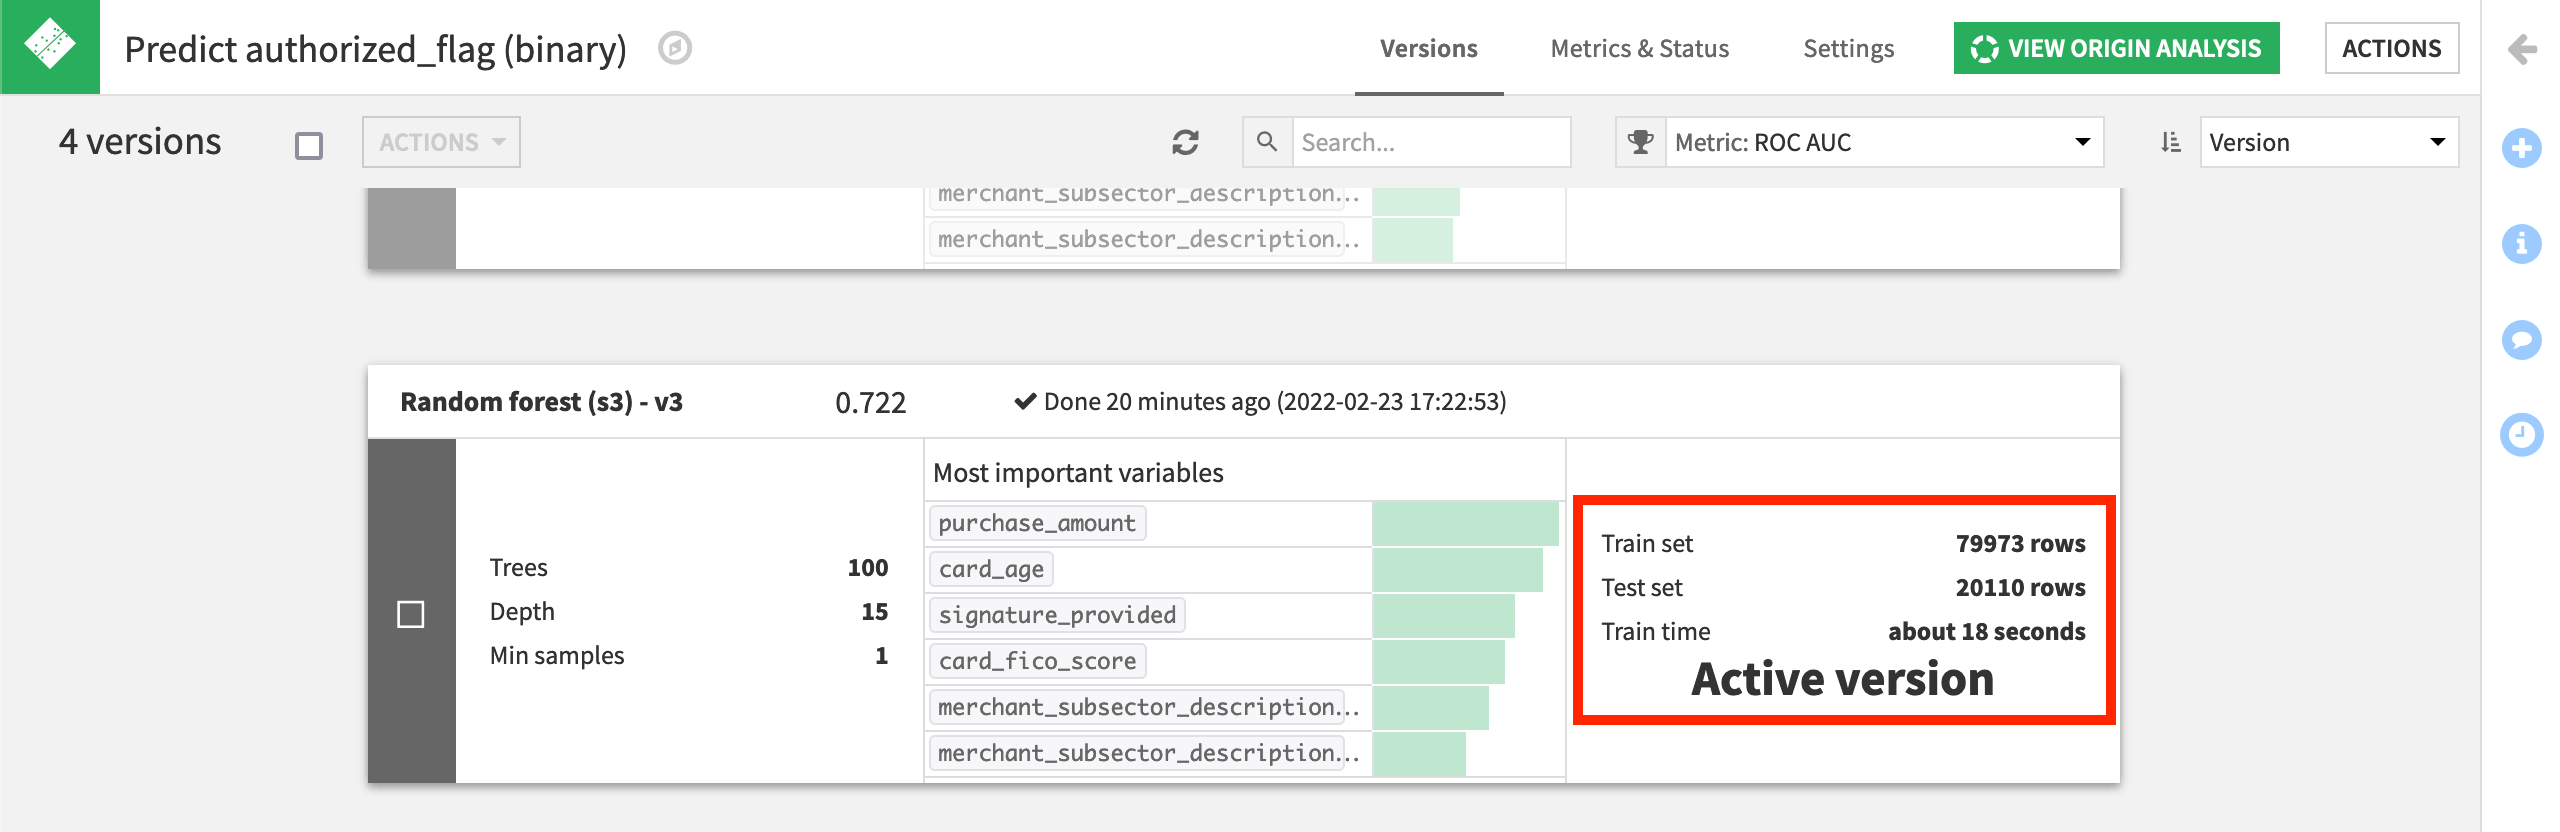
Finally, if you view the project on the Automation node, open the saved model to see the new active version of the model, trained on more rows than the previous versions.
What’s Next?
Congratulations! You’ve created a scenario that can automatically retrain a model and update a batch deployment.
While this level of automation may not always be desirable (or advisable), it hints at what’s possible using only very simple building blocks.
For more information, please refer to the product documentation on MLOps or production deployments.
The next step in your learning might be this article on building CI/CD pipelines with the Project Deployer.