How-To: Seamless Sharing
With quick sharing and managed sharing mechanisms in Dataiku, teams can strike the right balance between control over project objects and discoverability by others. Projects can be set as either private or limited access, and teammates can request access to both projects and project assets for reuse elsewhere.
This article covers the workflows for several different asset-sharing scenarios, including:
Project access requests
Managed object sharing
Quick sharing
Note
You must be the project owner, an administrator, or have the Manage Shared Objects permission in a Dataiku project to be able to control sharing settings. Project owners or admins can grant you this permission on the project security page under More options > Security > Permissions.
Manage Project Access
Project owners can manage their teammates’ access to projects through the project Security settings. On the Security page, you can select specific permissions for users or user groups to be able to read, write, publish, export, and manage aspects of the project.
In addition to this granular control, owners can also set up limited access to a project. This allows other users to discover projects and request access and enables owners to manage those requests on a case-by-case basis.
Set up Limited Access to Projects
Let’s say you have a project initially set to private, and you want to make it possible for any user to find the project and request access. You’ll need to set up limited access and enable project access requests.
From the top navigation bar, navigate to More options (the three horizontal dots) > Security > Permissions panel.
For the “Project visibility” dropdown, choose Discoverable.
For the “Project access requests” dropdown, choose Enabled.
Click Save in the top right.

This setting makes it possible for other users to:
search for the project from the Catalog or under Projects > See all, and
send an access request to the project owner, along with a message about why they are requesting access.
Manage Project Access Requests
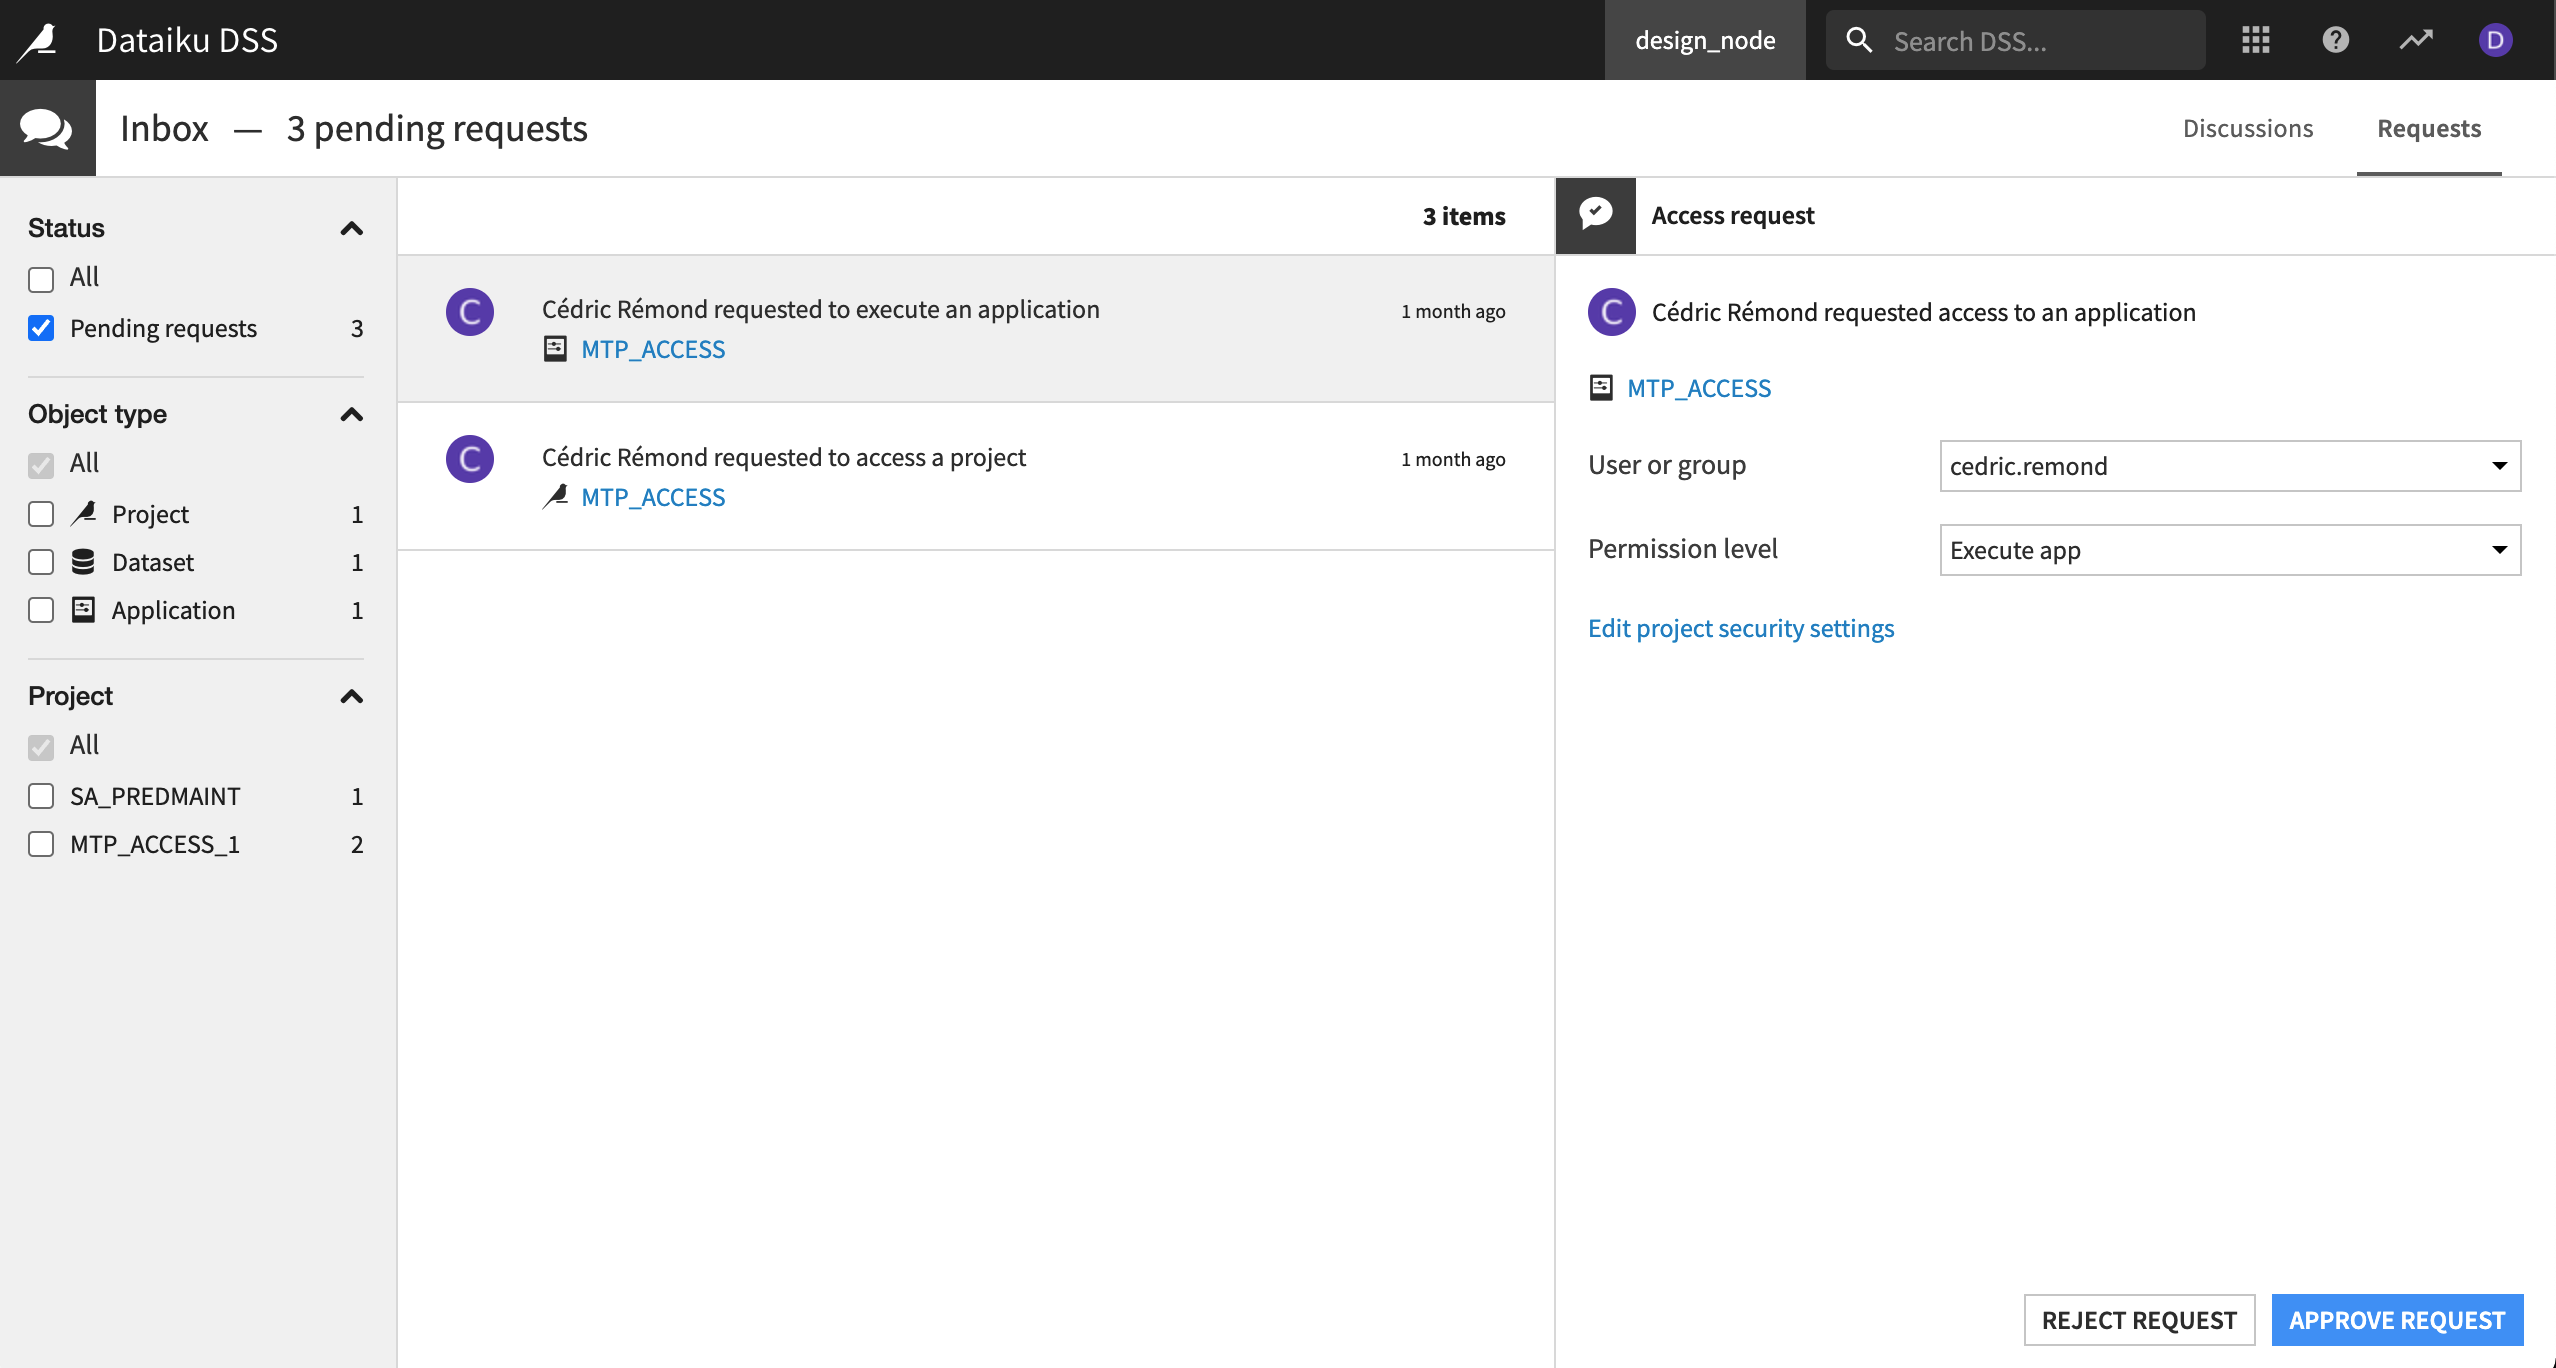
As the project owner you can see and manage requests to access the project from the Inbox.
After another user requests access to your project, you’ll see a notification on your profile icon in the top right. To manage the request:
Click on your profile icon in the top right, and select Go to Requests.
Select the request you want to manage.
Choose the Permission level you want to grant from the dropdown menu. You can allow this user to either Read project content or Write project content. You can grant more granular permissions in the Permissions pane of the project Security menu.
Select either Approve request or Reject request.
Managed Object Sharing
In addition to project sharing, you also can enable sharing and sharing requests for objects such as datasets, folders, and models. You can either enable sharing requests for all objects in the project or enable sharing for only the individual objects you want to share.
To enable share requests for all objects in the project:
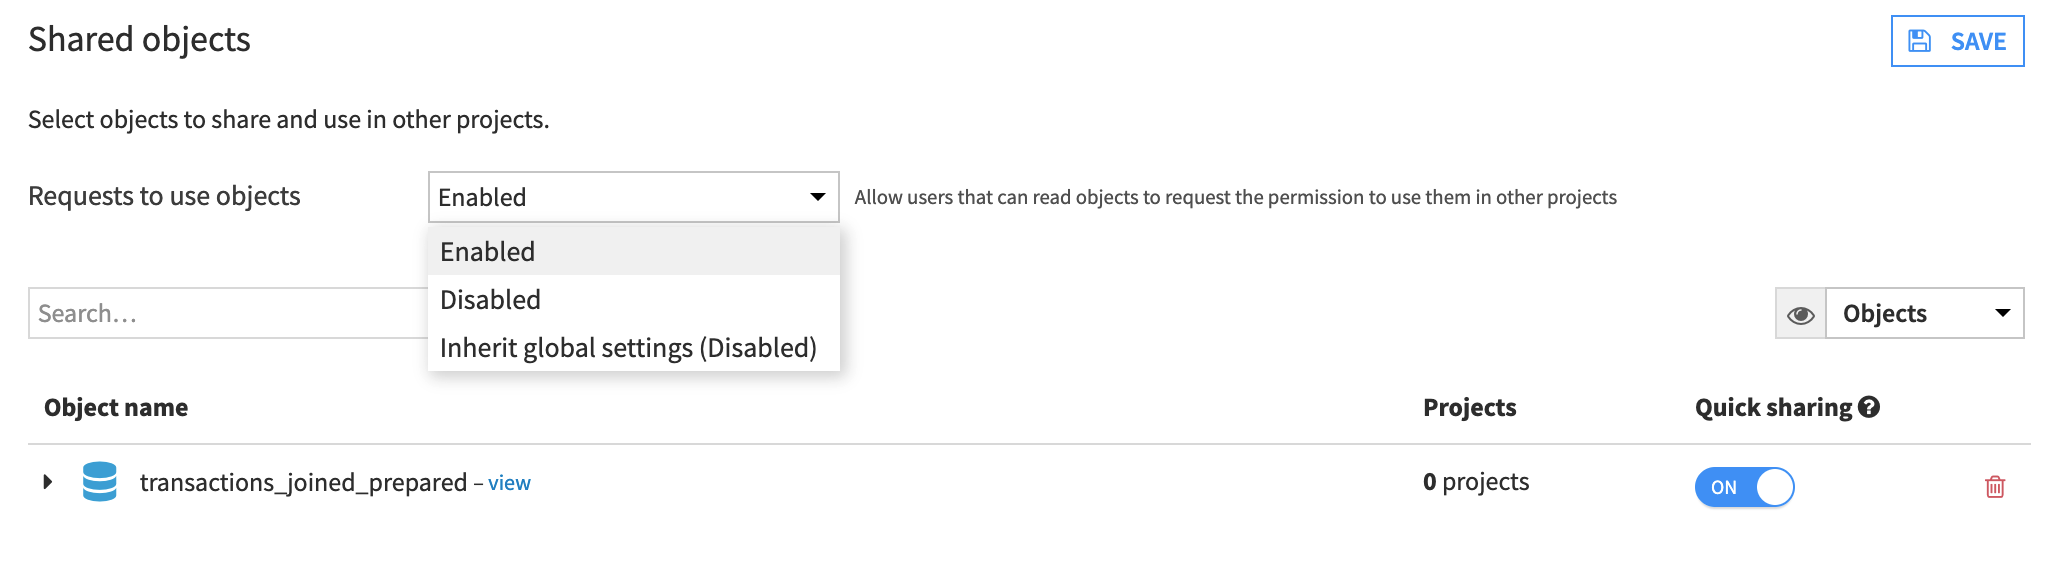
From within the project, navigate to More options (the three horizontal dots) > Security > Shared objects panel.
Under the “Requests to use objects” dropdown, choose Enabled.
Click Save in the top right.
All users, even those with read-only access to a project, can request access to the object using one of two ways: * select the dataset in the Flow and navigate to Actions panel > Share >, then send a request message to the project owner * or find the dataset or other object in the Catalog to request access.
Quick Sharing
Quick sharing allows any user to use the dataset or object in their projects without asking explicit permission. With sharing access requests enabled and Quick sharing off, users with at least read-only permissions on the project can see datasets but must request permission to use them.
To enable Quick sharing so that teammates can reuse a dataset:
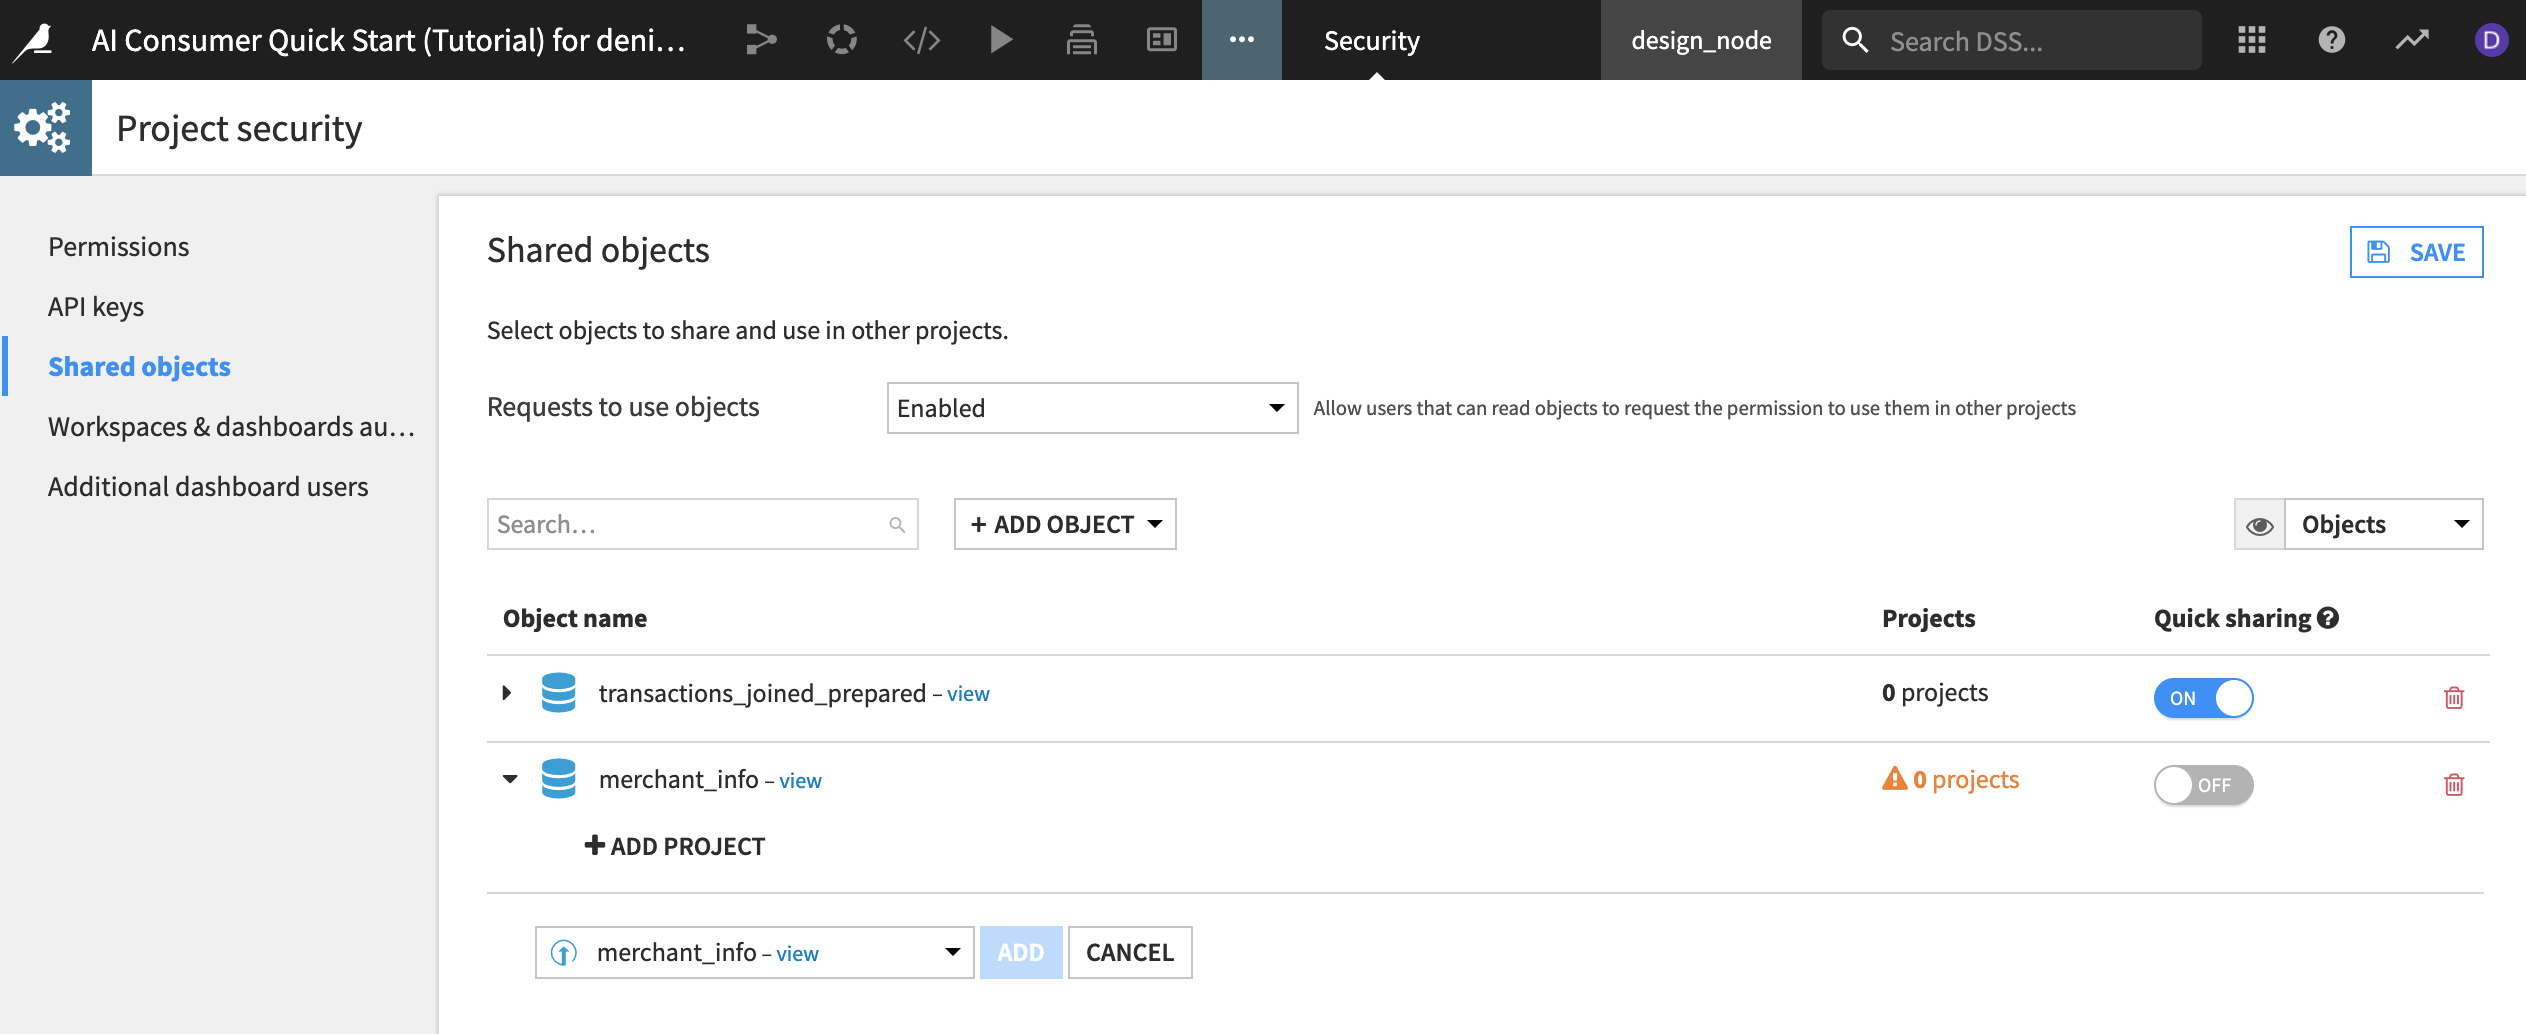
From within the project, navigate to More options (the three horizontal dots) > Security > Shared objects panel.
Click +Add Object and choose Dataset or other type of object.
In the dropdown menu that appears, choose the dataset or object you’d like to share and then select Add.
The dataset now appears in the Shared objects panel, with some additional options and information. You can add the object to a target project, view projects it is used in, and enable Quick sharing. To enable Quick sharing:
Next to the dataset or object you’d like to enable, toggle Quick sharing On.
Click Save in the top right.
Navigate back to the Flow. Notice an arrow icon now appears on the dataset.
Note
The arrow icon appears on any dataset that has been added to the shared objects list, even if it is not Quick shared or shared to an actual project. The icon also appears if: Quick sharing has been enabled or the object has been shared to other projects with managed sharing.
You also can turn on Quick sharing from the Flow.
Select the dataset you’d like to share in the Flow and navigate to Actions panel > Share >.
Toggle Quick sharing On.
Choose a target project to add the dataset, if desired.
Select Share.