How to Edit a Code Recipe Using Code Studios
When coding in Dataiku, it can be helpful to have access to your own Integrated Development Environment (IDE), such as JupyterLab or VS Code. Dataiku Code Studios allows you to code and debug in a private development environment, using your own IDE, within a Dataiku project.
To demonstrate Code Studios, we’ll work with a Python recipe. Follow along as we edit and debug our recipe using a VS Code Code Studio. We’ll then demonstrate how to sync files from a Code Studio back to the recipe in the project.
Note
To use Code Studios, your administrator will first need to create Code Studio templates for you. To find out more about Code Studios including which IDEs are supported, visit Code Studios in the product documentation.
Create Your First Code Studio
We’ll start with a basic Flow with a Python recipe. In this example, we’ve opened our Python recipe in a notebook.
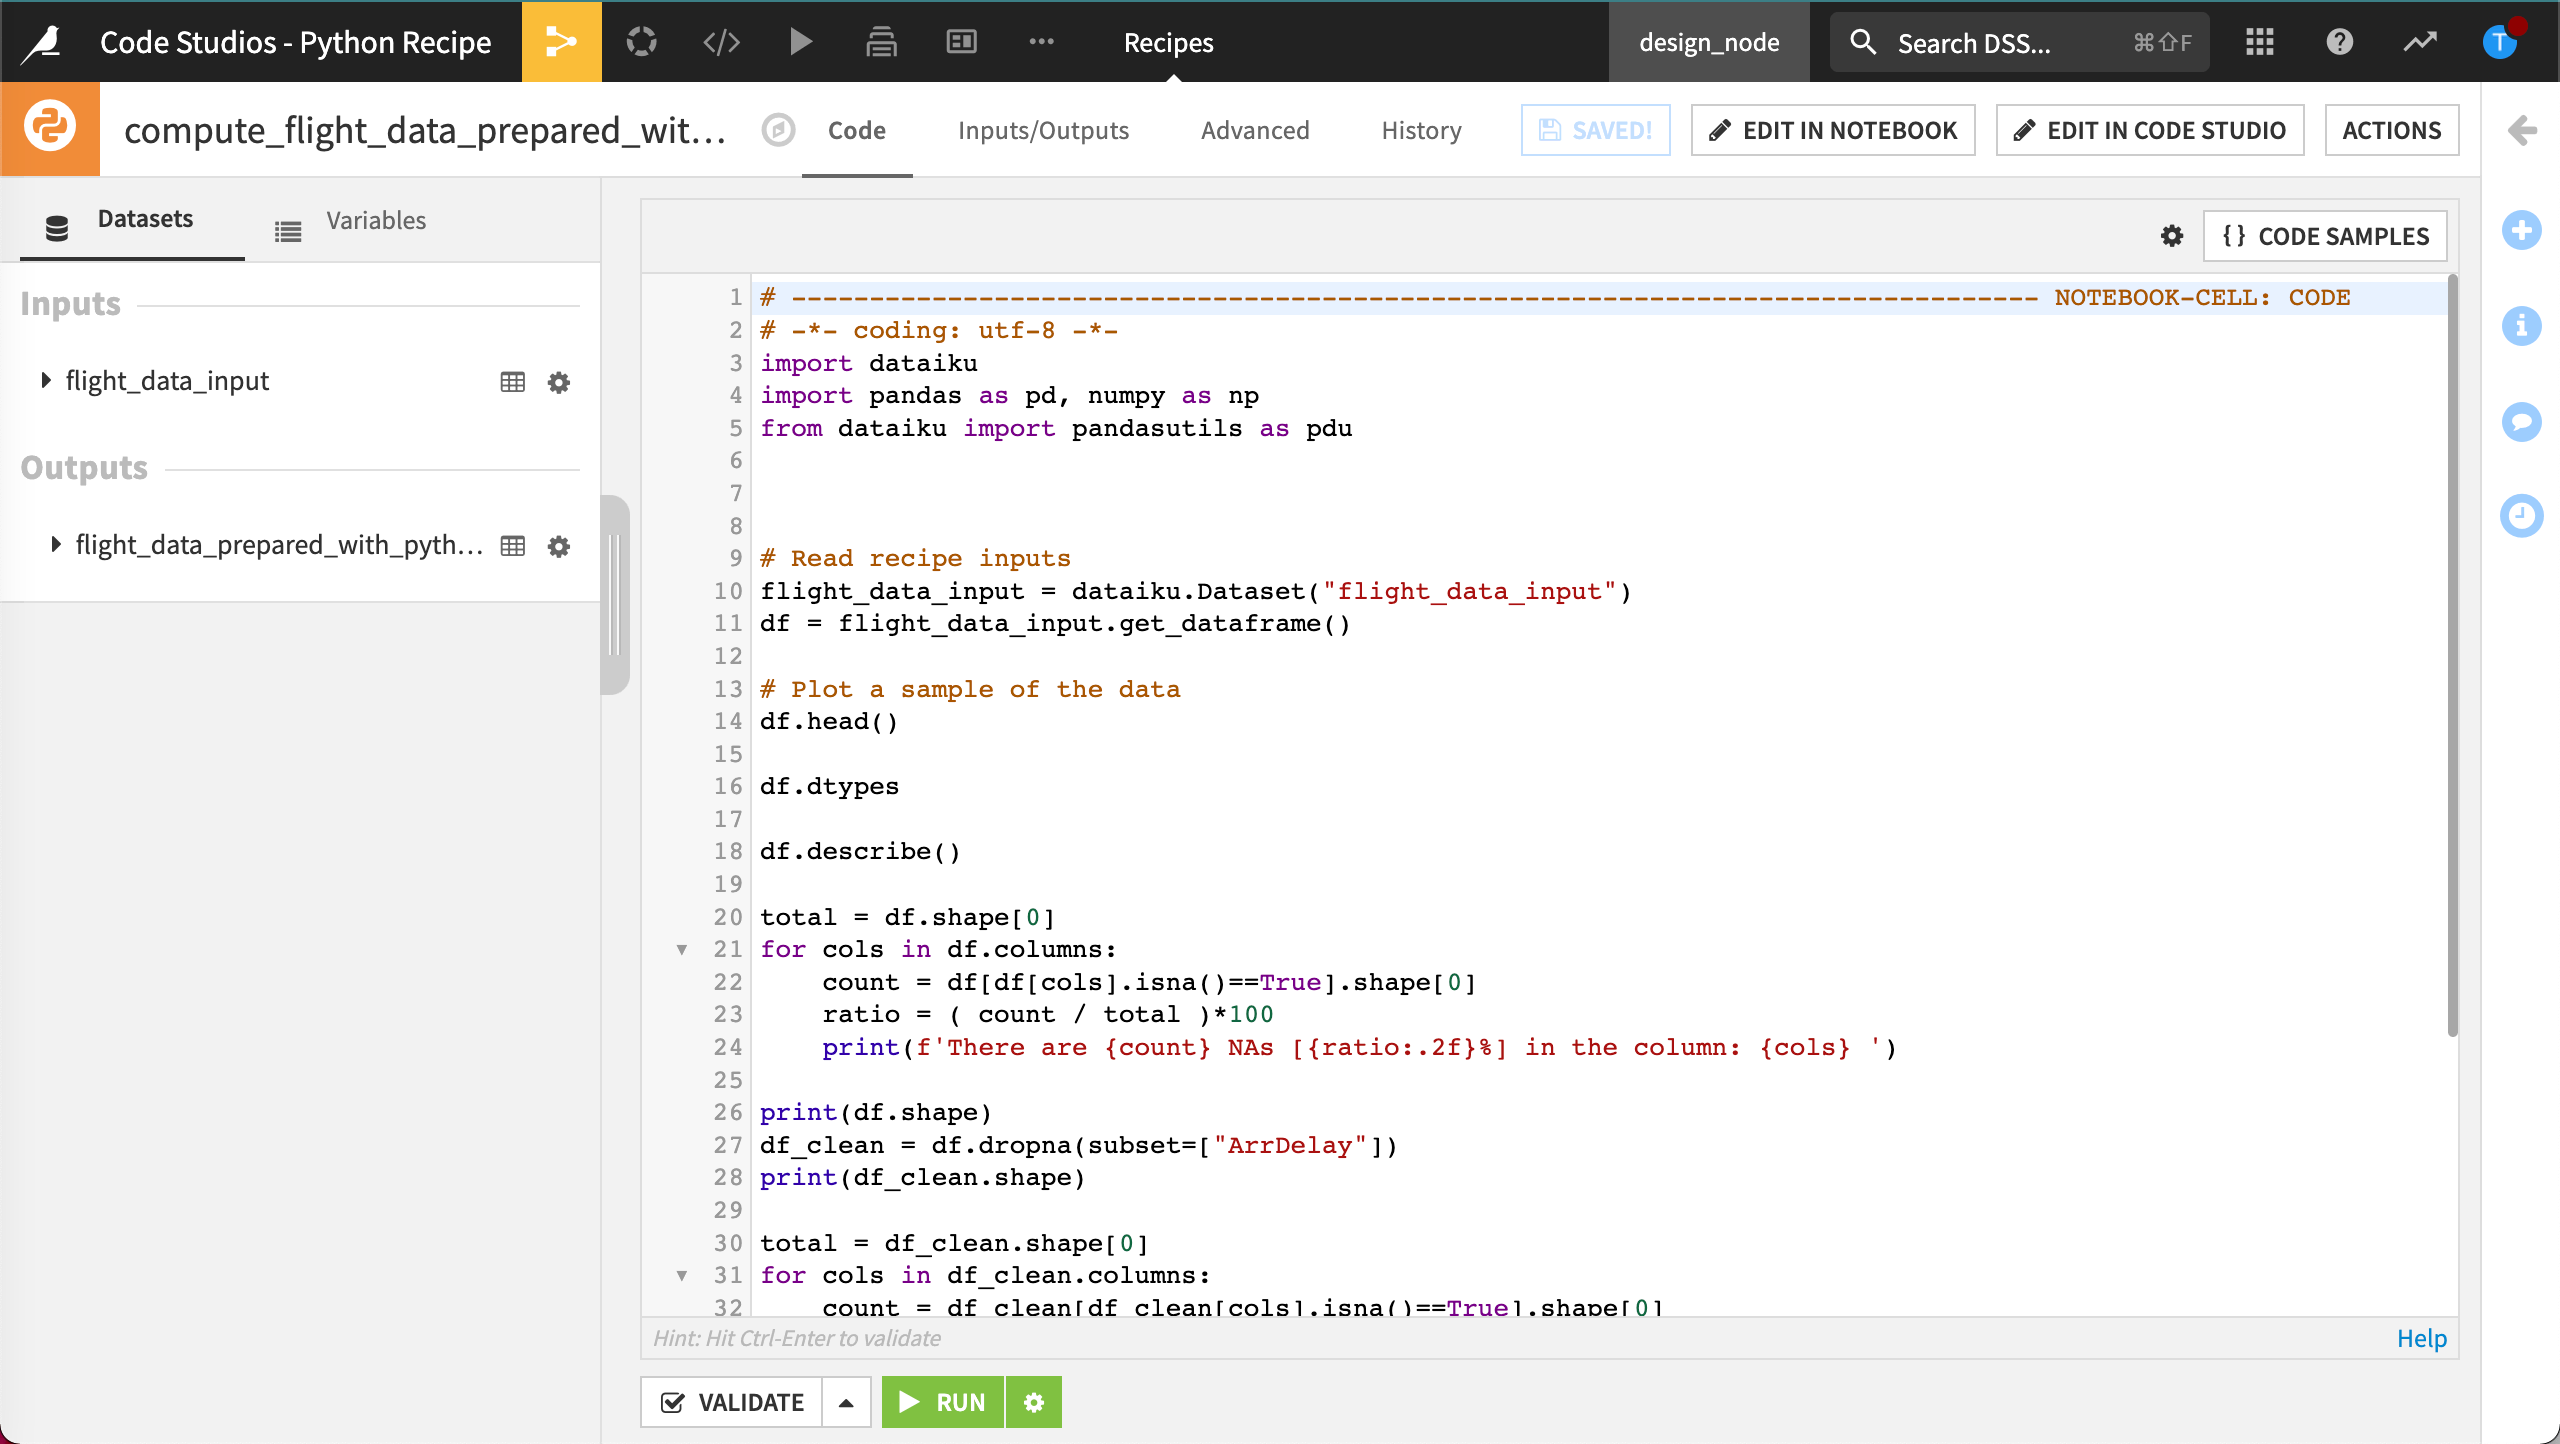
Our goal is to edit our code using tools in our IDE. We can step through the source code in our IDE and take advantage of support such as debugging. We can start a Code Studio within the project itself to do this.
Before editing our recipe in a Code Studio, let’s start our first Code Studio to ensure it is ready. To do this:
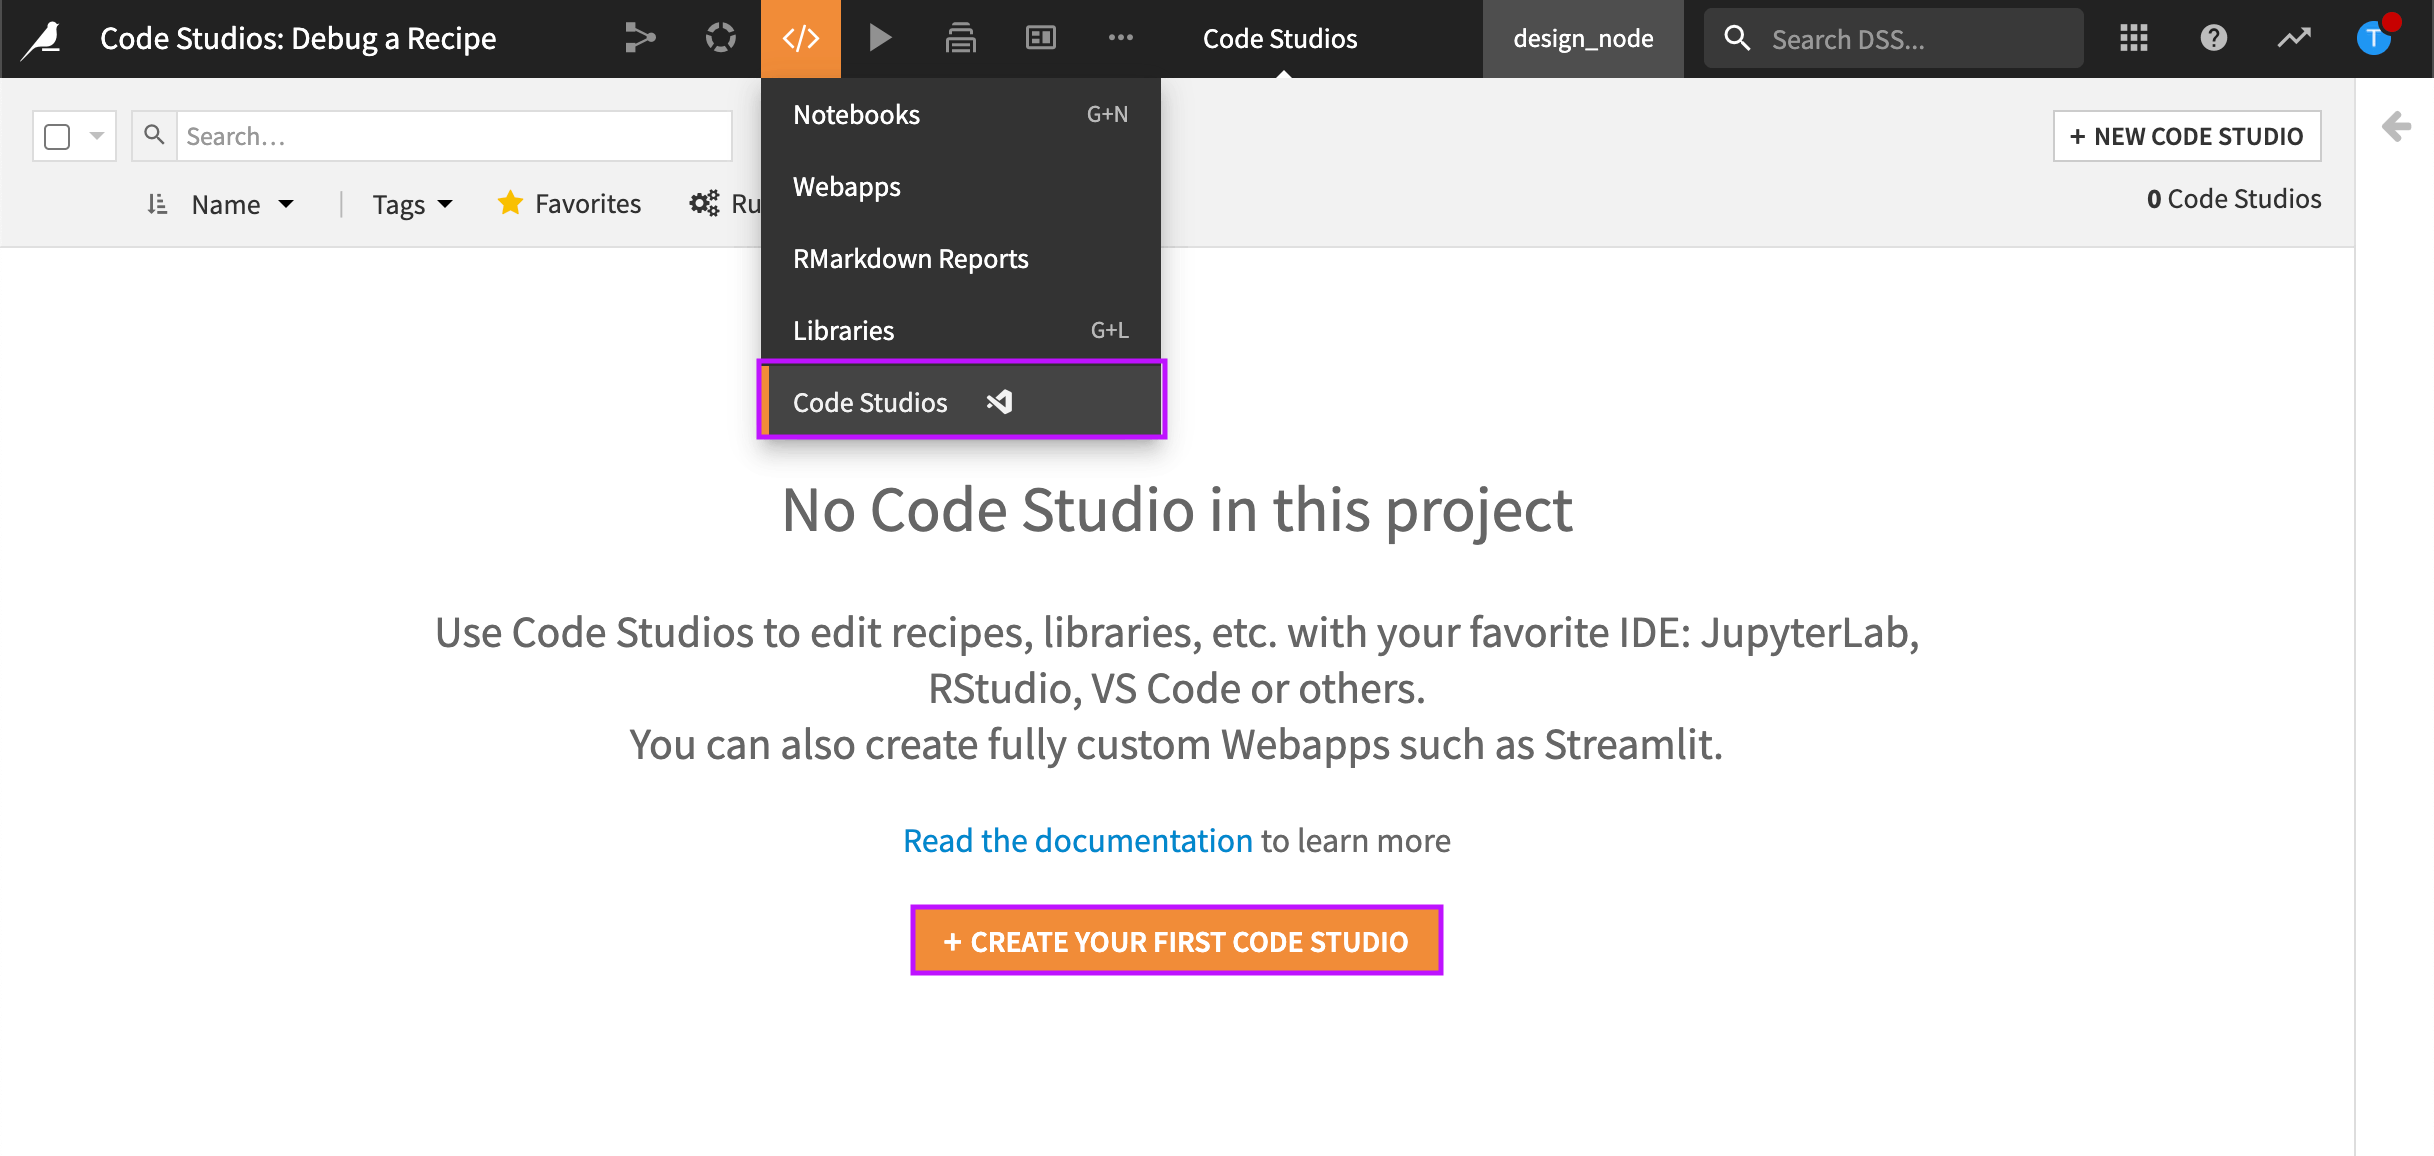
From the Code menu, select Code Studios.
Select Create Your First Code Studio.
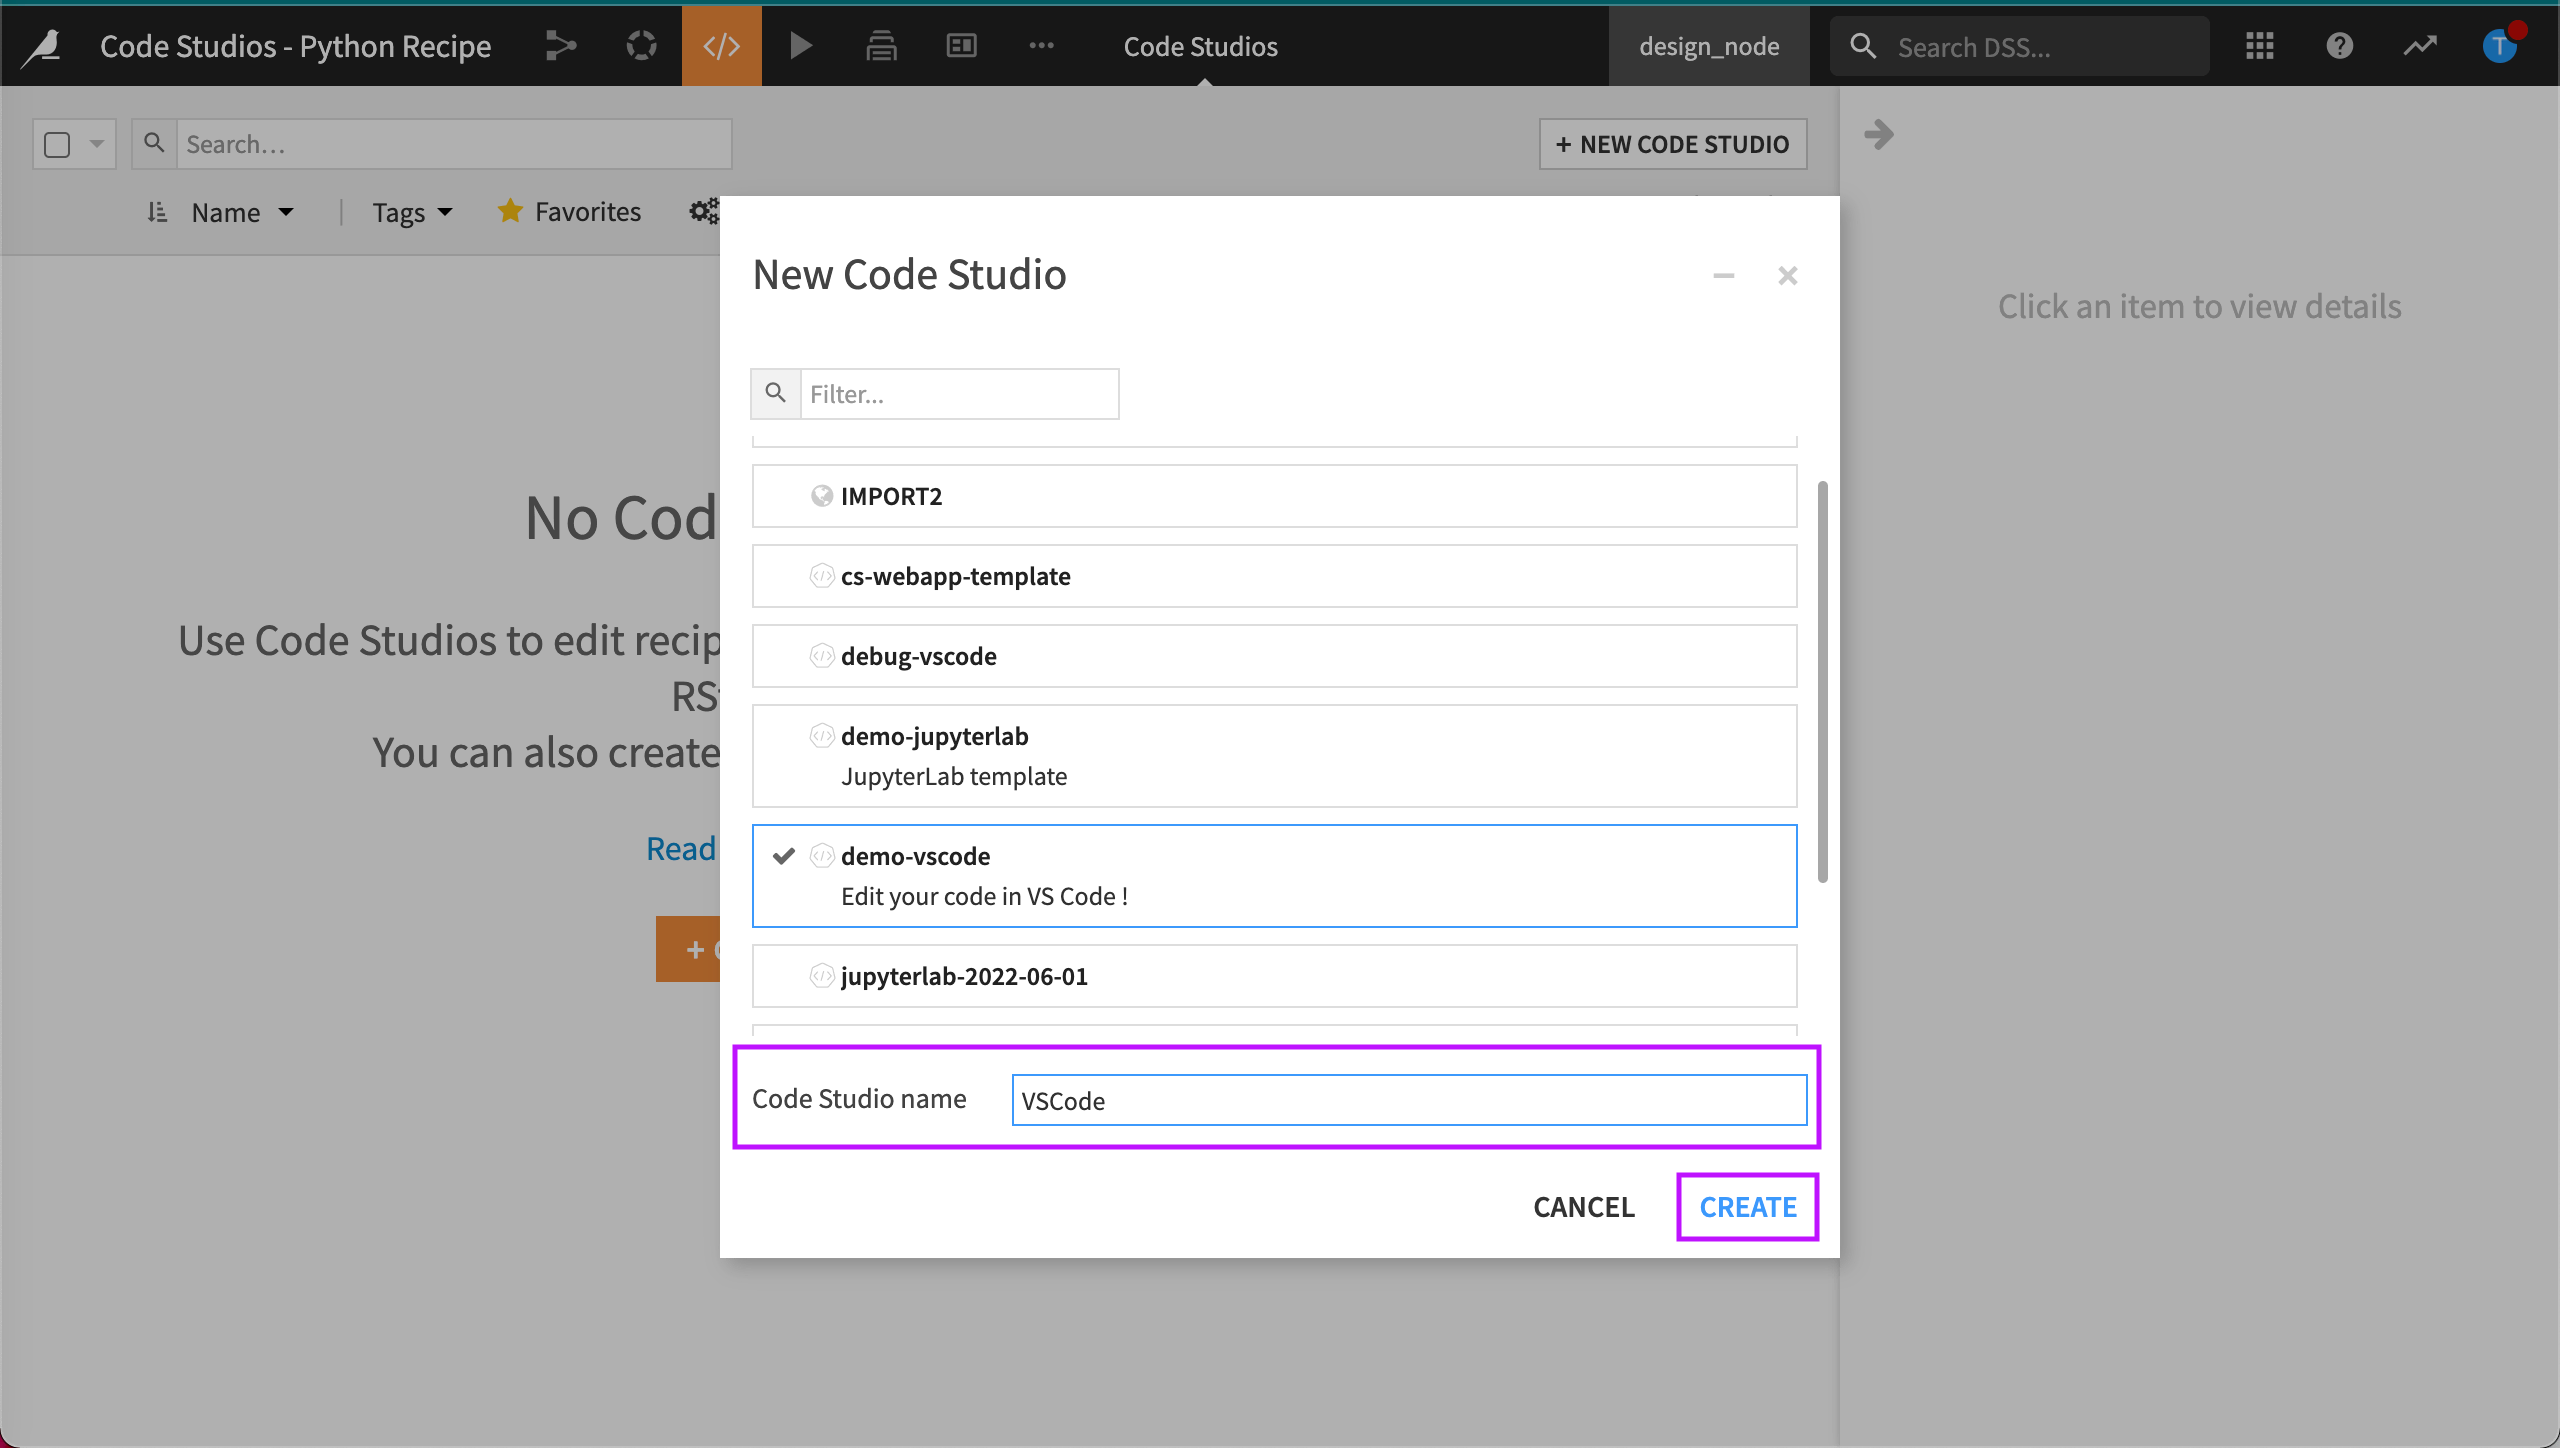
Select a Code Studio template.
For our example, we’ll use a VS Code template.
Type a descriptive name for your Code Studio and then select Create.
Dataiku creates the Code Studio. We’ll use this Code Studio in the next section.
Note
To avoid consuming resources, we’ll leave the Code Studio stopped when not in use.
Run and Edit the Notebook in the Code Studio
We’ll edit our Python recipe in our Code Studio in this section.
Open the Recipe and Start the Code Studio
Our Code Studio is not yet started. One way to start the Code Studio we created is to tell Dataiku we want to edit our recipe in a Code Studio.
Return to the Flow.
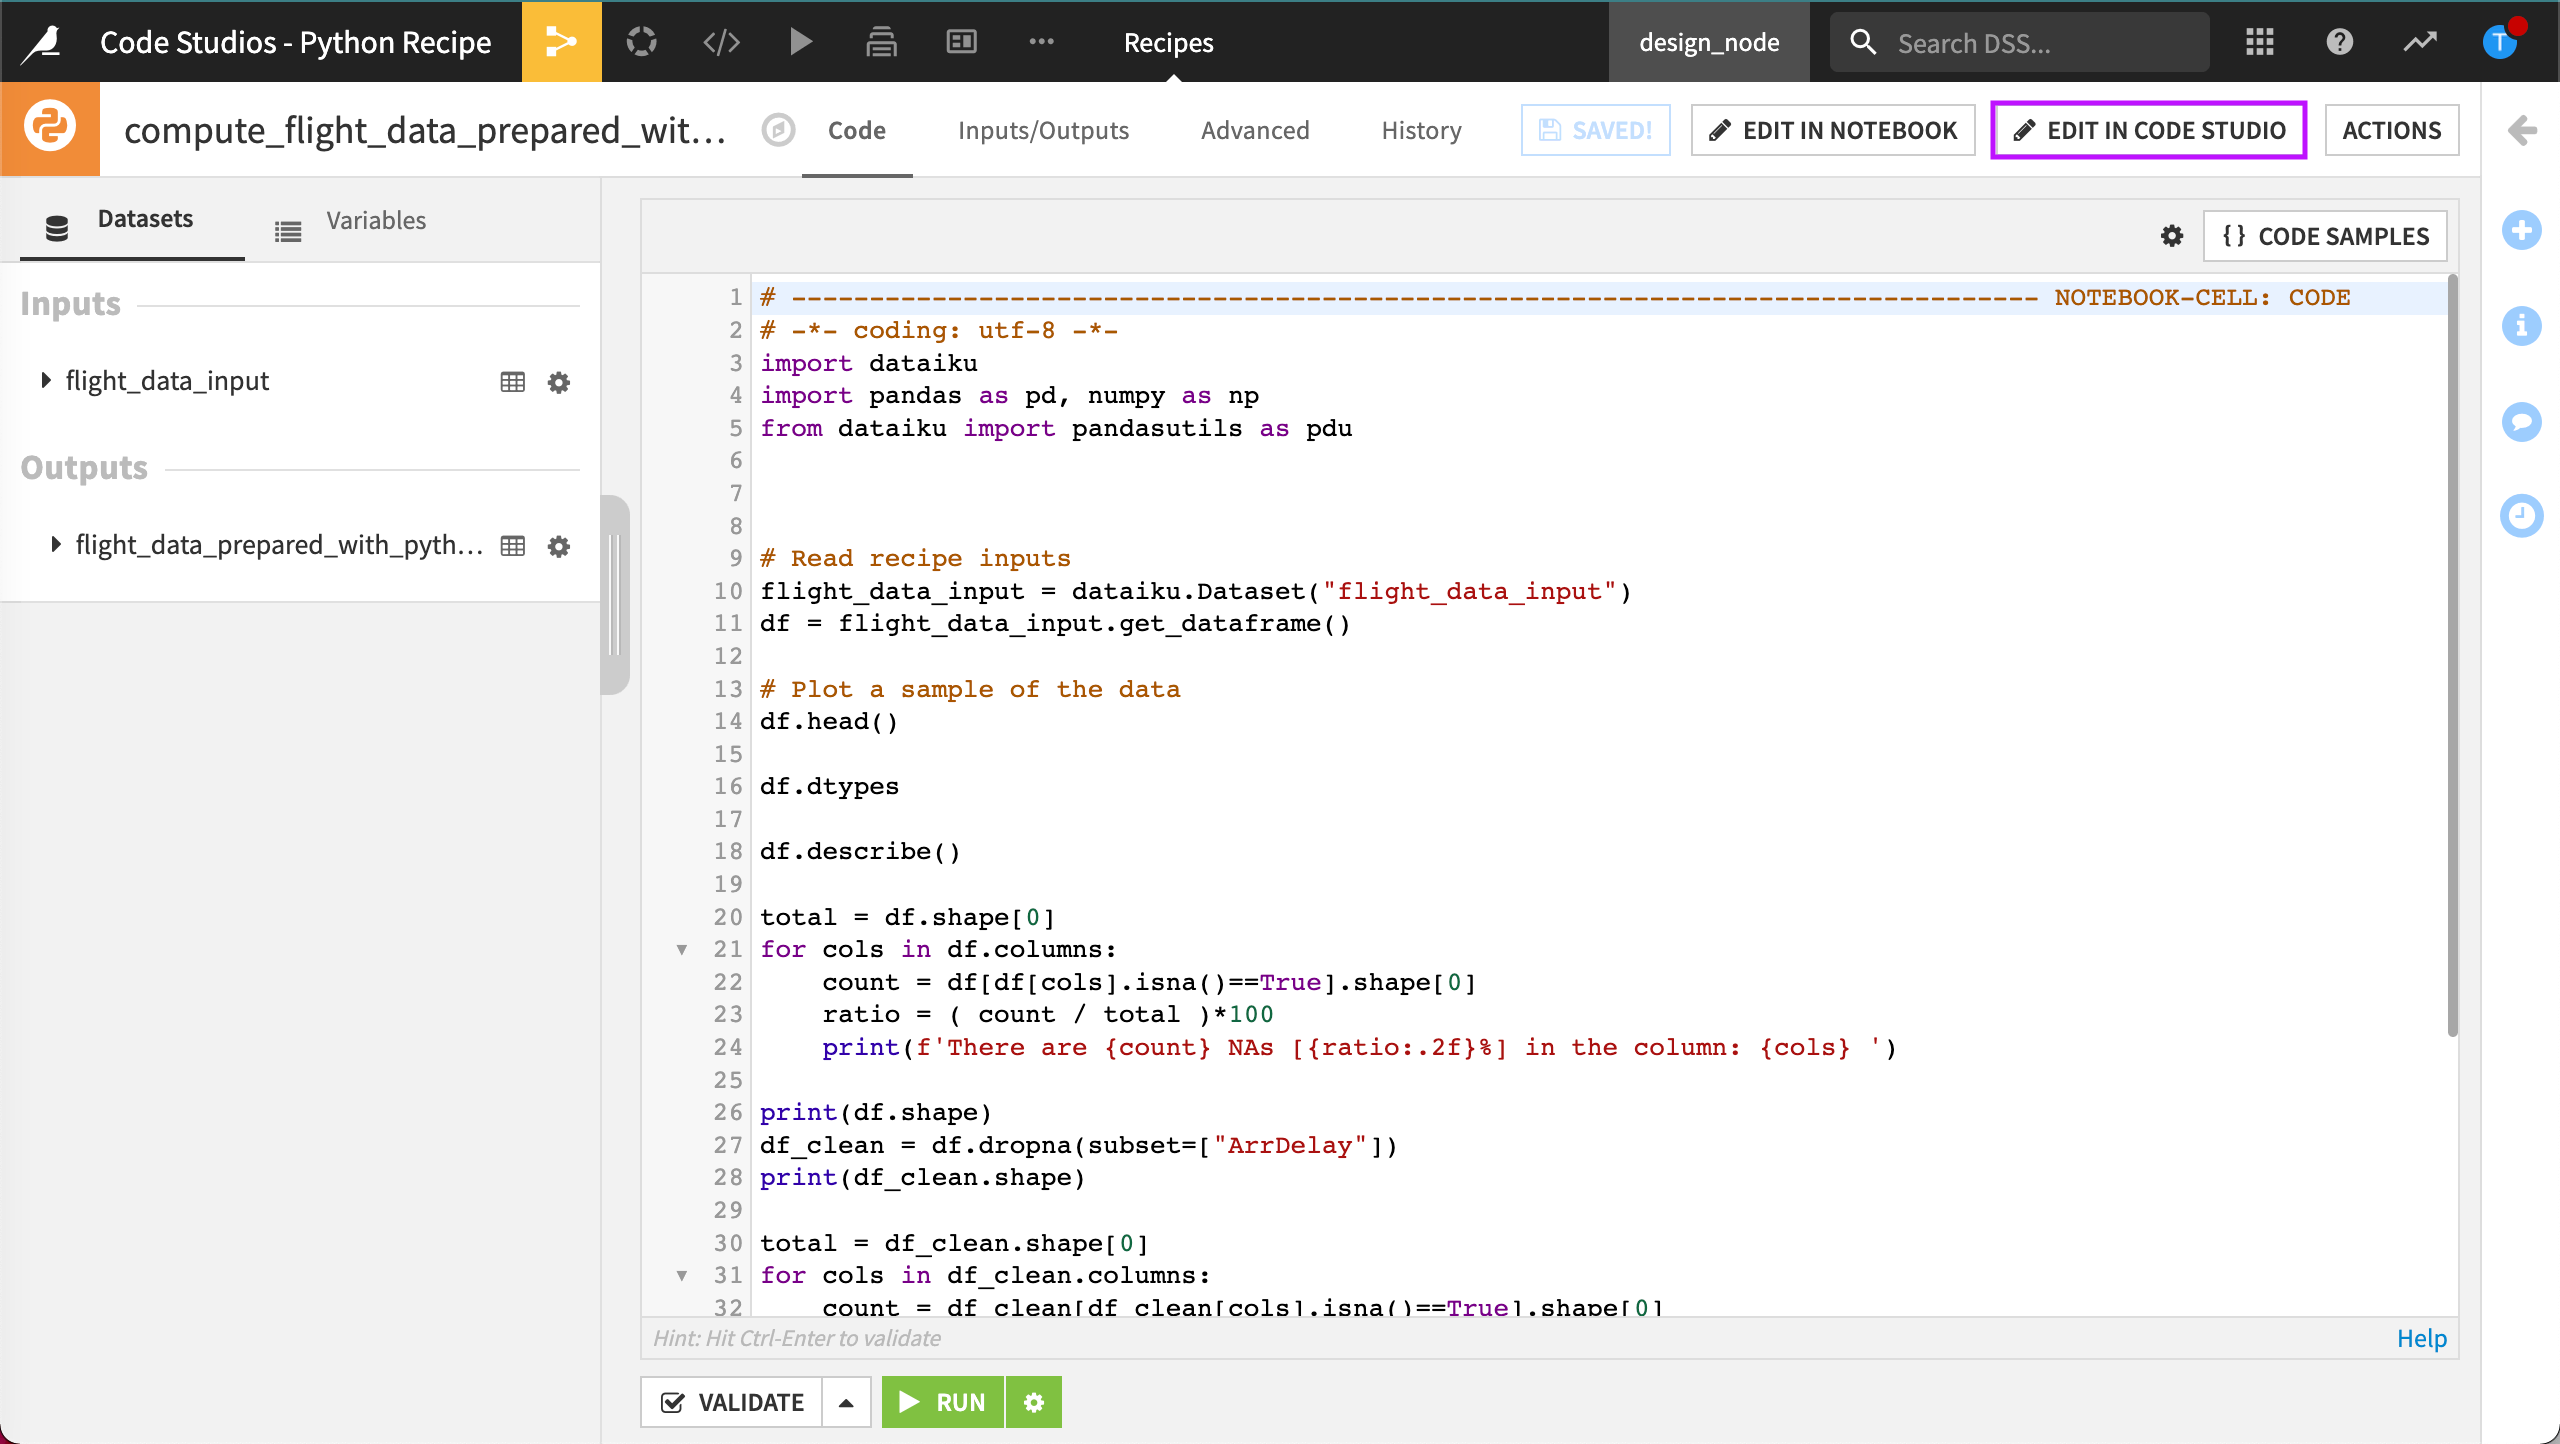
Open the Python recipe and then select Edit in Code Studio.
Select the Code Studio you just created and then select Start.
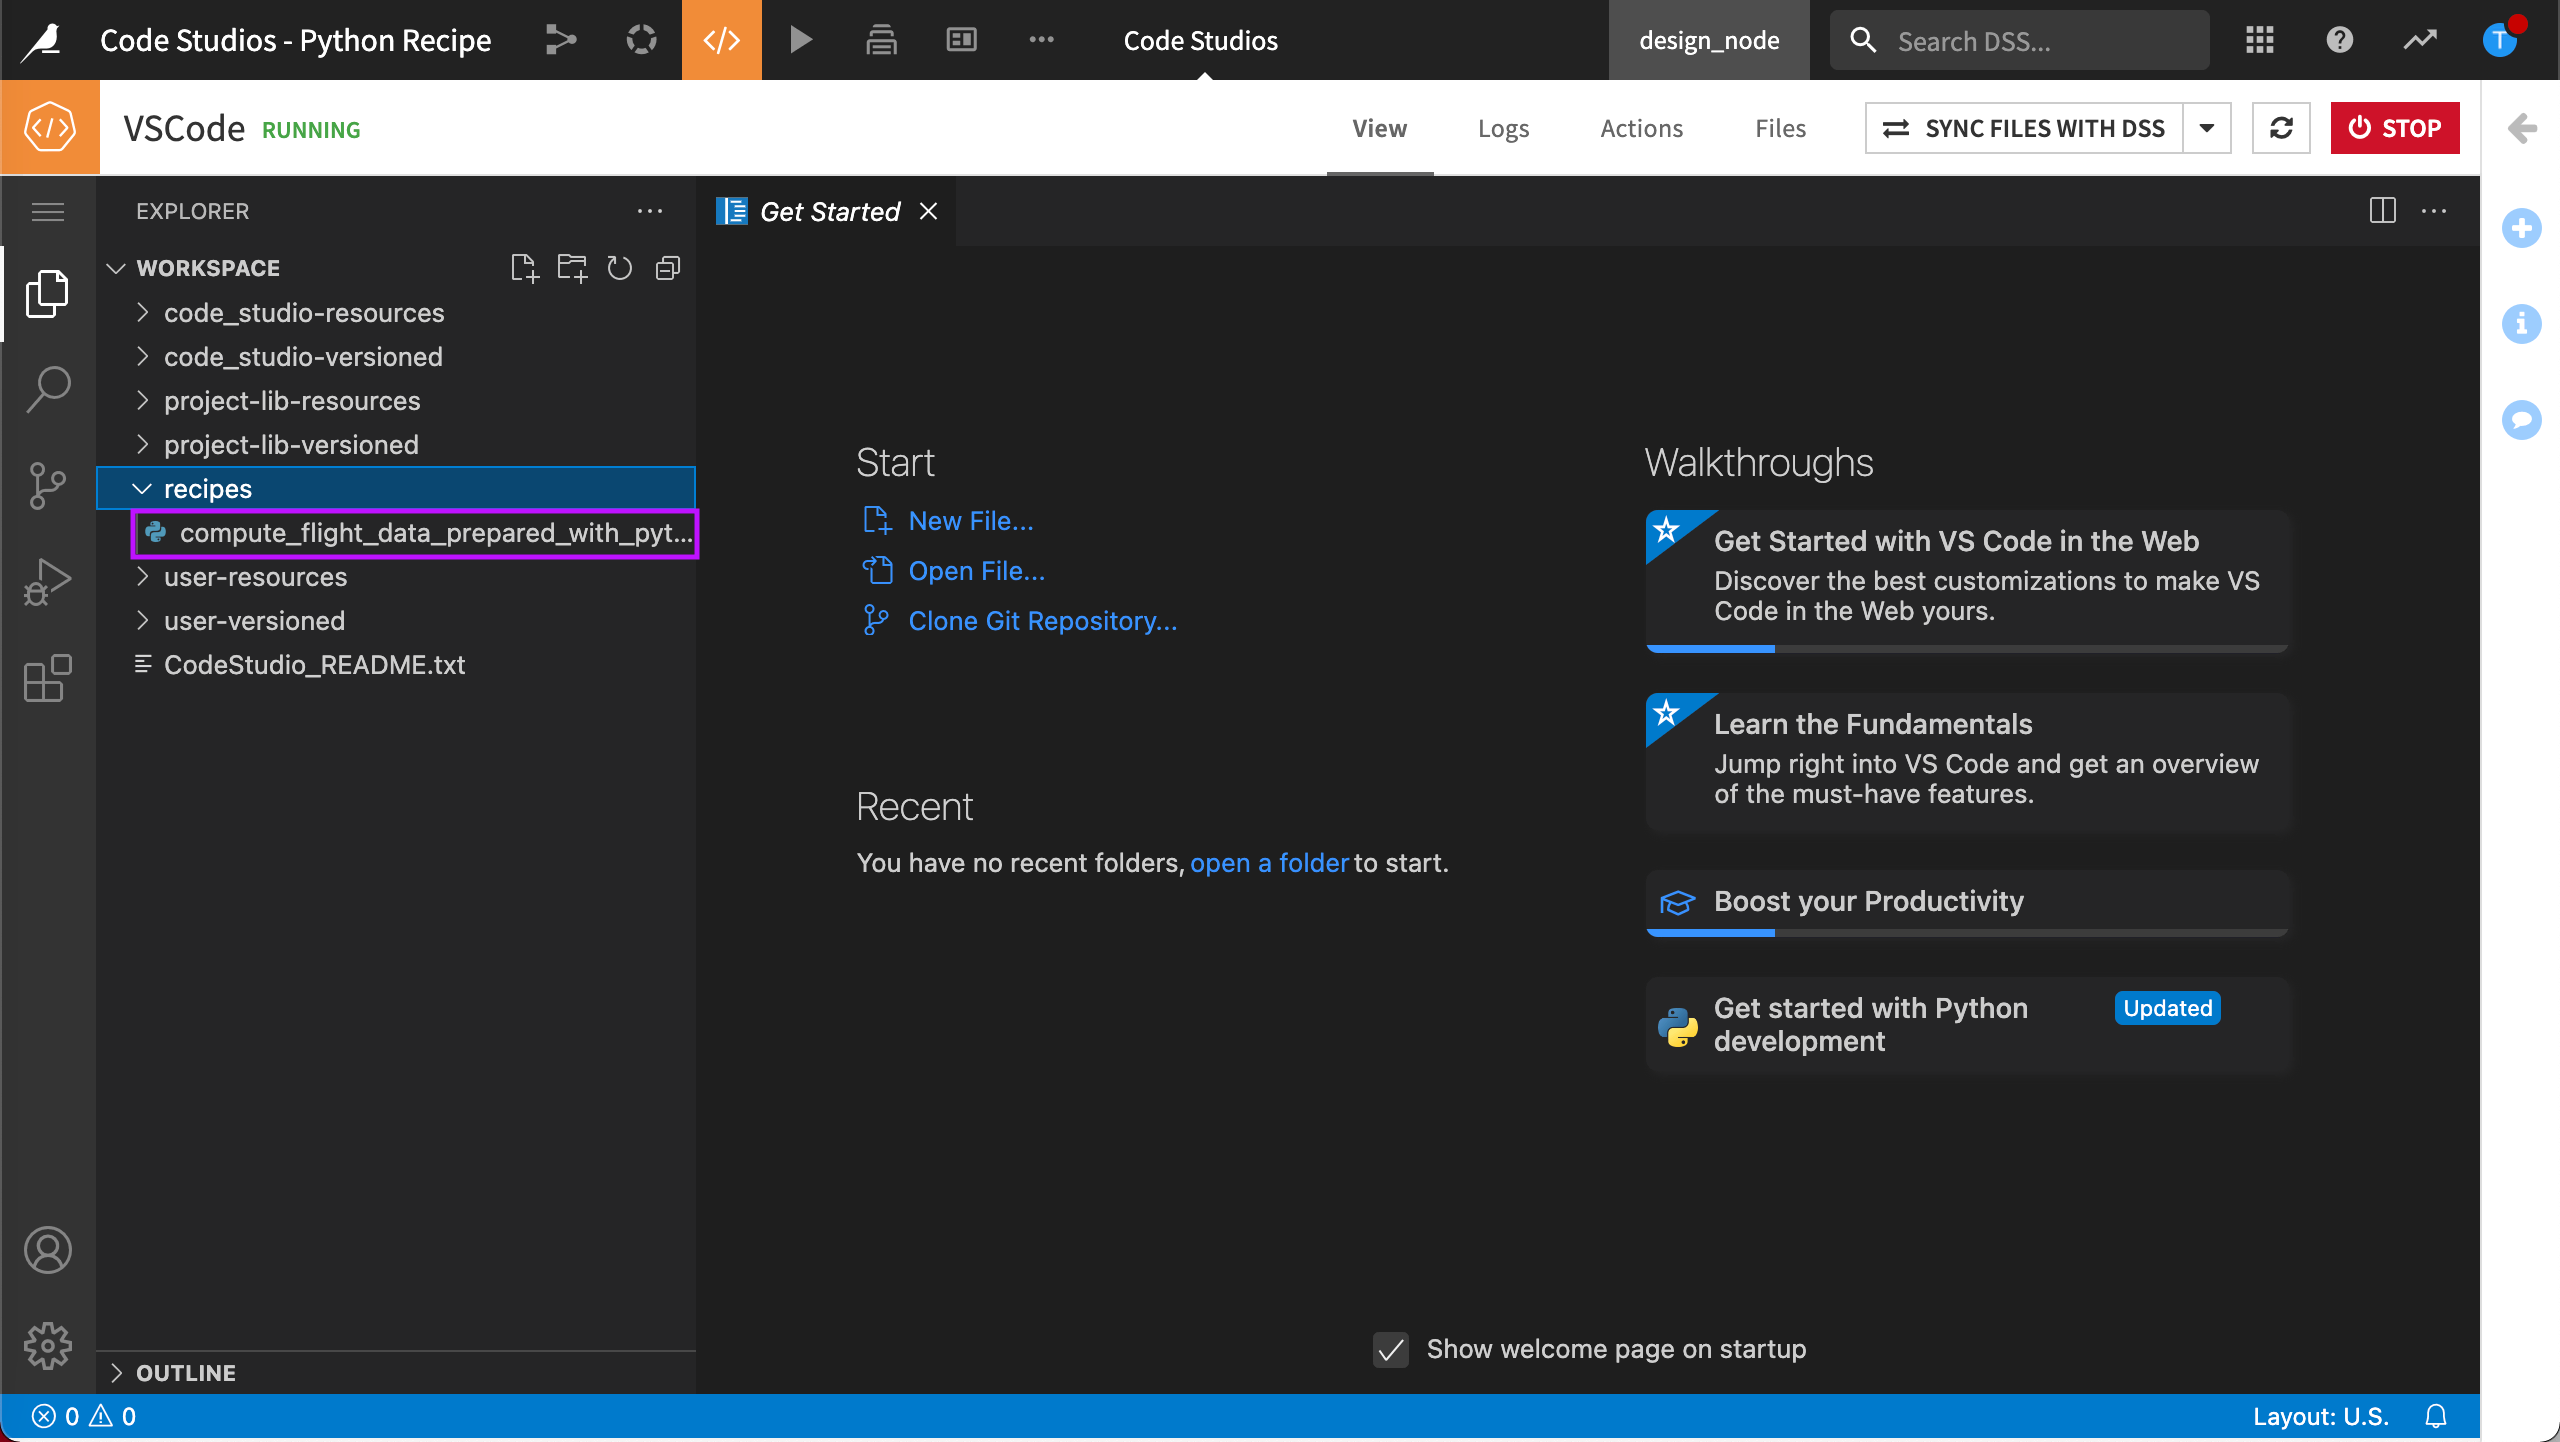
In the left navigation panel of the Code Studio console, you’ll find the VS Code Workspace Explorer. The Workspace contains the coding objects from our project that we can edit from within our Code Studio. For example, we can see that our Python recipe displays in the recipes folder.
Note
If we change the files in our Code Studio, we’ll need to synchronize them back to the Dataiku filesystem.
Edit and Run the Recipe
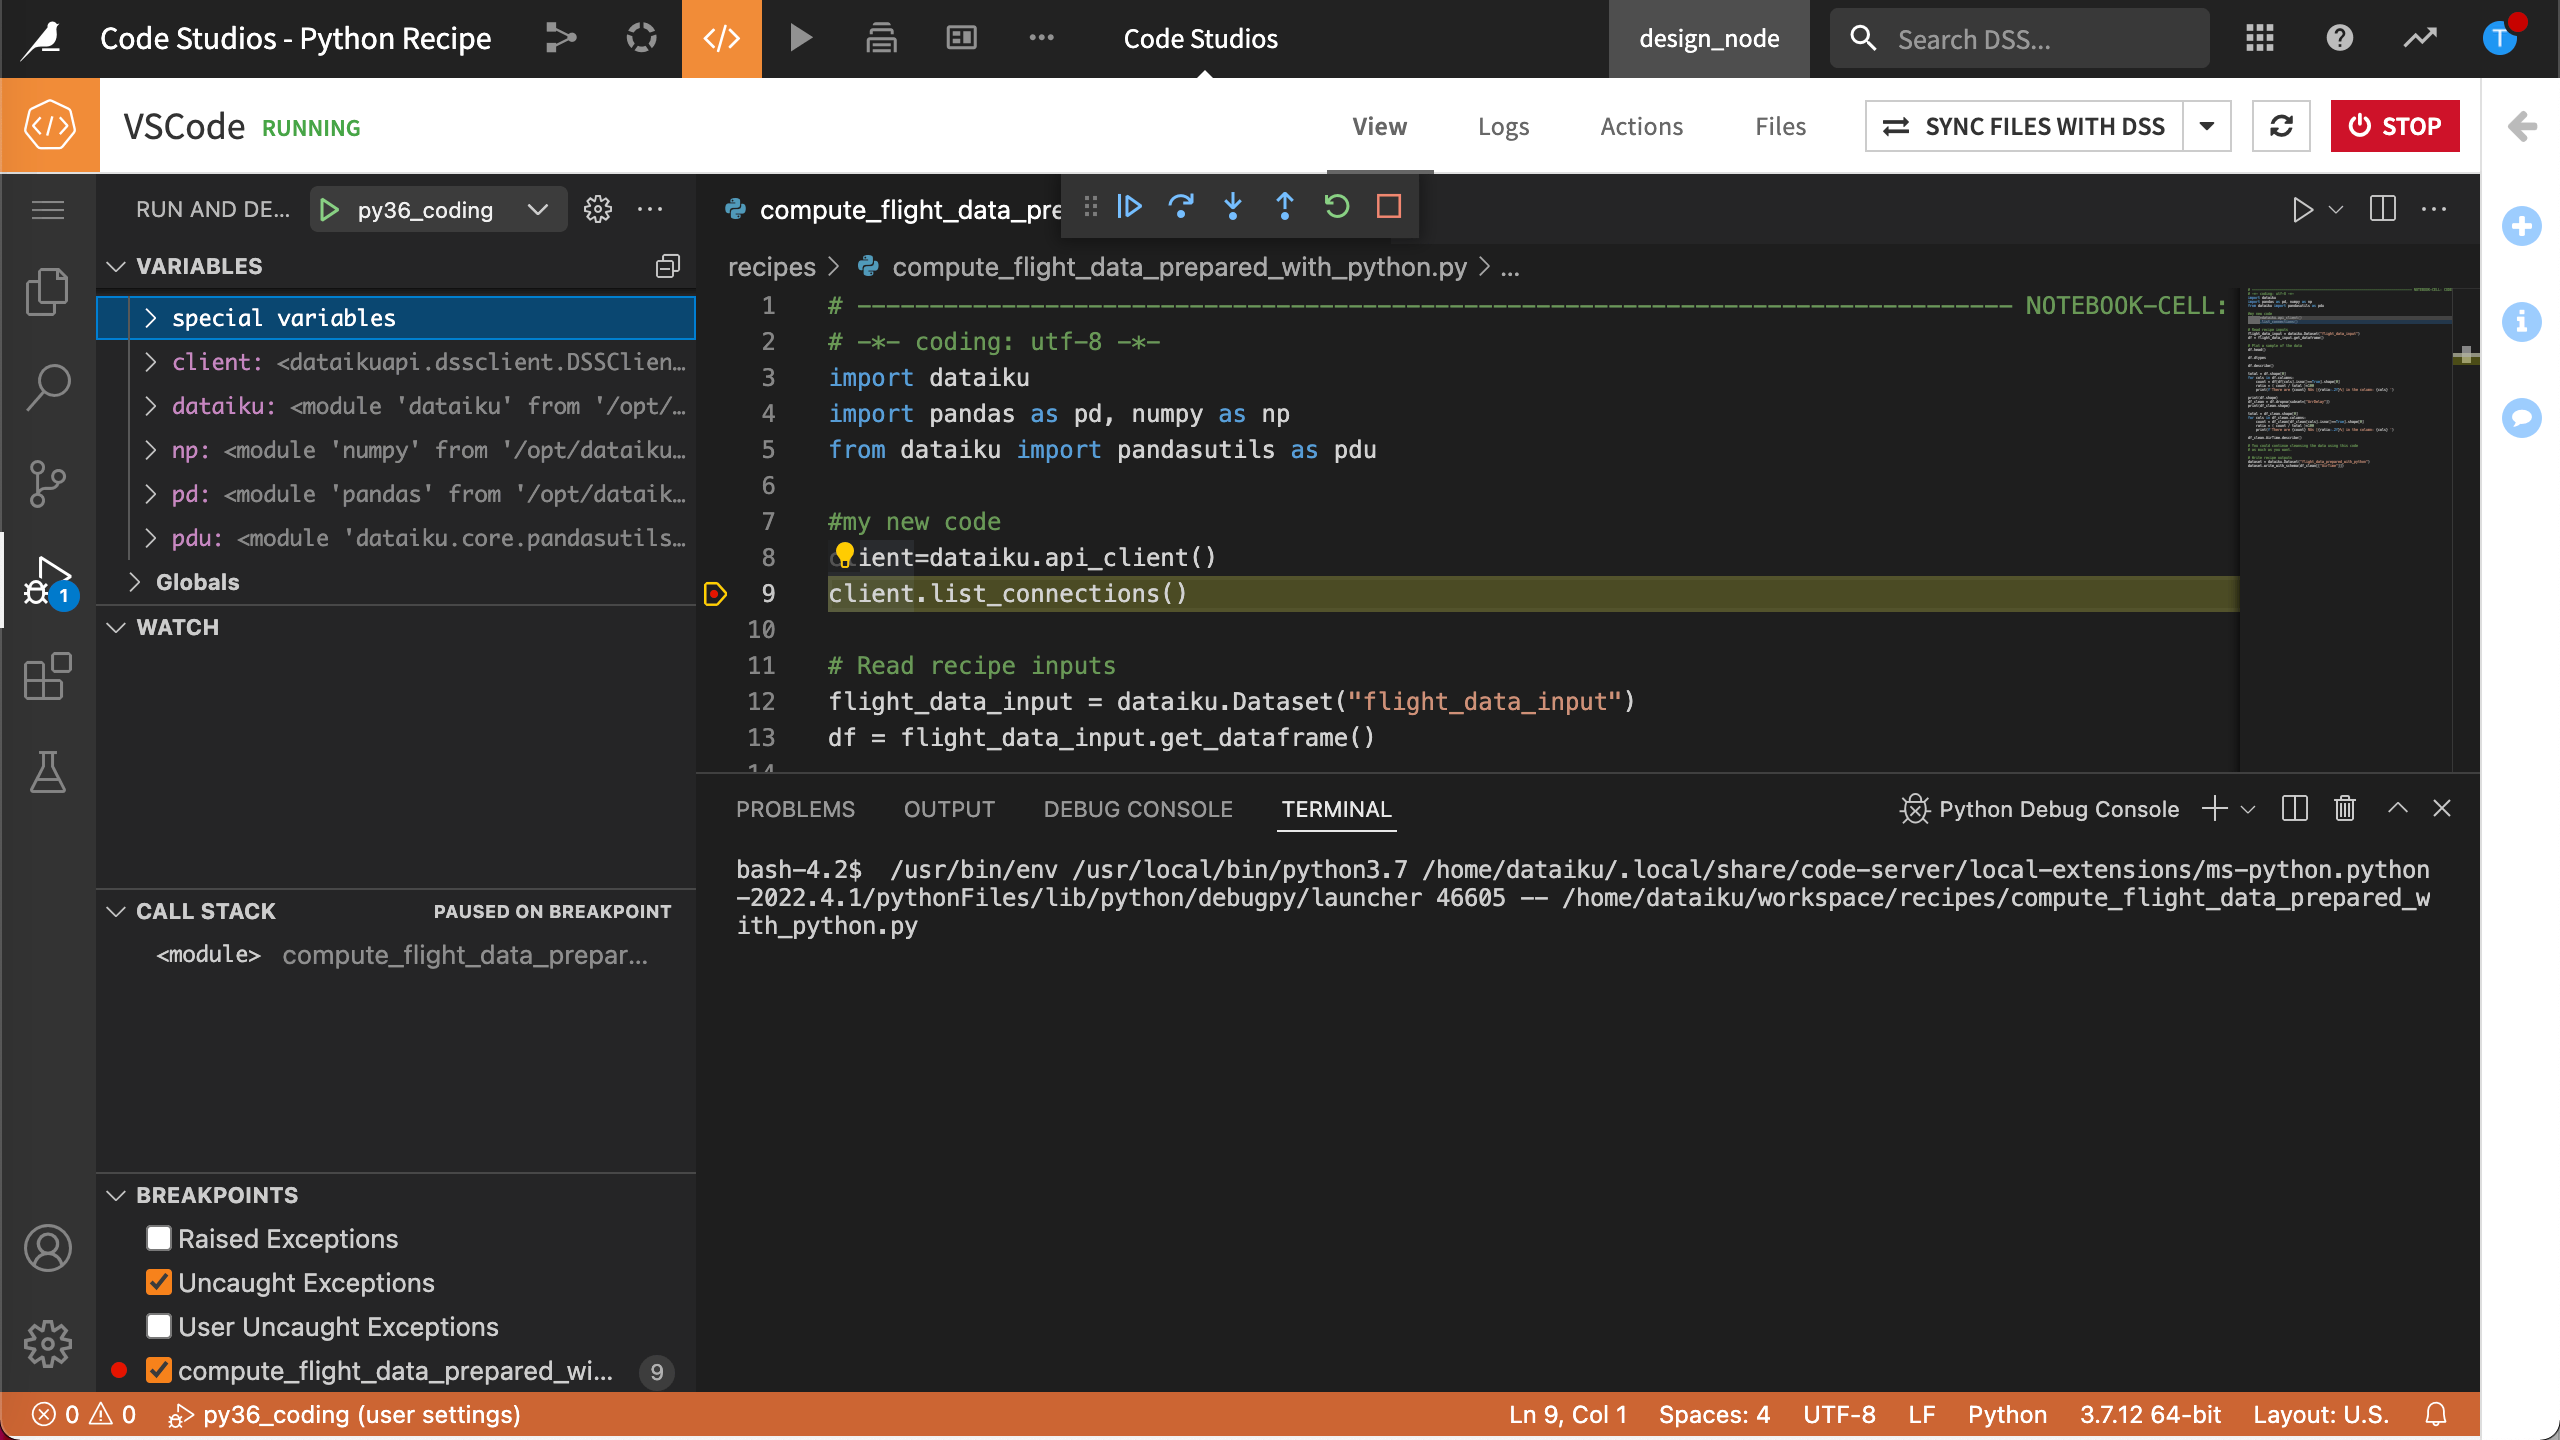
Let’s work with our Python recipe in the Code Studio console. We’ll run our recipe in debug mode to take advantage of debugging support.
Open the recipe from the Recipes folder.
Edit the code.
We’ll take advantage of the tools in our IDE tools to edit our code. For example, we’ll use Autocomplete when typing a command to list all client connections.
Set one or more breakpoints.
Type
Debug: Select and Start Debuggingfrom the VS Code command menu (Cmd + Shift + P on Mac OS).
If VS Code does not detect a debug environment automatically, you can select one.
Note
The debug environments are dependent on the code environments available to your project. Your Administrator configures code environments and can associate them with a particular Code Studio template.
VS Code runs the currently active file and stops at the breakpoint.
Sync Files Back to Dataiku
In this section, we’ll save our changes and sync our recipe back to our Dataiku project.
To do this:
Select Sync Files With DSS.
Return to the Flow.
We also have the option to stop our Code Studio and keep or discard our files. If we select to discard our files, Dataiku saves the Code Studio and discards the files.
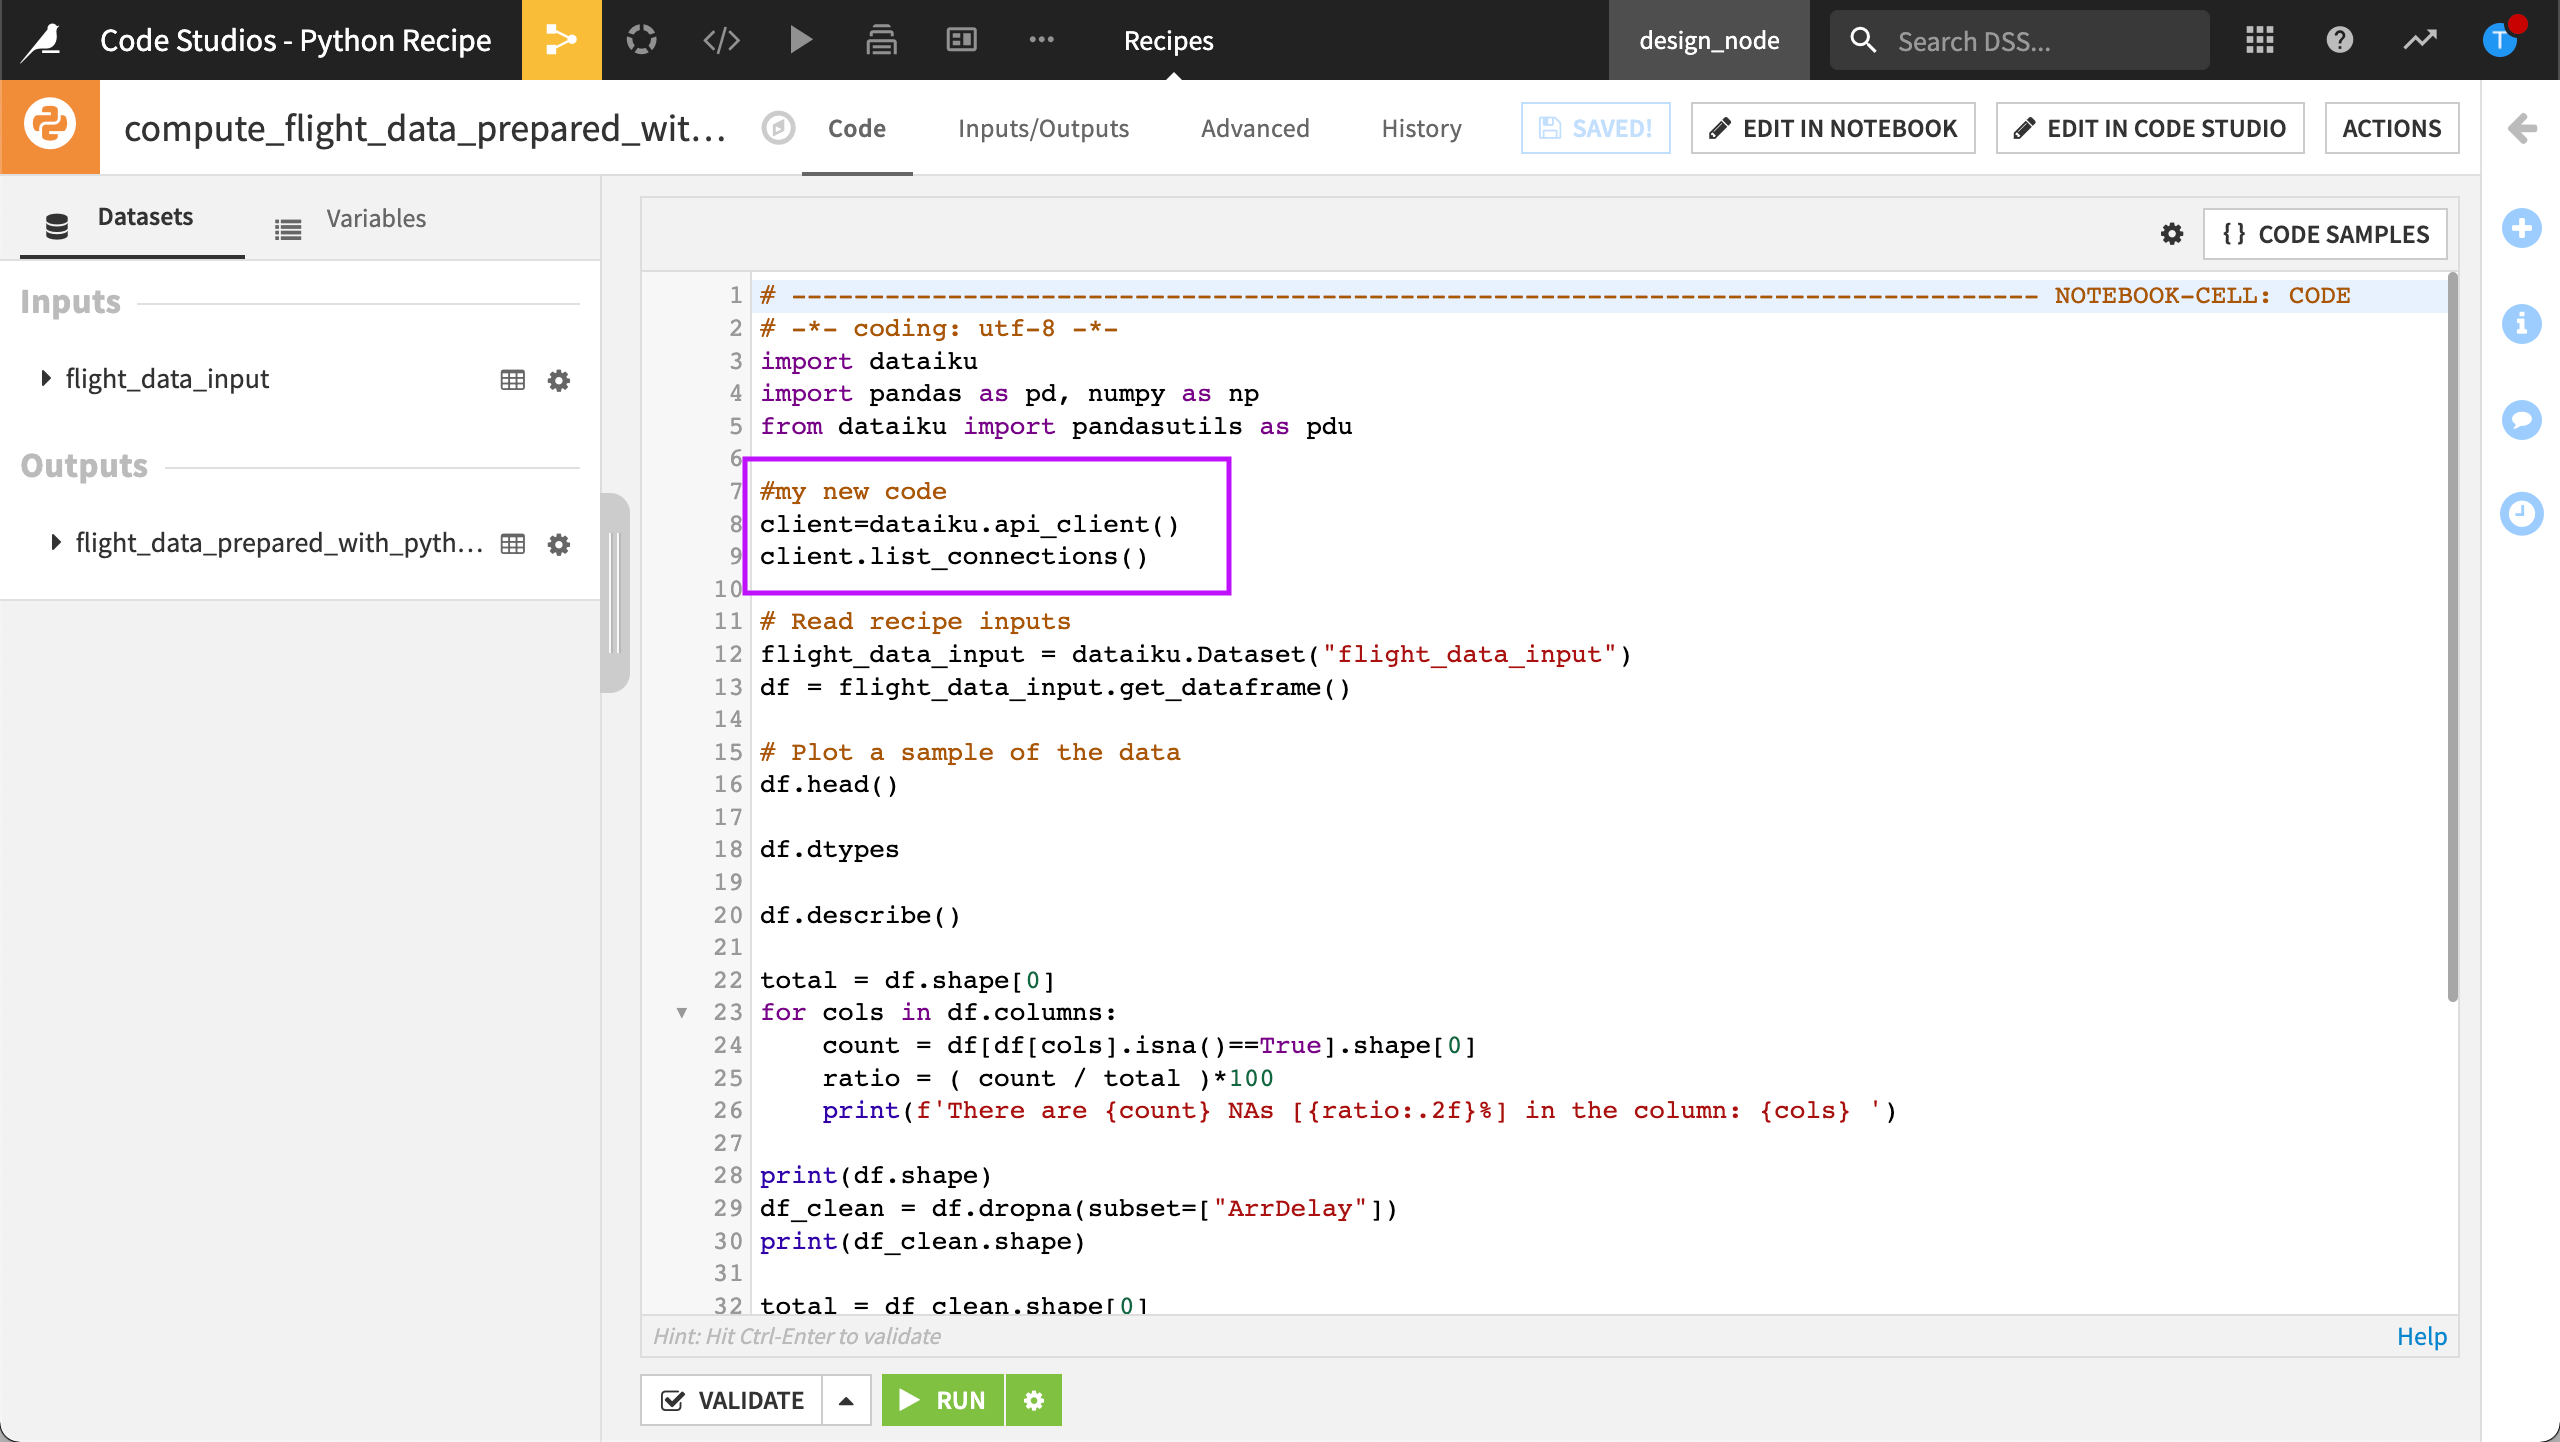
We can now run our recipe and rebuild the Flow.
Note
Code Studios requires an instance with a running Kubernetes cluster. If you don’t have one of these, Dataiku offers IDE integrations to customize your working environment.
What’s Next?
Now that you know how to work with Code Studios, you can try editing your own code recipe or notebook in your IDE.