Q-Learning
In this tutorial, we’ll learn about our first reinforcement learning (RL) algorithm, known as Q-Learning.
The idea behind Q-Learning is to learn a “cheat sheet” for a game. Doing so would help the agent to know the best action to take for each step.
We’ll use the DSS RL plugin to train a Q-Learning agent that will learn to navigate in the Frozen Lake game.
Technical Requirements
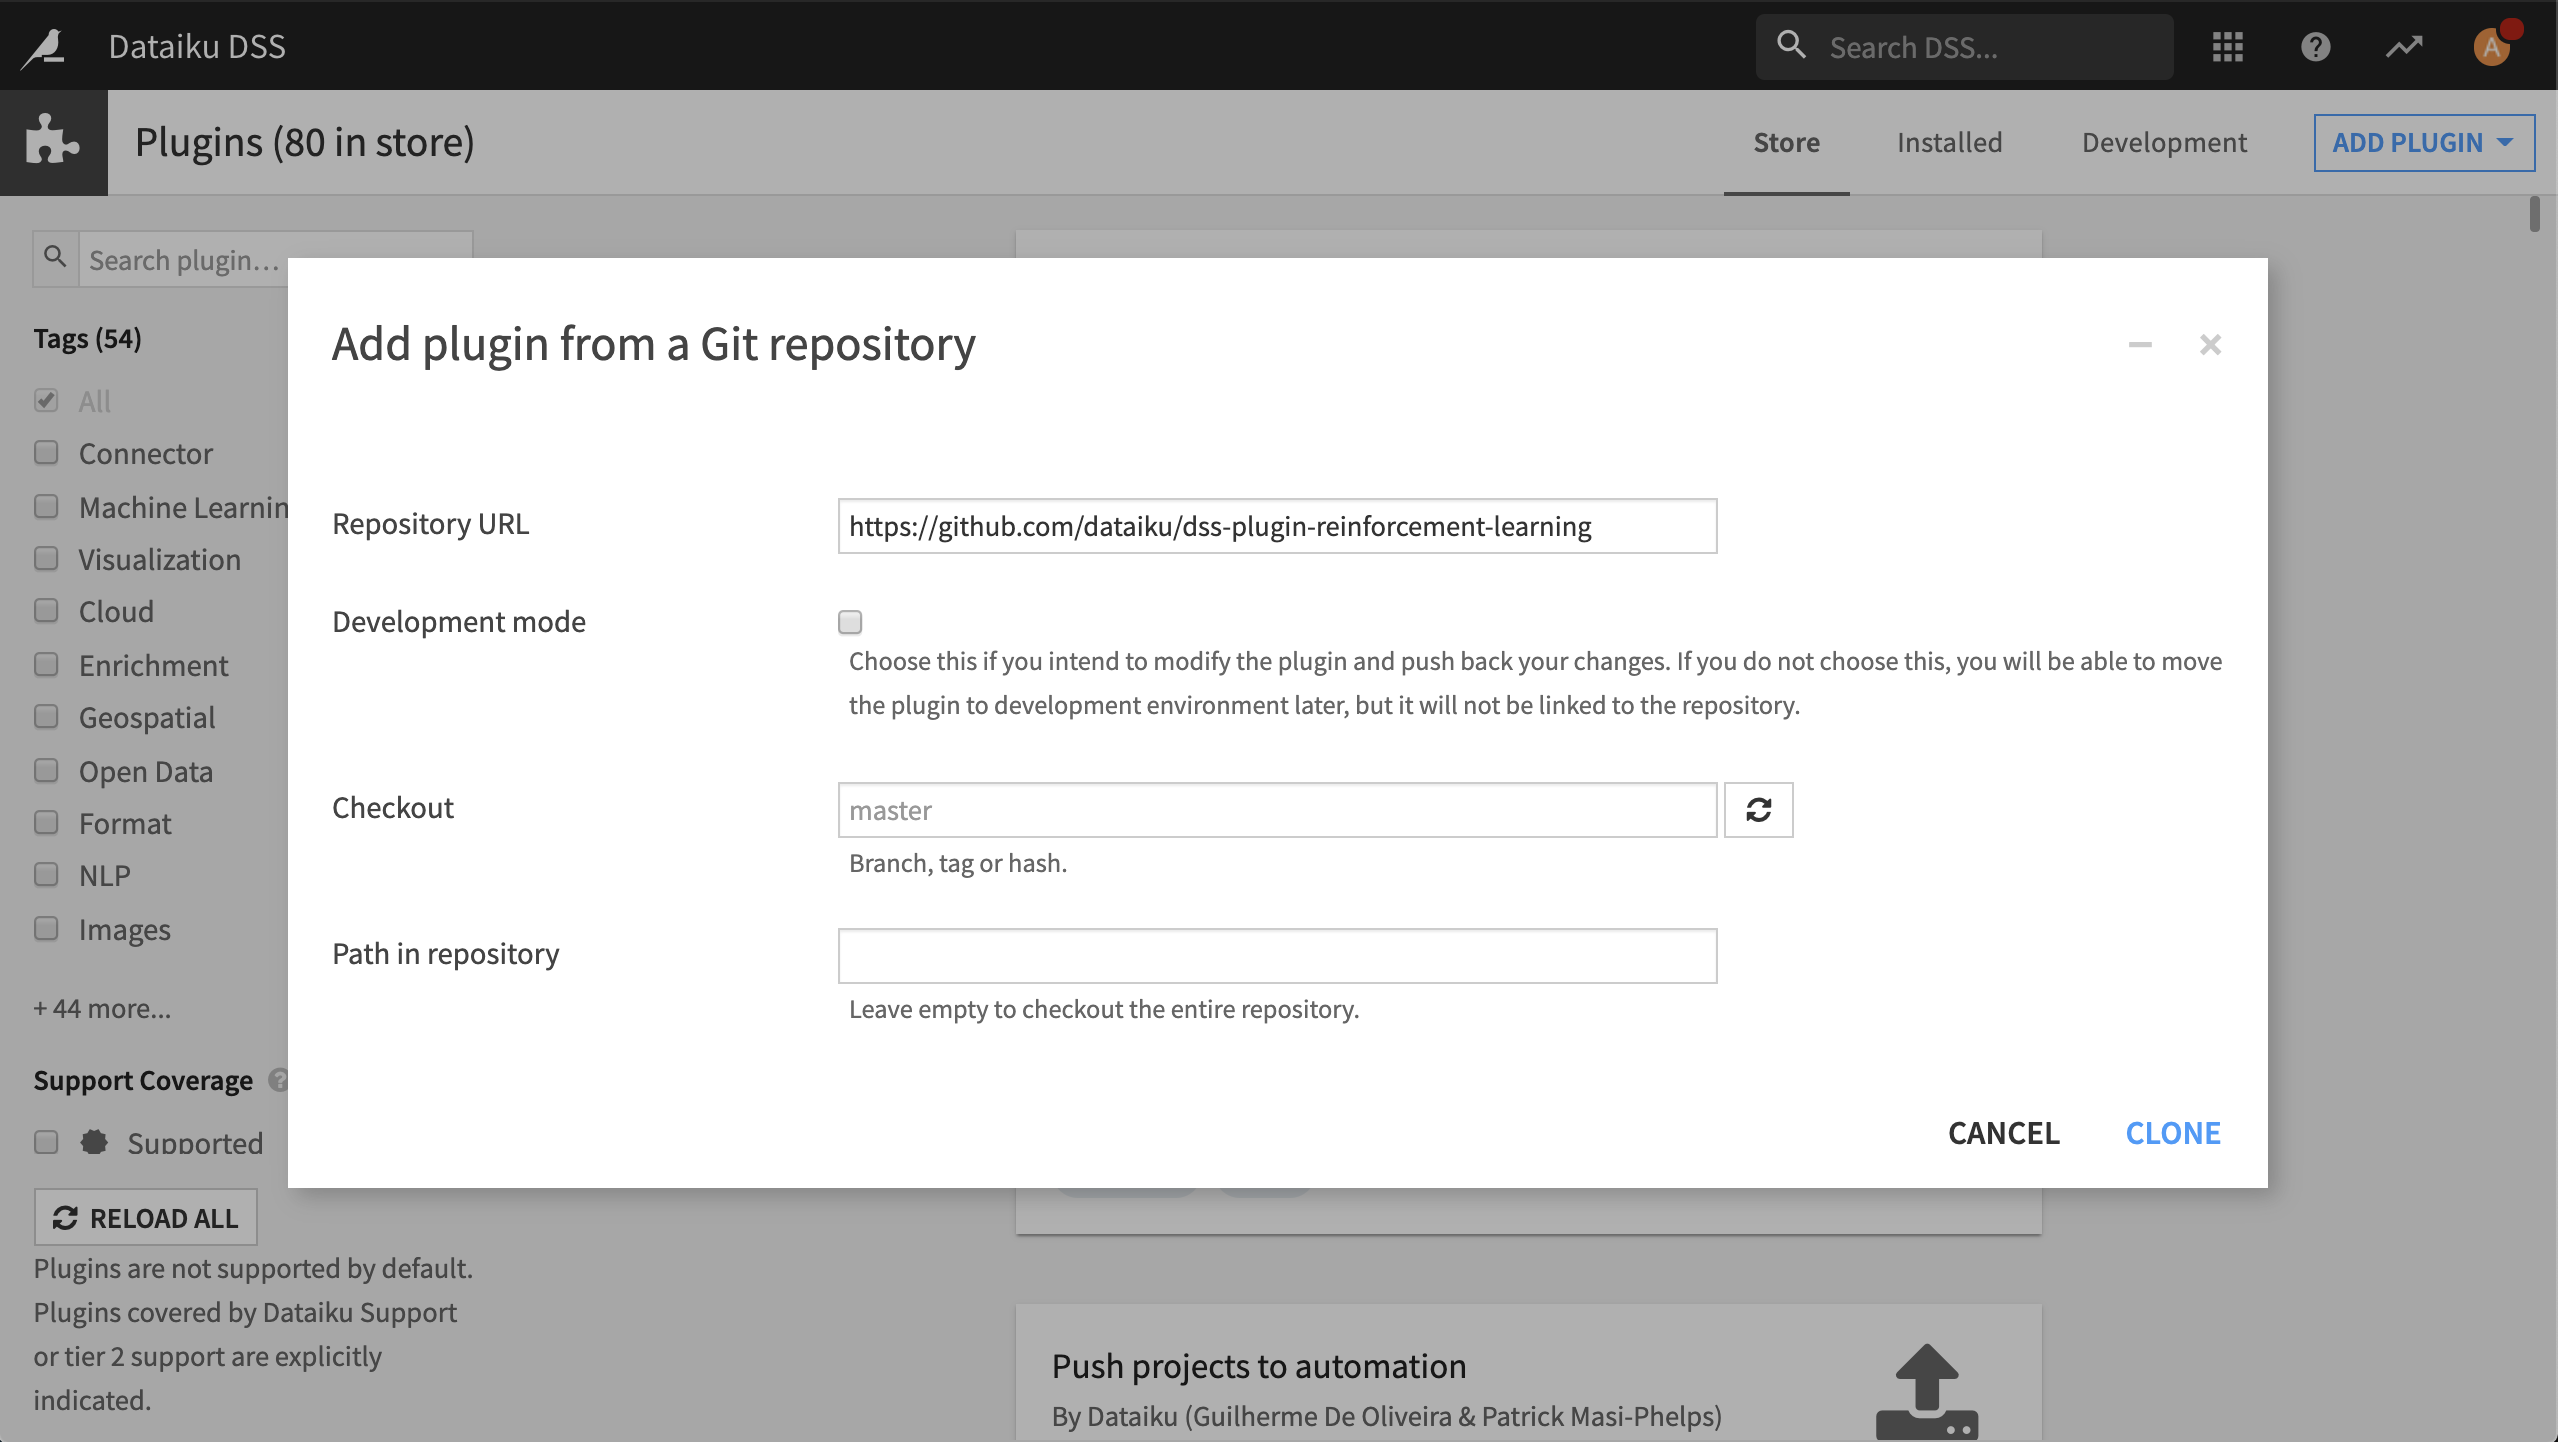
Install the Reinforcement Learning plugin from the git repository at: https://github.com/dataiku/dss-plugin-reinforcement-learning. Be sure to build the plugin’s code environment as part of installation.
Q-Learning in theory
This article gives an overview of Q-Learning. For more details about the theory behind RL, see chapter 6 of Reinforcement Learning (Sutton & Barto).
To understand what is Q-Learning and how it works, let’s start with an example.
The Knight and the Princess
Let’s say that you’re a knight, and you need to save the princess trapped in the castle shown on the following map.
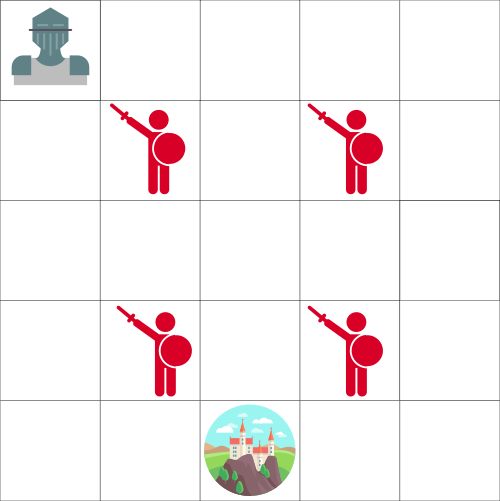
You can move one tile at a time, while the enemy can’t. However, if you land on the same tile as the enemy, you will die.
Your goal is to save the princess in the castle by the fastest possible route. This can be evaluated using a “points scoring” system.
You lose -1 at each step (losing points at each step pushes our agent to be faster).
If you touch an enemy, then you lose -100 points, and the episode ends.
If you are in the castle, then you get +100 points, and you win.
The question is this: how do you create an agent that will be able to win?
One approach could be that our agent tries to go to each tile (explore the environment), and then colors each tile — Green for “safe,” and red, otherwise.
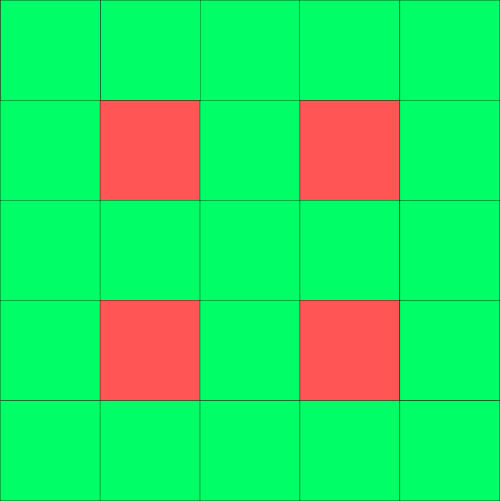
The same map, but colored in to show which tiles are safe to visit
We can then tell our agent to take only green tiles.
However, this approach is not very helpful. We don’t know the best tile to take when green tiles are adjacent to each other. Therefore, our agent can fall into an infinite loop by trying to find the castle!
Introducing the Q-Table
Since the first approach isn’t very helpful, let’s consider a second approach. Consider that we assign some values to each tile. The values will be the maximum, expected future reward for each action at each state. That is, each value represents the total reward that I’ll get if I start at a given state and take a particular action at that state.
Using this second approach, we can determine the best action to take for each state by simply taking the highest value!
Each state (tile) allows four possible actions. These actions are: move left, right, up, or down.
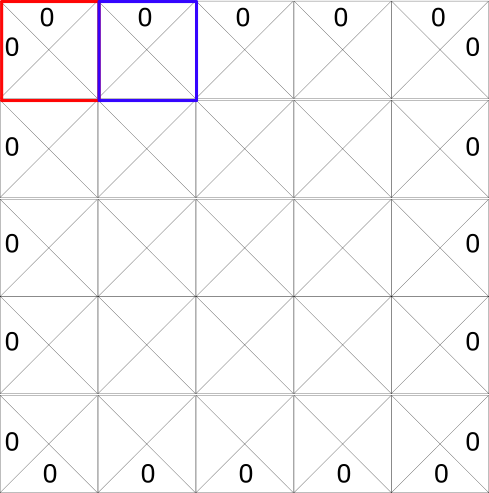
0 represents impossible moves. For example, if you’re in the top left-hand corner, then you can’t go left or up.
For the sake of computation, let’s transform this grid into a table. This table is known as a Q-table. “Q” comes from the “quality” of the action.
We create the Q-table by representing the columns as the four actions (left, right, up, down), and the rows will be the states, as shown in the following figure.
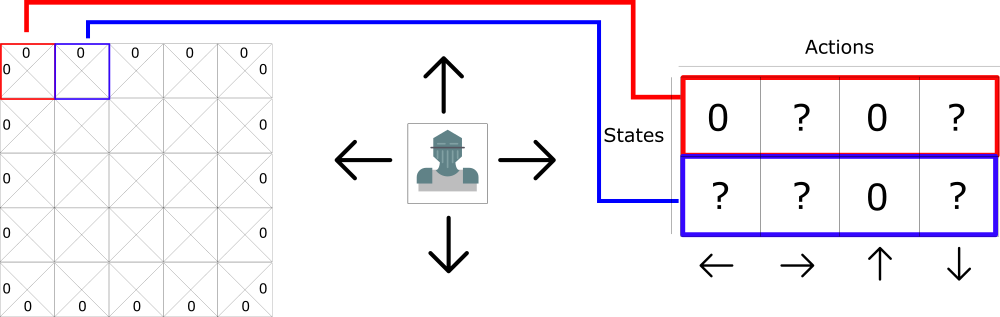
Each Q-table score will be the maximum, expected future reward that I’ll get if I take that action at that state.
Think of this Q-table as a game “cheat sheet.” Thanks to this “cheat sheet”, we can determine the best action to take for each state (each line in the Q-table) by finding the highest score in that line.
To learn each value of this Q-table, we’ll use the Q-learning algorithm on DSS. By exploring the environment, this algorithm will update, through time, the value of each state.
Q-Learning with DSS
Now that we have an understanding of what Q-Learning is, we will use the RL plugin to train our agent to play the Frozen Lake game on DSS.
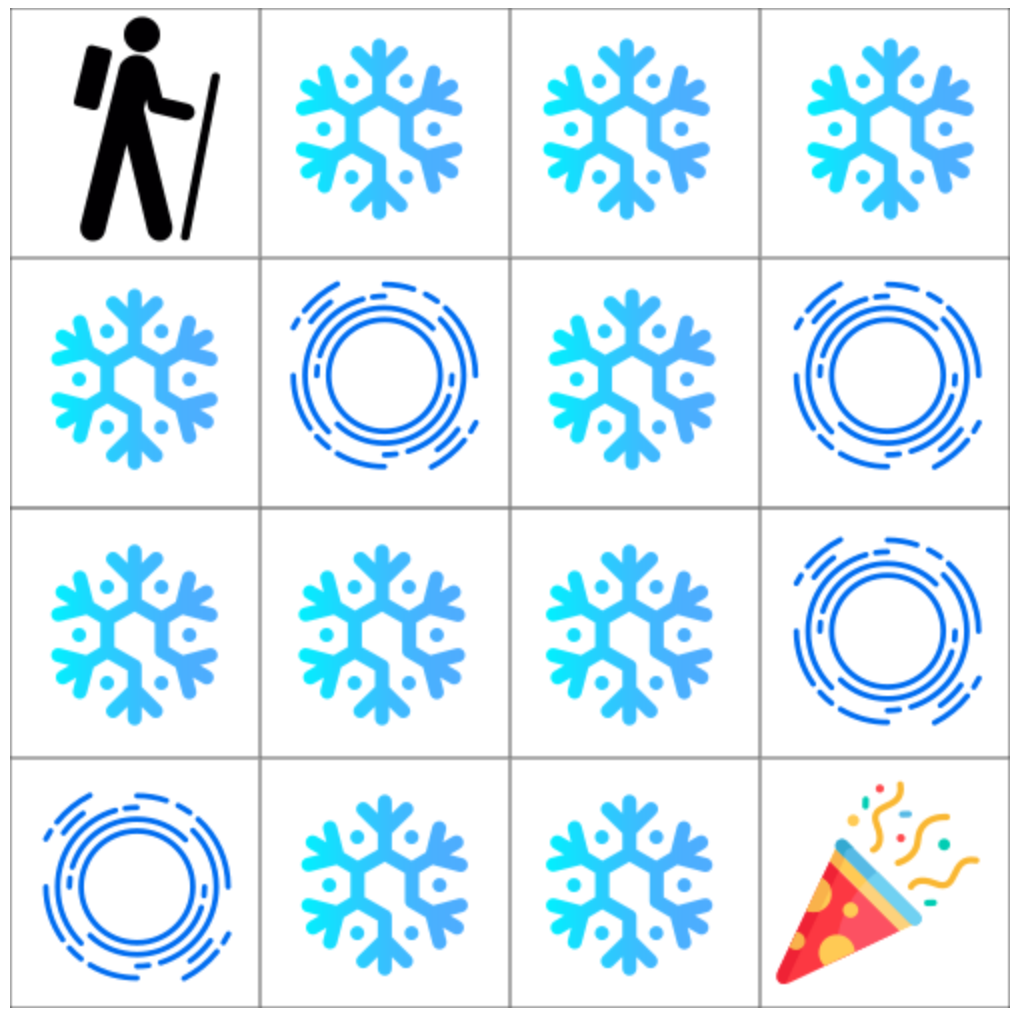
The goal of this game is to go from the starting state (S) to the goal state (G) by walking only on frozen tiles (F) and avoid holes (H). However, the ice is slippery, so you won’t always move in the direction you intend (to model a stochastic environment).
Create Your Project and Prepare Your Folders
Create a new project and name it something like: Q Learning with DSS.
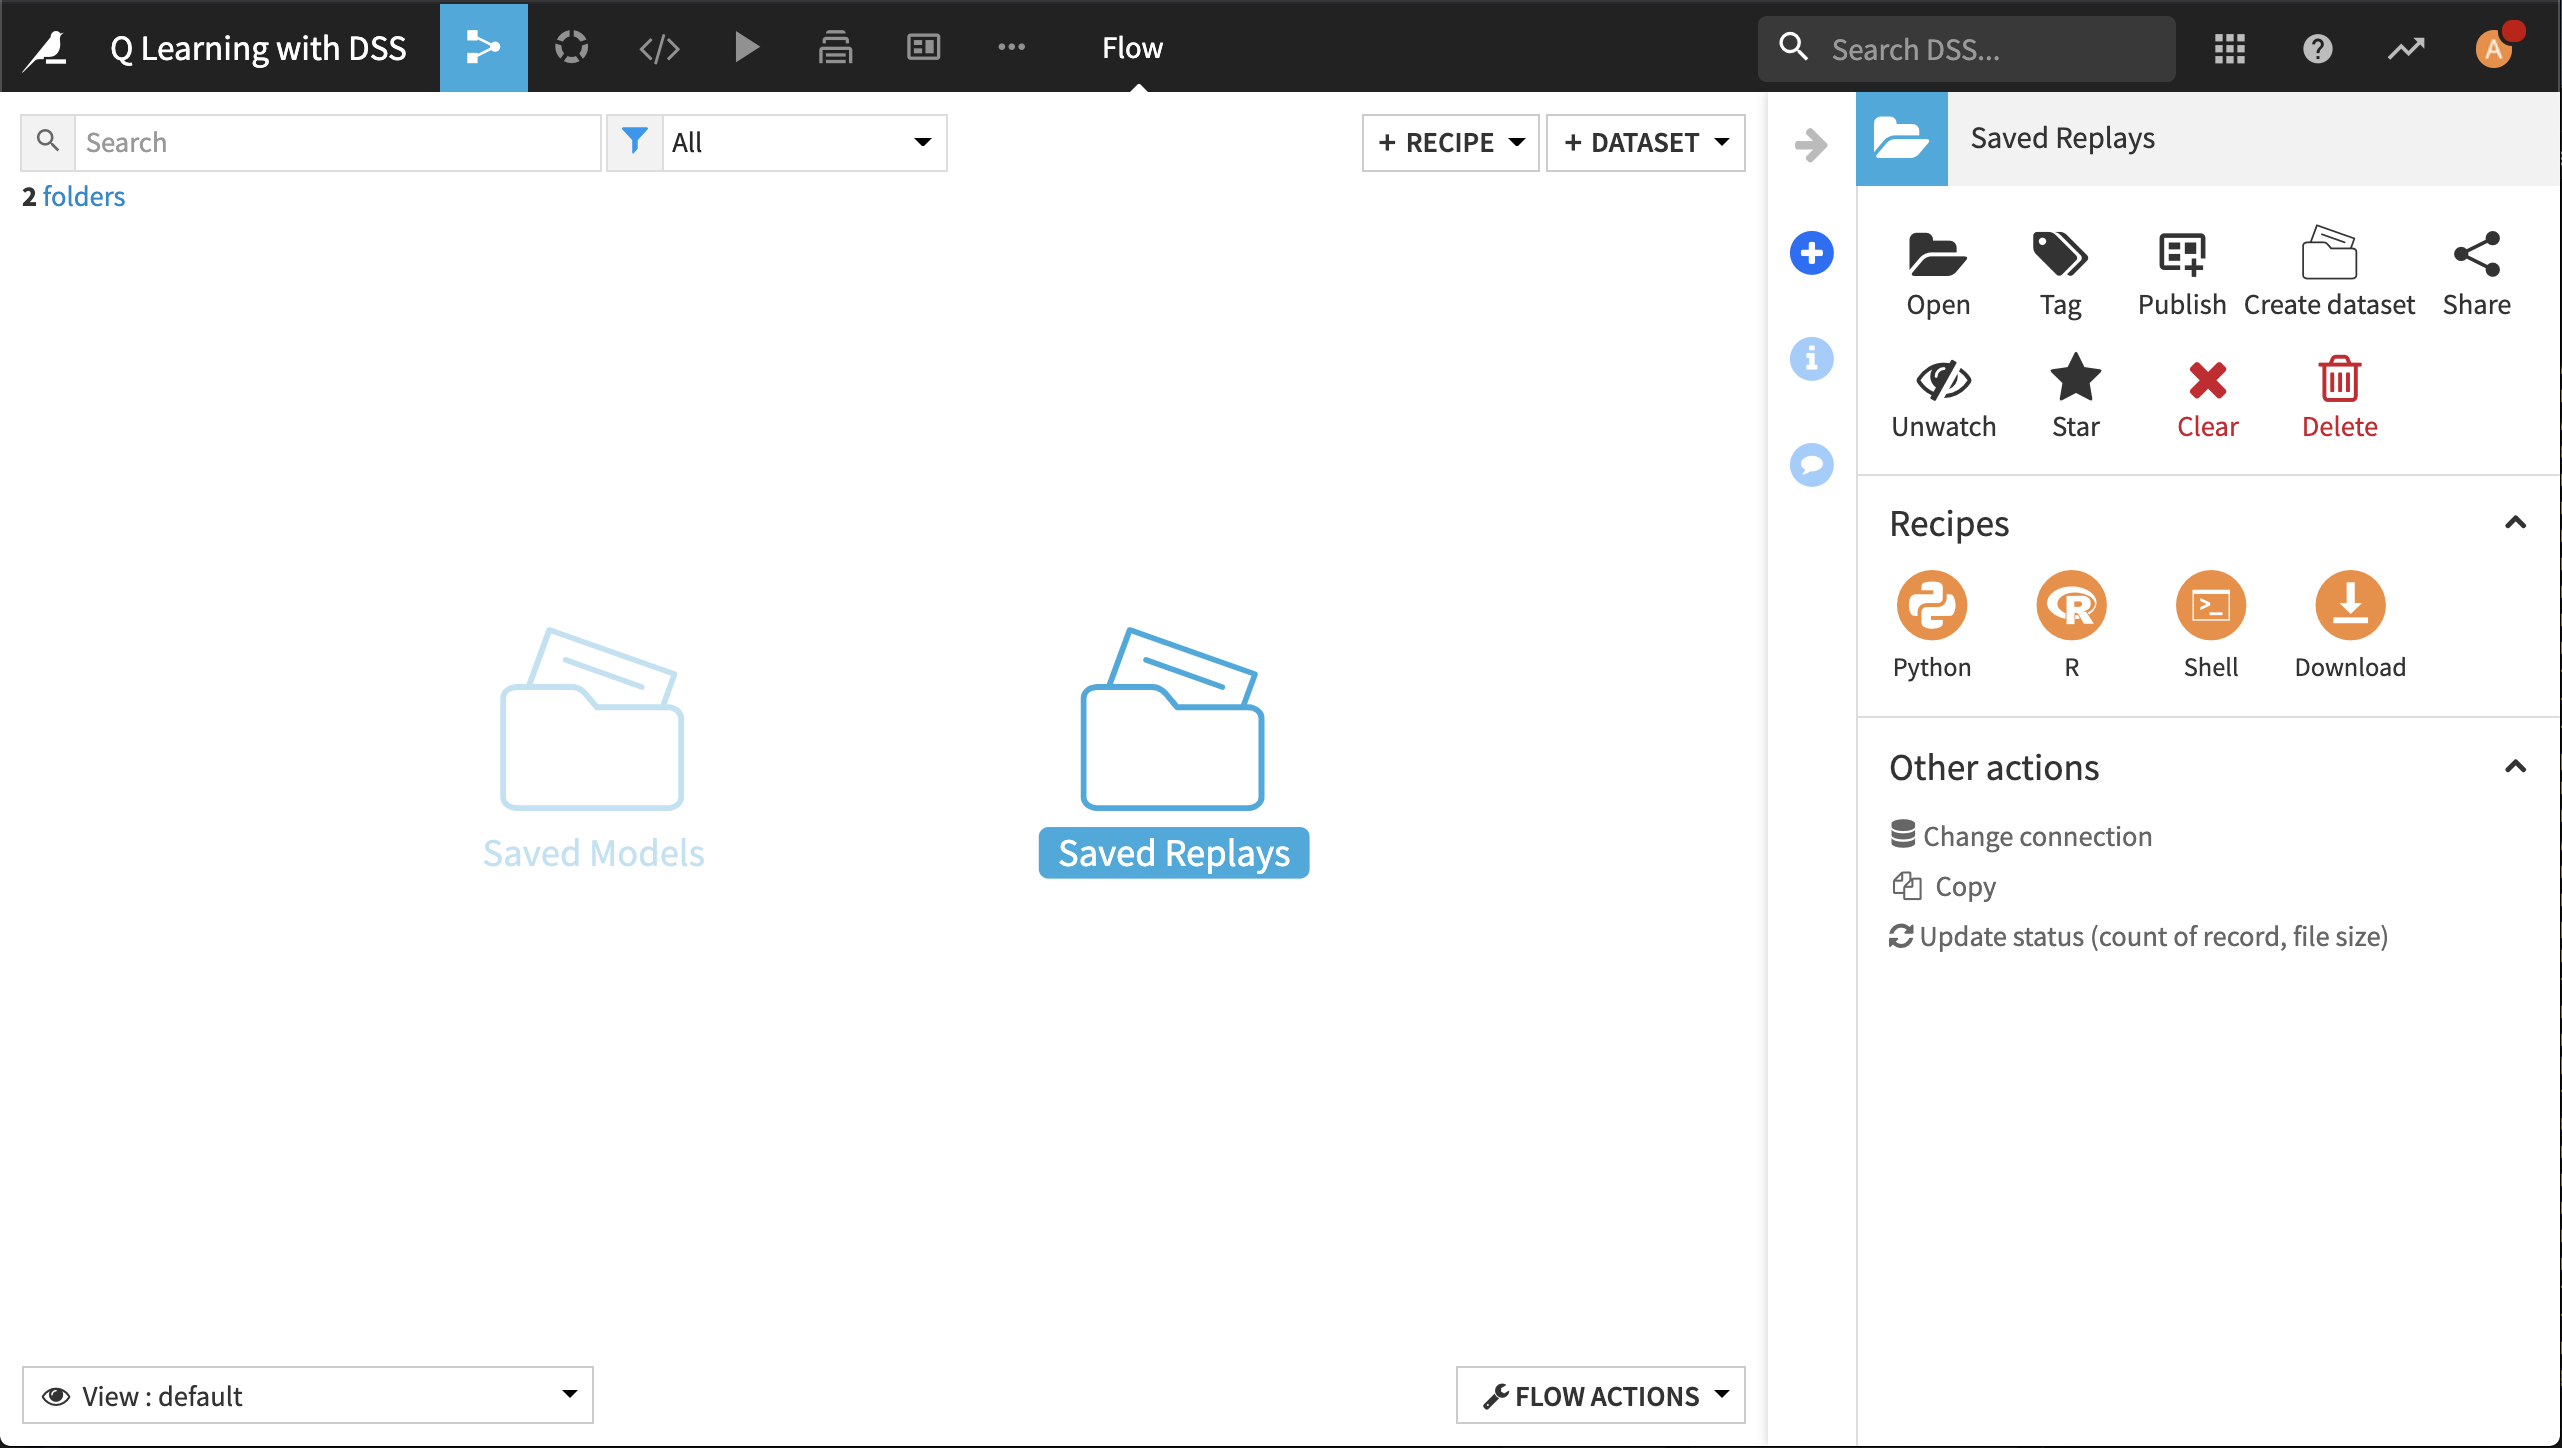
Create two folders in the Flow. From the +Dataset dropdown, select Folder. Name the folders:
Saved Models to contain the saved model and a JSON containing the training information.
Saved Replays to contain a JSON with the testing information.
Now you’re ready to use the RL plugin.
Define and Train Your Agent
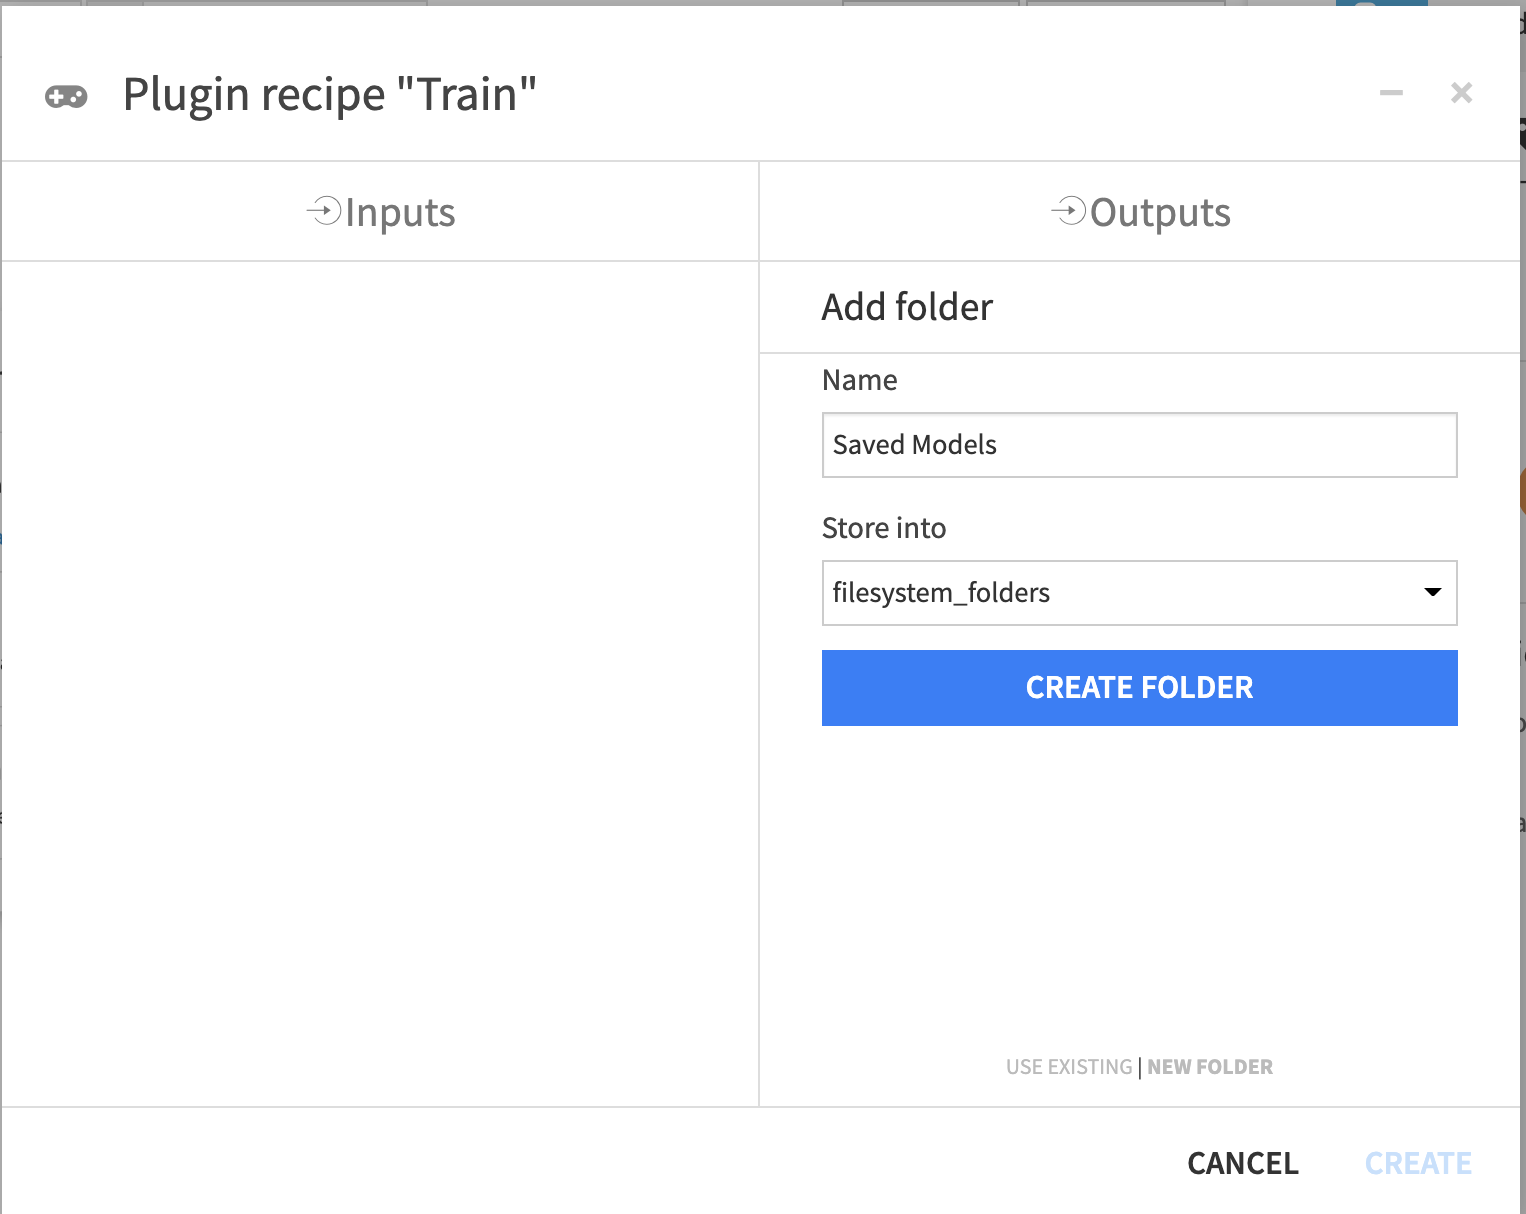
From the +Recipe dropdown, select Reinforcement Learning > Train.
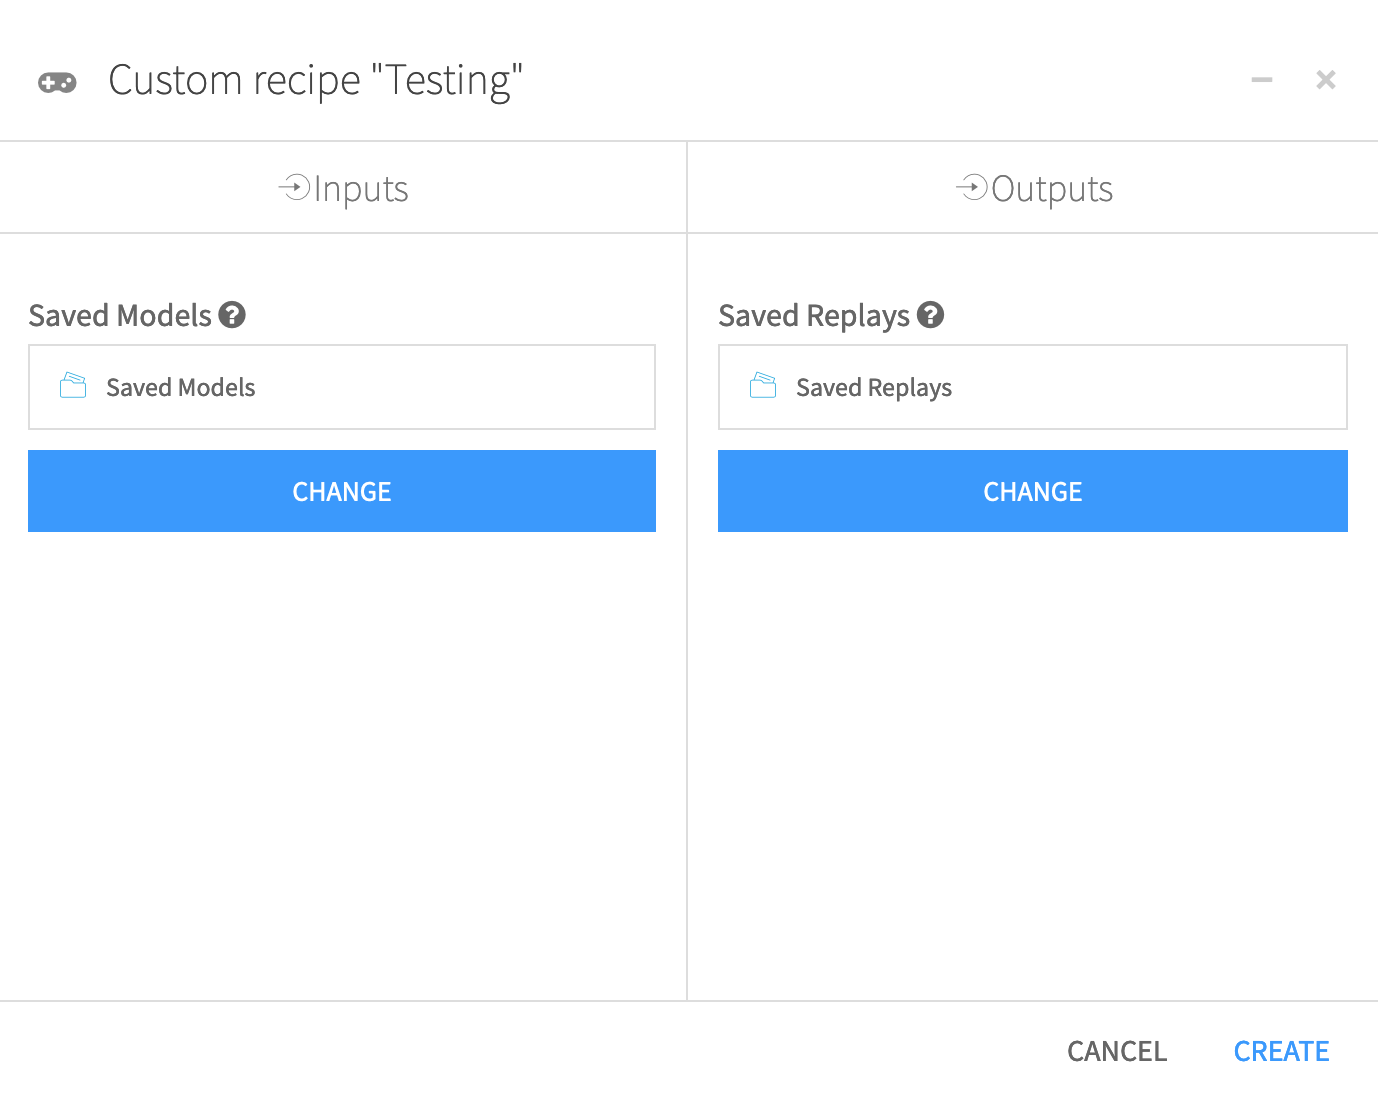
In the Recipe dialog box, select Saved Models as the “Saved Models” folder. Then click Create Recipe.
In the Training dialog, you have access to a lot of hyperparameters. Hyperparameters are variables that we need to set before applying a learning algorithm.
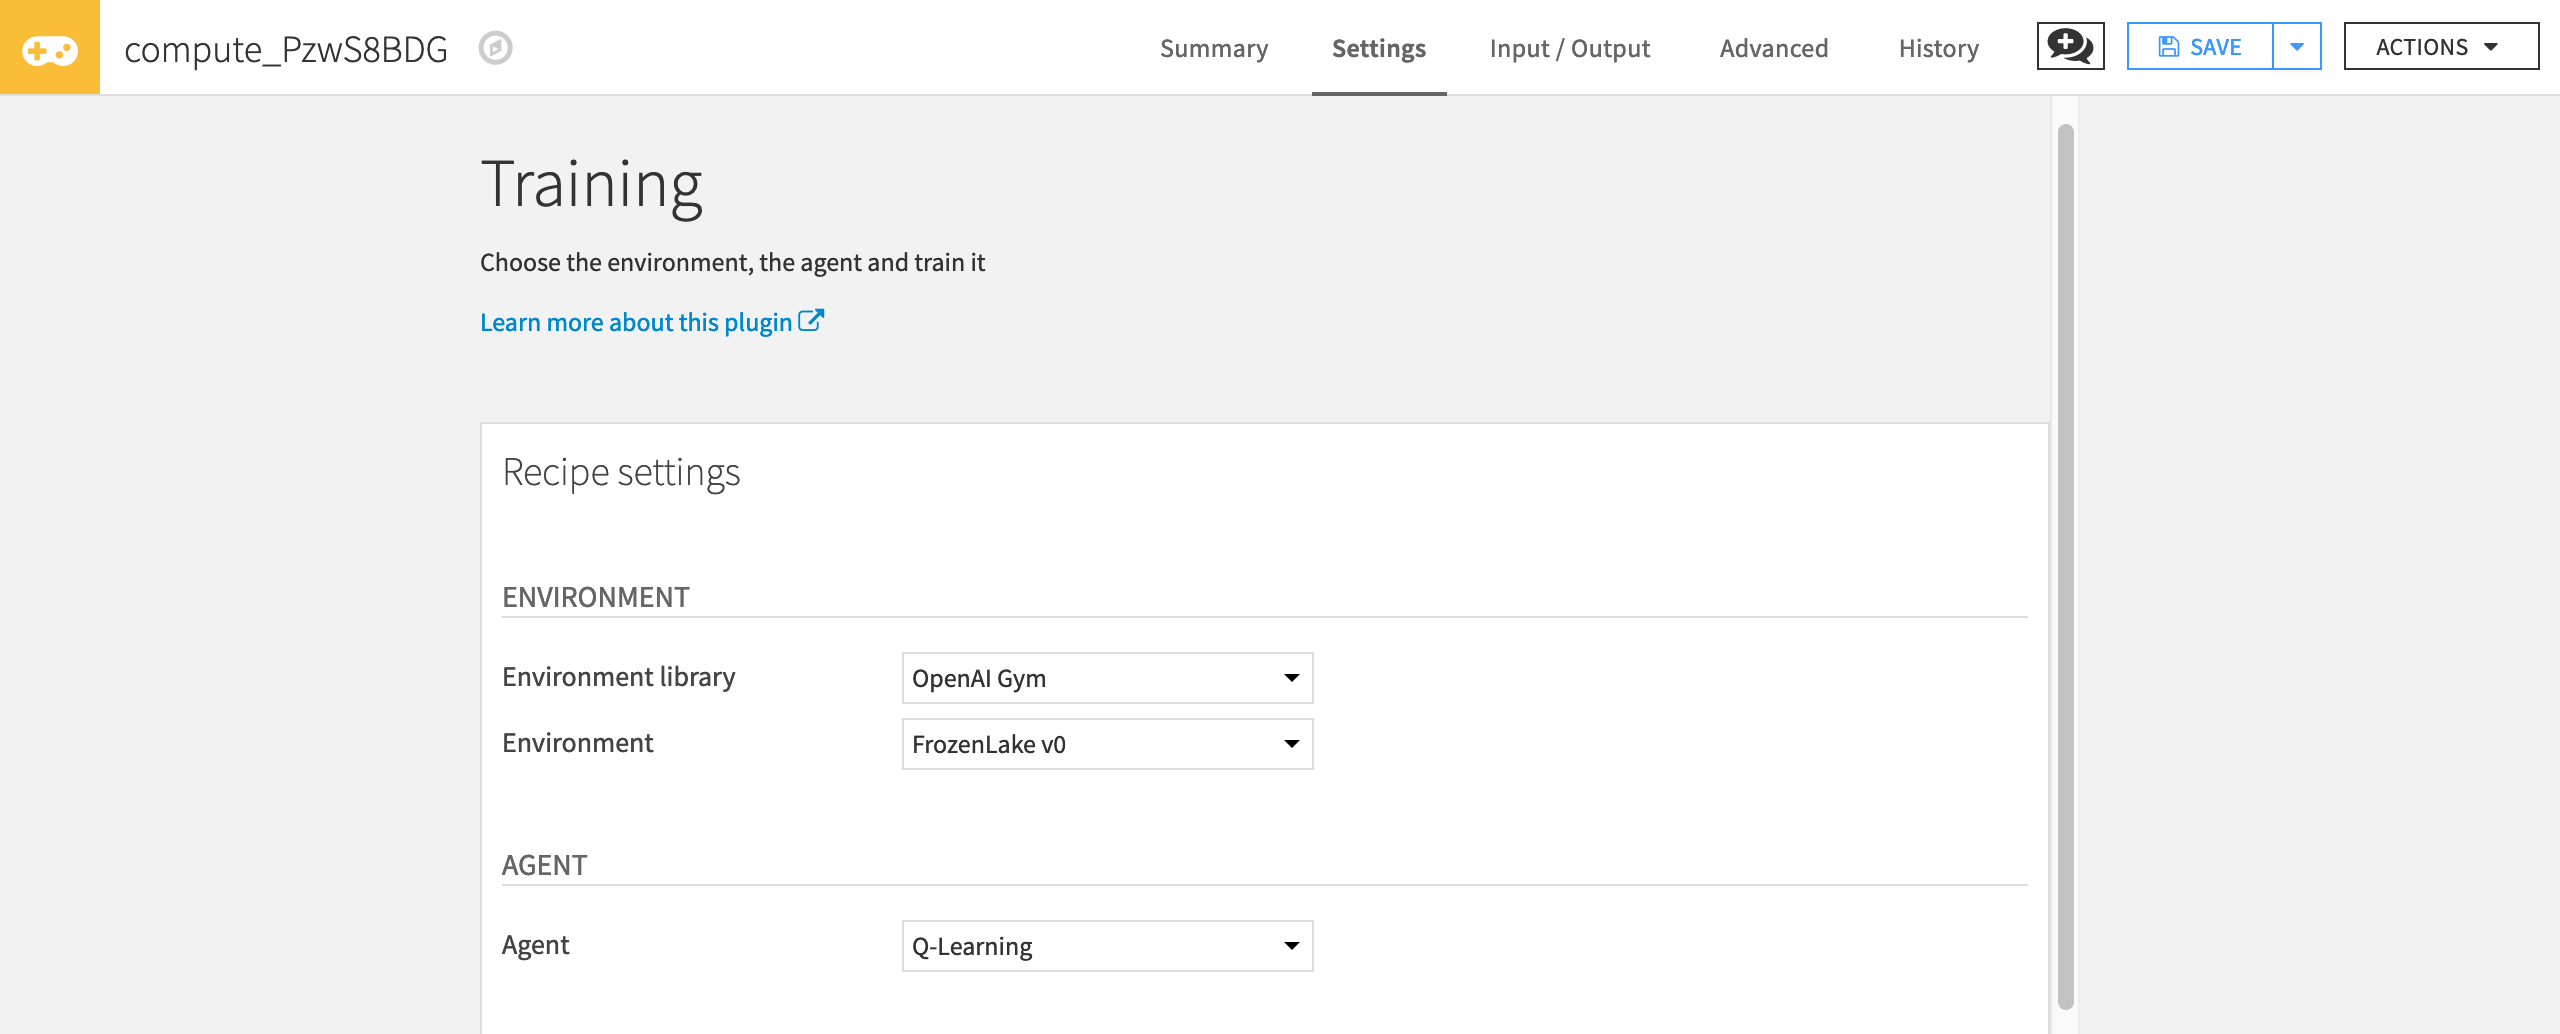
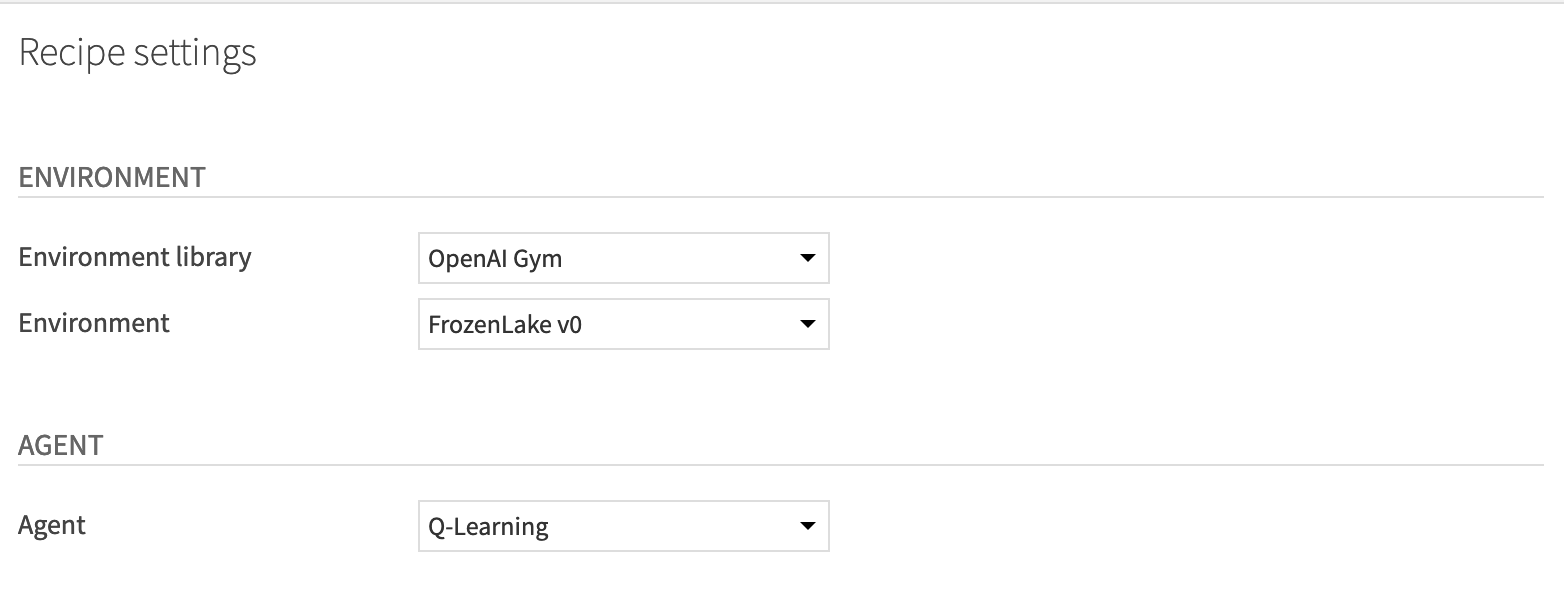
First, select the environment with which your agent will interact.
For “Environment library”, select OpenAI gym.
For “Environment”, select FrozenLake v0.
Then, select the agent you want to use (in our case Q-Learning Agent)
For “Agent”, select Q-Learning.
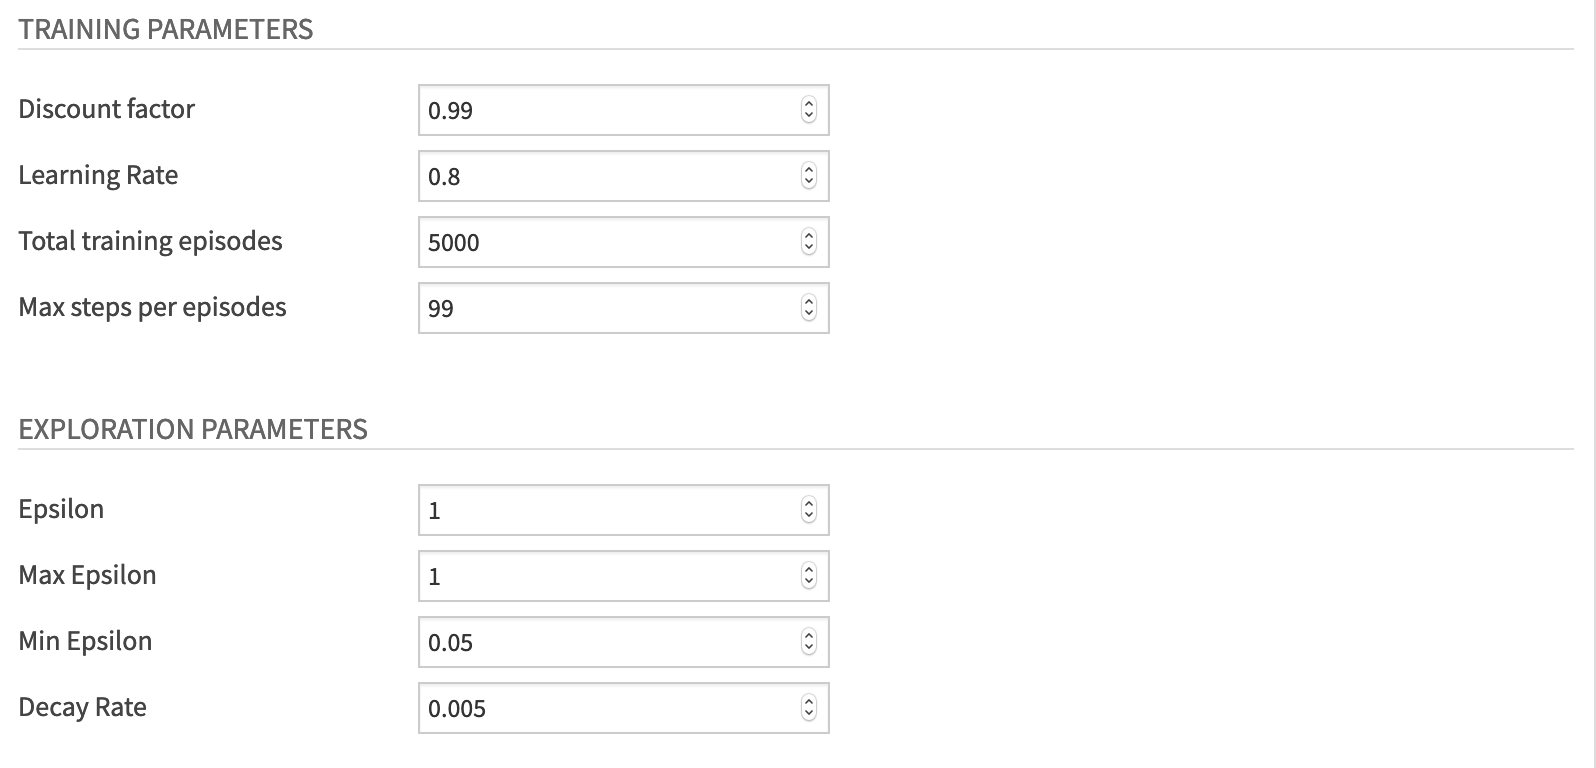
For the training parameters, set the value of the:
“Discount factor” to 0.95. This hyperparameter allows our agent to focus more or less on long term rewards.
“Learning Rate” to 0.8.
“Total training episodes” to 5000.
“Max steps per episodes” to 99.
For the exploration parameters, define the exploration/exploitation tradeoff by setting these values:
“Epsilon” to 1. Epsilon is the exploration parameter.
“Max Epsilon” to 1
“Min Epsilon” to 0.05
“Decay Rate” to 0.005. This hyperparameter defines the rate by which Epsilon will reduce at each episode until Epsilon reaches its minimum value.
Finally, click Run to train the agent.
Test Your Agent
Now that you’ve trained your agent, let’s test its performance. To do this, begin by clicking the +Recipe dropdown menu and selecting Reinforcement Learning > Test.
In the recipe dialog, select Saved Models as the “Saved Models” folder, and Saved Replays as the “Saved Replays” folder. Then click Create.
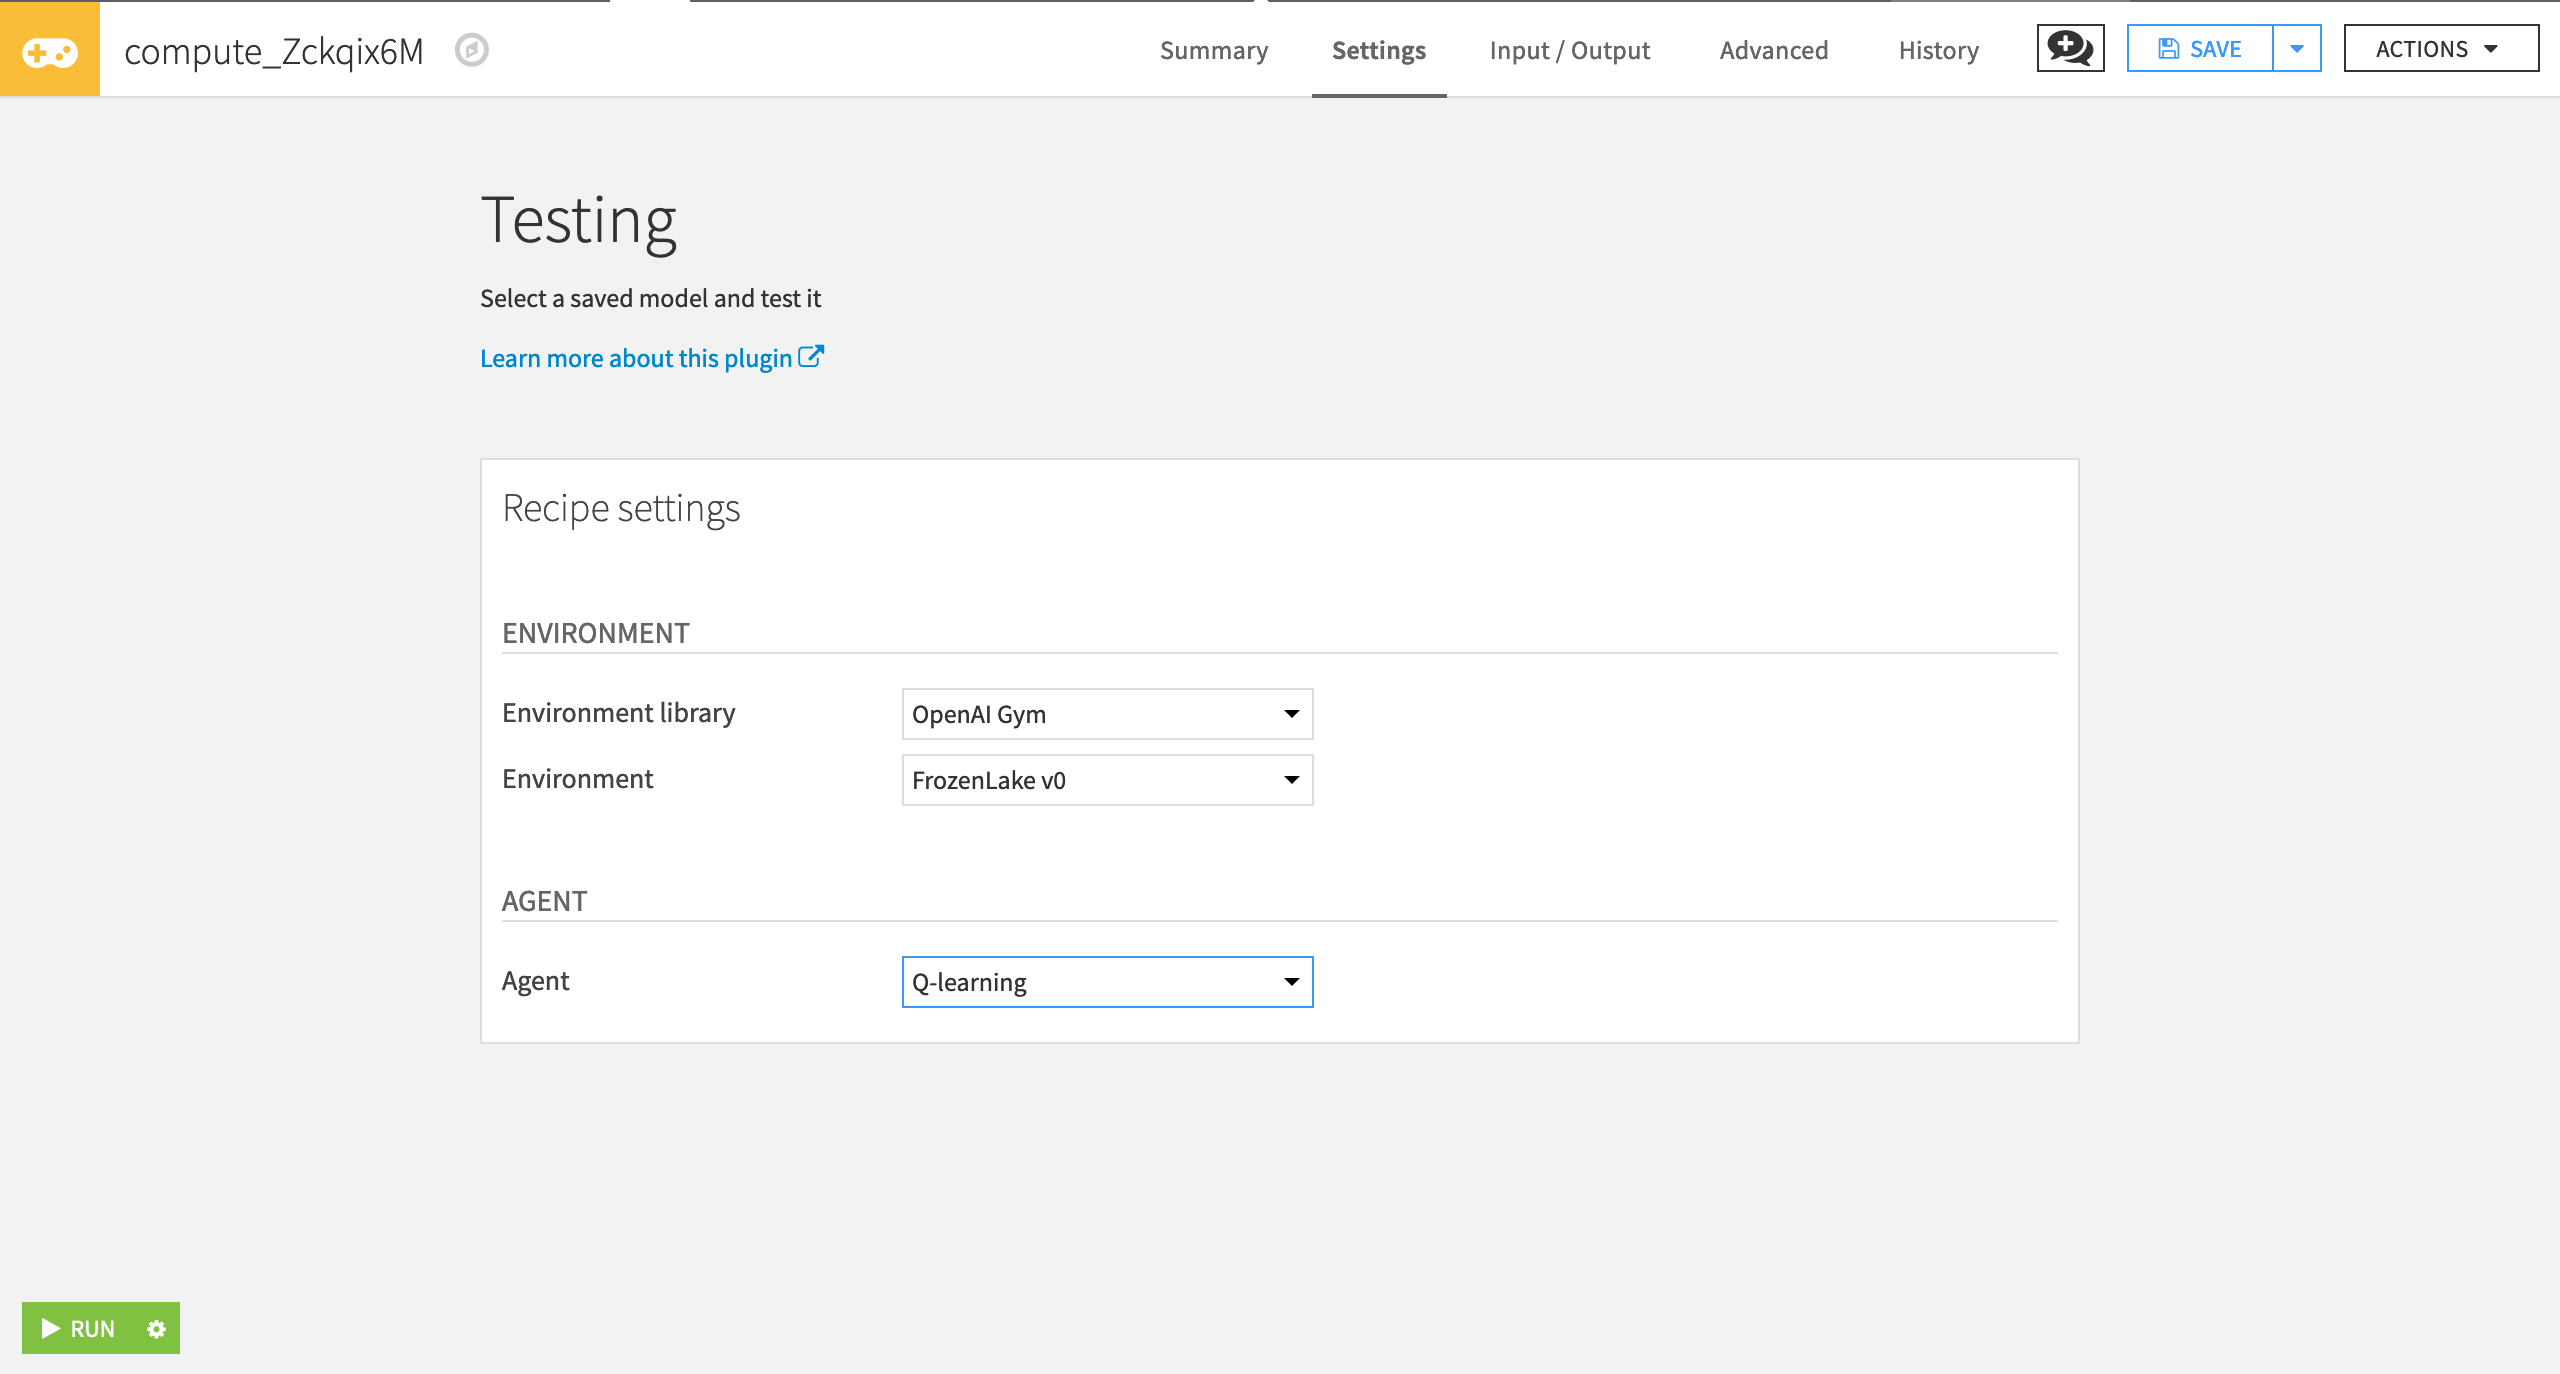
In the Testing window, specify the following values:
“Environment library” as OpenAI Gym.
“Environment” as FrozenLake v0.
“Agent” as Q-learning.
Click Run.
Display the Testing Results
Now you can use the RL web app to visualize the testing results. To do this:
Go to the Code menu > Webapps and then select +New Webapp > Visual Webapp > RL Agent Testing Results.
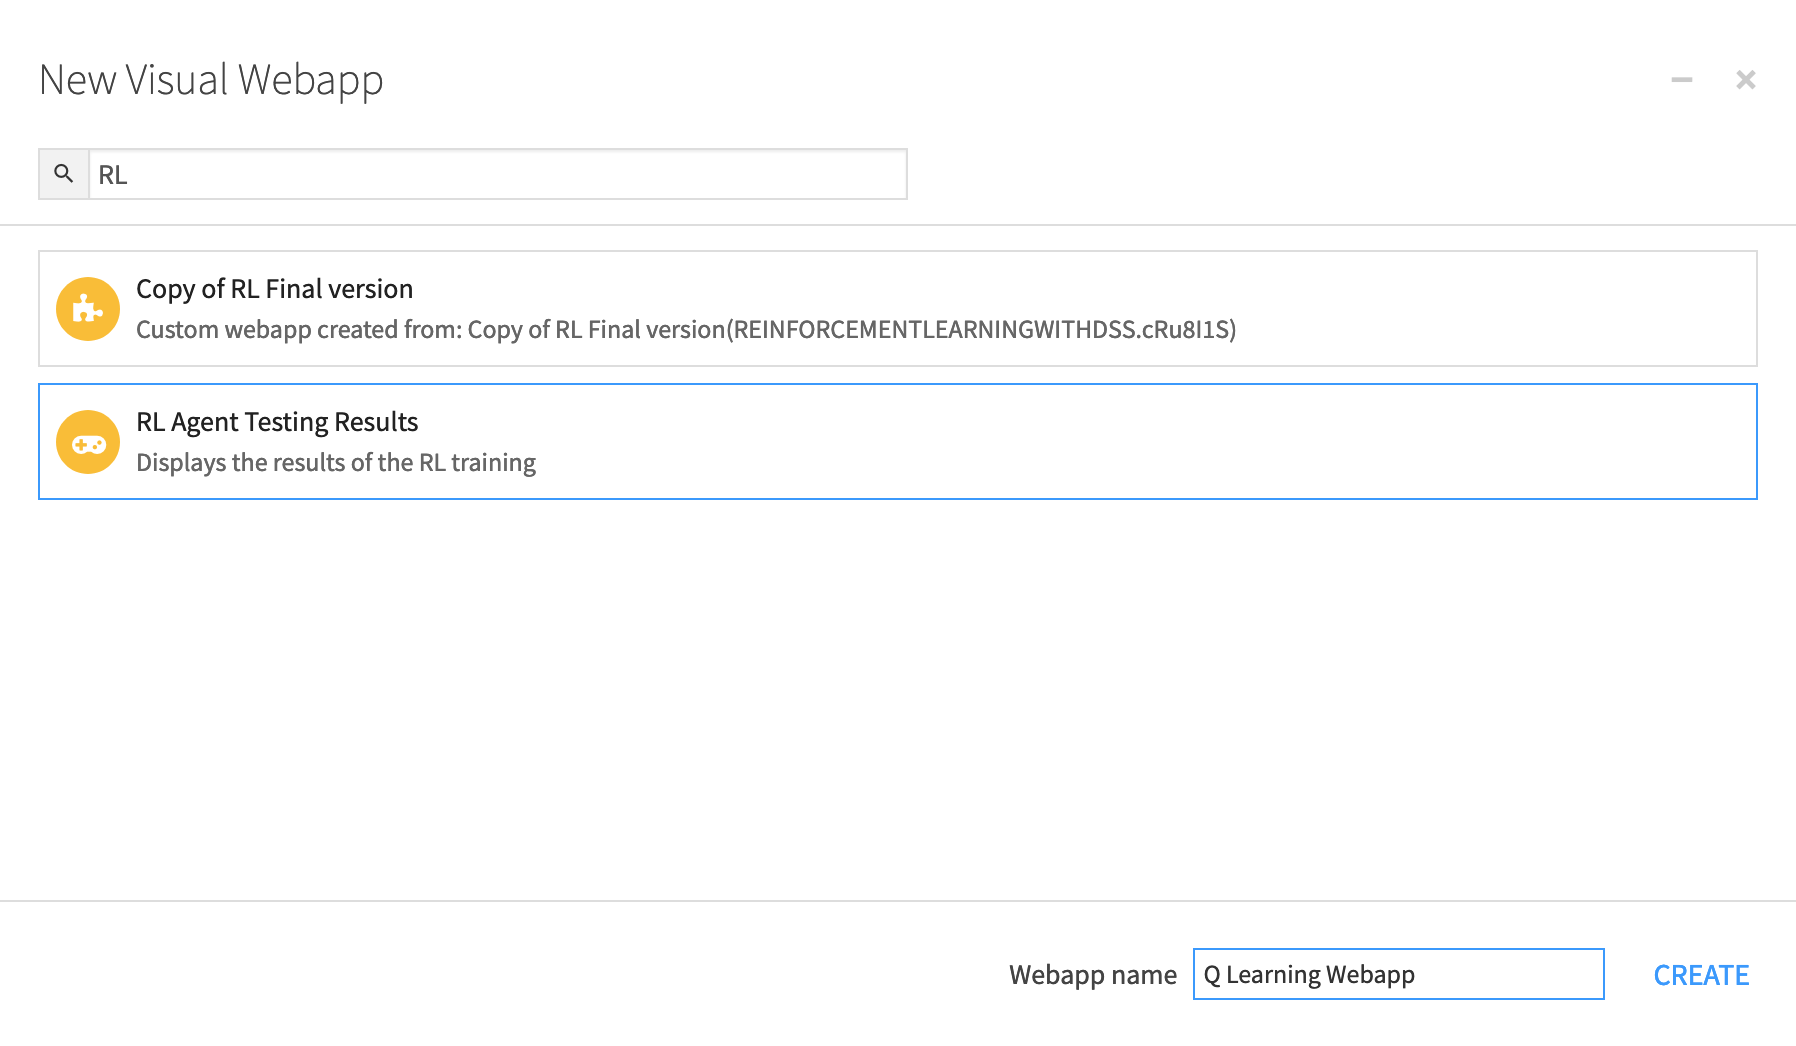
Name the web app and click Create.
Next, select the Replay Folder that contains your testing JSON file.
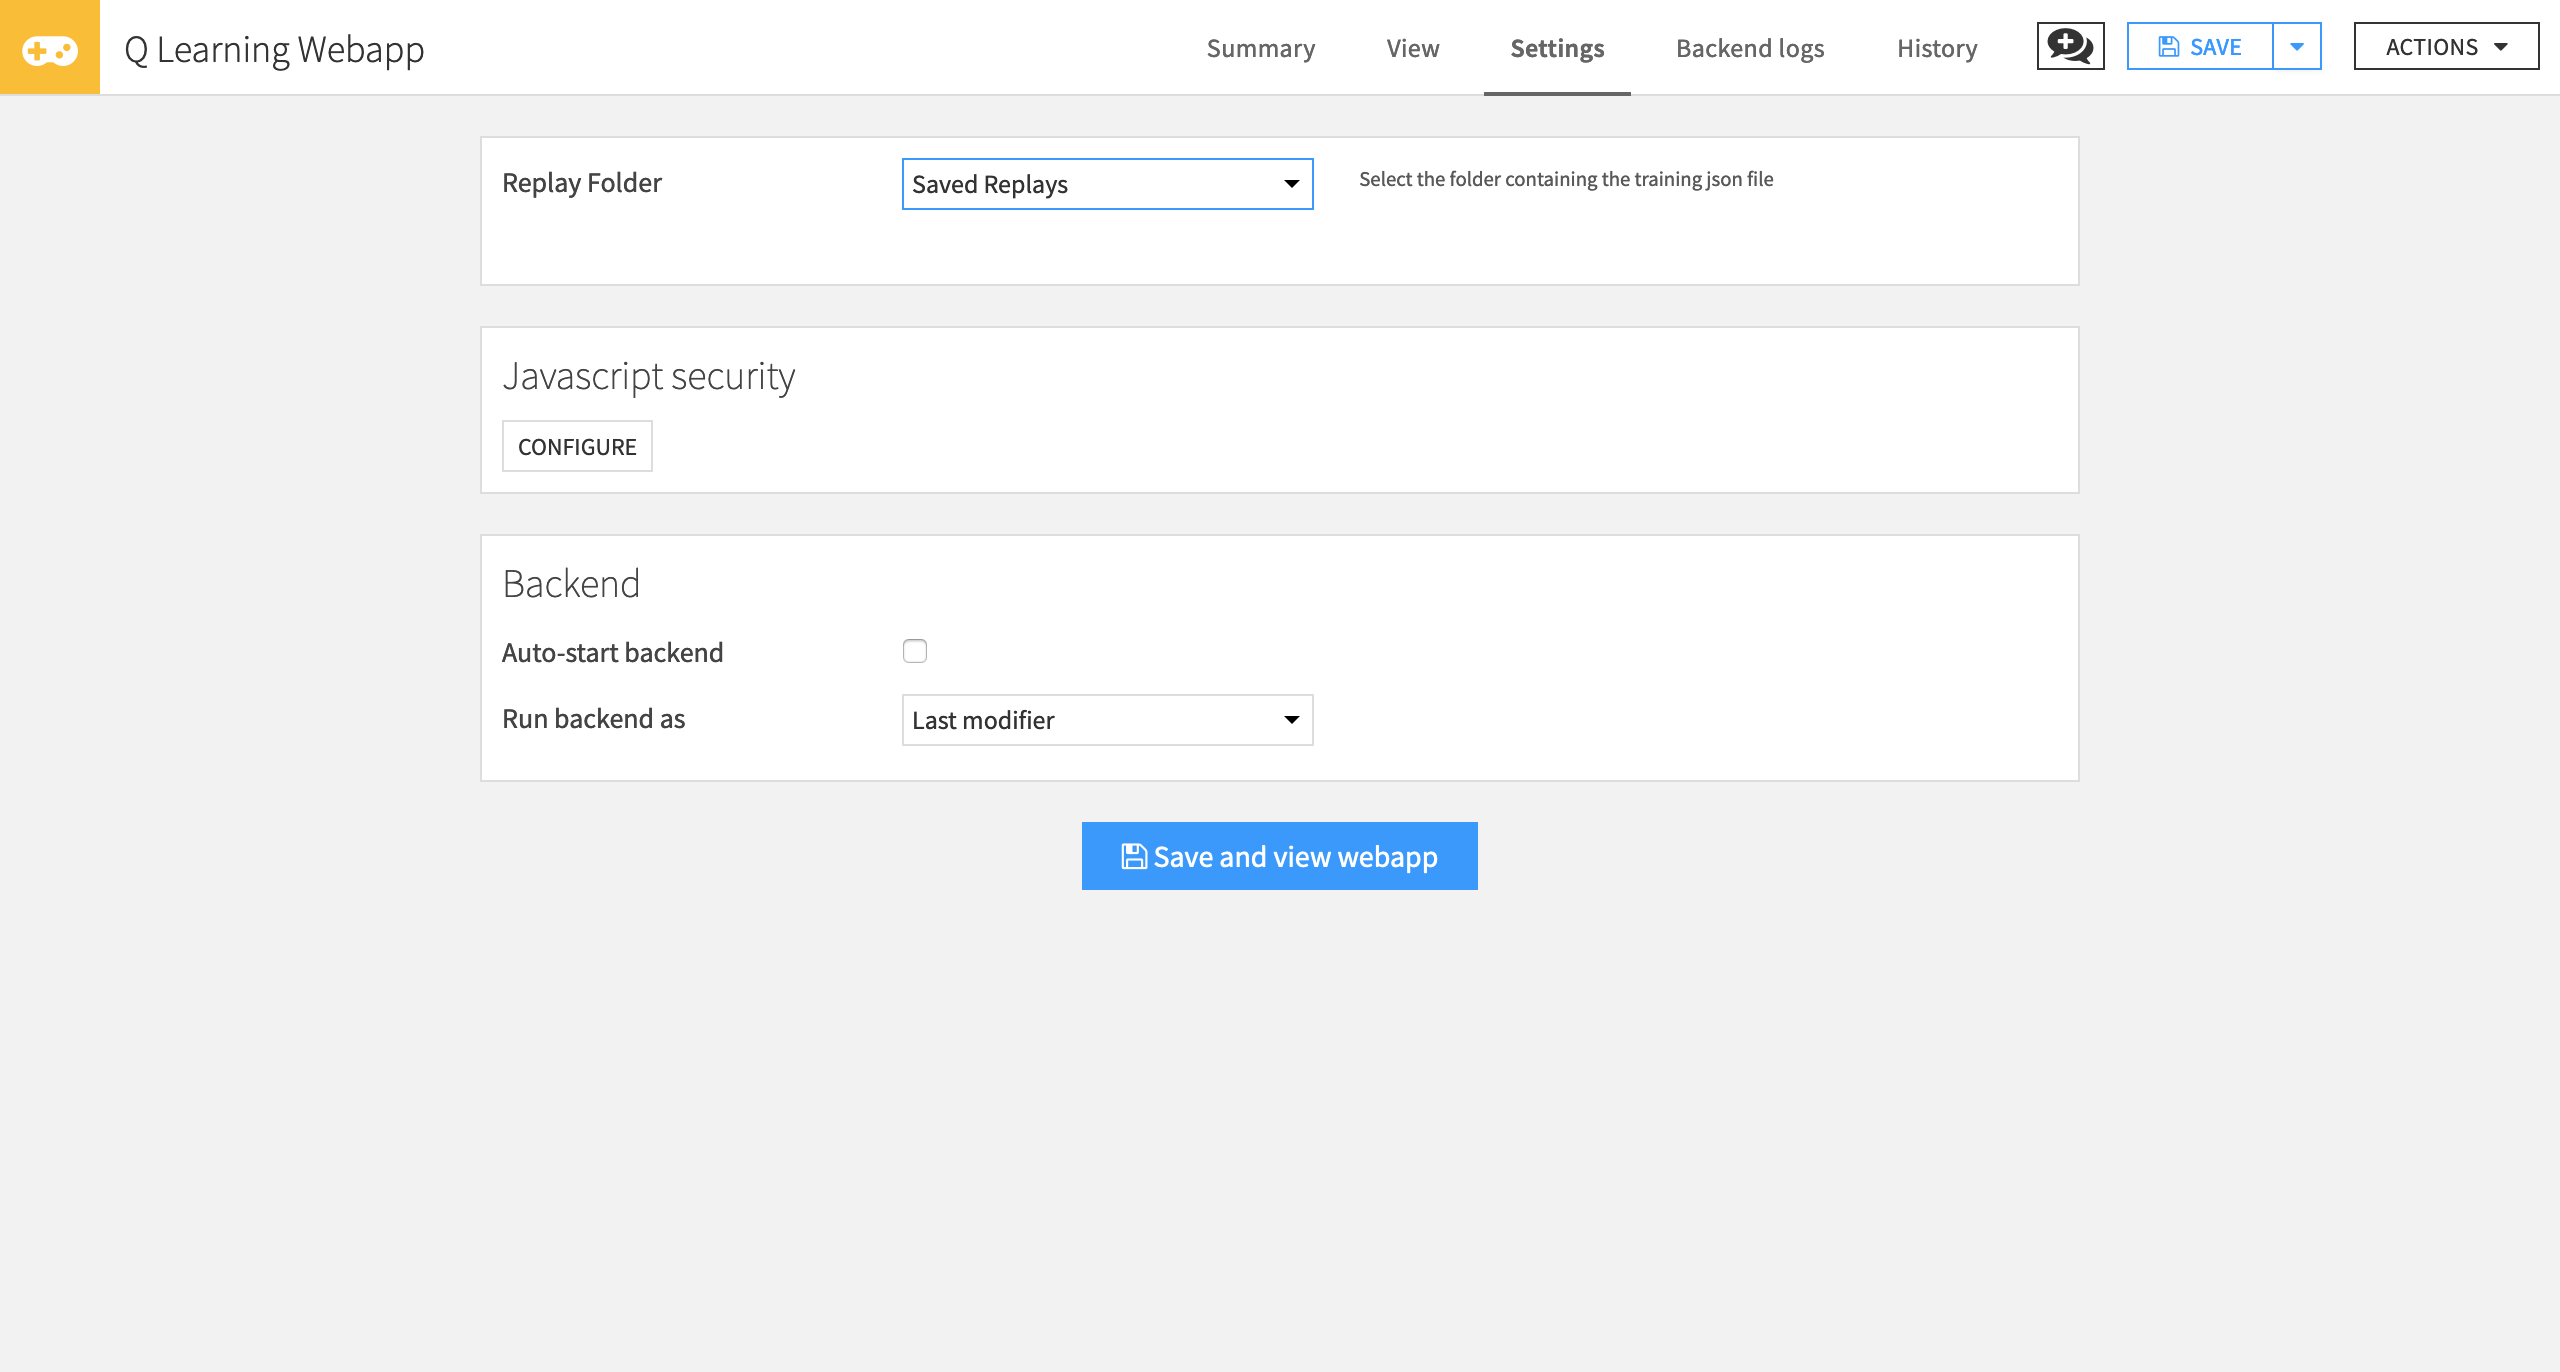
Click Save and view webapp.
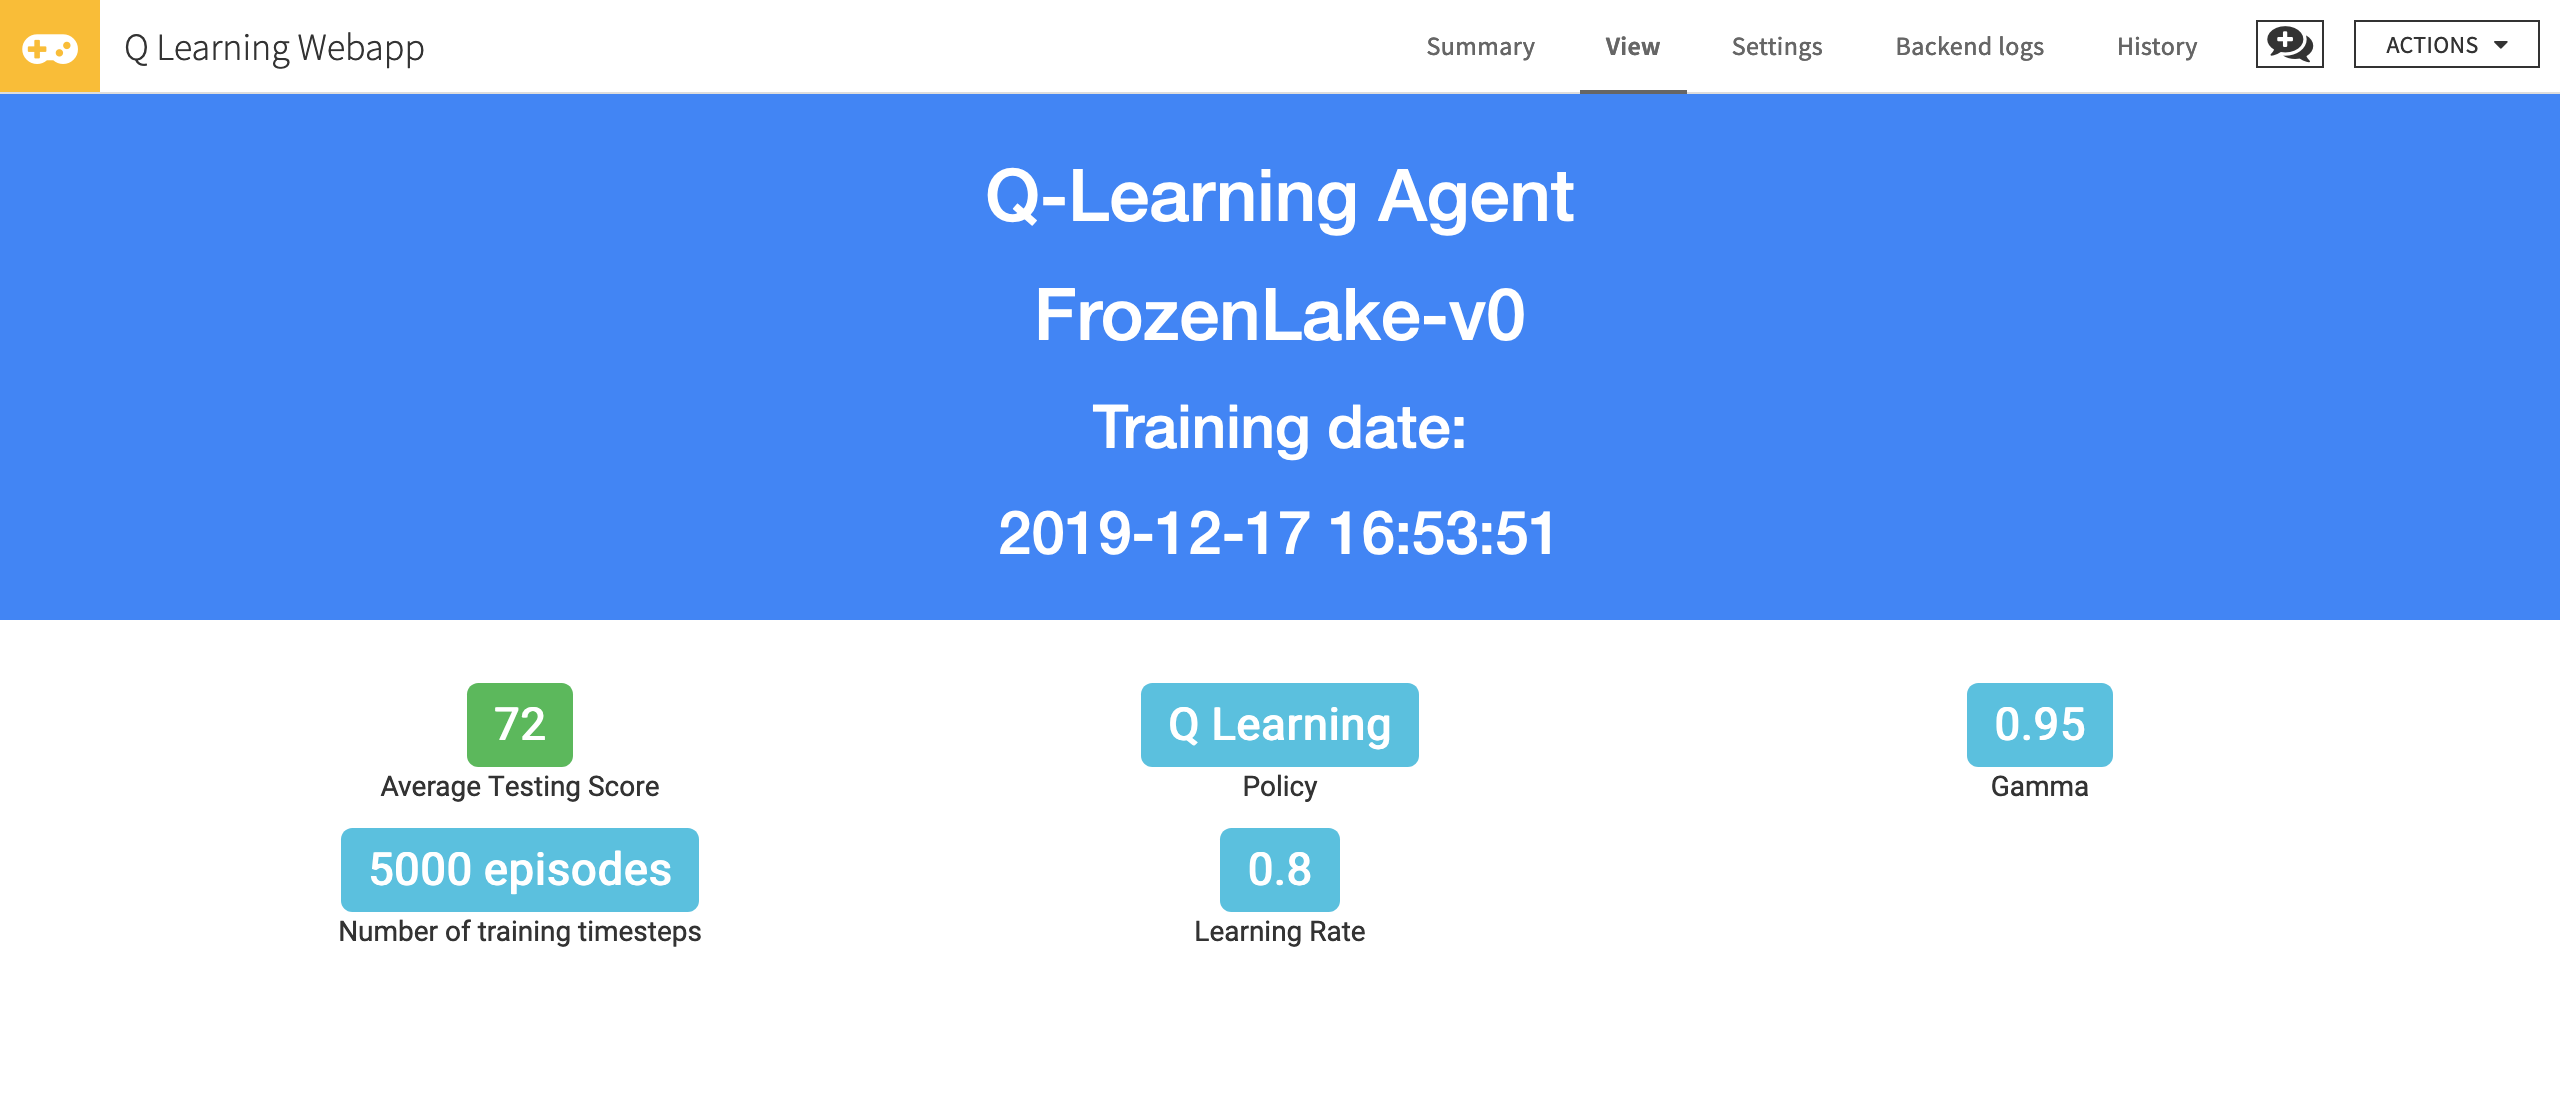
You can now see the average score (for our case, this is the percentage of successful testing episodes) and training hyperparameters.
Conclusion
Congratulations! You’ve just trained an agent that uses Q-Learning to learn how to play Frozen Lake. The average testing score must be between 60 and 80.
Now, try to change the hyperparameters to see if you can obtain better results.
Remember that the best way to learn is by doing, so try with other environments (for instance, use a more difficult one, such as Frozen Lake with 8x8 tiles, or Taxi-v3). Change the hyperparameters, and have fun!
Next time, we’ll work on Deep Q-learning, one of the most significant breakthroughs in Deep Reinforcement Learning in 2015. And we’ll train an agent that learns to play the game Cartpole.