Hands-On Tutorial: Deploy Real-Time API Service
Once you’ve designed an API service with the desired endpoints and tested that the endpoints return the expected responses to incoming queries, the next thing to do is deploy the API service to production. You do this by deploying the API service to an API node that exposes a REST API. You can then query the API to get results.
The Concept: API Deployer lesson introduced you to the API Deployer, which is one component of the Dataiku Deployer. In this hands-on tutorial, you’ll practice using the API deployer to move an API service into production.
For this tutorial, you’ll continue working with the project from the Hands-On Tutorial: Create Endpoint and Test Queries so that you begin with an API service that contains two endpoints (a prediction model and a dataset lookup) and an enrichment that are ready for deployment.
Let’s Get Started!
In this tutorial, you will:
publish an API service on the Deployer and deploy the service to the deployment infrastructure;
test the endpoints; and
deploy the API service to the production infrastructure.
Use Case
In tutorials throughout the MLOps Practitioner learning path, you’ll work with a simple credit card fraud use case. Using data about transactions, merchants, and cardholders, we have a model that predicts which transactions should be authorized and which are potentially fraudulent.
A score of 1 for the target variable, authorized_flag, represents an authorized transaction. A score of 0, on the other hand, is a transaction that failed authorization.
Prerequisites
This tutorial assumes that you satisfy the technical prerequisites for the MLOps Practitioner learning path.
Publish the API Service on the API Deployer
Returning to the project from the “Hands-On Tutorial: Create Endpoint and Test Queries”, we now have an API service that is ready to be deployed. But first, we need to publish the API service on the Deployer.
Note
The remaining steps in this tutorial require that you’re connected to the API Deployer. We’ve used a remote (standalone) deployer for illustration. However, your Dataiku instance may be configured to use a local deployer, depending on the Deployer setup that your instance admin has configured.
From the API designer, click the Publish on Deployer button.
Keep the default version id name (v1), and click OK.
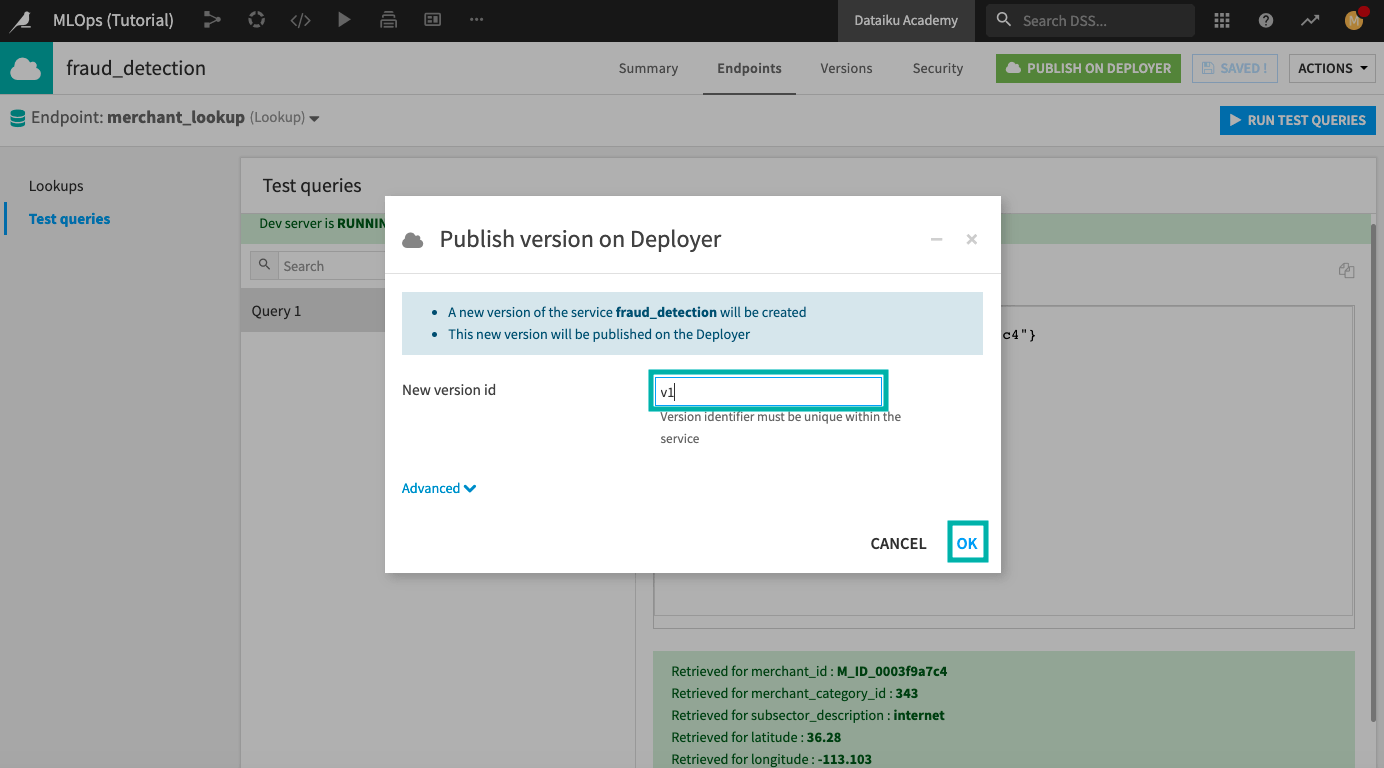
At the top of the page, you’ll notice a message that appears briefly to inform you that you’ve successfully published your API service on the API Deployer node. Next, we’ll go to the Dataiku Deployer.
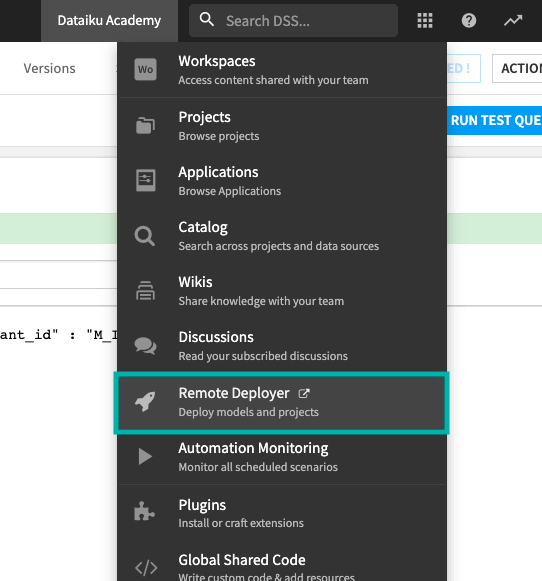
Click the Applications menu in the right-hand corner of the top navigation bar.
Click Remote Deployer.
The Dataiku deployer opens up and provides the option to select the Project deployer or the API Services deployer.
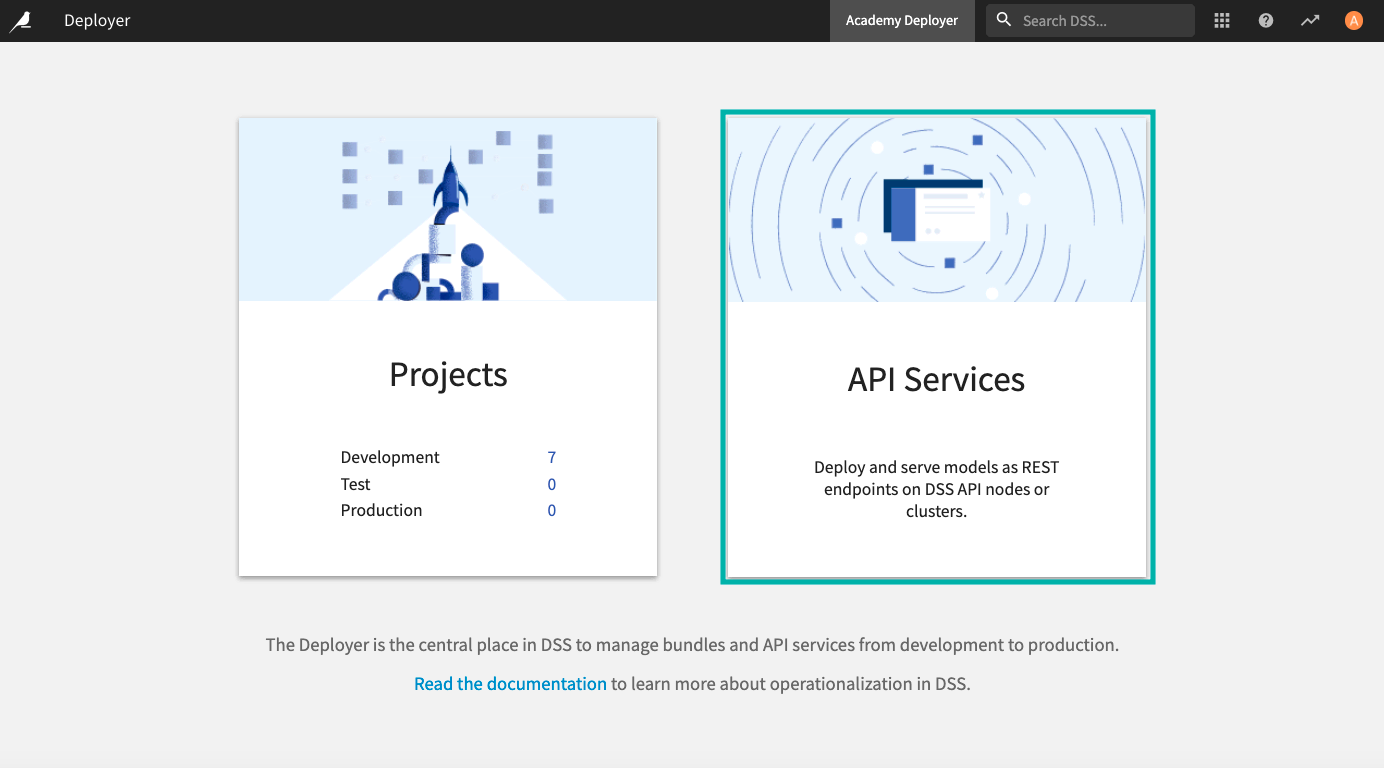
Select the API Services part of the deployer (which we refer to as the API deployer) to open the API deployer node.
Deploy the API Service to the Development Infrastructure
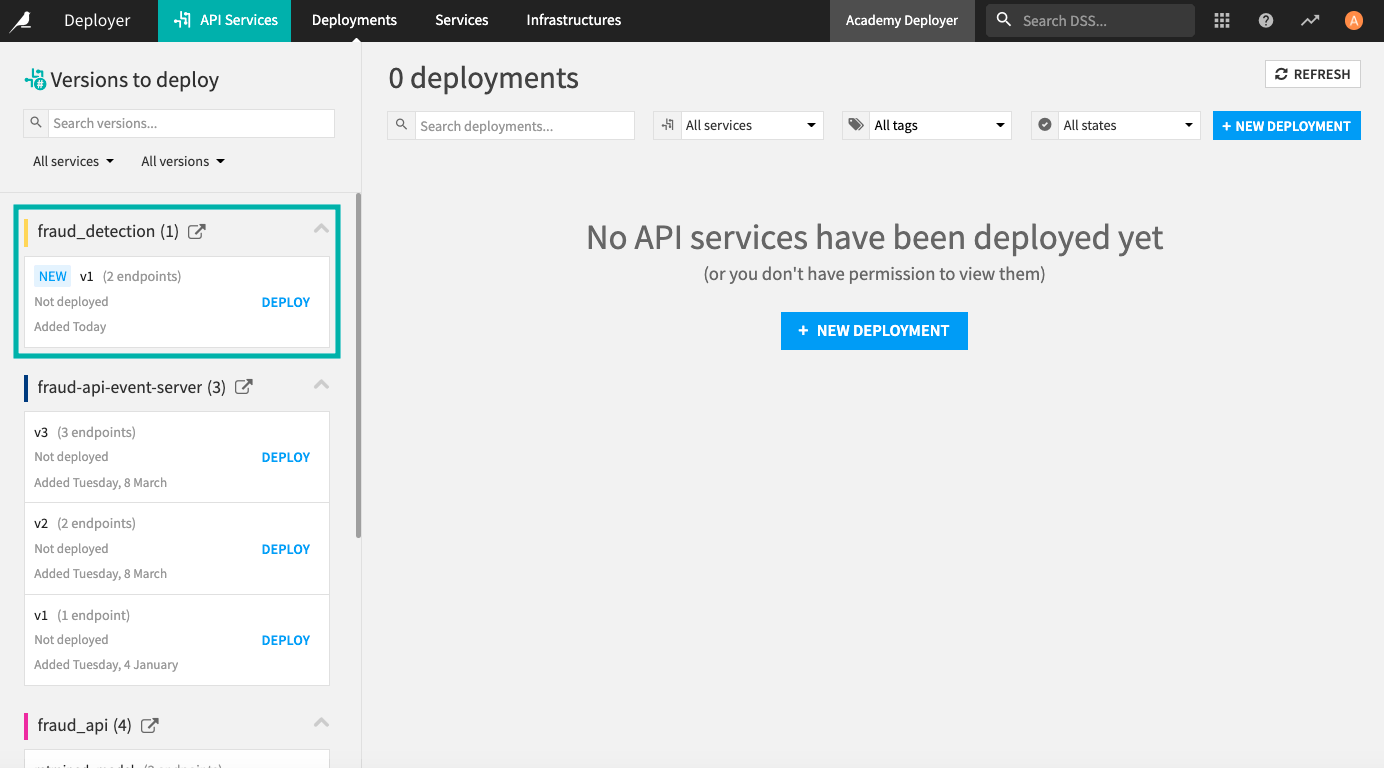
In the API Deployer node, you can see the fraud_detection service in the list of API services that are available for deployment.
Note
The API Deployer node shown here already includes three different API services available for deployment, and none of them have been deployed. However, your API deployer node will look different depending on factors such as what deployment infrastructures your Dataiku instance admin has configured, what API services have already been published to the API deployer node, and so on.
In the fraud_detection service, click Deploy.
Select the development infrastructure to use.
Note
Deployment infrastructures in Dataiku come preconfigured with “Development”, “Test” and “Production” lifecycle stages. However, a Dataiku instance admin can modify these stages as desired, so your options may be different. If you have more than one infrastructure for deployment, start with the “development” infrastructure. Here, we’ve used a development infrastructure called “api-dev-v10 (STATIC)”.
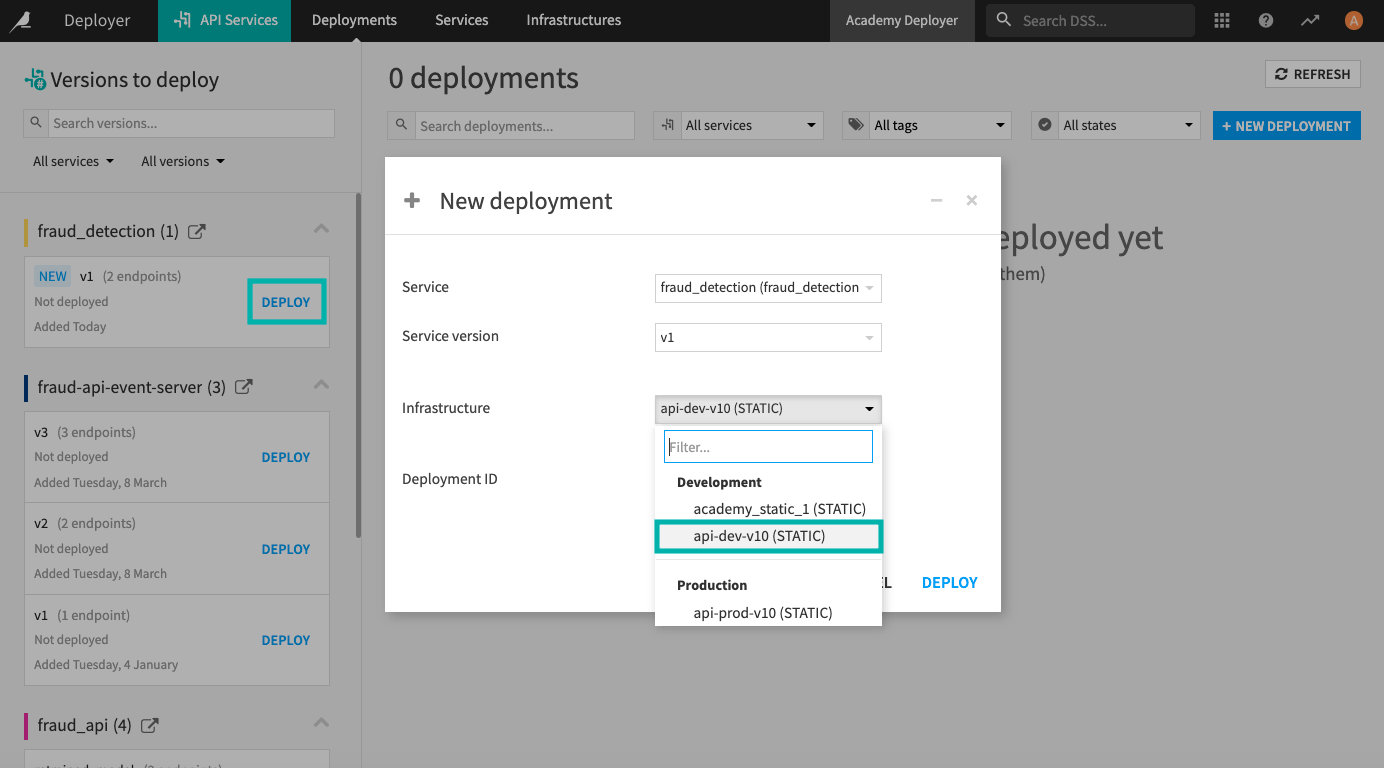
Keep the other default values for the deployment and click Deploy. The service is now ready to be deployed.
Click Deploy again on the page that opens up for the deployment.
Tip
If you get an error when deploying the API service to the API node, check with your Dataiku instance admin to confirm that the data connections on your API node are configured properly. If they are not, this will prevent the query enrichment and the dataset lookup endpoint from working as intended.
If the admin is unable to set up the data connections on the API node properly, you can also work around the error by removing the query enrichment and the dataset lookup endpoint. Afterward, re-deploy the API service. Doing this won’t prevent you from following the rest of the steps in this tutorial.
Congratulations! You now have two endpoints available to serve real-time API calls — a fraud prediction model endpoint and a merchant lookup endpoint. Note the dedicated URL for each API endpoint.
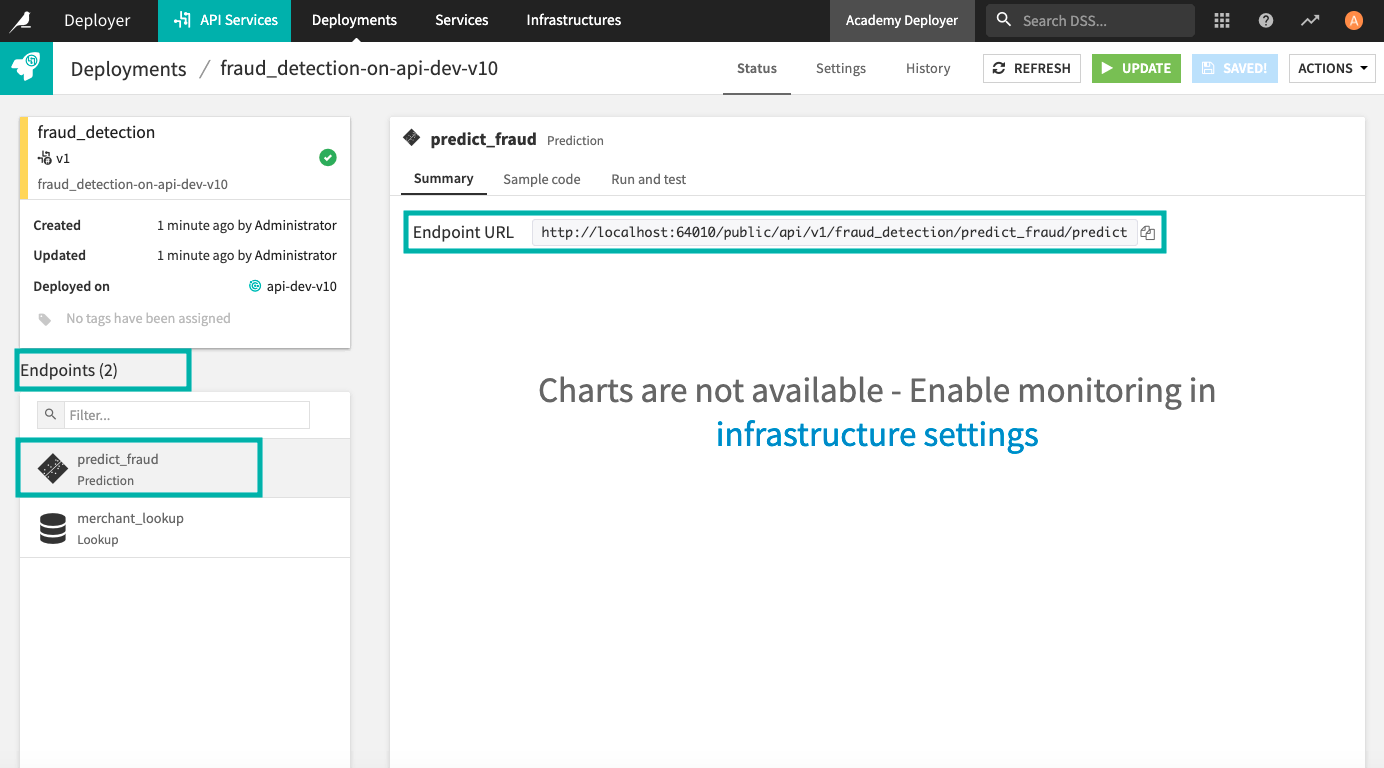
You can now submit queries to this service by calling the URL for each endpoint.
Test the Endpoints
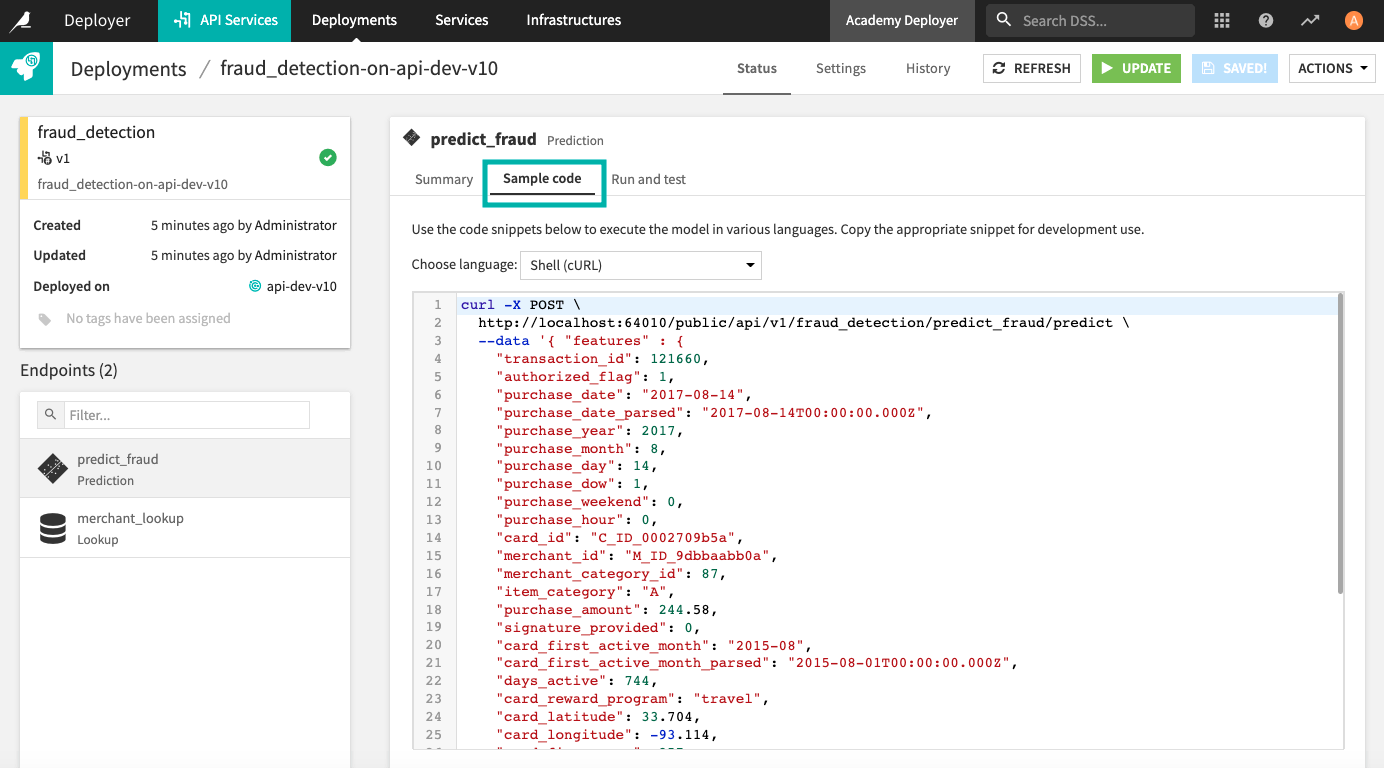
Let’s now test the endpoints. The Sample code tab provides snippets for calling the API in various languages such as Shell (cURL), Python, R, or Java.
Click the Sample code tab to see a code snippet you can use to test the prediction endpoint.
Note
The second line in the sample code indicates the URL of the prediction endpoint. Your URL will be different from the one shown in the screenshot.
For the next step, you first need to be connected to your API node.
As a test, run the default sample code in a terminal window on your computer. Your code should resemble the following, where your endpoint URL will replace
API_SERVICE_ENDPOINT_URL.
curl -X POST \
API_SERVICE_ENDPOINT_URL \
--data '{ "features" : {
   "transaction_id": 121660,
   "authorized_flag": 1,
   "purchase_date": "2017-08-14",
   "purchase_date_parsed": "2017-08-14T00:00:00.000Z",
   "purchase_year": 2017,
   "purchase_month": 8,
   "purchase_day": 14,
   "purchase_dow": 1,
   "purchase_weekend": 0,
   "purchase_hour": 0,
   "card_id": "C_ID_0002709b5a",
   "merchant_id": "M_ID_9dbbaabb0a",
   "merchant_category_id": 87,
   "item_category": "A",
   "purchase_amount": 244.58,
   "signature_provided": 0,
   "card_first_active_month": "2015-08",
   "card_first_active_month_parsed": "2015-08-01T00:00:00.000Z",
   "days_active": 744,
   "card_reward_program": "travel",
   "card_latitude": 33.704,
   "card_longitude": -93.114,
   "card_fico_score": 357,
   "card_age": 38,
   "merchant_subsector_description": "consumer electronics",
   "merchant_latitude": 33.481,
   "merchant_longitude": -105.916,
   "merchant_location": "POINT(-105.916 33.481)",
   "merchant_cardholder_distance": 736.51,
   "merchant_state": "New Mexico",
   "merchant_state_enName": "New Mexico",
   "card_location": "POINT(-93.114 33.704)",
   "card_state": "Arkansas",
   "card_state_enName": "Arkansas"
}}'
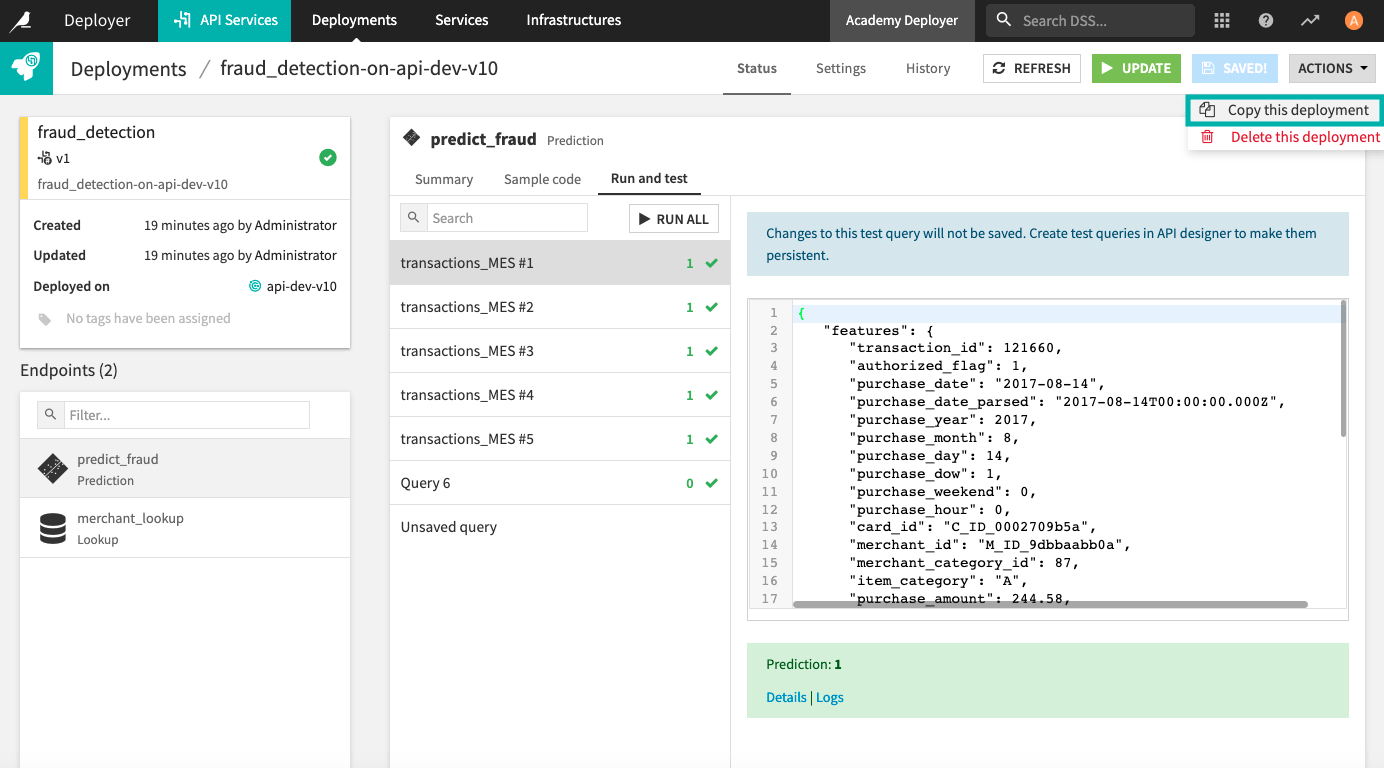
You can also run the test queries previously defined in the API Designer of your project.
Click the Run and test tab.
Click Run All.
Now the same queries we tested in the API designer will run on the API node.
Deploy the API Service to the Production Infrastructure
After testing your deployed API service, you can now deploy it to your test infrastructure and then your production infrastructure (if your Dataiku instance admin has already set up these infrastructures).
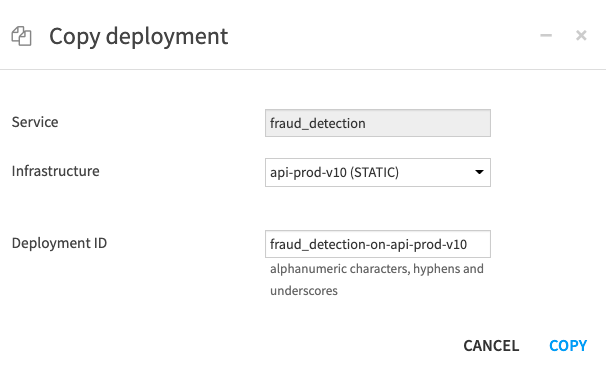
Let’s prepare to deploy the API service to the production infrastructure.
Go to the Actions button and click Copy this deployment.
Select your production infrastructure. Here, we’ve used a production infrastructure called “api-prod-v10 (STATIC)”, but yours will be different, depending on the setup by your Dataiku instance admin.
Keep the default values for the “Service” and “Deployment ID”.
Click Copy.
The service is now ready to be deployed.
Click Deploy again on the page that opens up for the deployment.
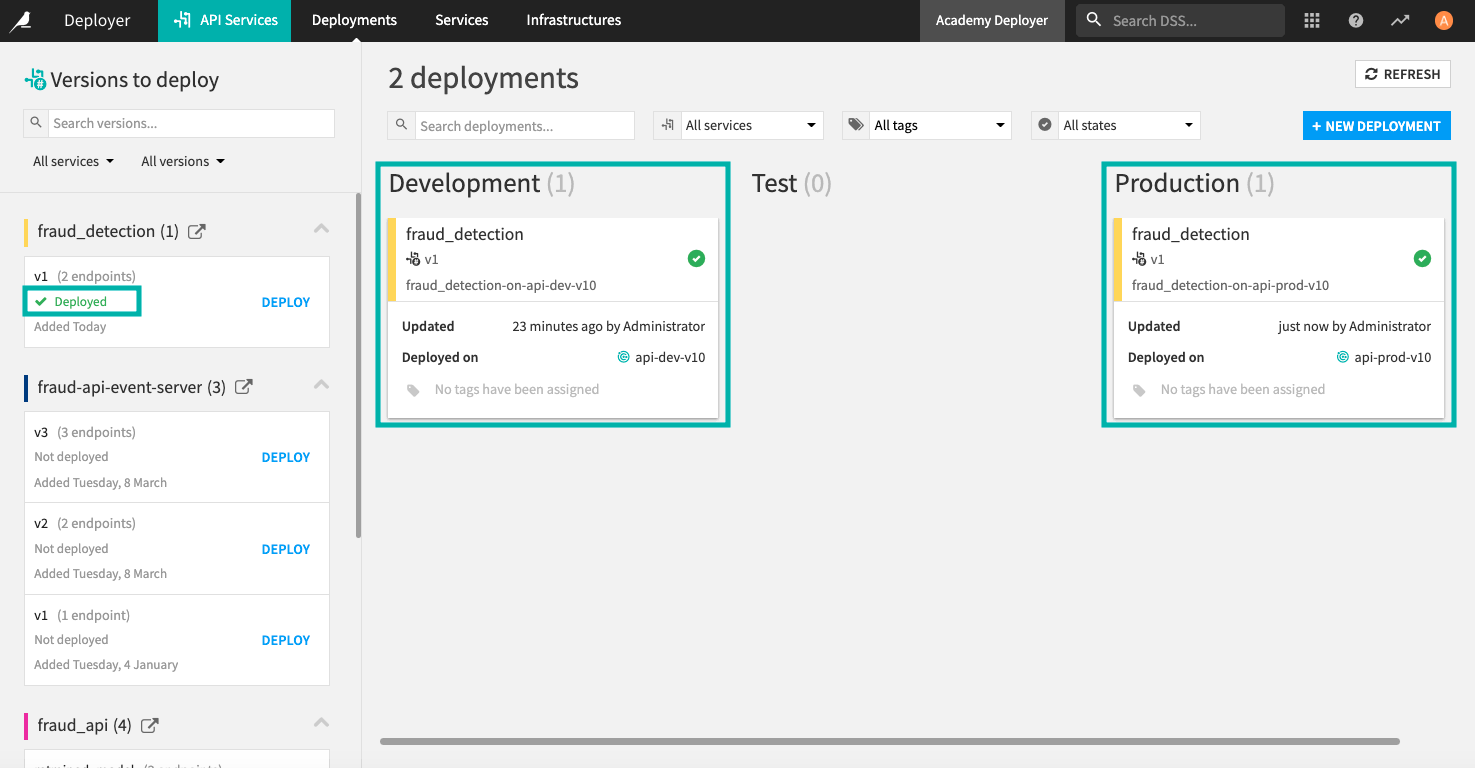
Once the deployment has been updated successfully, click Deployments in the top navigation bar to see that the fraud_detection API service was deployed to the development infrastructure and then to the production infrastructure.
What’s Next?
Congratulations! You successfully published an API service on the API Deployer and then deployed it to a development and production infrastructure. For more information, see the product documentation on Setting up the API Deployer and deployment infrastructures.
To continue learning, see the next lesson, Hands-On Tutorial: Manage Multiple Versions of an API Service, to learn how to update an API service and deploy multiple versions of an endpoint to use for A/B testing.