Modifying Instance Templates and Virtual Networks
To quickly deploy pre-configured Dataiku DSS (Dataiku) instances, or complete fleets, you can use a Fleet blueprint. A Fleet blueprint uses pre-configured instance templates and virtual networks.
Instance templates tell Fleet Manager how to deploy the instances linked to the template. Virtual networks tell Fleet Manager where to deploy your instances.
You can modify your instance templates and virtual networks and create new ones. Instance templates are not tied to a specific virtual network. Fleet Manager lets you know if the modifications you make to the properties of an instance template or virtual network require reprovisioning your Dataiku instances to take effect.
Note
Before making any modifications, there are essential considerations including the impact of upgrading or reprovisioning an instance.
In this article, we’ll walk through the steps required to modify the settings in your instance templates and virtual networks.
Creating or Modifying an Instance Template
A Dataiku instance is always launched from an instance template. The instance(s) you deploy from the same instance template have common properties. To modify these common properties, modify the instance template settings and then reprovision each instance linked to the template.
To view an instance template:
Launch Fleet Manager.
Under Settings, choose Instance templates.
You can create a new template or choose to modify an existing template.
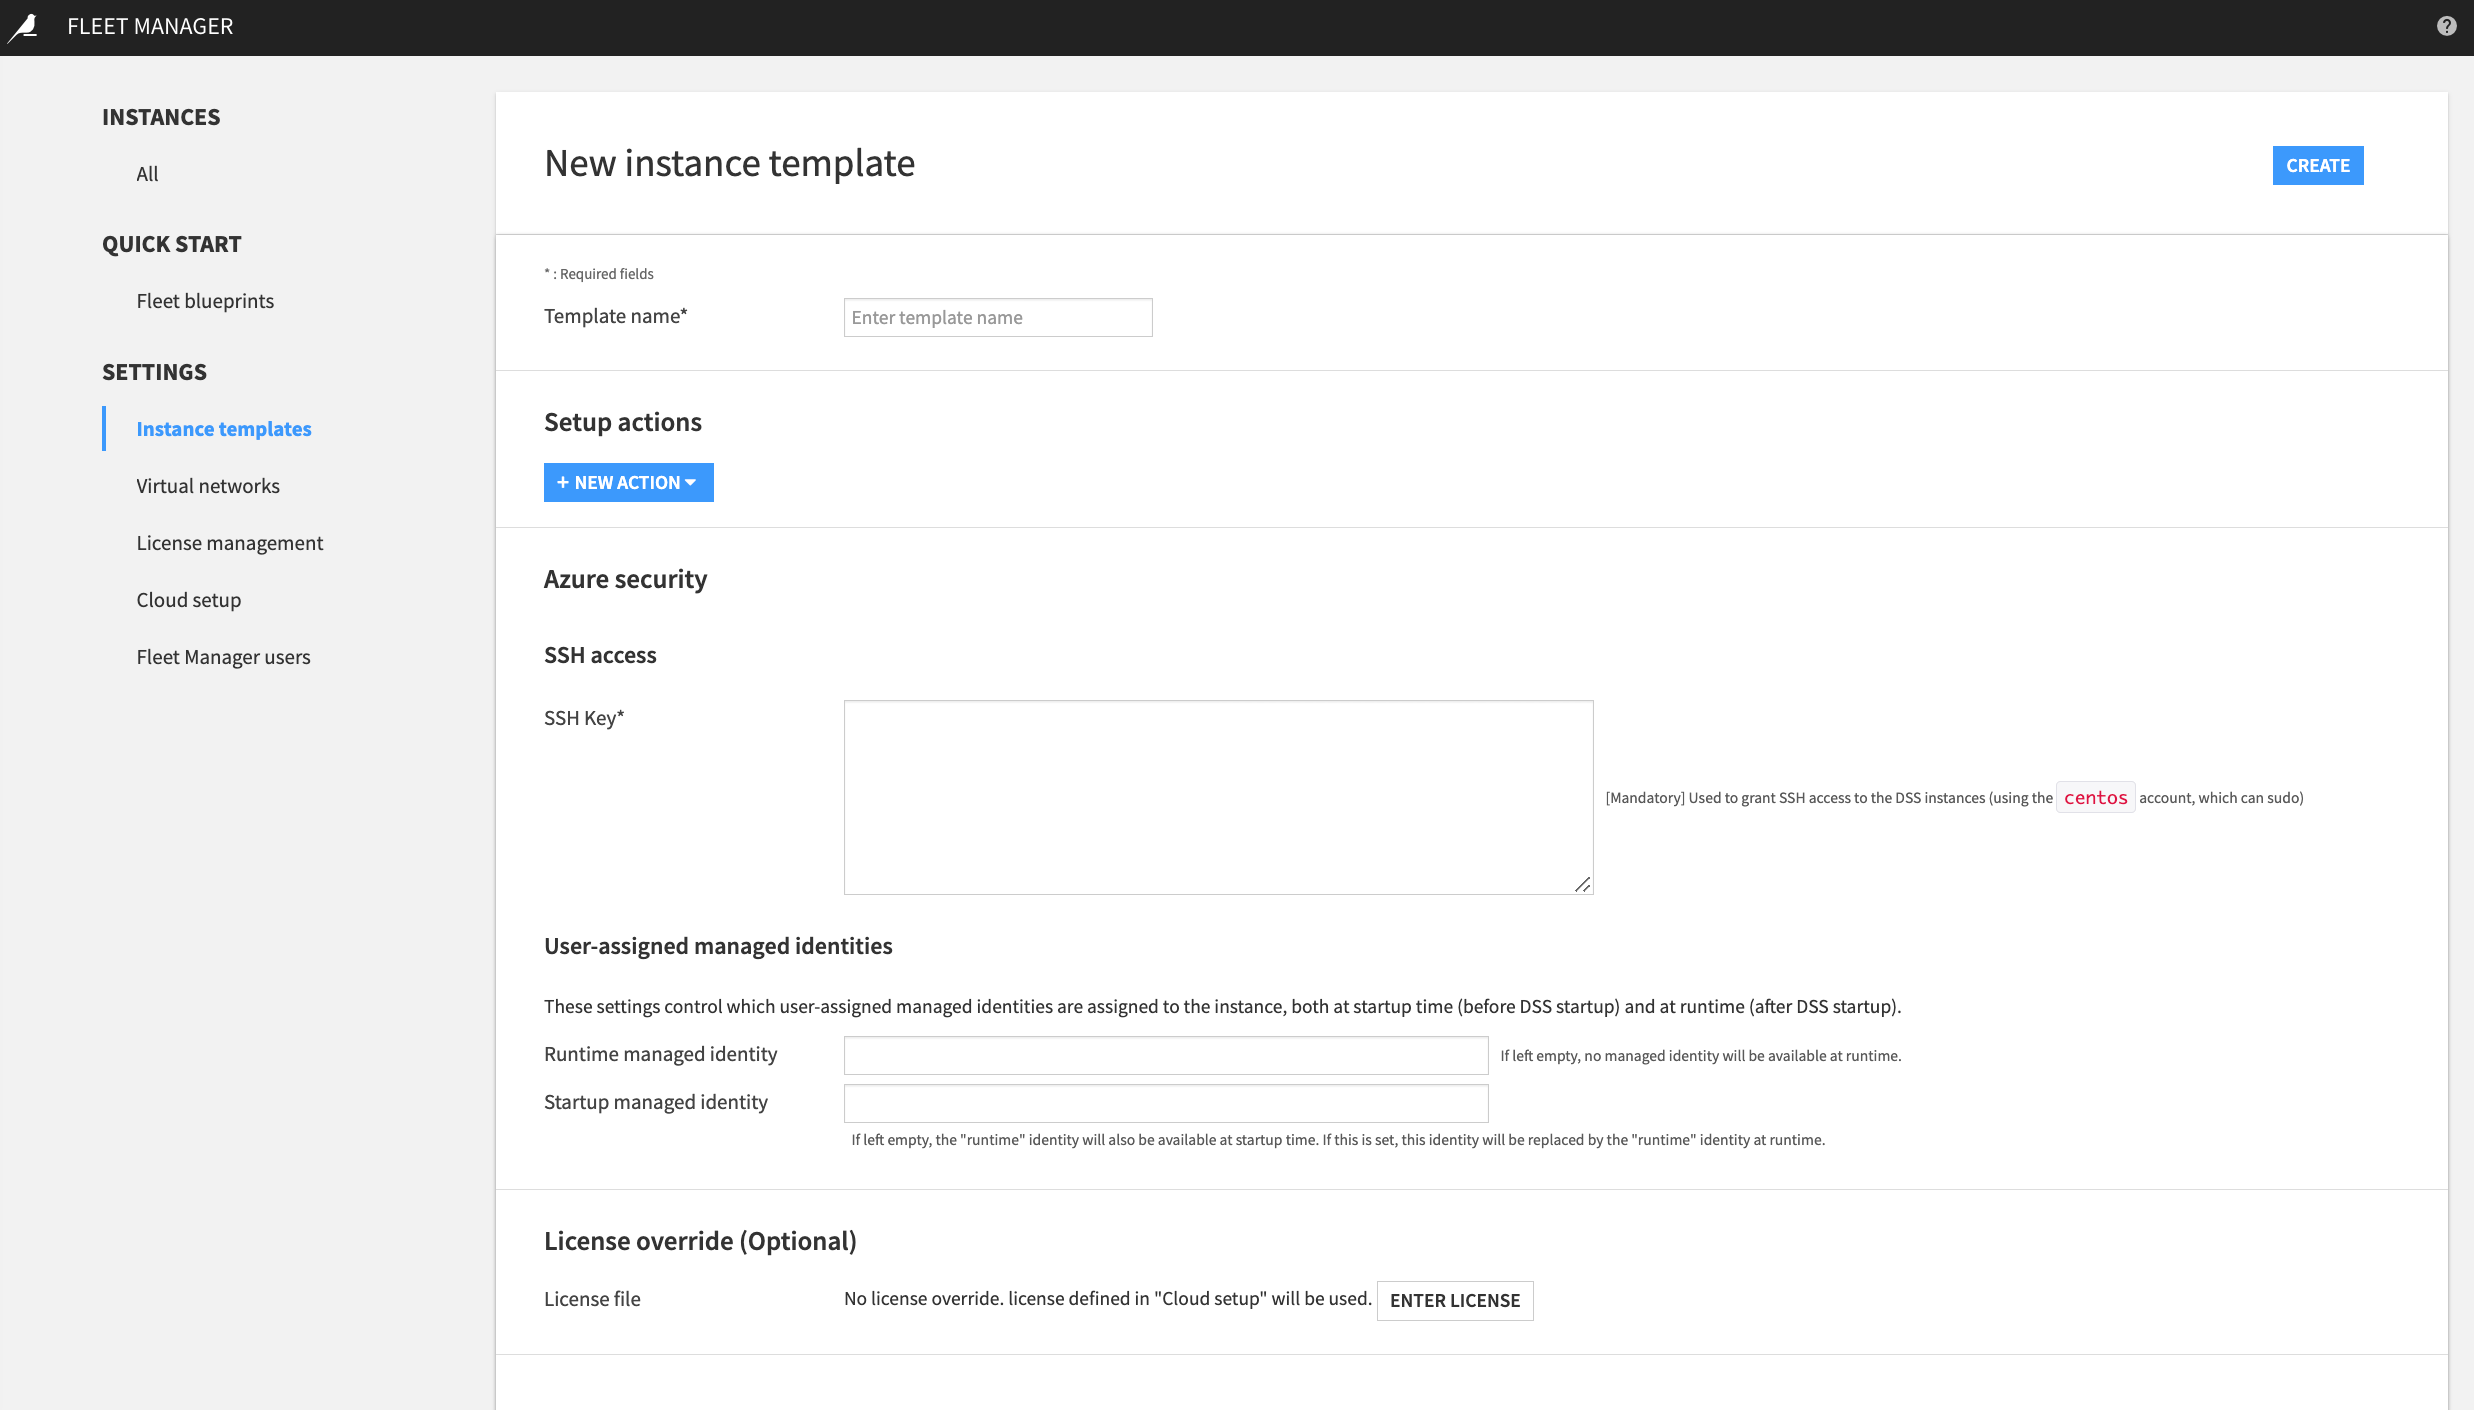
Setup Actions
Setup actions are configuration steps run by the Fleet Manager agent. You use setup actions to define the actions you want the Fleet Manager agent to execute on each instance linked to the template.
Setup actions allow you to configure the instance(s).
Note
Fleet Manager runs setup actions each time the instance is reprovisioned. Therefore, Setup actions should be idempotent. A Setup action is idempotent if the action can be run each time you reprovision the instance, resulting in the same expected outcome each time.
Add a New Setup Action
To add a new action to your instance template:
Under Settings > Instance templates, choose the instance template you want to modify.
Under Setup actions, select the New Action menu arrow to display the list.
Choose an action.
Configure the action and select Save.
Install System Packages
You can direct the Fleet Manager agent to install operating-system-level packages at the startup of each instance that is linked to the template. To do this:
Under Setup actions, choose Install system packages.
In Packages to install, specify the packages you want to install on the instance, making sure to input only one package name per line.
Add Authorized SSH Key
The SSH access defined in the Security section is limited to one SSH access key. You can authorize additional SSH keys using Setup actions.
To do this:
In Setup actions, choose Add authorized SSH Key.
In SSH Key, provide an SSH public key.
Repeat for each SSH key you want to add.
Set Up Advanced Security
You can set up security-related HTTP headers to be applied to each instance linked to the template.
Prevent Embedded Content from Rendering
You can prevent Dataiku from being embedded as an iframe or object by turning on basic headers. To do this:
Under Setup actions, choose Set security-related HTTP headers.
Toggle Basics headers to On.
Enforce HTTP Strict Transport Security
Under Setup actions, choose Set security-related HTTP headers.
Toggle HSTS to On.
Install a JDBC Driver
Dataiku instances deployed through Fleet Manager already include drivers for PostgreSQL, Snowflake, and MariaDB. You can install additional JDBC drivers for each instance linked to the template.
To do this:
Under Setup actions, choose Install a JDBC driver.
In Database type, choose a database.
Optional configuration settings:
In URL, enter the full address where Fleet Manager will download the driver archive from.
In Paths in archive, add all the paths to find the JAR files in the driver archive.
This field is required when the driver is shipped as a tarball or ZIP file.
Paths are relative to the top of the archive.
Wildcards are supported.
This is useful when the archive contains instructions or other files that are not required for the driver to work.
In HTTP Headers, add the headers required to access the source which the driver is downloaded from.
This field is only needed if you download the driver from an HTTP(S) endpoint, otherwise, it is ignored (and you need to add headers to the HTTP request).
Type one header per line using “NAME: VALUE” format.
In HTTP Username, add the username.
This field is only needed if the HTTP(S) endpoint expects basic authentication.
To explicitly specify which Assigned Identity to use (when the machine has several), use the client_id.
To authenticate with a SAS Token on Azure Blob Storage (not recommended), type
token.
In HTTP Password, add the password.
This field is only needed if the HTTP(S) endpoint expects basic authentication.
To authenticate with a SAS Token on Azure Blob Storage (not recommended), store the token in this field.
In Datadir subdirectory, set the name of the subdirectory.
This field is not required for most drivers. The driver will be placed in data_dir/lib/jdbc.
Some drivers are shipped with multiple JAR files. In this case, you may want to install them under an additional level in the lib/jdbc directory.
Run Ansible Tasks
You can run a list of Ansible tasks as if they were a role executed by a playbook targeting the host(s).
Each Dataiku instance is configured with Dataiku’s Ansible Module that allows you to configure Dataiku including its connections, settings, and projects through a YAML description.
If you want to apply more settings, you can leverage any builtin Ansible modules.
To run an Ansible task:
Under Setup actions, choose Run Ansible tasks.
In Stage, select the stage where you want the Ansible tasks to run.
Before DSS install.
After DSS install.
After DSS is started.
In Ansible tasks, write a YAML list of Ansible tasks as if they were written in a role.
You can include base Ansible tasks and Ansible modules for Dataiku.
Set Up Kubernetes and Spark-on-Kubernetes
You can set up Kubernetes (K8S) and Spark-on-Kubernetes for each instance linked to the template. If your Dataiku nodes connect to Kubernetes clusters, you must enable this setting.
Fleet Manager automatically downloads and configures the required packages and configurations to leverage Kubernetes clusters. This includes the Kubernetes plugin, the ability to attach container images, and define configurations for Kubernetes and Spark to point to the correct Azure Container Registry.
To do this:
Under Setup actions, choose Setup Kubernetes and Spark-on-Kubernetes.
To use the host IP instead of hostname for communication between pods and Dataiku:
Toggle Use private IP to On.
Remove a Setup Action
To remove a setup action from your instance template:
Launch Fleet Manager.
Under Settings, choose Instance templates.
Choose the instance template you want to modify.
Under Setup actions, delete the setup action you want to remove.
Select Save.
Azure Security
SSH Access
You can add a public key to allow SSH access to Dataiku. Since Fleet Manager does not support multiple Azure accounts, this public key must be defined in the same Azure account used to set up Fleet Manager.
Note
You can authorize additional SSH keys using Setup actions.
To grant SSH access:
Navigate to Azure security > SSH access.
In SSH Key, provide a public SSH key.
This grants SSH access using the “centos” user which can run sudo commands. To authorize additional SSH keys, use the Setup action, “Add authorized SSH key.”
User-Assigned Managed Identities
You can assign user-assigned managed identities to each instance linked to the instance template.
Note
You created user-assigned managed identities when you set up Fleet Manager. Visit the user guide for more information.
It is possible to have one managed identity assigned at startup (before the instance starts up) and another one at runtime (after the instance starts up). This helps to limit the scope of the managed identity while the instance is running.
To assign user-assigned managed identities:
Navigate to Azure security > User-assigned managed identities.
In Runtime managed identity, provide the user-assigned managed identity.
In Startup managed identity, provide the user-assigned managed identity.
Select the Restrict metadata access checkbox to prevent end-user processes from accessing the Azure metadata server.
This ensures the Dataiku end users cannot assume the instance role.
License Override
You can use the license override setting to apply a Dataiku license file to each instance linked to the template. Alternatively, you can specify a license file for each instance.
Navigate to License override (Optional) in the template.
In License file, select Enter License.
Enter your license file. Be sure to copy the entire contents of the JSON file, including the final ‘}’.
Fleet Manager agent will apply the license file to each instance linked to the template once you have saved your changes and reprovisioned each instance.
To update a license file, repeat these steps.
Creating or Modifying a Virtual Network
A virtual network defines where instances are deployed. A virtual network represents the network context in which instances are launched. It is a reference to the virtual network provided by your cloud provider. It contains configuration information, including how DNS and HTTPS are handled.
You can create a new virtual network or choose to modify an existing one. If creating a new virtual network, Fleet Manager automatically completes the VPC and subnet fields based on the VPC and subnet where the Fleet Manager is currently running.
Instance templates are not tied to a specific virtual network. However, Dataiku instances are tied to a specific virtual network. Once a virtual network is associated with an instance, you cannot change to a different virtual network.
To view a virtual network:
Launch Fleet Manager.
Under Settings, choose Virtual networks.
You can choose to create or modify a virtual network.
To modify a virtual network:
Choose the virtual network you want to modify.
Fleet Manager displays the virtual network’s dashboard.
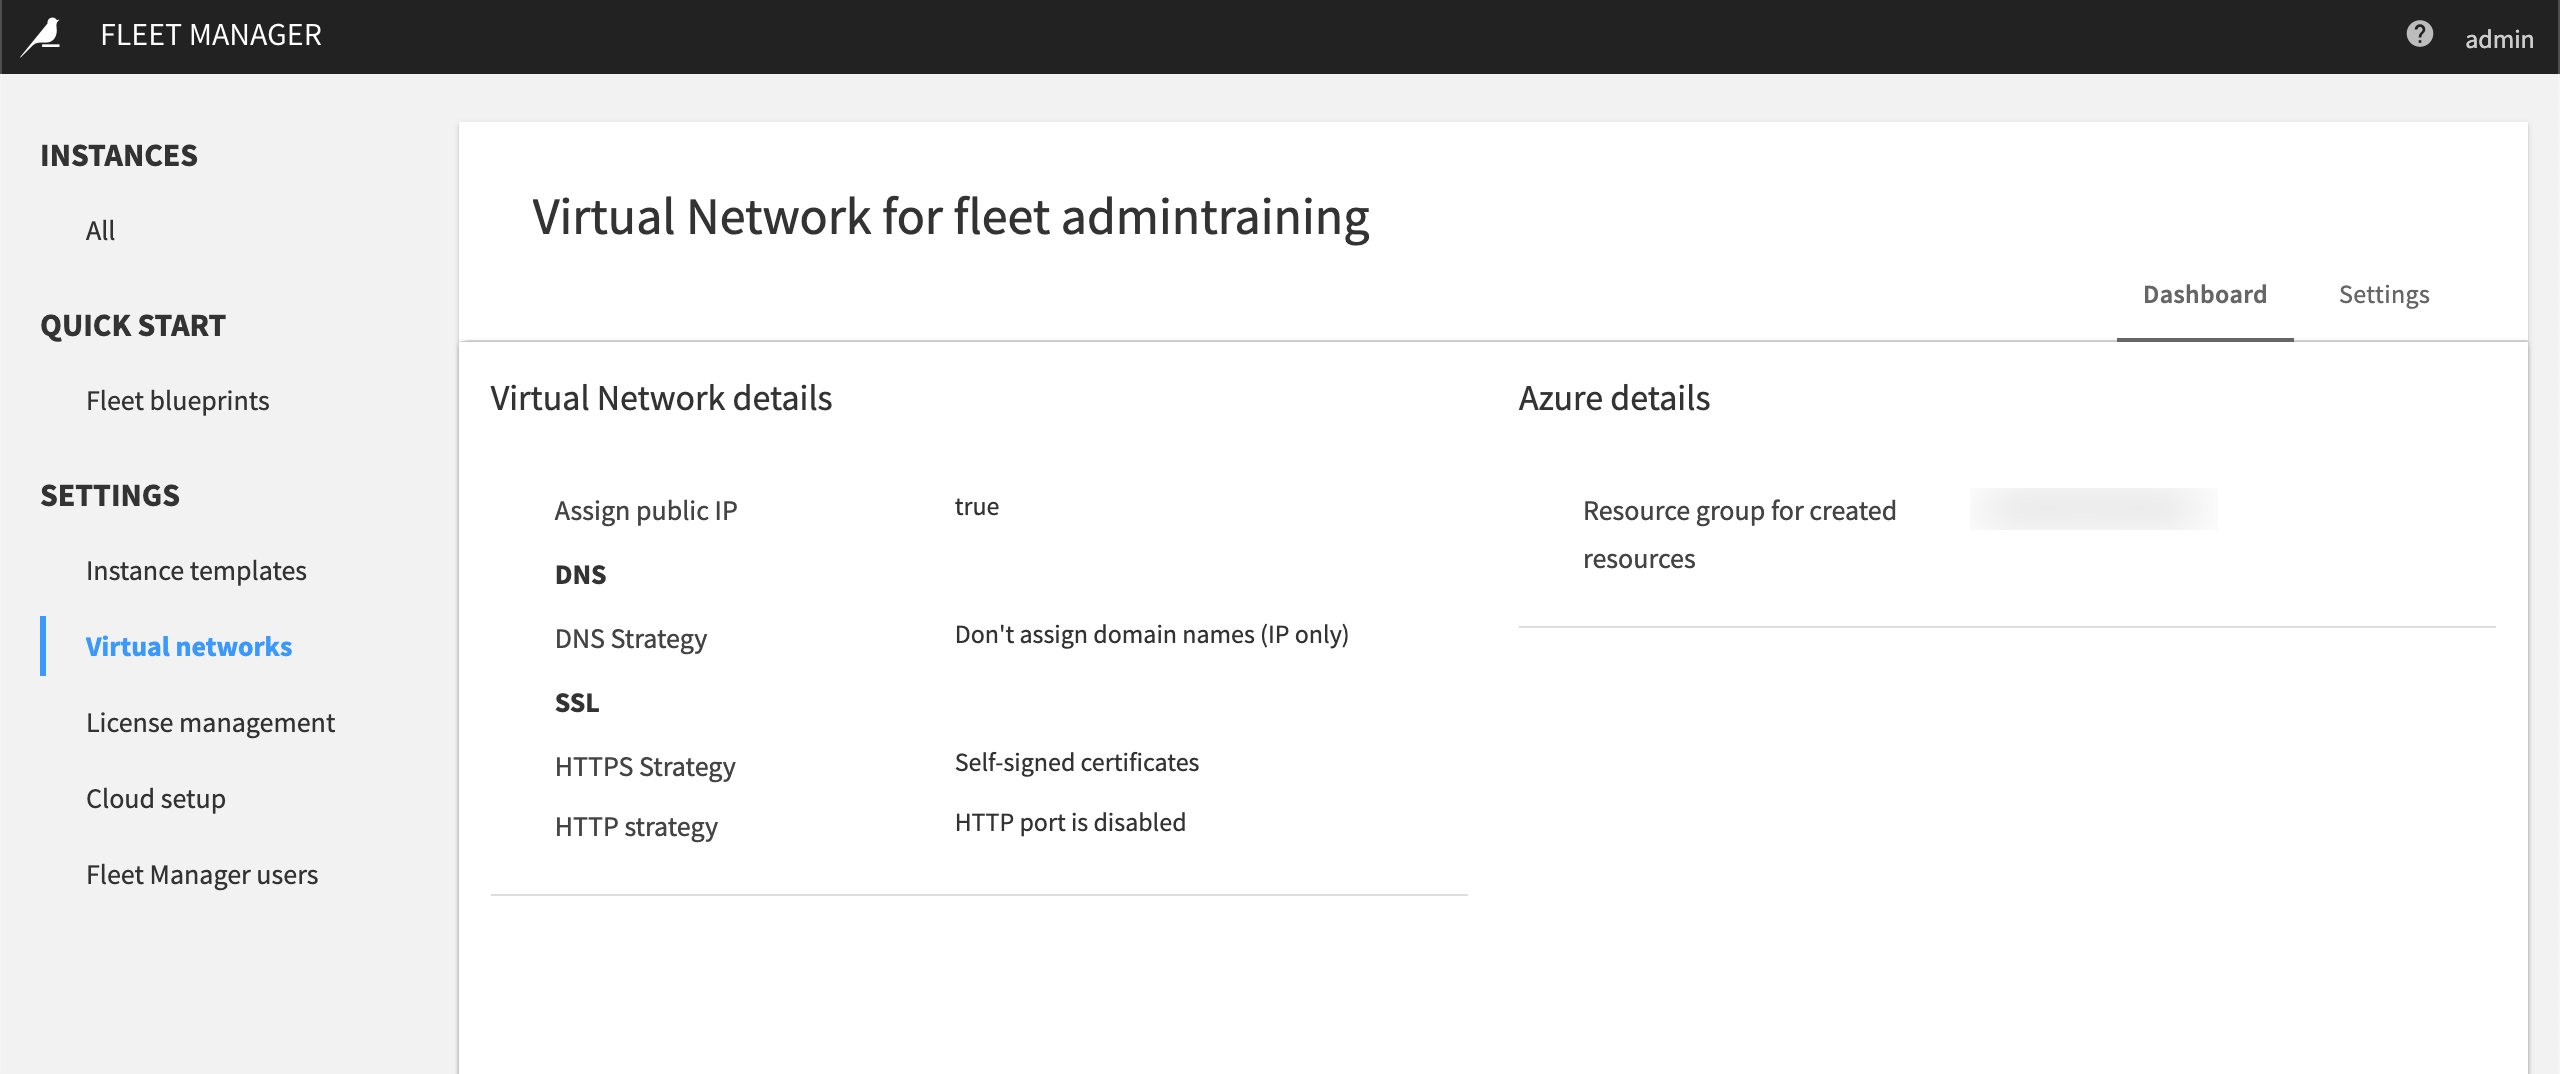
Select the Settings tab.
Modify the settings according to the guidelines and then select Save.
Virtual Network Guidelines
Guidelines for using fields for new and existing virtual networks.
Virtual Network Name
When creating a new virtual network, Fleet manager asks for the virtual network label. When you deploy Dataiku instance(s) from a Fleet Manager blueprint, the virtual network is pre-configured with the fleet’s name.
To edit the virtual network name:
In Label, enter a name for the virtual network.
Assign a Public IP Address
You can assign a public IP address to all Dataiku instances linked to the virtual network.
To do this:
Select the Assign a public IP address checkbox.
Assign a Virtual Network Id and Subnet Name
When creating a new virtual network, you can assign a virtual network ID and subnet name.
To do this:
In Virtual Network Id, enter the ID.
In Subnet Name, enter the name of the subnet.
Update Security Groups
When creating a new virtual network, you can configure the Network Security Group to allow communication between Fleet Manager and its DSS instances, and choose the Internet Access Mode.
To do this:
Select the Update security groups checkbox.
In Internet Access Mode, choose a mode:
No internet access
Egress only internet
Create an internet gateway
Azure Tags
When creating a new virtual network you can tag your Azure resources to help organize them.
Fleet Management
You can enable Fleet Management so that all the instances linked to the virtual network know each other. This simplifies the configuration of log centralization and of the deployer.
To enable Fleet Management configuration options:
Select the Enable checkbox.
Event Server
You can specify the address of the event server. This is a Dataiku node that is enabled to collect audit logs from other Dataiku nodes linked to the same template. This allows you to centralize the logs in a single location.
To do this:
In Event Server, enter the name of the node that should act as the centralized event server for logs concentration.
Fleet Manager will send all audit logs for all nodes to this node.
Deployer Management
Select a Deployer strategy.
Do not manage deployer.
Central deployer. Select this strategy if you have more than one Design node or you may have more than one Design node in the future. As a result:
The Deployer is deployed as a standalone node and all other nodes are configured to connect to it.
Deploy from design nodes. Select this strategy if you have a single Design node and want a simpler setup. As a result:
Your Design node is enabled as a Deployer node, and
Every Automation node is configured as a deployment infrastructure in the Deployer.
Govern Server
You can define your Govern node so that it is automatically configured in all Dataiku nodes linked to the virtual network.
In Govern Server, enter the node’s ID (the instance name as defined in Fleet Manager) that should act as the centralized Govern server.
DNS Strategy
You can assign an Azure DNS domain name that you manage.
To do this:
In DNS strategy, choose Assign a Azure domain name that you manage.
Enter the Azure Dns Zone Id in Azure Dns Zone Id.
SSL Strategy
You can manage the TLS certificates associated with each instance linked to the virtual network.
In HTTPS strategy, choose a strategy:
None (HTTP) only. Does not manage TLS at all. The instance is only accessible via the HTTP (80) port.
Self-signed certificates. Each instance will have a self-signed certificate created automatically.
Enter a certificate/key for each instance. Select this strategy if you prefer to manage the certificates yourself. You’ll need to specify a certificate and key per each instance in the instance’s settings.
Generate certificates using Let’s Encrypt. This strategy leverages “Let’s Encrypt” to generate certificates for each instance. “Let’s Encrypt” needs to be able to complete the DNS challenge to create a certificate. To allow this, you’ll need to configure the Azure Dns Zone Id in the DNS strategy. This strategy automatically renews the certificate before it expires.
Enter an email address in Contact Mail.
In HTTP strategy, choose a strategy:
HTTP port is disabled.
HTTP port redirects to HTTPs. This is the recommended option.
When modifying a virtual network template or creating a new network template, Fleet Manager deploys the virtual network in Azure.
Applying the Modifications
Fleet Manager lets you know when modifications require reprovisioning before the changes take effect.
To reprovision an instance:
From Instances, choose All and then locate the instance you want to reprovision.
Select Reprovision.
Select Confirm.
Wait while Fleet Manager reprovisions the instance.