Hands-On Tutorial: Batch Deployment
For the purposes of this tutorial, the Flow and automation scenarios are complete. We are ready to package the Flow, and deploy it to an Automation node!
Let’s Get Started!
In this tutorial, you will:
create a bundle from a project on the Design node;
push the bundle to the Project Deployer;
deploy and activate the bundle on the Automation node; and finally,
modify the original project on the Design node and push a new bundle version to the Automation node.
Use Case
In tutorials throughout the MLOps Practitioner learning path, you’ll work with a simple credit card fraud use case. Using data about transactions, merchants, and cardholders, we have a model that predicts which transactions should be authorized and which are potentially fraudulent.
A score of 1 for the target variable, authorized_flag, represents an authorized transaction. A score of 0, on the other hand, is a transaction that failed authorization.
The focal point of the Flow is a model evaluation store that logs the performance of the prediction model against new quarters of data. In this case, we consider three months of data as one batch.
Prerequisites
This tutorial assumes that you satisfy all of the technical prerequisites for the MLOps Practitioner learning path.
Video Overview
This tutorial explains all of the steps for batch deployment in detail. In addition, you might want to watch a screencast executing the same instructions from beginning to end.

Create the Project
For this tutorial, we’ll start from a project ready for deployment. In a real scenario, this means that this project should have an optimized Flow, working metrics, checks, scenarios and reporters, and a well-documented workflow, among other qualities.
If you successfully completed the Automation for a Production Environment hands-on tutorial, you can use the final project as the starter project for this tutorial.
If not, from the homepage of the Design node, click +New Project > DSS Tutorials > MLOps > MLOps (Tutorial).
Note
You can also download the starter project from this website and import it as a zip file.
Remap Connections (Recommended)
To simplify the import process, the starter project contains only filesystem connections. However, the walkthrough of this tutorial has synced the eight intermediate datasets to a PostgreSQL database. To change the filesystem connections to a SQL connection, review the remap connections article in the Knowledge Base.
Note
While we recommended that you remap filesystem connections to a SQL database, it is not required for completing this hands-on tutorial.
Also, note that if you use a SQL connection on the Design node, you’ll need to create the same SQL connection on the Automation node or remap the SQL connection to another SQL connection on the Automation node.
Build the Flow
If starting from a new project, you’ll need to ensure the Flow is built.
If the Flow includes empty datasets, manually open and then run the “Build Flow” scenario.
Warning
This scenario does not include the metrics, checks, trigger, and reporter added in the Automation Best Practices tutorial. Although bad practice in a real situation, here we are just focused on successfully deploying to production.
Create the Bundle
The first step is to create the bundle from the project found in the development environment (the Design node).
Note
Recall from the Production Concepts course, that a development environment, as opposed to a production environment, is a sandbox for experimental analyses where failure is expected.
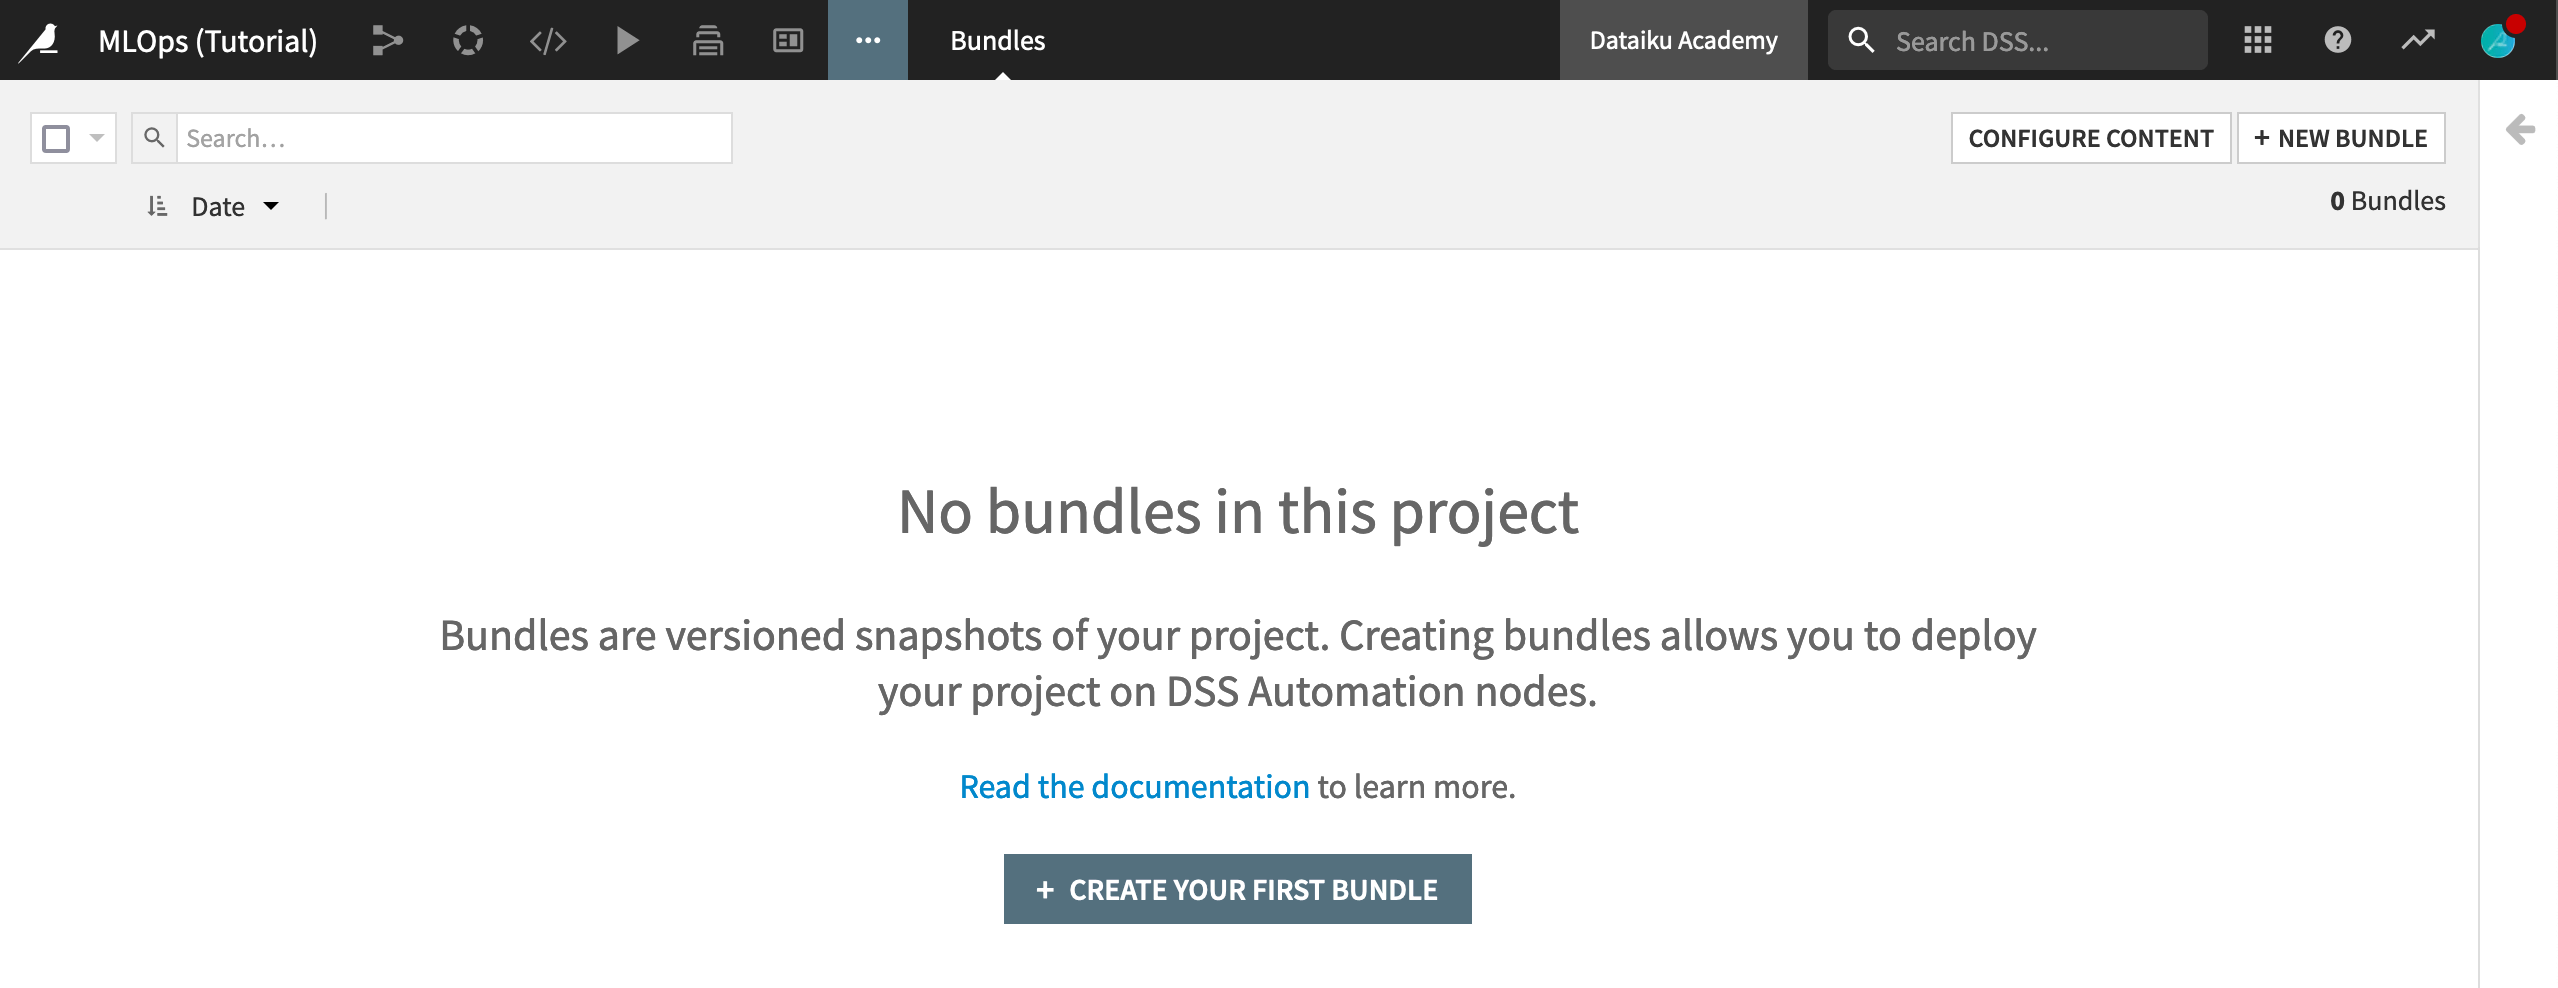
In order to package the Flow into a bundle, from the More Options (…) menu in the top navigation bar, choose Bundles.
Click Create Your First Bundle.
Note
You can learn more about the concept of a project bundle here.
Add Additional Content
A bundle acts as a consistent packaging of a complete Flow. By default, it includes only the project metadata. As a result, all datasets will come empty, and models will come untrained. However, depending on the use case, we can choose to include additional datasets, managed folders, saved models, or model evaluation stores.
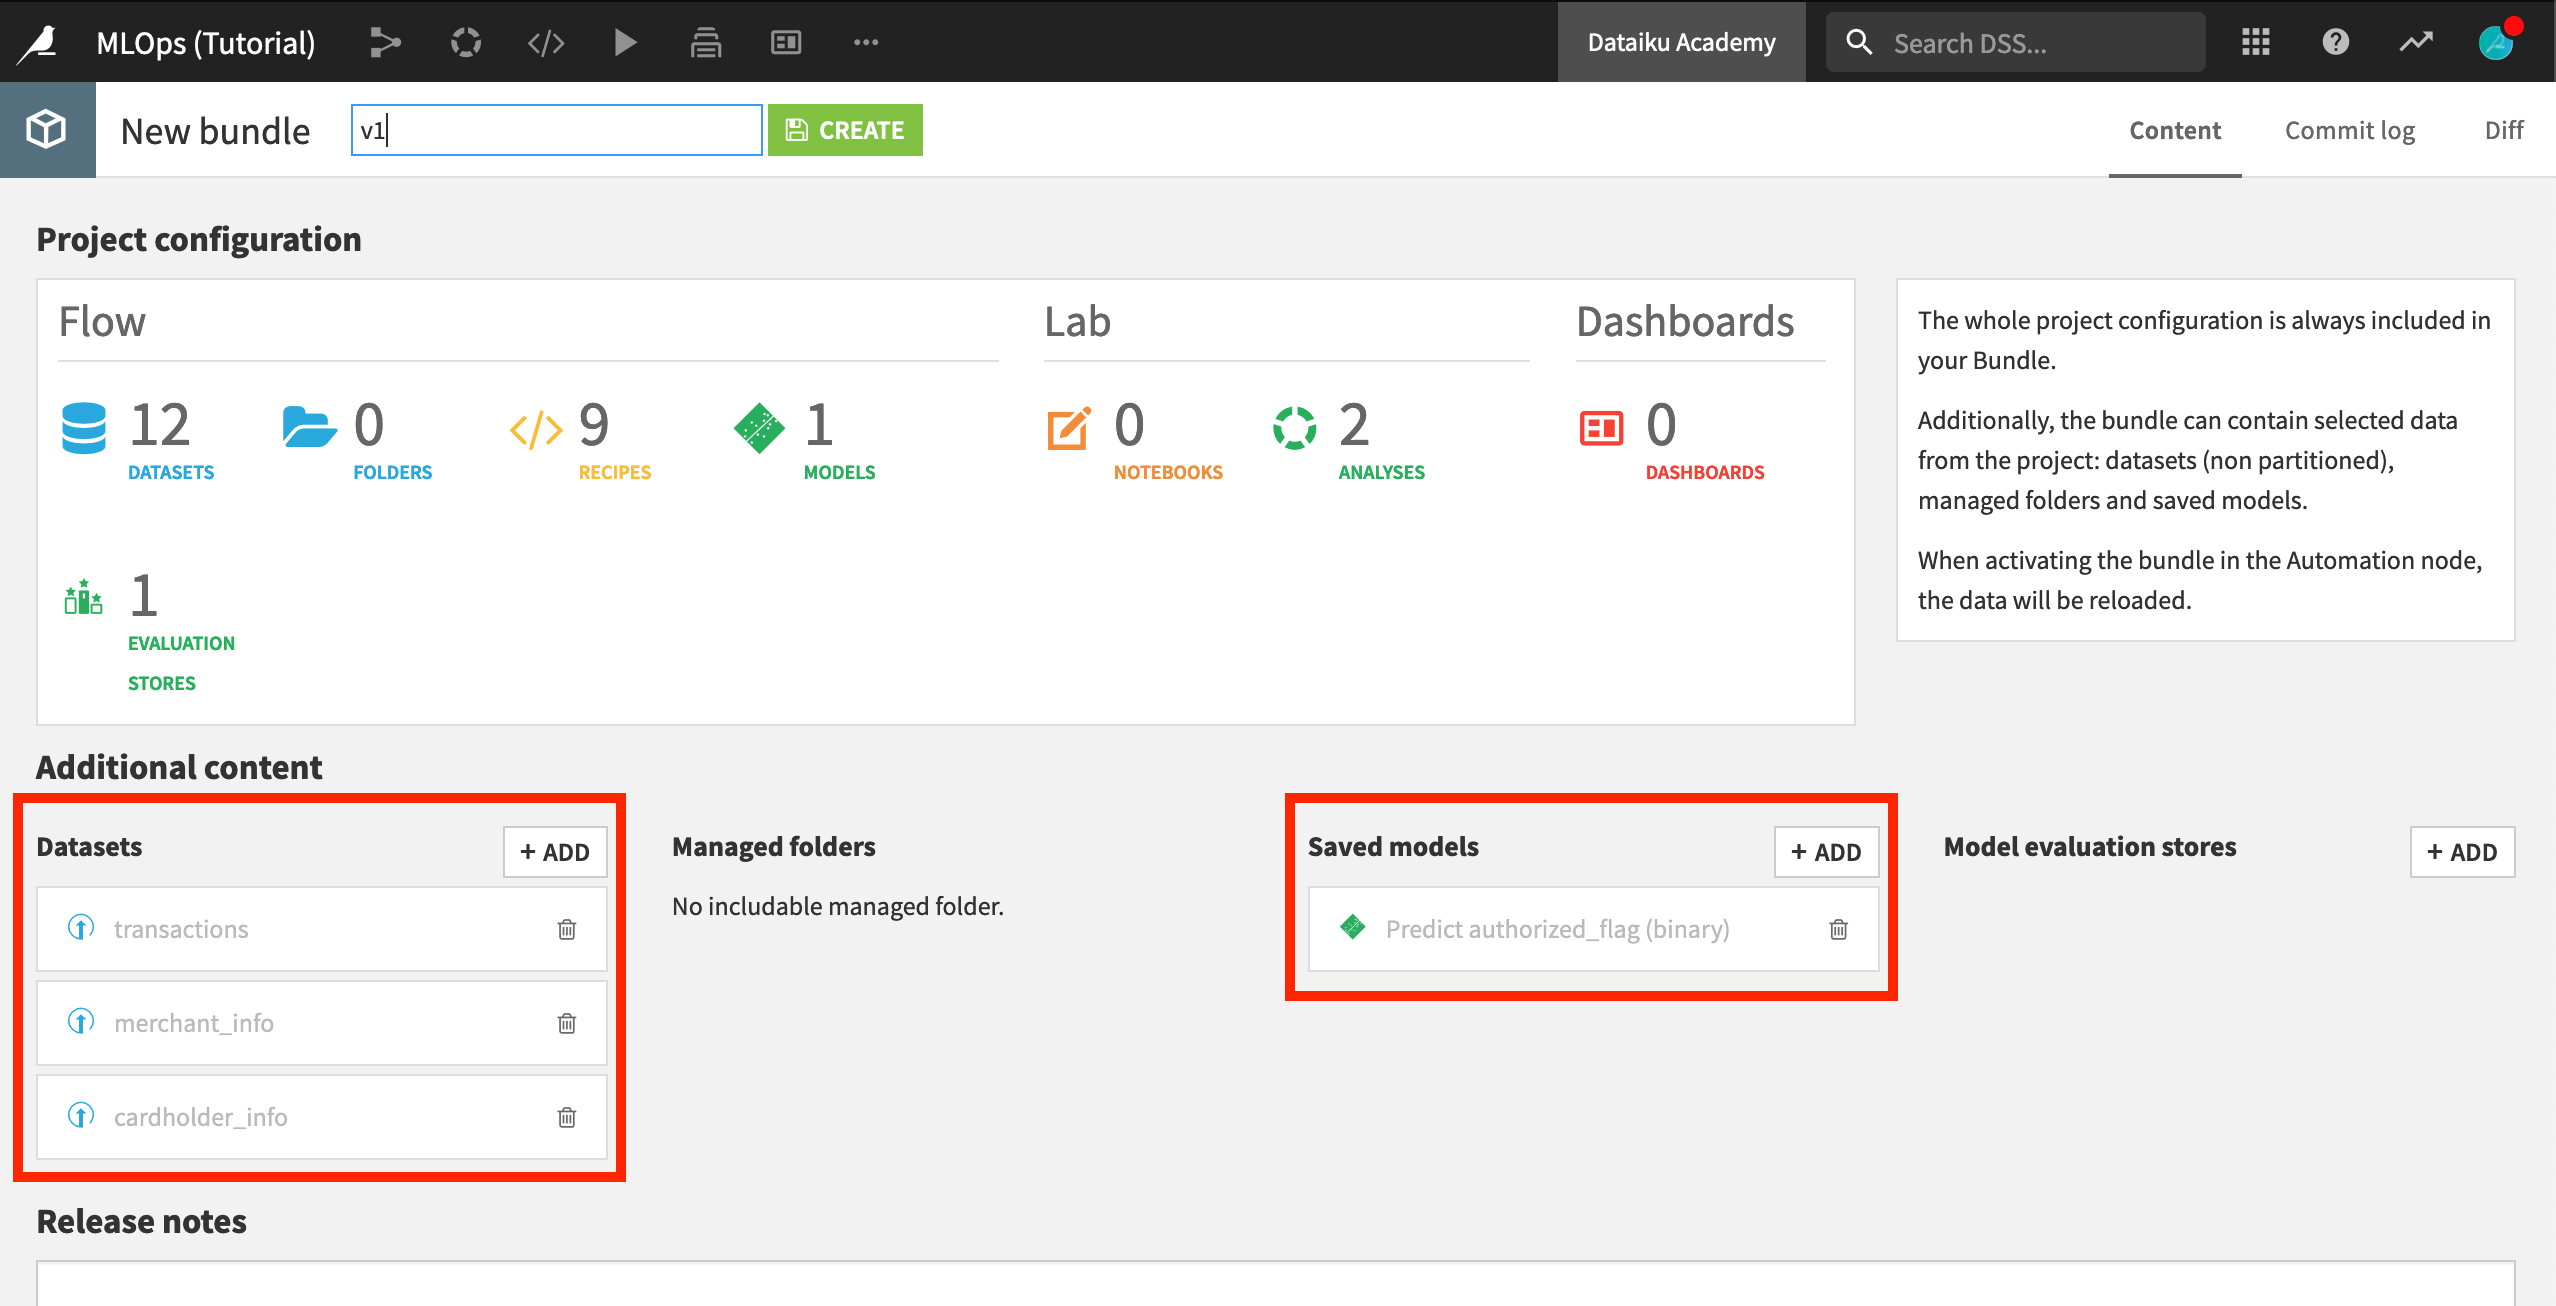
Let’s add the saved model trained on the Design node to the bundle so it can be used for scoring new production data on the Automation node.
Name the bundle
v1.In the Additional Content section, click +Add Saved models.
Choose Predict authorized_flag (binary).
In this training exercise, our initial datasets are uploaded files, and so won’t be re-computed in production. To access them in the production environment then, we’ll also need to include them in the bundle.
In the Additional Content section, click +Datasets, and choose cardholder_info, merchant_info, and transactions.
Click Create.
Note
You can learn more about creating a bundle in the product documentation.
Publish the Bundle to the Deployer
We now have a project bundle. We could always download this file and upload it to the Automation node. Instead of this manual process, however, we are going to use the Project Deployer, which centralizes the history of all deployments.
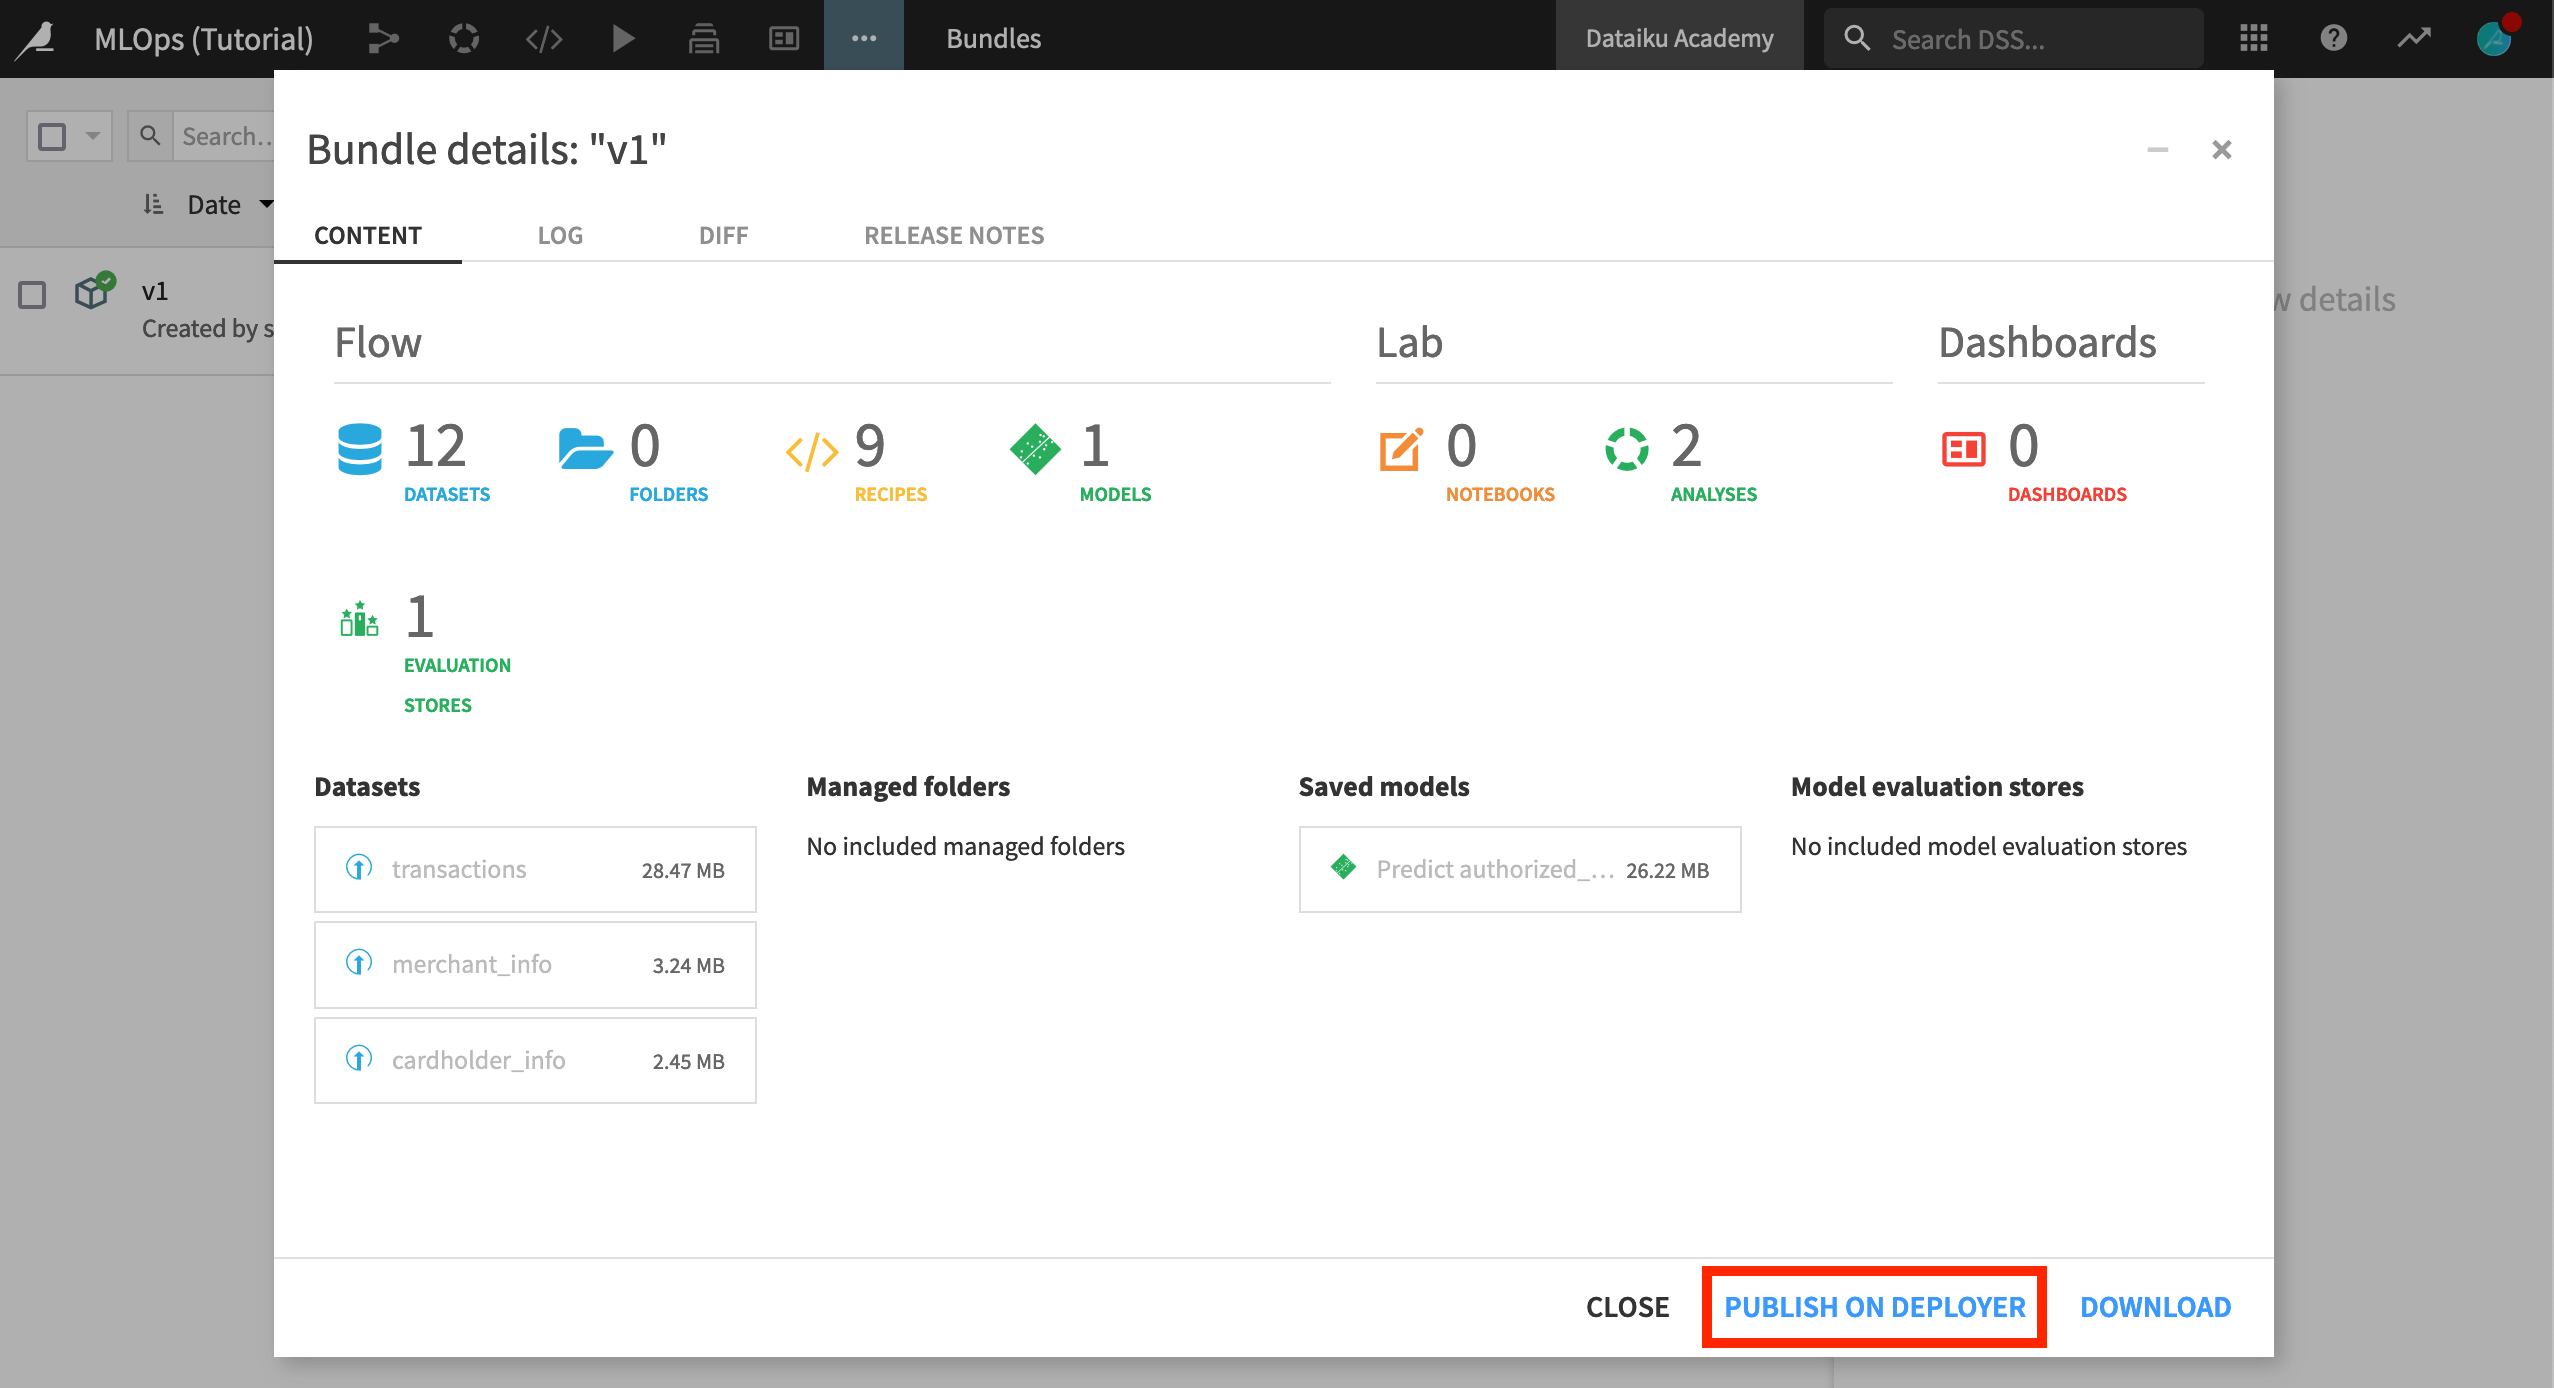
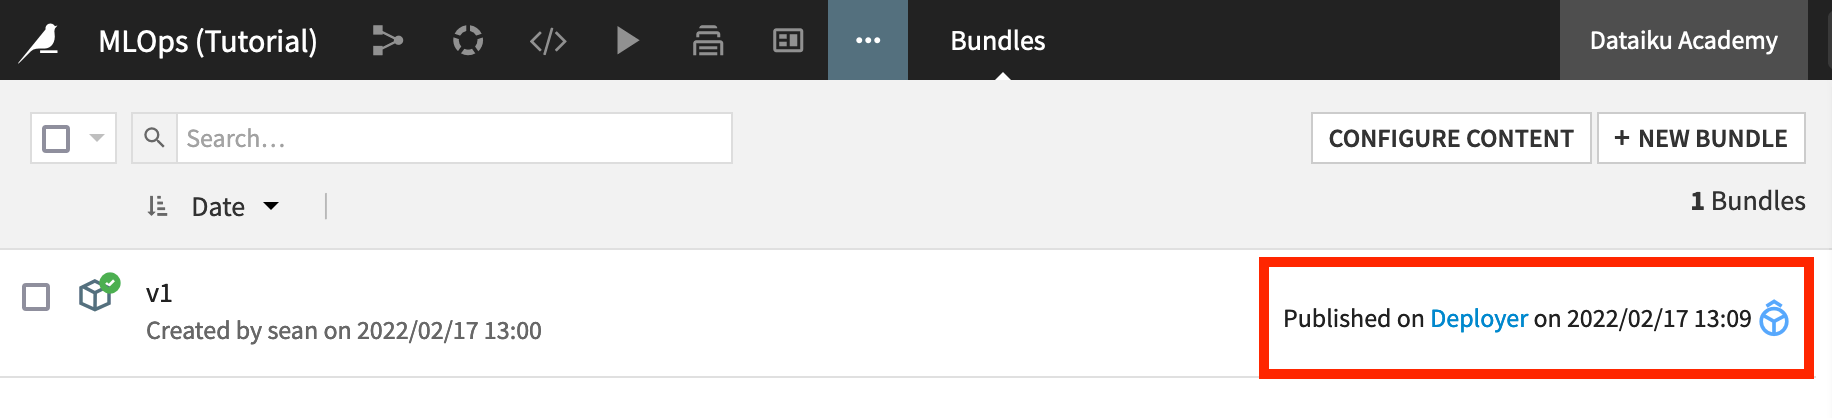
From the Bundles page of the project on the Design node, select the newly-created bundle.
Click Publish on Deployer, and then again confirm the same.
Explore the Deployer
Before actually deploying the bundle to the Automation node, let’s take a look at what the Deployer, and in particular the Project Deployer, offers.
There are actually two modes for installing the Deployer:
One is a local Deployer that sits on top of either the Design or Automation node and requires no further setup.
The other is a standalone or remote Deployer for infrastructures with multiple Design and/or Automation nodes.
Regardless of which setup your instance administrators have chosen, the process for using the Project Deployer is the same.
If you are using a remote Deployer, make sure you are connected to this instance. (You’ll need credentials from your instance administrator).
Then for either setup, from the bundle details page on the Design node, click Open in Deployer. If you’ve closed this dialog, just click “Deployer” where the publishing date is recorded.
Tip
You can also always navigate to the Deployer by choosing “Local/Remote Deployer” in the Applications menu from the top navigation bar.
Before actually creating a new deployment, take a moment to explore the Deployer. If you are using the remote Deployer, note the change in the instance URL.
From the Project Deployer, click on Deployer at the top left to see how this node has separate components for deploying projects and API services.
Click on Projects to view current deployments, projects that have published bundles, and infrastructures available.
Create a New Deployment
Let’s create a new deployment to push the bundle from the Project Deployer to the Automation node.
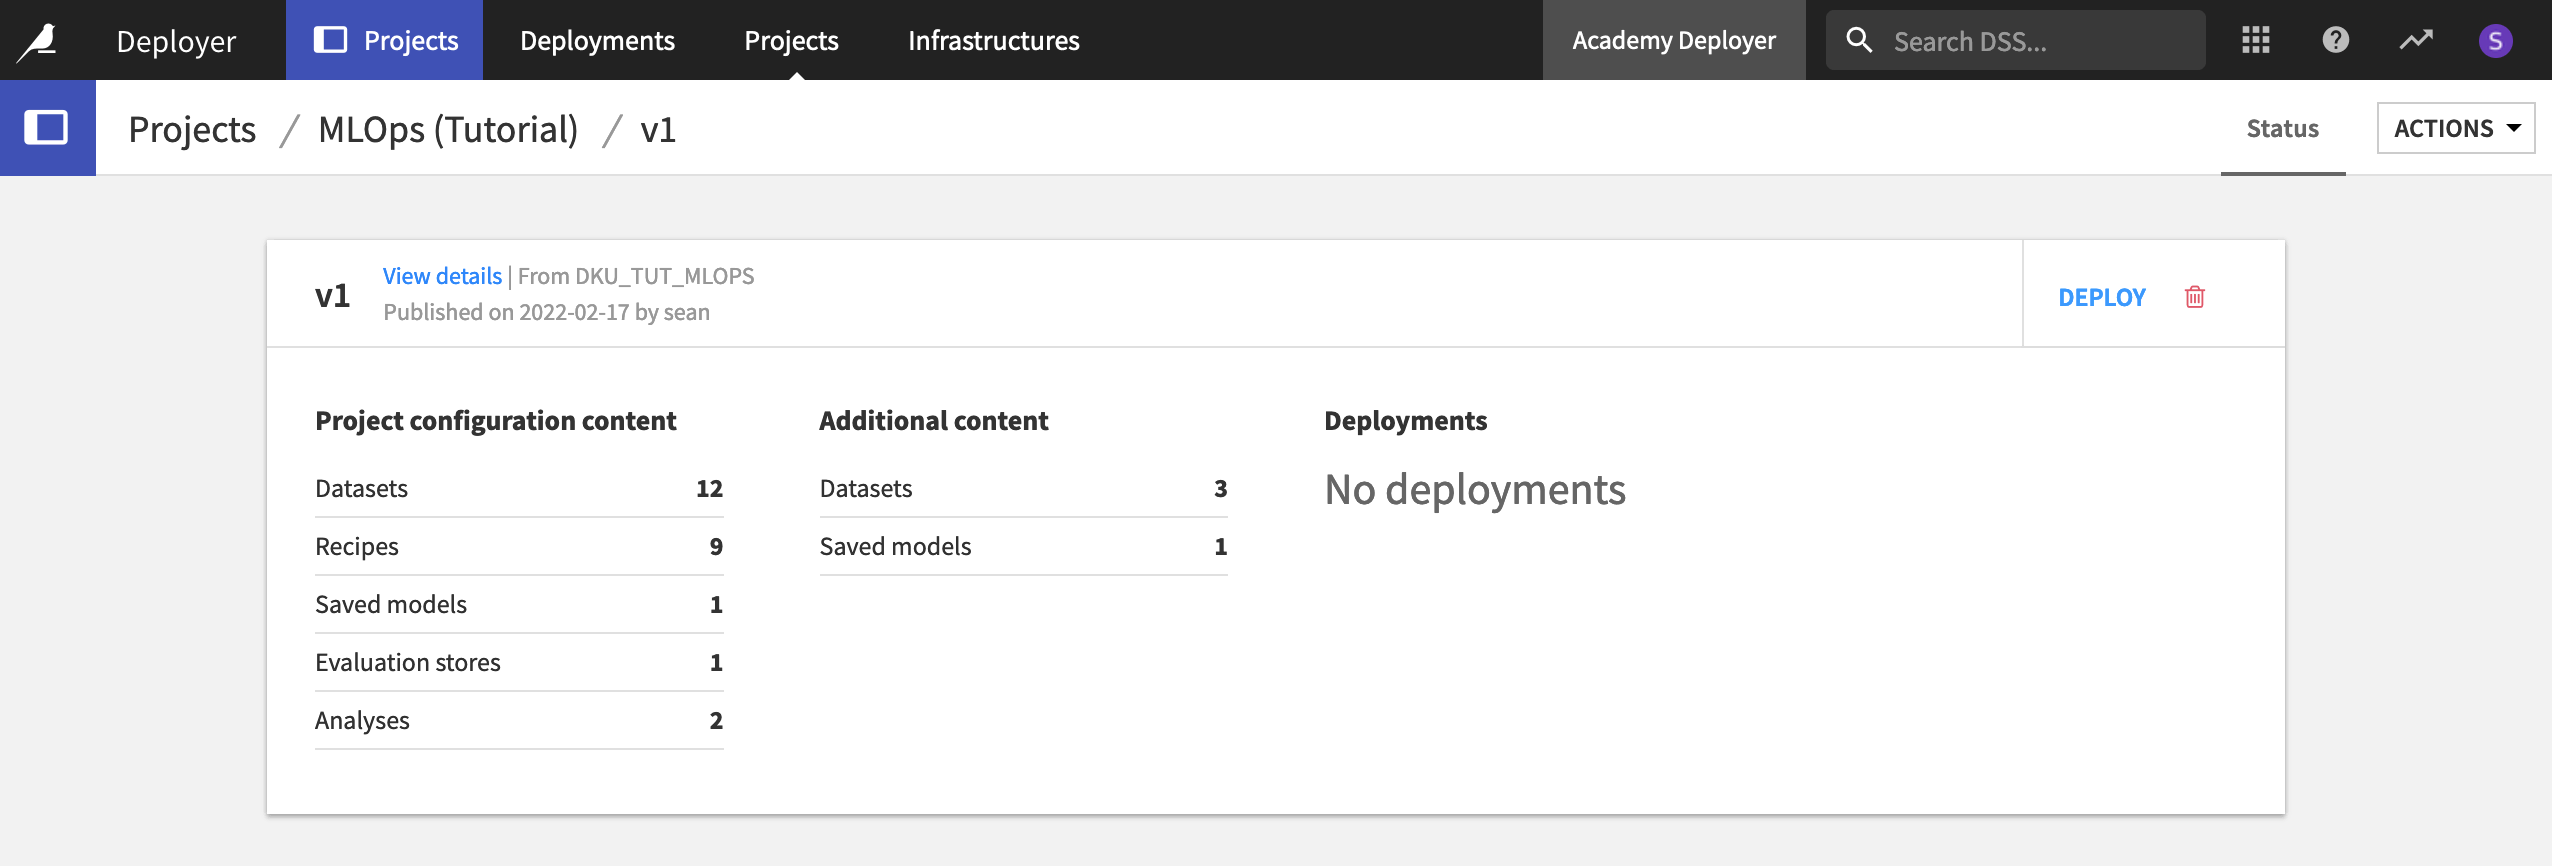
On the Project Deployer, find the v1 bundle for this project, and, click Deploy.
Warning
If the “Deploy” button is not clickable, it means there is no infrastructure ready for deployment. Please contact your instance administrator to create one.
Choose a target infrastructure. This will vary depending on the infrastructure available to your organization.
Leave the default Deployment ID, which takes the form of “PROJECTKEY-on-INFRASTRUCTURE”.
Click Create, and then Deploy and Activate.

Warning
Just as when importing a project to an instance (such as from a project export), you may see warnings about missing plugins or plugin version mismatches. If any of these plugins are used in the project at hand, you’ll want to closely review them.
The same can be said for missing connections. See the article on Preparing the Automation node for more details.
Manage Deployment Settings
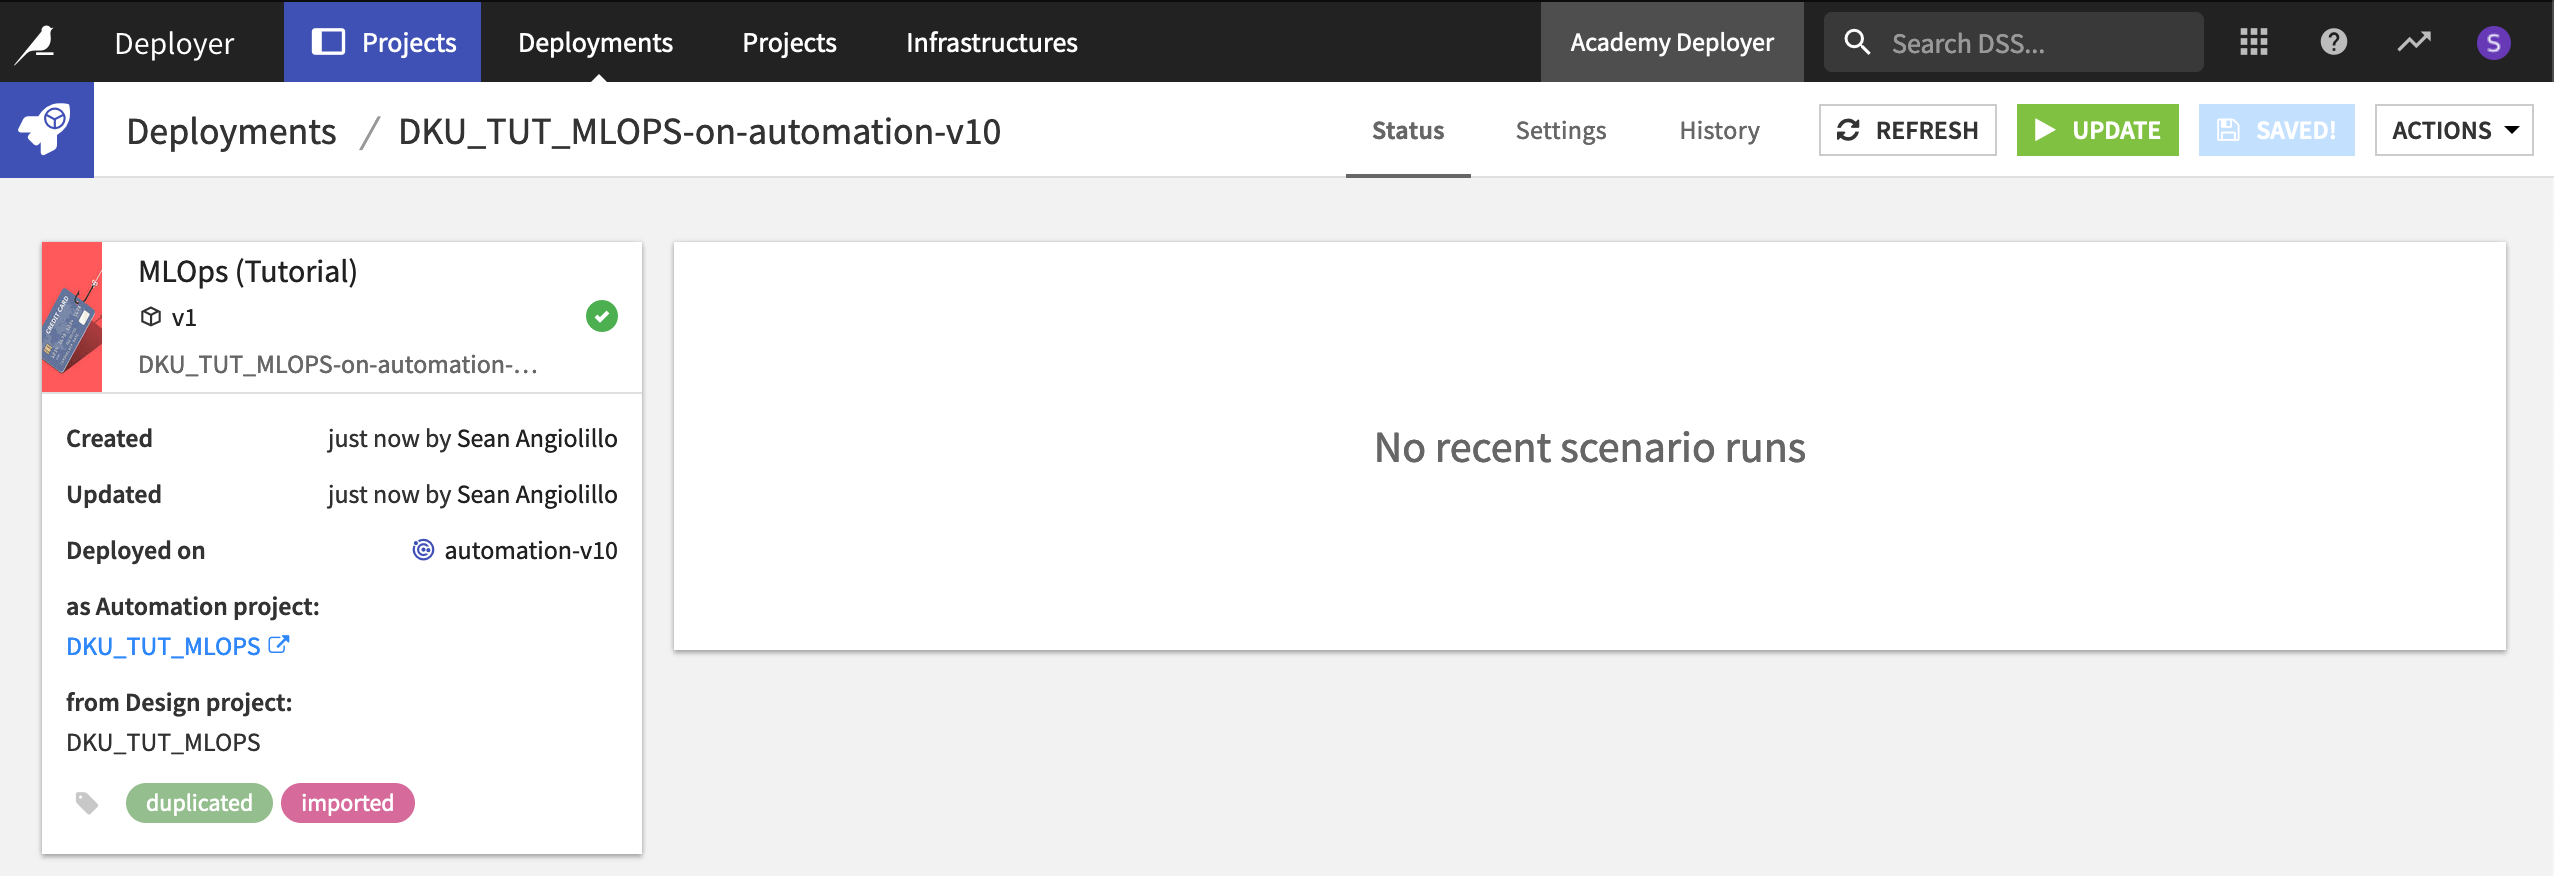
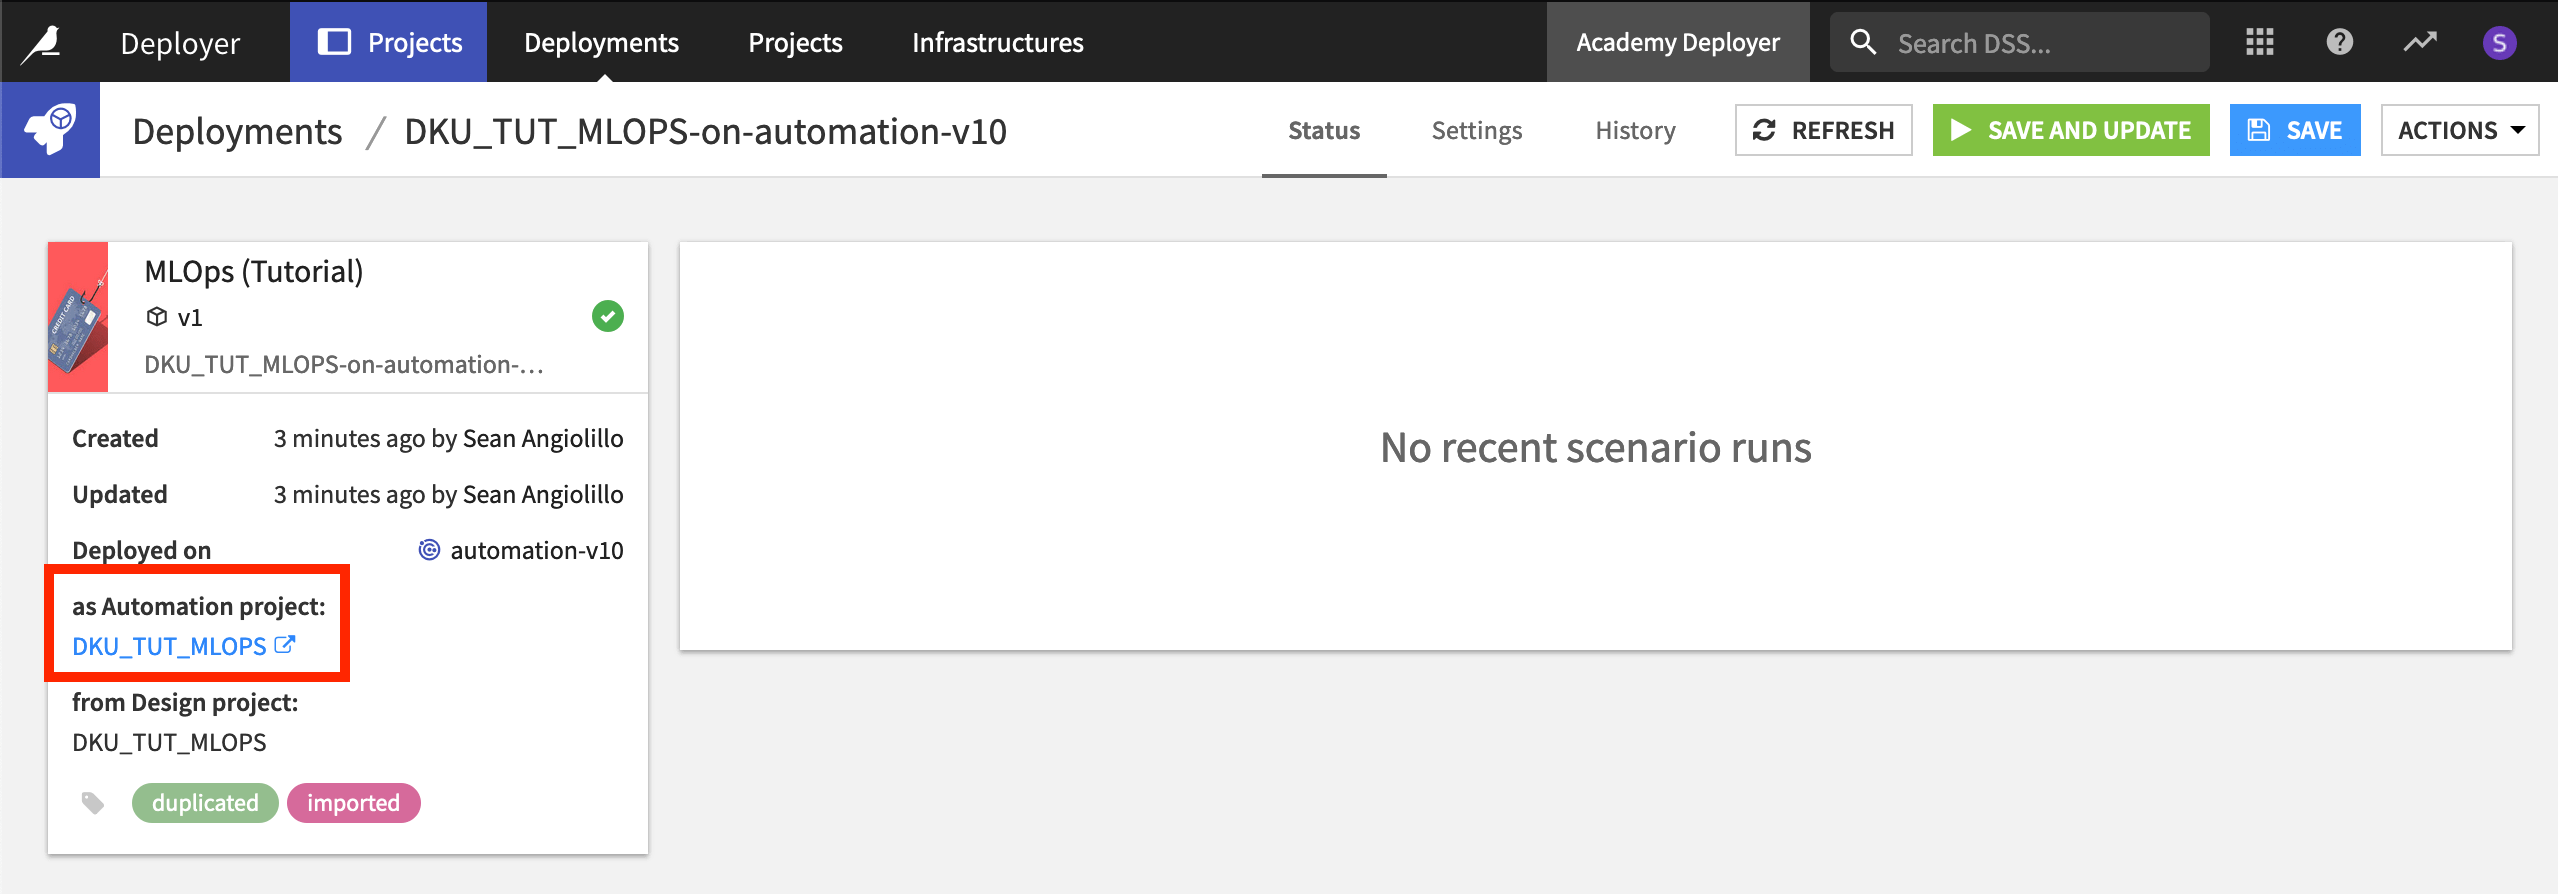
Your project is now running on the Automation node! You can click to open it from the panel on the left. Before doing so though, it is helpful to understand what deployment settings can be controlled from the Project Deployer itself.
Within the Project Deployer, we can monitor the status of deployments, such as when it was created (and by whom), when it was updated (and by whom), and recent scenario runs.
Note
The product documentation also covers how to modify deployment settings from the Project Deployer.
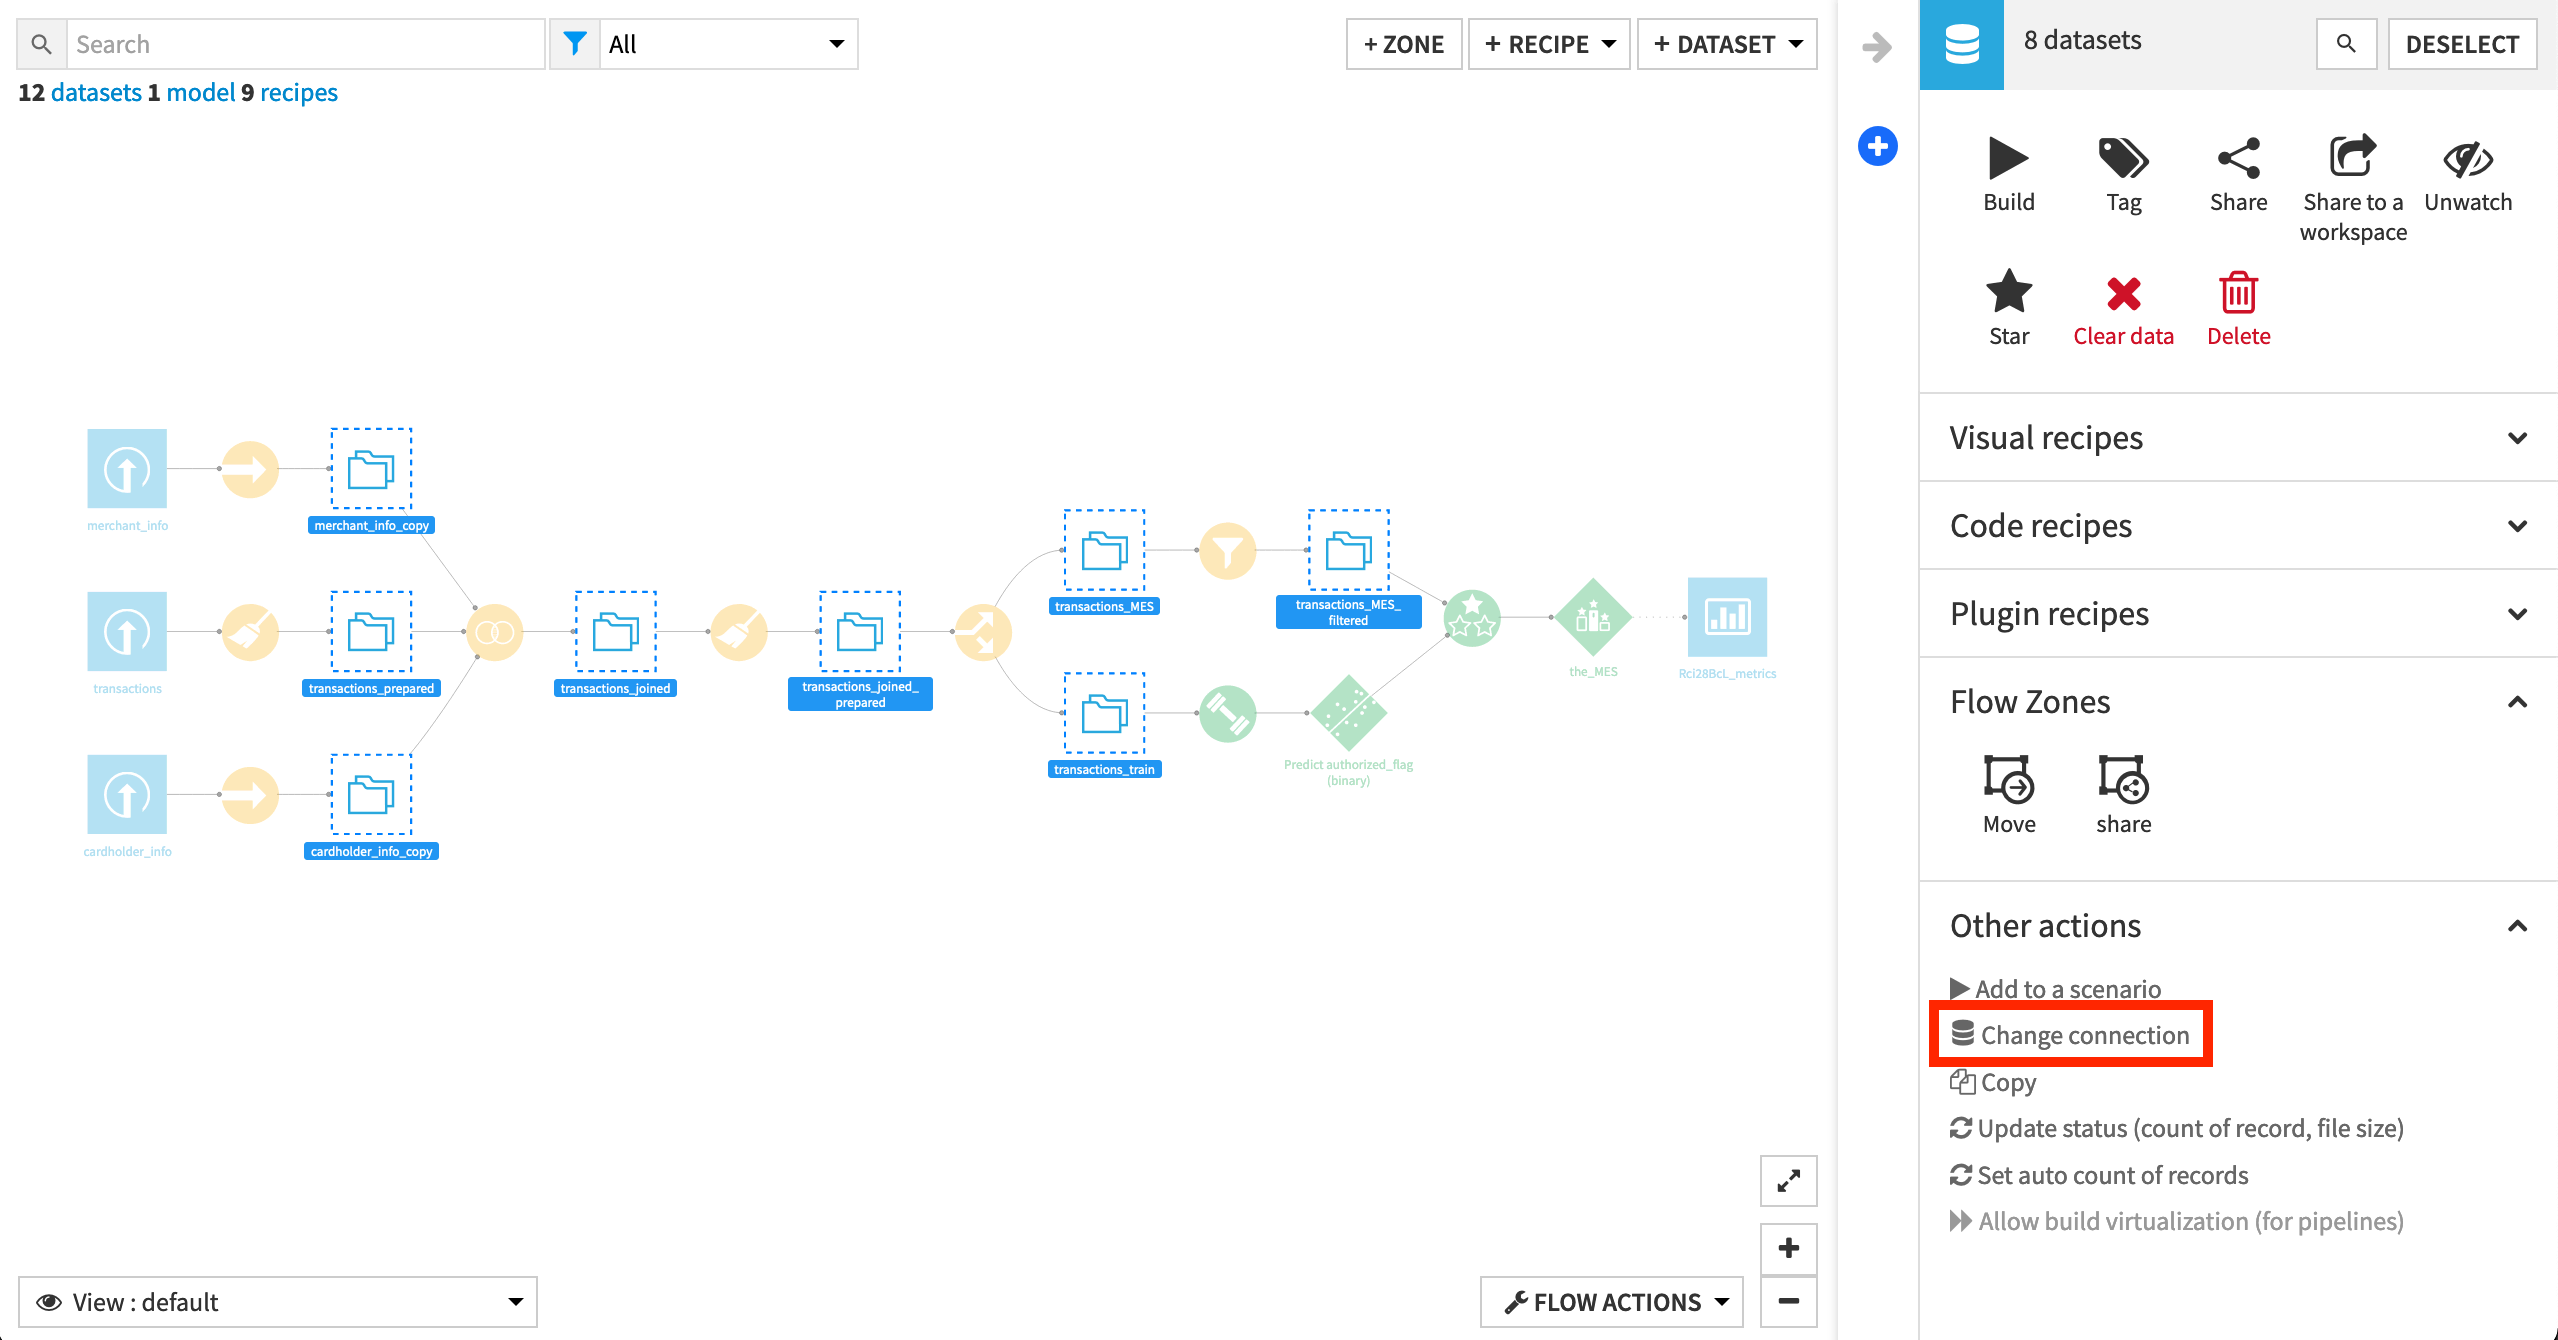
Remap Connections
In the Settings tab of a deployment, you can further configure criteria around variables, connections, code environments, and scenarios.
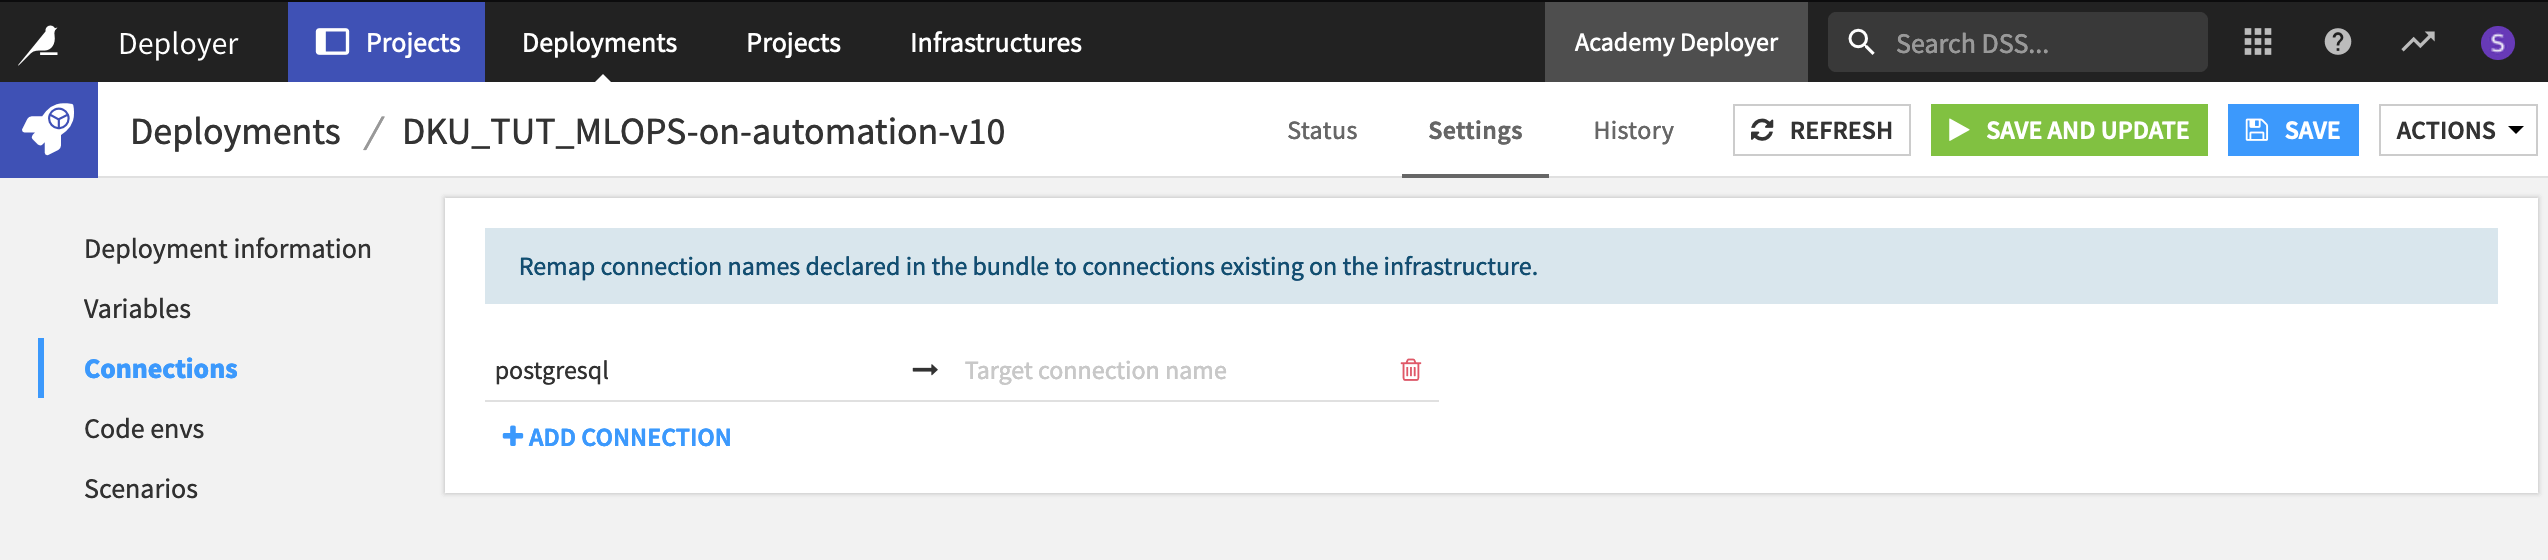
Navigate to the Settings tab, and then the Connections pane within that.
Connection remapping, for example, is one setting that will commonly need to be configured. In many cases, organizations maintain different databases for development and production environments. If this is the case, you’ll need to remap the source connections used on the Design node to the target connections that should be used on the Automation node.
Note
If, for the purposes of this tutorial, you are using the same database for development and production environments, there is nothing you need to do here.
You can learn more about remapping connections in this article.
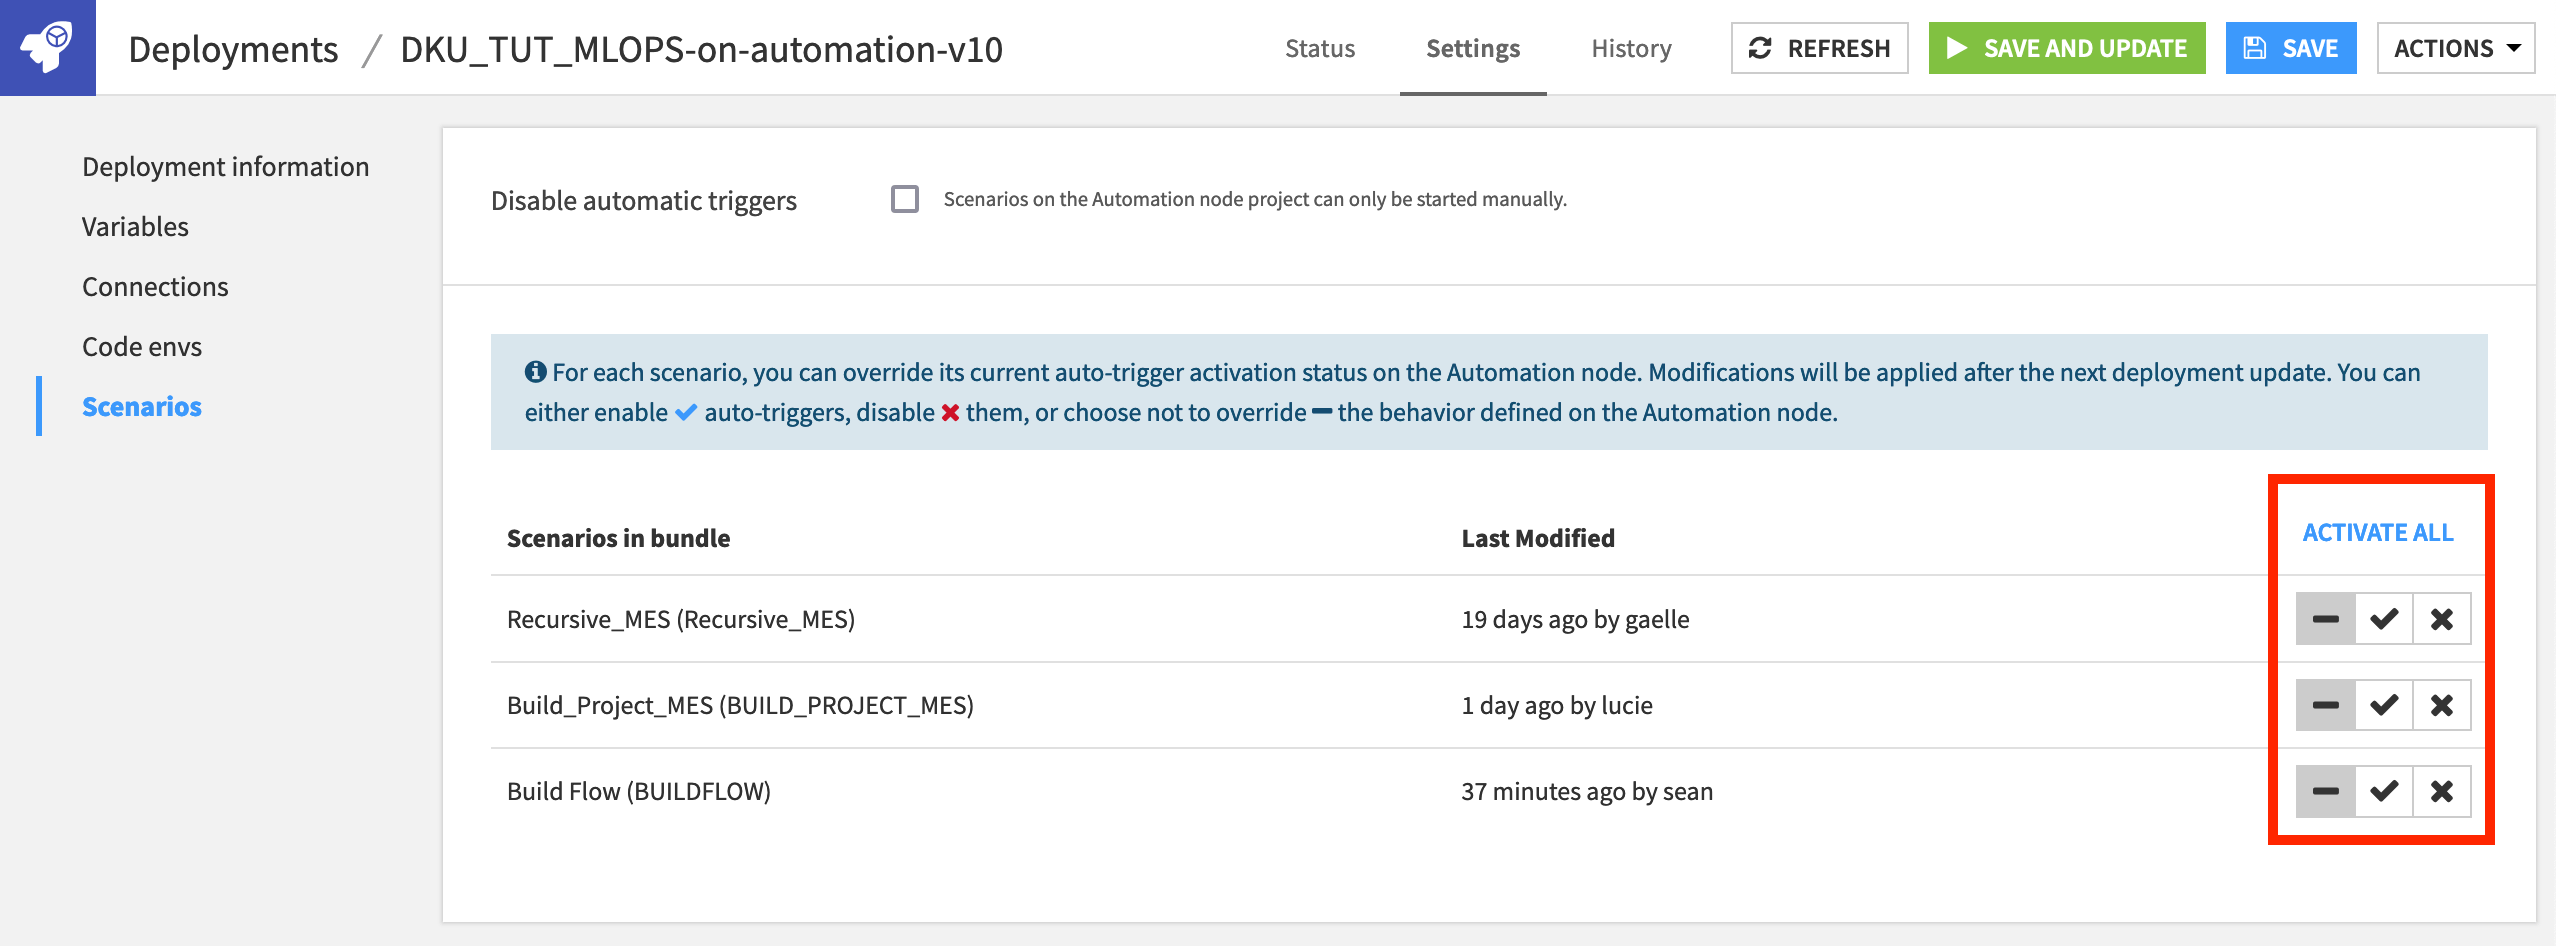
Manage Scenario Auto-Triggers
To ensure scenarios never run unexpectedly, all scenarios in a new deployment are deactivated by default—regardless of their settings on the Design node.
On the Settings tab of the deployment, navigate to the Scenarios pane.
Here you can enable, disable, or even override the behavior defined on the Automation node—giving you the option of how you want to manage the scenarios for a deployed project.
Leave the default setting in place (the one that does not override the behavior defined on the Automation node).
The Automation Node
Finally, let’s check out the project on the Automation node.
Ensure you are connected to the Automation node.
From the Deployer, navigate back to the Status tab of the deployment, and click to open the project on the Automation node.
Once on the Automation node, your project should look quite familiar. Confirm a few points:
The project homepage reports what bundle is running and when it was activated.
The scenario auto-triggers are turned off.
Rather than use some kind of trigger, let’s manually run it to confirm it is working.
While in the Automation node version of the project, open the “Build Flow” scenario, and click Run to manually start it.
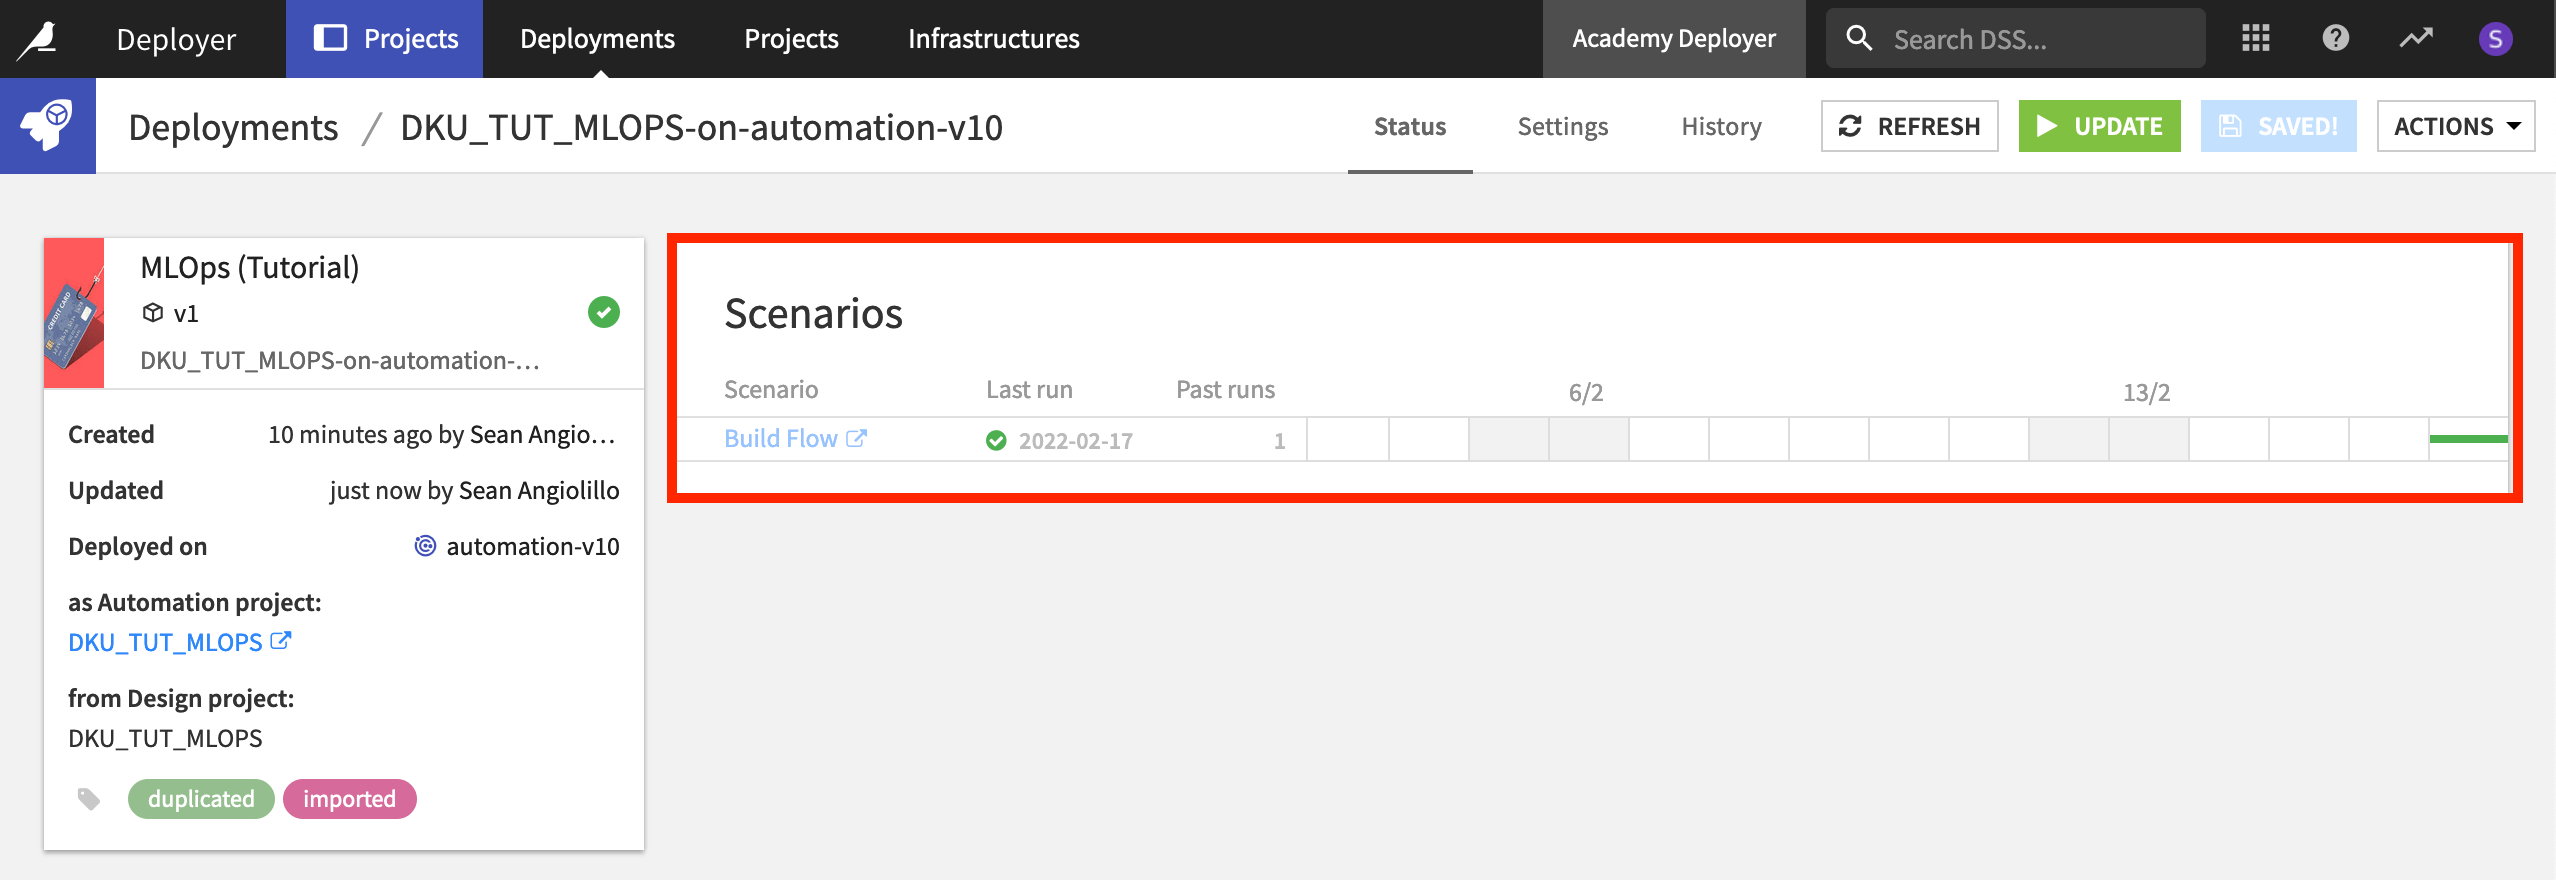
Instead of checking the progress on the Automation node, let’s monitor its progress from the Project Deployer.
Return to the Deployer, and open the same deployment. Note how the success of the most recent scenario run is reported.
Versioning a Deployed Project
Congratulations! You have successfully created a project bundle in the Design node and, via the Deployer, published it to the Automation node.
Of course, this is not the end of the story! Data science is an iterative process. You’ll need to deploy updated versions of this project as requirements change over time.
When it is necessary to make a change to a deployed project, it’s critical to make such changes in the development environment (the Design node), and then push an updated bundle to the production environment (the Automation node).
It may be tempting just to make a quick change to the project on the Automation node, but you should avoid this temptation, as the project in the production environment would no longer be synced with its counterpart in the development environment.
Consider a situation where something went wrong, and you want to revert back to an earlier version of the project. If you’ve made changes in the Automation node, these changes will be lost. Accordingly, actual development should always happen in the Design node, and new versions of bundles should be pushed from there.
Note
Although outside our focus here, you can learn more about version control for projects in the product documentation.
Create a New Bundle
Let’s demonstrate the process for updating a deployment with a new bundle.
Return to the original project on the Design node.
We could make any change, but for example, change the trigger of the “Build Flow” scenario to run at 3am instead of 2am
If a trigger doesn’t exist, add any time-based trigger. Save any changes.
From the Bundles page, click + New Bundle.
Name it
v2.In the release notes, add
adjusted scenario trigger timing.Click Create.
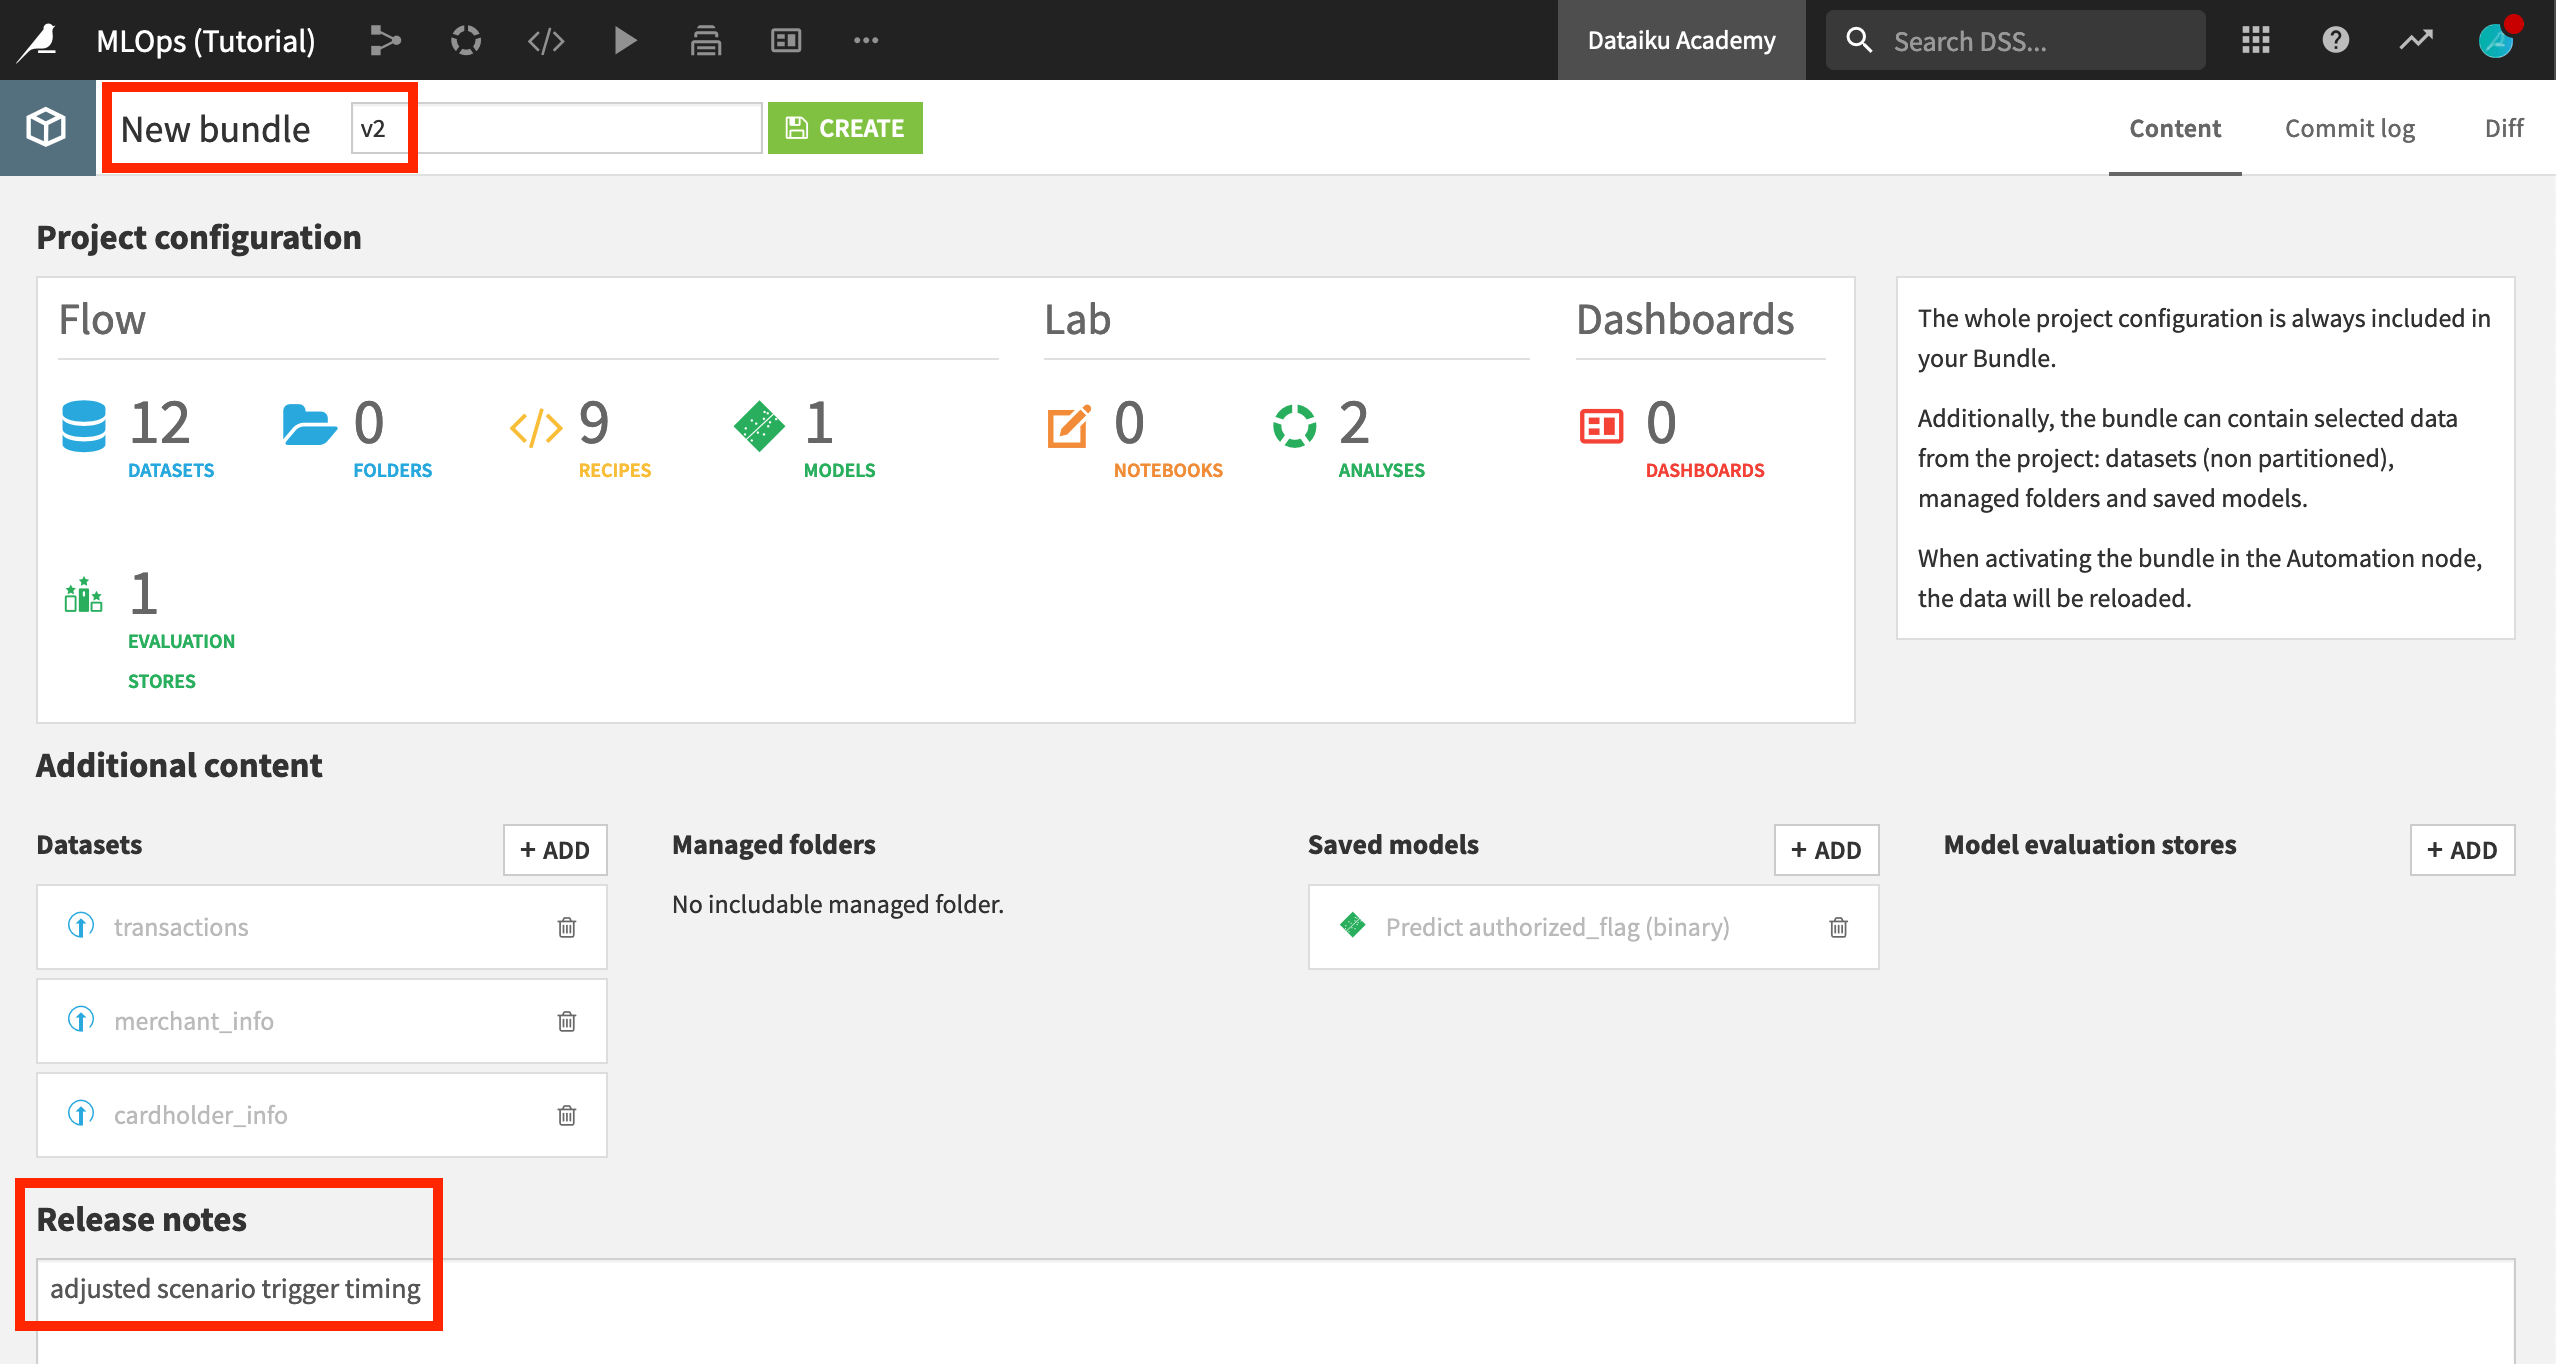
Note
Note how when creating the second version of the bundle, the configuration of the previous one is inherited. In this case, the saved model and initial datasets are already included.
Deploy the New Bundle
The process for deploying the new bundle is essentially the same as for the first one.
Click on the newly-created bundle, and click Publish on Deployer.
Confirm that you indeed want to Publish on Deployer.
Click to Open in Deployer to view the bundle details on the Deployer.
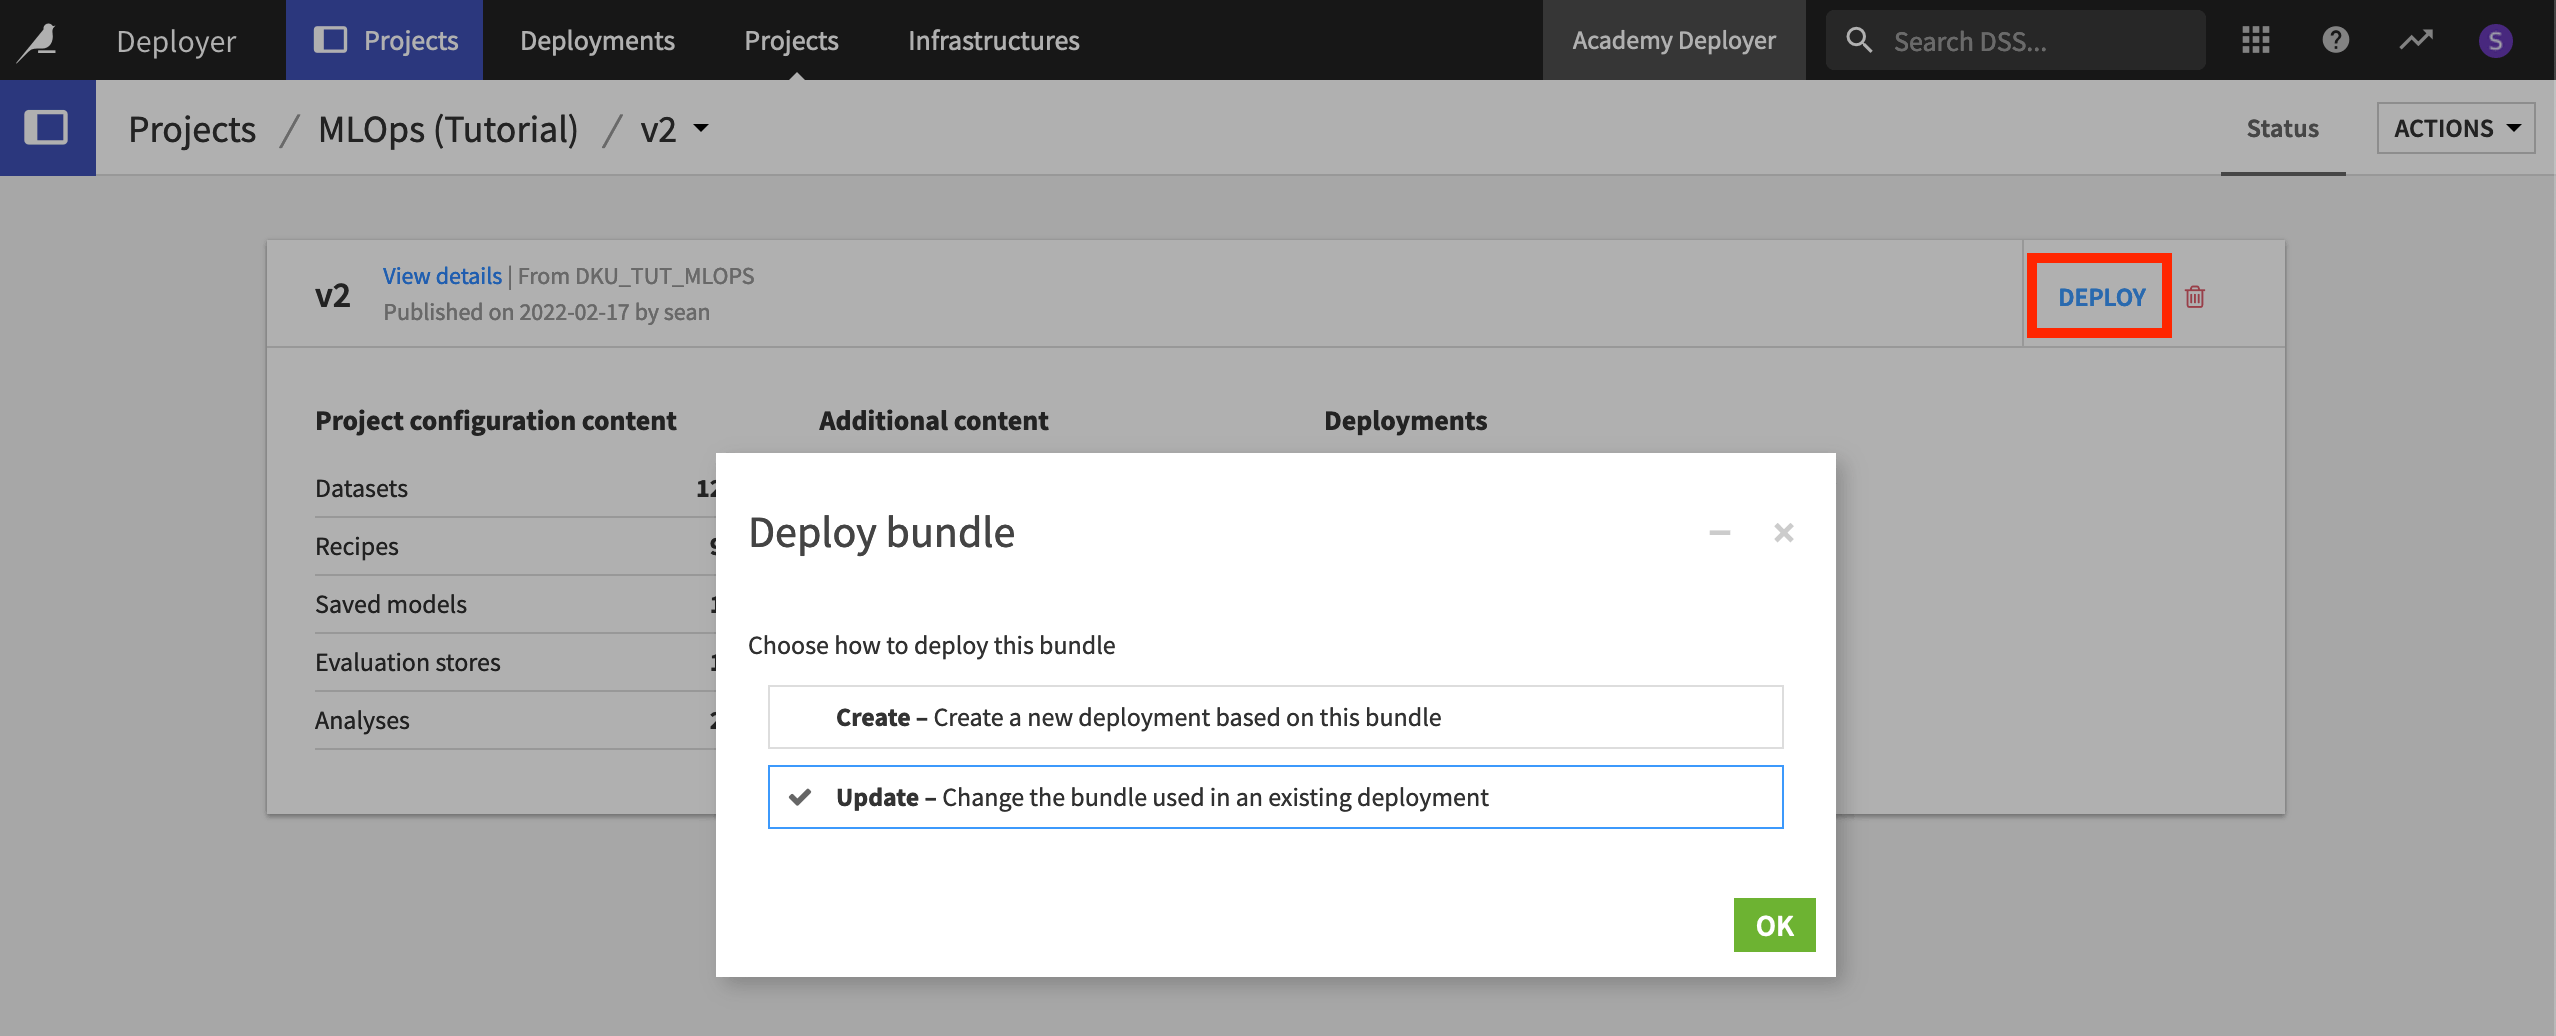
Click Deploy on the v2 bundle.
Dataiku gives the option to create a new deployment or update the existing one.
Since this is a new version of an existing deployment, make sure “Update” is selected, and click OK. Click OK again to confirm the deployment you want to edit.
We’re not done yet!
Navigate to the Status tab, and note how Dataiku DSS warns that the active bundle on the Automation node does not match the configured bundle.
Click the green Update button to deploy the new bundle.
On the Project Deployer, you’ll be able to see the new bundle as the currently deployed version of this project.
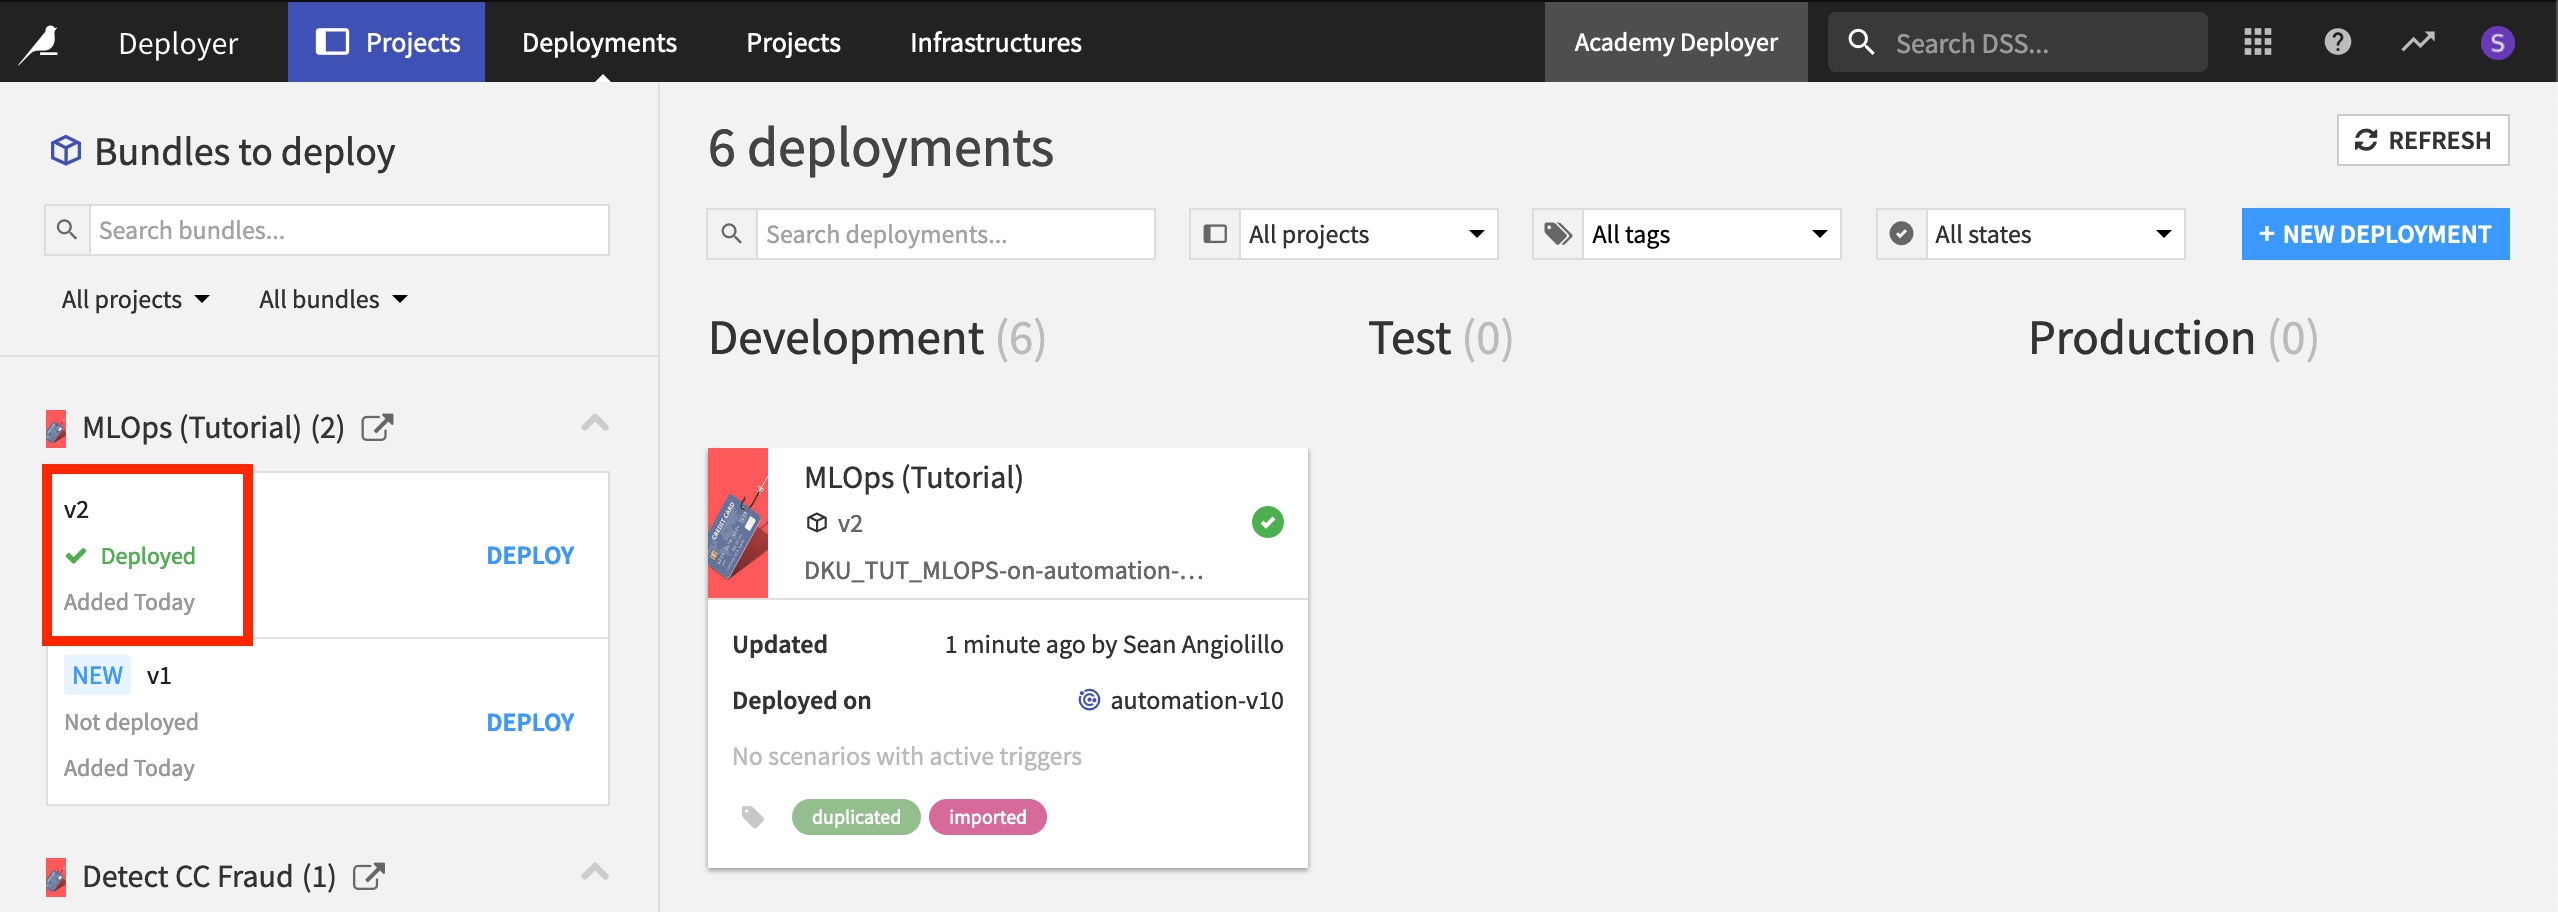
Tip
In the image above, you’ll note that there happen to be six deployments. Here we are using a remote or standalone Deployer, which centralizes all of the deployments connected to the instance.
Revert to a Previous Bundle
It’s also important to retain the ability to revert to an earlier version, should a newer bundle not work as expected. Let’s demonstrate that now.
From the Deployments tab of the Deployer, find the project in the left hand panel.
Click Deploy next to the v1 bundle.
With “Update” selected, click OK, and confirm this is correct.
Now on the Settings tab with v1 as the source bundle, click the green Update button.
If you return to the Status tab of this deployment, or open the project on the Automation node, you’ll see that v1 is the active bundle running in production.

Note
You can learn more about reverting bundles in the product documentation.
What’s Next?
Congratulations on putting your first project bundles into production! For more information, consult the product documentation on project deployments and bundles.
Now that you are comfortable deploying and versioning project bundles, you’re ready to take a closer look at monitoring projects running in production.