Hands-On Tutorial: Shared Code
Developers benefit from collective knowledge when they code with others developing projects on the same Dataiku instance. One of the most common ways to access and share frequently-used code in Dataiku is project libraries. When the code you need is available in a Git repository, you can import it into your project library and share that library with other projects for maximum reusability.
In this tutorial, we’ll create a single project library that you can share among projects.
Let’s Get Started!
In this hands-on tutorial, you will learn how to:
create a shareable project library;
add a file by importing it from a remote Git repository into a project’s library;
import the project library into a second project; and
make use of a shared code module.
Prerequisites
To complete this tutorial, you’ll need the following:
Dataiku - version 8.0 or above.
A Python environment that includes the package openpyxl.
Note
The 14-Day Free Online Trial contains a code environment, “dash”, that includes everything you need to complete the courses in the Developer learning path.
Note
This tutorial was tested using a Python 3.6 code environment. Other Python versions may be compatible.
A GitHub account with a public SSH key. This is needed so that you can download a Python file from the Dataiku Academy Samples repository using SSH.
Note
Visit GitHub Docs to find out how to sign up for a GitHub account. For more information about adding a public SSH key to your account, visit GitHub Docs: Connecting to GitHub with SSH.
Create the Starter Projects
Create Projects A and B
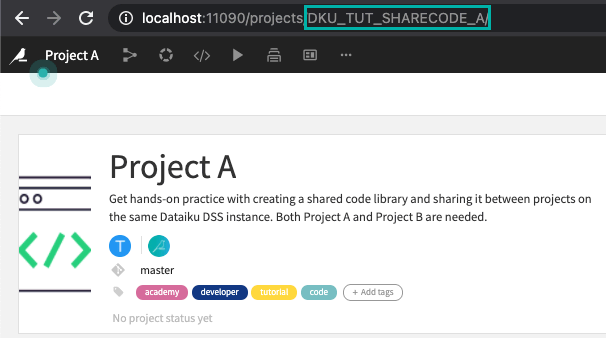
From the Dataiku homepage, click +New Project > DSS Tutorials > Developer > Project A (Tutorial).
Then, click +New Project > DSS Tutorials > Developer > Project B (Tutorial).
Note
You can also download Project A and Project B from the downloads page and import them as zip files.
Here is the starting Flow for Project A.
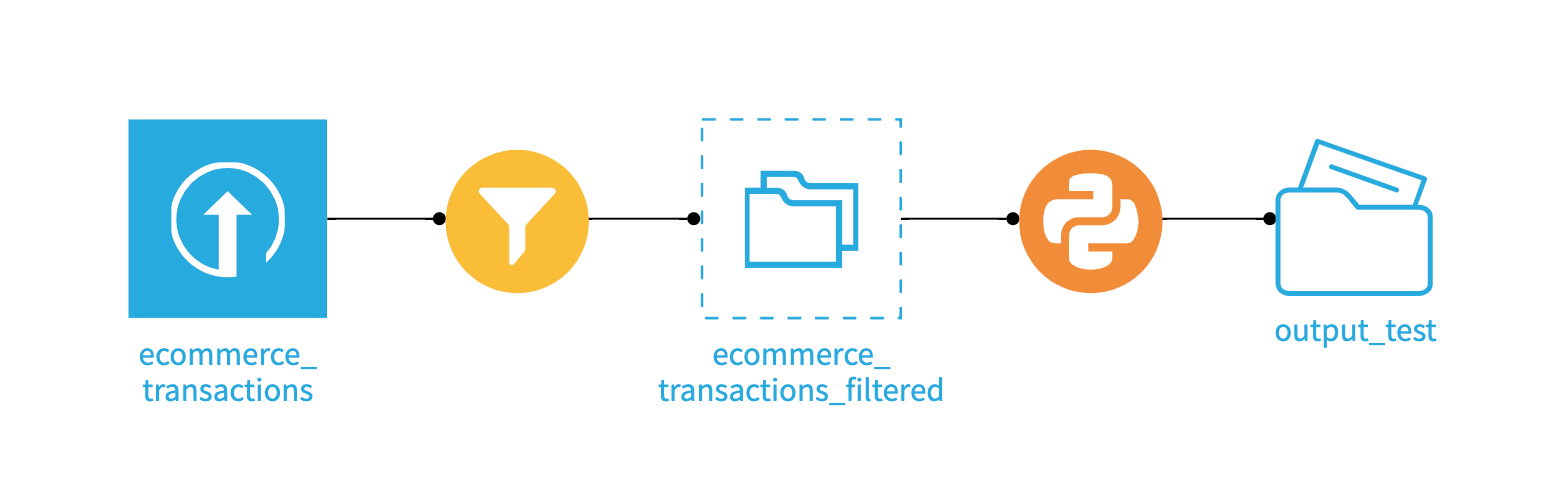
Note
The data quality issues in the ecommerce_transactions dataset will not impact the steps needed to complete this tutorial.
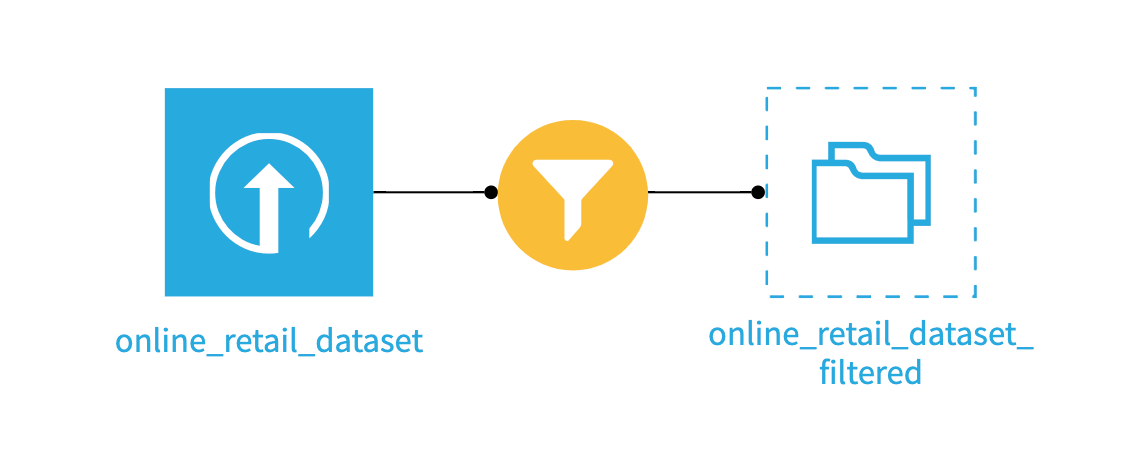
And the same for Project B.
Create a Code Library in Project A
In this section, we’ll add a “Pandas Dataframe to Excel” function to our shared code library in Project A by cloning a library from a remote Git repository. To find out more, visit Working with Git.
Note
A Project Library is the place to store code that you plan to reuse in code-based objects (e.g., code recipes and notebooks) in your project. You can define objects, functions, etc., in a project library.
Project libraries should be used for code that is project-specific. However, libraries also leverage shared GitHub repositories, allowing you to retrieve your classes and functions.
You can import libraries from other Dataiku DSS projects to use in your project. See the product documentation to learn about reusing Python code and reusing R code.
Access the Remote Git Repo
The first step is to access the remote Git repo and copy the SSH URL. We’ll need this URL to import the Python file from the remote repo into our project library.
Note
When importing from Git, use SSH for a secure connection. Visit GitHub reference documentation to find out more about using SSH with GitHub. Visit Working with Git for more information about working with Git in your Dataiku project.
Sign in to your GitHub account, then go to the Dataiku Academy samples repository: https://github.com/dataiku/academy-samples.
Click Code, then copy the SSH URL to the clipboard. If you do not have SSH configured, you can copy the HTTPS URL instead.
We’ll use this URL in the next section.
Import the File from Git
Let’s import the remote Git repository into the library for Project A.
Open Project A.
From the “code” menu in the top navigation bar, choose Libraries.
Click Git > Import from Git.
Paste the SSH URL of the Git repository you copied (
git@github.com:dataiku/academy-samples.git). Alternatively, paste the HTTPS URL (https://github.com/dataiku/academy-samples.git).In Checkout, click the retrieve icon to retrieve the branches, then choose the main branch. This branch contains the content we want to import.
If you encounter an error when trying to retrieve the branches, try using the HTTPS URL.
Enter
shared-codeas the Path in repository. We only want to import a part of the repository–the “shared-code” directory.Enter the
/python/Target path. This tells Dataiku to import the repository into the Python folder in our project library. If left blank, Dataiku will replace the entire Python library in the project, removing any existing files and code. Note that the syntax starts and ends with “/”.
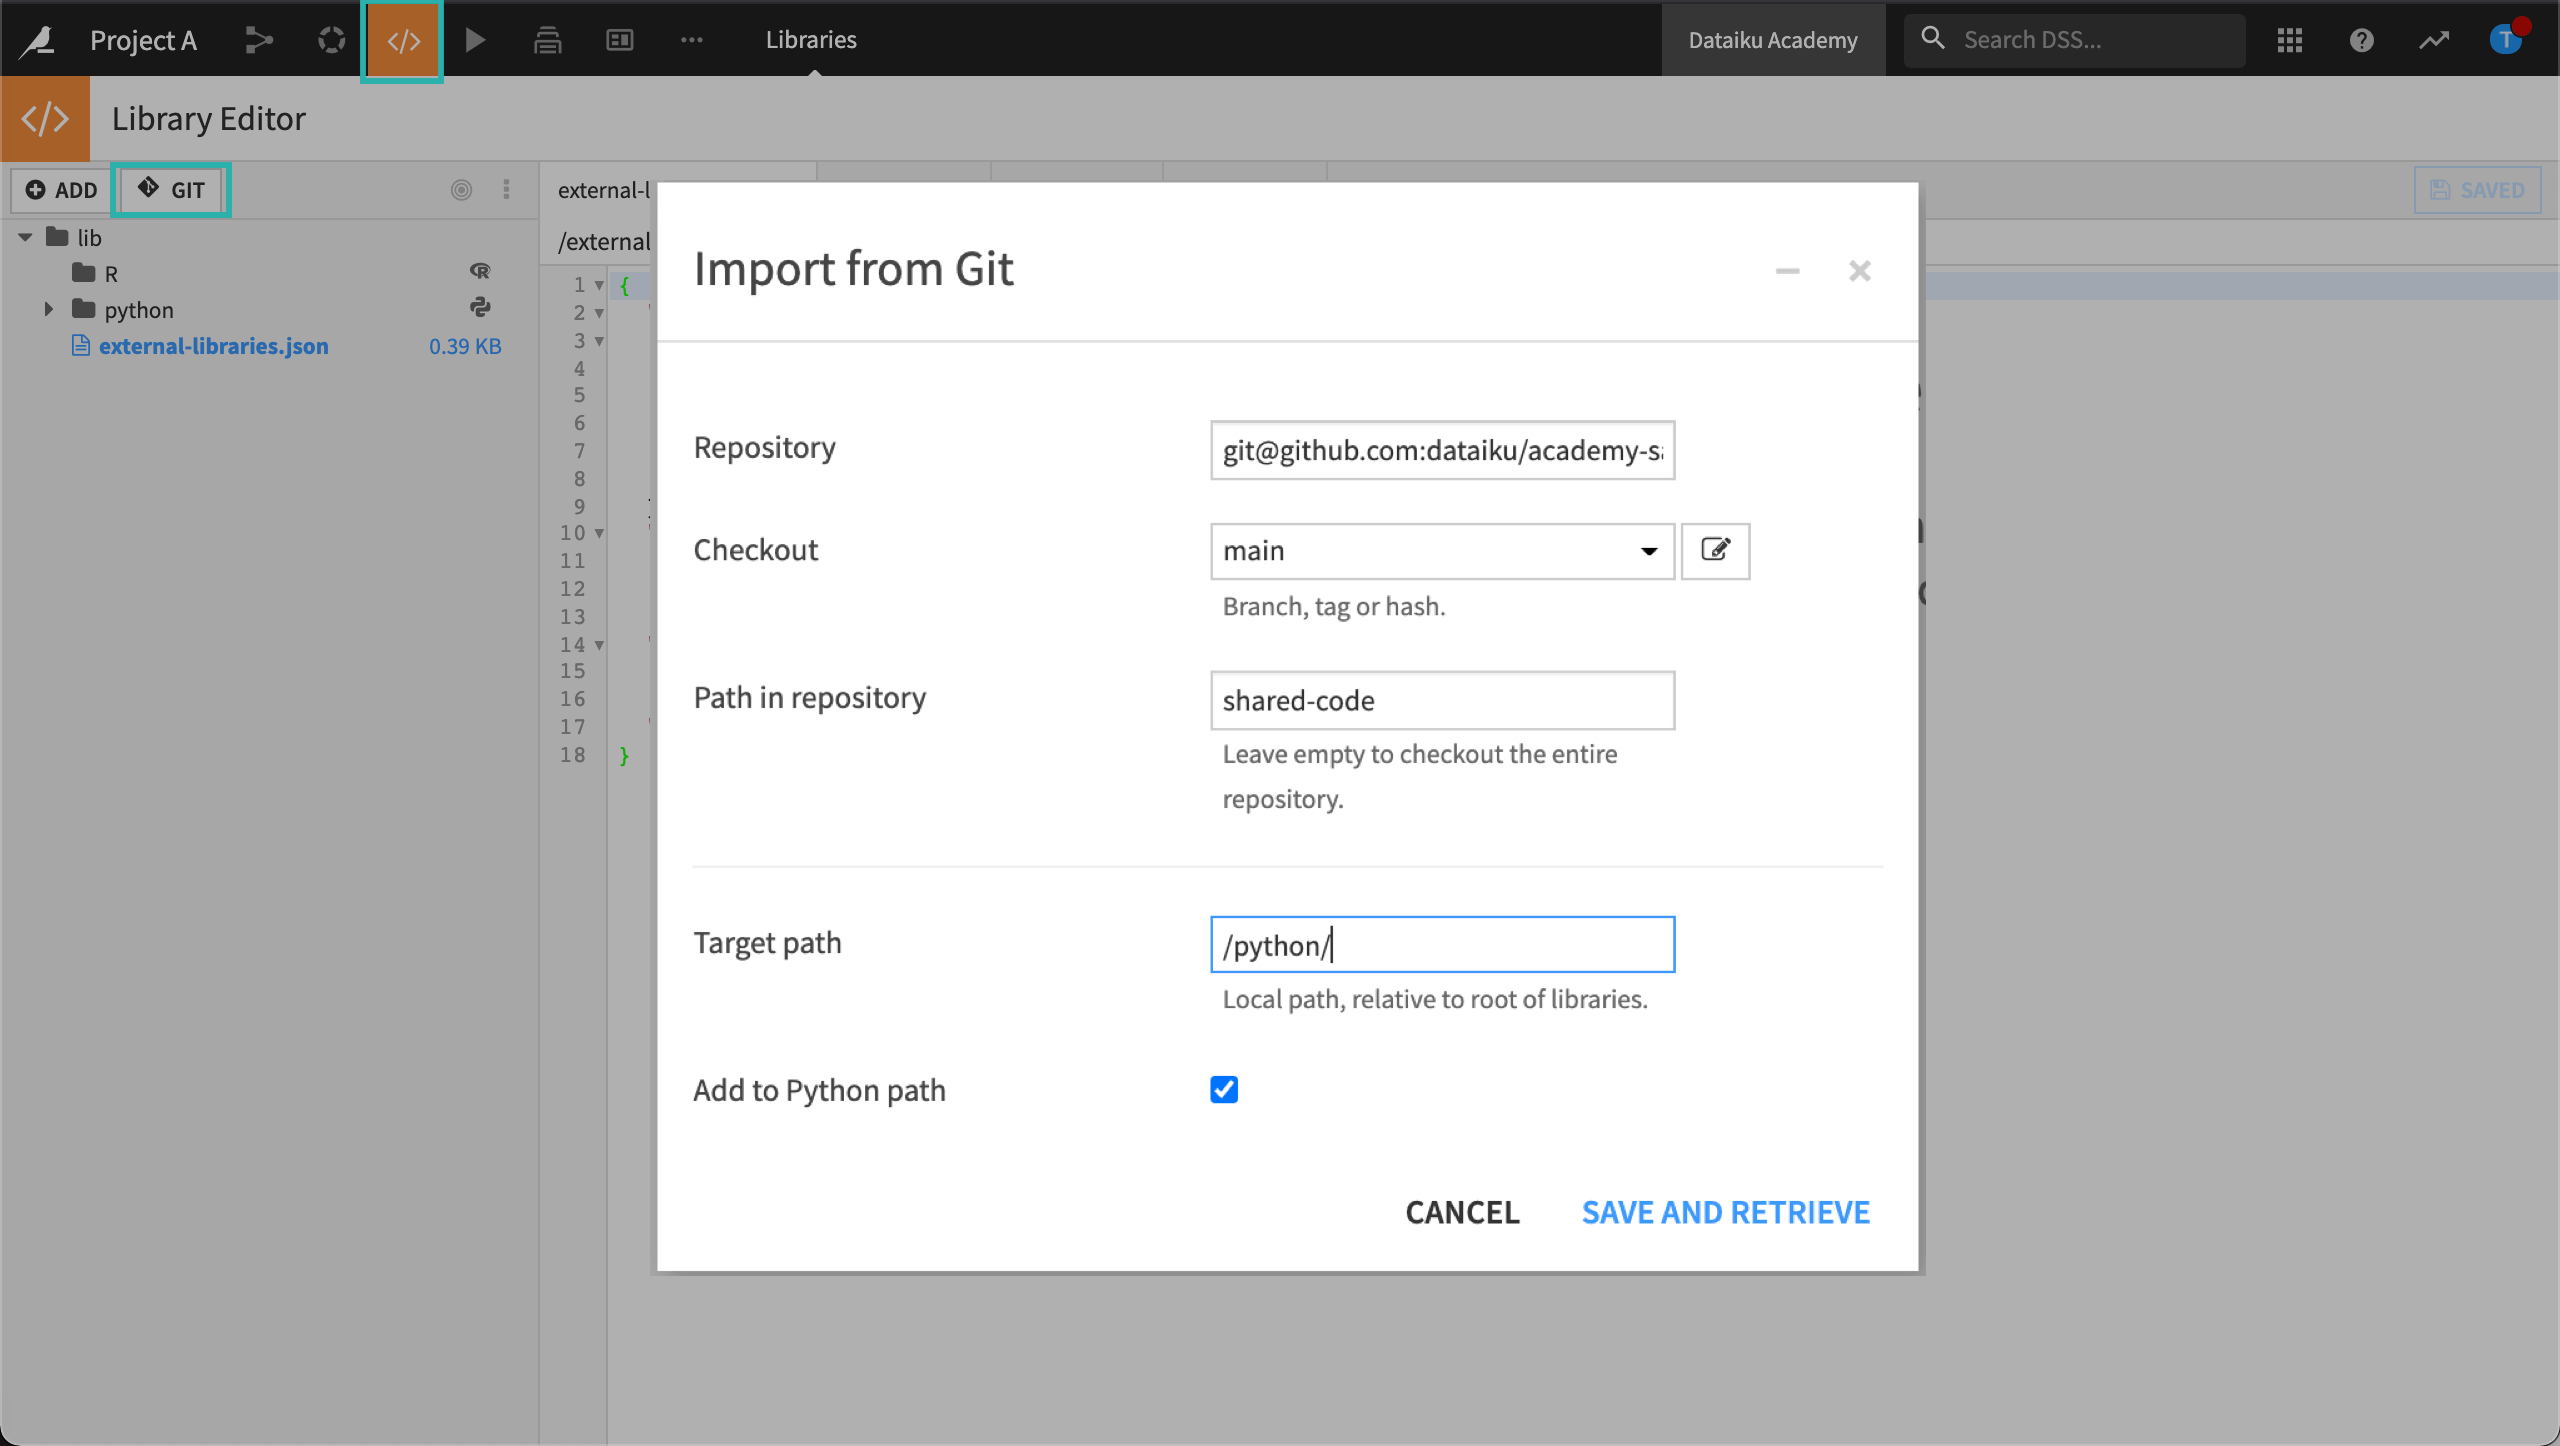
Click Save and Retrieve to fetch the repository.
Dataiku displays a success message letting you know the Git reference update was successful. Our Python library now contains the file, to_xlsx.py.
This Python file contains a “Pandas Dataframe to Excel” function that is now available to use in code capacities within Dataiku, including recipes and notebooks.
About the Pandas Dataframe to XLSX Function
The “Pandas Dataframe to Excel” function writes a specified DataFrame to an XLSX file and stores it in an output folder in the Flow.
It requires three inputs:
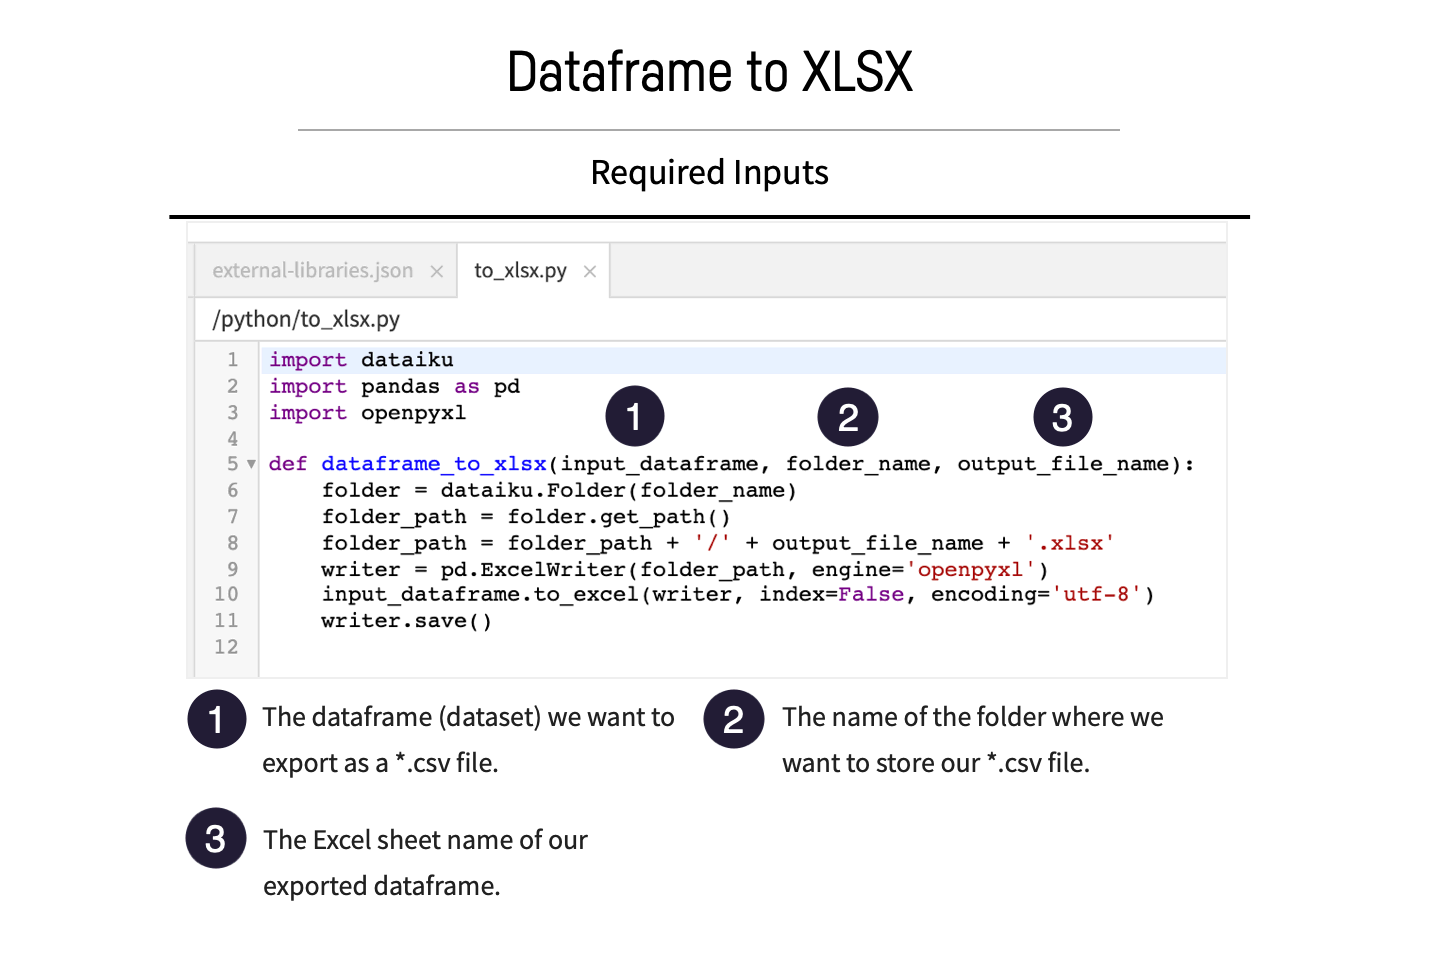
Later, we’ll provide these inputs via a Python recipe.
Note
The DataFrame to Excel function demonstrates the use of shared code. However, you do not have to import a function to export a dataset as an Excel file in Dataiku. You can use the built-in export function when working with a dataset.
Turn the Project Library into a Shared Code Library
How could other teams on the same Dataiku instance use the code from Project A in their projects? Other teams can use the code library from another project on the same Dataiku instance in their projects. In this section, we’ll turn the code library from Project A into a shared library by importing it into Project B. Then we’ll use the Dataframe to XLSX function in a Python recipe to export a dataset as a XLSX file.
Import the Project Library from Project A into Project B
To import the code library from one project to another, you’ll need to add the parent project’s key (each project in Dataiku has a unique project key) to the “external-libraries.json” file of the child project.
Let’s add the project key of Project A to the “external-libraries.json” file in Project B.
To do this:
Open Project A.
Copy the project key from the URL. You can find the project key in the URL of the project.
Open Project B and go to the library editor.
Open the “external-libraries.json” file.
Add the project key you just copied to the
import Libraries From Projectslist, putting the project key in quotes and wrapping it in square brackets.
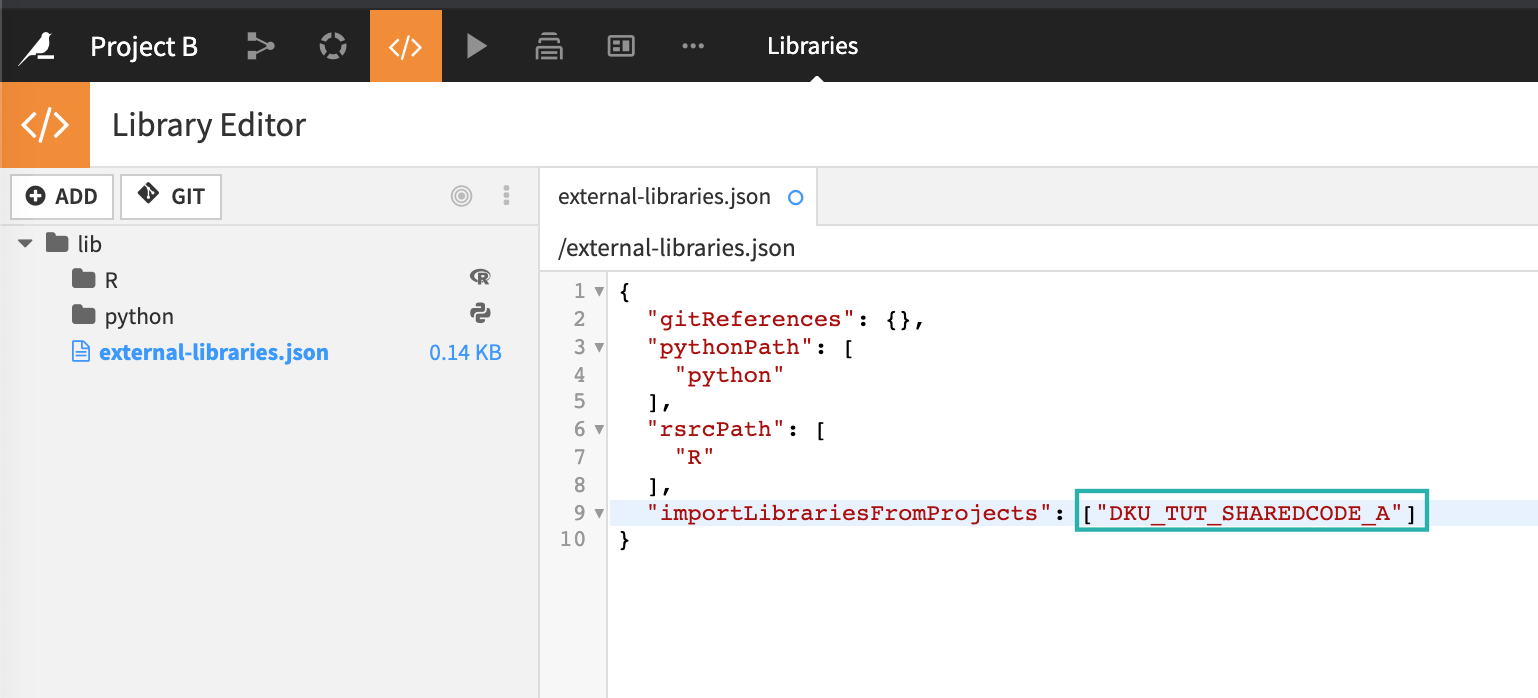
Click Save All.
The project library from Project A is now imported into Project B.
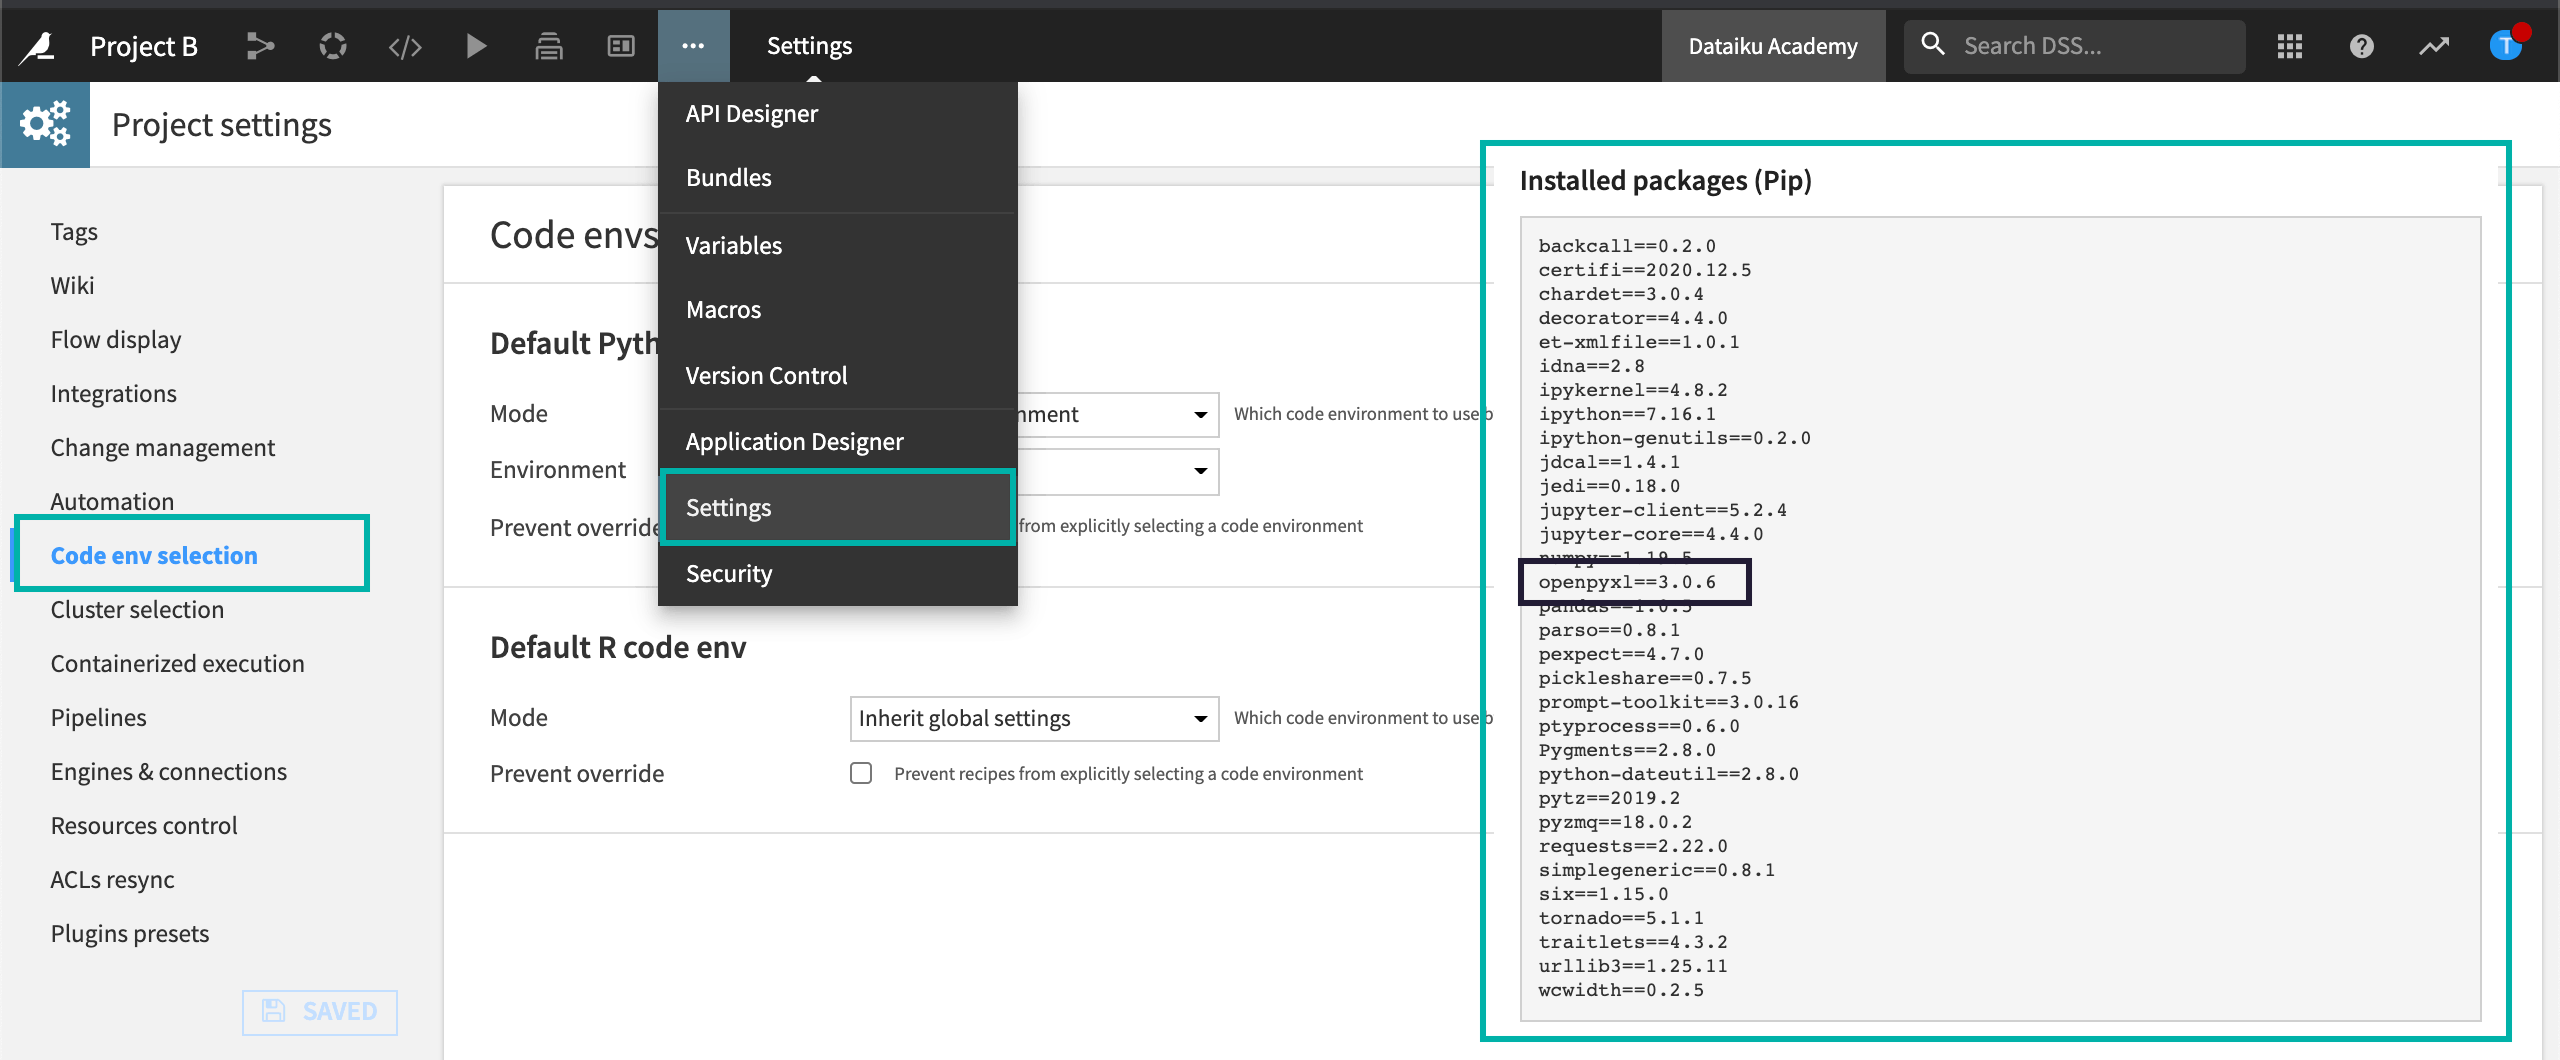
Set the Code Environment
To ensure our code runs successfully, we’ll need to designate a code environment for Project B–one that has the package openpyxl. The function we are importing from Project A requires this package.
From the More options menu in the top navigation bar, select Settings > Code env selection.
Change the default Python code env by changing the Mode to “Select an environment” and selecting a designated Environment.
Click Save.
Build the Flow
The dataset, online_retail_dataset_filtered is not yet built. This is the DataFrame we want to export as a XLSX file using the “Dataframe to XLSX” function. We’ll need to make sure this dataset is built in our Flow.
Go to the Flow.
Click Flow Actions from the bottom-right corner of your window.
Select Build all and keep the default selection for handling dependencies.
Click Build.
Wait for the build to finish, and then refresh the page to see the built Flow.
Create a Python Recipe and a Managed Folder
Let’s create our Python recipe where we’ll use the function DataFrame to XLSX. Recall that our function uses a folder named “output_test”.
We’ll make this managed folder when we create the recipe.
In Project B, go to the Flow.
Open the Filter recipe and Run it to build the dataset, online_retail_dataset_filtered.
Return to the Flow.
With the dataset selected, add a Python recipe.
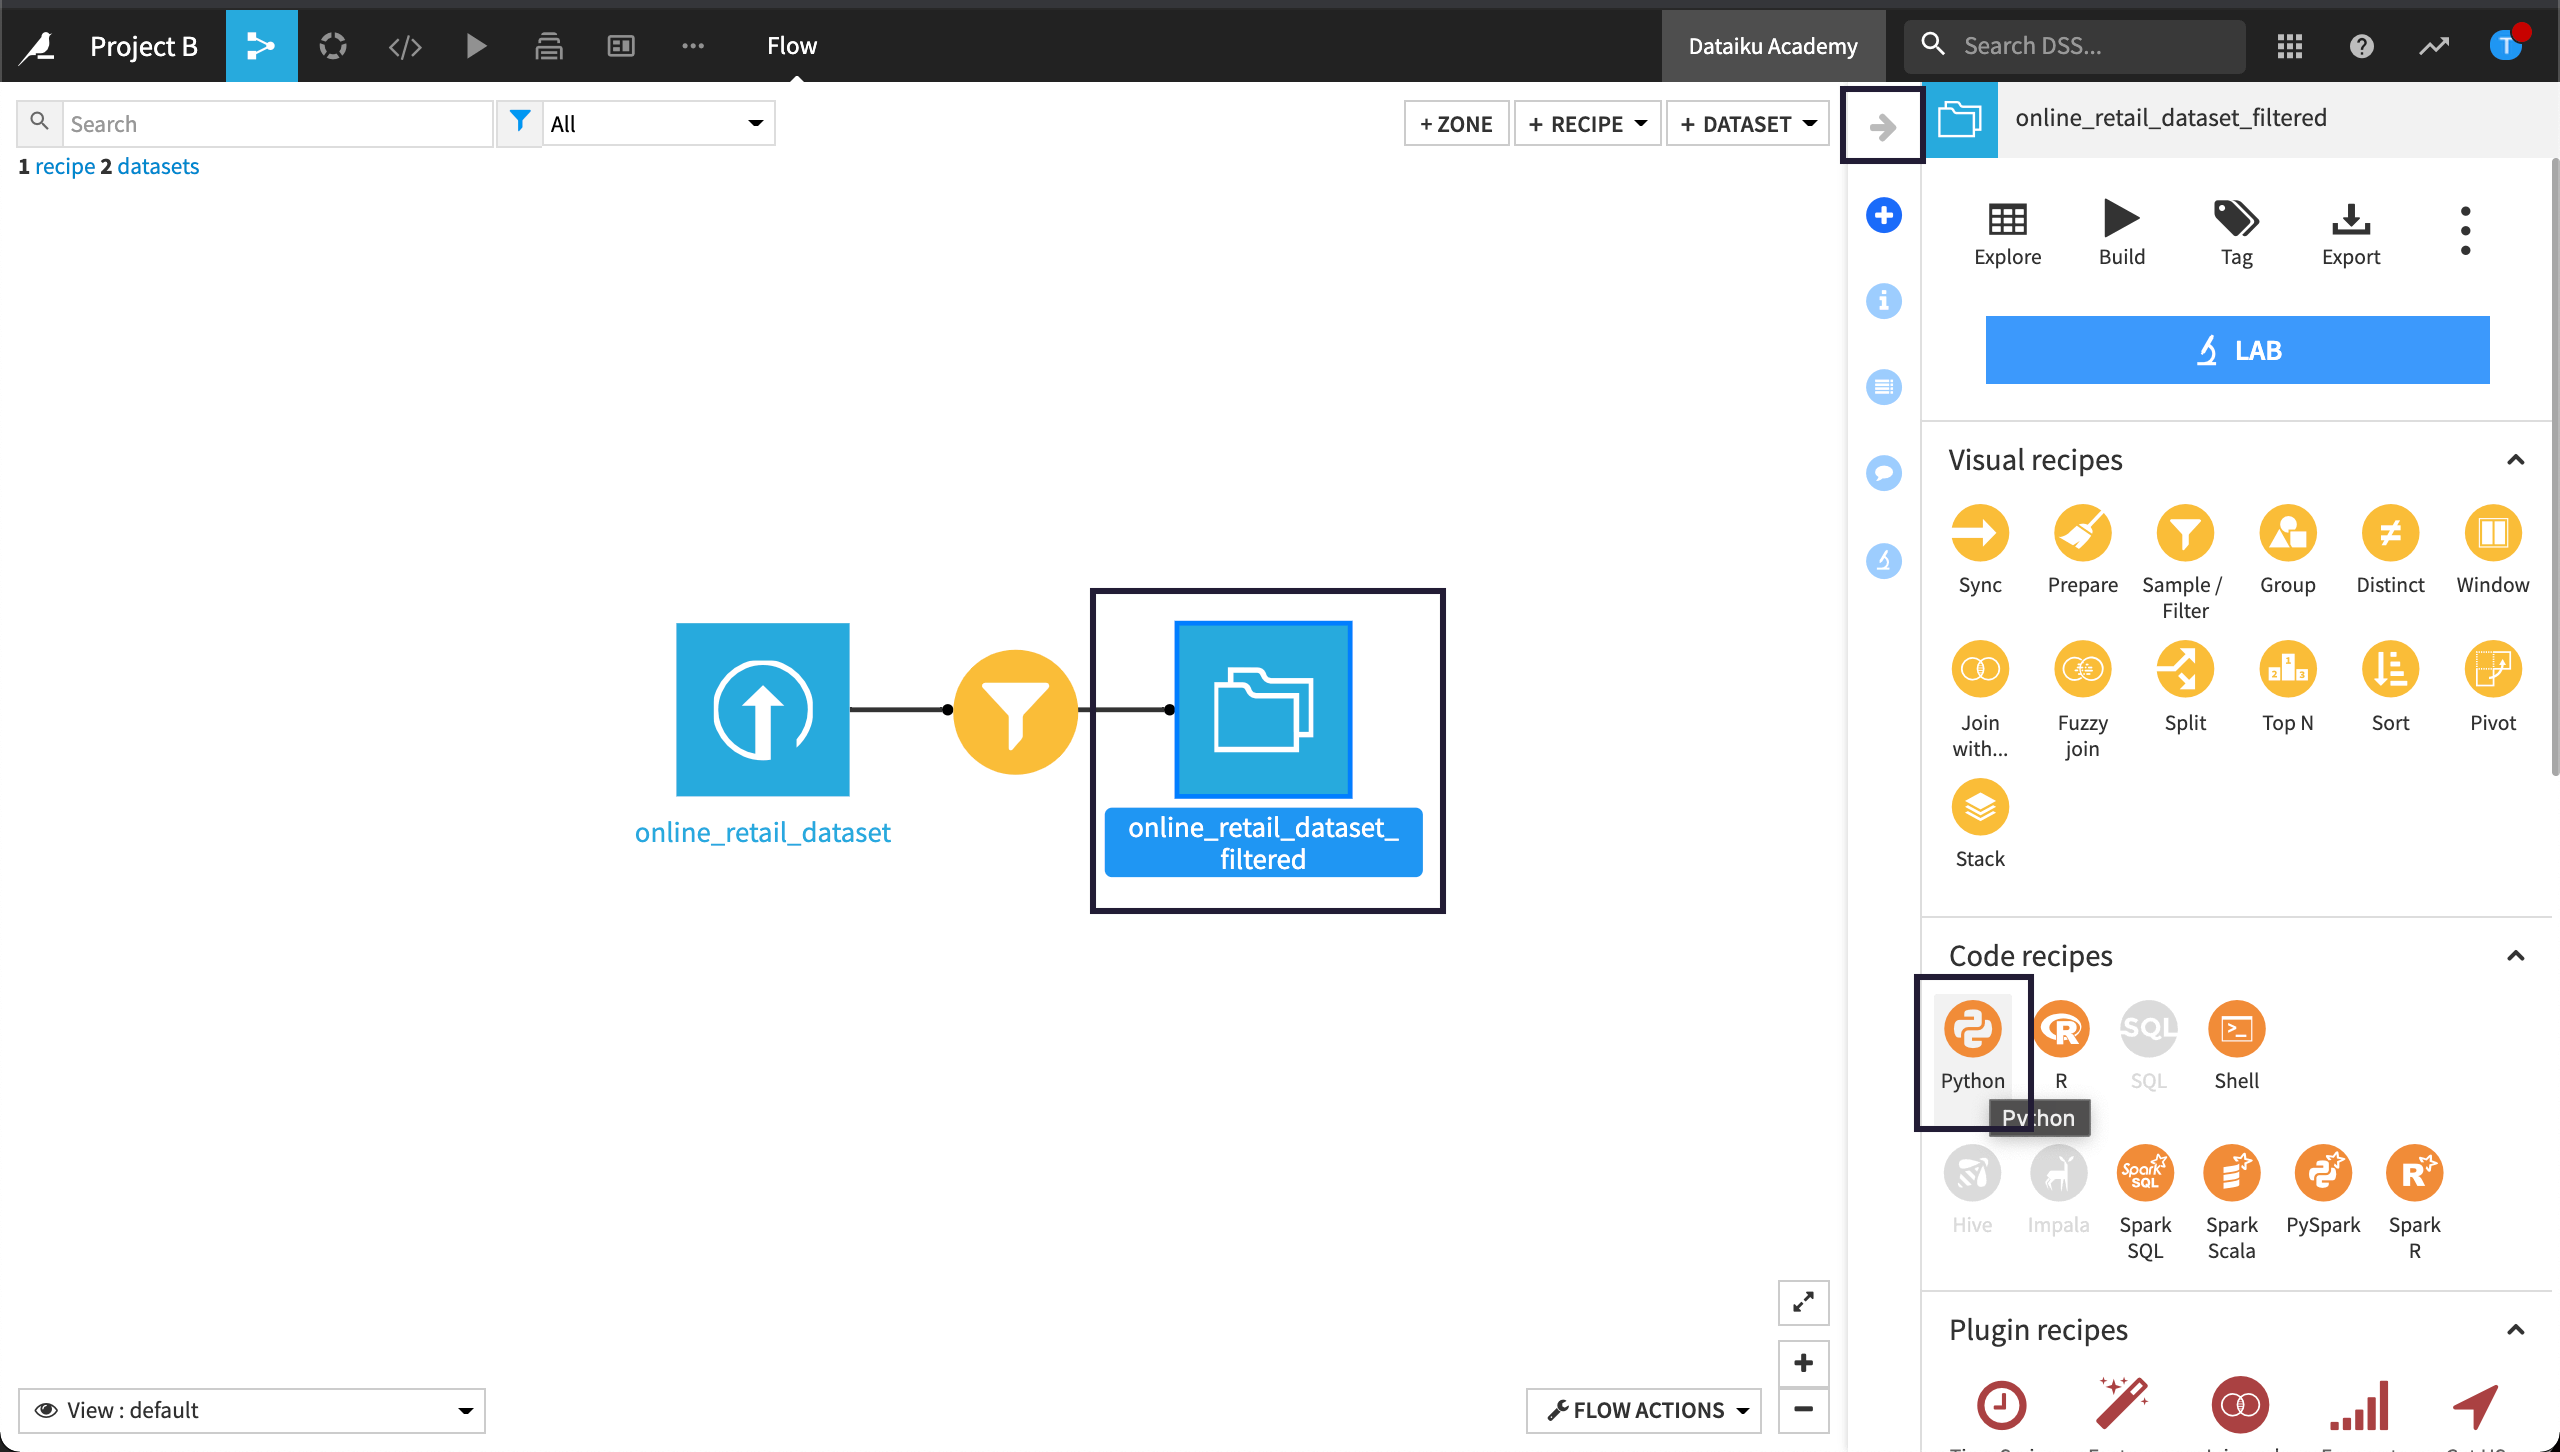
In the New python recipe window, set the Input to online_retail_dataset_filtered.
Under Output, click + Add.
In the next step, we’ll add a folder instead of a dataset.
Click New Folder and name it
output_test.Create the folder, storing it into the filesystem folders.
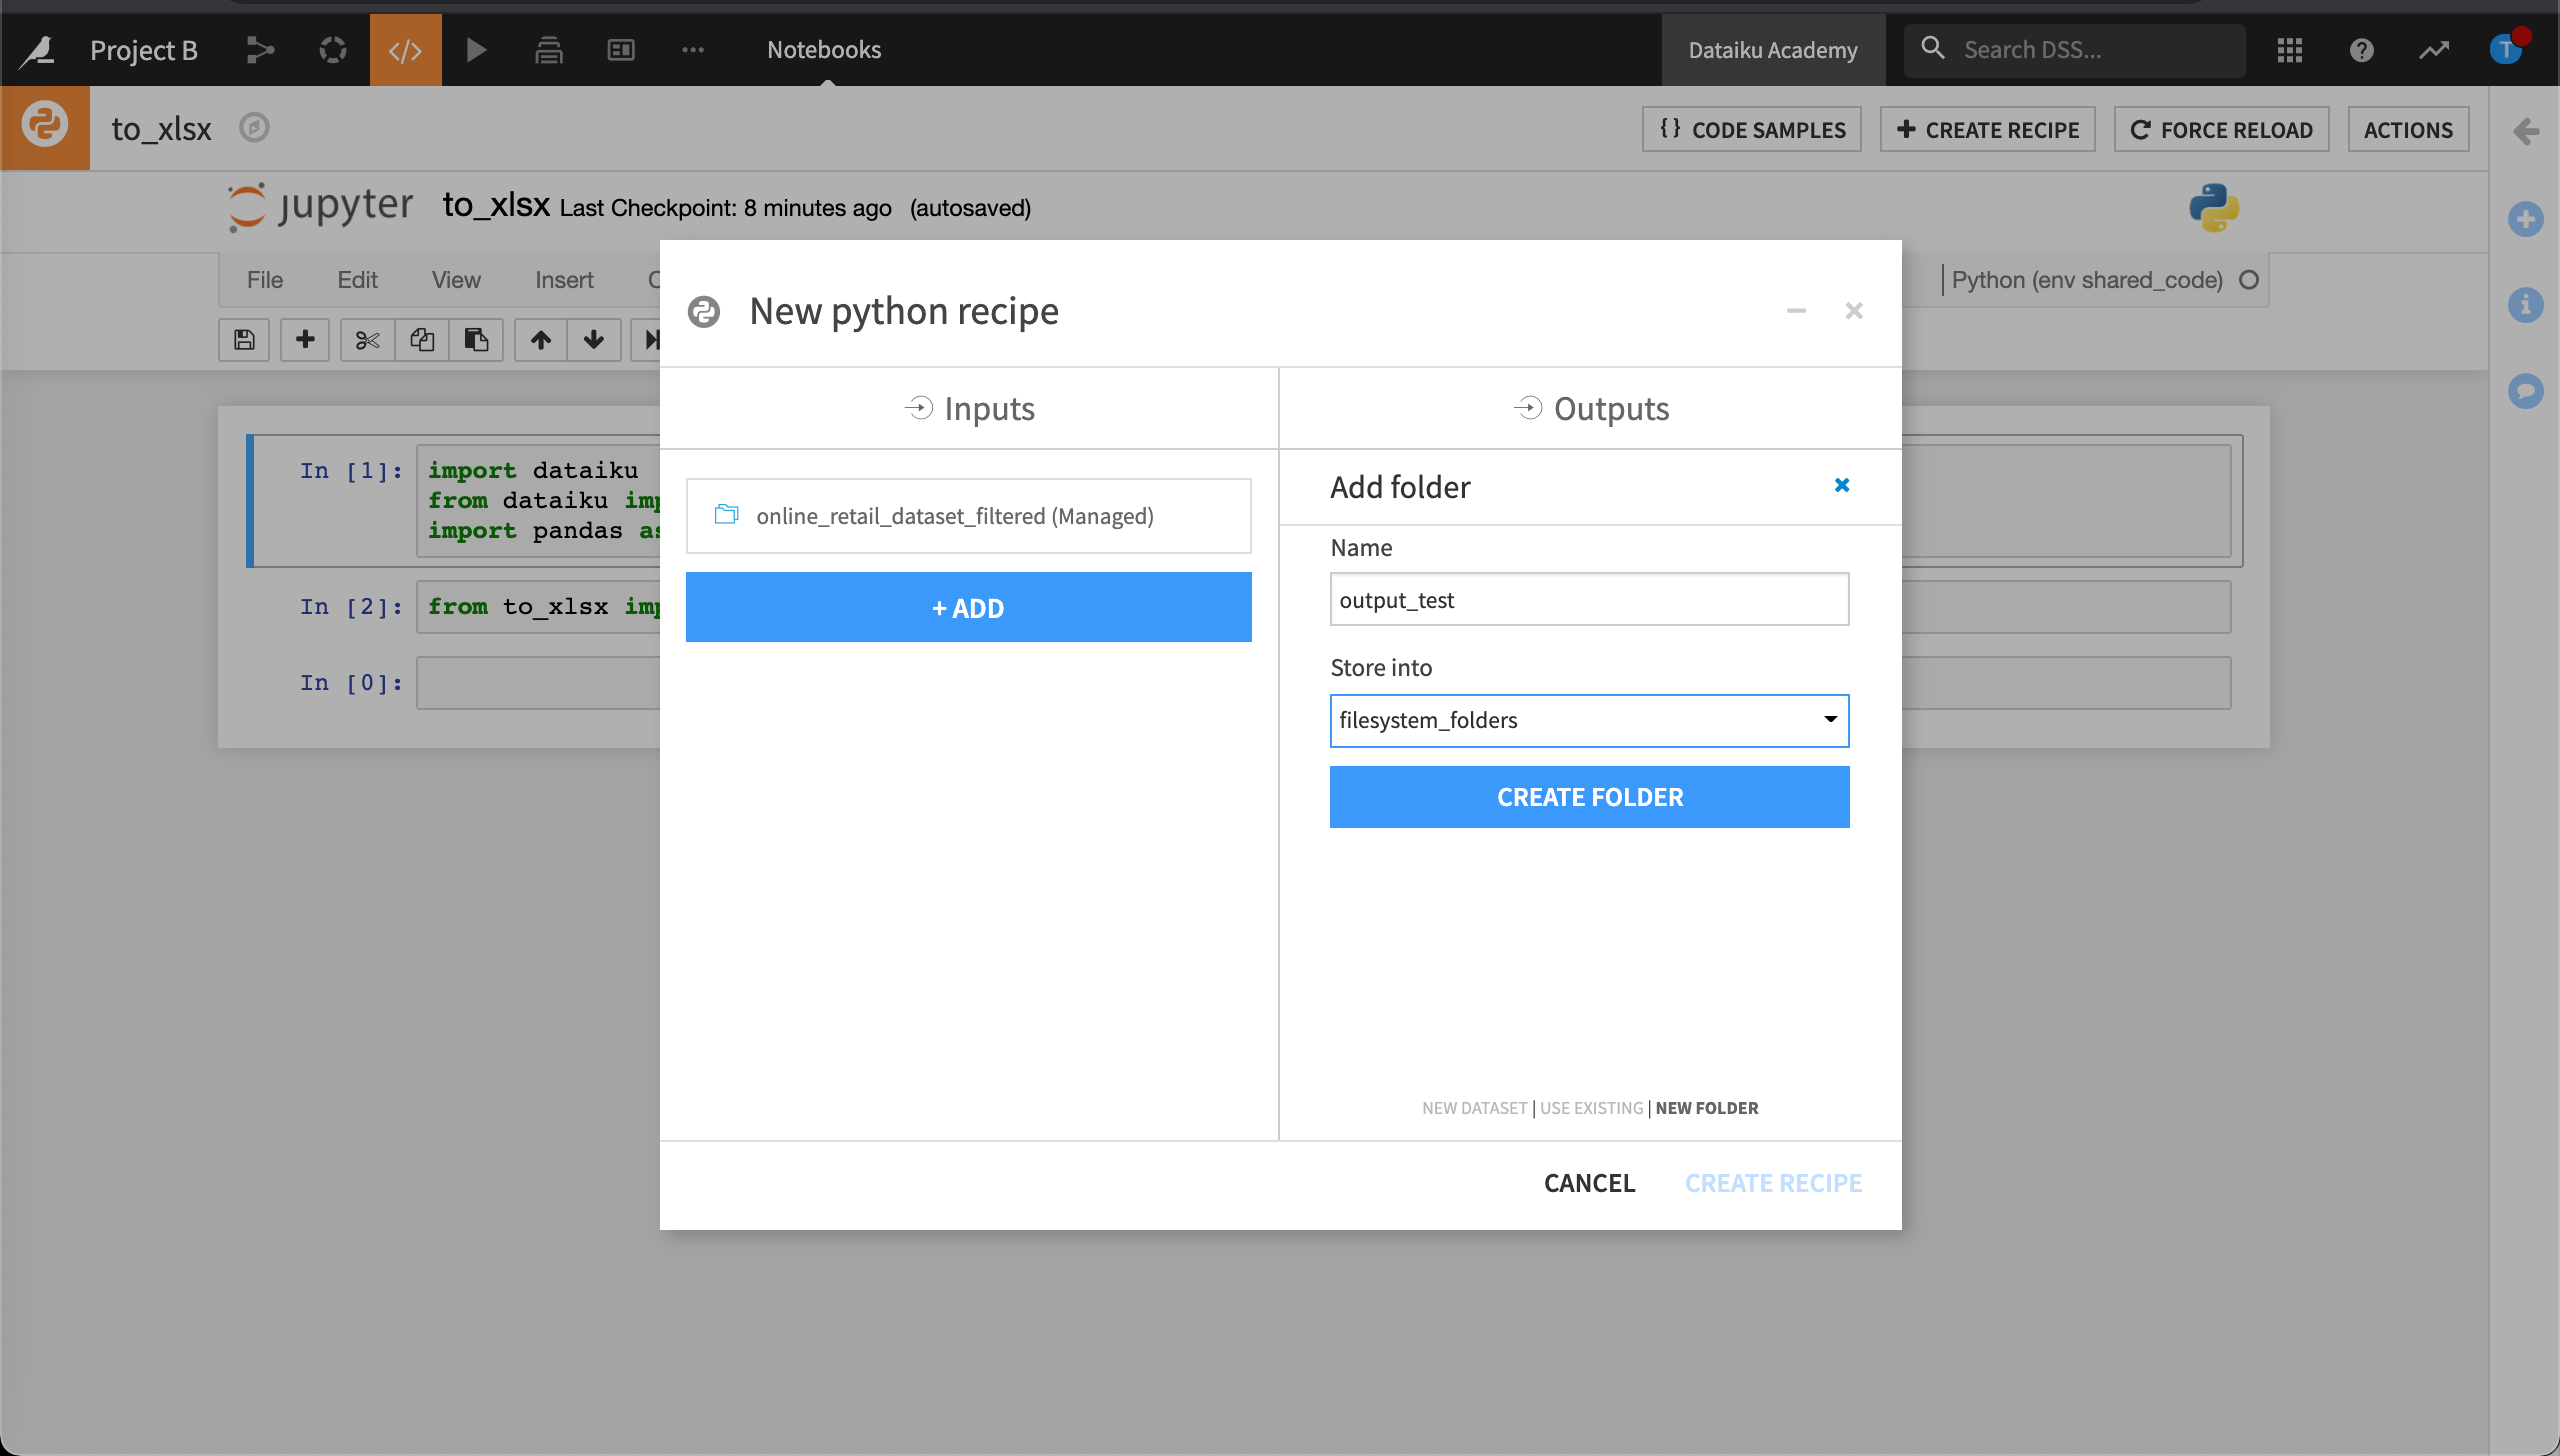
Click Create Recipe.
Let’s replace the sample code.
Delete the sample code and replace it with the following code that provides the Dataframe to XLSX function with the required inputs.
# -------------------------------------------------------------------------------- NOTEBOOK-CELL: CODE
import dataiku
from dataiku import pandasutils as pdu
import pandas as pd
from to_xlsx import dataframe_to_xlsx

# -------------------------------------------------------------------------------- NOTEBOOK-CELL: CODE
# Example: load a DSS dataset as a Pandas dataframe
transactions_filtered = dataiku.Dataset("online_retail_dataset_filtered")
transactions_filtered_df = transactions_filtered.get_dataframe()

# -------------------------------------------------------------------------------- NOTEBOOK-CELL: CODE
#dataframe_to_xlsx(input dataframe, folder where output file will be written, name of the output file)
dataframe_to_xlsx(transactions_filtered_df,'output_test', 'Transactions')
The first cell tells Dataiku to import the function, dataframe_to_xlsx from the Python file, to_xlsx (which exists in the code library in Project A). The second cell tells Dataiku which DataFrame we want to convert to output as a XLSX file–online_retail_dataset_filtered. The third cell references the managed folder where we want to store our XLSX file and the Excel sheet name.
Save and Run the recipe.
When the Job is finished running, return to the Flow.
Our output_test managed folder now contains Transactions.xlsx.
Note
When we share libraries between projects and deploy our project to the automation node, we must also deploy the parent project so that the project library is available.
What’s Next?
Now that you have two projects sharing the same project library, you can try adding a shared notebook by importing it from Git. To do this, you could create a notebook from the Python recipe in Project B. You could then export the notebook to your own GitHub repo. Experiment with the different ways you can import the notebook into your project’s library - using both SSH and HTTPS URLs. If you want to save local modifications back into the remote repository, you can experiment with manually pushing your changes to the referenced Git repo.
Visit the Dataiku product documentation, Importing Jupyter Notebooks from Git to learn more.