Hands-On Tutorial: Use the Object Detection in Images Plugin
Dataiku provides a plugin, Object detection in images, that contains recipes and macros for things like drawing bounding boxes and detecting objects in both video and images.
Note
Dataiku can also natively create object detection models. See Computer Vision in the product documentation for more details.
Let’s Get Started
In this tutorial, you will:
retrain a pre-trained object detection model from the “Object detection in images” plugin;
detect objects in images using this model; and
draw bounding boxes around images.
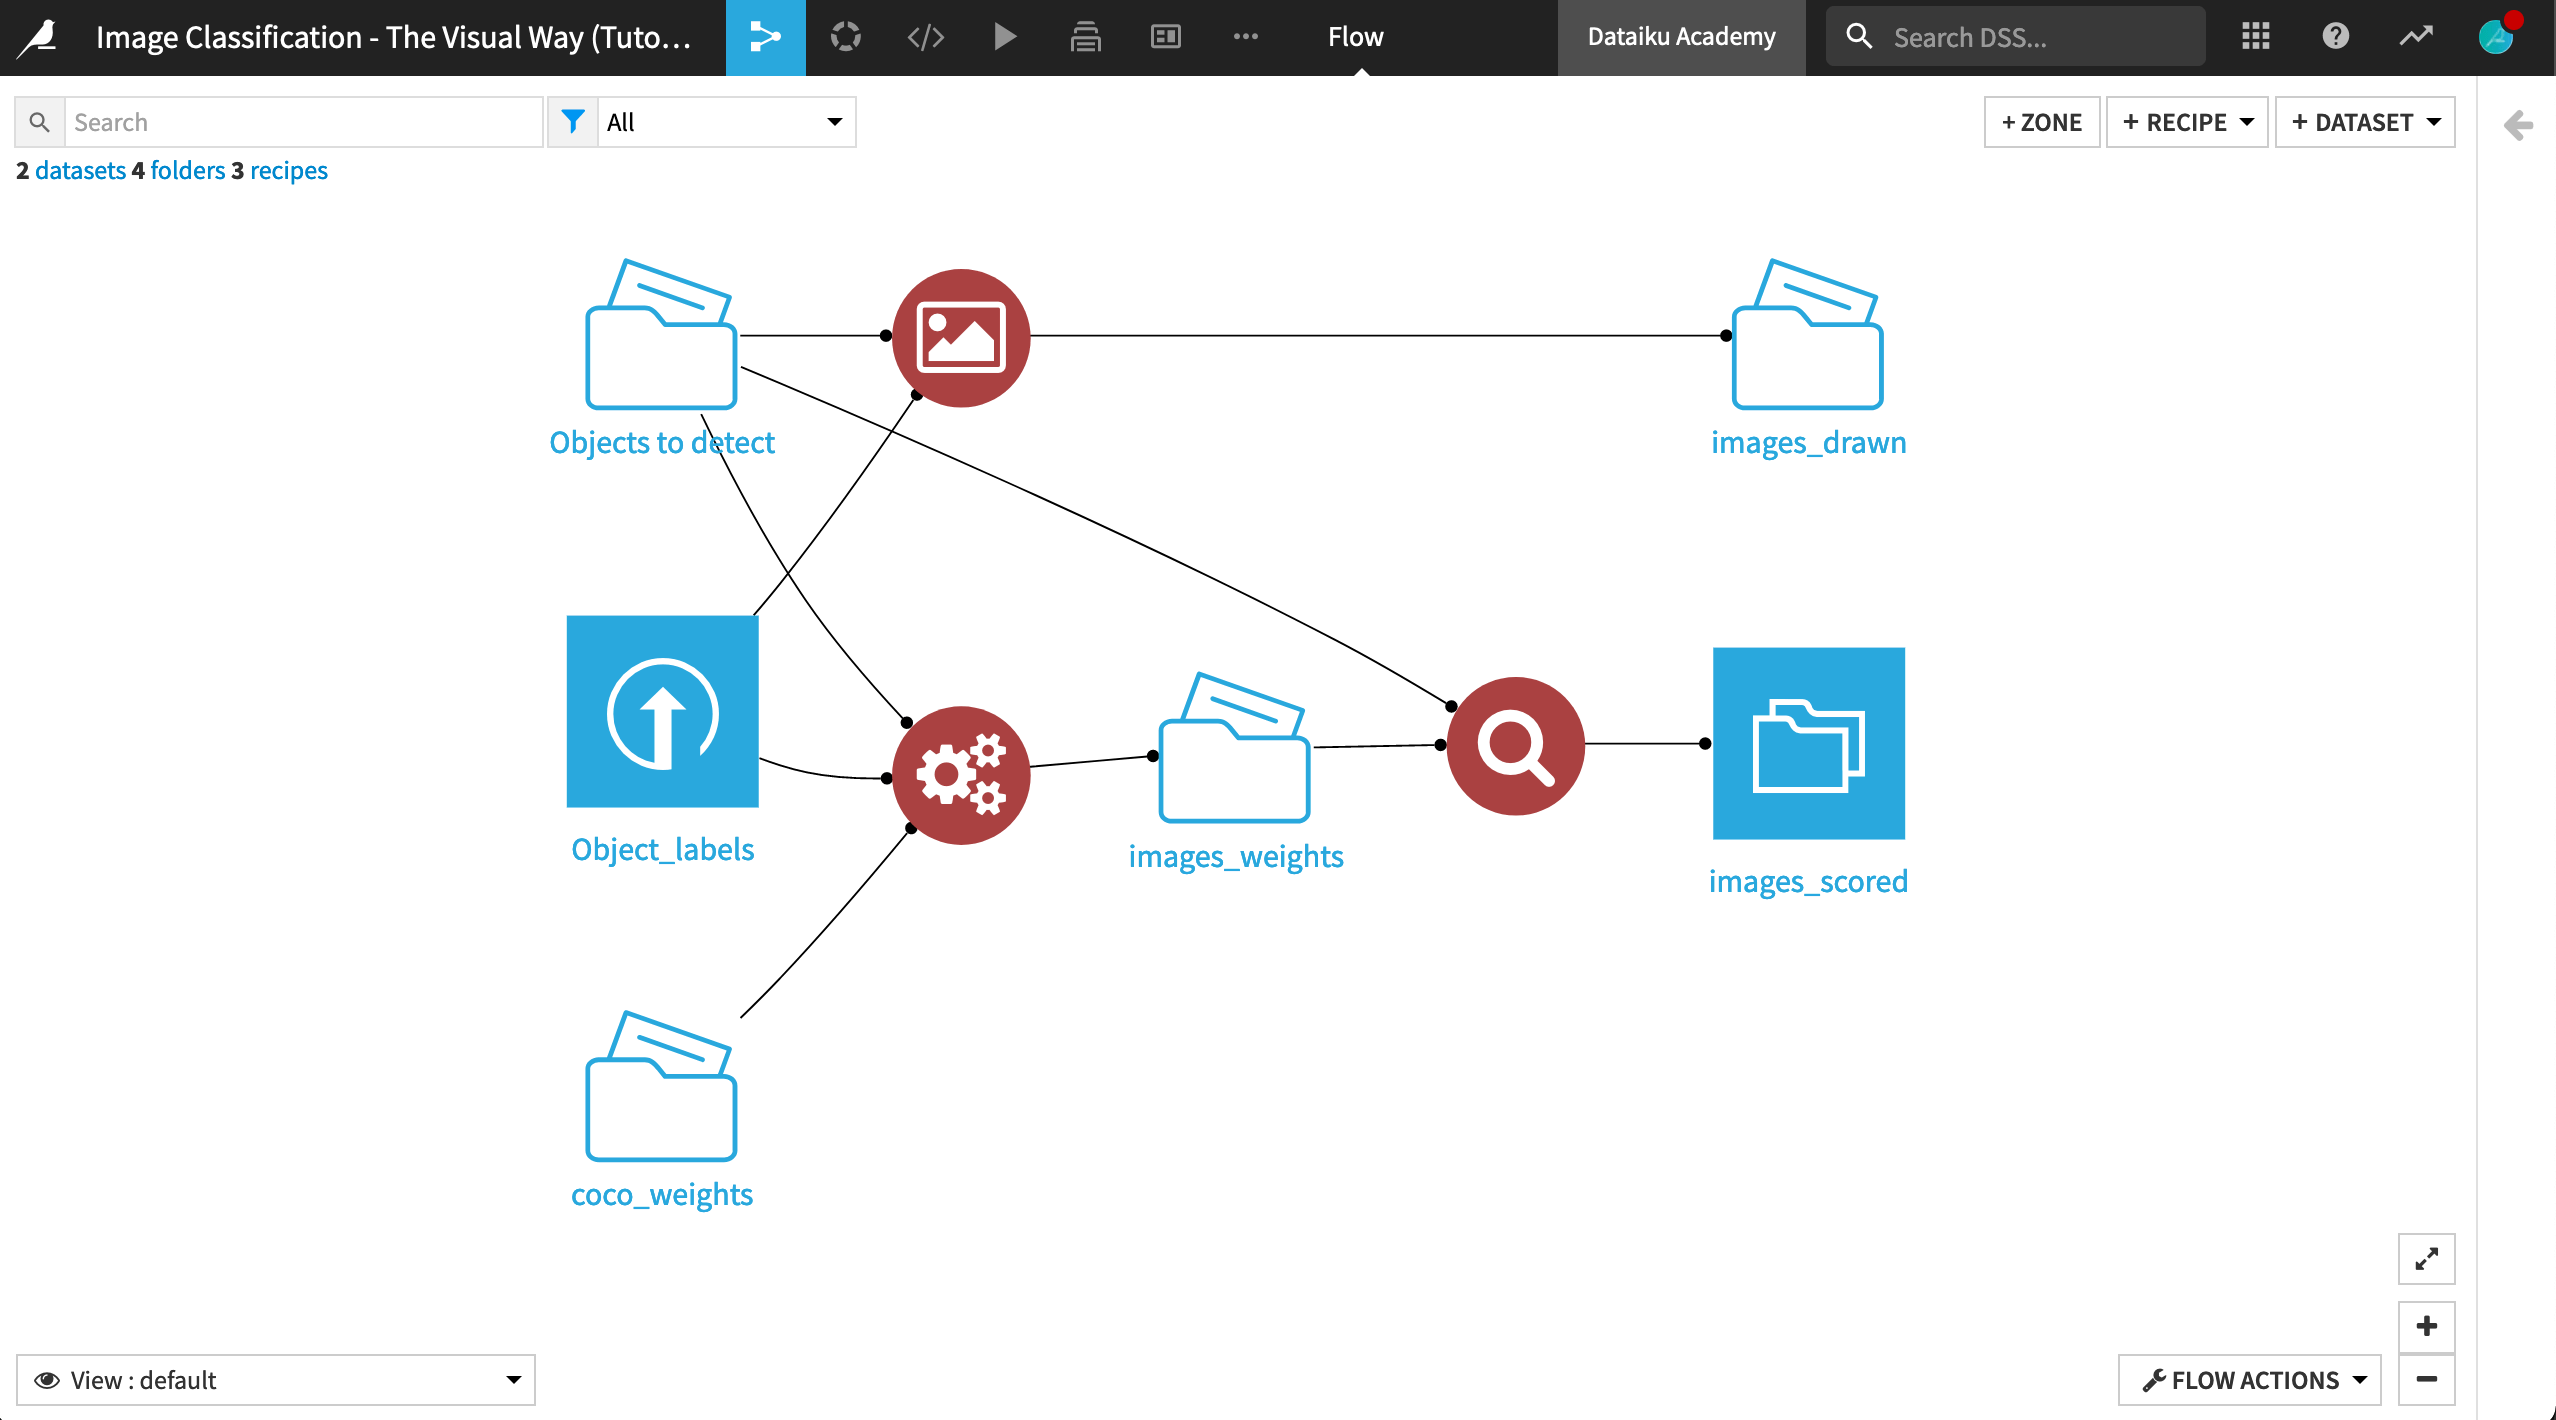
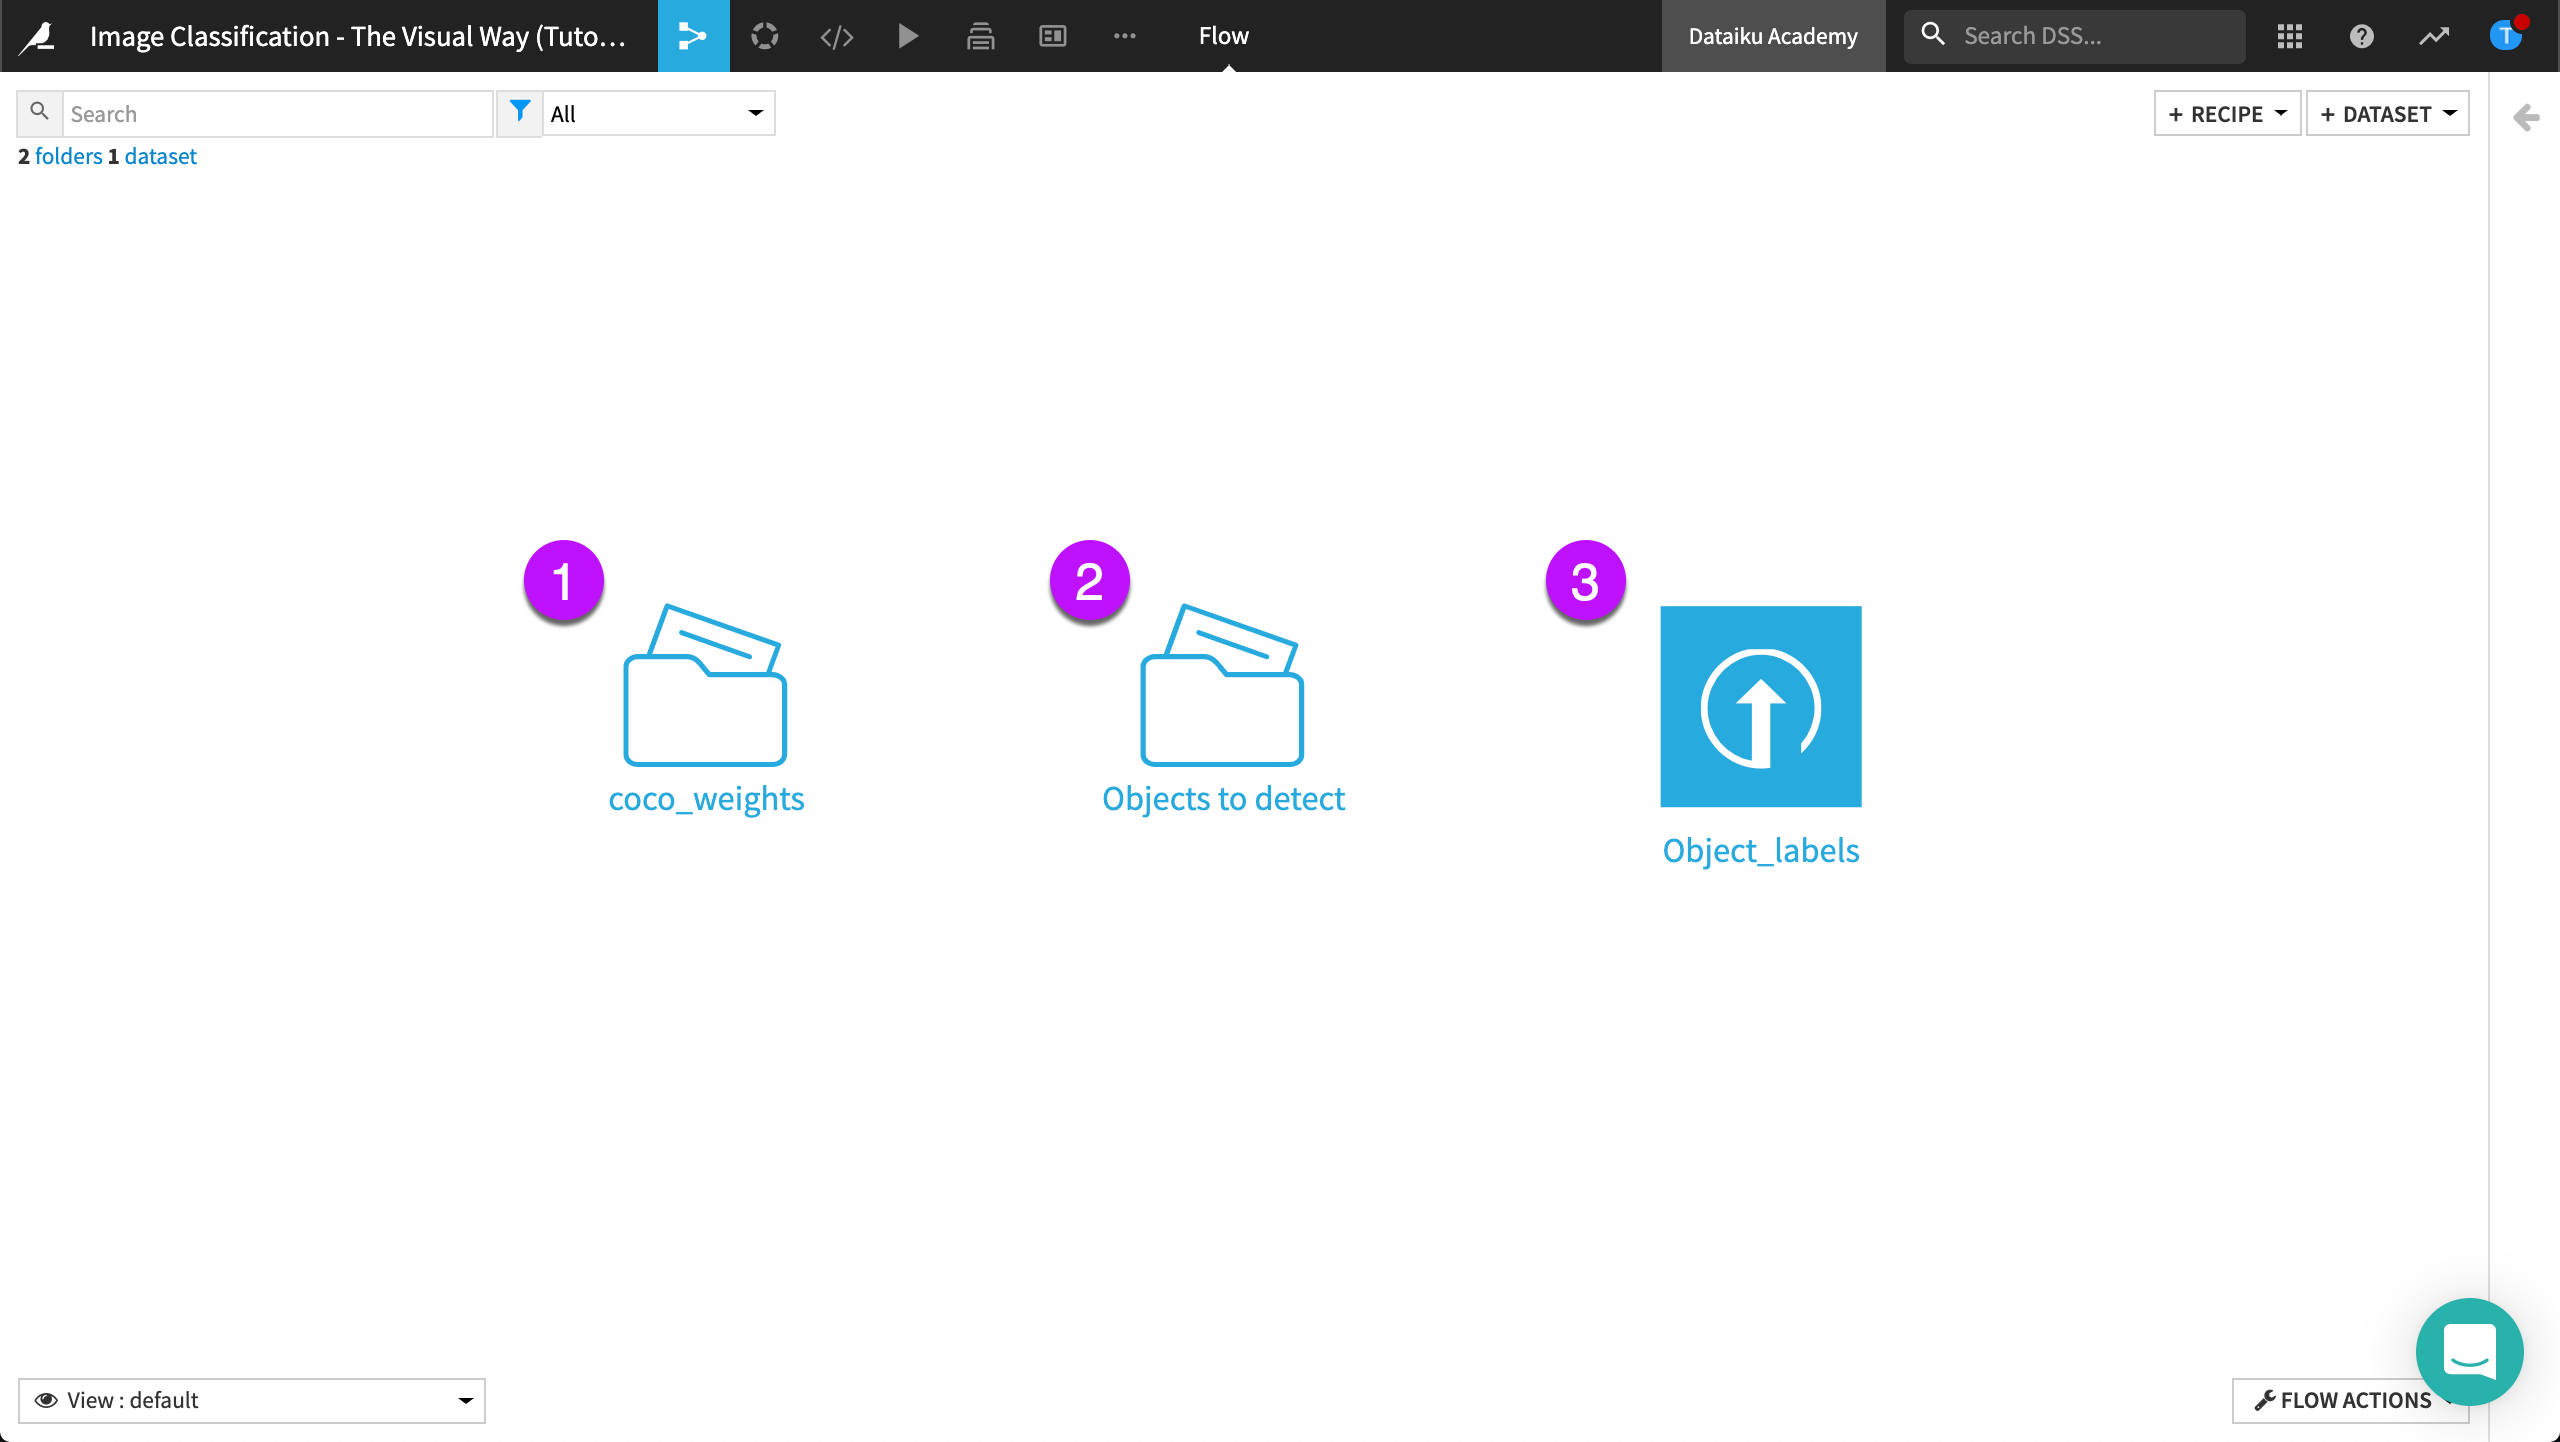
When finished you’ll have built the Flow below.
Prerequisites
a Dataiku instance (version 10.0 or above)
the Object Detection in Images plugin (version 0.1.3 or above) (CPU or GPU depending on your instance)
Note
You can find the instructions for installing plugins in the product documentation. To check whether the plugin is already installed on your instance, go to the Installed tab in the Plugin Store to see a list of all installed plugins.
While searching for the “Object Detection in Images” plugin, you will notice there are two versions: one for working with GPUs and one for working with CPUs. Install the CPU version unless your Dataiku instance is configured for GPUs.
Note that this plugin is not available for Dataiku Online.
Create the Project
From the Dataiku homepage, click +New Project > DSS Tutorials > ML Practitioner > Object Detection Plugin (Tutorial).
Note
You can also download the starter project from this website and import it as a zip file.
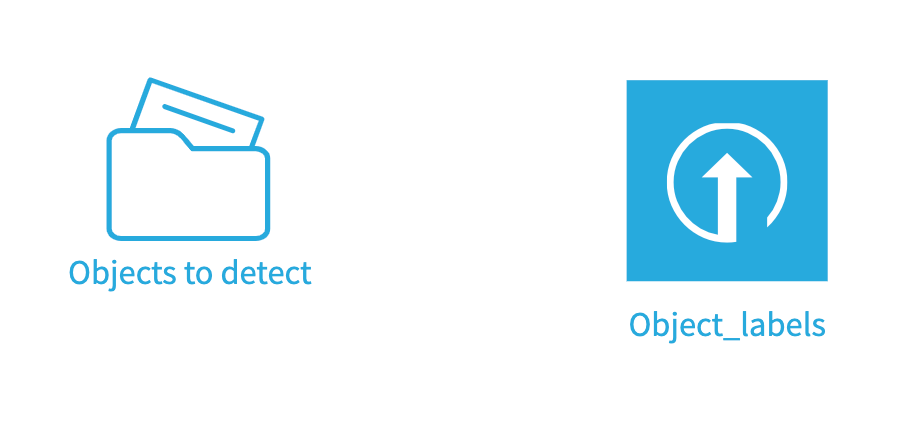
In the Flow, Objects to detect is a folder that contains images, and Object_labels is a dataset that contains labeled images with bounding-box coordinates.
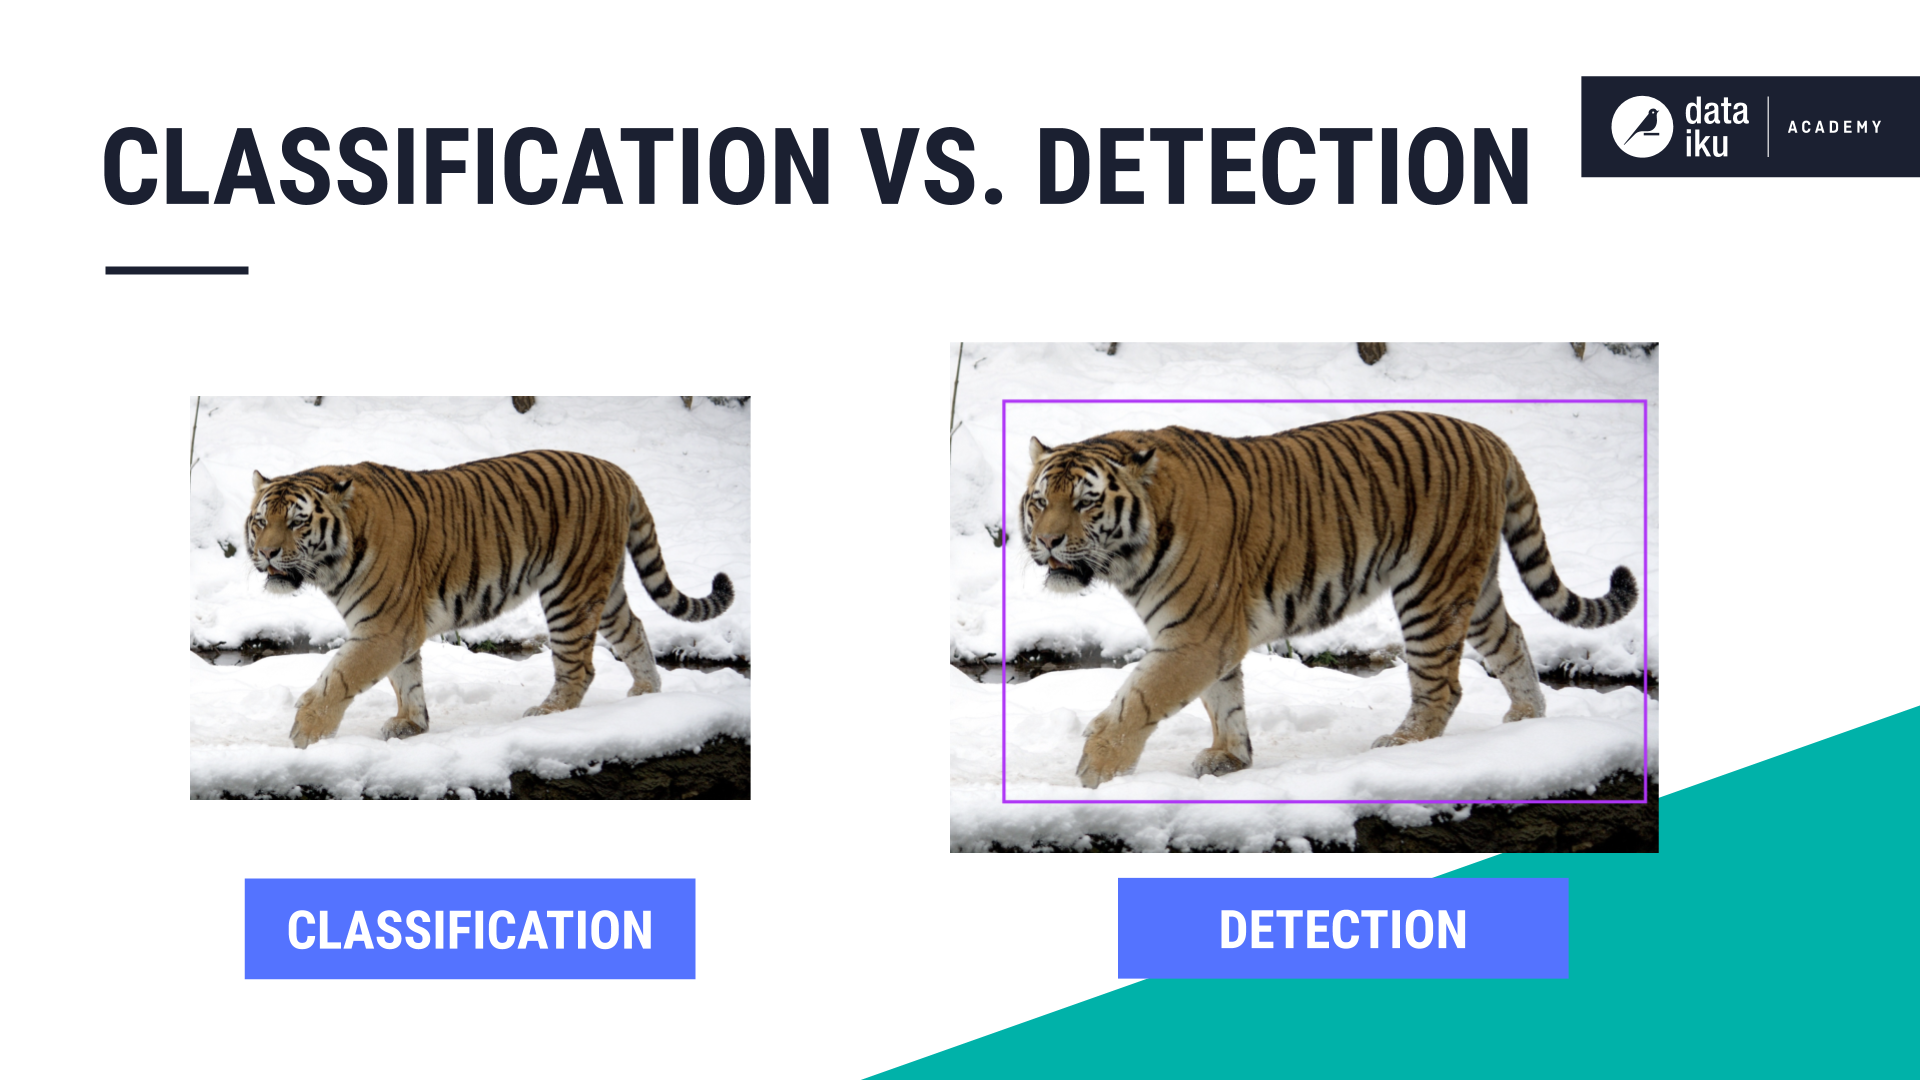
About Object Detection
Image classification and object detection tasks can be achieved using a deep learning model that is based on a neural network. The difference is, in image classification, a neural network is used to return the probability that the image belongs to a class, while in object detection, a neural network is used to return the position of detected objects in images, the class of the object, and the associated probability.
Explore the Plugin’s Components
Before performing object detection tasks, let’s explore the components of the “Object detection in images” plugin.
From the Apps menu, go to Plugins, and then choose the Installed tab to view installed plugins.
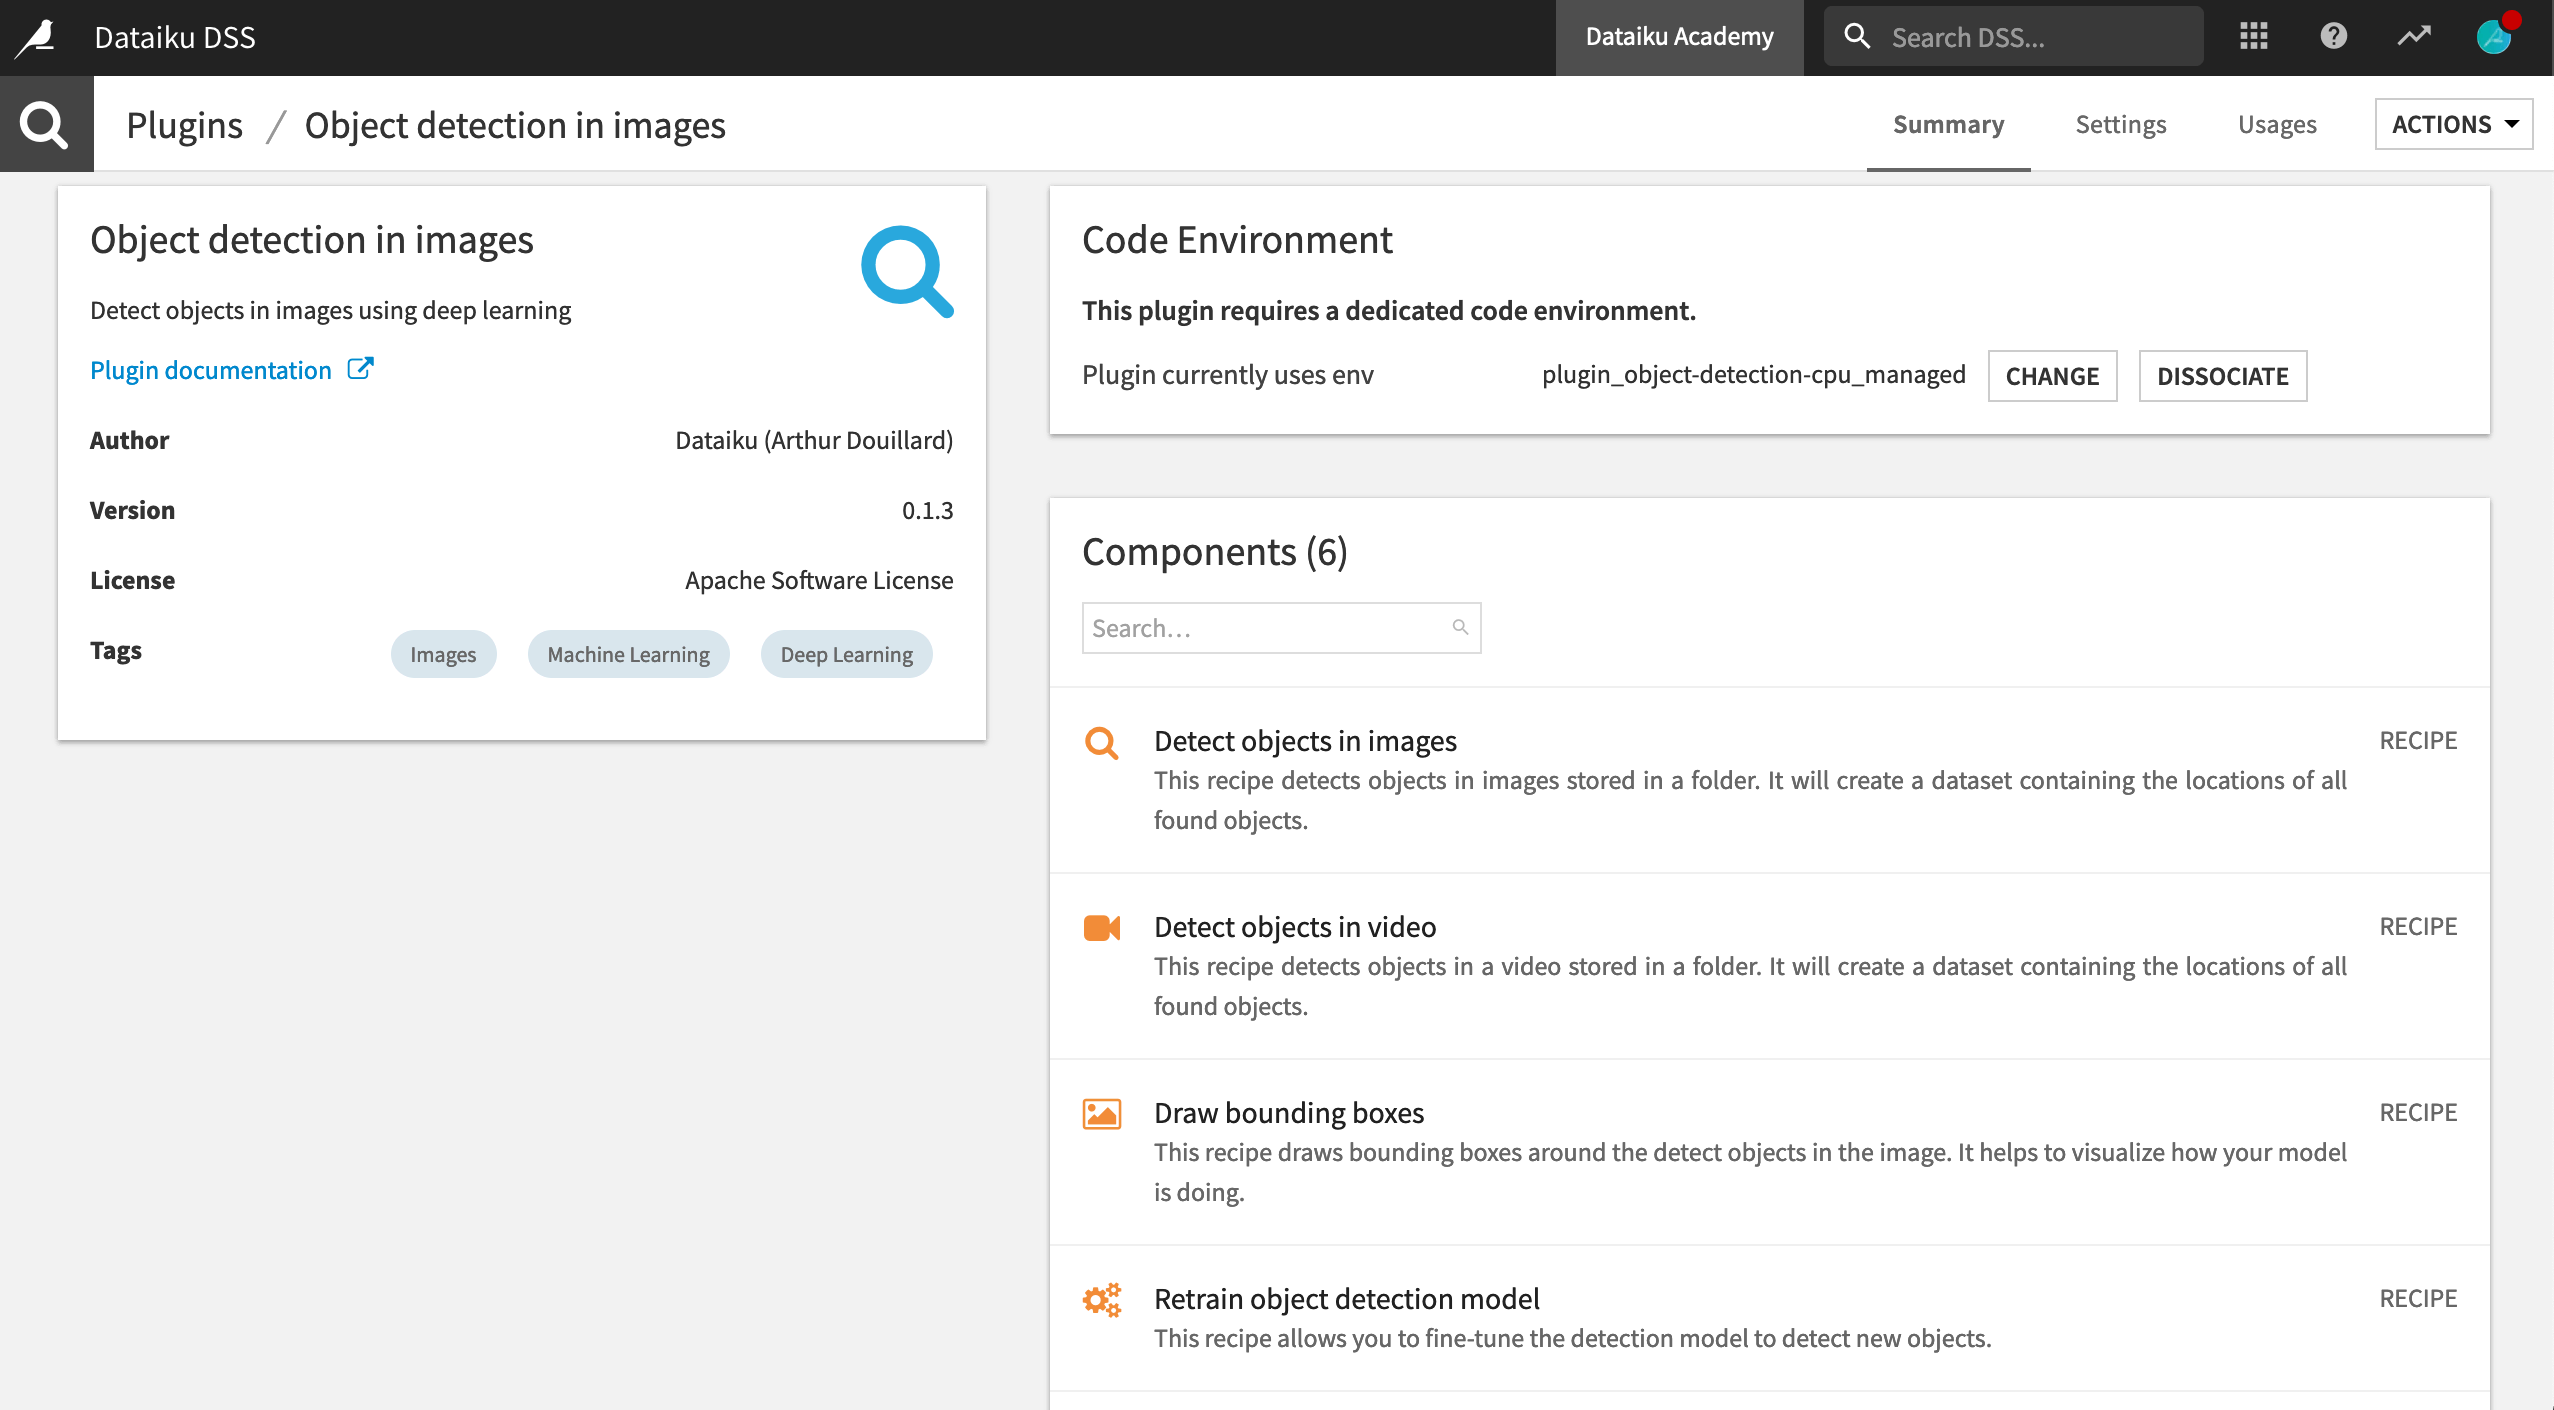
Click the Object detection in images plugin to view its components.
The plugin includes four recipes and macros:
Detect objects in images
Detect objects in video
Draw bounding boxes
Retrain object detection model
And two macros:
Object detection endpoint
Download pre-trained detection model
We will use a few of these recipes and macros to accomplish our object detection task.
Add a Pre-Trained Detection Model to the Flow
As done for image classification, we’ll start with a macro to download a pre-trained model.
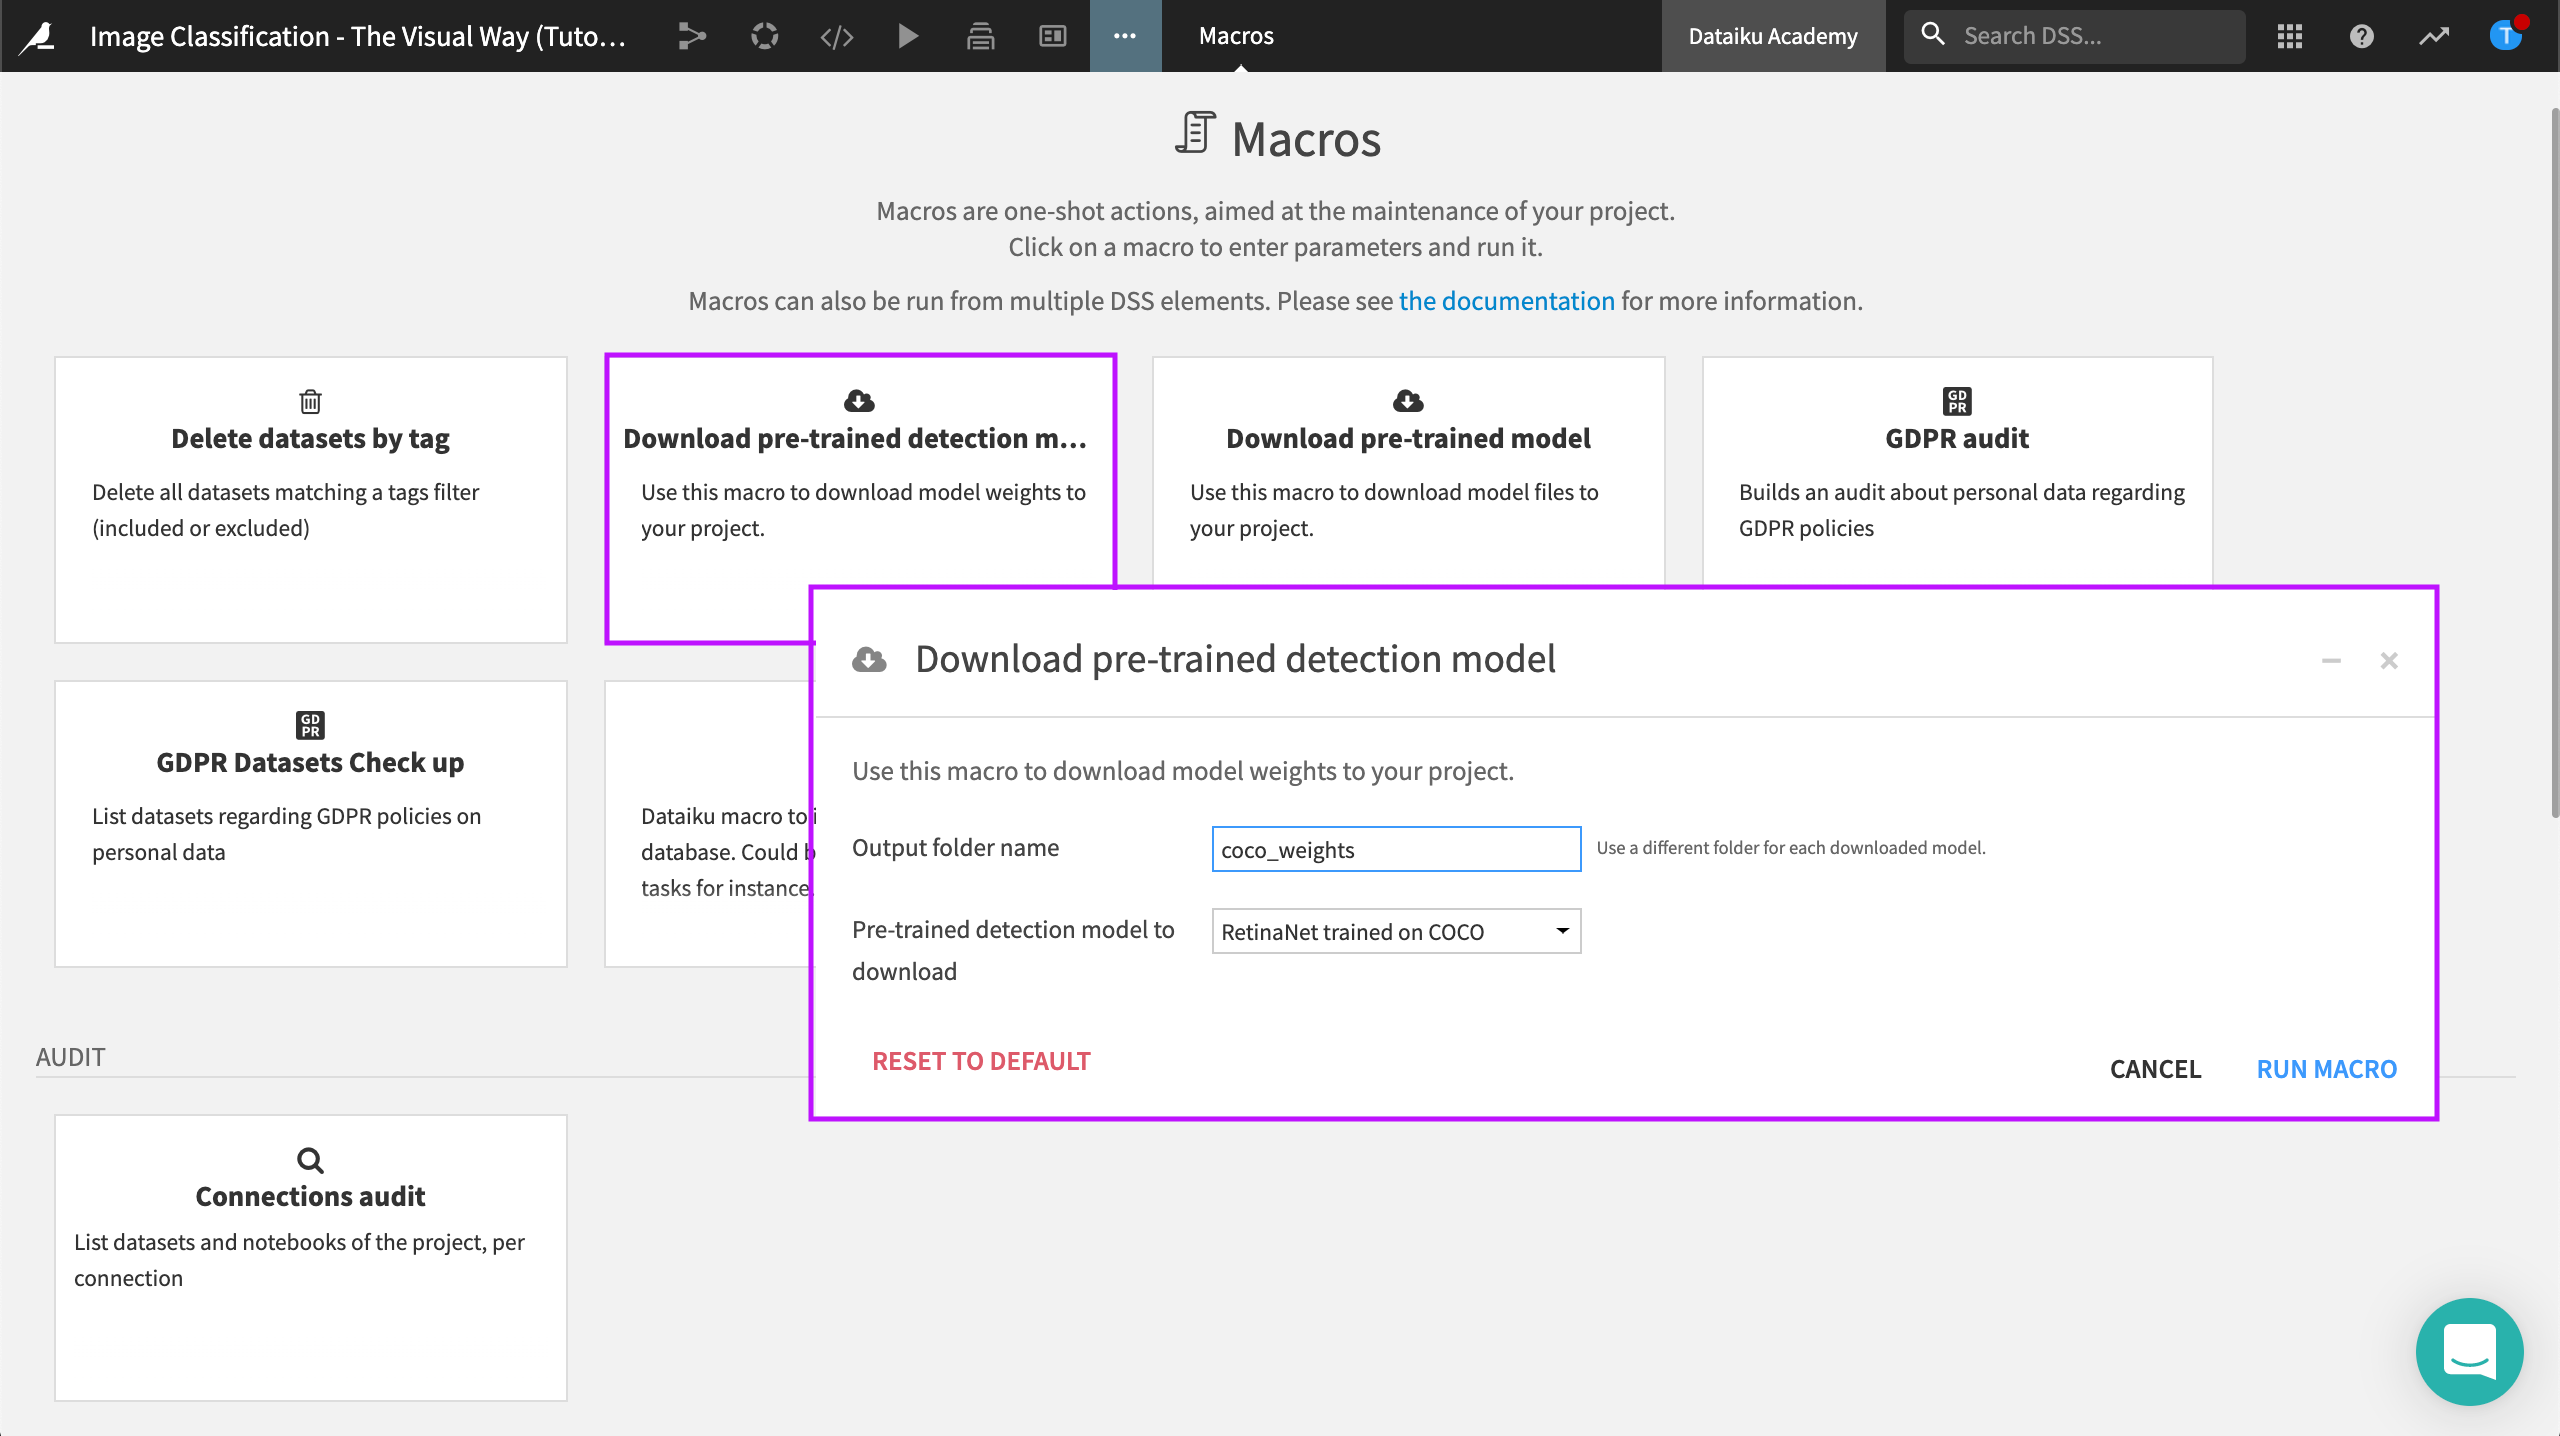
From your project, navigate to Macros in the “More Options” menu of the top navigation bar.
Click Download pre-trained detection model.
For “Output folder name”, type
coco_weights.Click Run Macro.
Note
COCO is a large-scale object detection, segmentation, and captioning dataset.
When the process completes, return to the Flow to see that the coco_weights folder has been added, and the pre-trained model inside it is ready for use.
Predict the Missing Labels
We’ll use the plugin recipe Retrain object detection model to learn from the labeled images. This will allow us to predict the missing labels. This recipe requires three inputs:
the pre-trained model,
a folder containing images, or objects, we want to detect, and
a dataset containing bounding box labels.
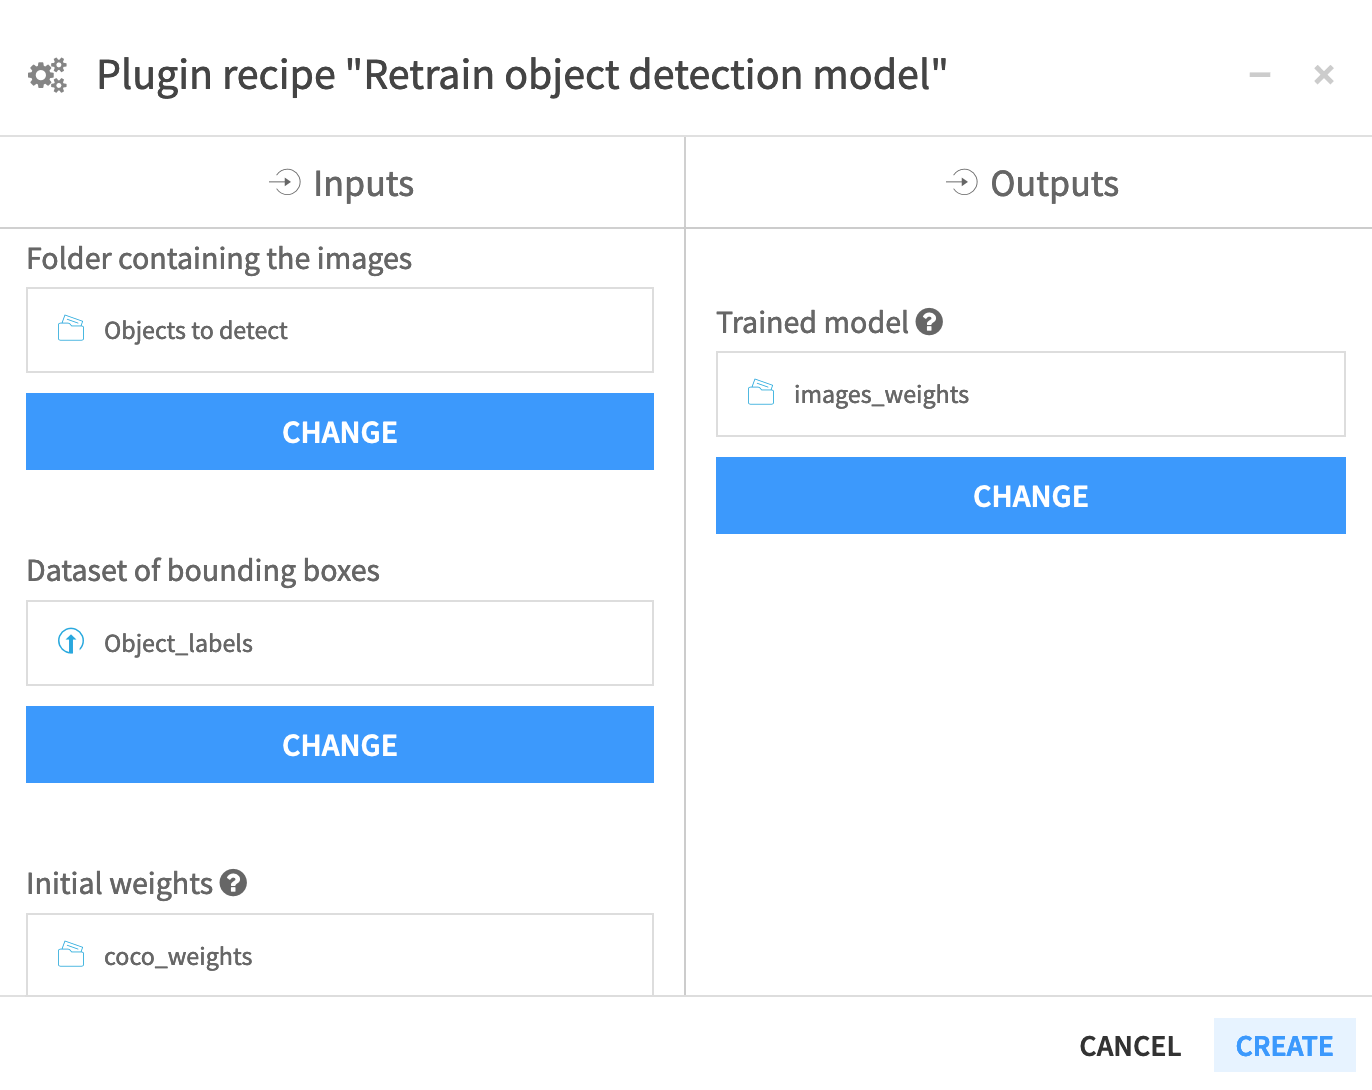
From the + Recipe dropdown, select Object detection in images > Retrain object detection model.
In the recipe creation dialog, select:
Objects to detect as the “Folder containing the images”,
Object_labels as the “Dataset of bounding boxes”,
coco_weights as the “Initial weights”, and
images_weightsas the “Trained model” output.
Click Create Folder, then click Create.
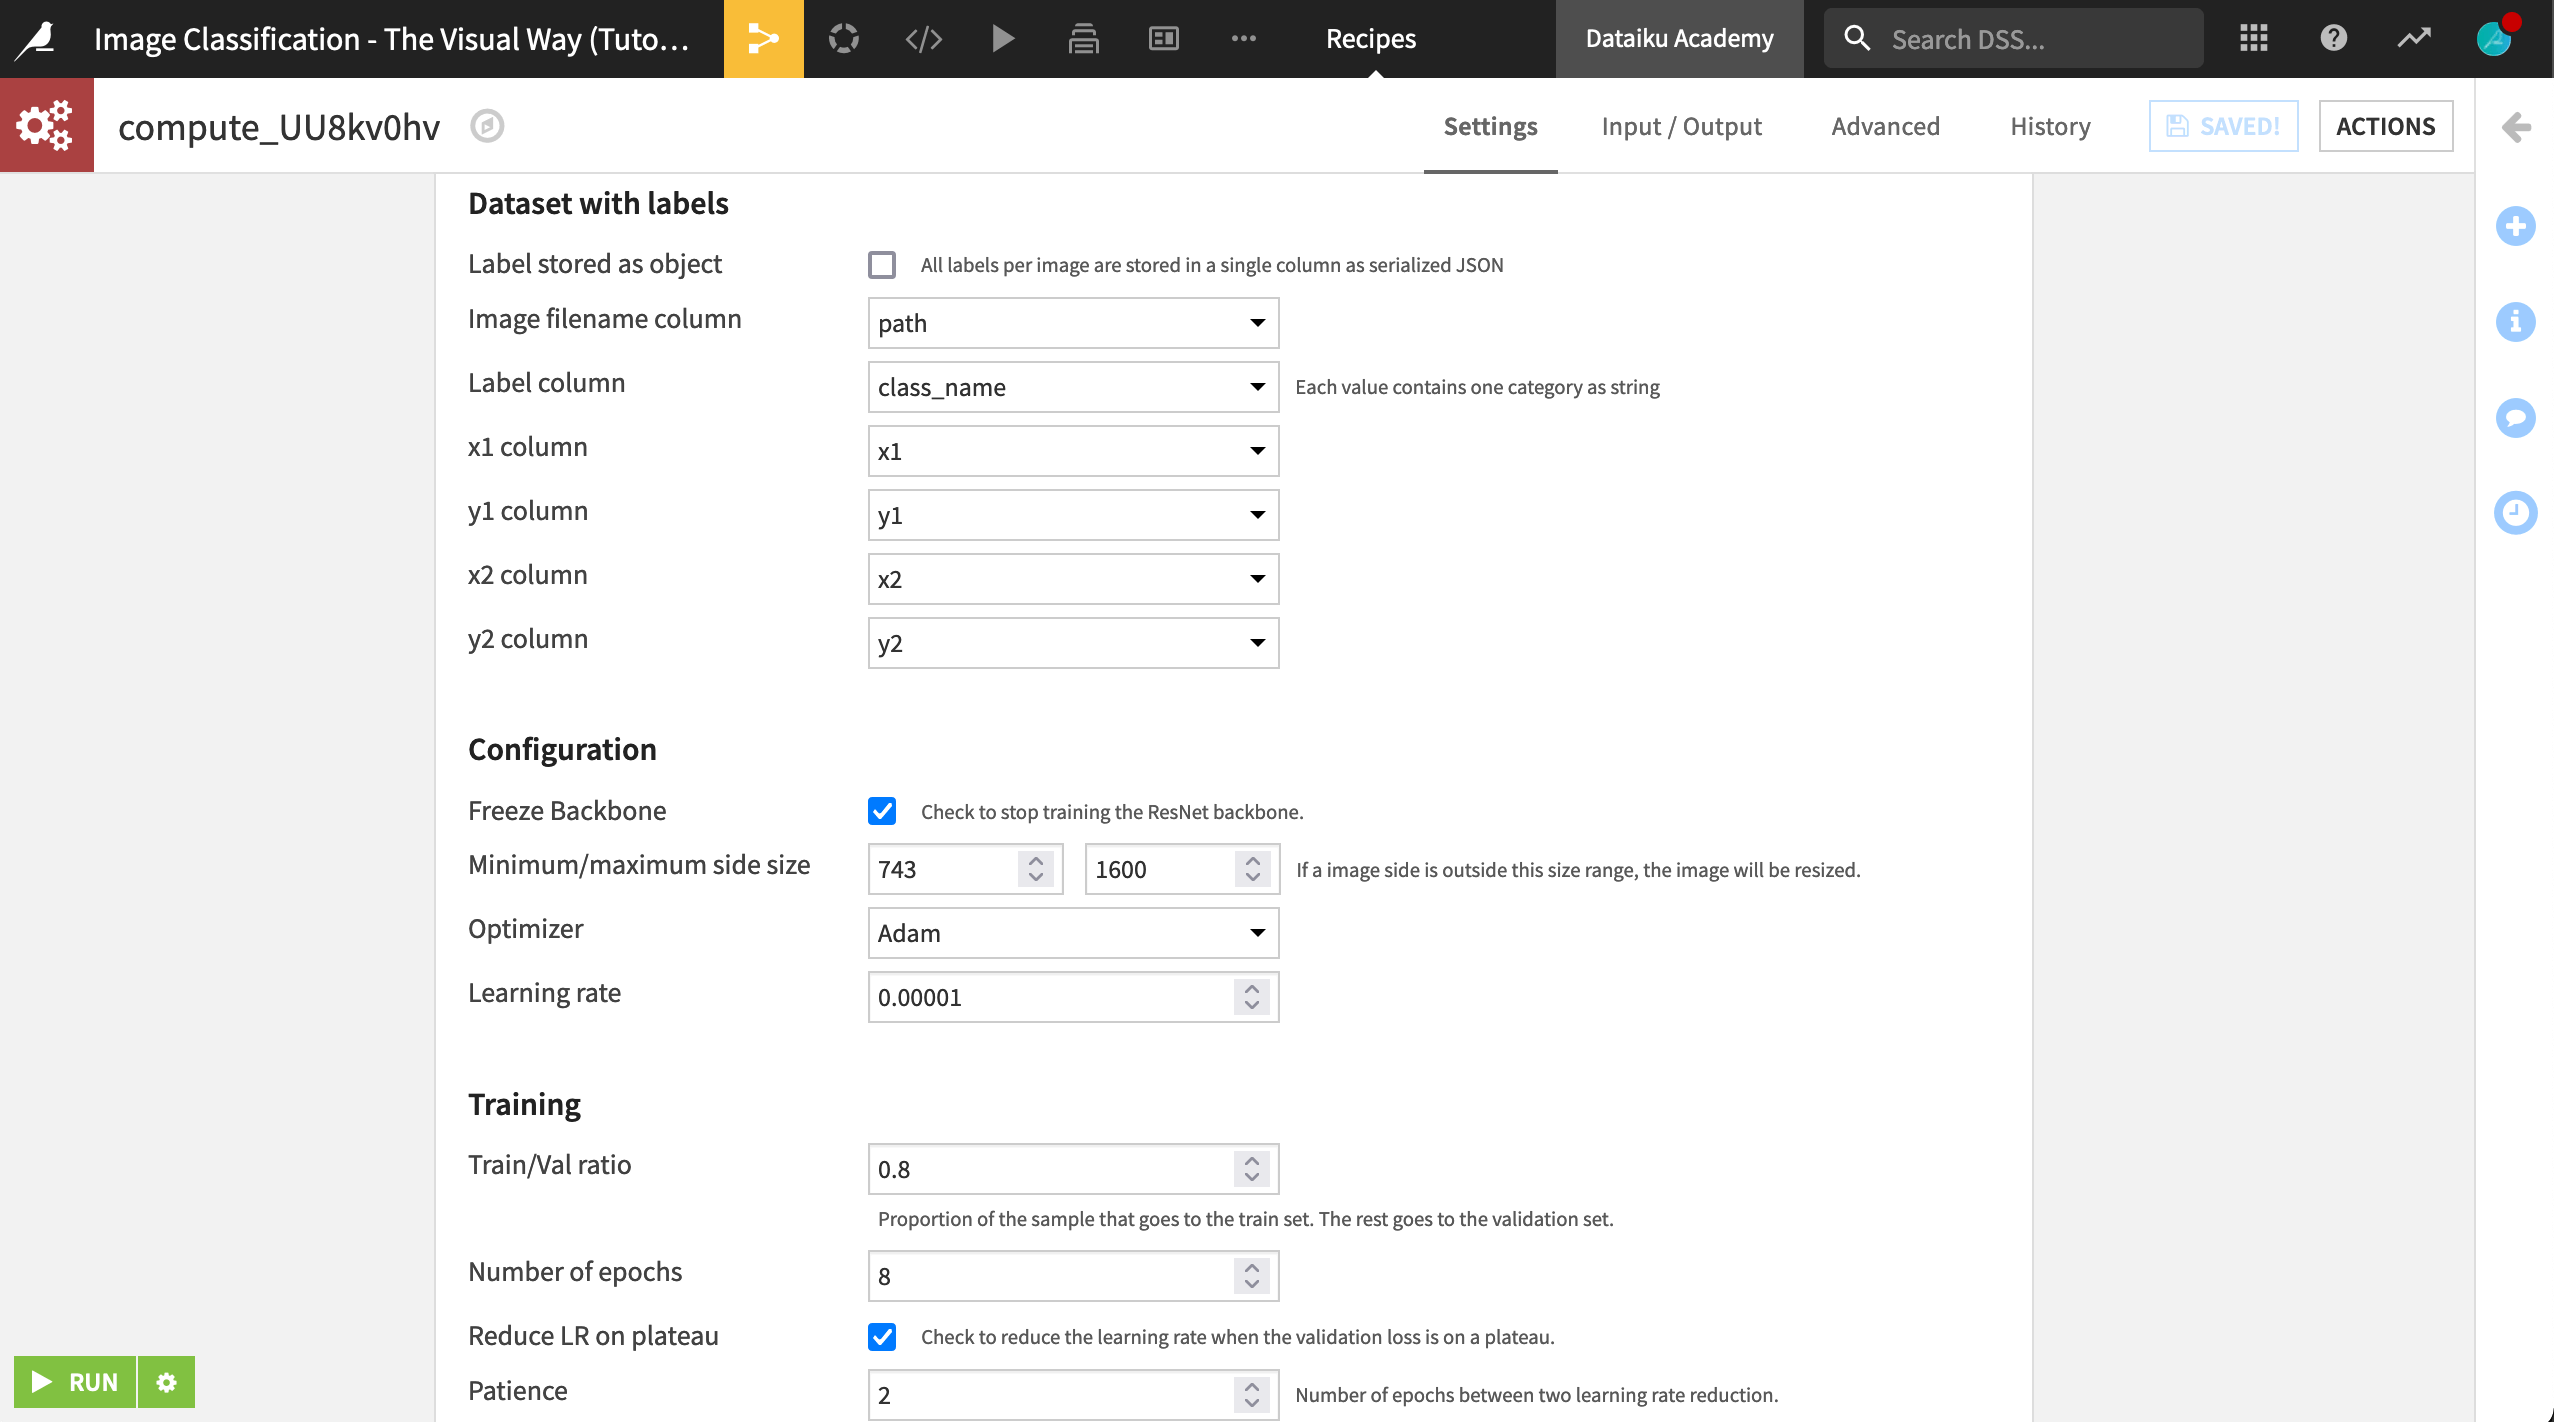
Now for the recipe’s settings.
Under the Dataset With Labels settings, provide:
path as the “Image filename column”,
class_name as the “Label column”, and
x1, y1, x2, and y2 with the column of the same name.
Under the Configuration settings, set the “Minimum/maximum side size” to
800and1737.Under the Training settings, set the “Number of epochs” to
8, and check the box to “Reduce LR on plateau”.Select Reduce LR on plateau
Save the recipe, and then click Run.
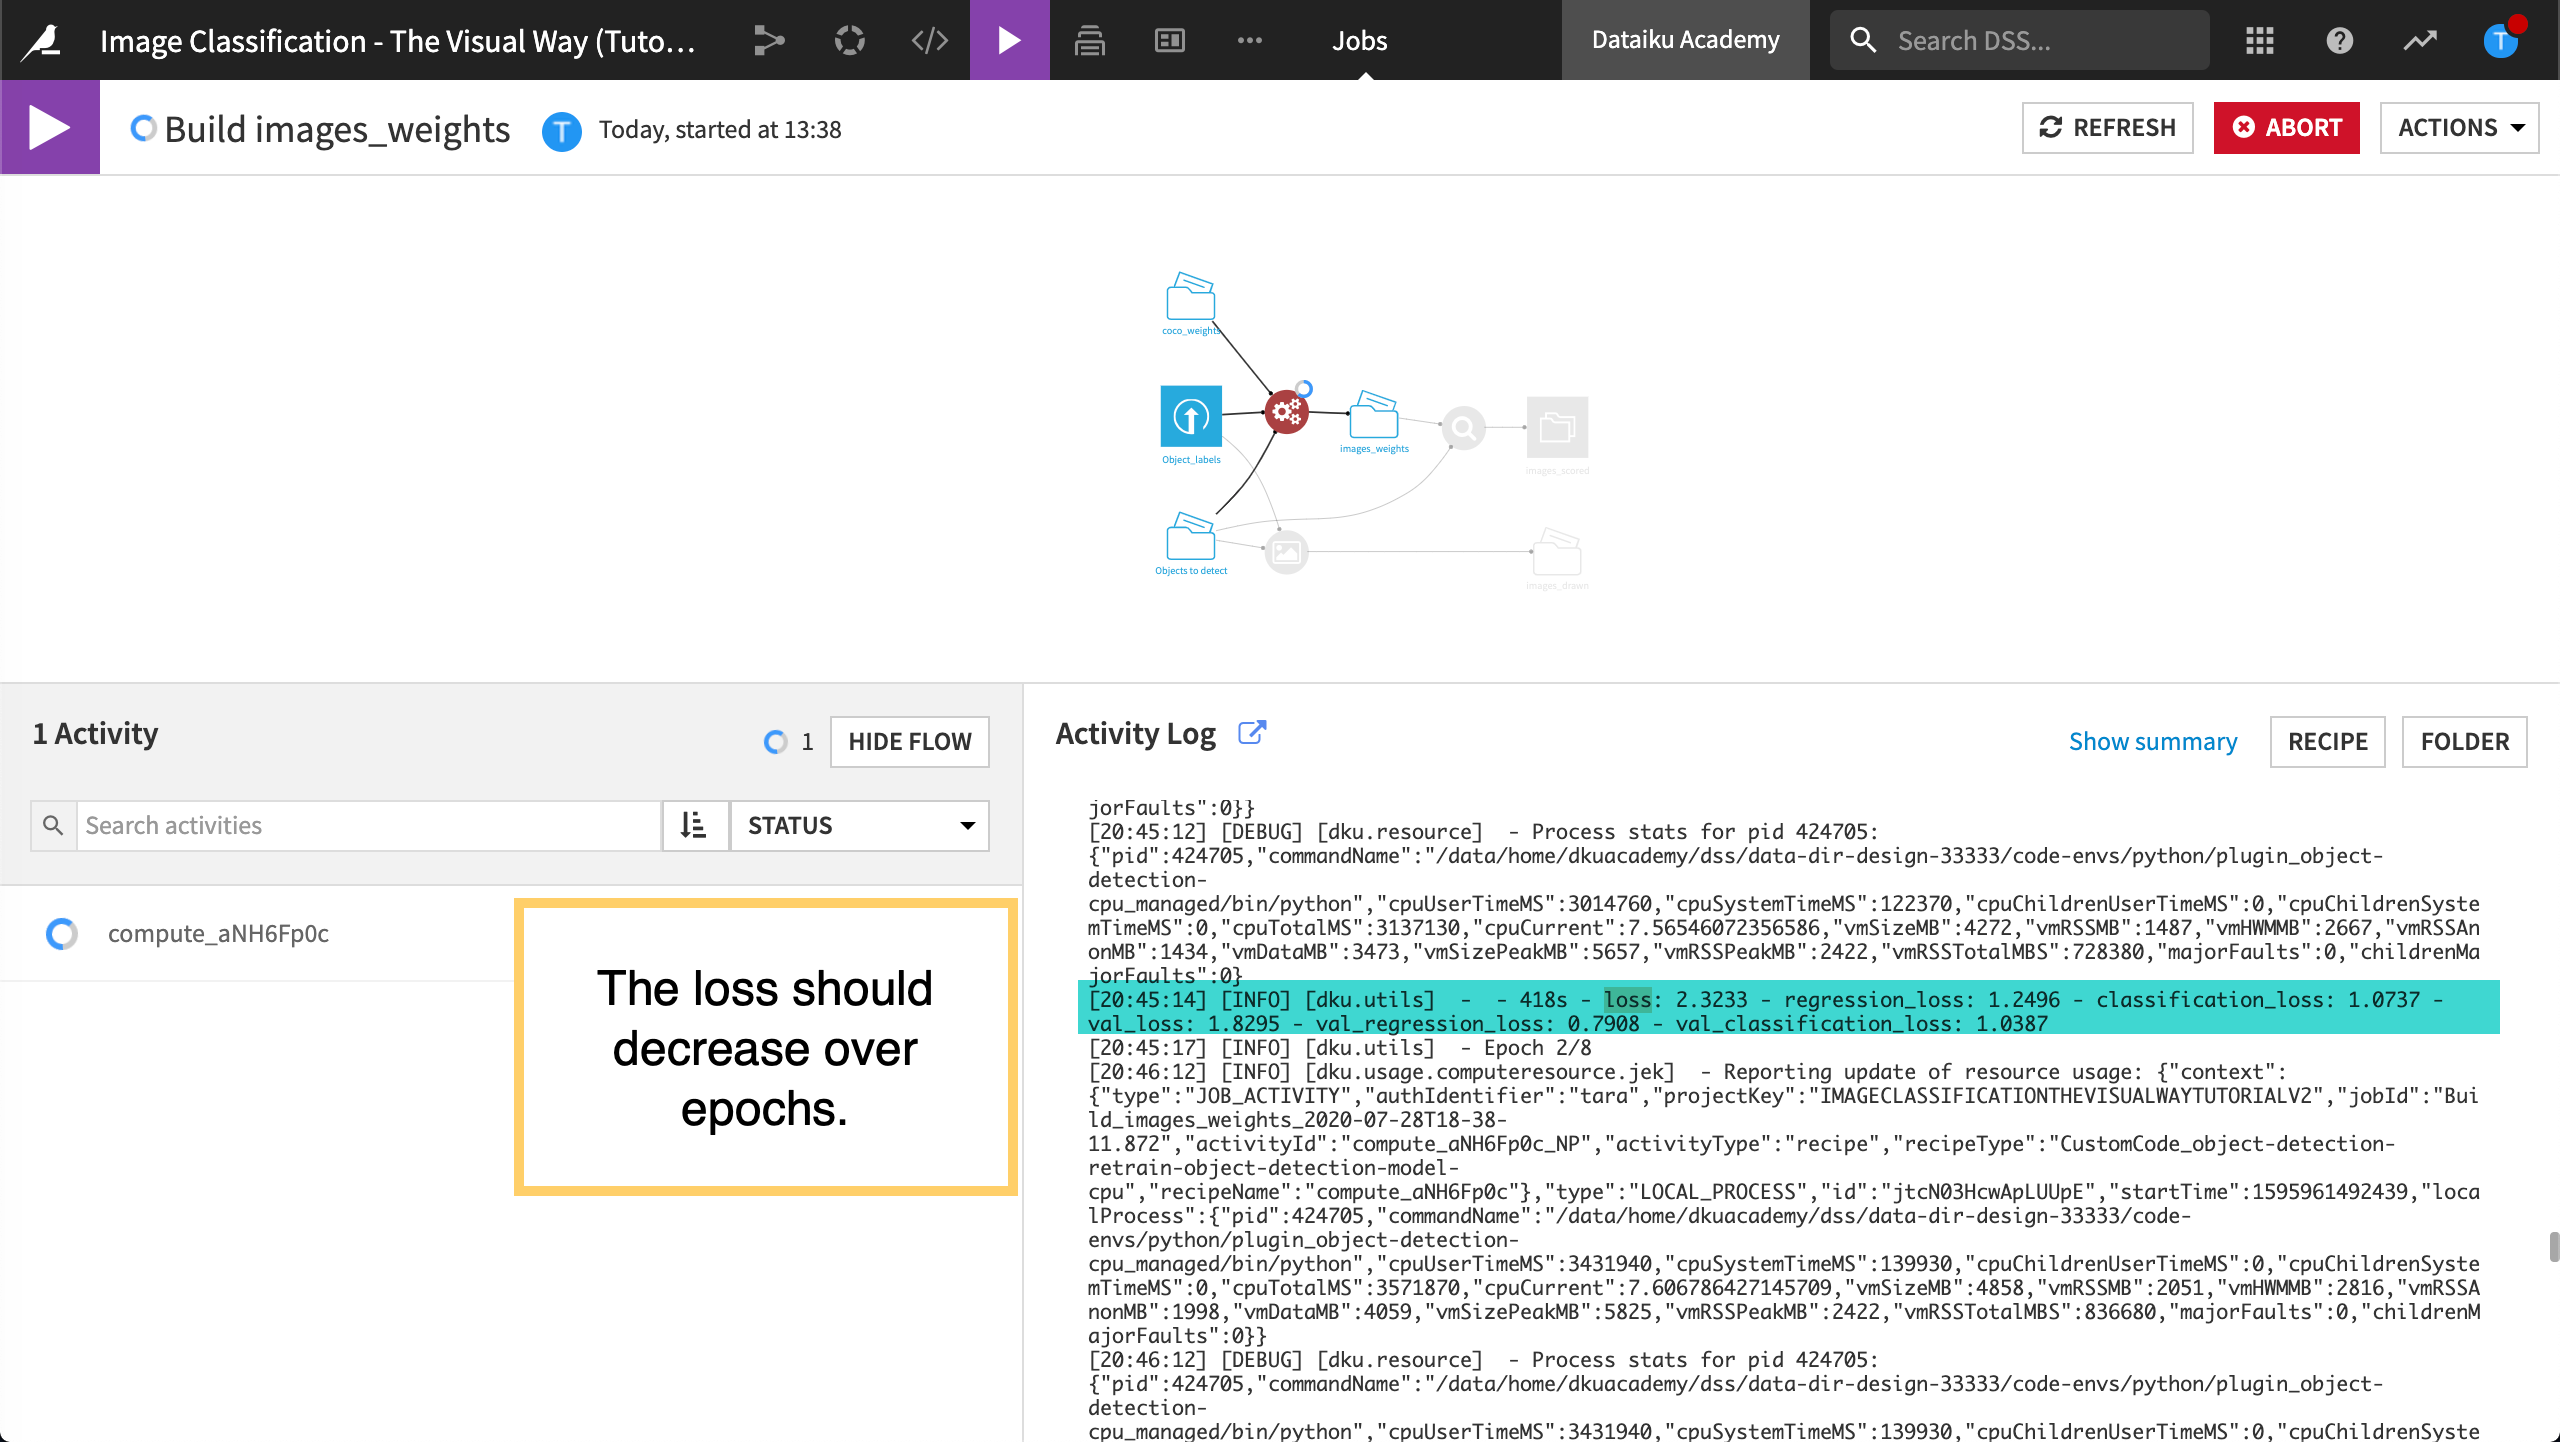
Since this computation is time consuming, let’s view the loss evolution over epochs while the recipe is running.
View the Loss Evolution Over Epochs
While the Retrain object detection model recipe is running (approximately 45-60 minutes), let’s monitor the job.
Note
The number of epochs is the number of times that the model will run through the entire training dataset. For example, eight epochs means the model will run through the training dataset, Object_labels, eight times.
In the Jobs menu, click to view the most recent job in the left panel.
Then click to view the Activity log, to monitor the loss for each epoch.
The loss is a metric that measures the error of the model. By monitoring the loss over epochs, we can monitor the model’s performance. By searching the log for “epoch”, we can see that the loss is decreasing for the first three epochs. If the loss starts to increase, we might want to stop training earlier by setting a lower number of epochs.
Detect Objects in (or Score) Images
Now that we’ve retrained the object detection model on our own folder of images and dataset of bounding boxes, let’s use the new model to detect objects in images.
In the Flow, from the + Recipe dropdown, select Object detection in images > Detect objects in images.
Provide Objects to detect as the “Folder containing the images” and images_weights as the “Model’s Weights”.
Name the output dataset
images_scored. Click Create Dataset, and then click Create.Keep the configuration settings, and then click Run.

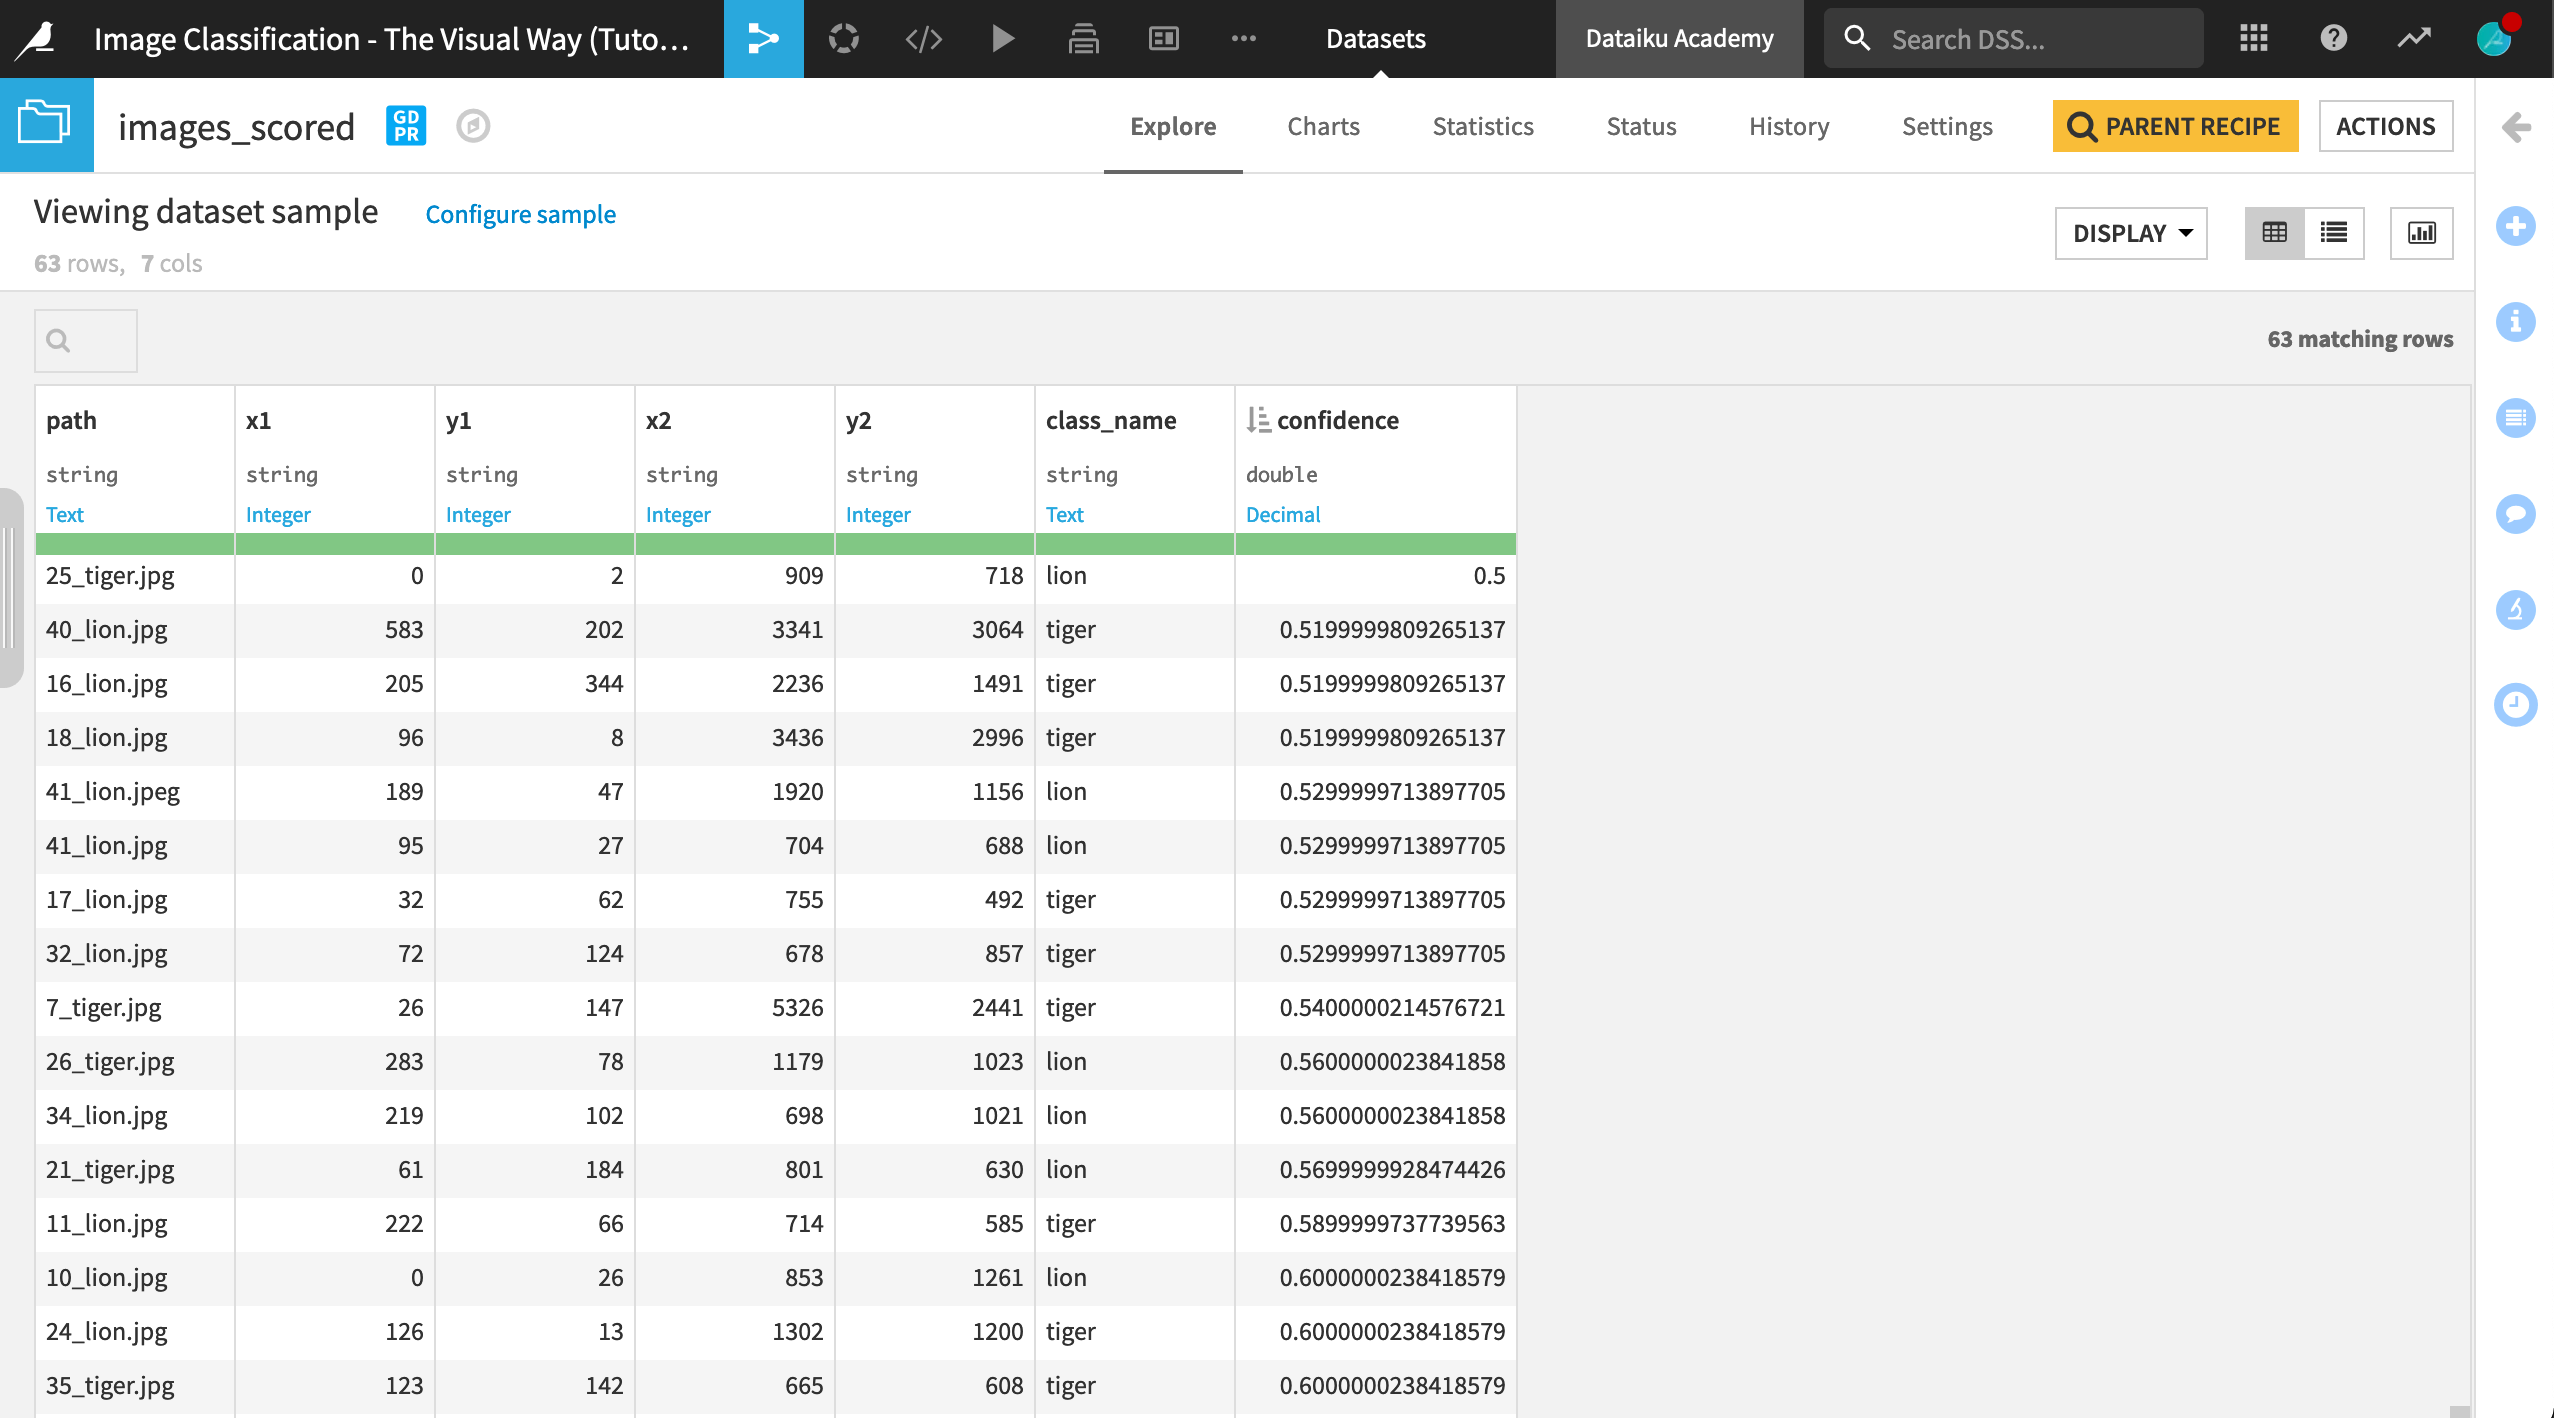
Explore Prediction Labels
Let’s explore the output.
In the Flow, open the images_scored dataset.
Use the Analyze tool on:
the class_name column for the count of lion vs. tiger images.
the confidence column to find the minimum value (minimum confidence).
Note
In this tutorial, a small number of images is used to help reduce processing time. However, a real-world dataset is likely to contain a much larger number of images. This would likely increase the minimum score but would also increase processing time.
You might also notice that some images appear to have been mislabeled!
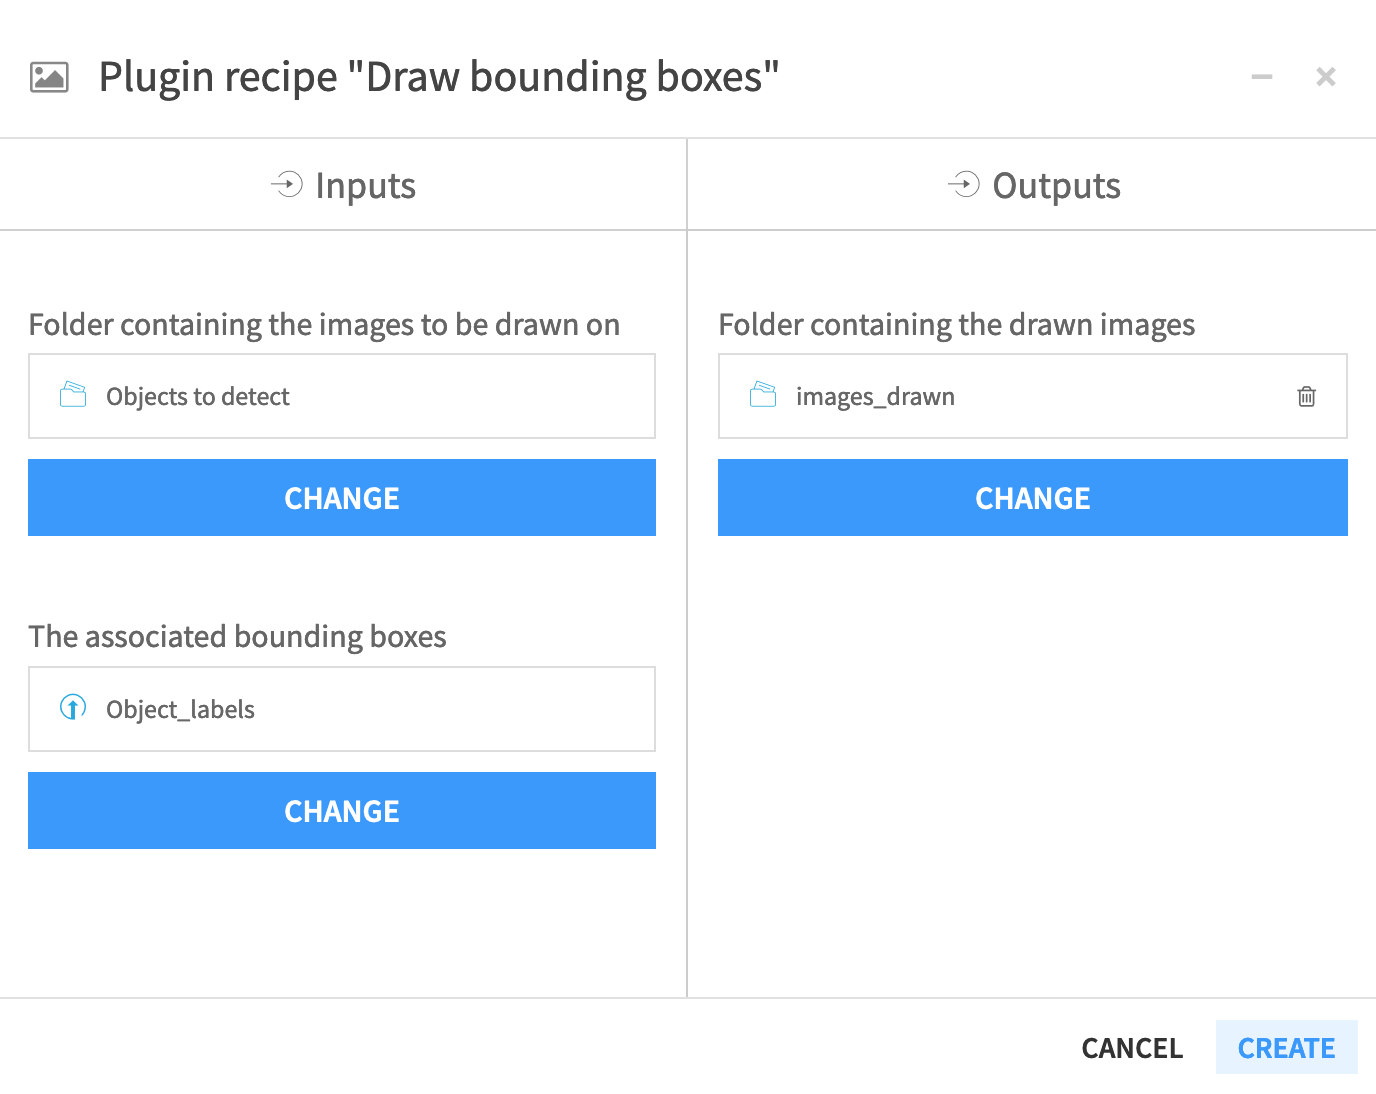
Draw Bounding Boxes
Now let’s draw bounding boxes around the detected objects in our images to help visualize how the model is doing.
In the Flow, from the + Recipe dropdown, select Object detection in images > Draw bounding boxes.
Set Objects to detect as the “Folder containing the images to be drawn on” and Object_labels as the “The associated bounding boxes”.
Name the output folder
images_drawn. Click Create Folder, and then click Create.In the Draw bounding boxes dialog, ensure the Draw label checkbox is selected, and then click Run.
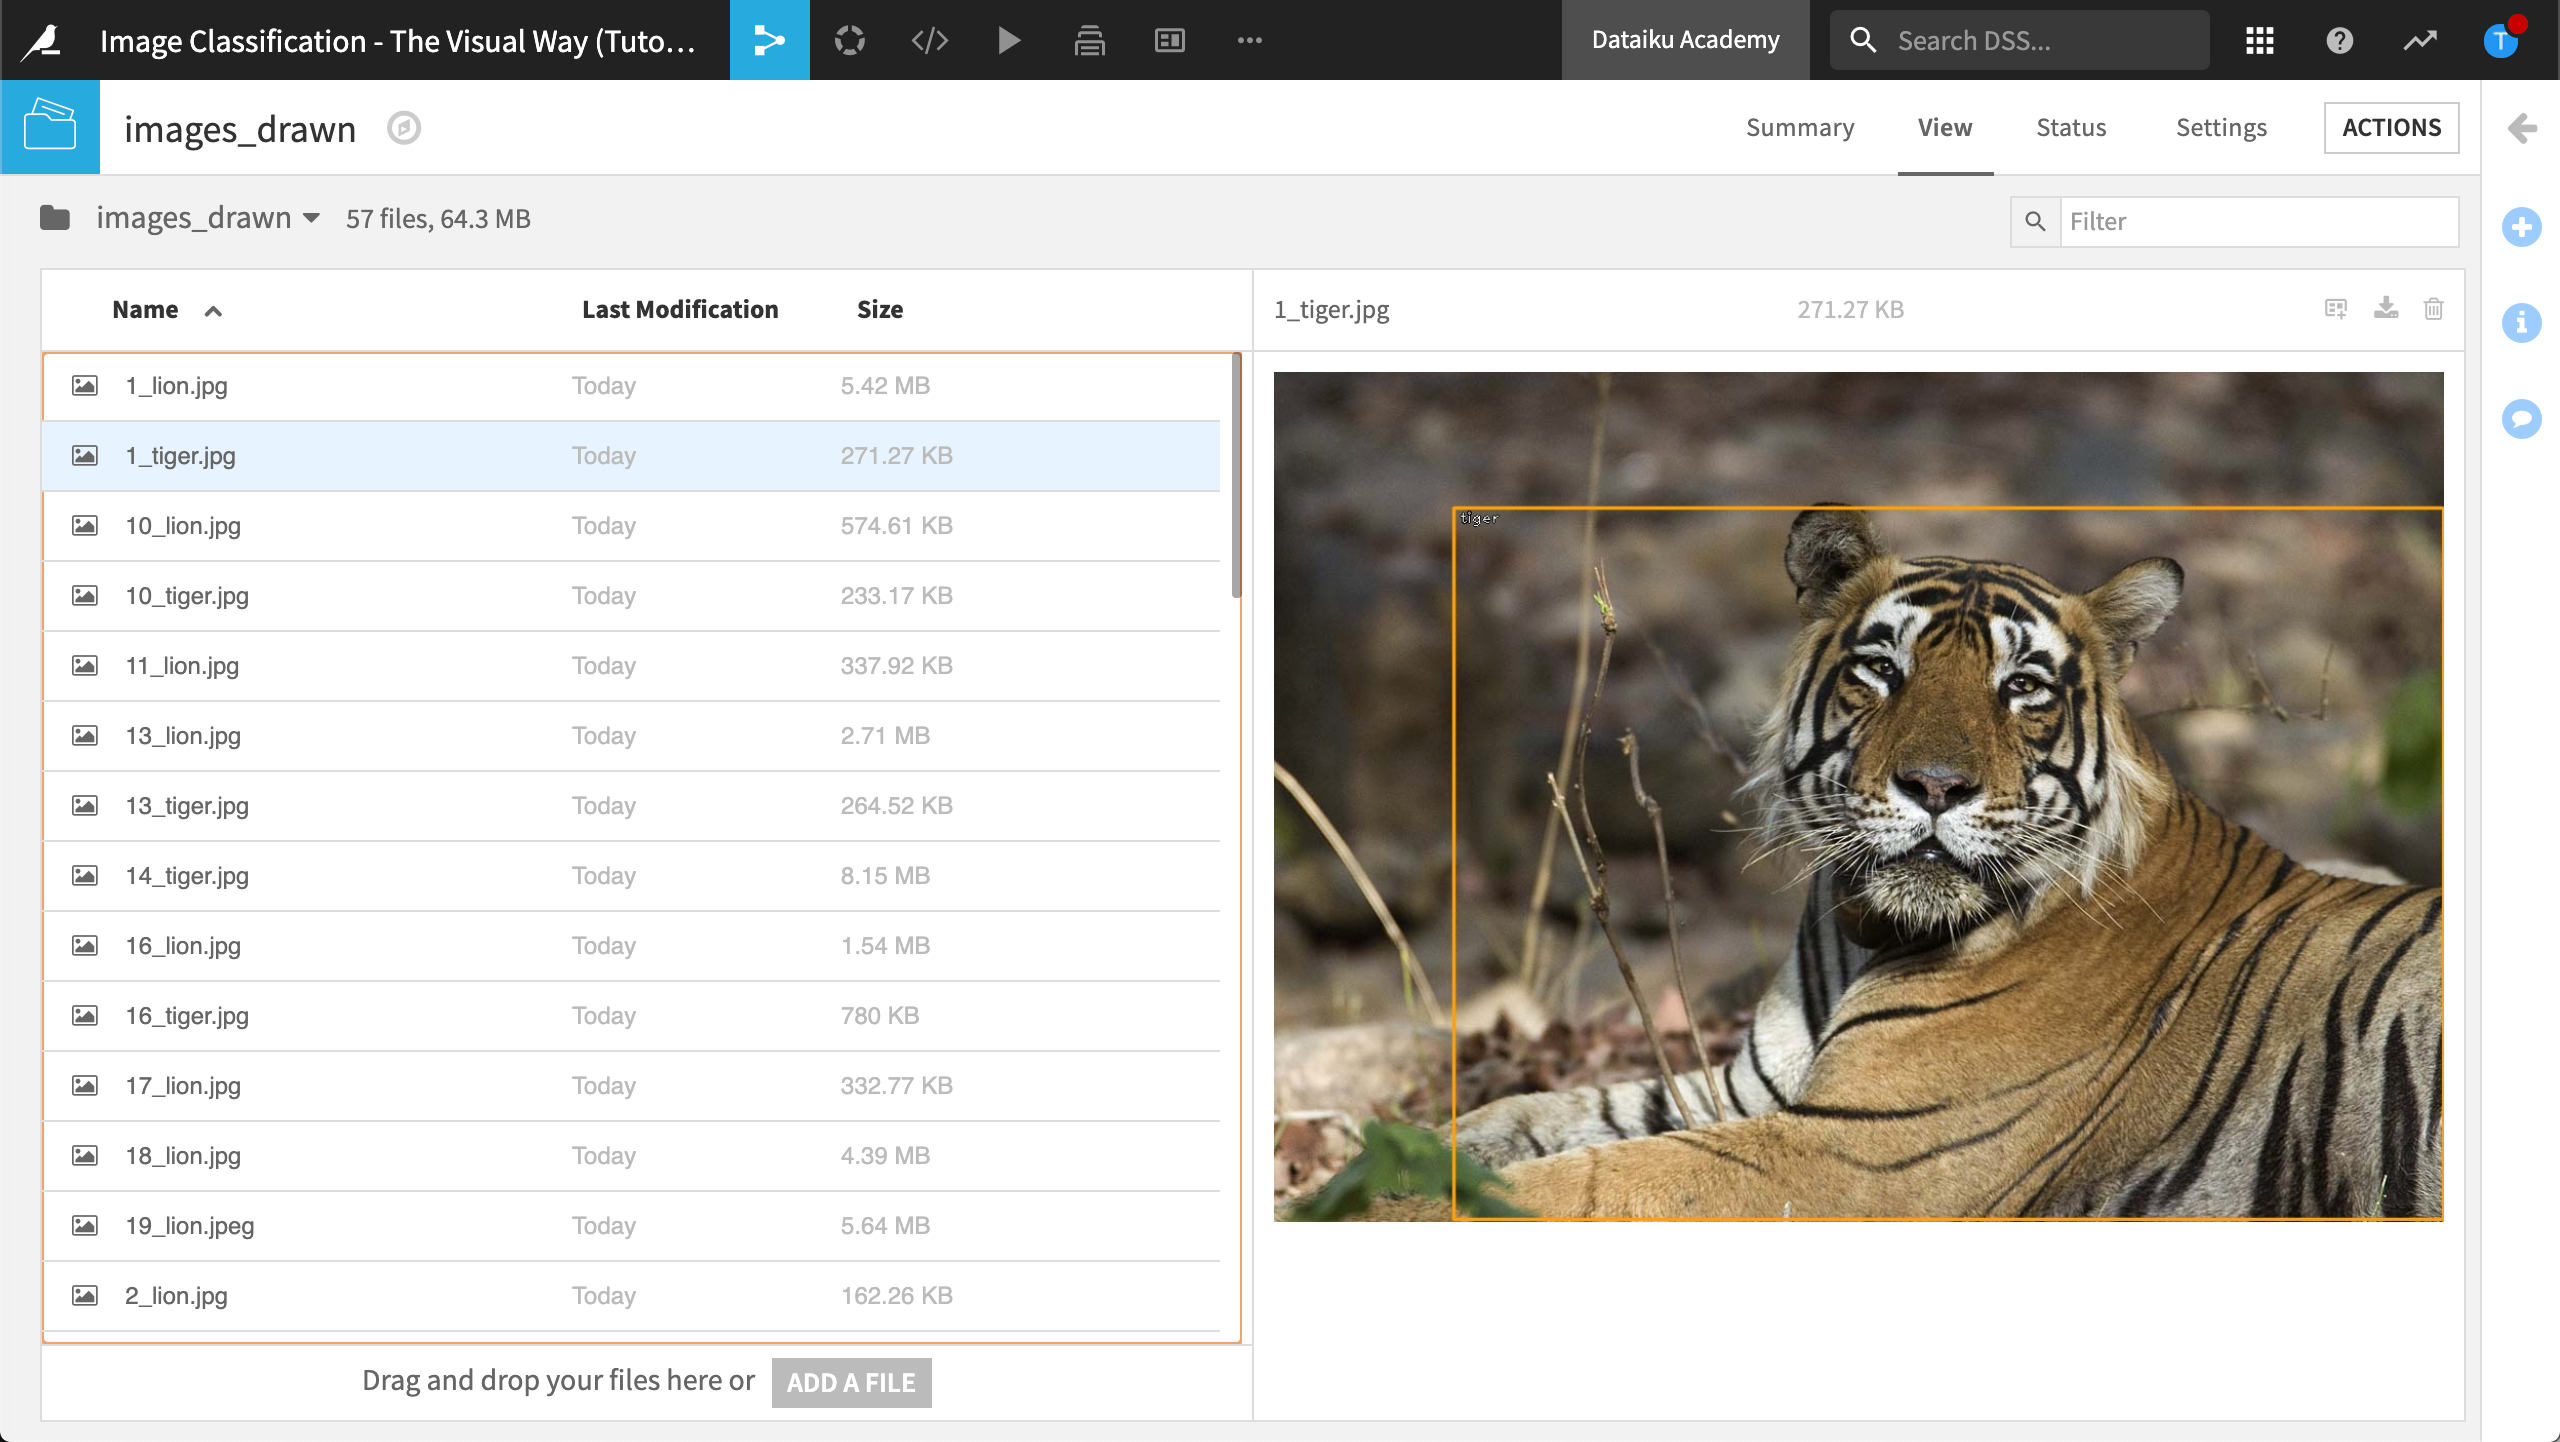
Explore Images With Bounding Boxes
Let’s explore the images with the newly-drawn bounding boxes.
In the Flow, open the images_drawn folder.
Select an image to view the bounding box.
Wrap Up
Congratulations! You have used macros and recipes from the Object Detection in Images plugin to perform common object detection tasks.
Note
You can learn more about object detection, including how it can be done natively in Dataiku, in the product documentation.