Hands-On Tutorial: Create Endpoint and Test Queries
For this tutorial, you’ll start by working with a prediction model already deployed in the Flow of a project in the Design node. You’ll use the model to create an endpoint that will be included in an API service for deployment to the API node.
Let’s Get Started!
In this tutorial, you will:
package an API service that includes a prediction model and a dataset lookup endpoint for deployment;
test queries; and
add enrichments to the queries.
Use Case
In tutorials throughout the MLOps Practitioner learning path, you’ll work with a simple credit card fraud use case. Using data about transactions, merchants, and cardholders, we have a model that predicts which transactions should be authorized and which are potentially fraudulent.
A score of 1 for the target variable, authorized_flag, represents an authorized transaction. A score of 0, on the other hand, is a transaction that failed authorization.
Prerequisites
This tutorial assumes that you satisfy the technical prerequisites for the MLOps Practitioner learning path.
Create the Project
To create the project, you can use the completed project from the Automation for a Production Environment hands-on tutorial or the completed project from any hands-on lesson in the Projects in Production course.
Alternatively, you can create a new project.
From the homepage of the Design node, click +New Project > DSS Tutorials > MLOps > MLOps (Tutorial).
Note
You can also download the starter project from this website and import it as a zip file.
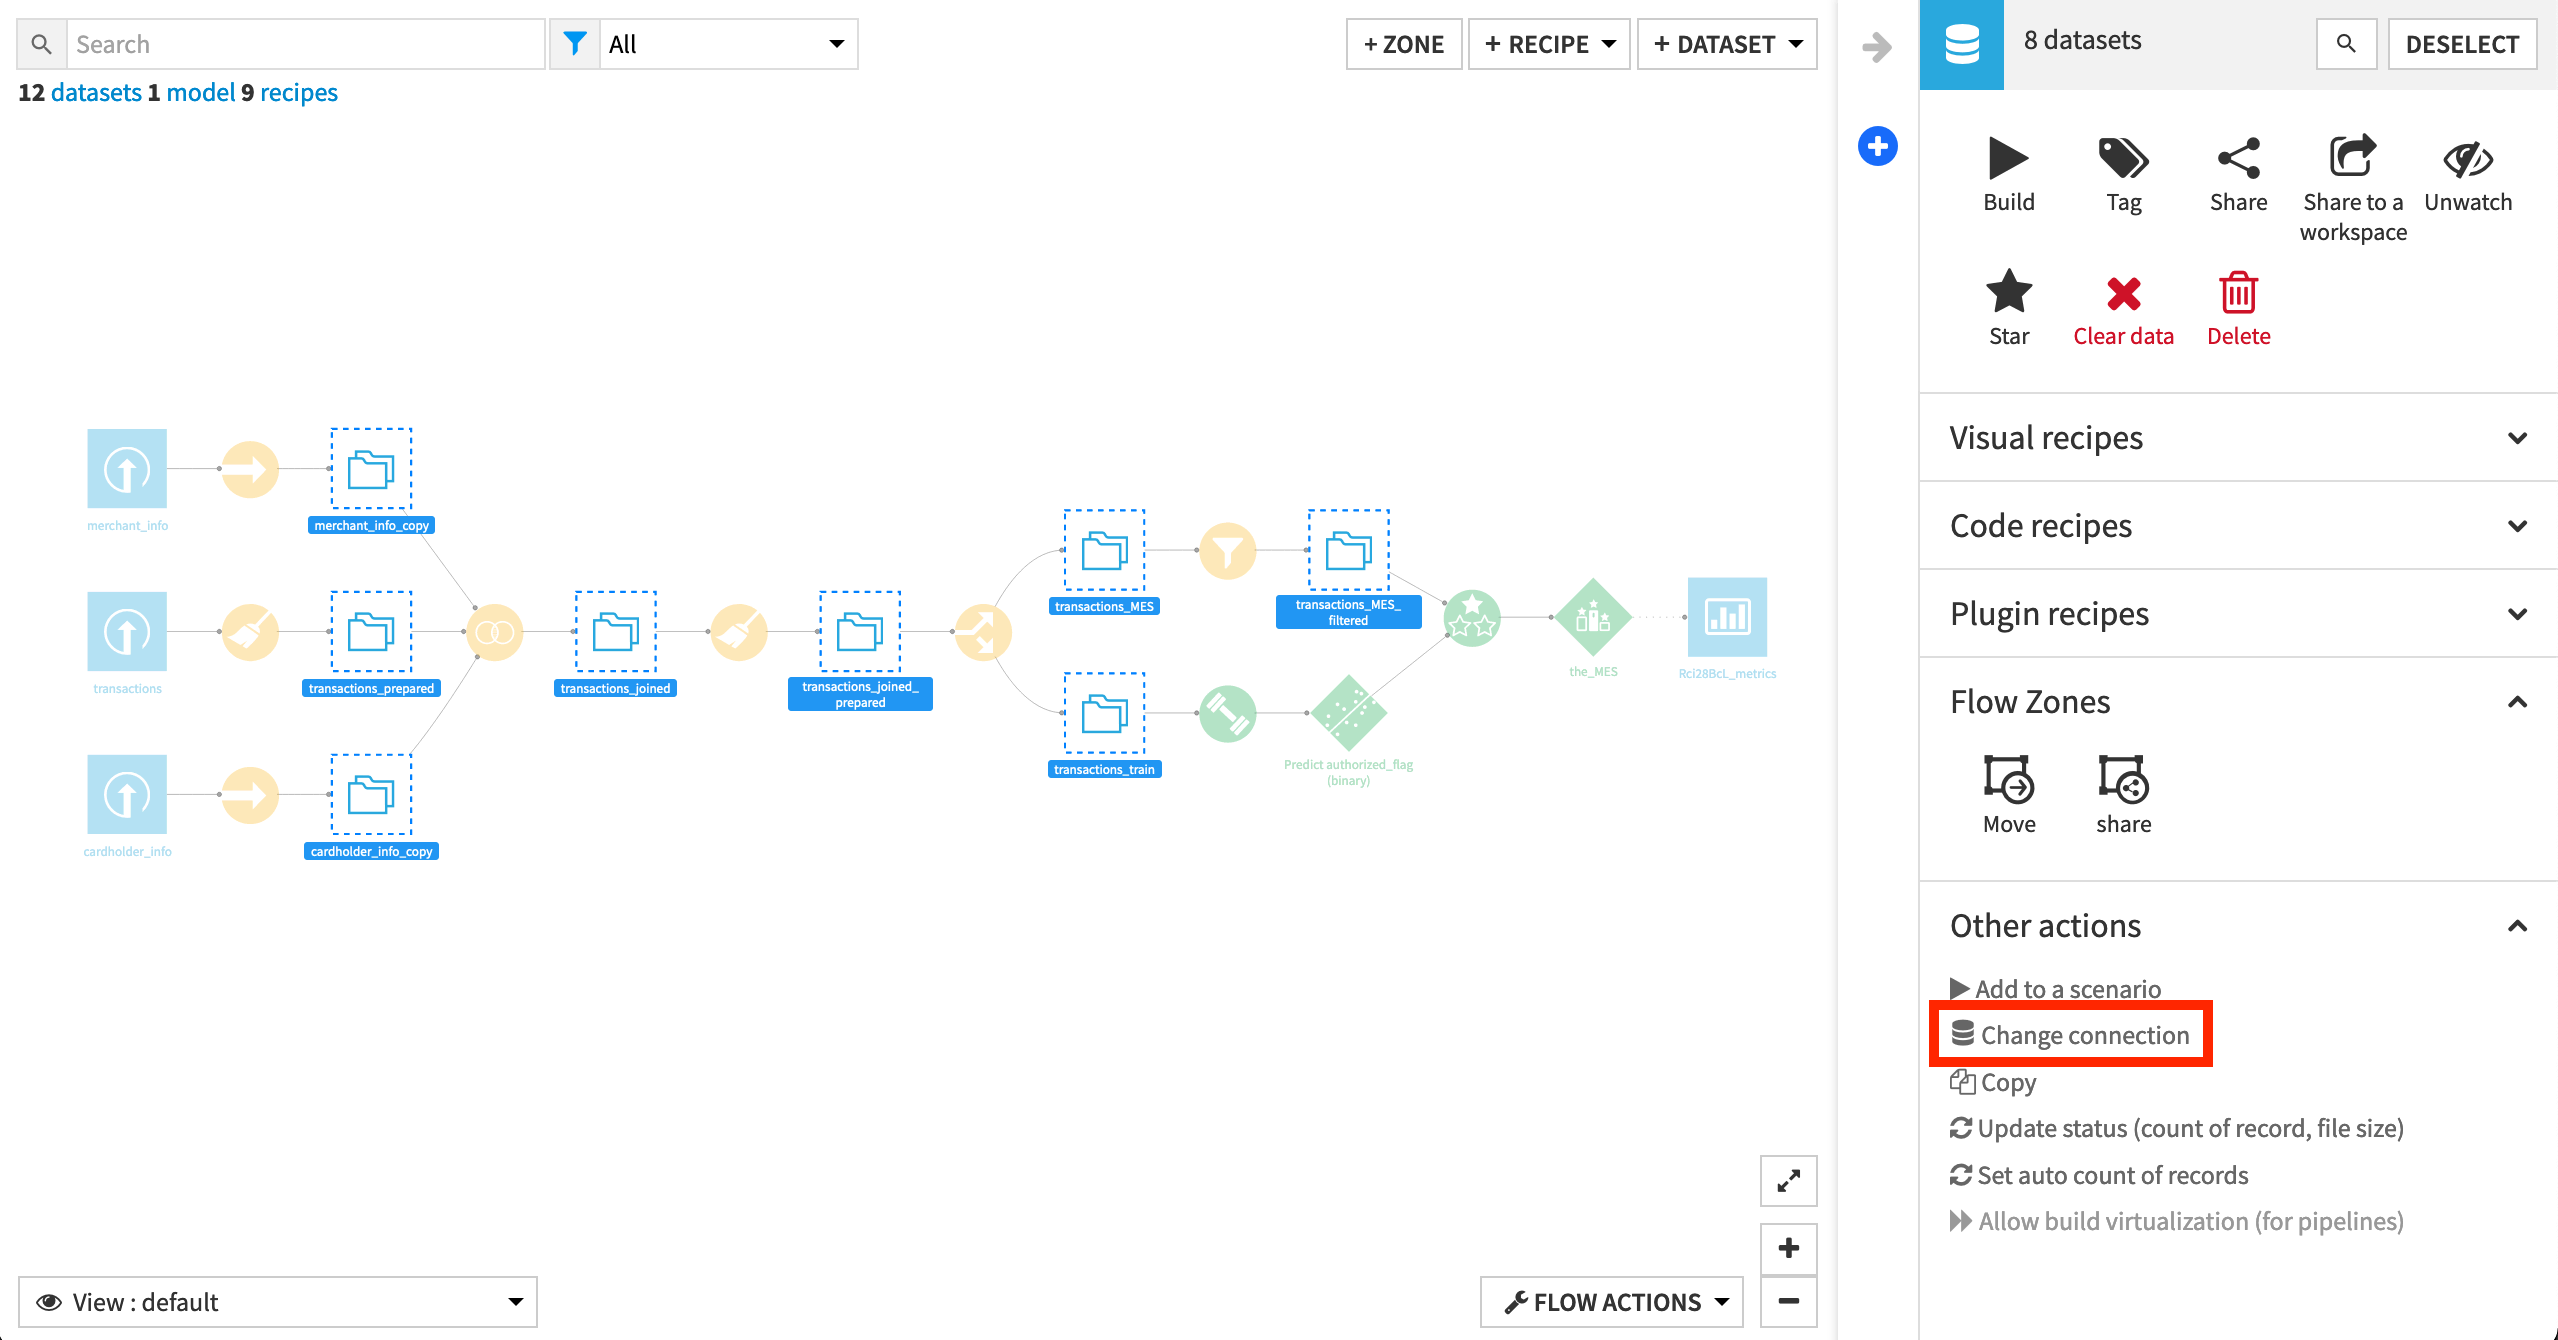
Remap Connections
To simplify the import process, the starter project contains only filesystem connections. However, the walkthrough of this tutorial has synced the eight intermediate datasets to a PostgreSQL database. To change the filesystem connections to a SQL connection, review the remap connections article in the Knowledge Base.
Build the Flow
If starting from a new project, you’ll need to ensure the Flow is built.
If the Flow includes empty datasets, manually open and then run the “Build Flow” scenario.
Warning
This scenario does not include the metrics, checks, trigger, and reporter added in the Automation Best Practices tutorial. Although bad practice in a real situation, here we are just focused on successfully deploying to production.
Notice that a visual ML prediction model is already deployed in the Flow. This model predicts whether a credit card transaction is fraudulent or not.
Note
The visual ML model must be deployed in the Flow before it can be used in an API endpoint.
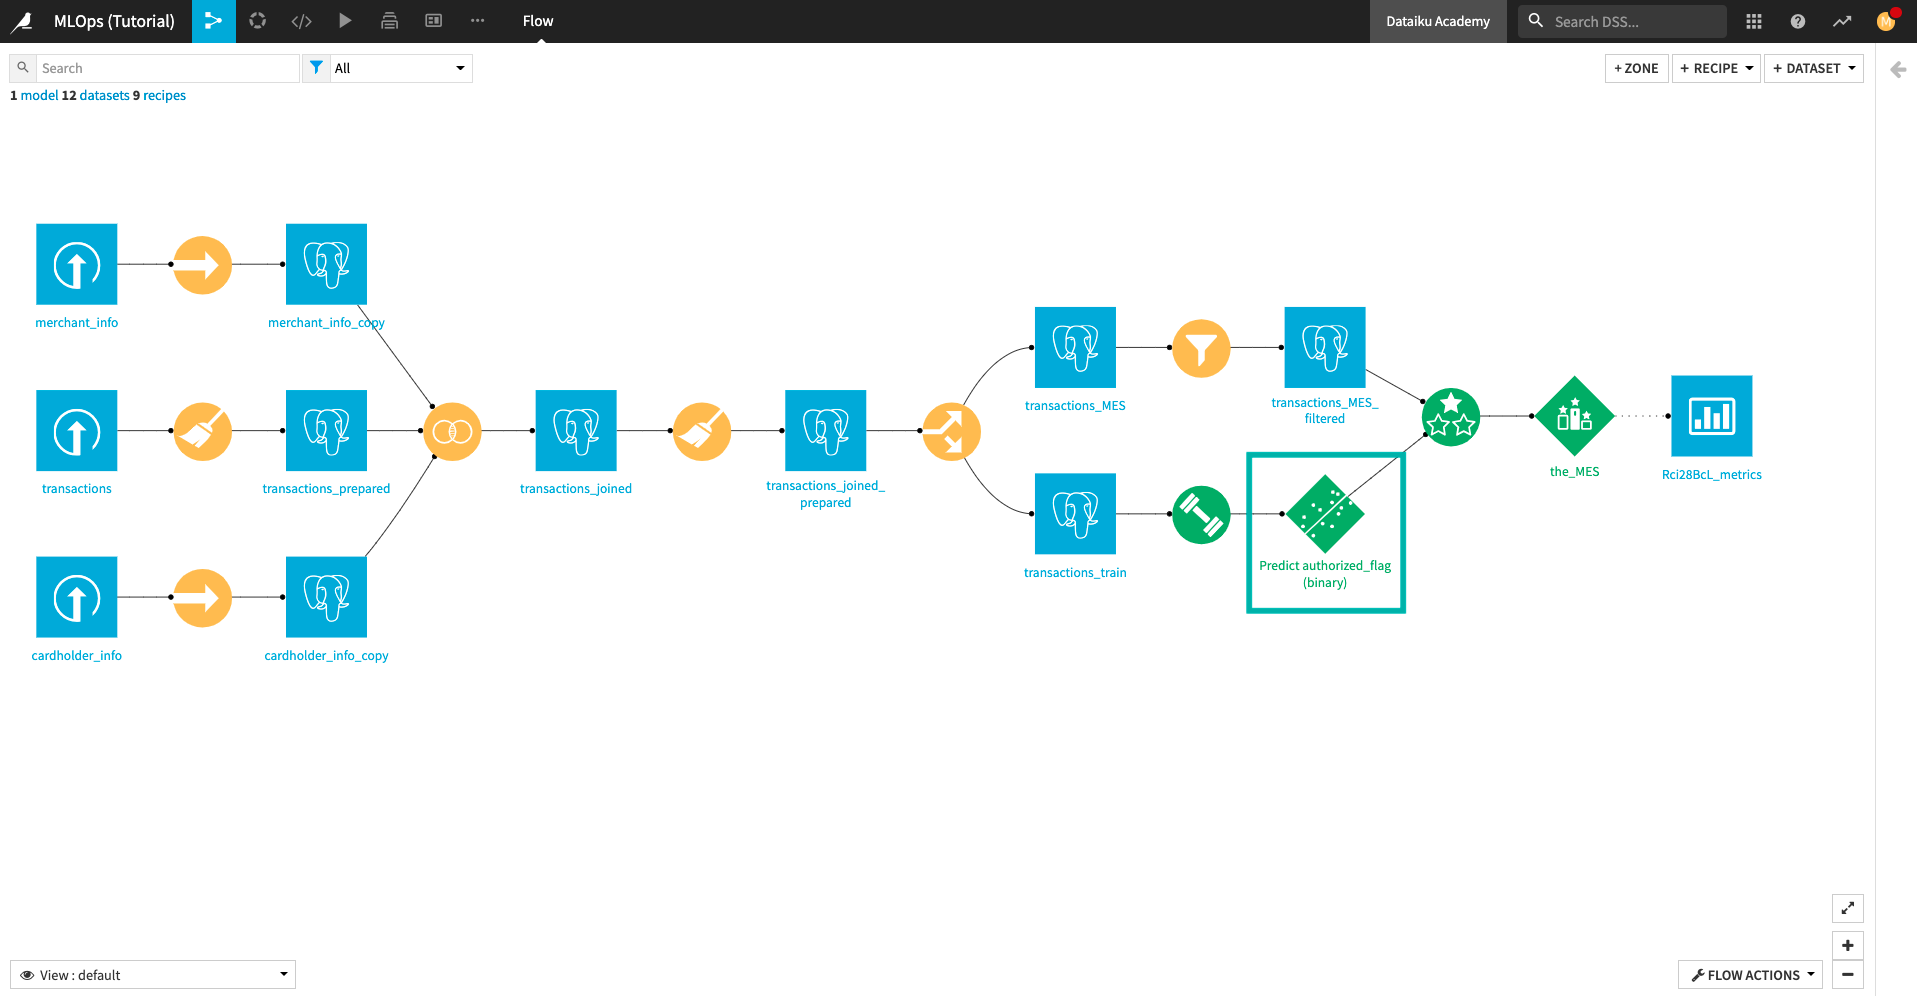
Next, we’ll package the prediction model as an endpoint in an API service.
Create an API Service With a Prediction Endpoint
In this section, we’ll begin working from the Dataiku project to create an API service with a prediction endpoint.
From the project Flow, select the prediction model.
Open the right-side panel and click Create API.

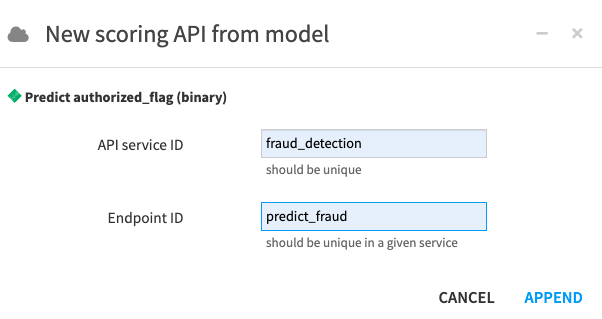
In the New scoring API from model dialog box, name the “API service ID”
fraud_detection.
Tip
The API service ID must be unique, or you’ll get an error. If an API service with the same name already exists in your project, consider adding a unique identifier (such as your name) to the API service ID.
Name the “Endpoint ID”
predict_fraud. This ID should be unique within the API service.Click Append to open the API designer.
Test the Prediction Endpoint
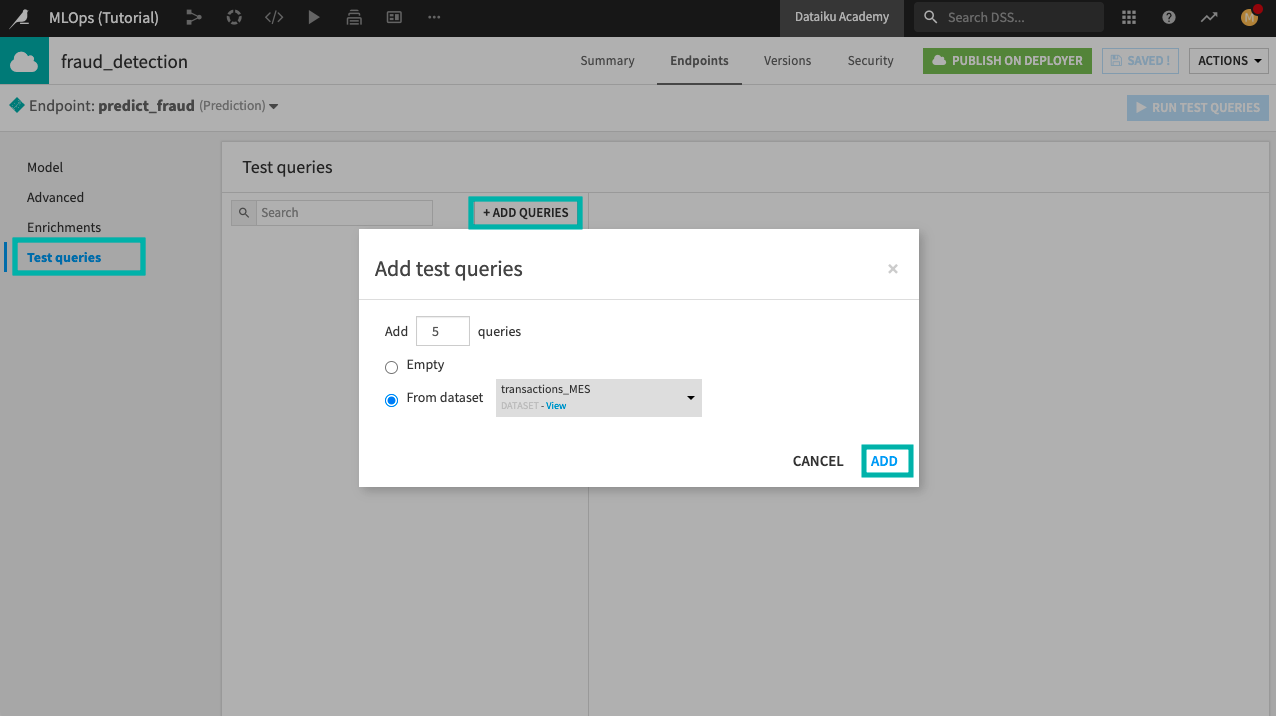
The fraud_detection API service now includes the prediction model. Next, we’ll run some test queries from the test dataset (transactions_MES) to confirm that the prediction endpoint properly predicts whether a credit card transaction is fraudulent or not.
Go to the Test queries panel and click +Add Queries.
Add five queries from the transactions_MES dataset.
Click Add.
Click Run Test Queries.
You can click the Details of the first query to see details of the prediction.
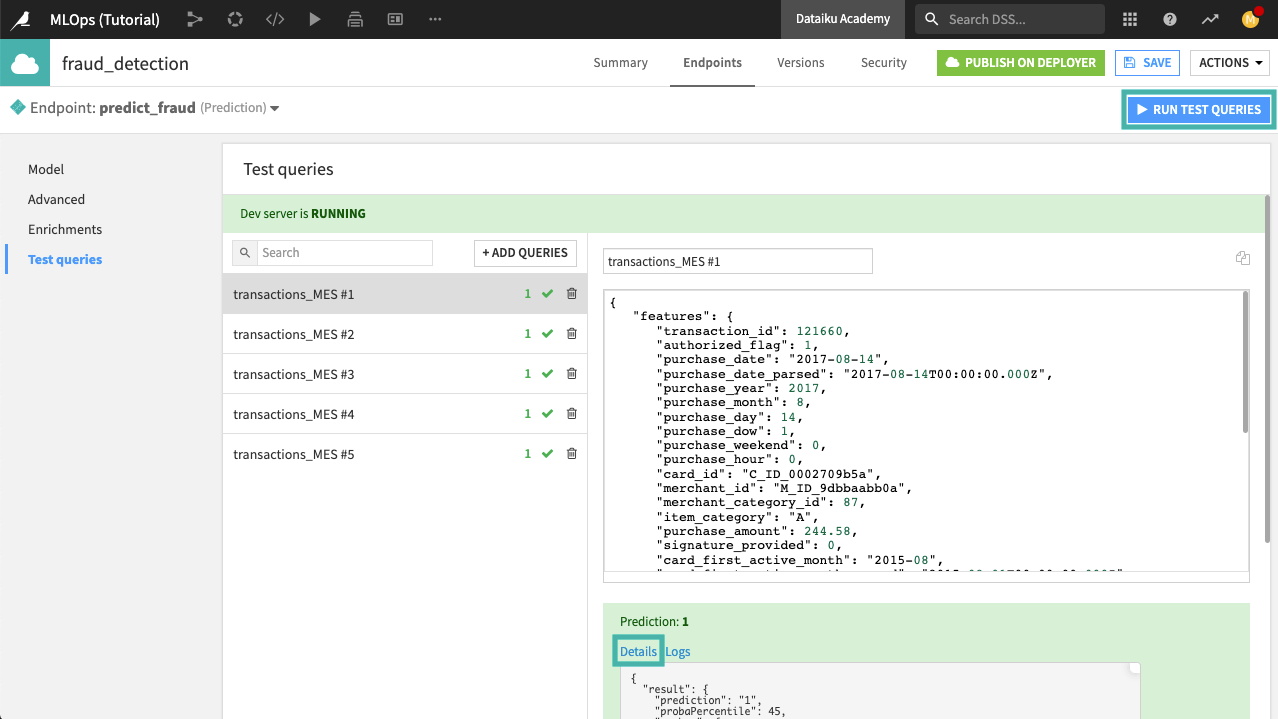
The Logs tab (next to Details) provides information that can be useful for debugging and troubleshooting, in the event that something fails.
Add a Query Enrichment
In this section, we’ll add a query enrichment to the prediction endpoint. This enrichment will allow us to enhance features by using a lookup on an additional table cardholder_info_copy in our database.
The prediction model in the Flow was trained on six features from the training dataset. These features are:
signature_provided
merchant_subsector_description
purchase_amount
merchant_state
card_age
card_fico_score
Ideally, an incoming transaction to the API endpoint would have values for all of these features for accurate real-time scoring. However, suppose at the time a transaction occurs, a merchant point of sale system sends values for only a subset of these features:
signature_provided
merchant_subsector_description
purchase_amount
merchant_state
We can retrieve the missing values for the features card_fico_score and card_age from our internal database and use these values to enrich the API queries.
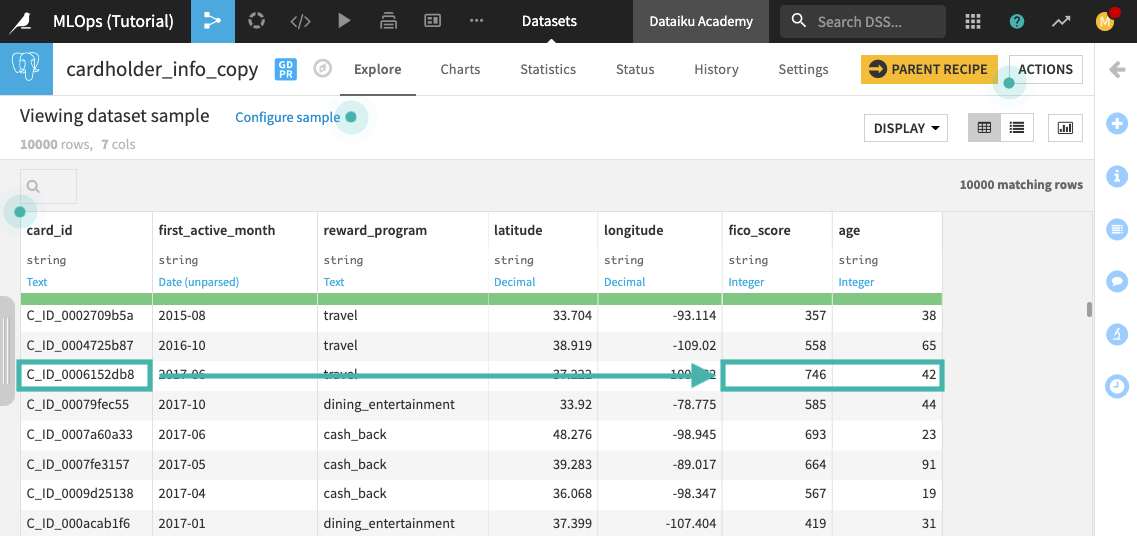
Using the cardholder_info_copy dataset in the project, we’ll use the card_id value of each real-time transaction to look up the corresponding values for fico_score and age and then pass the complete feature set to the prediction model.
In the API designer, click the Enrichments tab.
Click +Add Enrichment.
Select the cardholder_info_copy dataset to use for enrichment.
Select the “Referenced (SQL only)” deployment policy” to query the table from the Flow directly.
To configure the unique lookup key, click +Add Key and select the card_id column.
Specify the columns to retrieve from the dataset as fico_score and age.
The prediction model was trained to recognize these columns with the “card_” prefix; therefore, we’ll remap the column names as follows:
fico_score –>
card_fico_scoreage –>
card_age

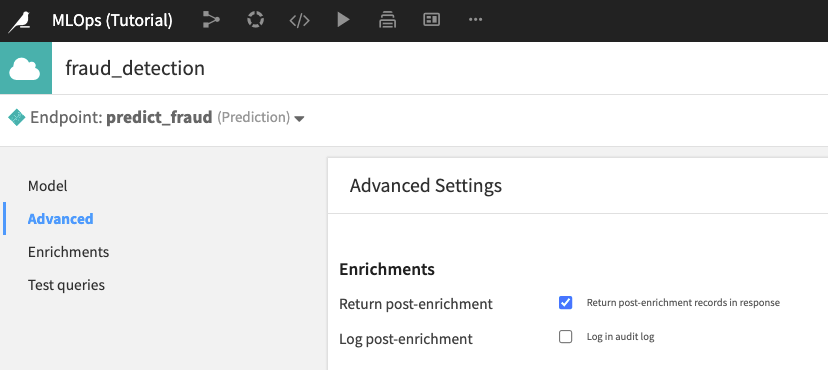
Click the Advanced panel of the API designer.
Check the box to “Return post-enrichment”. This will return a more verbose response to each API query.
Test the Query Enrichment
To test the enrichment, we’ll use a test query that includes only four of the six features that were used to train the prediction model.
Click the Test queries panel of the API designer.
Click +Add Queries to add a new “Empty” query.
Click Add. A new query, “Query 6”, is now in the list of test queries.
Paste the following JSON code sample in the query window. This query includes only a subset of the features that were used to train the ML model.
{
  "features": {
      "card_id": "C_ID_23626074d5",
      "purchase_amount": 3704.17,
      "signature_provided": 0,
      "merchant_subsector_description": "luxury goods",
      "merchant_state": "Wyoming"
    }
}
Click Run Test Queries.
Click Details in the API response.
The model predicts “0” (= fraud) for this particular transaction!
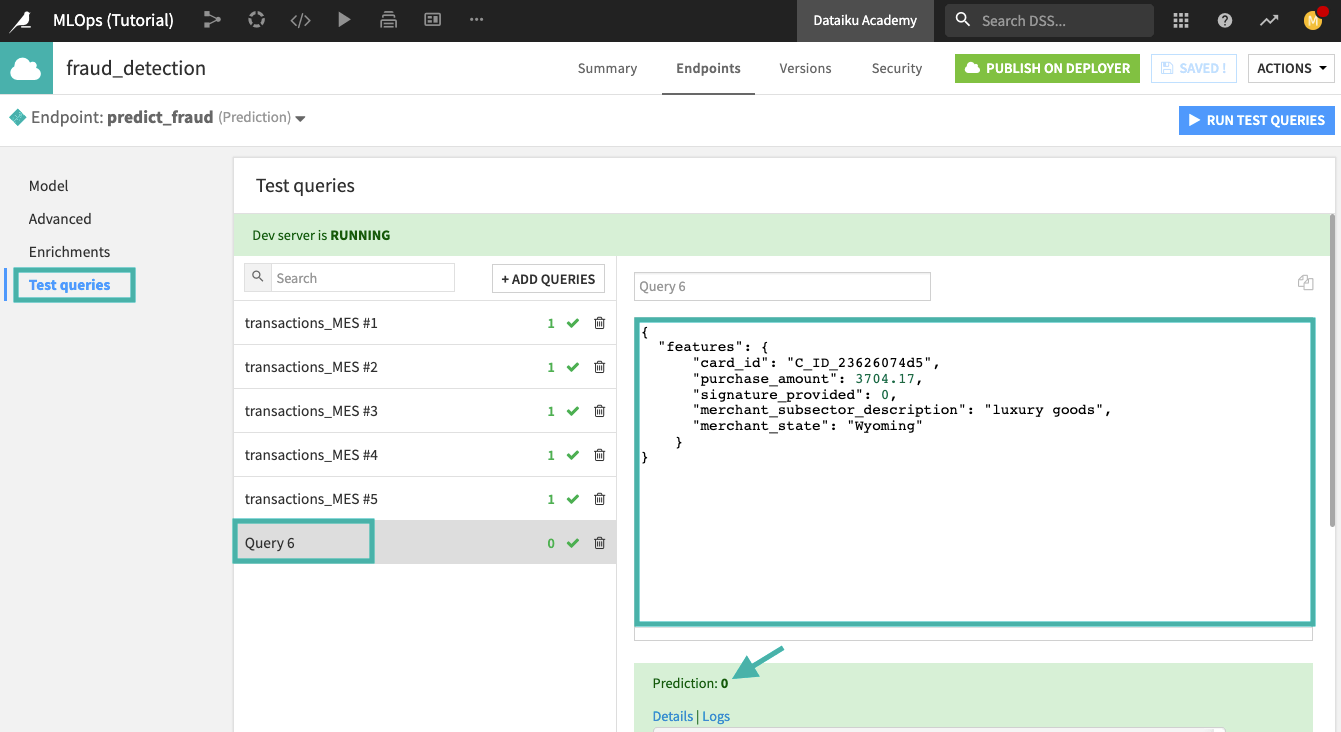
The enrichment uses the card_id to retrieve the missing features (card_fico_score and card_age) so that the ML model has all the features needed to determine a prediction.
Note
You can also test the enrichment by modifying the JSON code for any of the existing test queries. To do this, simply delete all the features except for the ones used in the JSON code sample above. When you run the test queries, you’ll notice that the endpoint returns the same prediction as before for the modified test query, even with the missing features.
Create a Second Endpoint: A Dataset Lookup
Suppose we want a user to be able to send a query to an endpoint in the API service, such that the query includes a specific merchant_id, and in response, they receive all information relating to this specific merchant from the database.
We can add another endpoint to the API service just for this purpose. The new endpoint will perform a dataset lookup in the merchant_info_copy dataset.
In the API designer, click the arrow next to “predict_fraud (Prediction)”.
Click Create new endpoint.

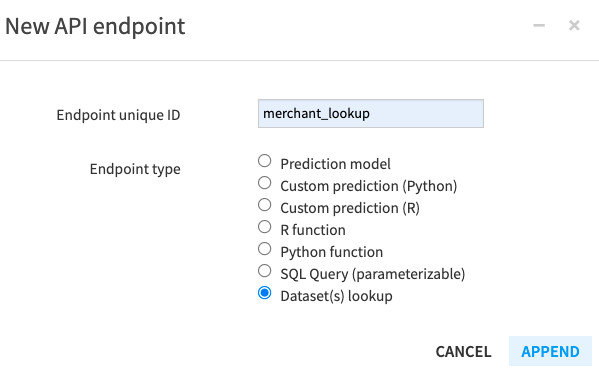
Name the endpoint
merchant_lookup.Select “Dataset(s) lookup” as the Endpoint type.
Click Append.
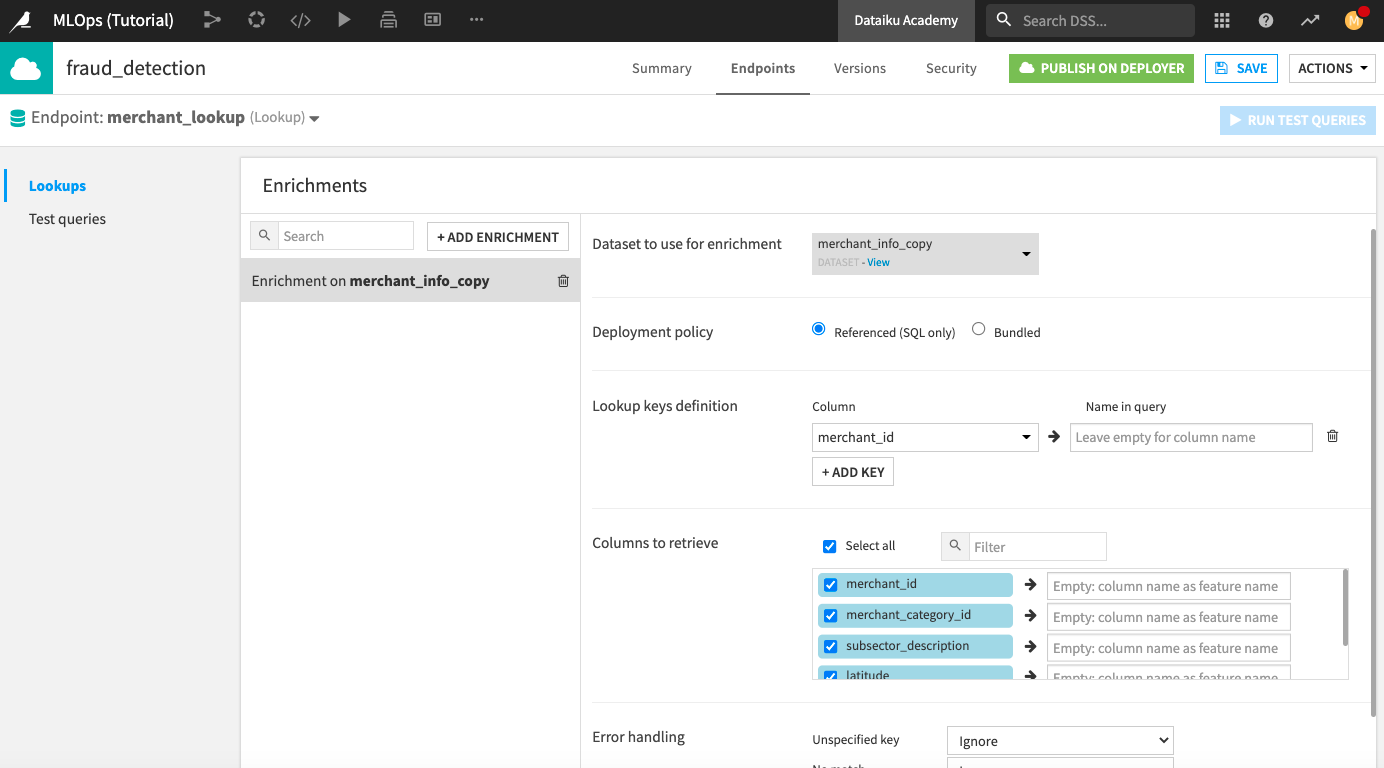
In the API designer, click +Add Enrichment.
Specify merchant_info_copy as the dataset for enrichment.
Use the “Referenced (SQL)” deployment policy.
Specify the lookup key as merchant_id. The “Name in query” for this feature will be the same, so you can leave the field empty here.
Click the check box next to “Select all” to retrieve all columns.
Test the Dataset Lookup Endpoint
The dataset lookup endpoint is now included in the fraud_detection API service and ready for use. But first, let’s test the endpoint to confirm that it works properly.
Click the Test queries panel of the API designer and add the following query:
{
 "data": {"merchant_id" : "M_ID_0003f9a7c4"}
}
Run the test query. You should get the results in the following screenshot.

What’s Next?
Congratulations! You’ve successfully designed an API service with a prediction endpoint, an enrichment, and a dataset lookup endpoint. For more information, see the product documentation on API Node & API Deployer: Real-time APIs.
To continue learning, see the lesson on Concept: API Deployer to learn how to deploy an API service to an API node.