Concept: API Deployer
Tip
This content is also included in a free Dataiku Academy course on Real-Time APIs, which is part of the MLOps Practitioner learning path. Register for the course there if you’d like to track and validate your progress alongside concept videos, summaries, hands-on tutorials, and quizzes.
Once an API service has been designed and is ready for deployment to an API node, the deployment is accomplished by using the API Services component of the Dataiku Deployer (which we refer to as the API deployer).
API Deployer
The Dataiku Deployer is accessible from any project in the Design or Automation node, and it consists of a Project deployer and an API deployer.
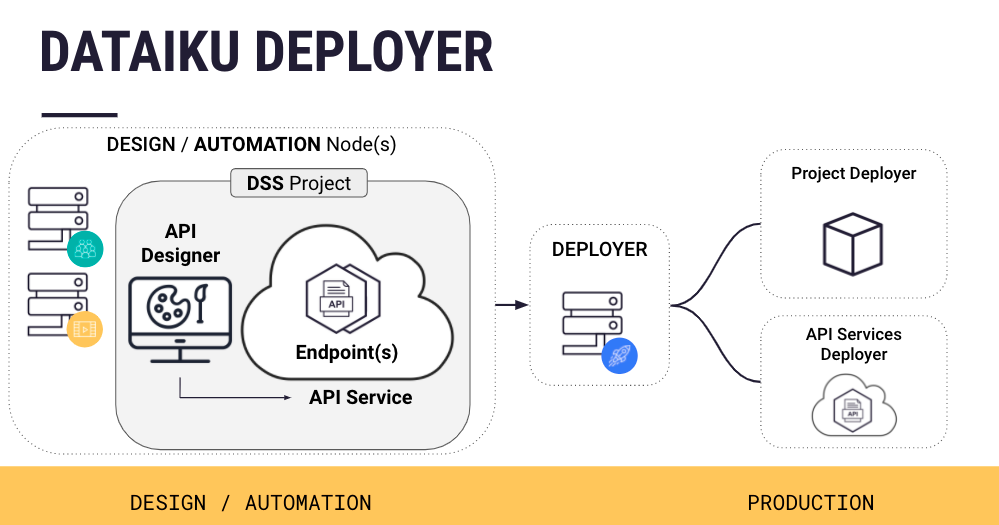
Using the API deployer, you can:
Define API infrastructures, with each infrastructure pointing to an already-installed API node or to a Kubernetes cluster.
Deploy new API services on one or more of these infrastructures
Monitor the health and status of your API nodes, and
Manage the lifecycle of your APIs from development to production — because all API services are versioned in the API deployer, you can roll back to previous versions of an API service at any time.
Deployer Set-up and Architecture
Note
An administrator will be responsible for configuring the deployer as needed. The product documentation covers Setting up the Deployer in detail, but we’ll briefly cover some key points about the deployer in this lesson.
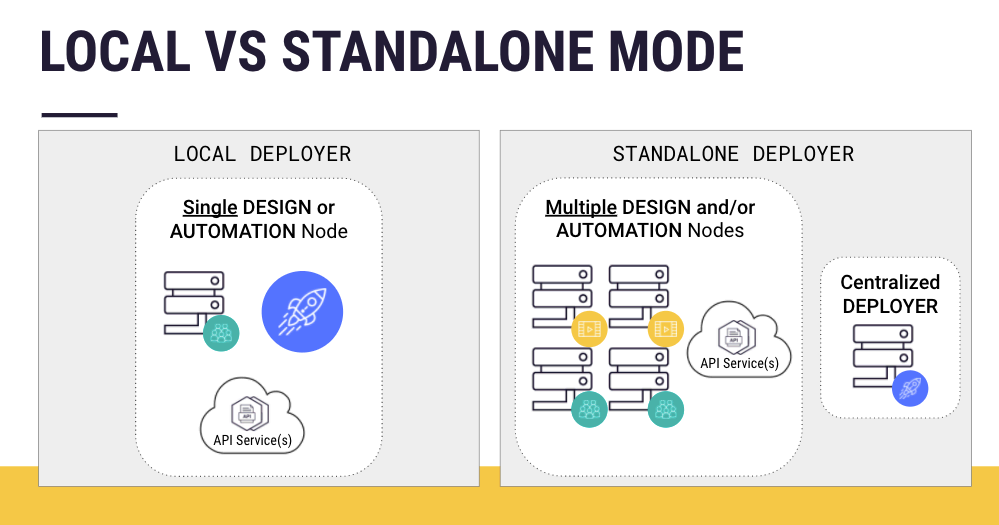
There are two modes of installing the Deployer:
Local Deployer. When your infrastructure has a single Design or Automation node that you will use to create API services and/or projects, the Deployer can be part of this Design or Automation node itself. This way, no additional setup is required.
Standalone (or remote) Deployer. When your infrastructure includes multiple Design and/or Automation nodes that you will use to create API services and/or projects, you can install a separate Dataiku node which will act as the centralized Deployer for all your Design and Automation nodes.
Furthermore, each deployment infrastructure can either be:
A Static infrastructure, that is, a set of pre-deployed API nodes that the API Deployer manages, or
A Kubernetes infrastructure, in which case the API Deployer dynamically creates containers in your Kubernetes cluster to run the API Node server.
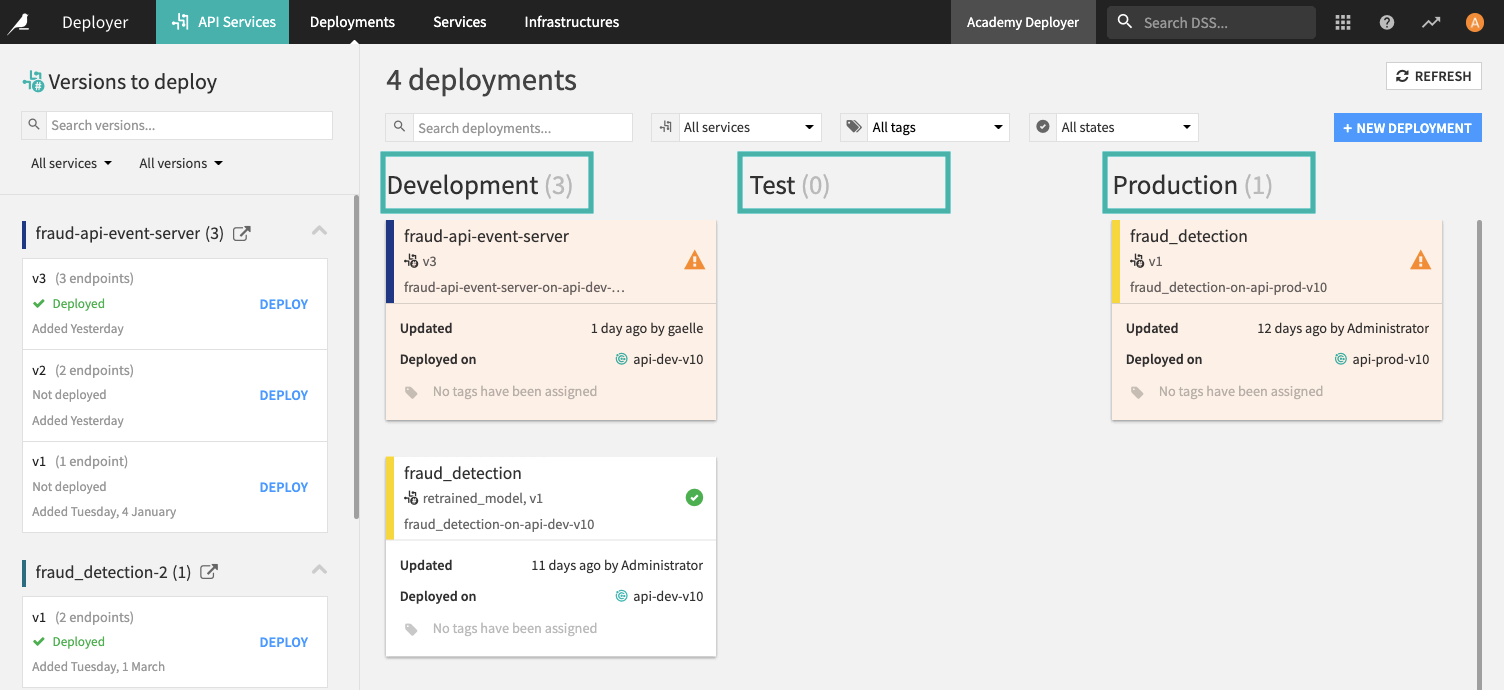
These deployment infrastructures are organized into Lifecycle Stages (like “Development”, “Test”, and “Production”) that organize how your various deployments will be shown.
What’s Next?
Now that you’ve had an introduction to the basics of the API deployer in Dataiku, follow the Hands-On Tutorial: Deploy Real-Time API Service and then the Hands-On Tutorial: Manage Multiple Versions of API Services to get some practical experience!