Deploy the Project to Production (Optional)
Now that a scenario has been created to automate the rebuild of the Flow and score new assets every day, it is time to batch deploy the whole project to a dedicated production environment, the Automation node.
Warning
In order to complete this last section, you’ll need to satisfy a few additional requirements:
a Business or Enterprise license
a Design node connected to an Automation node and deployment infrastructure
a user profile belonging to a group with access to the deployment infrastructure
From the “More Options” menu in the top navigation bar, choose Bundles.
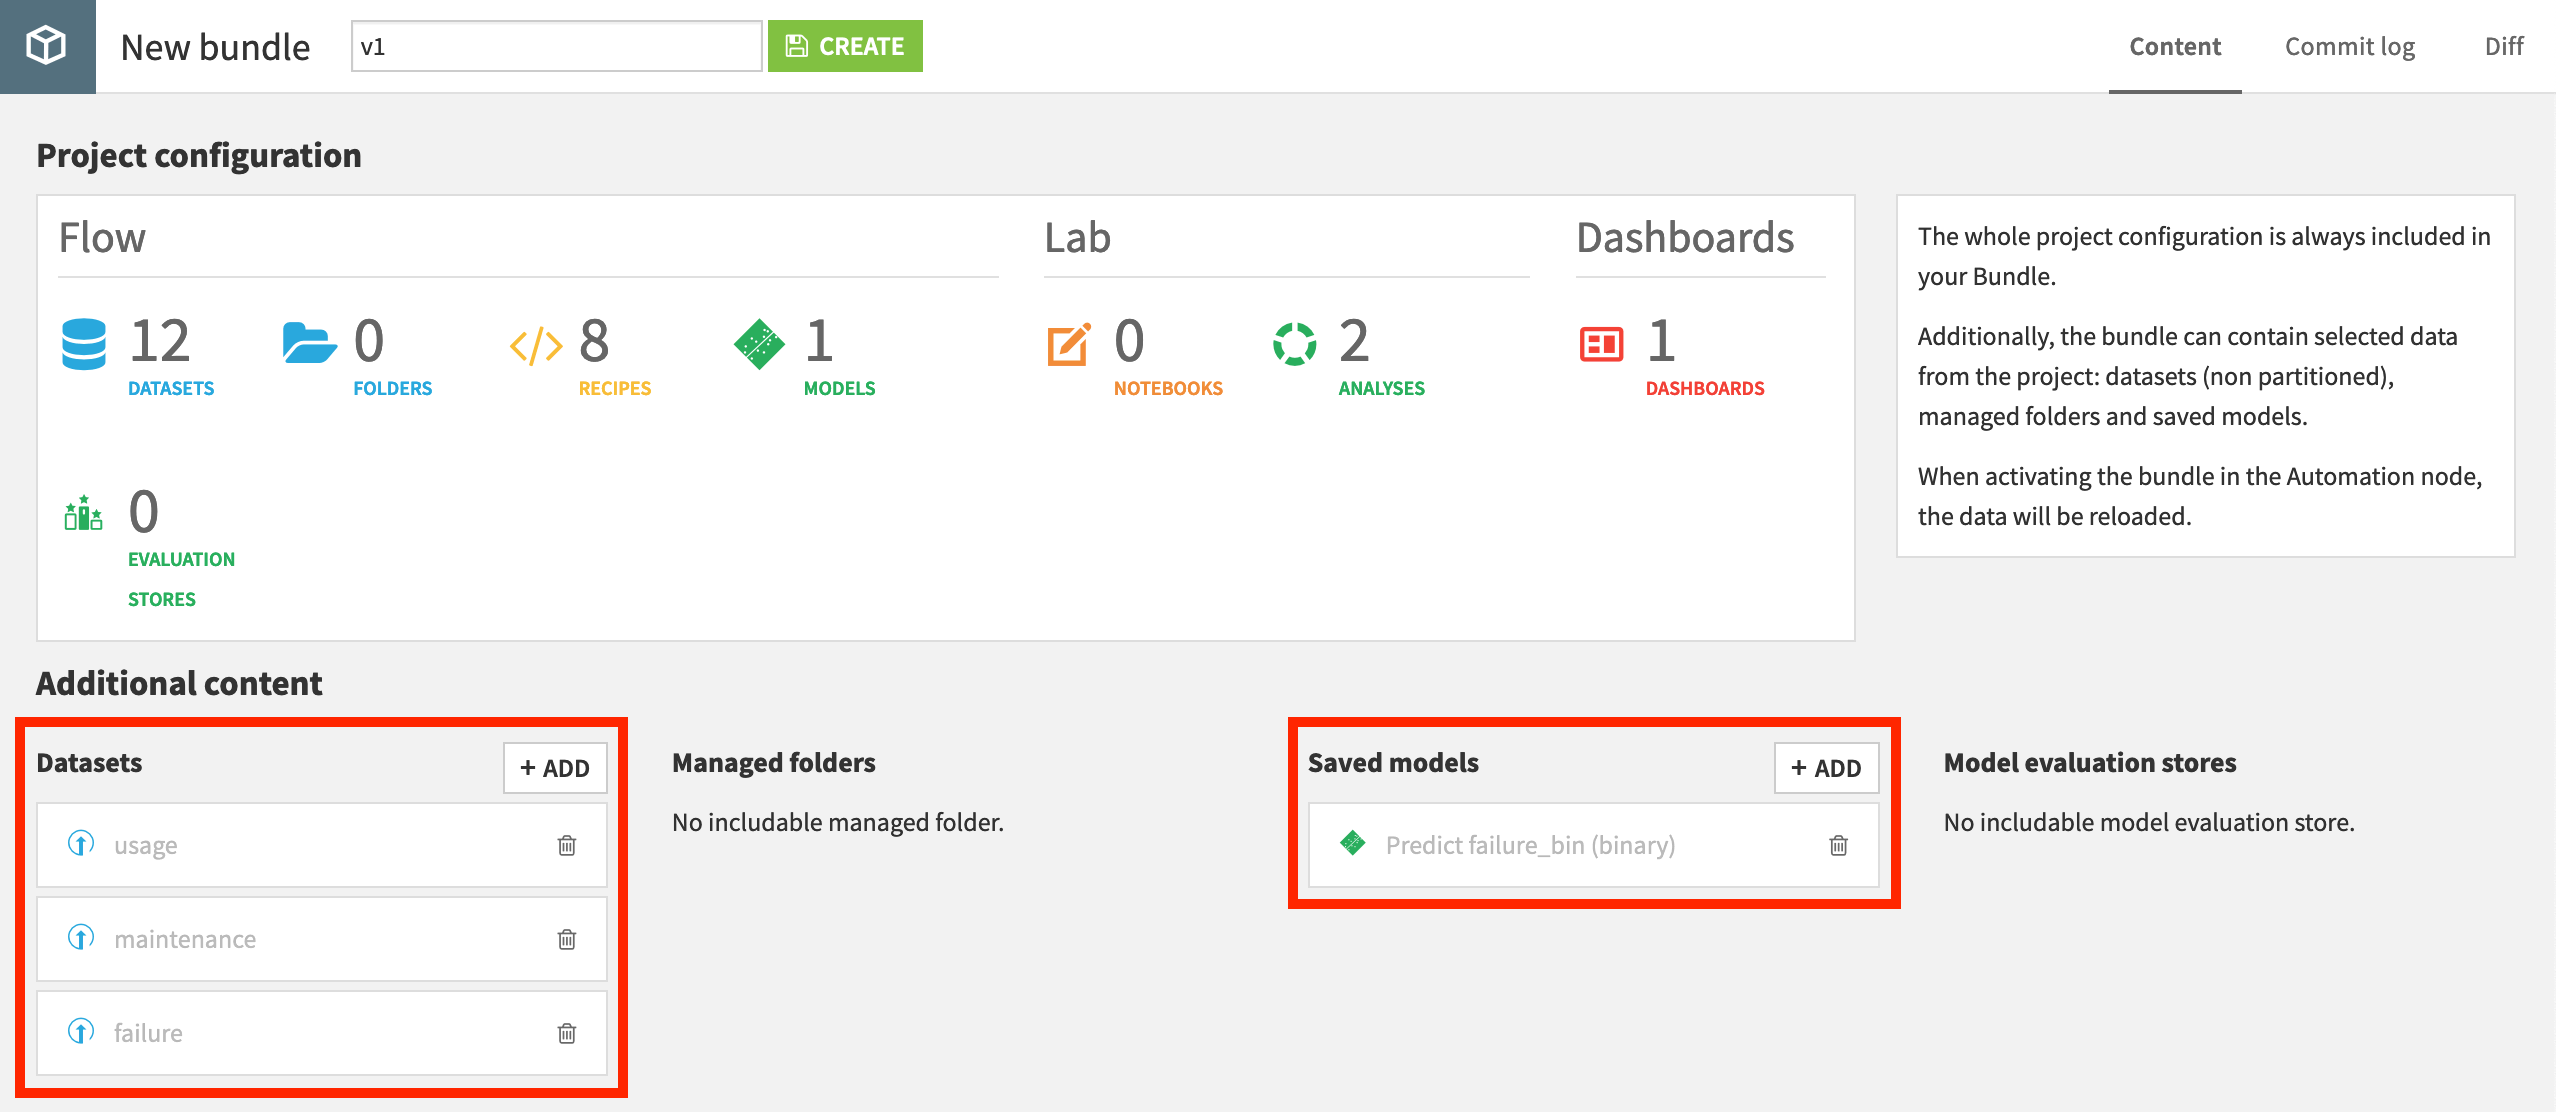
Click + New Bundle or + Create Your First Bundle.
Since our data in this case is not coming from an external database connection, add the three uploaded datasets: failure, maintenance, and usage.
Also, add the saved model to be included in the bundle.
Name the bundle
v1, and click Create.
Now that we have a bundle, we can publish it on the Deployer, and from there deploy it to the Automation node.
From the Bundles page, click on the v1 bundle, and click Publish on Deployer.
Confirm that you want to Publish on Deployer.
Open the bundle in the Deployer.
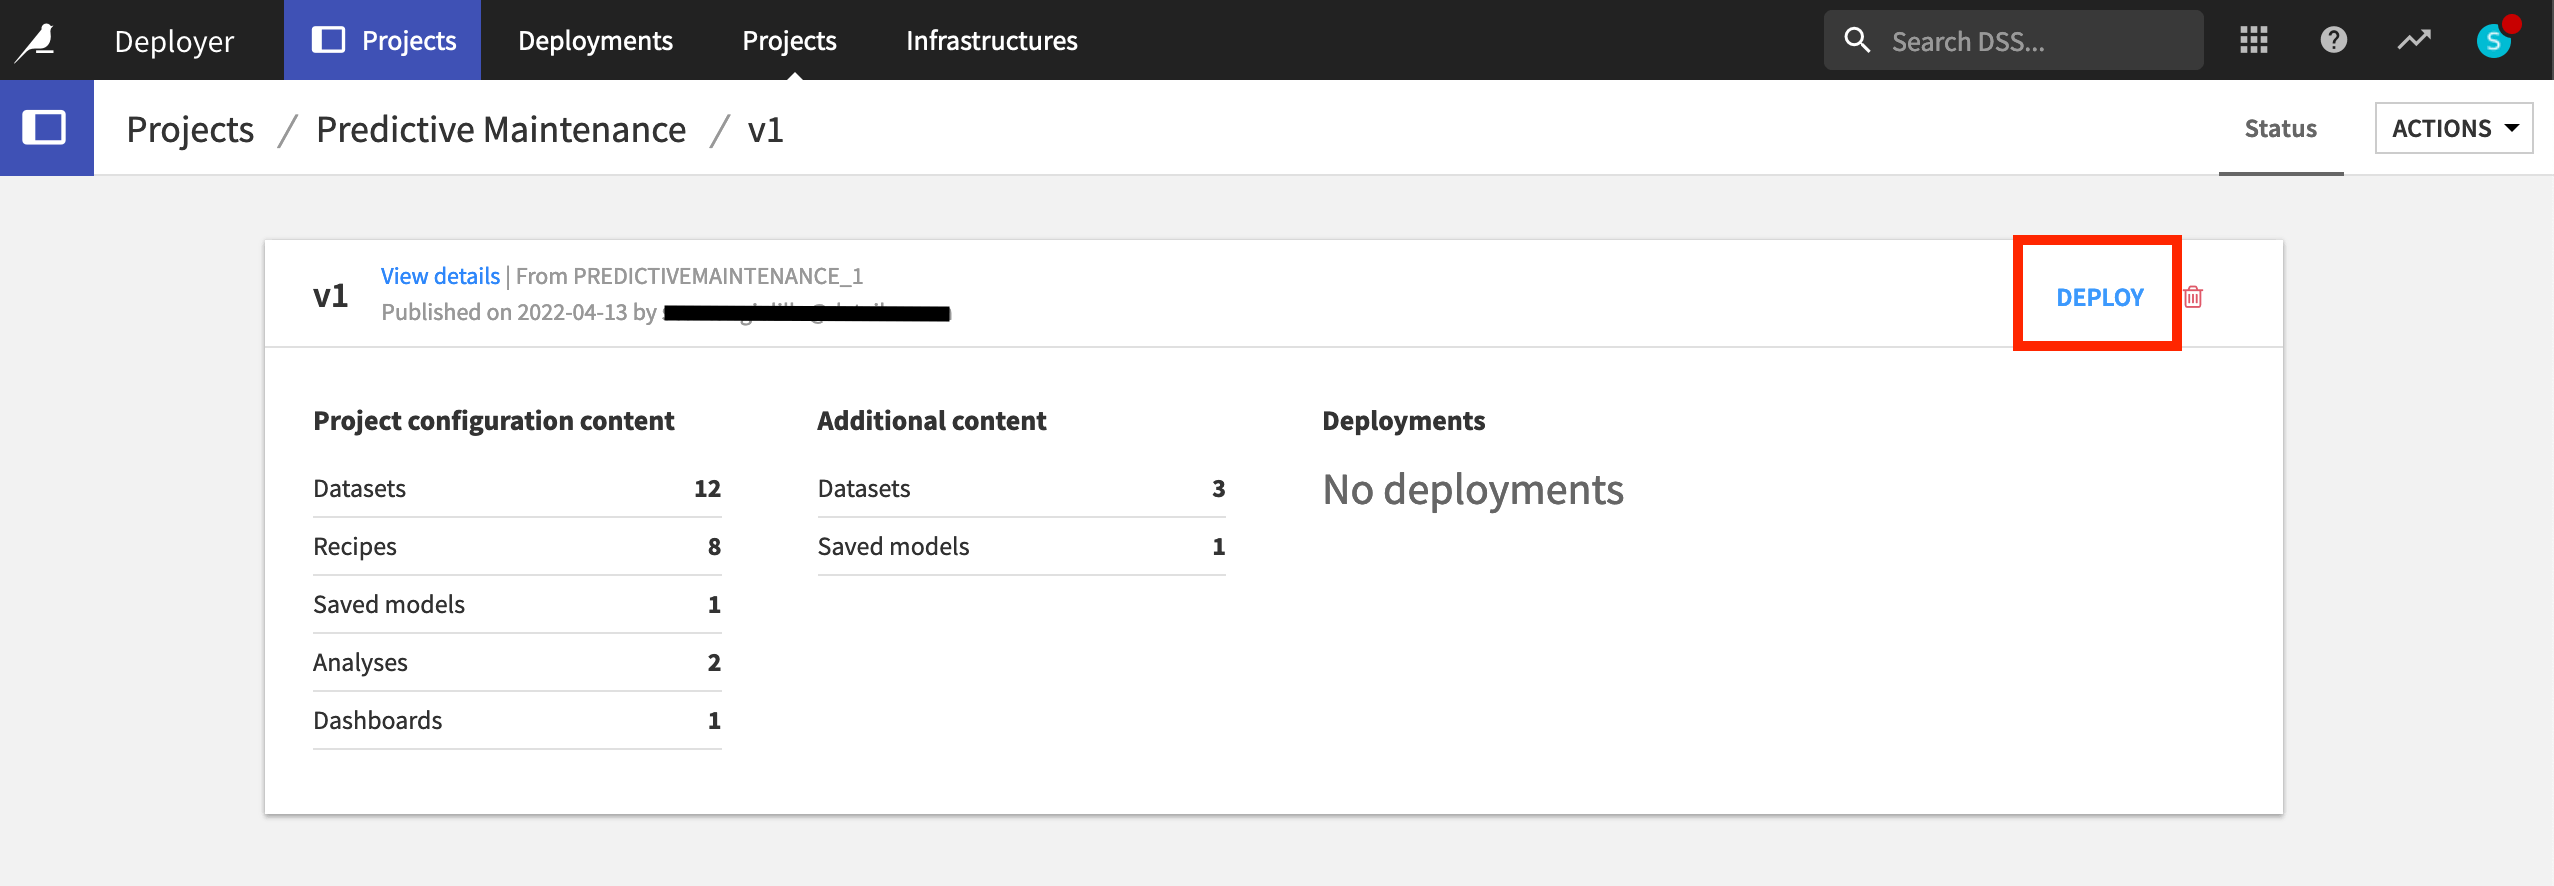
Now in the Deployer, click Deploy to actually create the deployment.
Choose an available target infrastructure, and click Create.
Finally, click Deploy and Activate.
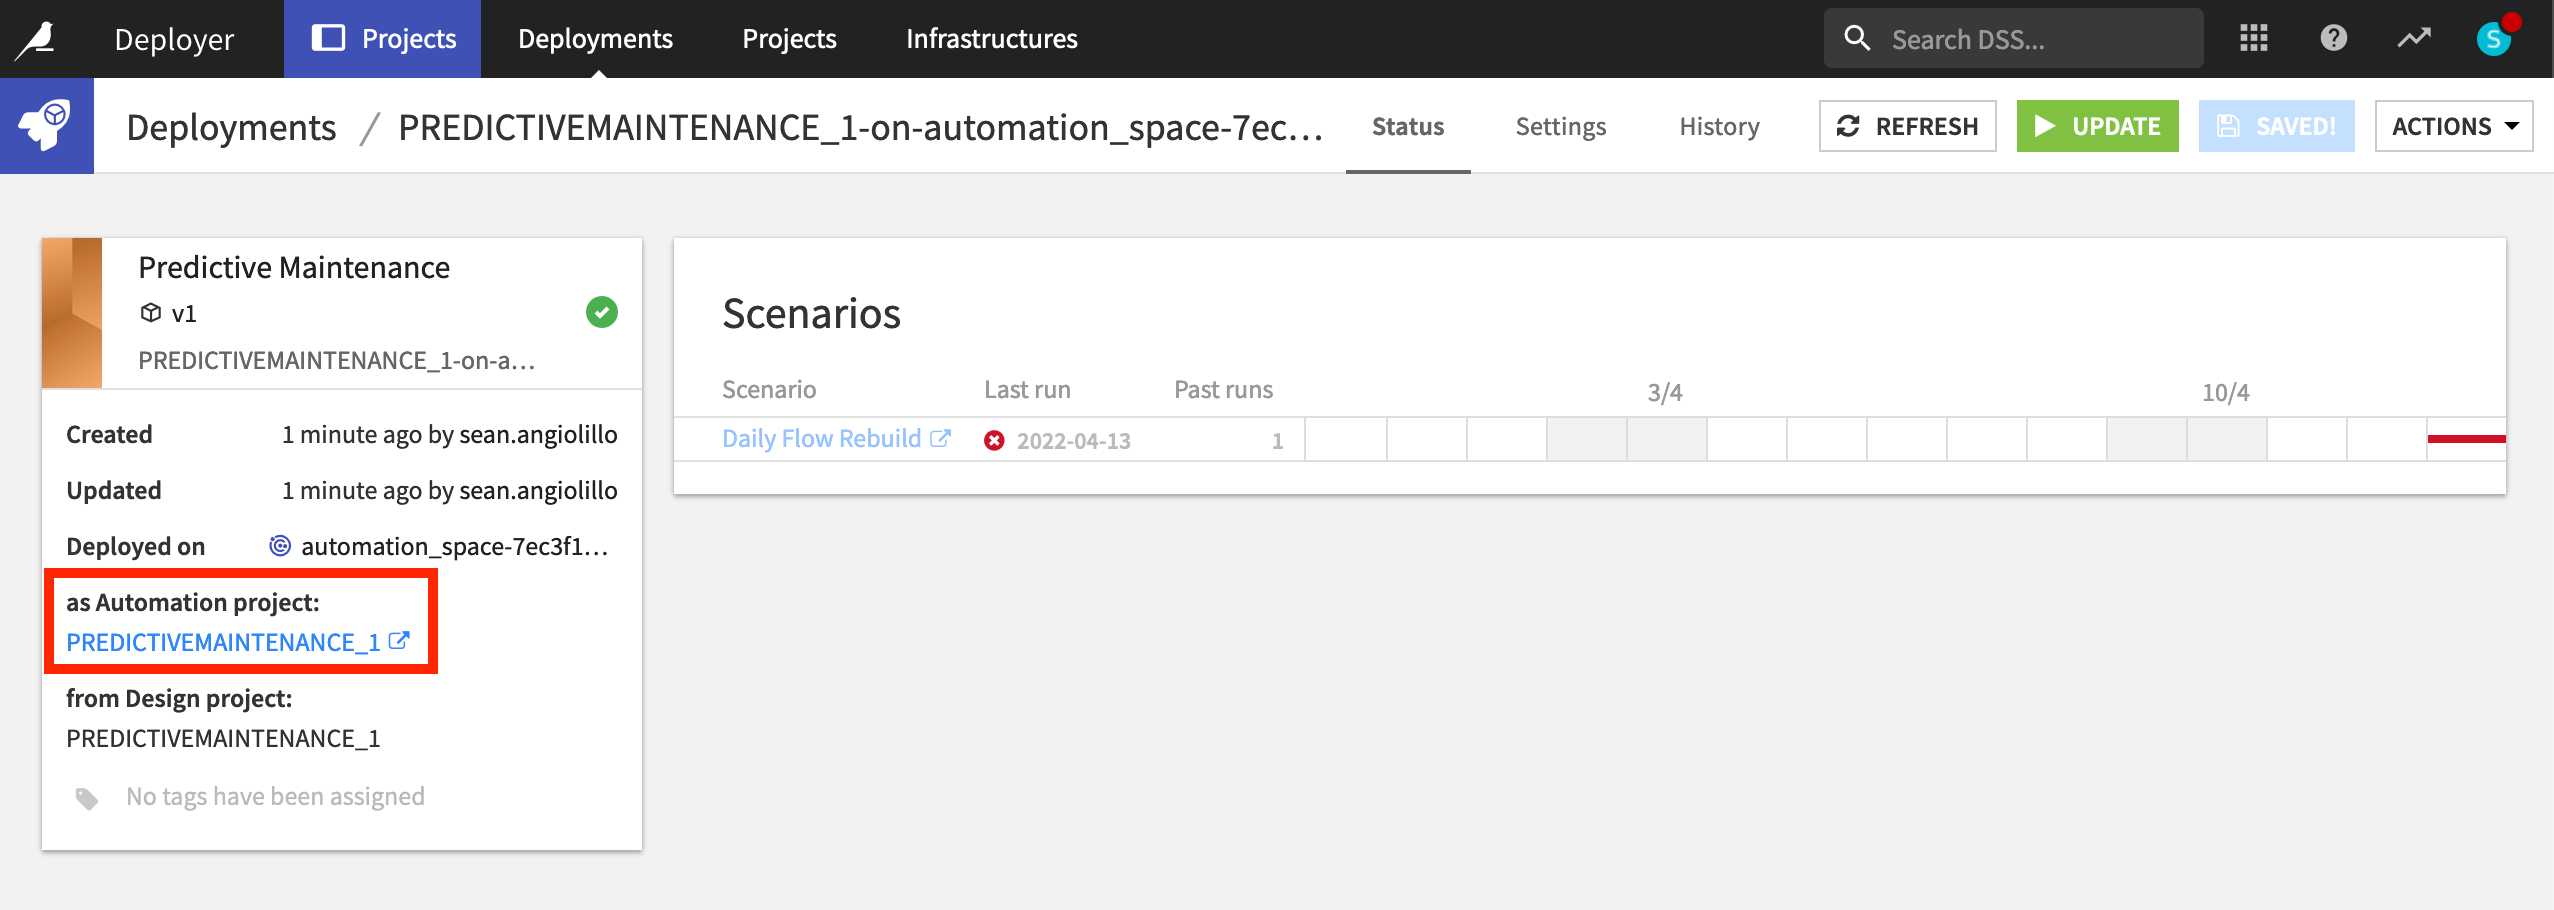
Once the deployment has been created, we can view the bundle running on the Automation node.
From the Status tab of the new deployment, click on the link for the Automation project.
Once on the Automation node, confirm in the project homepage that it’s running the v1 bundle.
Then go to the Scenario tab, and turn on the scenario’s auto-trigger.
Although it has no new data to consume, Run the scenario to confirm it is now running in a production environment separate from the Design node.
Voilà! You now have a predictive maintenance project deployed in production!
Note
The process for batch deployment is covered in much greater detail in the Projects in Production course.