Generate Features
In the previous lesson, the Evaluate recipe returned the metrics dataset where we saw the model’s accuracy on the test dataset. The model accuracy can be improved. To improve it, we will now generate new features that will be used to train a new machine learning model.
Generate Features With the Window Recipe
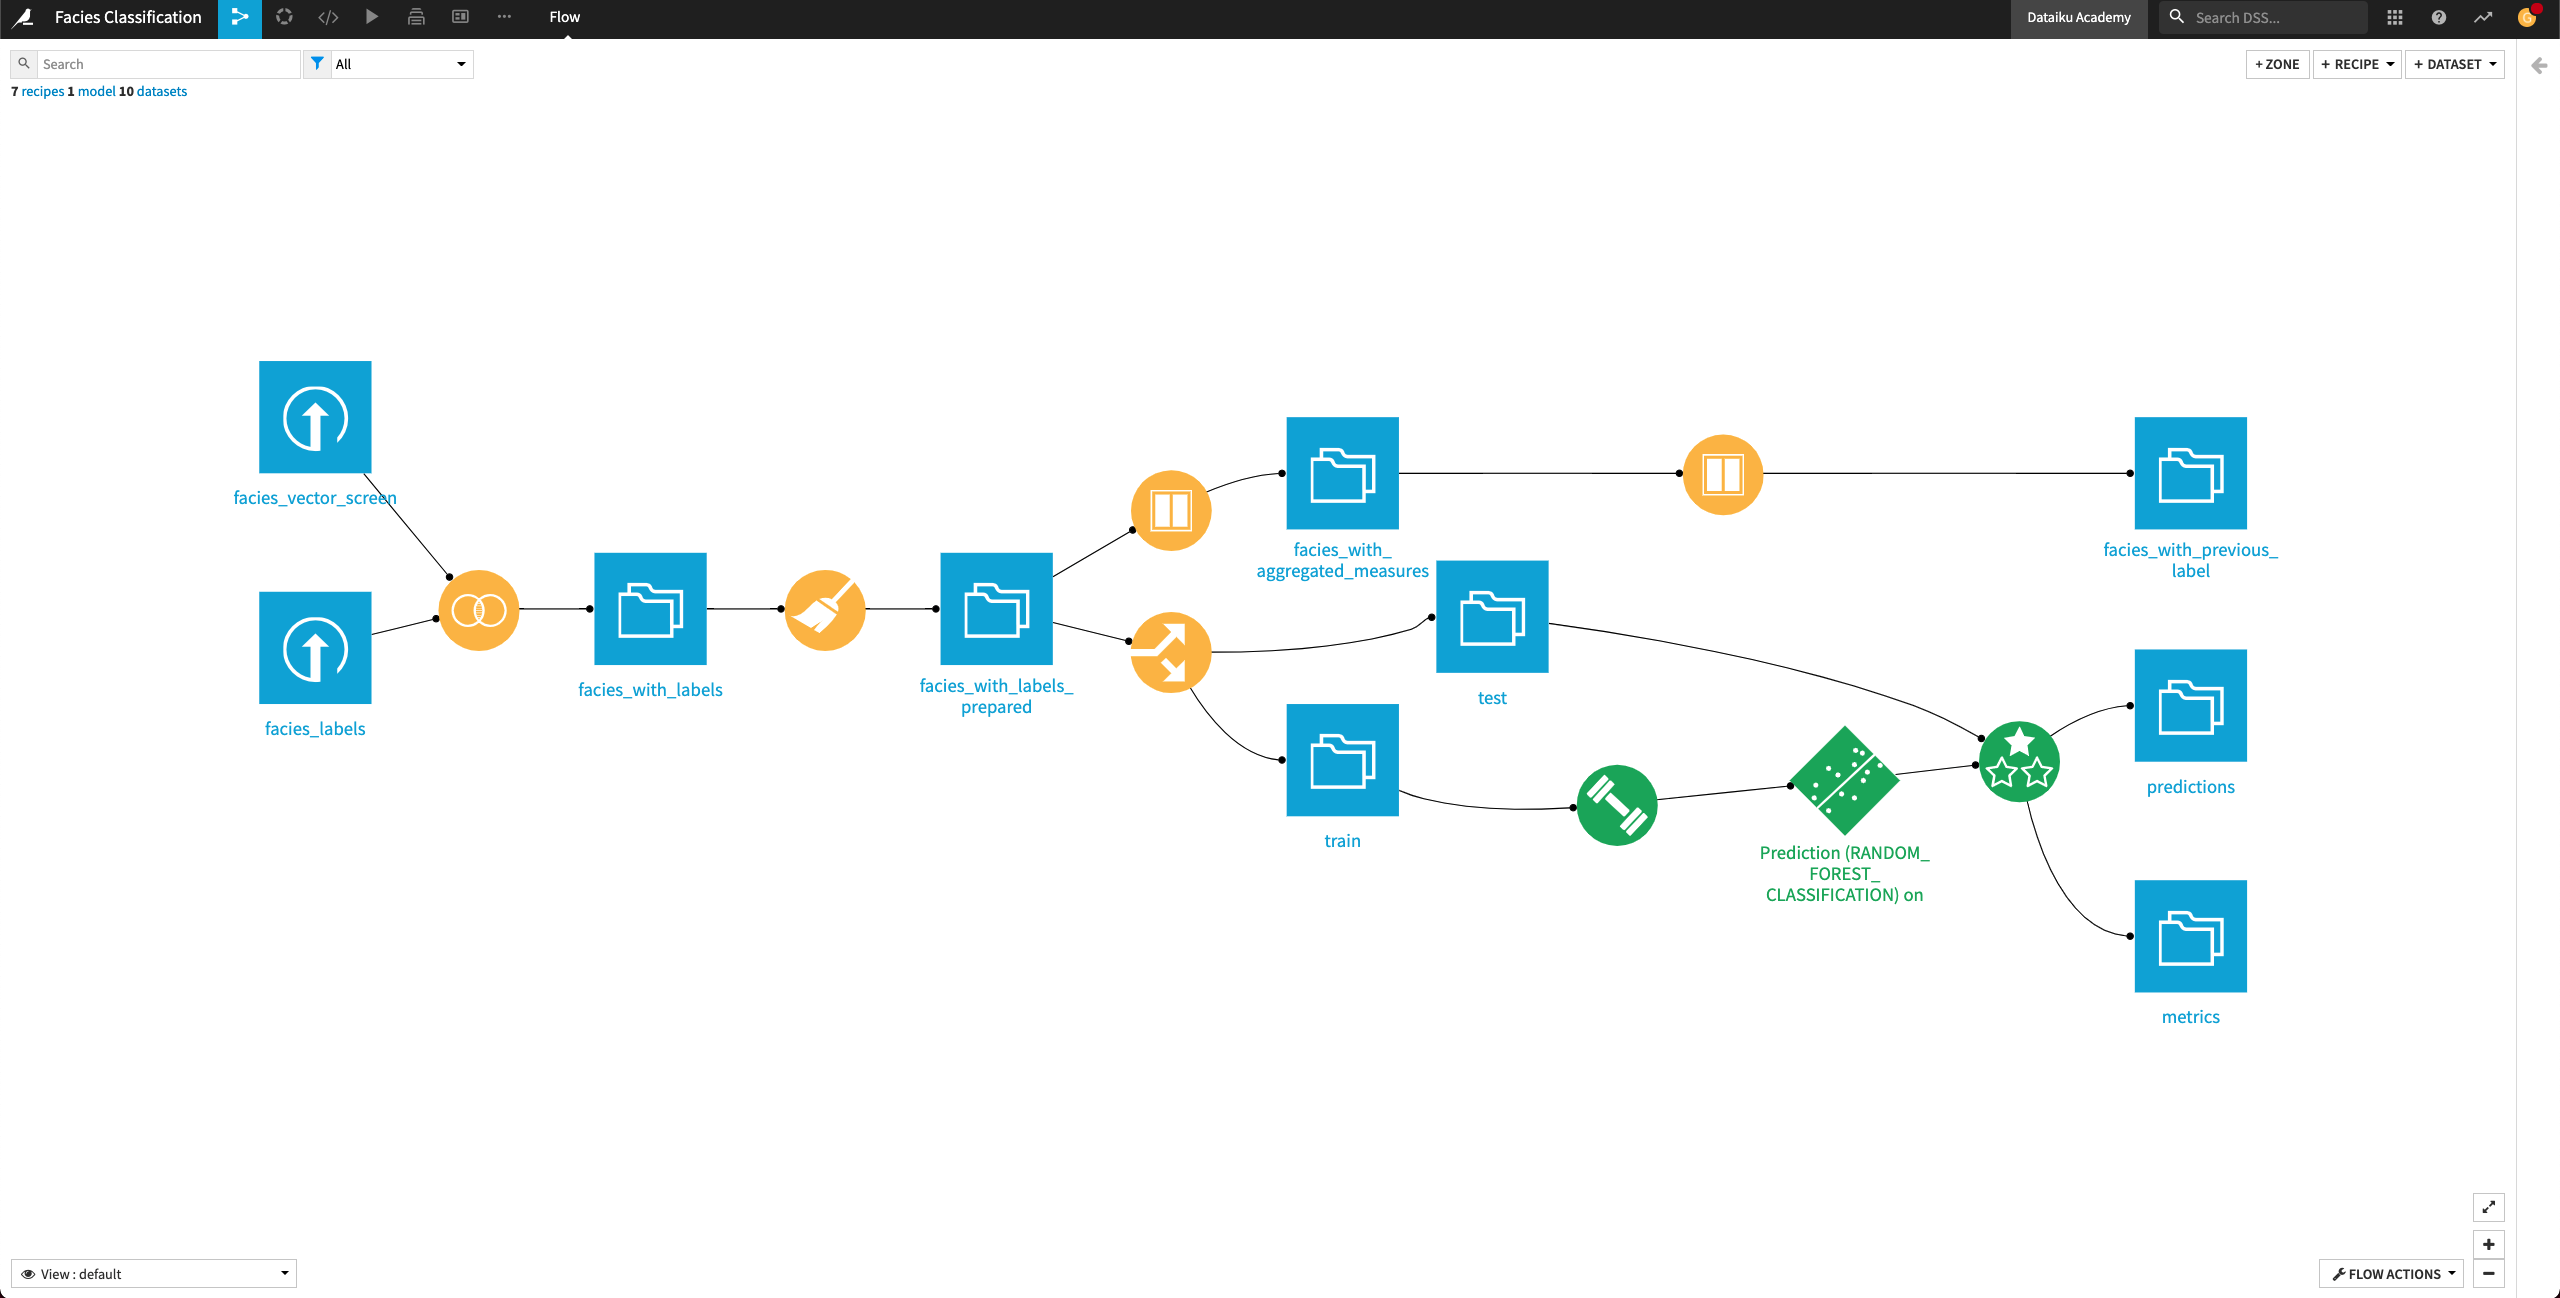
The facies_with_labels_prepared dataset has 11 columns. Let’s say that for a facies sample at depth “D”, we have access to the physical data and the facies label at previous depths (D-1, D-2, …). We’ll now use the data from the previous depths to generate additional features for our machine learning model. For this, we’ll use a Window recipe.
Create Aggregated Features
For each sample, in the facies_with_labels_prepared dataset, let’s calculate the average, minimum, and maximum of the measurements over the previous four samples (that is, the samples that occur at depths D-1, D-2, D-3, and D-4)by using a Window recipe.
From the Flow, click the facies_with_labels_prepared dataset to select it.
Select the Window recipe from the right panel.
Name the output facies_with_aggregated_measures and create the recipe.
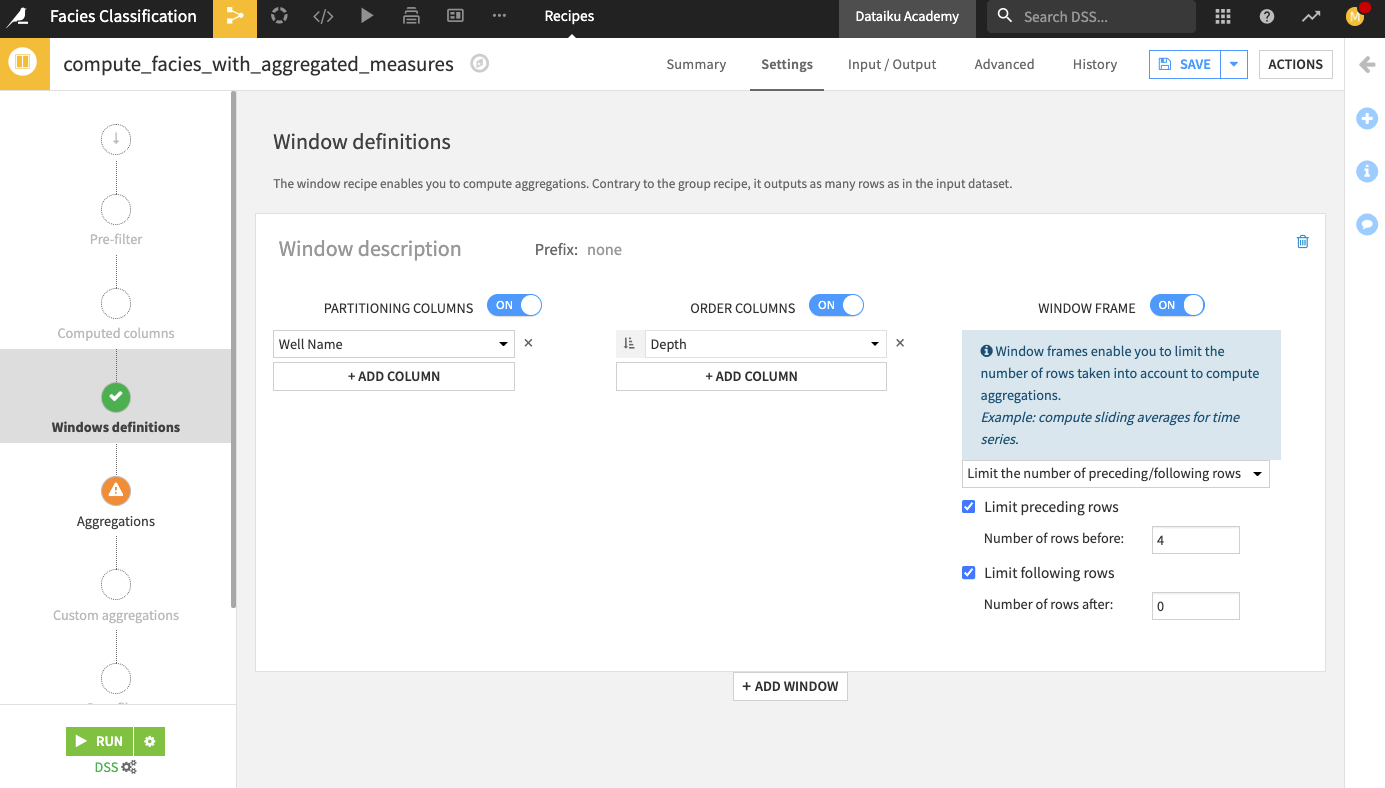
Upon creating the recipe, you land on its “Settings” page.
In the “Windows definitions” step, click the slider next to “Partitioning Columns” to enable it.
Select Well Name as the partitioning column.
Enable the “Order Columns” option and specify Depth as the column to use.
Enable the “Window Frame” option.
Limit the preceding rows to
4and the following rows to0.
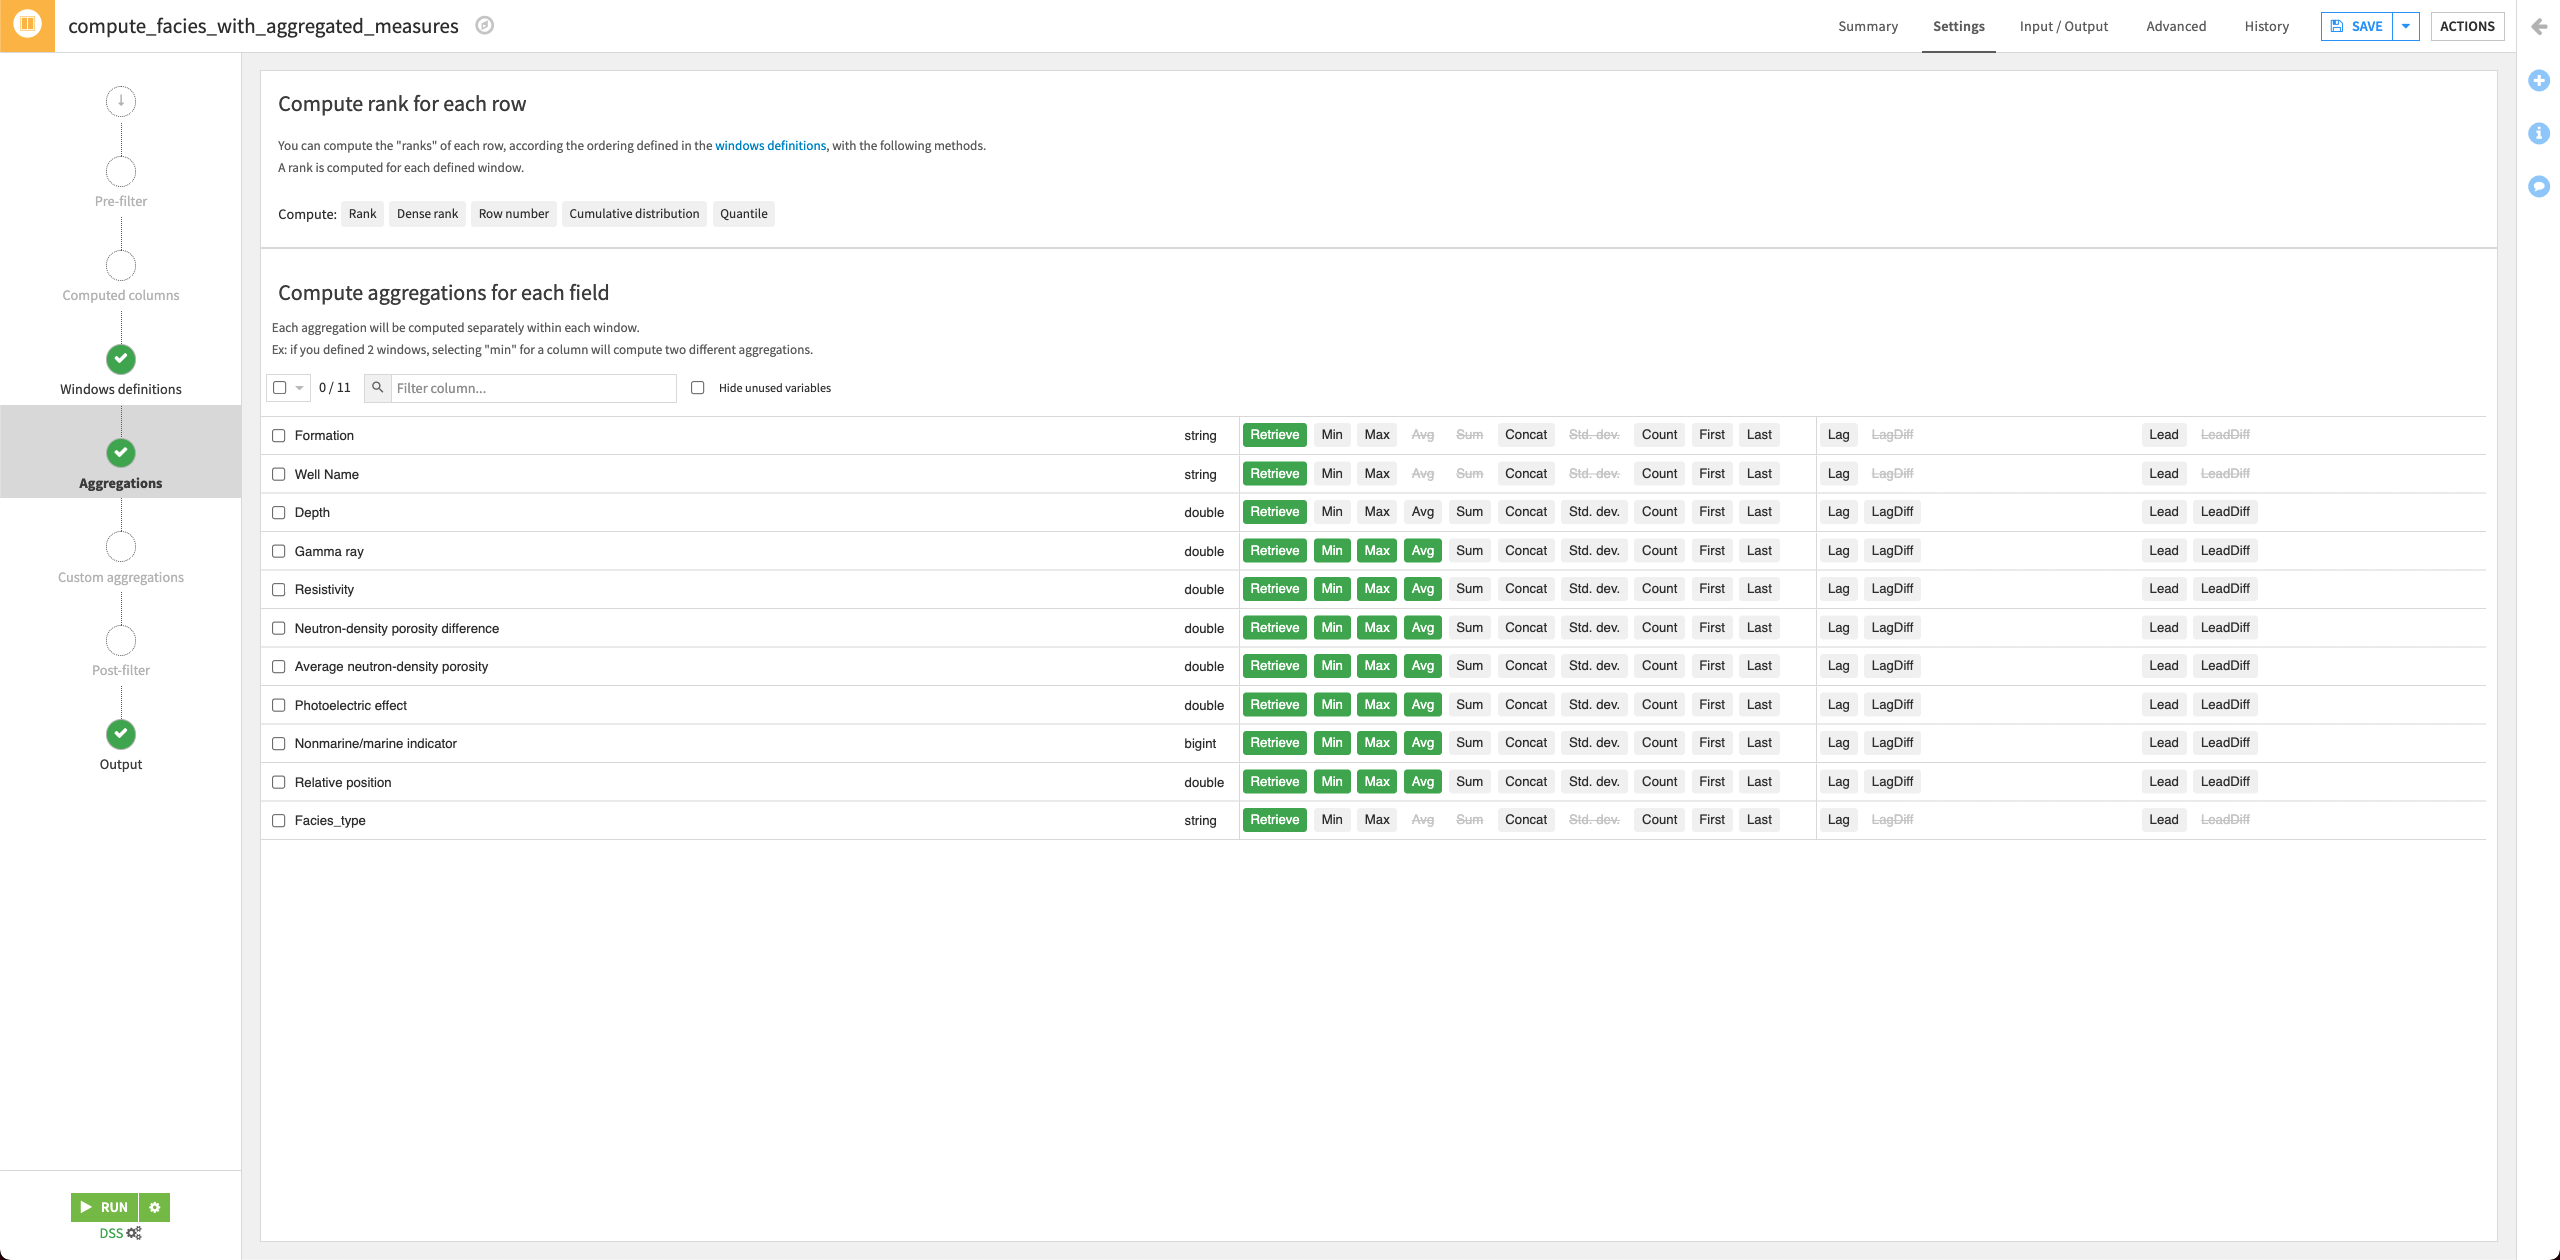
In the “Aggregations” step, select the Min, Max, and Avg for all the measurements columns (that is, all columns except Formation, Well Name, Depth, and Facies_type).
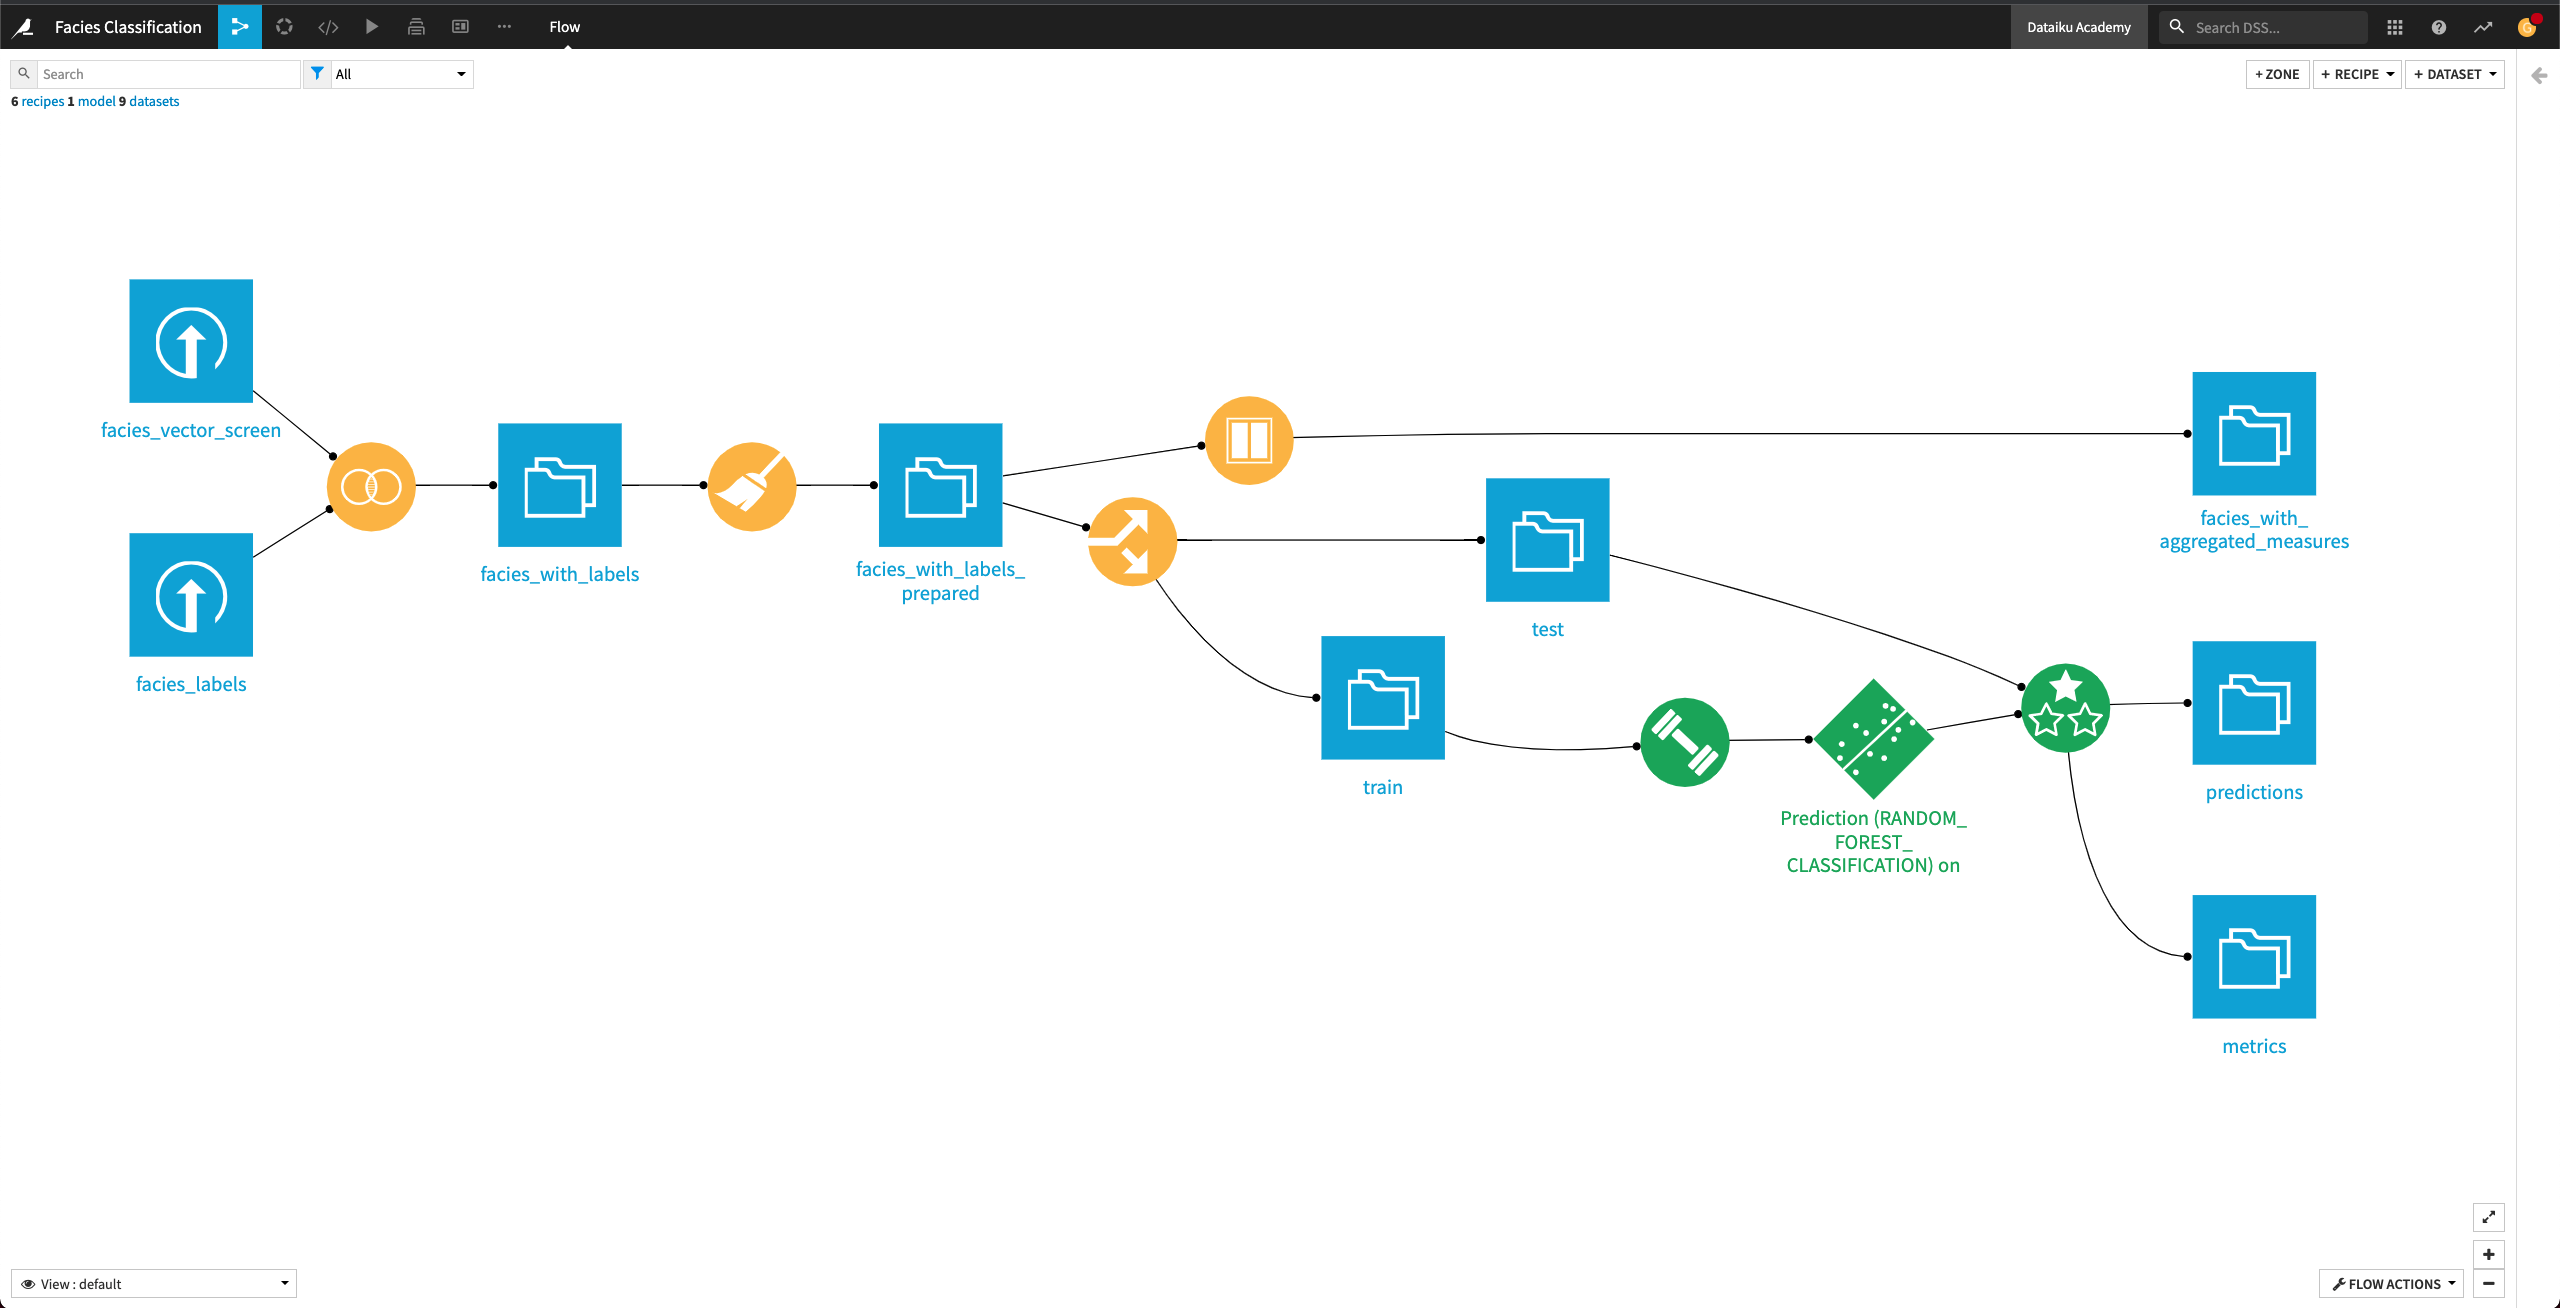
Run the recipe and update the schema when prompted.
Return to the Flow.
Create Features With Previous Sample
Let’s also add one more interesting feature. We’ll assume that for each sample at depth “D”, we know the facies label at depth “D-1”. This is a strong assumption, and in reality, you might not have this level of information when collecting the data out in the field. However, for the purpose of this exercise, we’ll assume this to be true.
Click the facies_with_aggregated_features dataset and select a new Window recipe from the right panel of the Flow.
Name the output
facies_with_previous_labeland create the recipe.In the “Windows definitions” step, click the slider next to “Partitioning Columns” to enable it.
Select Well Name as the partitioning column.
Enable the “Order Columns” option and specify Depth as the column to use.
Enable the “Window Frame” option.
Limit the preceding rows to
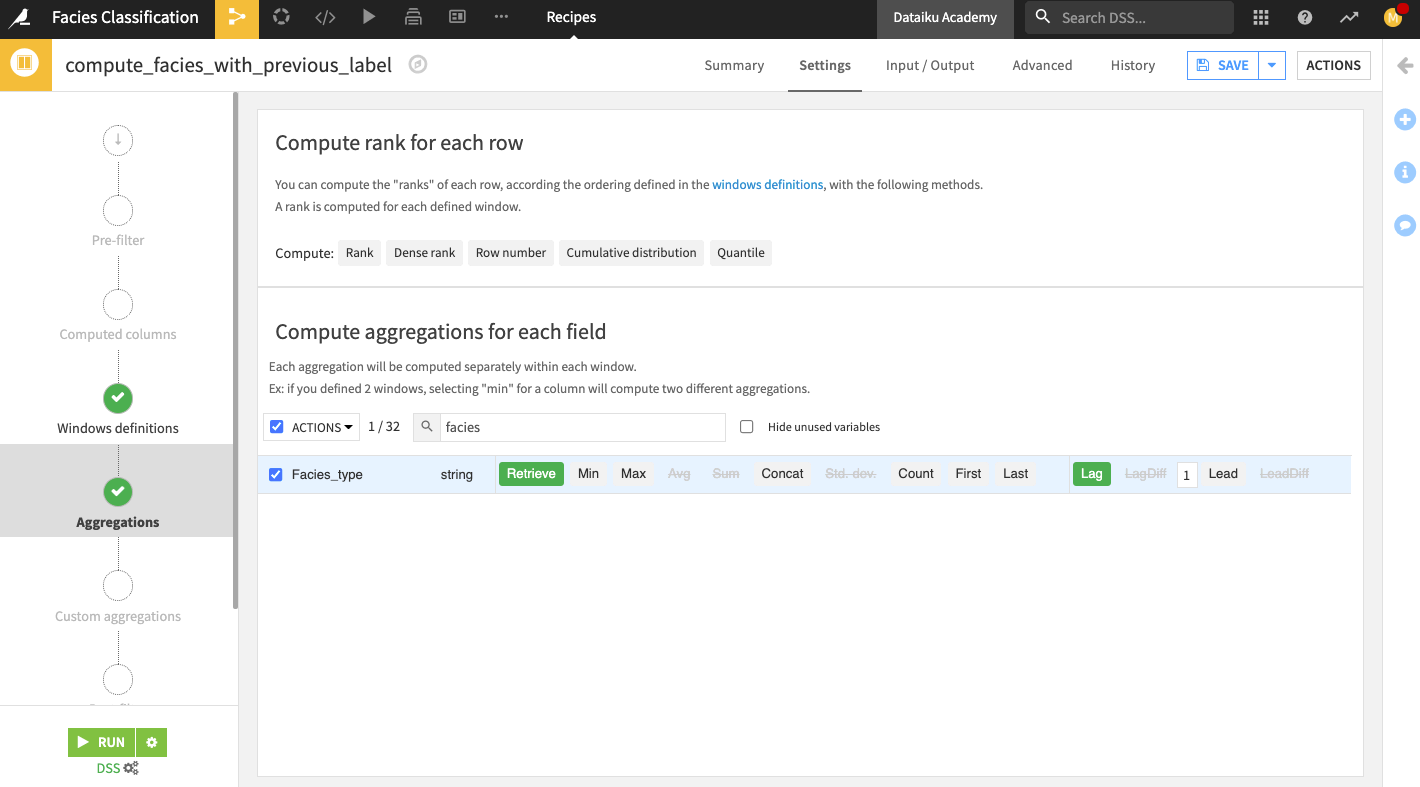
1and the following rows to0.In the “Aggregations” step, search for
faciesto bring up the Facies_type column.Select the aggregation Lag for the column and specify a lag value of
1.
Run the recipe and update the schema when prompted.
Open the Output dataset facies_with_prvious_label to see that the dataset contains 33 columns. We’ve now added a total of 22 new features to the data from the facies_with_labels_prepared dataset.
Return to the Flow.