Custom Python Models
Dataiku DSS provides useful and powerful built-in visual tools, but also always allows you to extend its functionality with code.
This article explains how to add custom Python code-based machine learning (ML) algorithms in our guided Machine Learning framework. You are advised to take the ML Basics course prior to starting this reading.
Specifying the Custom Model
In a Visual Analysis (Lab), go to the Models tab. In the Design stage of a model, go to the Algorithms panel. The list of algorithms begins with the built-in models. You can add custom Python models at the bottom of the list. Click the edit button to change the model name, displayed in the output, from the default “Custom Python Model”. Dataiku DSS provides some code samples to get you started:
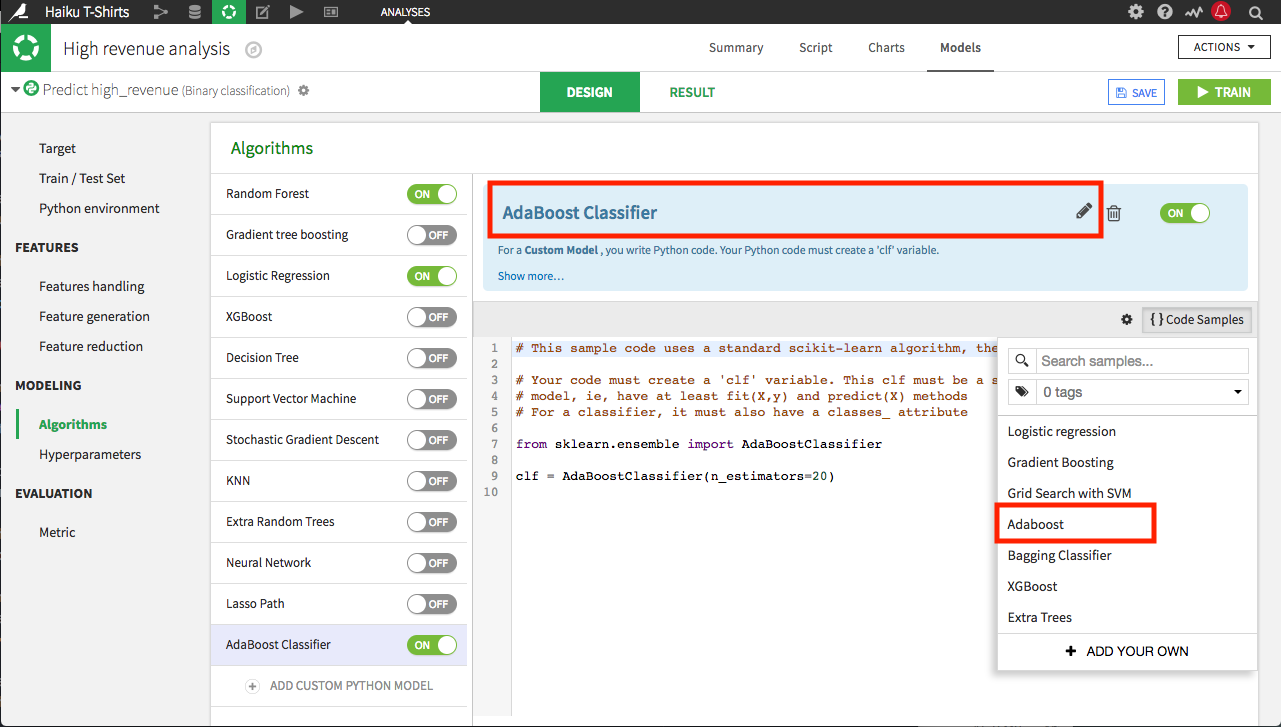
The code must follow some constraints depending on the backend you have chosen (in-memory or MLlib).
In this example, we use the Python in-memory backend: the custom code needs to implement a classifier which has the same methods as a classifier in scikit-learn, that is, it must provide the methods fit() and predict(), and predict_proba() when this makes sense.
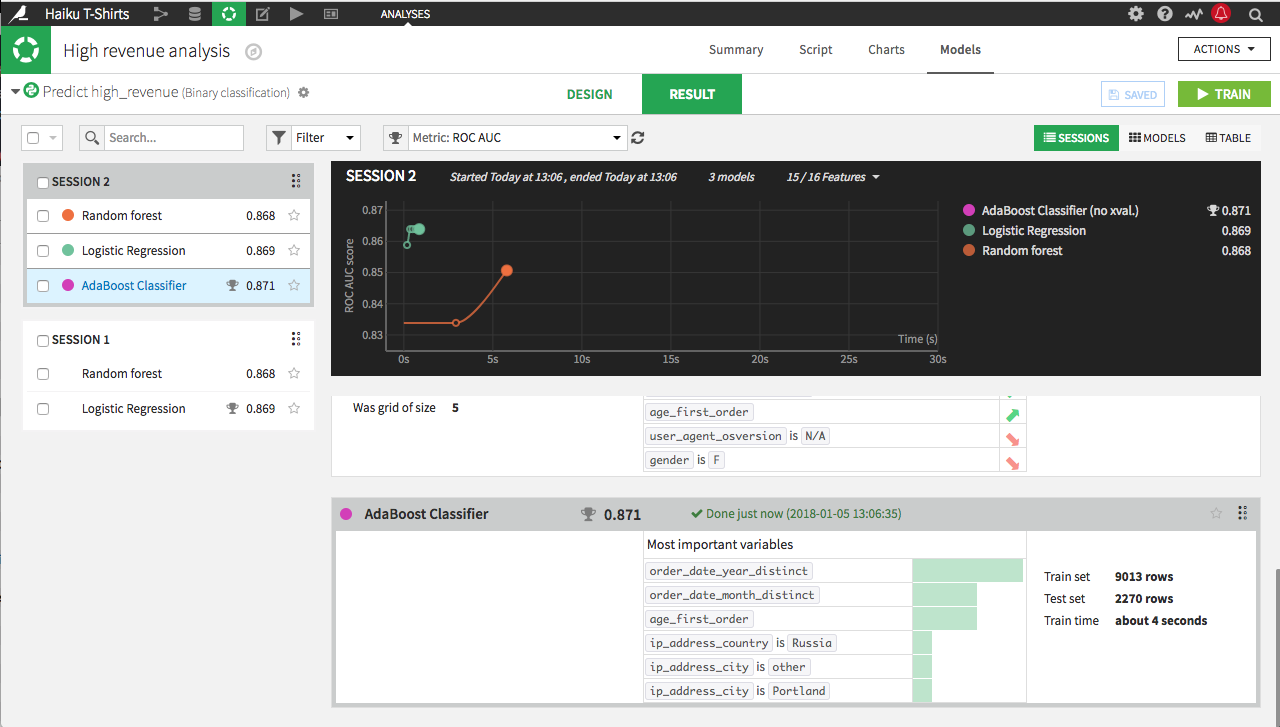
Dataiku DSS will leverage these in its machine learning pipeline to train, compute performance statistics, and generate the associated visual insights!
Session Output With A Custom Model
Once trained, your custom model appears in the session output in the list of all models built during the session.
Assessing Custom Model performance
Open the custom model to visualize its performance and all associated visual insights, just as you would with a built-in model.
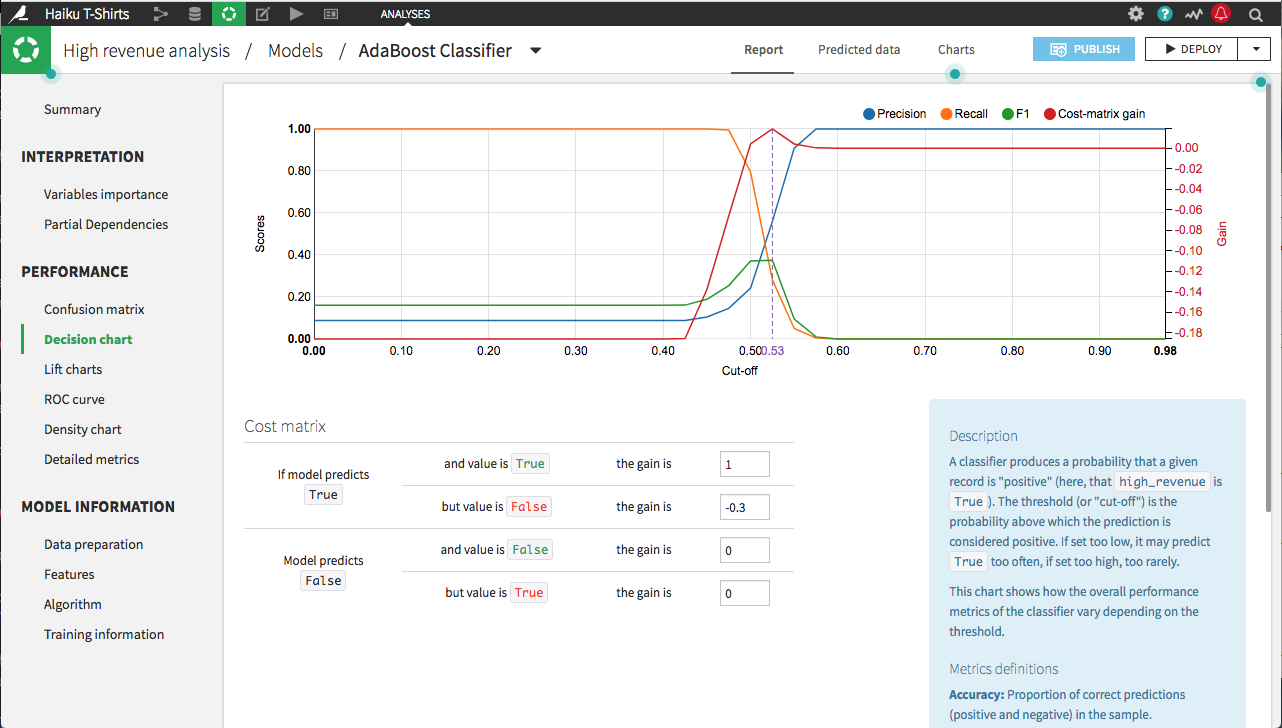
The custom model can now be deployed in the flow and used just like a standard built-in model!
Please read the reference documentation to implement your own MLlib models in Scala while still using Dataiku DSS modeling in the Visual Analysis.