Active Learning for object detection problems using Dataiku Apps
Prerequisites
You should be familiar with the basics of machine learning in Dataiku DSS.
Technical Requirements
Access to a DSS instance of version higher than 8.0 where the ML-assisted Labeling and Object detection plugin plugins are installed.
A code Python 3.6 code environment called ml-assisted-labeling-visual-ml-python-36 should be created. It should have these packages installed:
tensorflow==1.8.0
keras==2.1.5
scikit-learn>=0.20,<0.21
scipy>=1.1,<1.2
statsmodels>=0.9,<0.10
jinja2>=2.10,<2.11
flask>=1.0,<1.1
h5py==2.7.1
pillow==5.1.0
Setting Up
Suppose you need to detect the location of different playing cards on the images. We’re going to download a set of unlabeled images and label them manually using active learning in a specific webapp.
Supporting Data
We will use a set of images of playing cards. In total (train + test sets) it contains 363 images of playing cards of 6 types: nine, ten, jack, queen, king and ace.
We’re going to use both train and the test set images together since we’re going to ignore the test set labels and label the data manually.
Create the Project
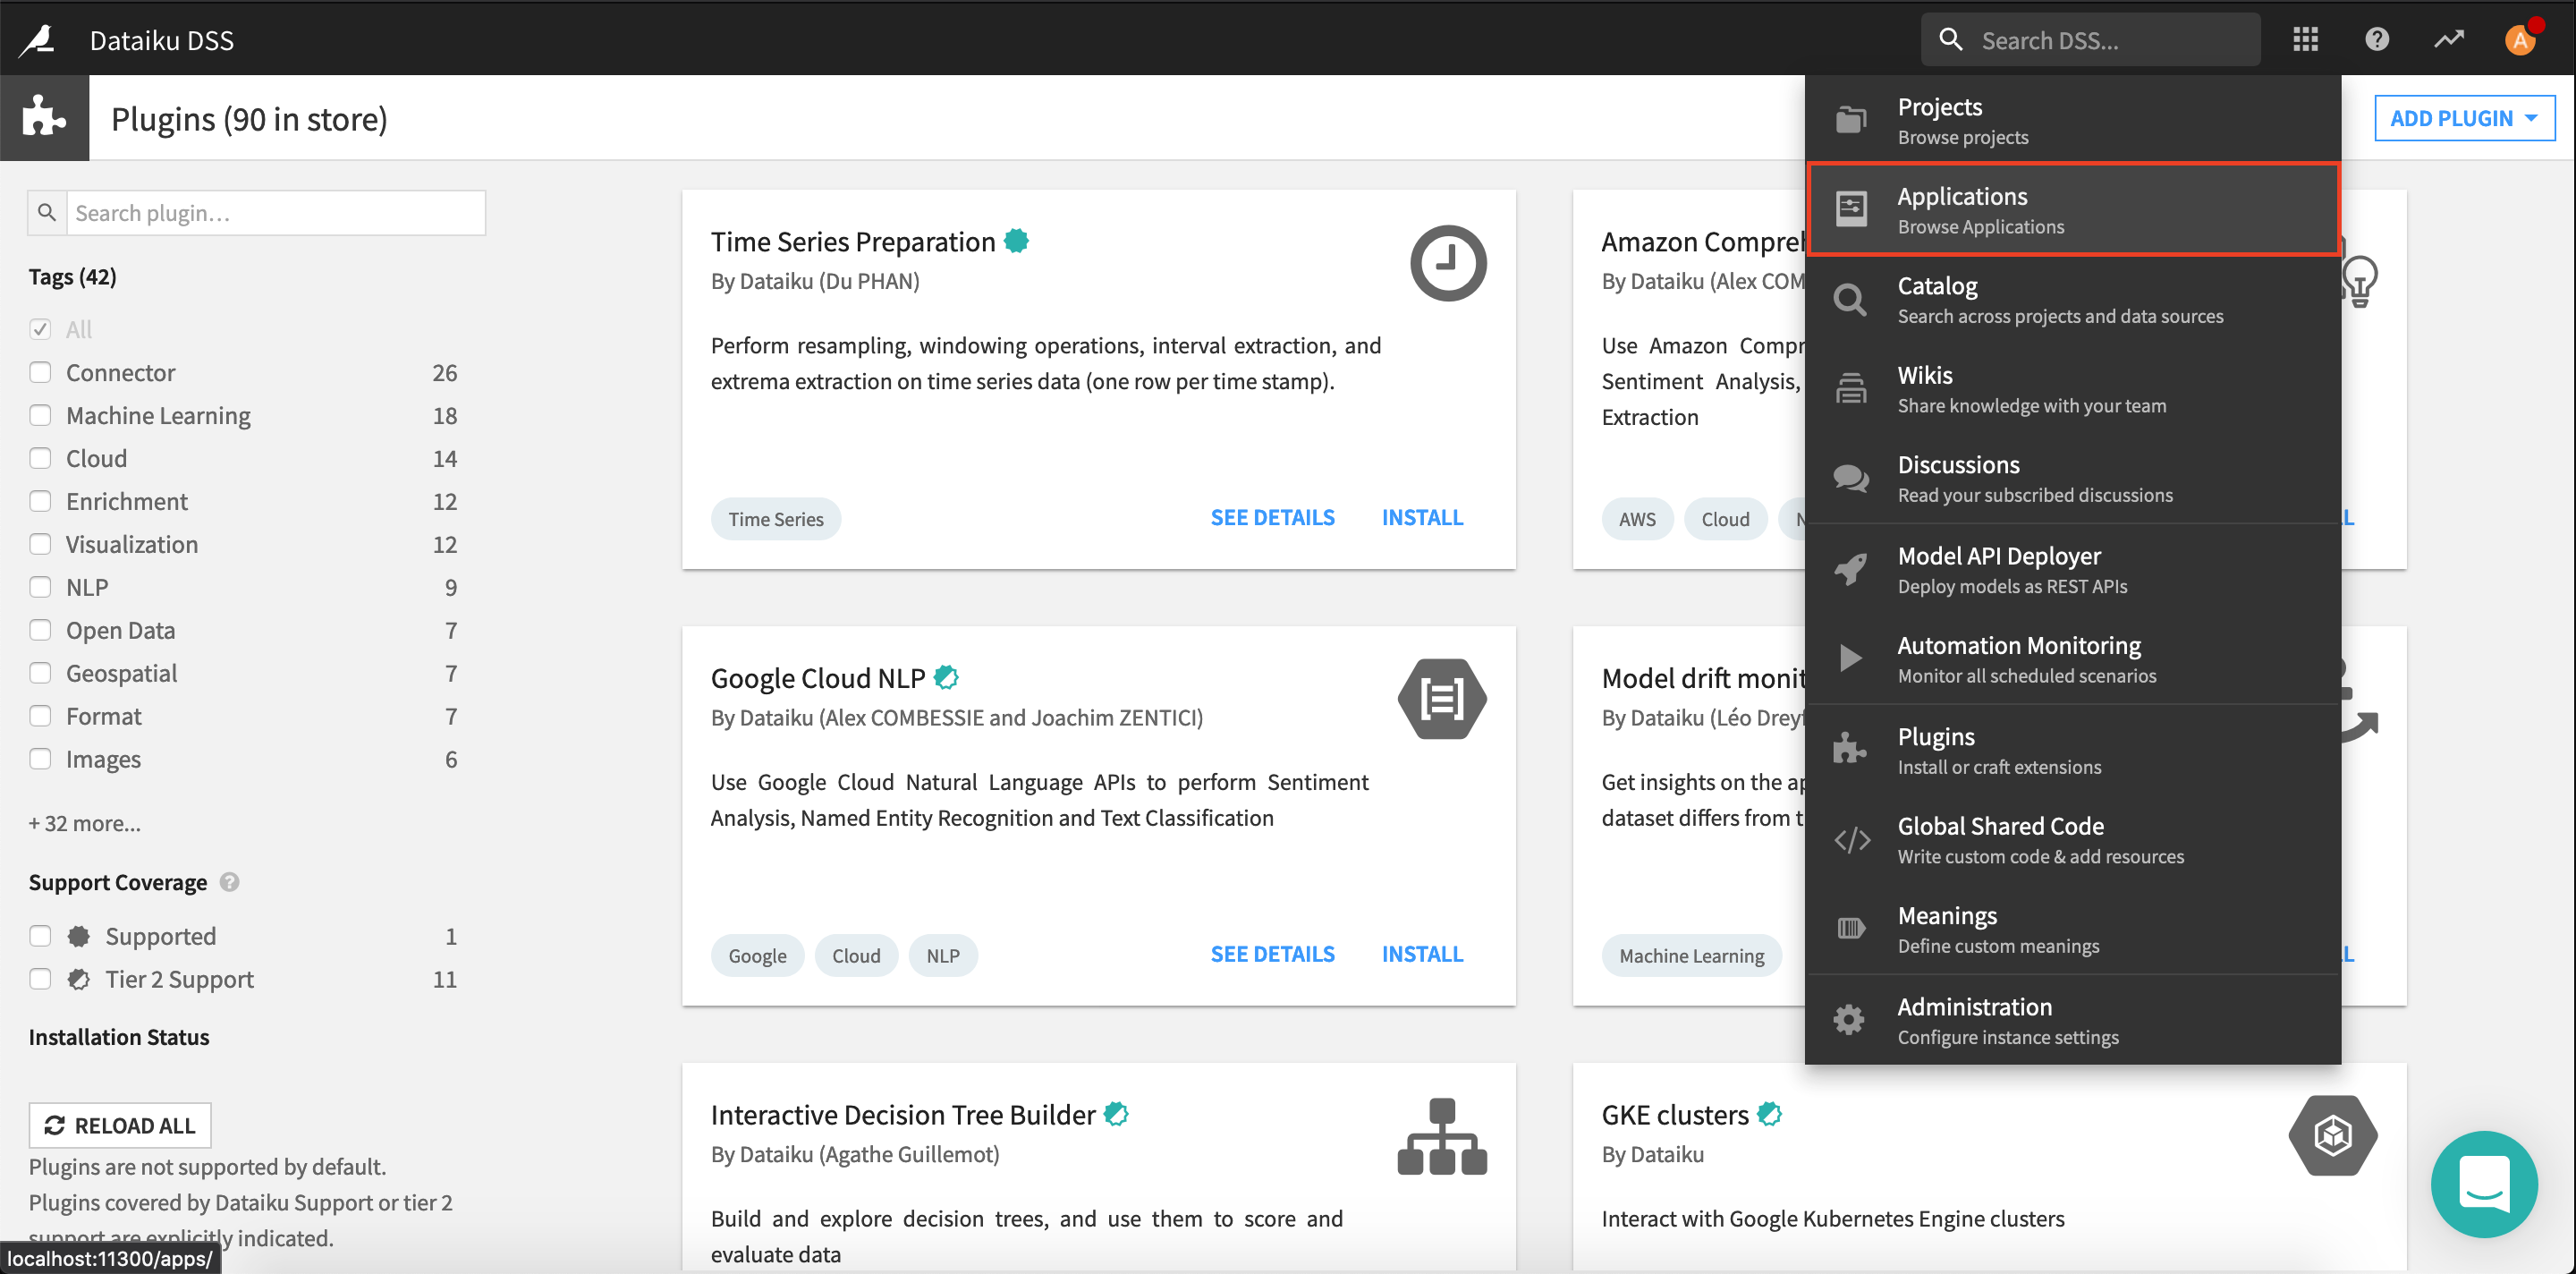
In this tutorial, we will use a Dataiku app to fasten the creation of the flow. From the application menu, select Object detection - ML Assisted Labeling and click on Start using the application.
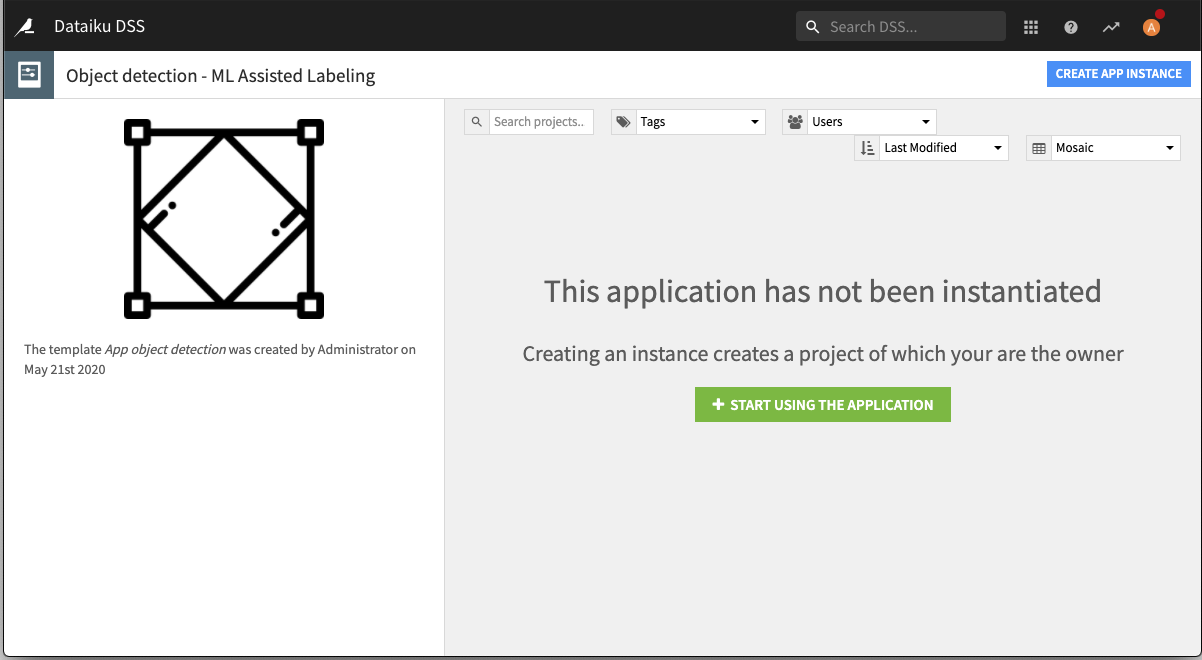
Give a name to your project, for example Playing cards.
Prepare the Data
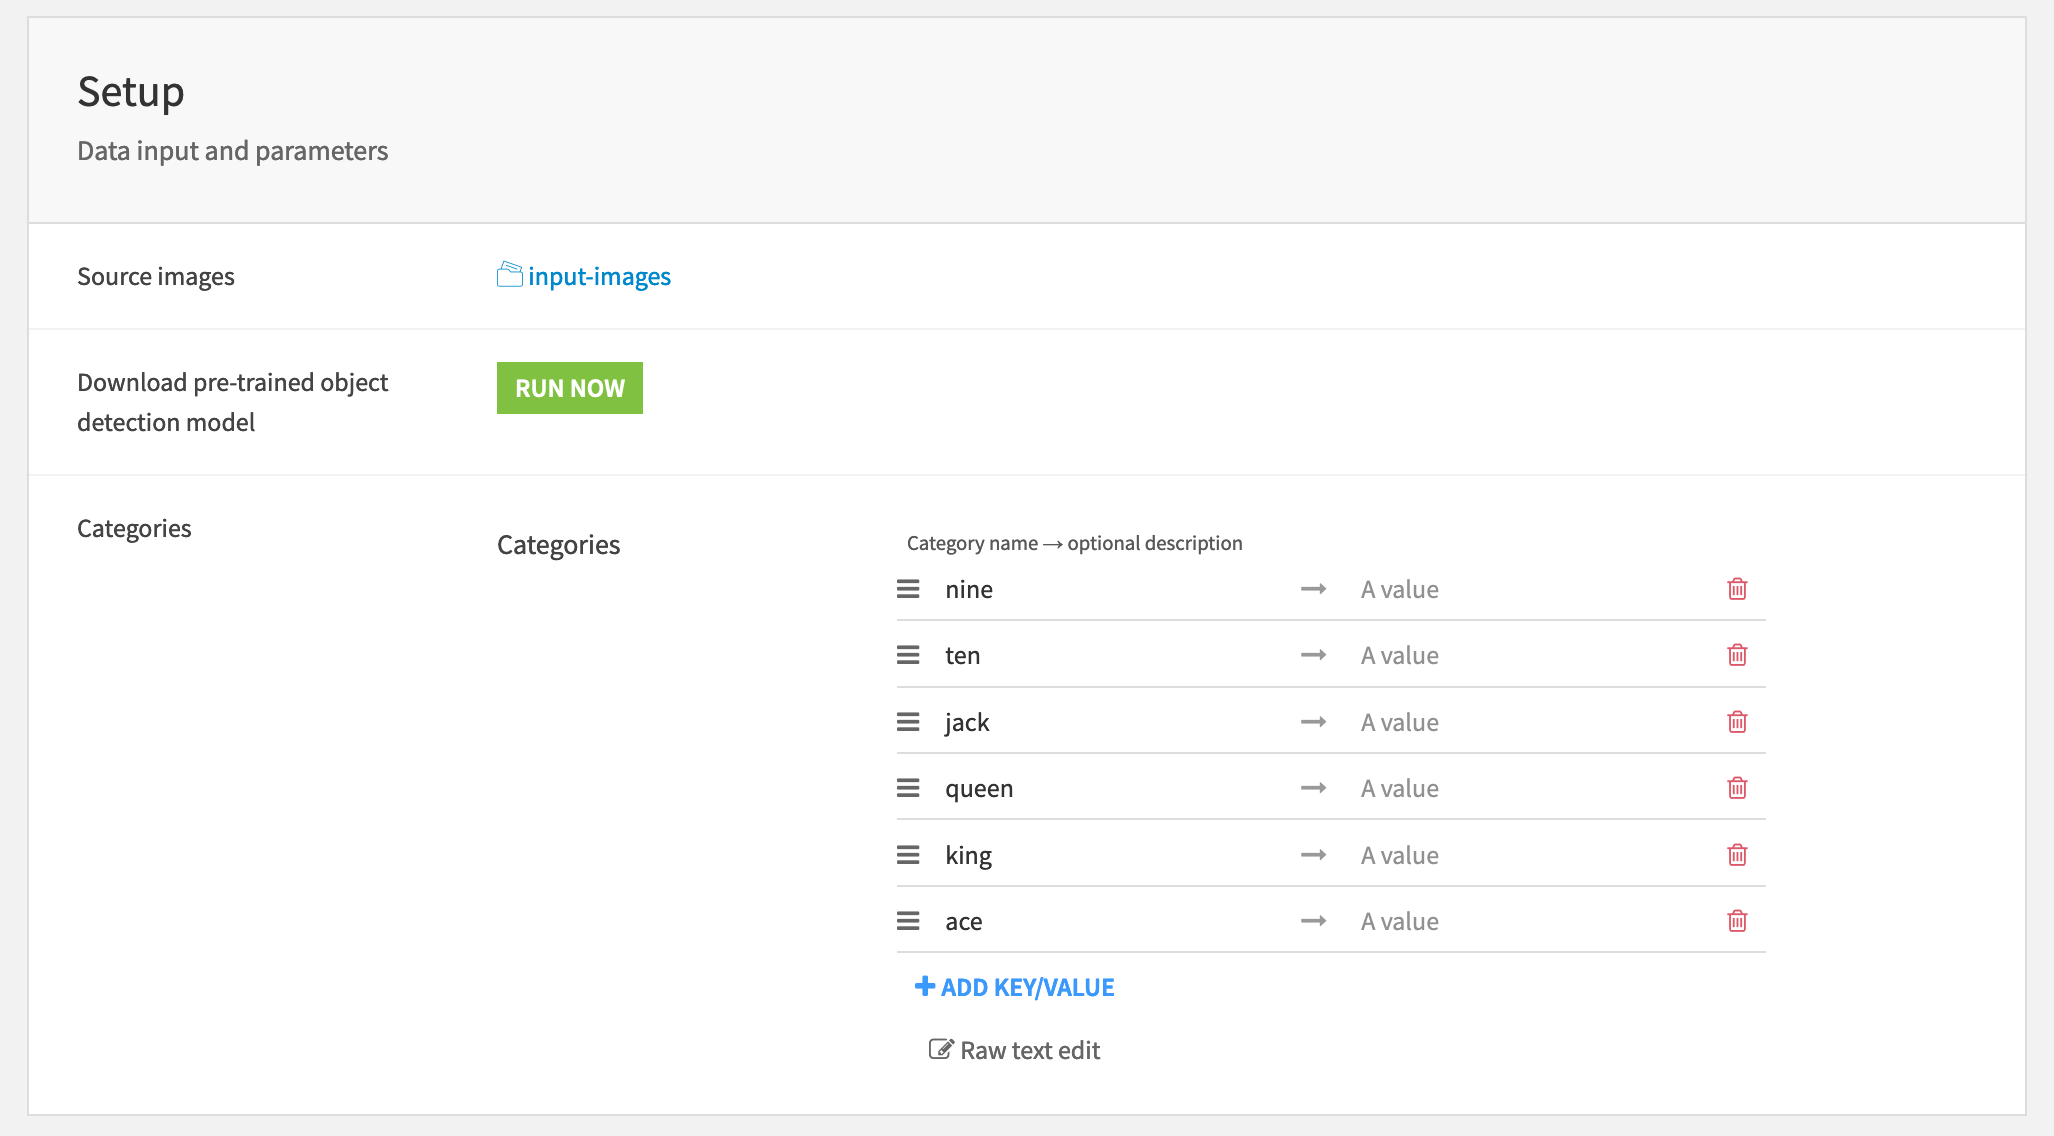
You are now presented with a user-friendly user interface of the object detection application. There are two steps required to kickstart the application:
Upload the pictures. Simply click in the input-images folder and upload your archive. It does not matter if your images are in a subdirectory.
Download the weights of the object detection network. Simply click the Run now button next to the second menu.
Define categories. The categories are the different classes of the object detection task. In this example, we chose nine, ten, jack, queen, king, and ace. Note that specifying categories in the application settings will make them available in all the labeling web applications of this project.
Label the data
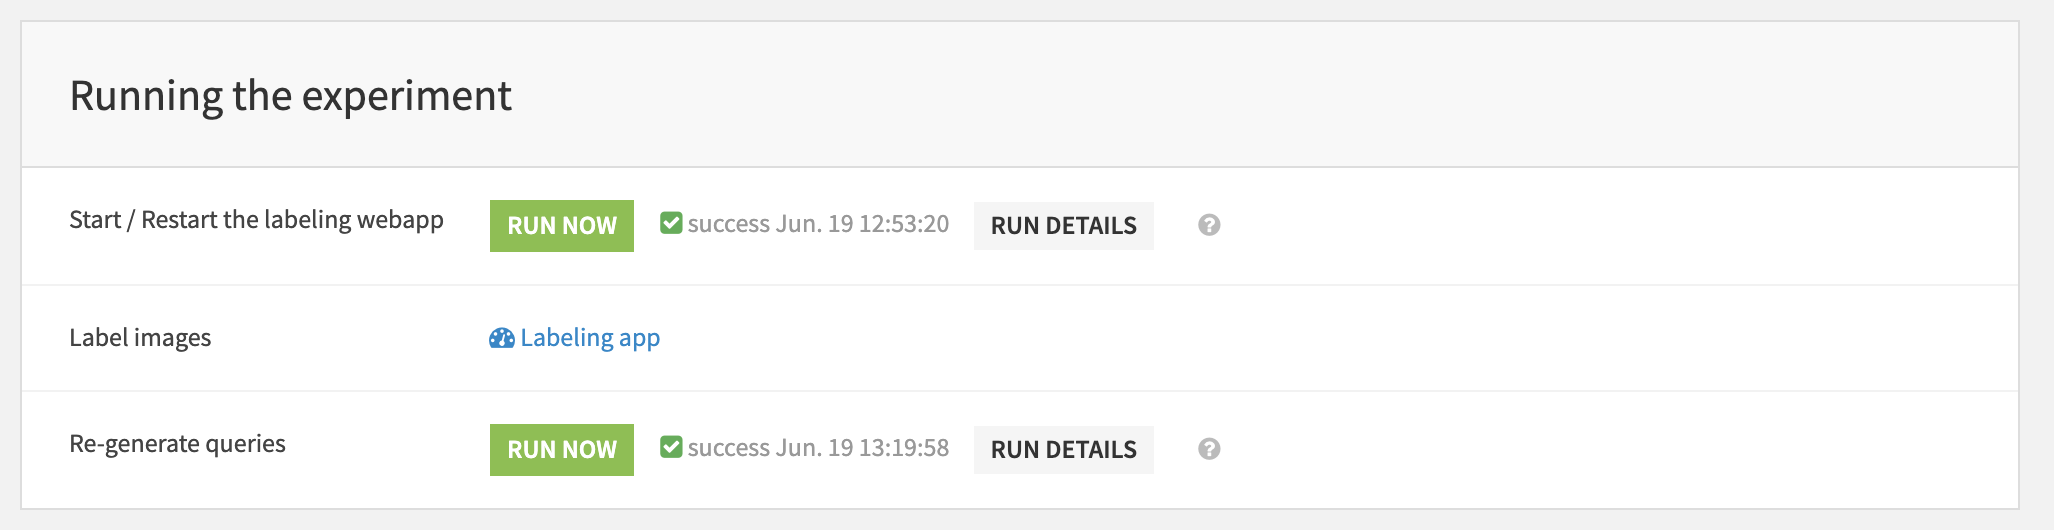
At this point, you may need to click on Start/Restart the webapp to ensure that it is up and running.
Now that you have 363 unlabeled images before you can start training a deep learning model to detect cards you first have to label them. Thanks to the Dataiku app, all the settings are already set. Click Labeling app to access the labeling dashboard and start labeling cards on the images.
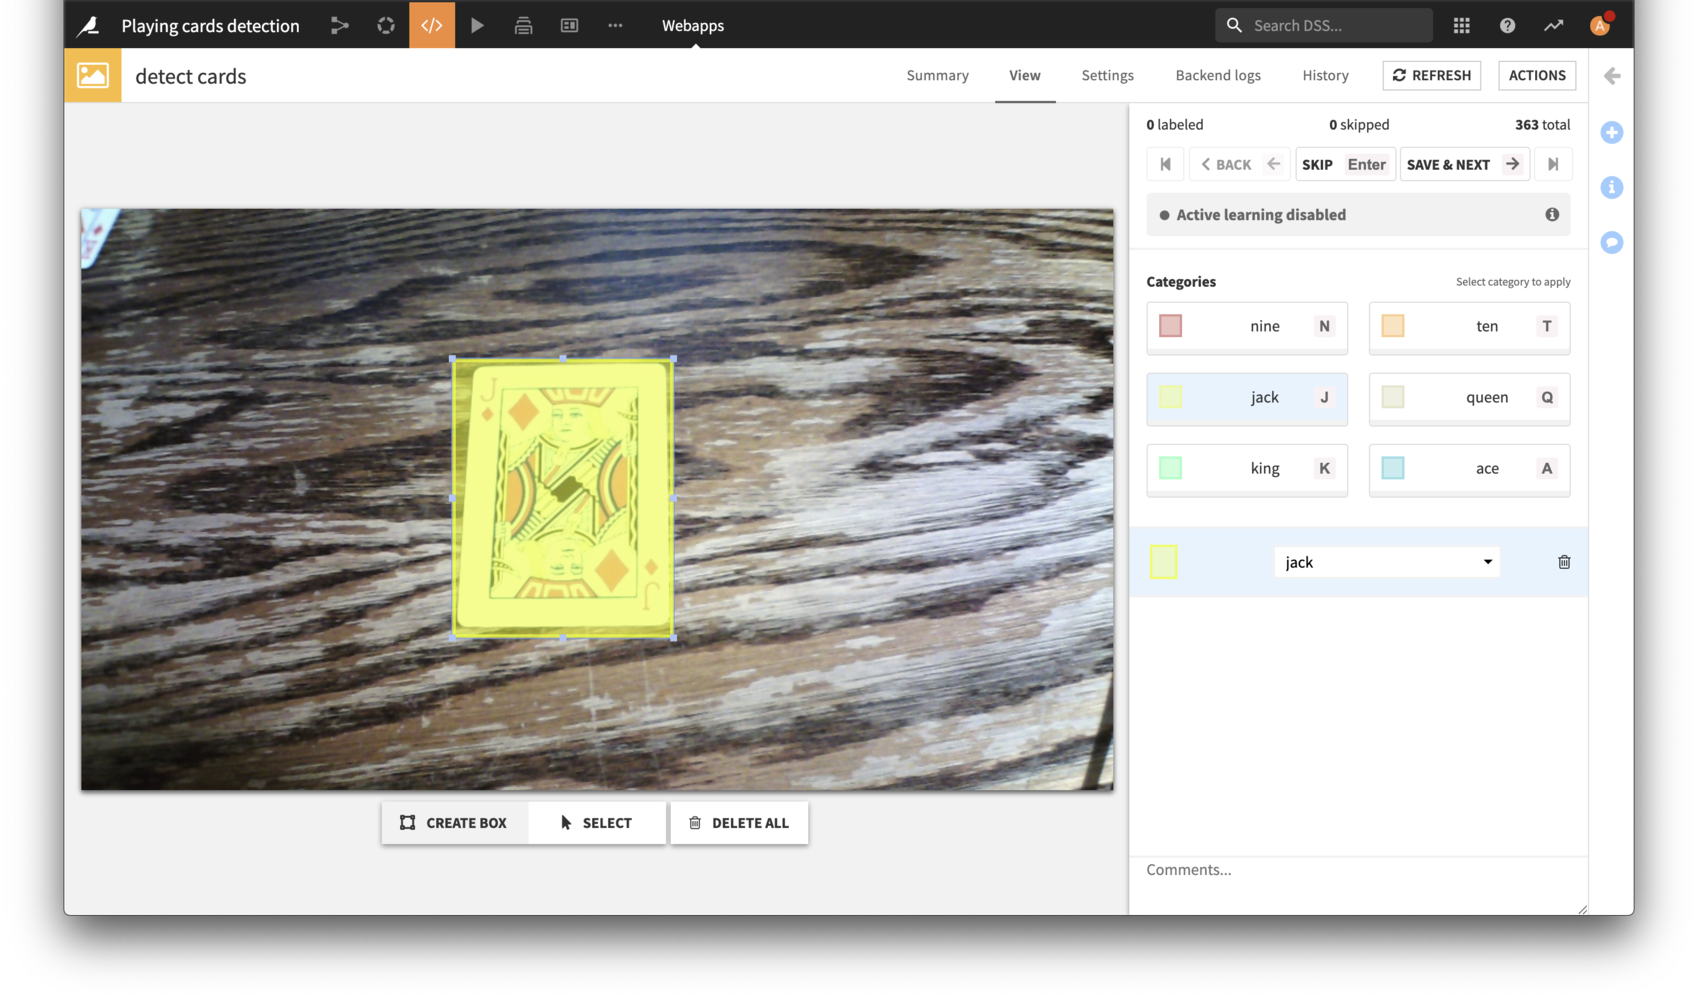
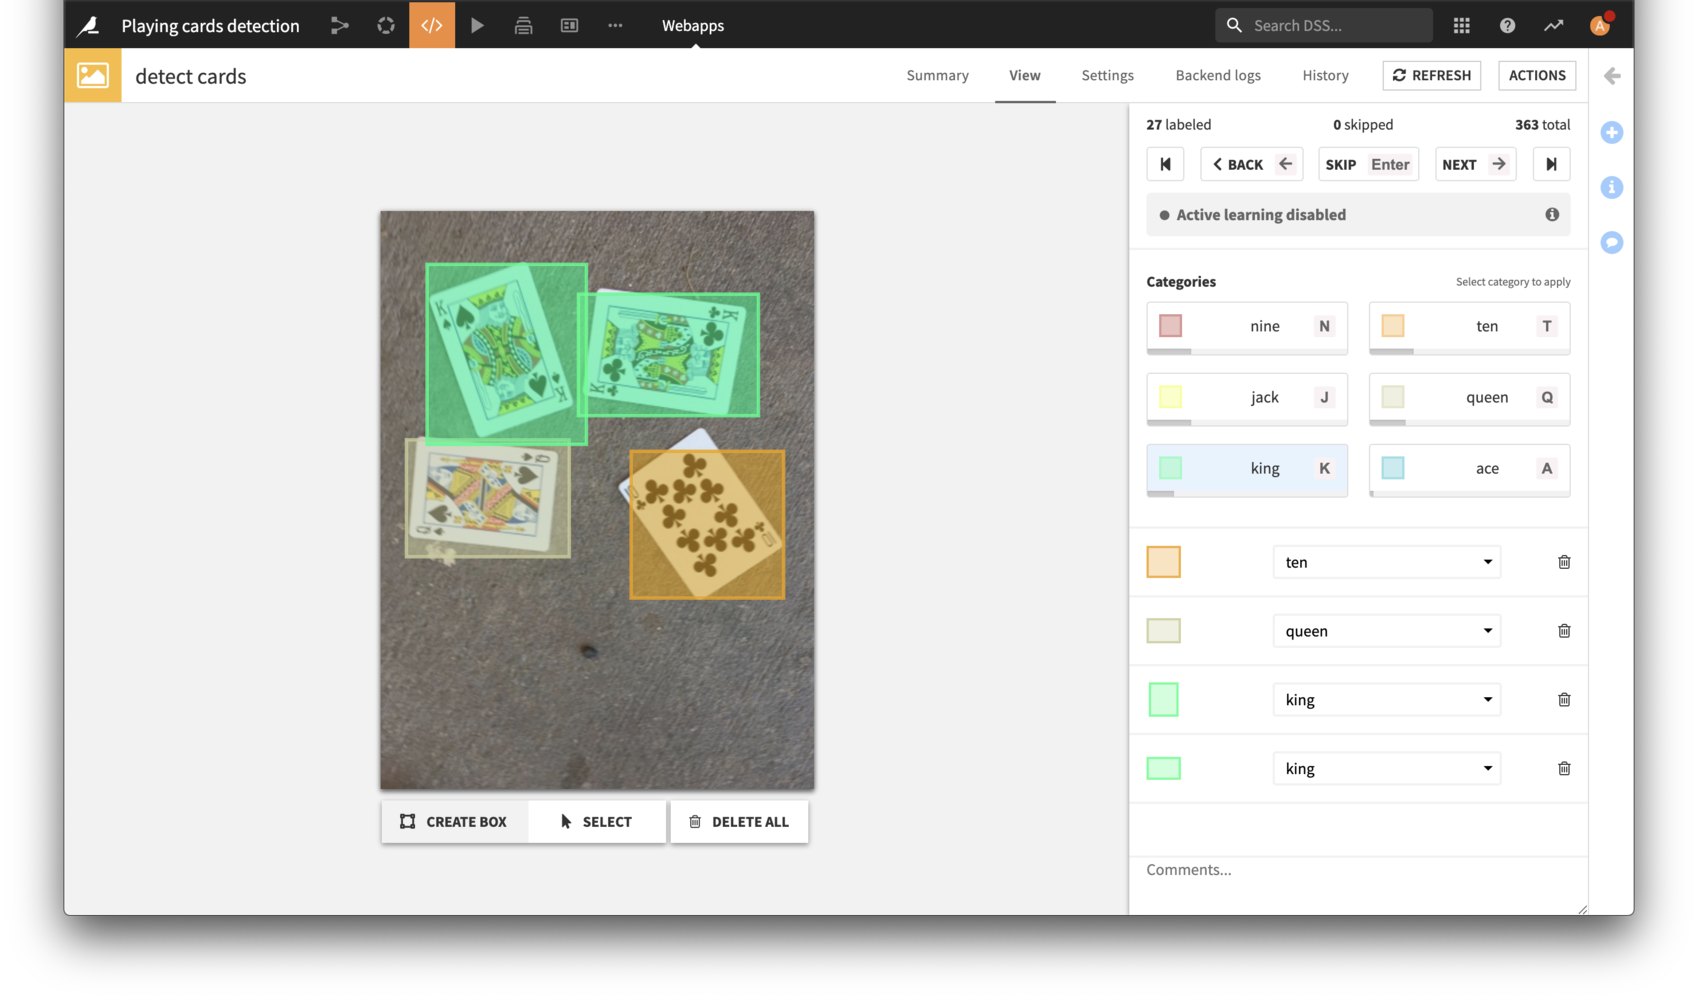
In order to start labeling select a category by clicking on it or pressing a corresponding hotkey. Then draw a rectangle around an object on the image. If the category needs to be changed, select a bounding box and then chose the right category from a drop down list on the right. Once all of the objects are selected on the image you can proceed to the next one by using the most convenient option:
pressing the right arrow key
clicking on “Save and next” button
pressing a space key
Label a few samples, make sure that you have at least one label per category (grey progress bar under a category button). Once you have enough labeled samples you can start training your model.
Training the model
In order to train the model navigate back to the home page of the Dataiku App and simply click on the Re-generate queries button.
Label data
This is it! You can use the webapp by going to its View tab. Start labeling cards. Notice that you can use keystrokes to select categories faster. Simply hit j or n, on your keyboard to select the category and draw the bounding box of the corresponding type. You may also hit Space or right arrow button to confirm your labels and proceed to a next sample.
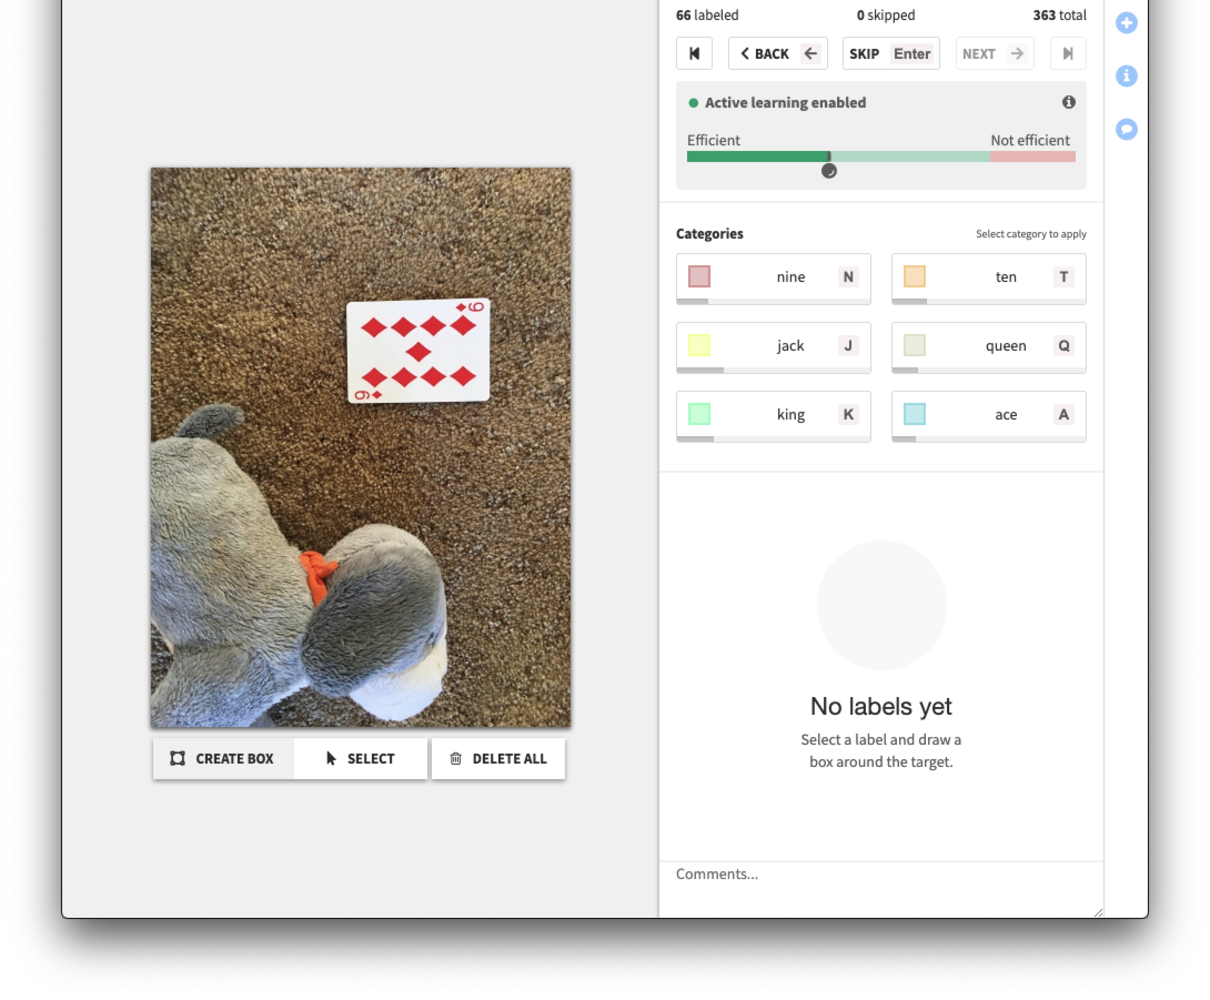
As you label, you will see notifications pop every 10 labels.
What’s Next
For more on active learning, see the following posts on Data From the Trenches:
References