Tags
Tags help you to organize your work within projects and make it discoverable across the Dataiku DSS instance. This tutorial will show you how to:
Create and assign tags to DSS objects.
Use tag views within the Flow.
Create tag categories for better data governance.
Create the Project
Let’s use the Haiku Starter project as it was at the end of the Flow Zone lesson.
Note
If you haven’t done the Flow Zone lesson, you can start with a fresh version of the project by clicking + New Project > DSS Tutorials > General Topics > Haiku Starter. As you work through this lesson, your Flow will appear a little different from the images, but otherwise, your experience with the lesson should be the same.
To have a clean starting point for this tutorial:
Delete the Experimental Flow Zone.
Expand all Flow Zones.
Creating and Assigning Tags
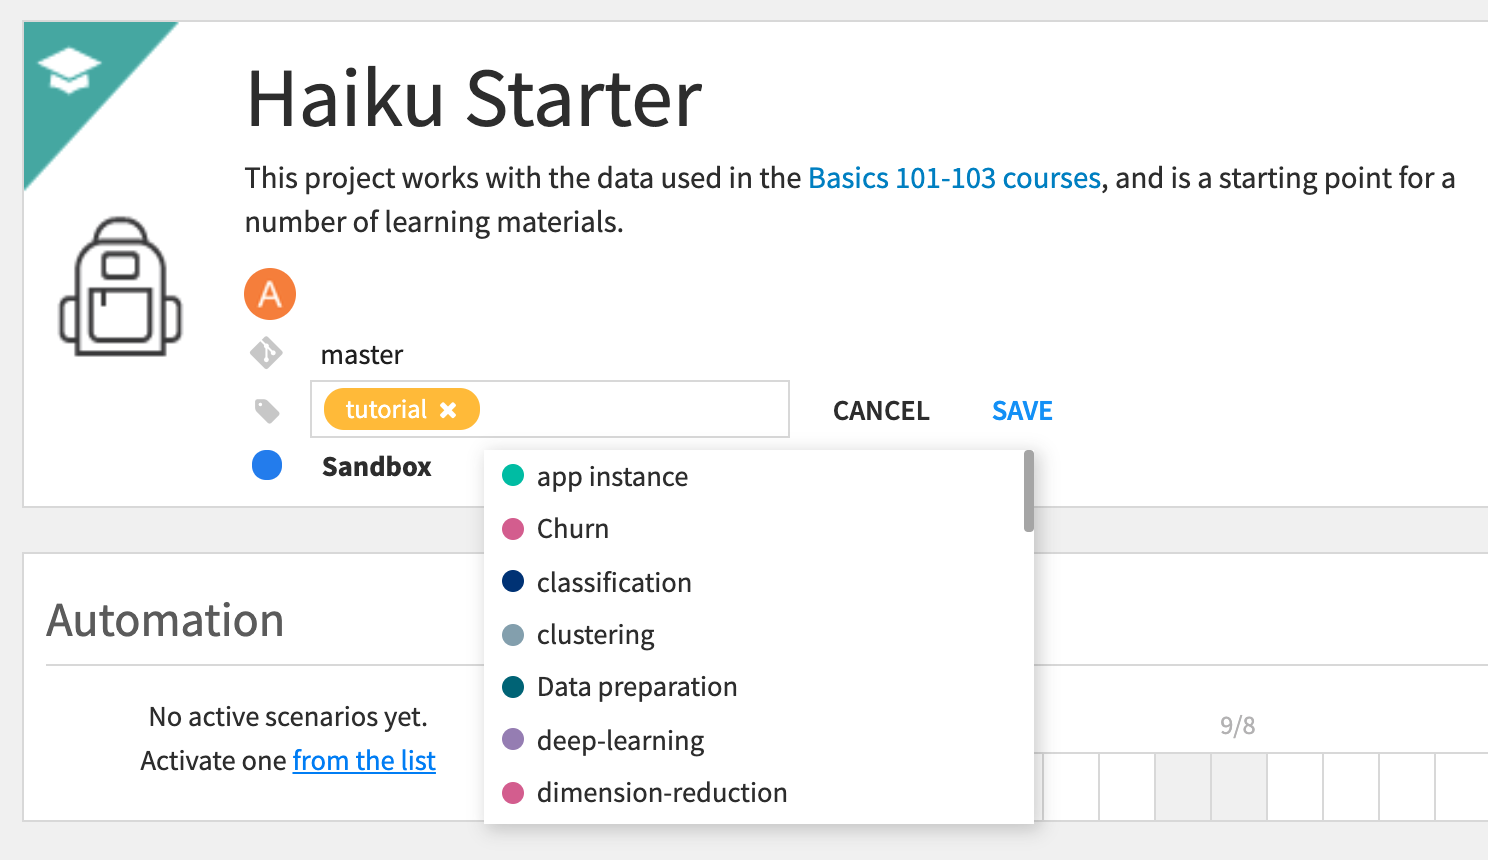
Tags are a universal property of all DSS objects. One of the easiest ways to create and assign them is from the Summary of a DSS object. To create your first tag:
Go to the project homepage for Haiku Starter.
Click + Add tags to open the tag editor. From here, you can remove tags currently assigned to the project, add tags that already exist on this instance, and create and assign entirely new tags.
Since this project deals with a classification problem, add classification as a tag, creating it if necessary.
Since this project deals with customer data, add customer analytics as a tag, creating it if necessary.
Click Save.
These tags are useful for filtering search results in the Catalog, making the project more discoverable for colleagues looking for projects that contain classification problems, and/or work with customer data.
Note
The list of available existing tags depends upon the DSS instance you’re working on, so what you see may differ from the image below.
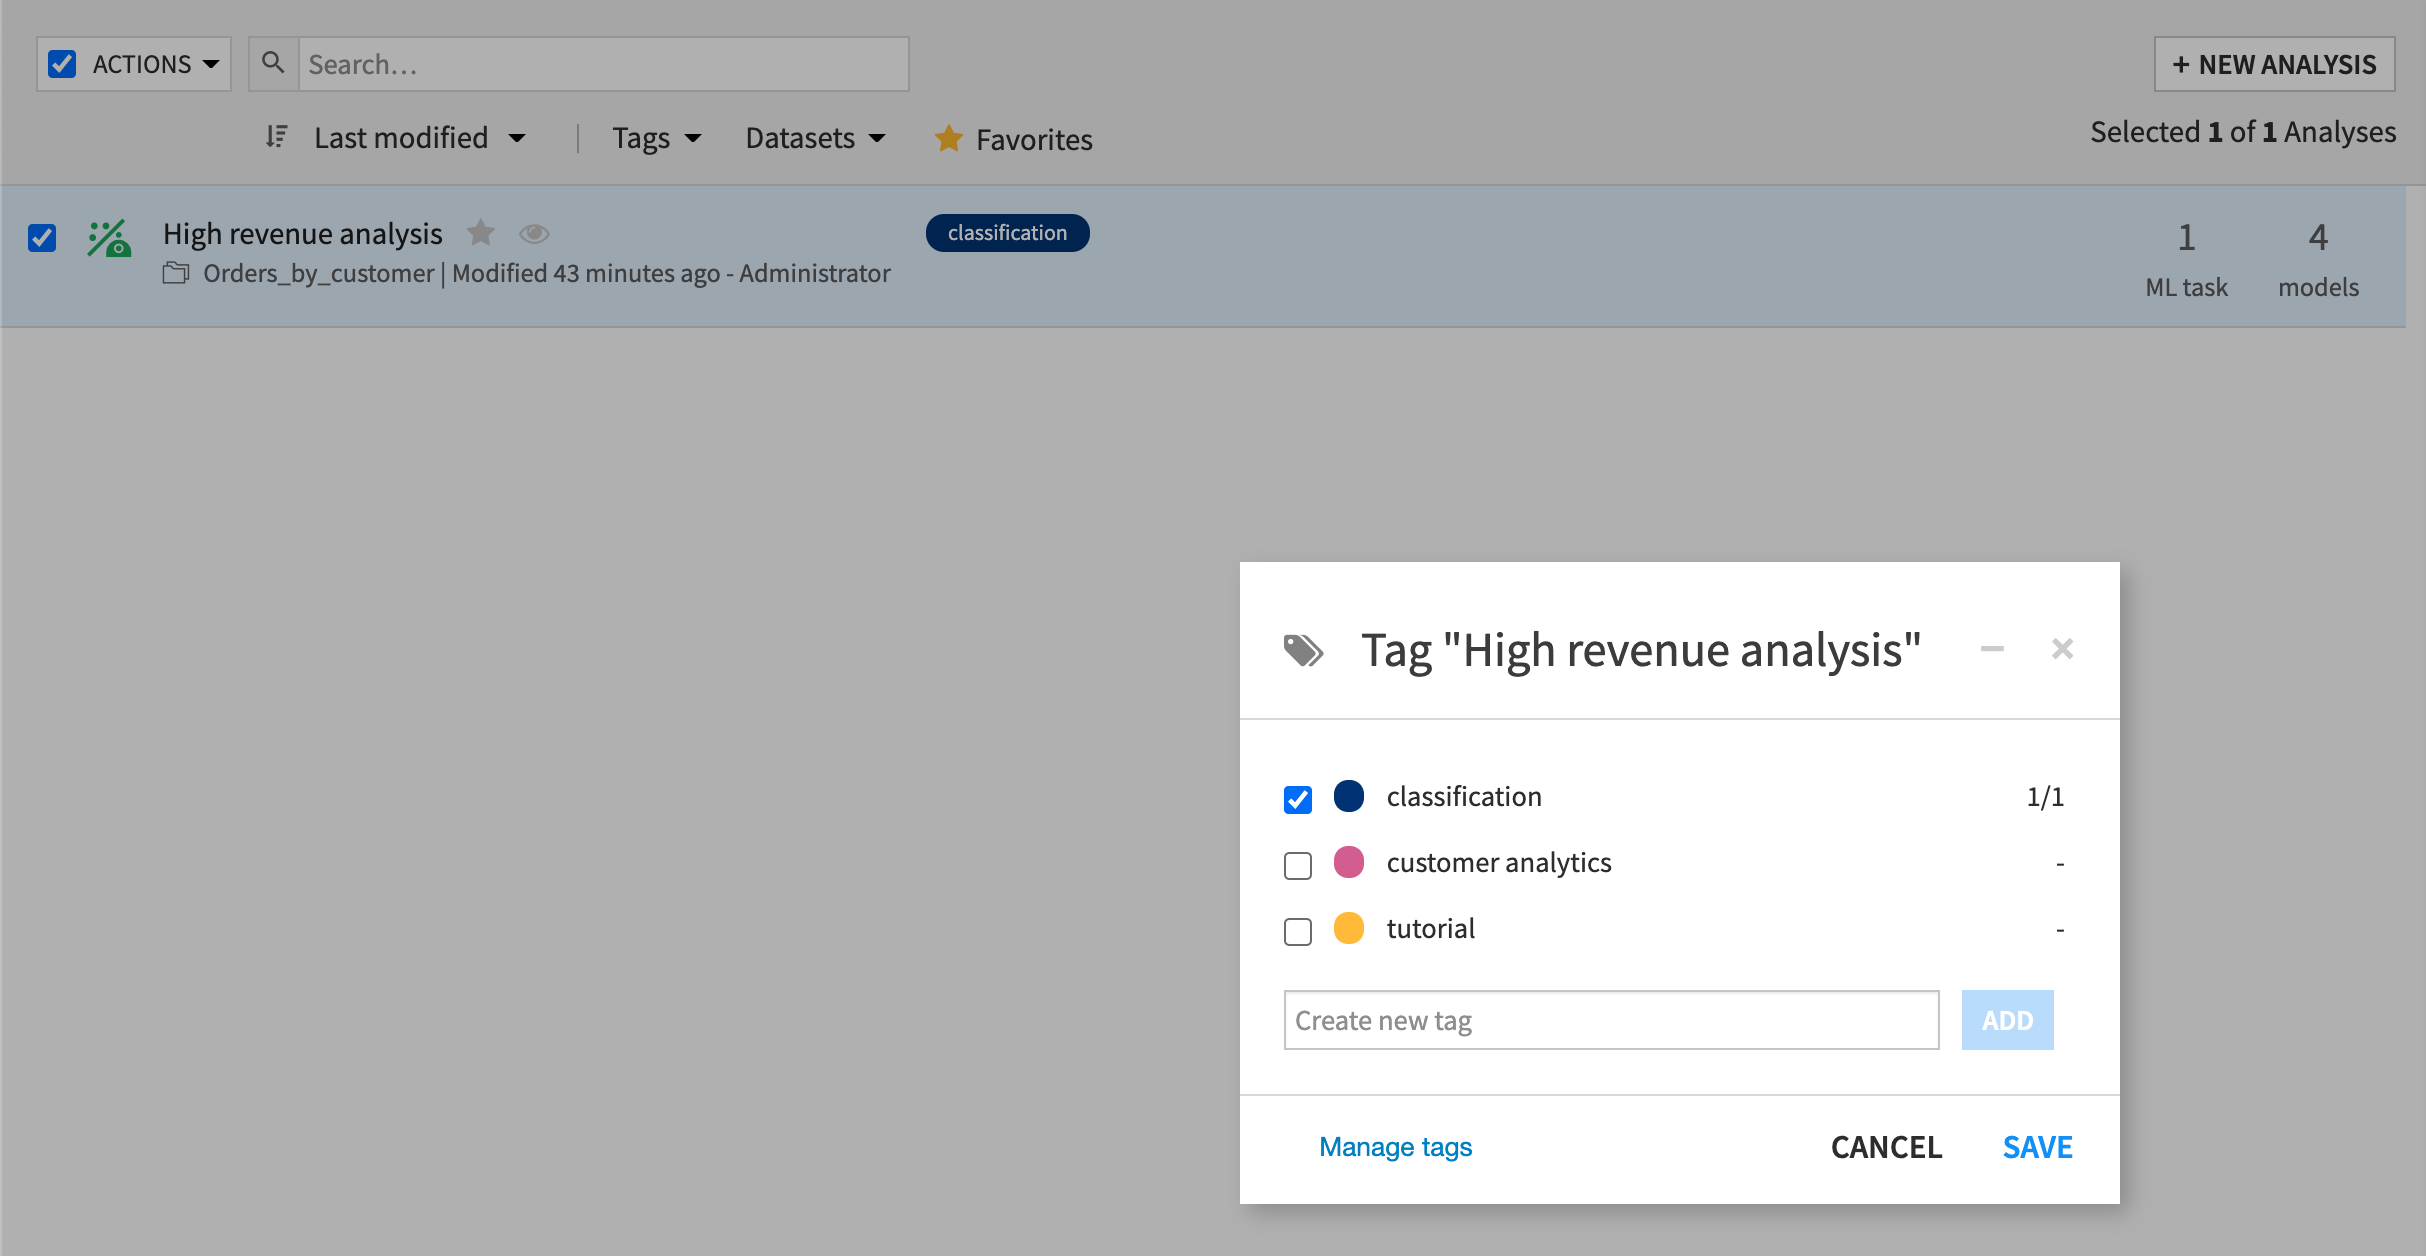
You can also apply tags to lists of objects.
From the top navigation bar, click Visual Analyses.
Select the checkbox for High revenue analysis.
From the Actions menu, select Tag.
Since this is a classification problem, select classification as the tag.
Click Save.
You can also apply tags directly to objects in the Flow. Let’s set a goal to tag objects within the Flow to indicate different stages of activities: Connecting to data, Processing Data, and ML/Scoring.
Return to the Flow of this project.
Select the Orders and Customers folders and datasets.
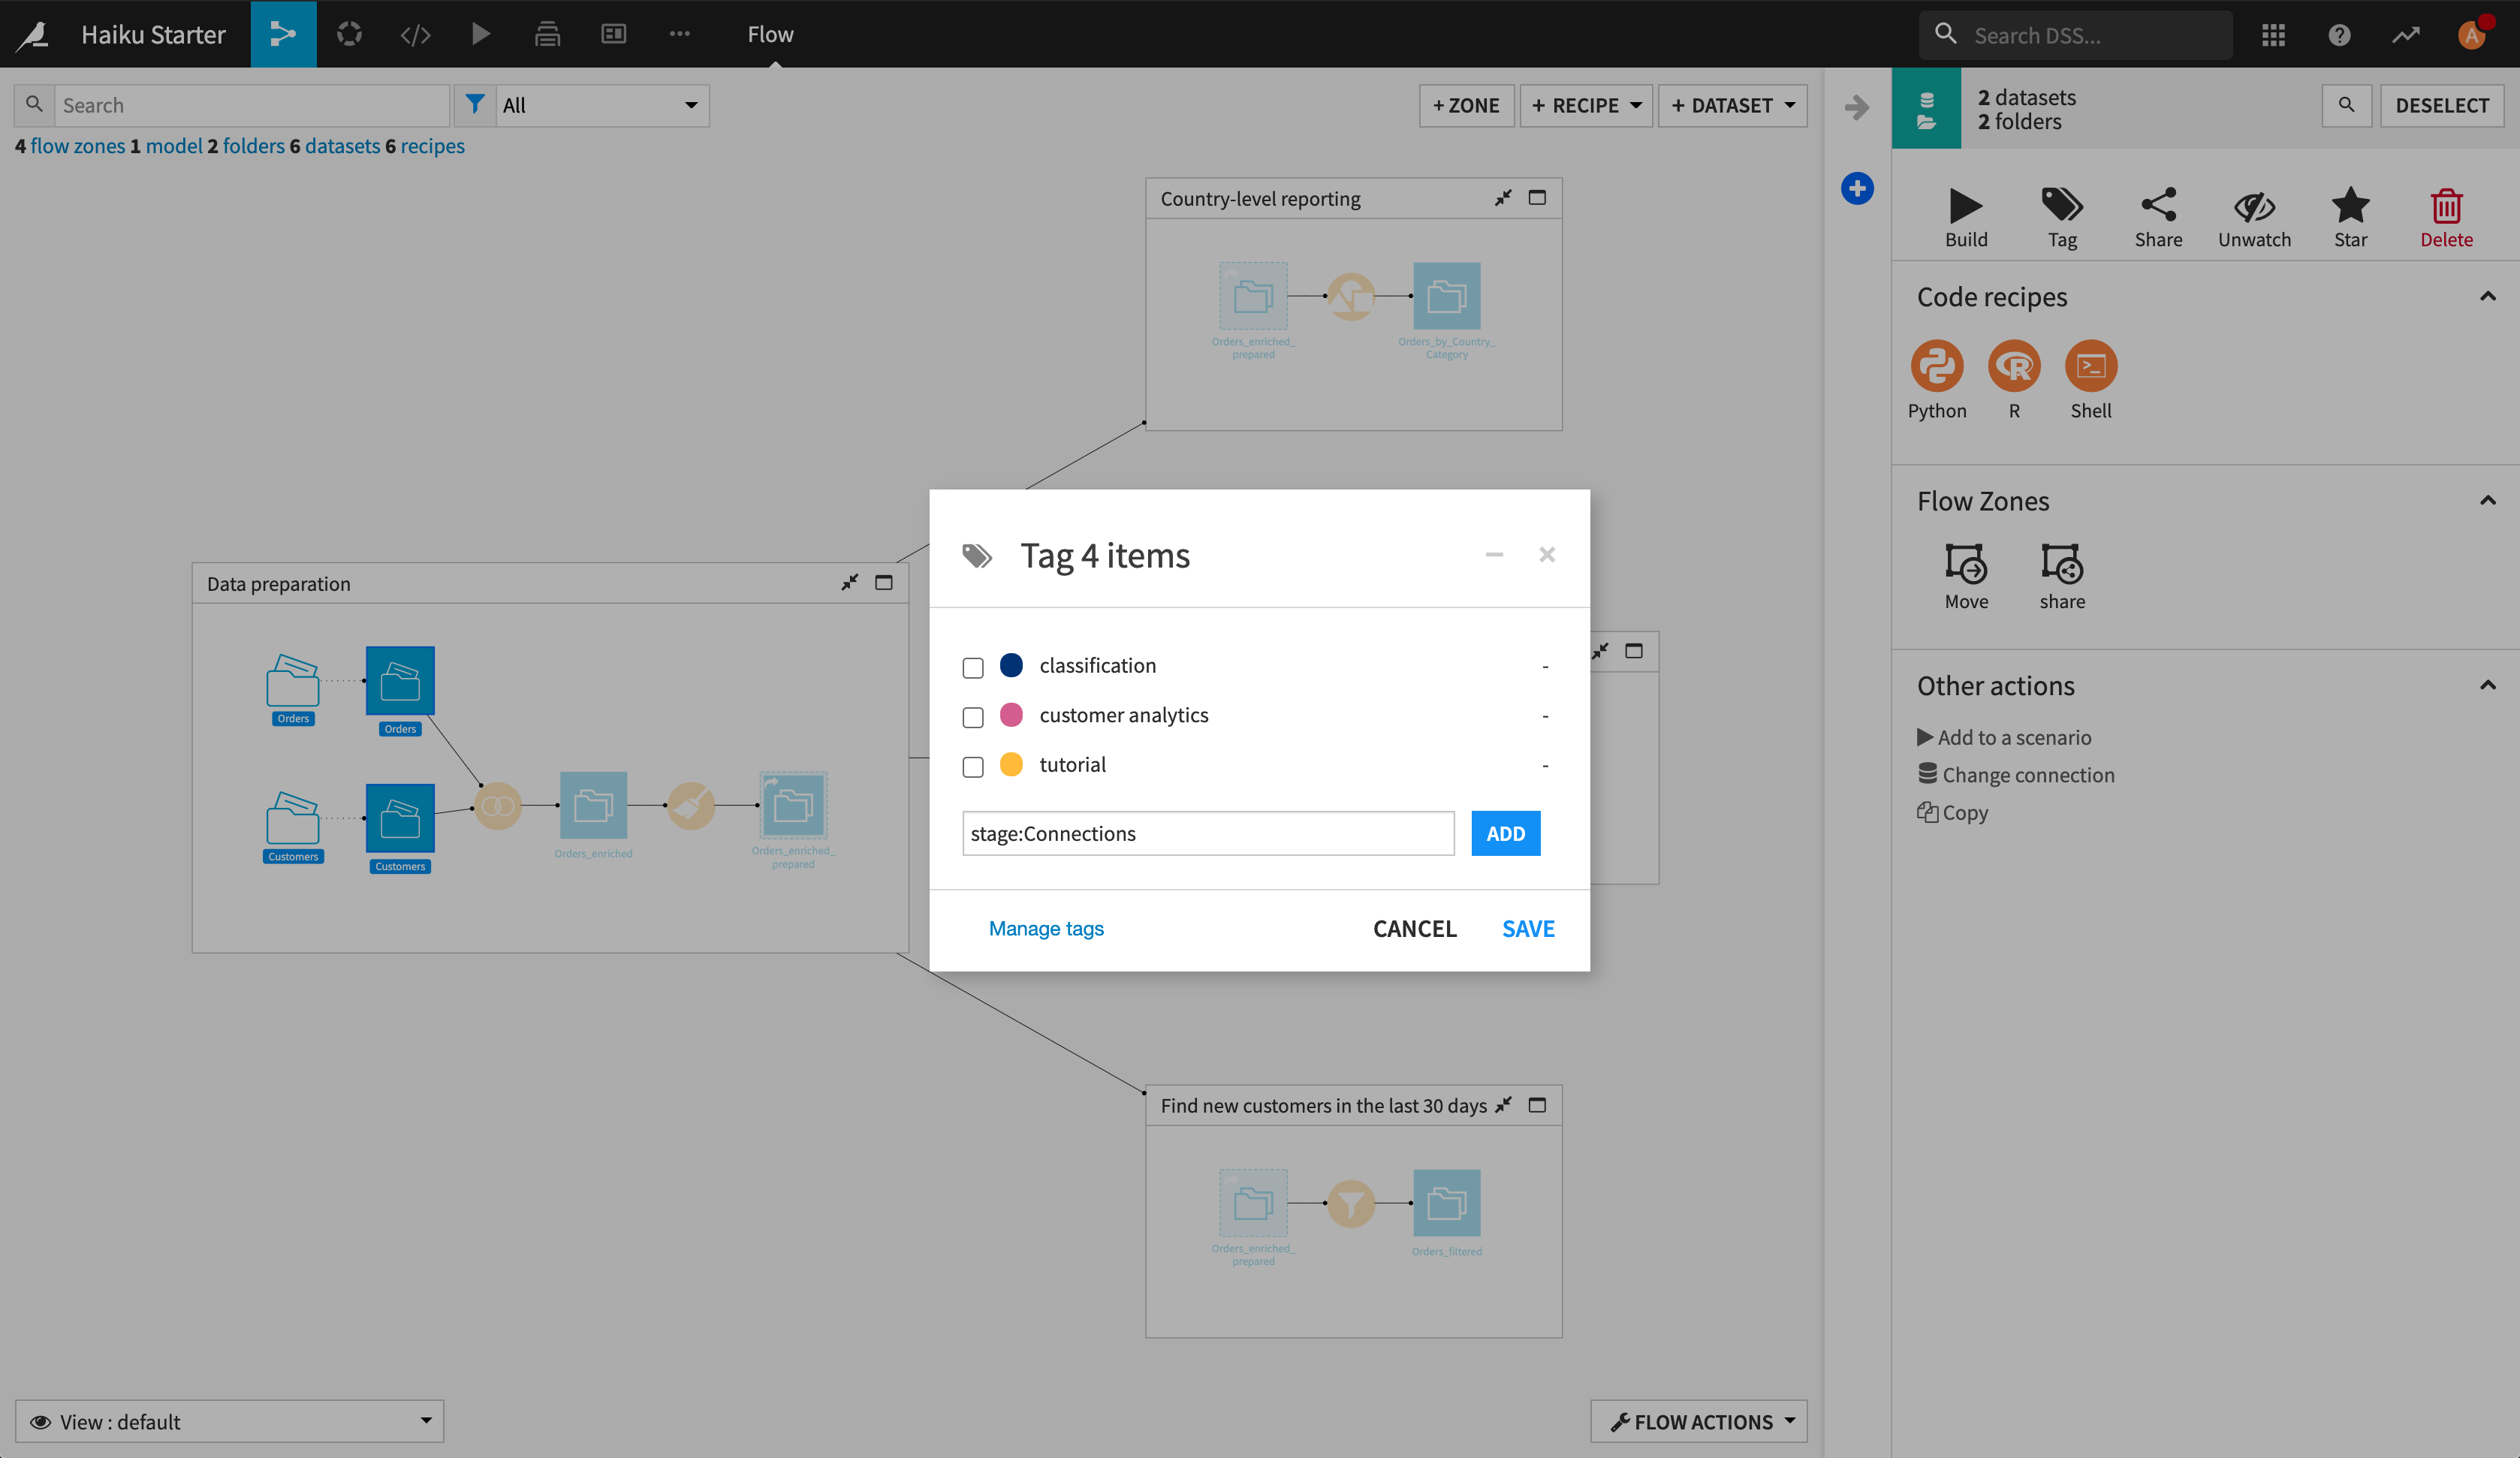
In the Actions right panel, click Tag.
In the modal dialog, type
stage:Connectionsand click Add.Click Save.
Now we’ll repeat the process.
Select all the objects from the Join recipe to the Orders_enriched_prepared dataset, inclusive.
In the Actions right panel, click Tag.
In the modal dialog, type
stage:Data processingand click Add.Click Save.
Select all the objects from the Group recipe to the High revenue prediction deployed model, inclusive.
In the Actions right panel, click Tag.
In the modal dialog, type
stage:ML/Scoringand click Add.Click Save.
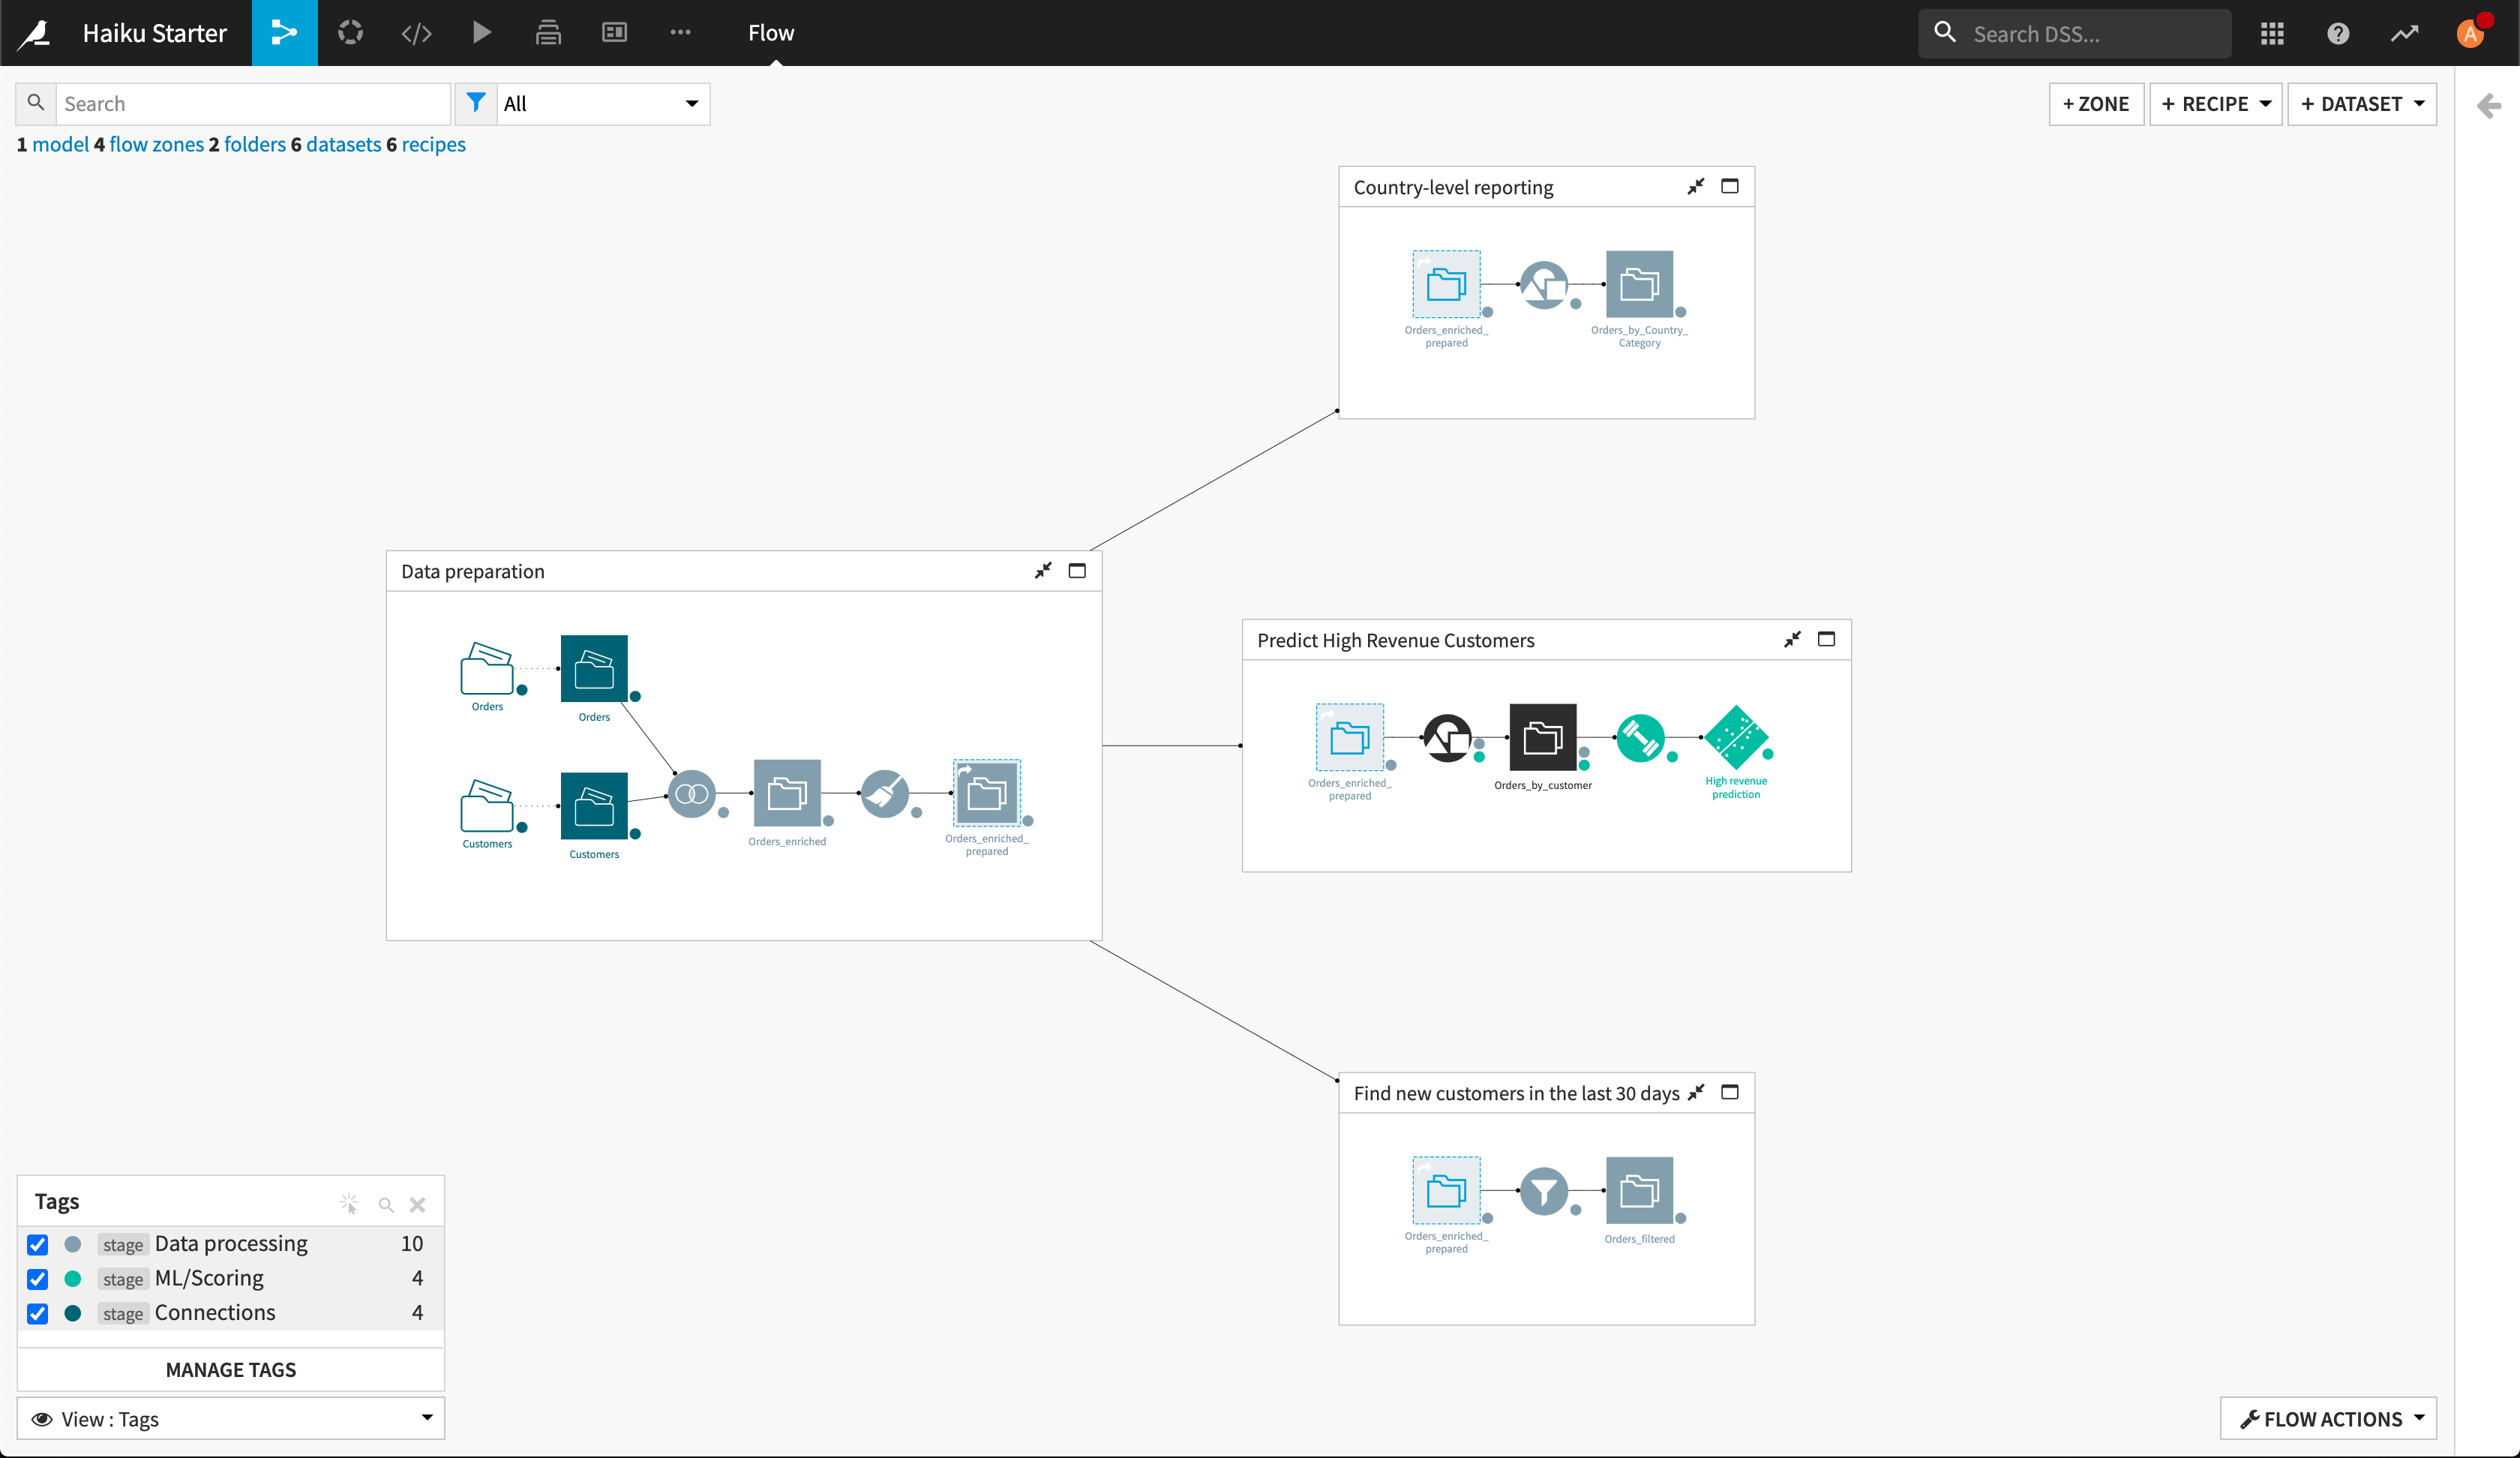
In the primary view, the tags are invisible in the Flow. Next, we’ll use tag views to see how they can enrich our understanding of the Flow.
Tags View
There is a special Tags view:
From the View menu in the lower left of the Flow, select Tags.
Select all three tags.
You can thus get a view of the Flow with the objects colored by tag, rather than by type of object. There is a small dot at the lower right of each icon so that even when a tag is not selected in the view, you can see that the object is tagged.
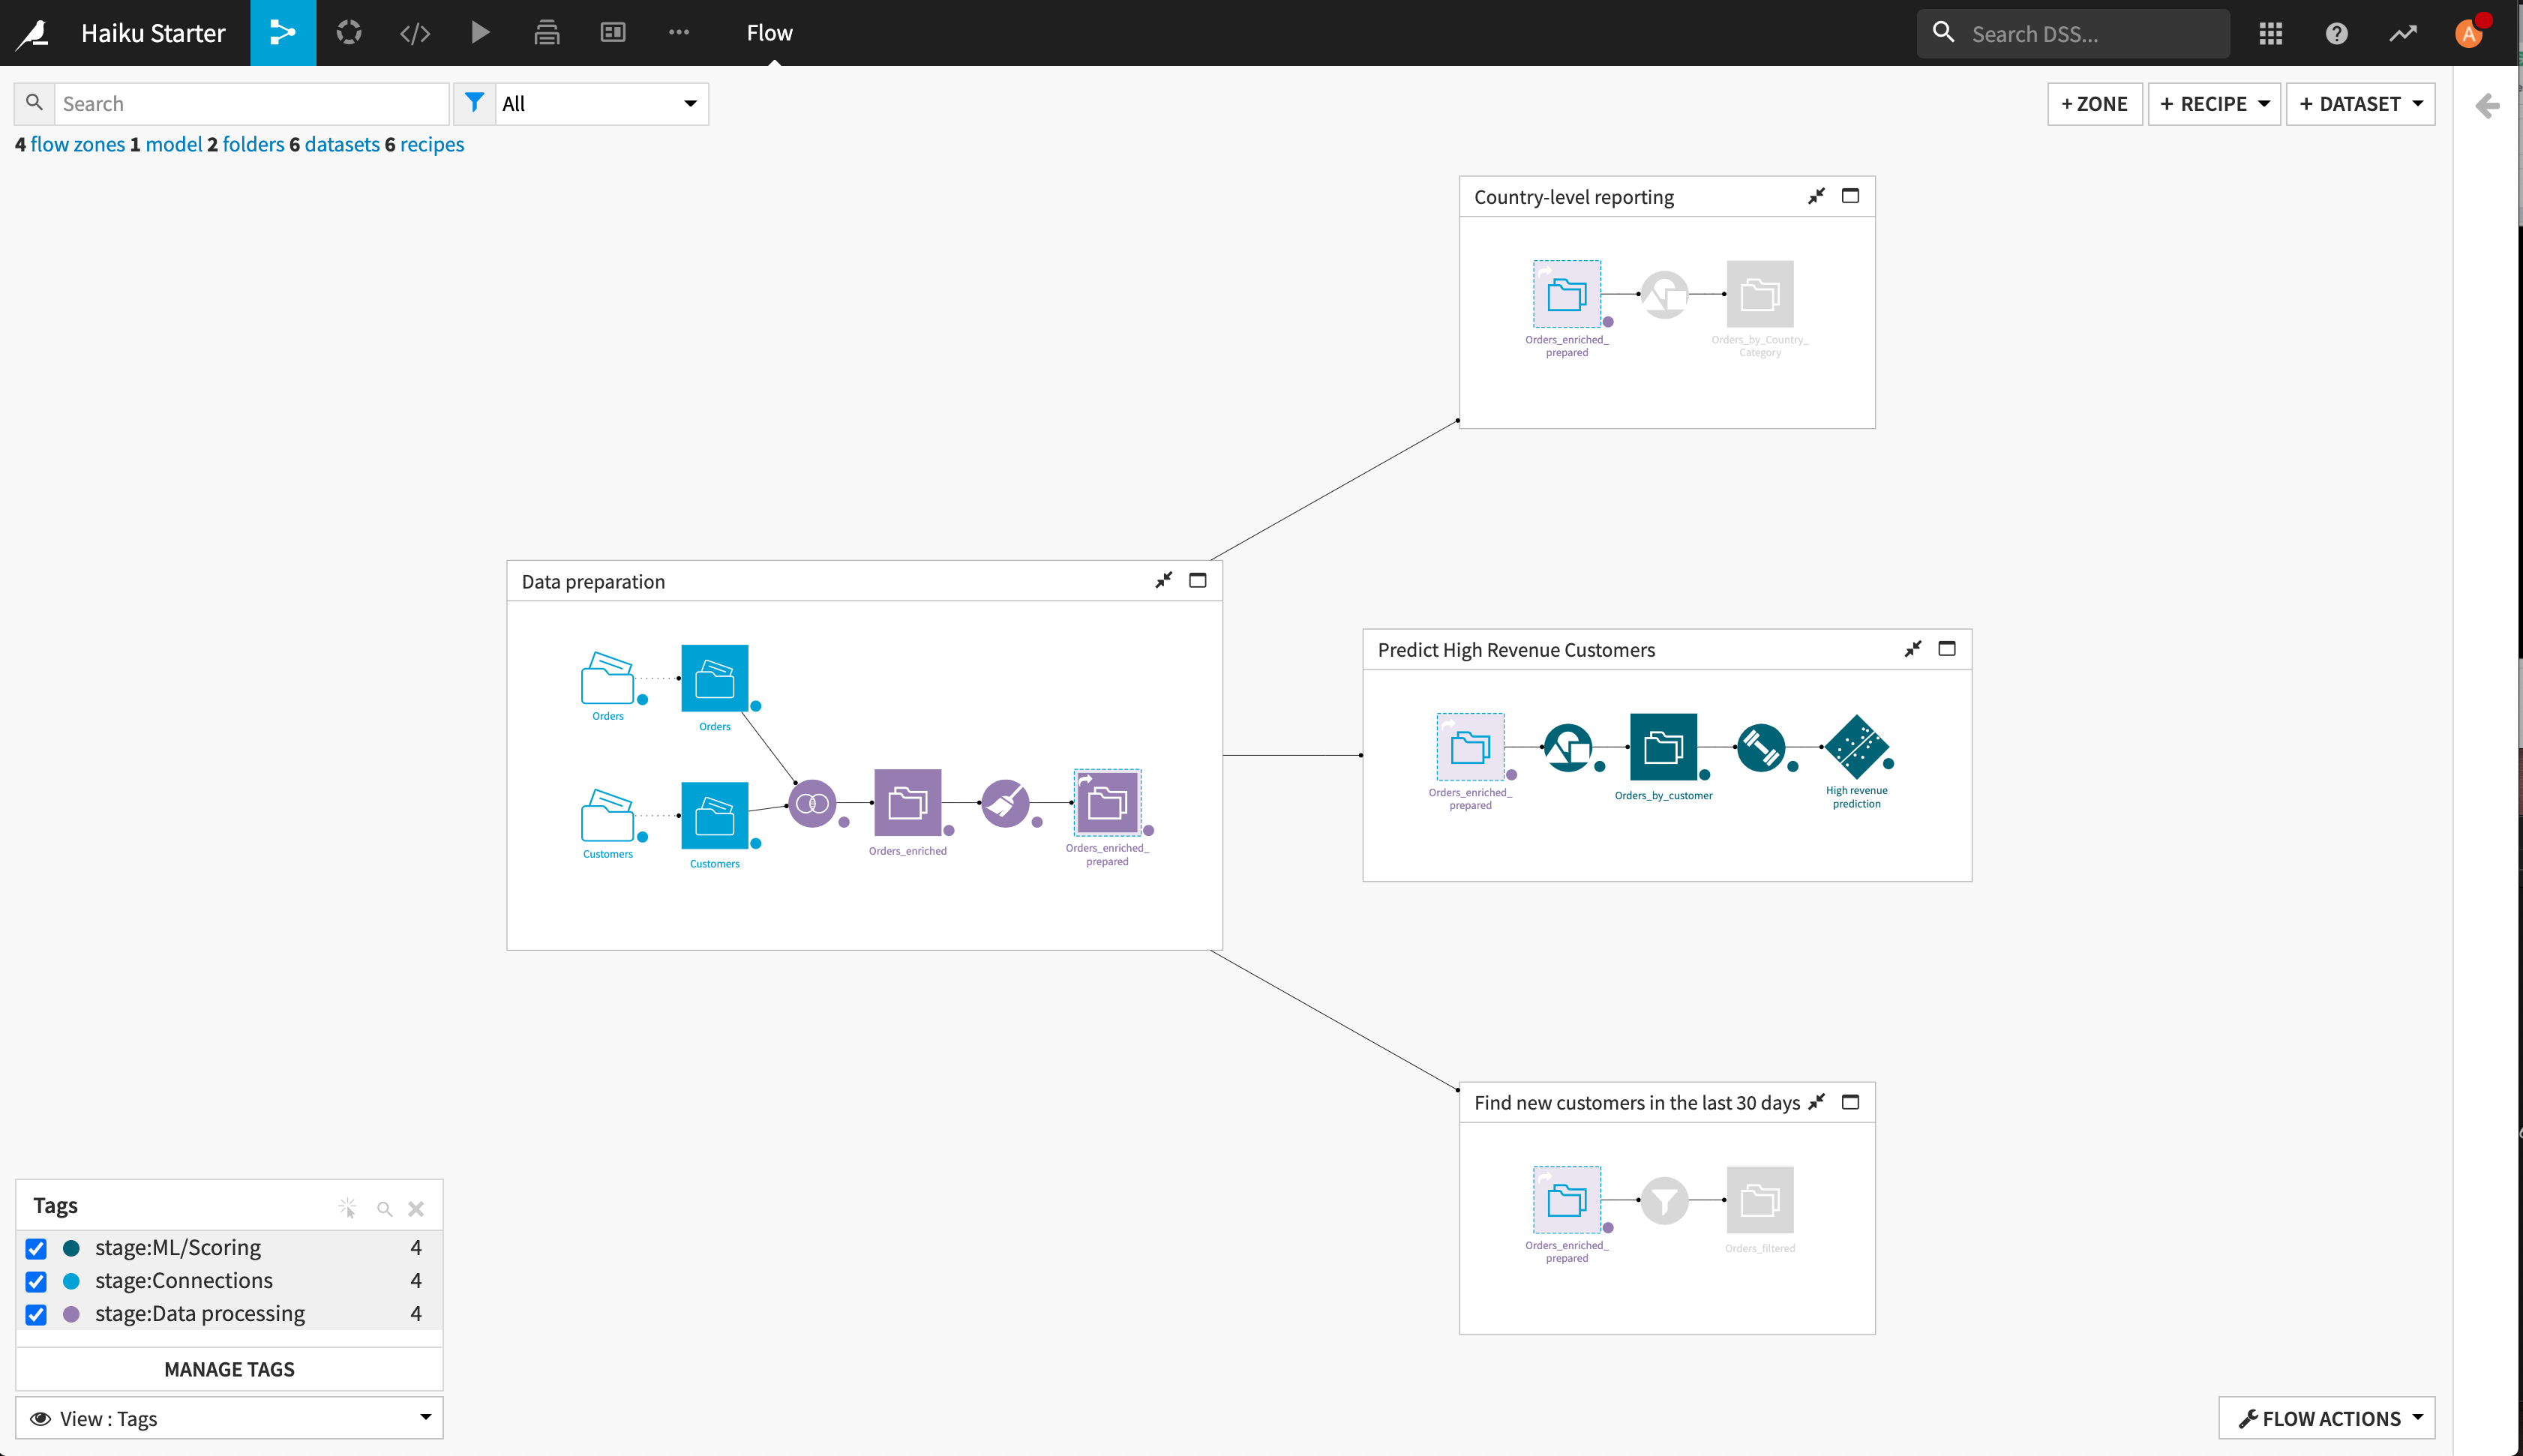
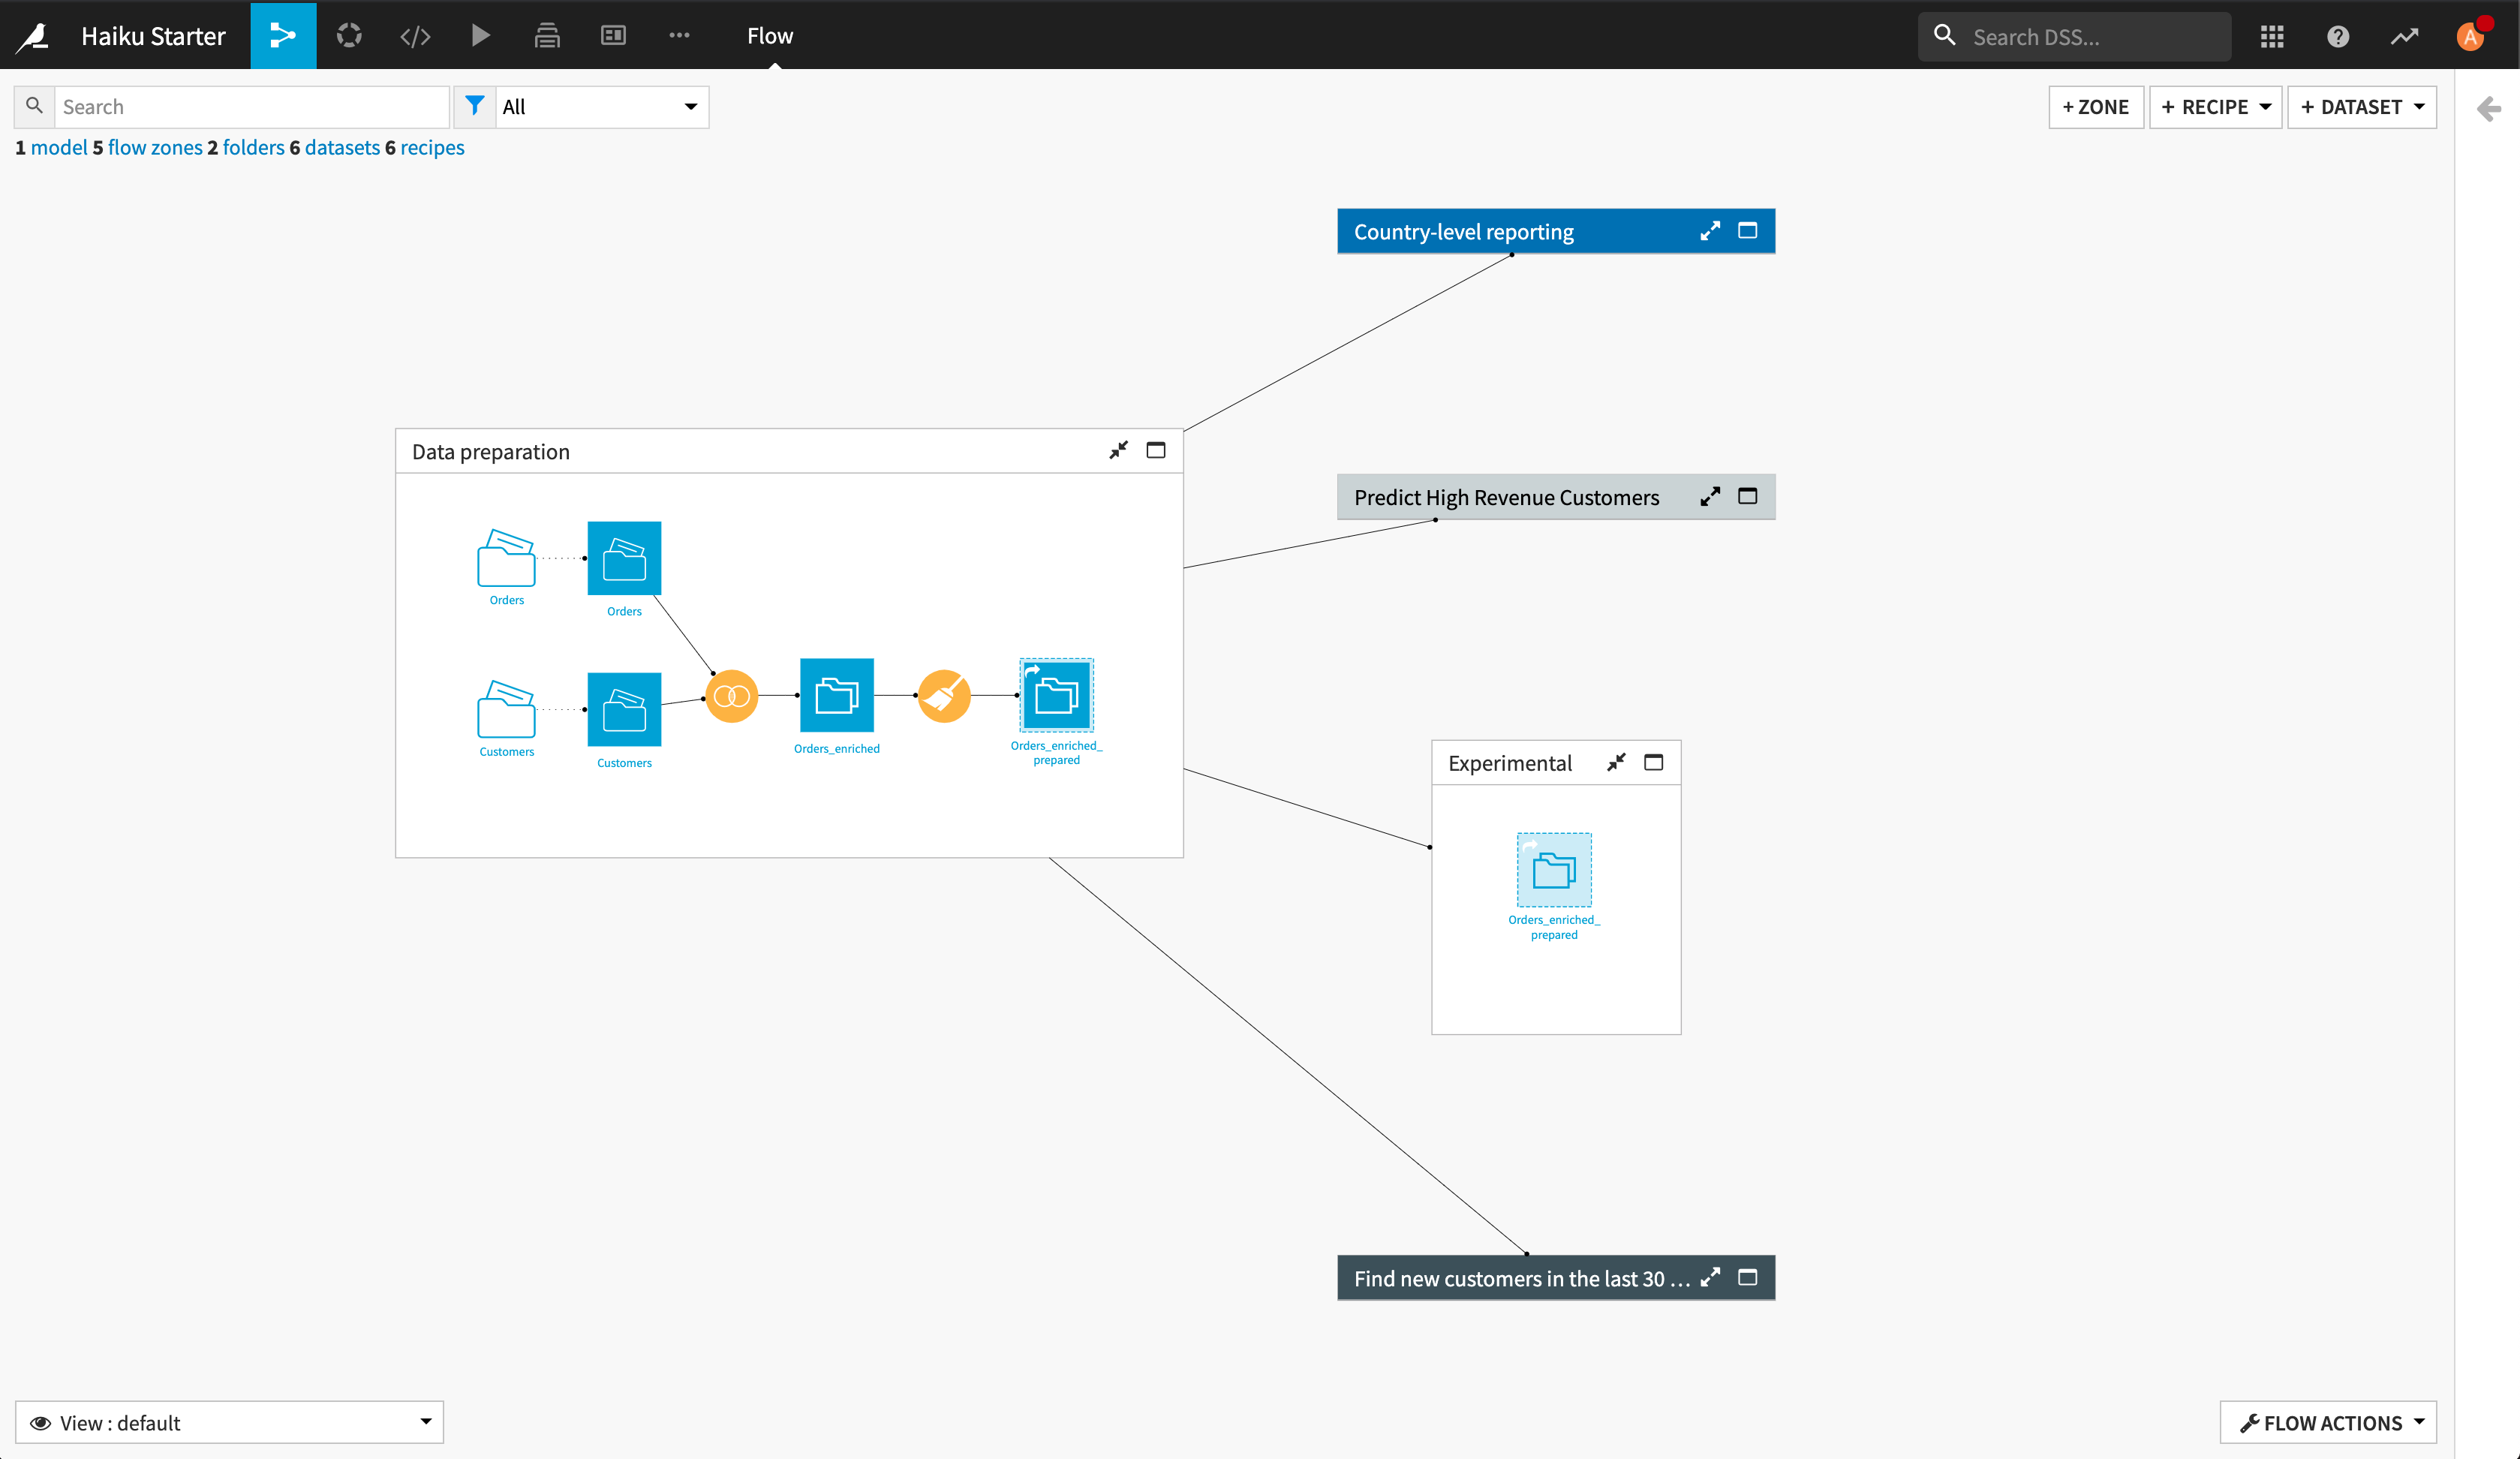
We can immediately see that some of the objects in the flow are not tagged. We can tag them from the Tags view.
Deselect the stage:ML/Scoring and stage:Connections tags.
Select the following objects:
The Orders_by_Country_Category dataset and its parent Group recipe.
The Orders_by_Customer dataset and its parent Group recipe.
The Filter recipe and Orders_filtered dataset.
Right-click, and from the context menu, select Add tag stage: Data processing to selected items.
Now every object is tagged. Note in particular that the Orders_by_customer dataset and its parent Group recipe have two tags applied because they involve data processing as part of a lead-up to a machine learning model.

So far, we have been creating tags on an ad hoc basis. But what happens if another colleague creates their own tags like stage:Inputs, stage:Processing data, stage:Machine Learning? The intent behind these tags is the same as the ones we’ve created, but because the names of the tags are different, it will make discoverability more difficult. Fortunately, we can use tag categories to create common tags across instances.
Tag Categories
Tag categories are an administrative tool to improve governance and consistency. They are set at a global level and apply across the entire instance.
Note
You must have the Administrator general permission on your DSS instance in order to manage tag categories.
Within the admin settings, you can create tag categories and define the tags within the category.
From the application menu, choose Administration.
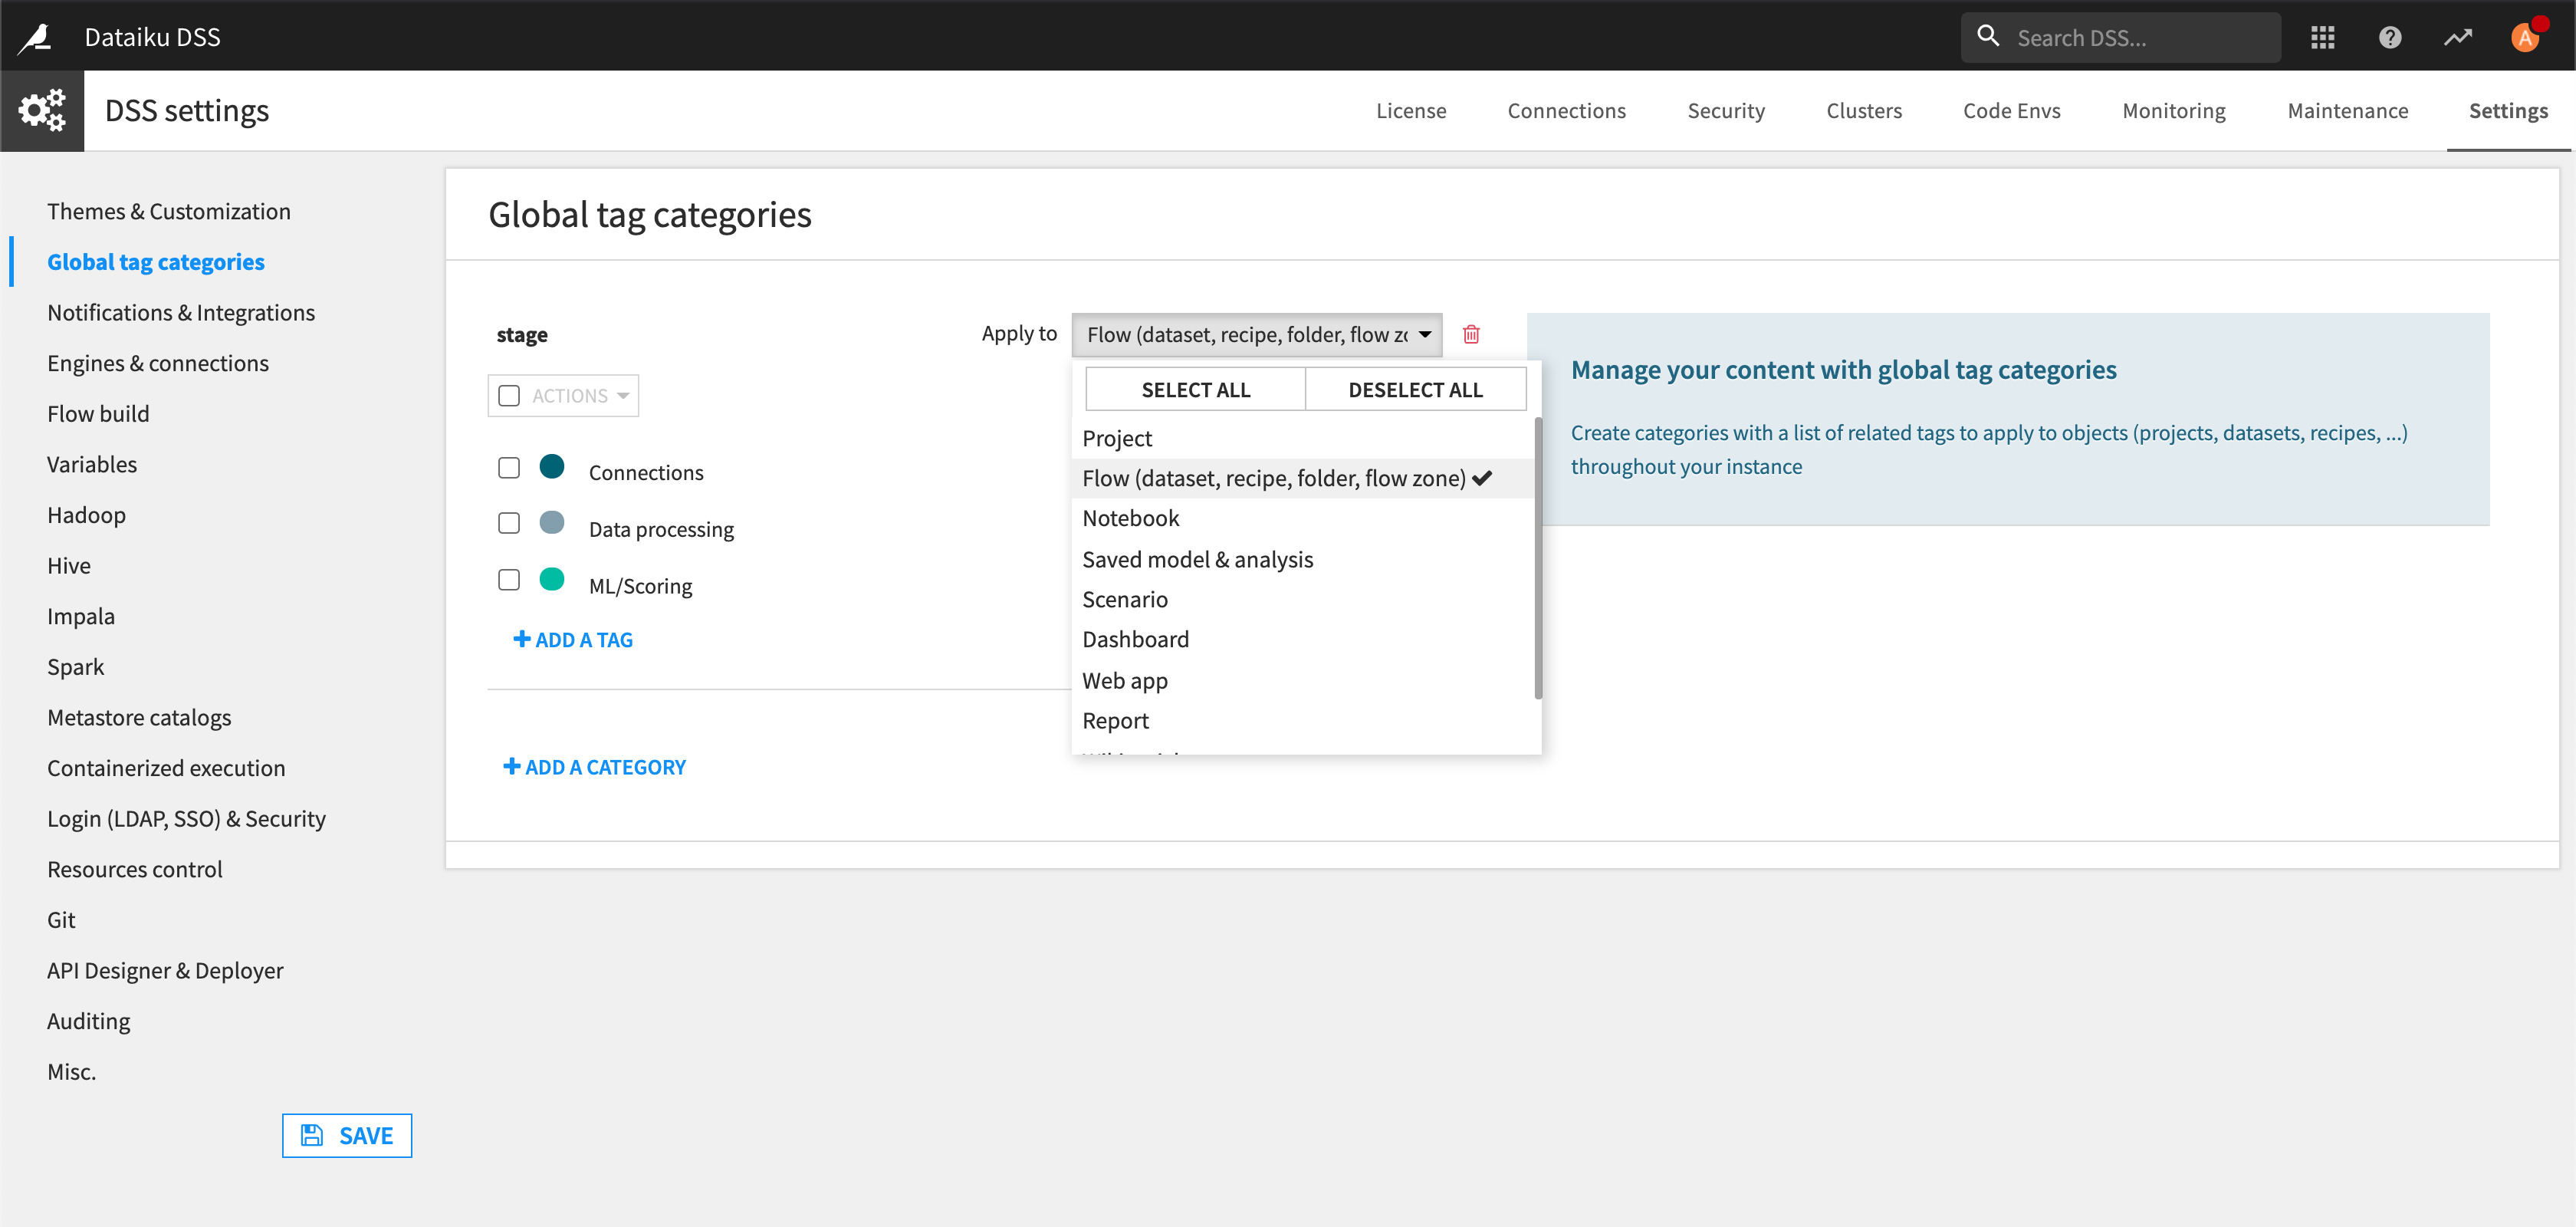
Navigate to Settings > Global tag categories.
Click + Add a Category.
Name the category
stage.Click + Add a Tag and type
Connectionsas the name of the tag.Repeat to create tags
Data processingandML/Scoring.Tag categories can be applied to all Dataiku DSS objects or a subset of them. Choose to apply these categories just to the Flow.
Click Save.
Once created and saved, tags from global tag categories act like any other tag. Return to the Flow to see that the new tag categories have superseded our old tags. This is because of the special format we used to create the tags, <category> + “:” + <tag>, so that when we created category stage with tag Connections, it immediately took the place of stage:Connections.