Classify a Set of Test Images with the Pre-Trained Model
We will use the pre-trained model we just downloaded to classify the images in our Images to classify folder.
To do this, from the + Recipe dropdown, select Deep learning on images (CPU) > Image Classification. In the create recipe dialog, select Images to classify as the Image folder and Pre-trained model (imagenet) as the Model folder. Create a new output dataset called Classification. Click Create Dataset then click Create.
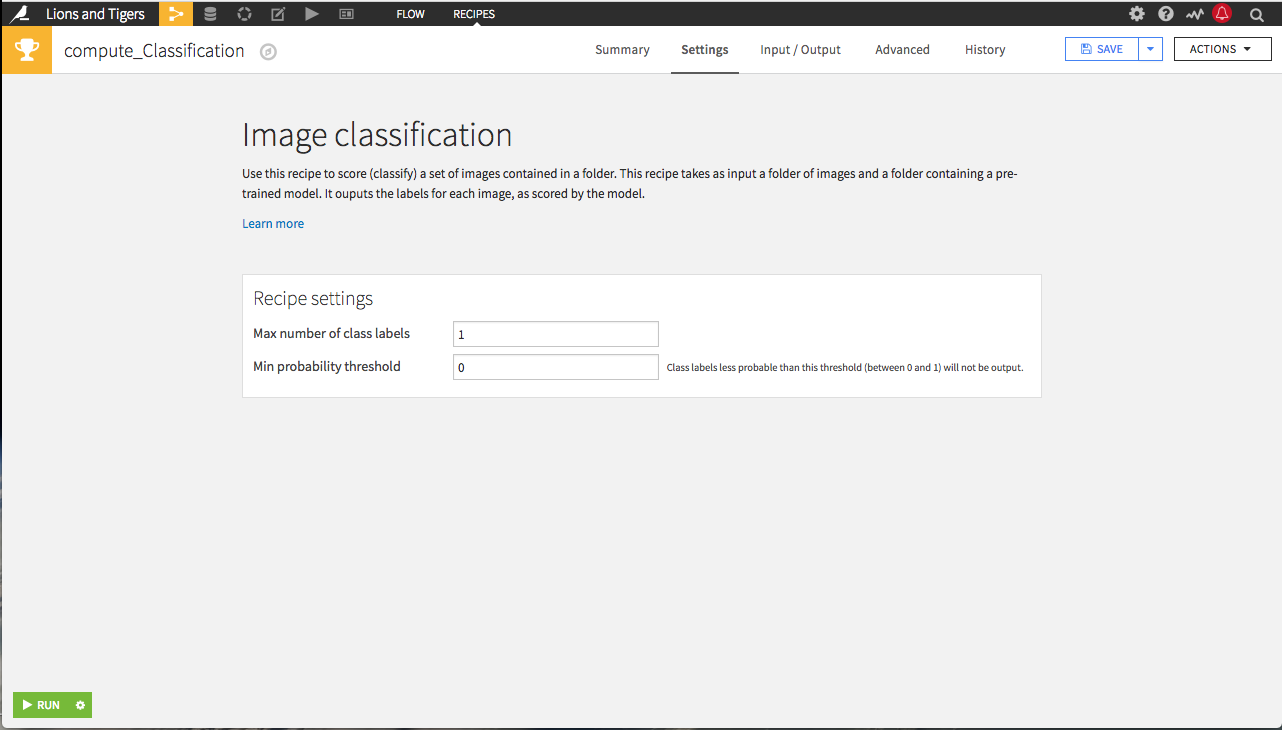
In the Image classification dialog, set the Max number of class labels to 1. We want the model to make a single prediction for each image. Save then run the recipe.

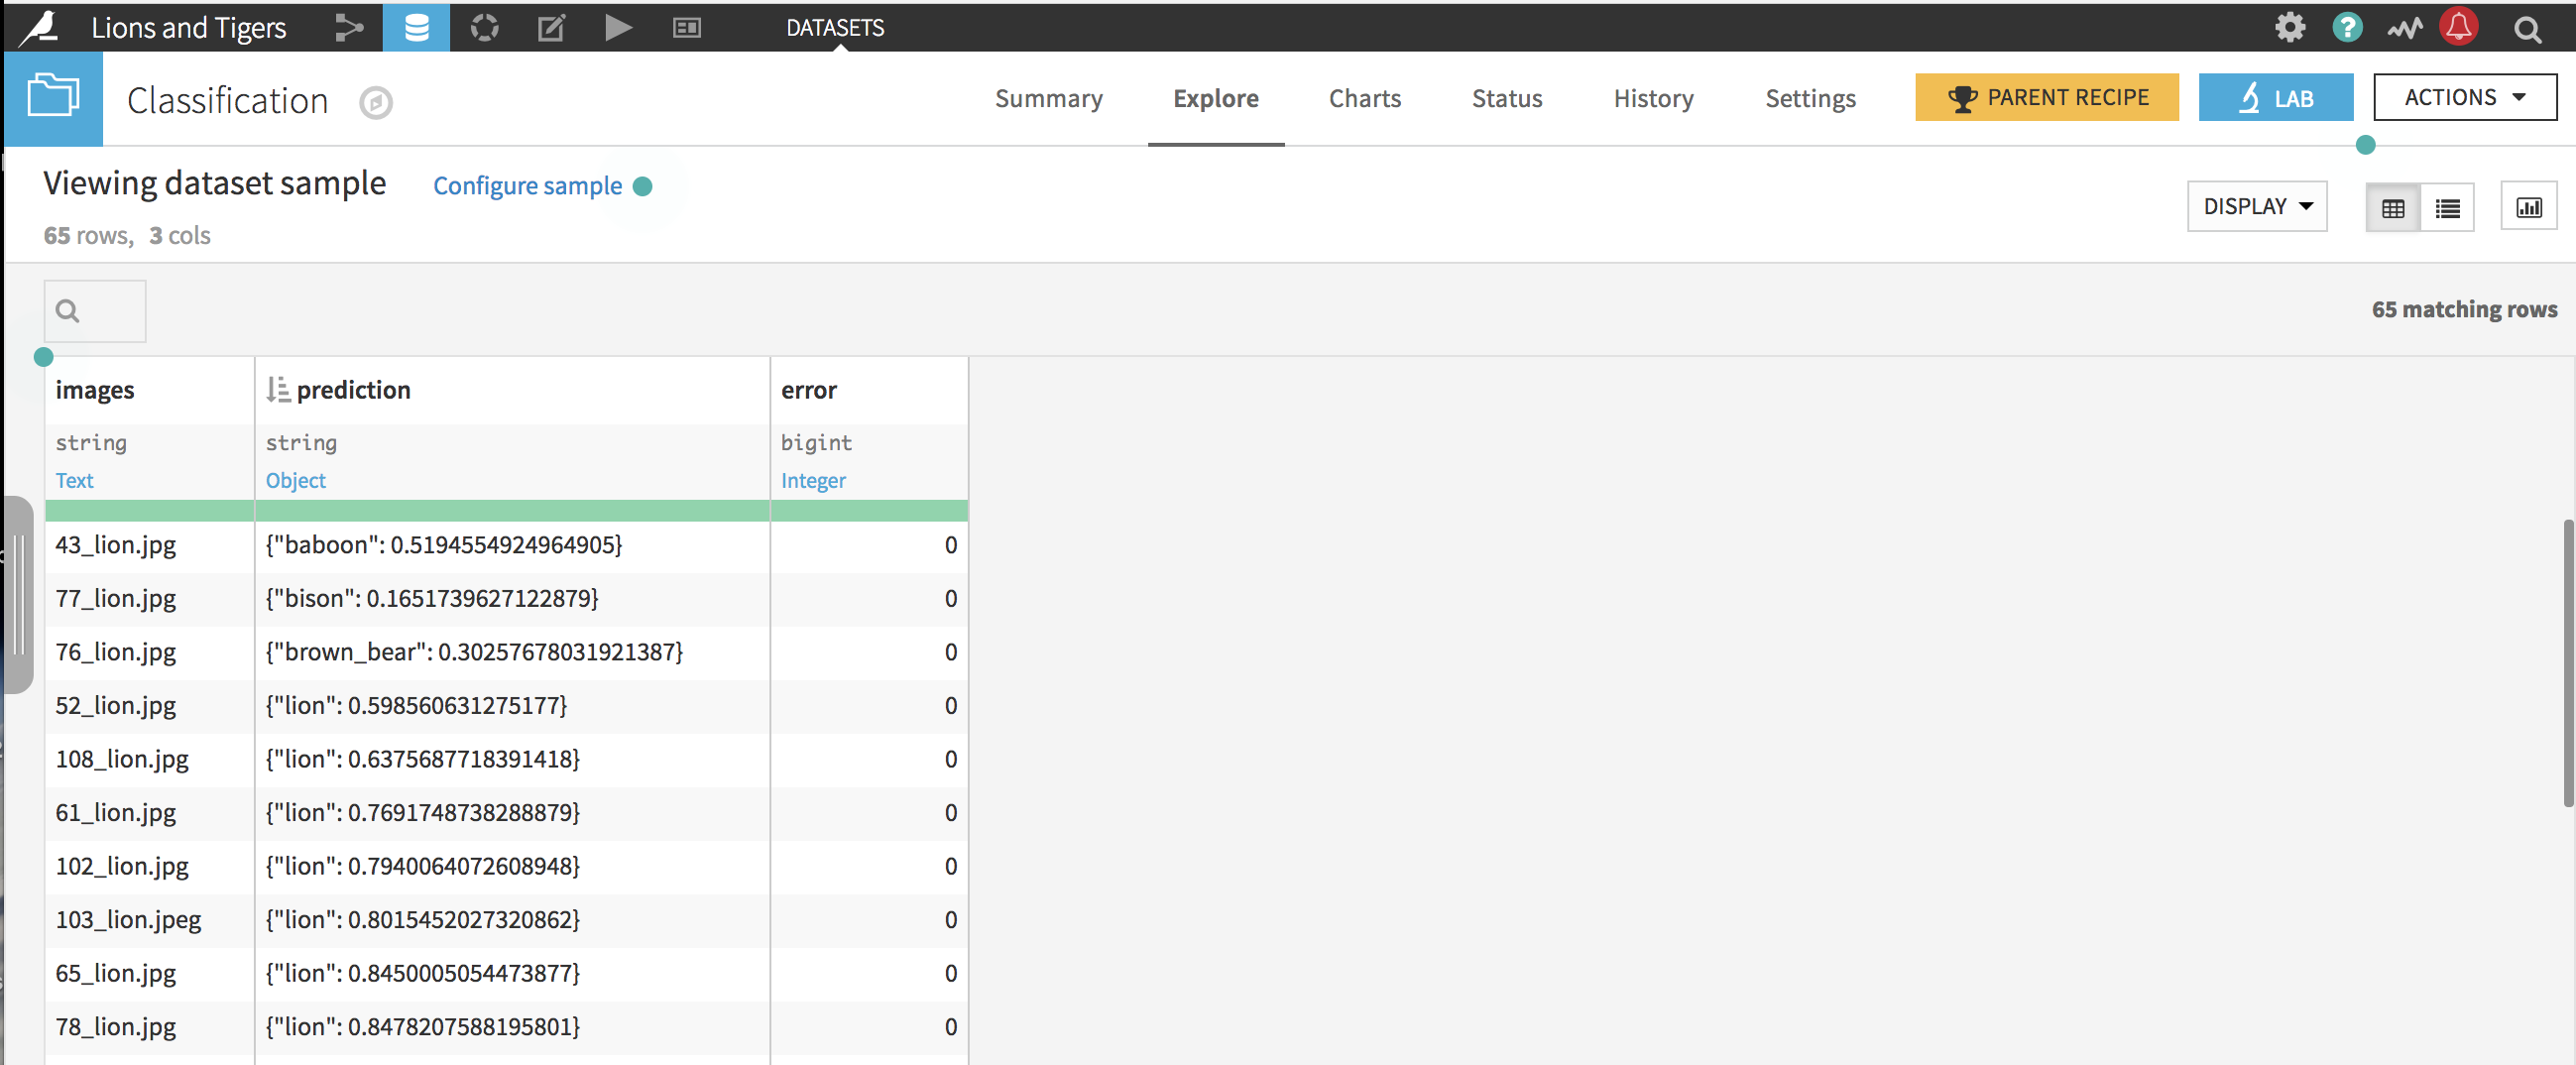
The resulting dataset contains a column with the predictions. Each prediction is a simple JSON with the predicted label and the model-predicted probability that the label is correct.
Manually scanning the predictions to see which are correct is time-consuming and error-prone, so we’ll use a Prepare recipe to find the correct and incorrect classifications.

From the Actions menu of the Classification dataset, select the Prepare recipe. In the recipe creation dialog, rename the output dataset Classification_results, then click Create Recipe.
From the images column dropdown, select More actions > Find and replace…. Type labels as the output column name. Select Regular expression as the matching mode. Type .*_(.*)\..* as the regular expression and $1 as the replacement value.
From the prediction column dropdown, select More actions > Find and replace…. Select Regular expression as the matching mode. Type \{'(.*)'.* as the regular expression and $1 as the replacement value.
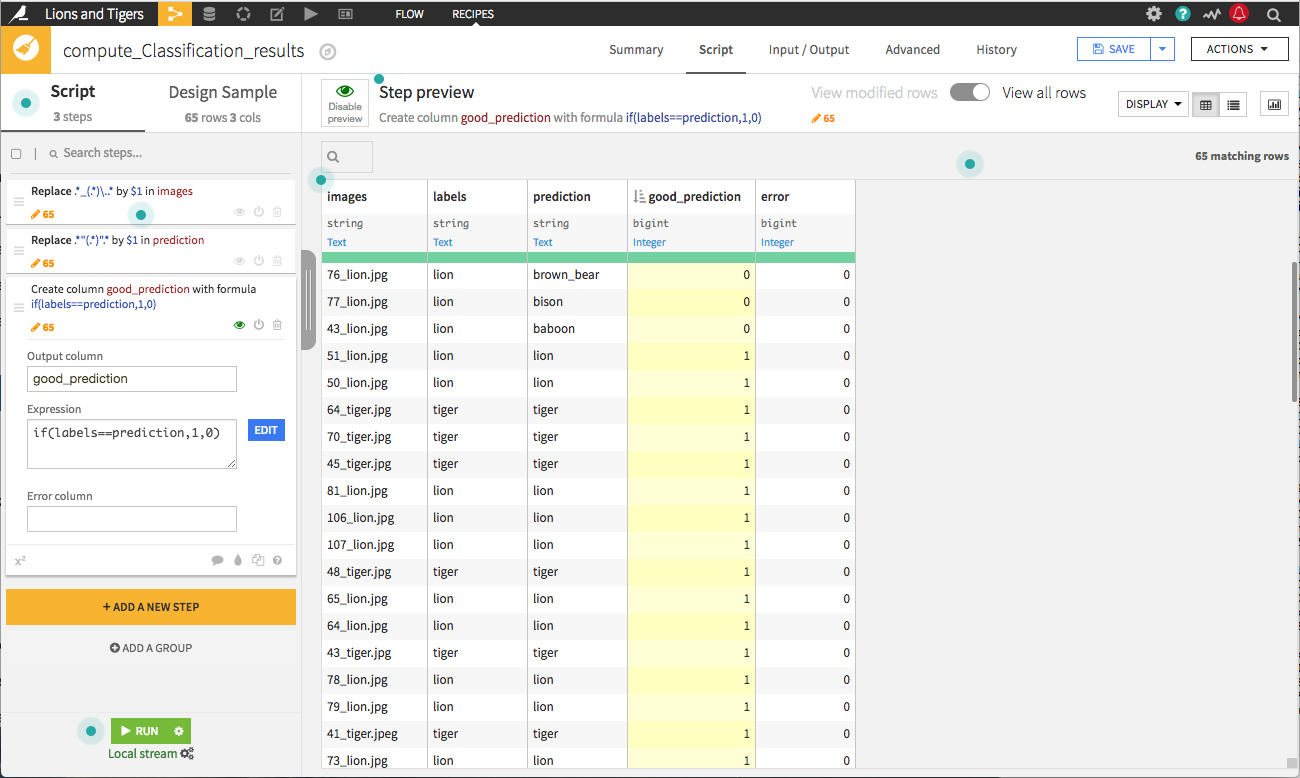
Click Add a New Step and choose Formula from the processors library. Type good_prediction as the name of the output column. Type if(labels==prediction,1,0) as the expression.
Sort the new good_prediction column in ascending order.
Right out of the box, the pre-trained model can classify lions and tigers; however, three lions are misclassified as “brown_bear”, “bison”, and “baboon”.

Finally, click Run to create the output dataset and return to the Flow.
What’s Next
In the Image Classification hands-on lessons, we created a project, prepared our data, installed the deep learning plugins, and classified a set of images using a pre-trained model. In the next hands-on lesson, we’ll use the folder containing our training images, Images for retraining, to improve the pre-trained model with transfer learning.