Hands-On: Transfer Learning to Retrain the Model
In the Image Classification-The Visual Way hands-on lessons, we created a project, prepared our data, installed the deep learning plugins, and classified a set of images using a pre-trained model. Let’s improve the pre-trained model with transfer learning.
To do this, we’ll use the folder containing our training images, Images for retraining.
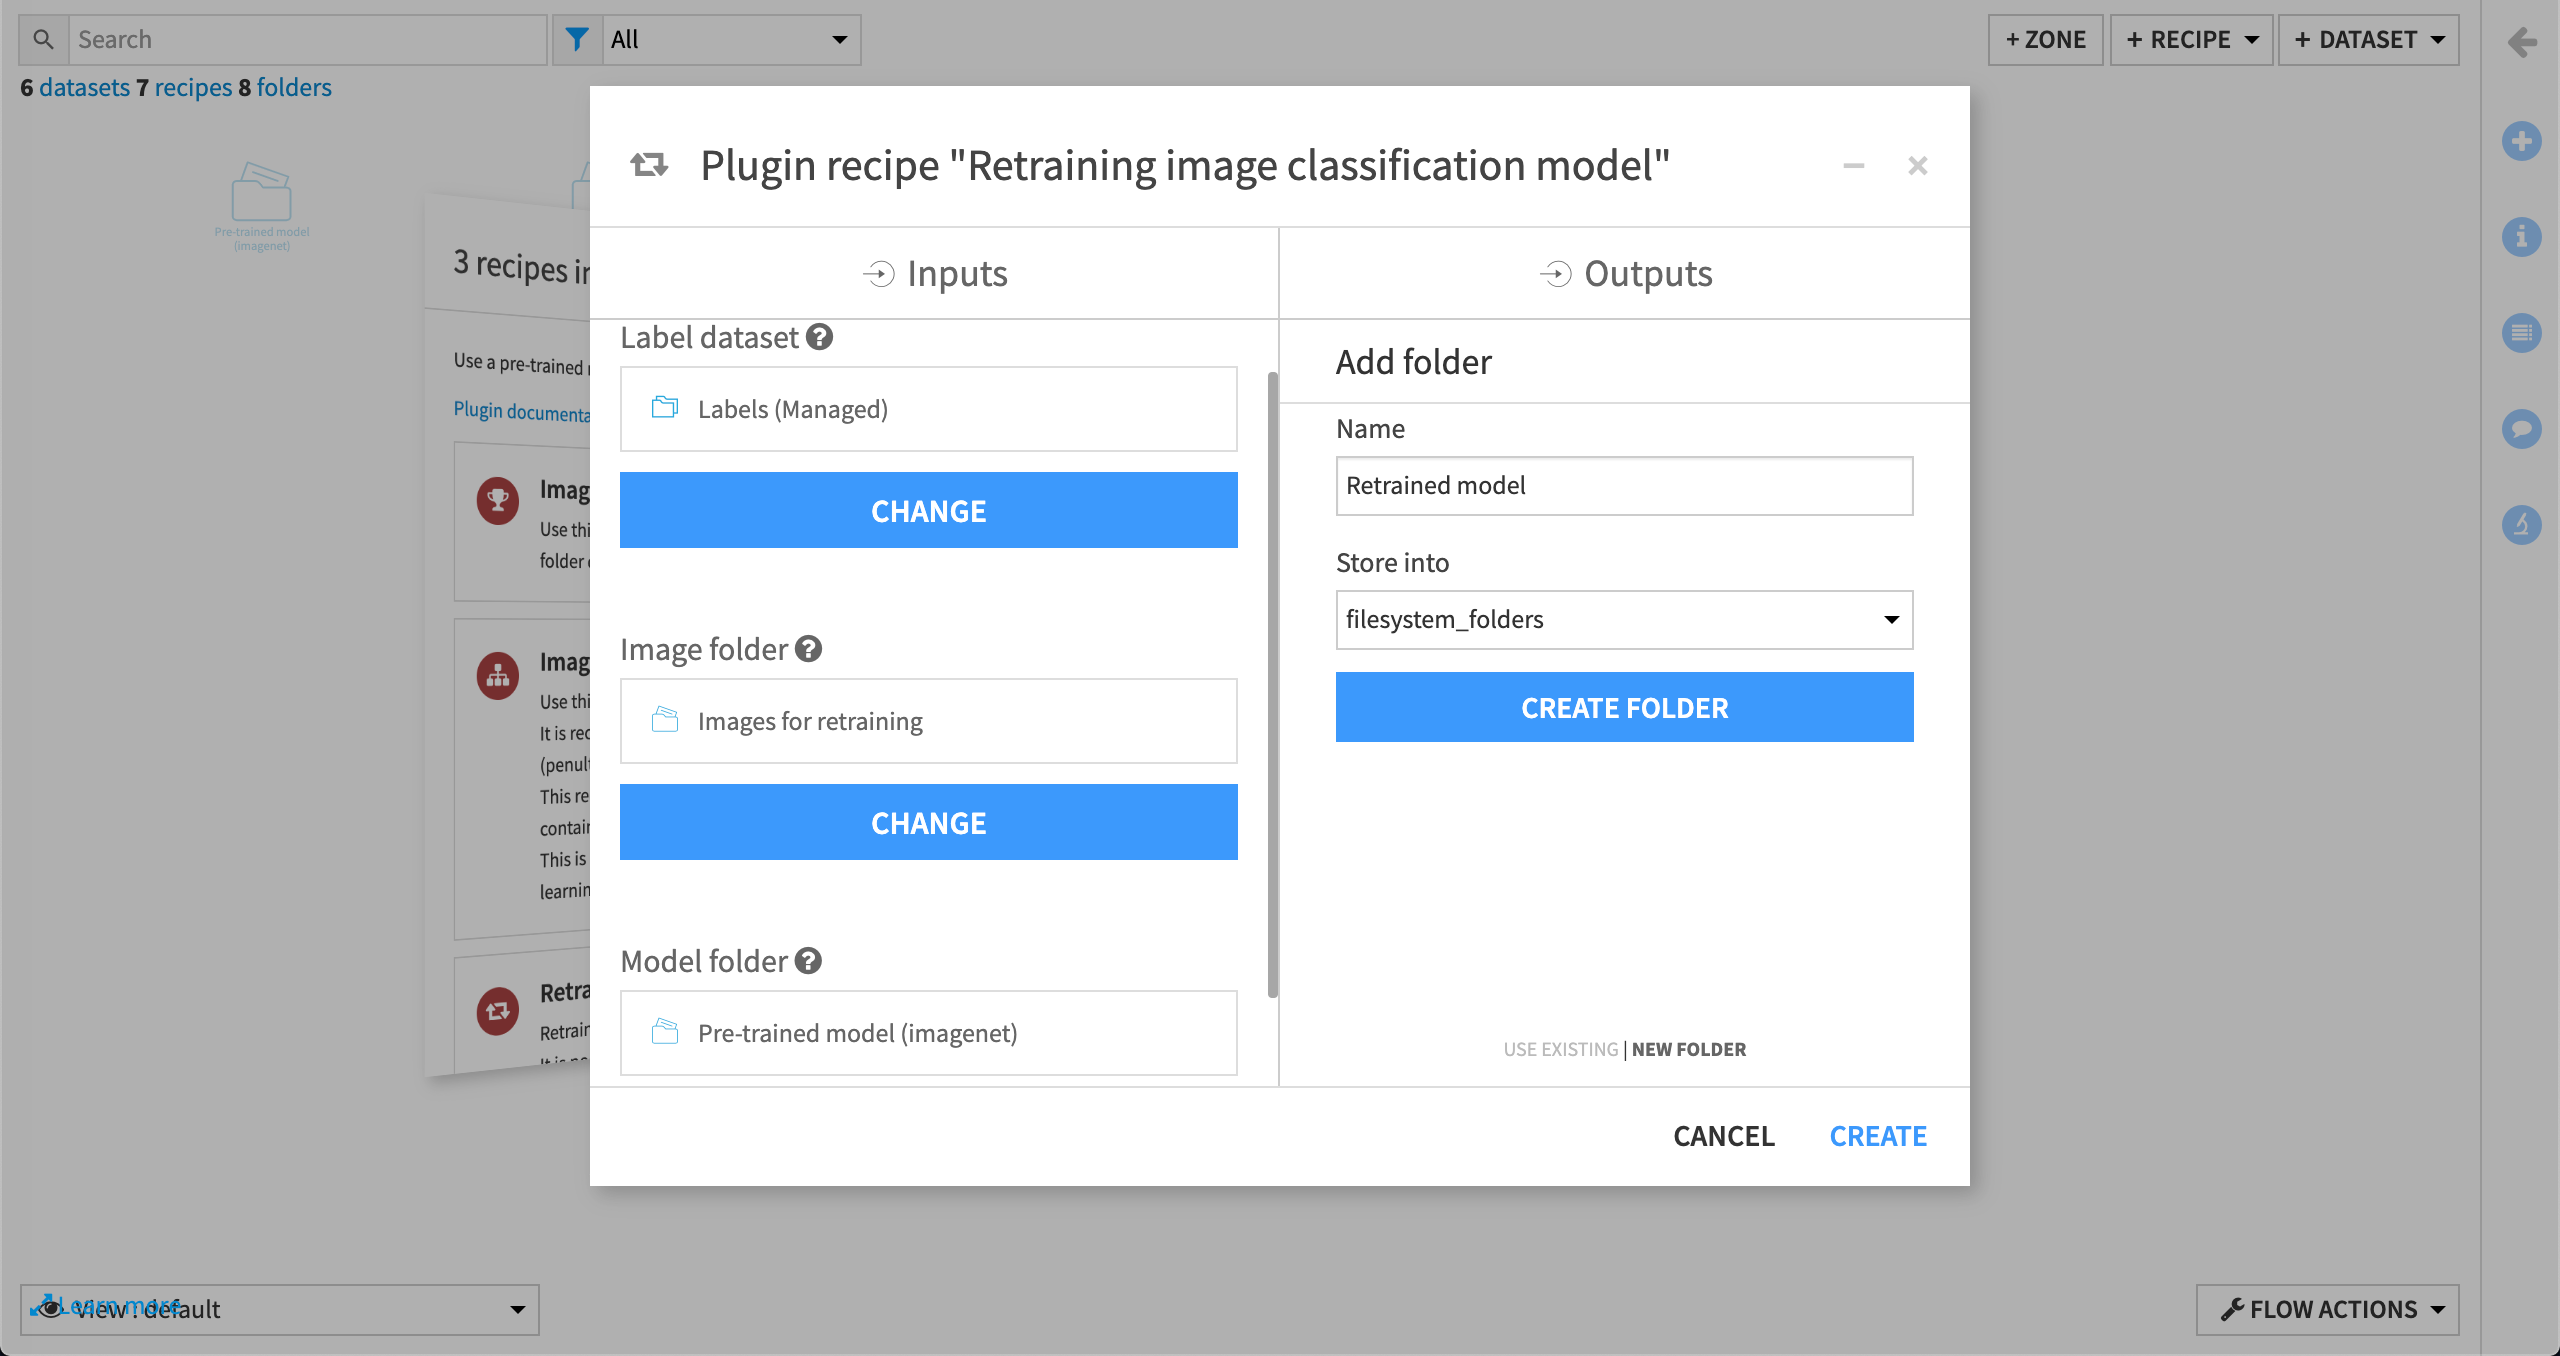
From the + Recipe dropdown, select Deep learning on images (CPU) > Retraining image classification model. In the create recipe dialog, select Labels as the Label dataset, Images for retraining as the Image folder, and Pre-trained model (imagenet) as the model folder. Create a new output folder called Retrained model. Click Create.
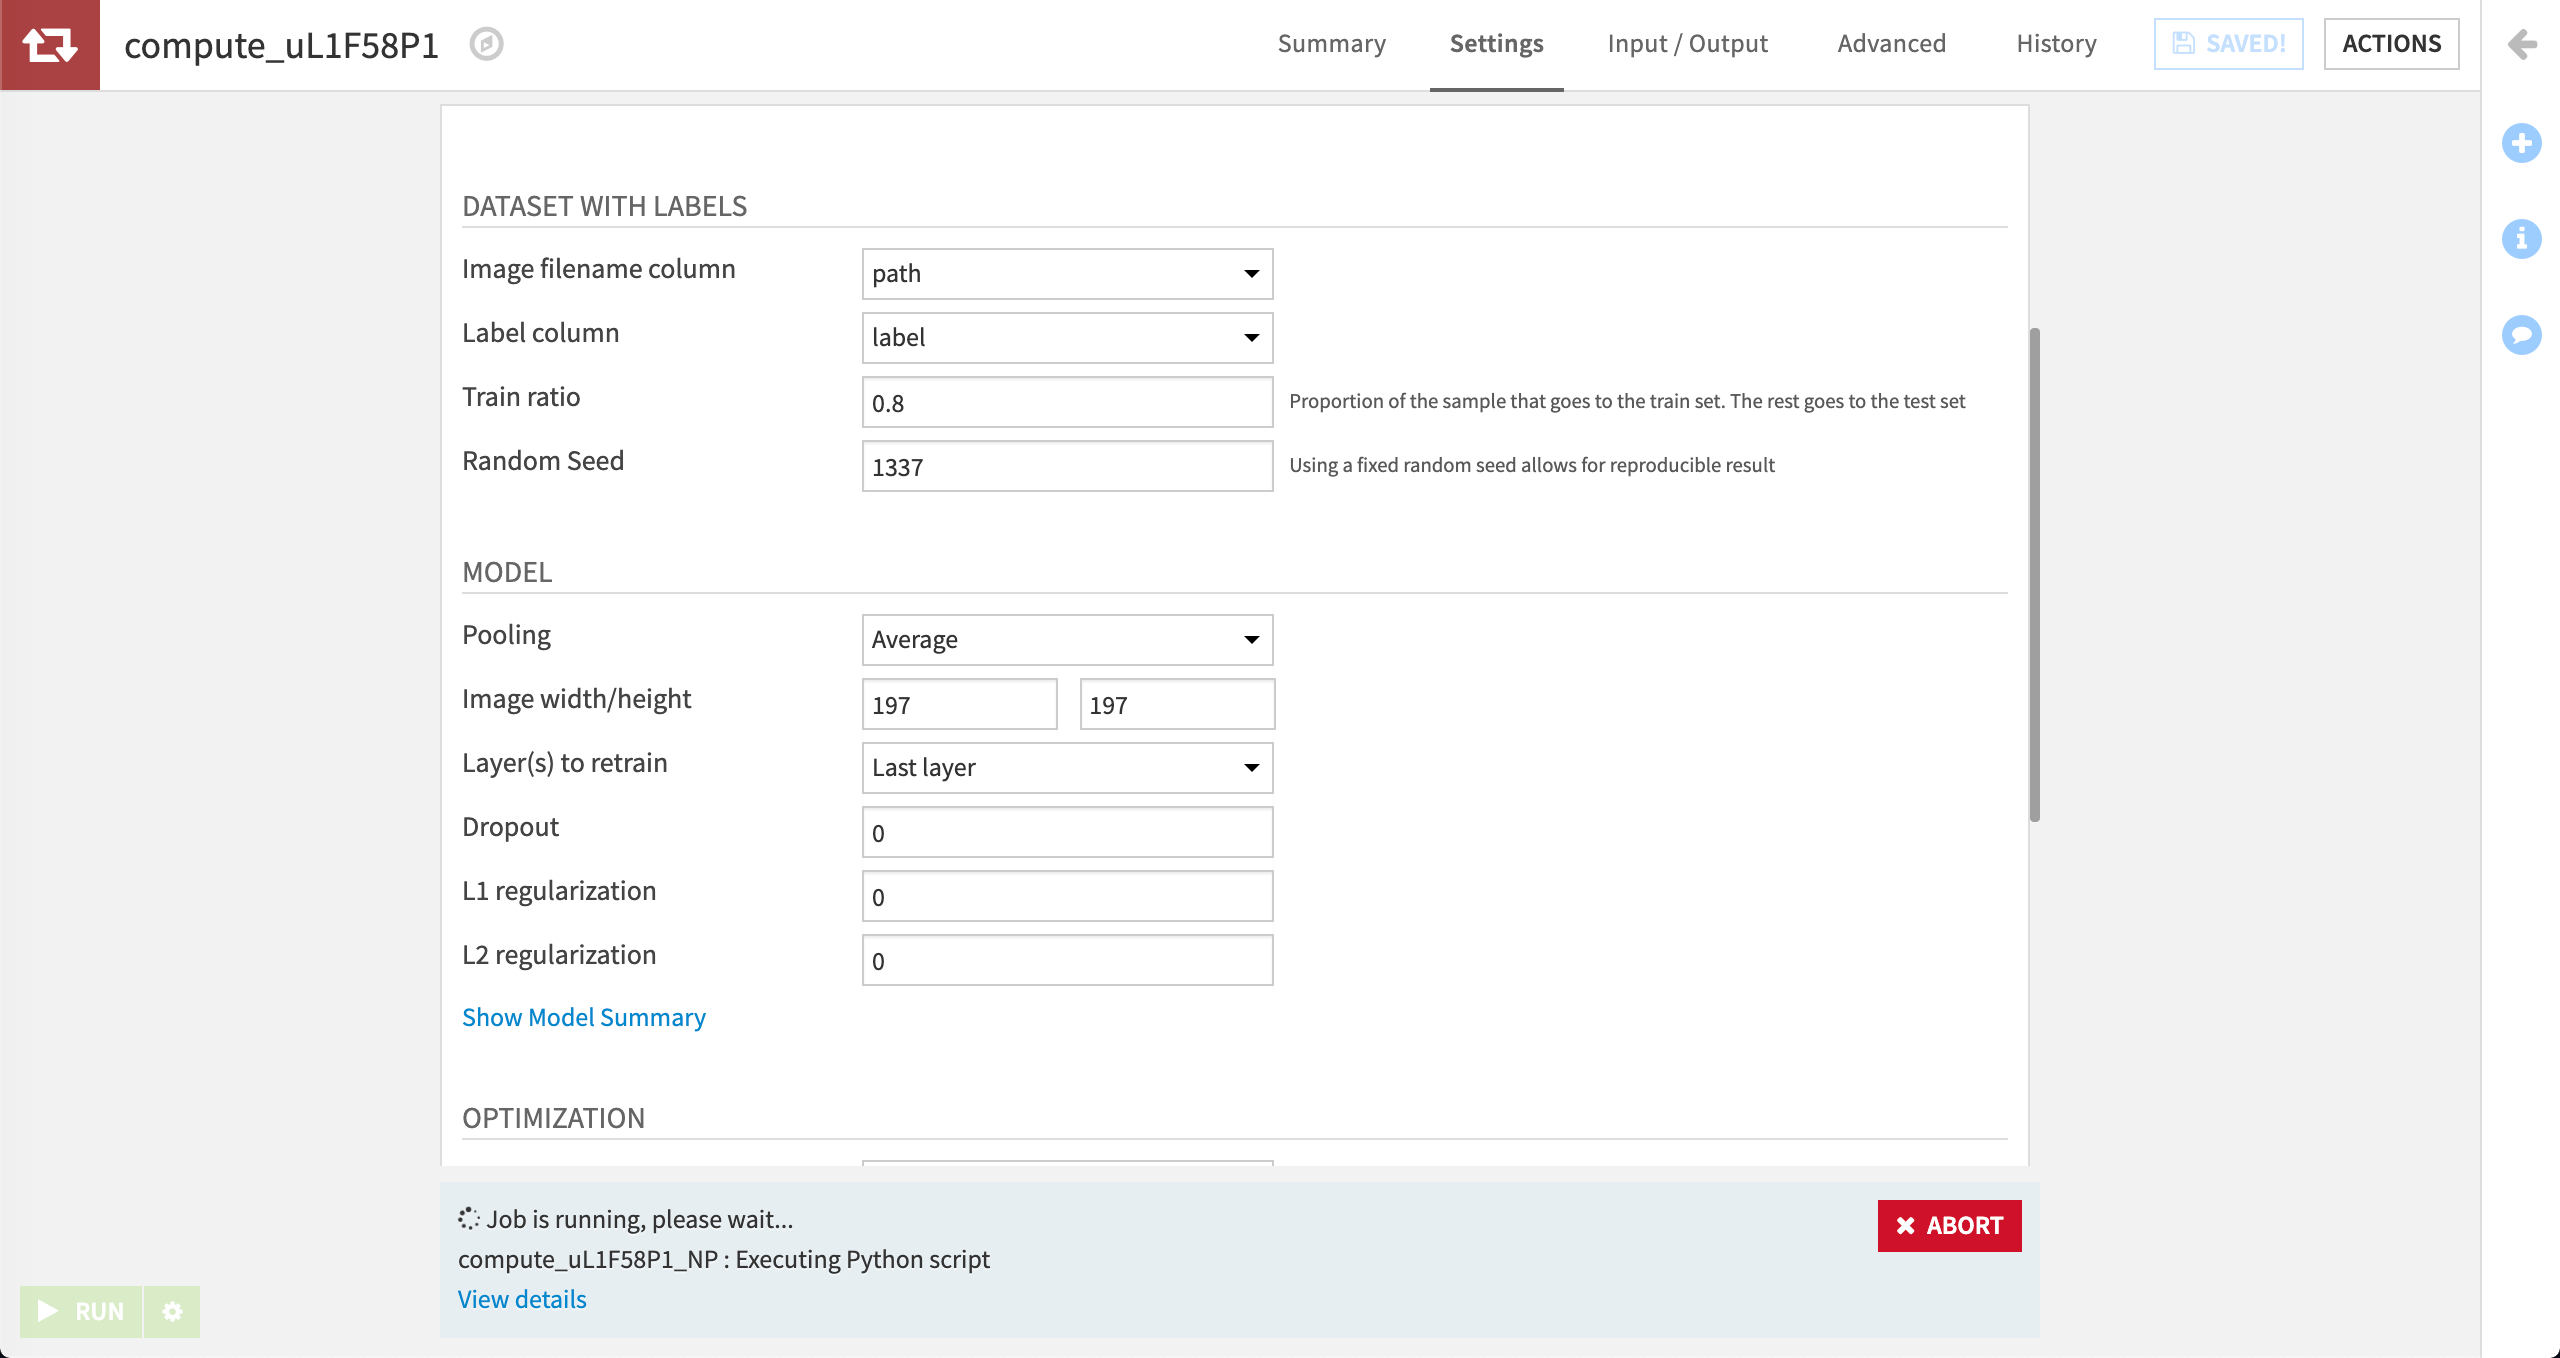
In the Retraining Image Classification Model dialog, set the Image filename column to path, and set the Label column to label. Under Training, reduce Batch Size to 10, Steps per Epoch to 10, and Number of Validation Steps to 5 in order to speed up re-training.
Be sure to select the checkbox, You can access tensorboard via a DSS webapp before saving and running the recipe.
Classification after Transfer Learning
Now let’s use the re-trained model to classify the test set. From the + Recipe dropdown, select Deep learning on images (CPU) > Image classification. In the create recipe dialog, select Images to classify as the Image folder and Retrained model as the Model folder. Create a new output dataset called Classification_after_retrain. Click Create Recipe.
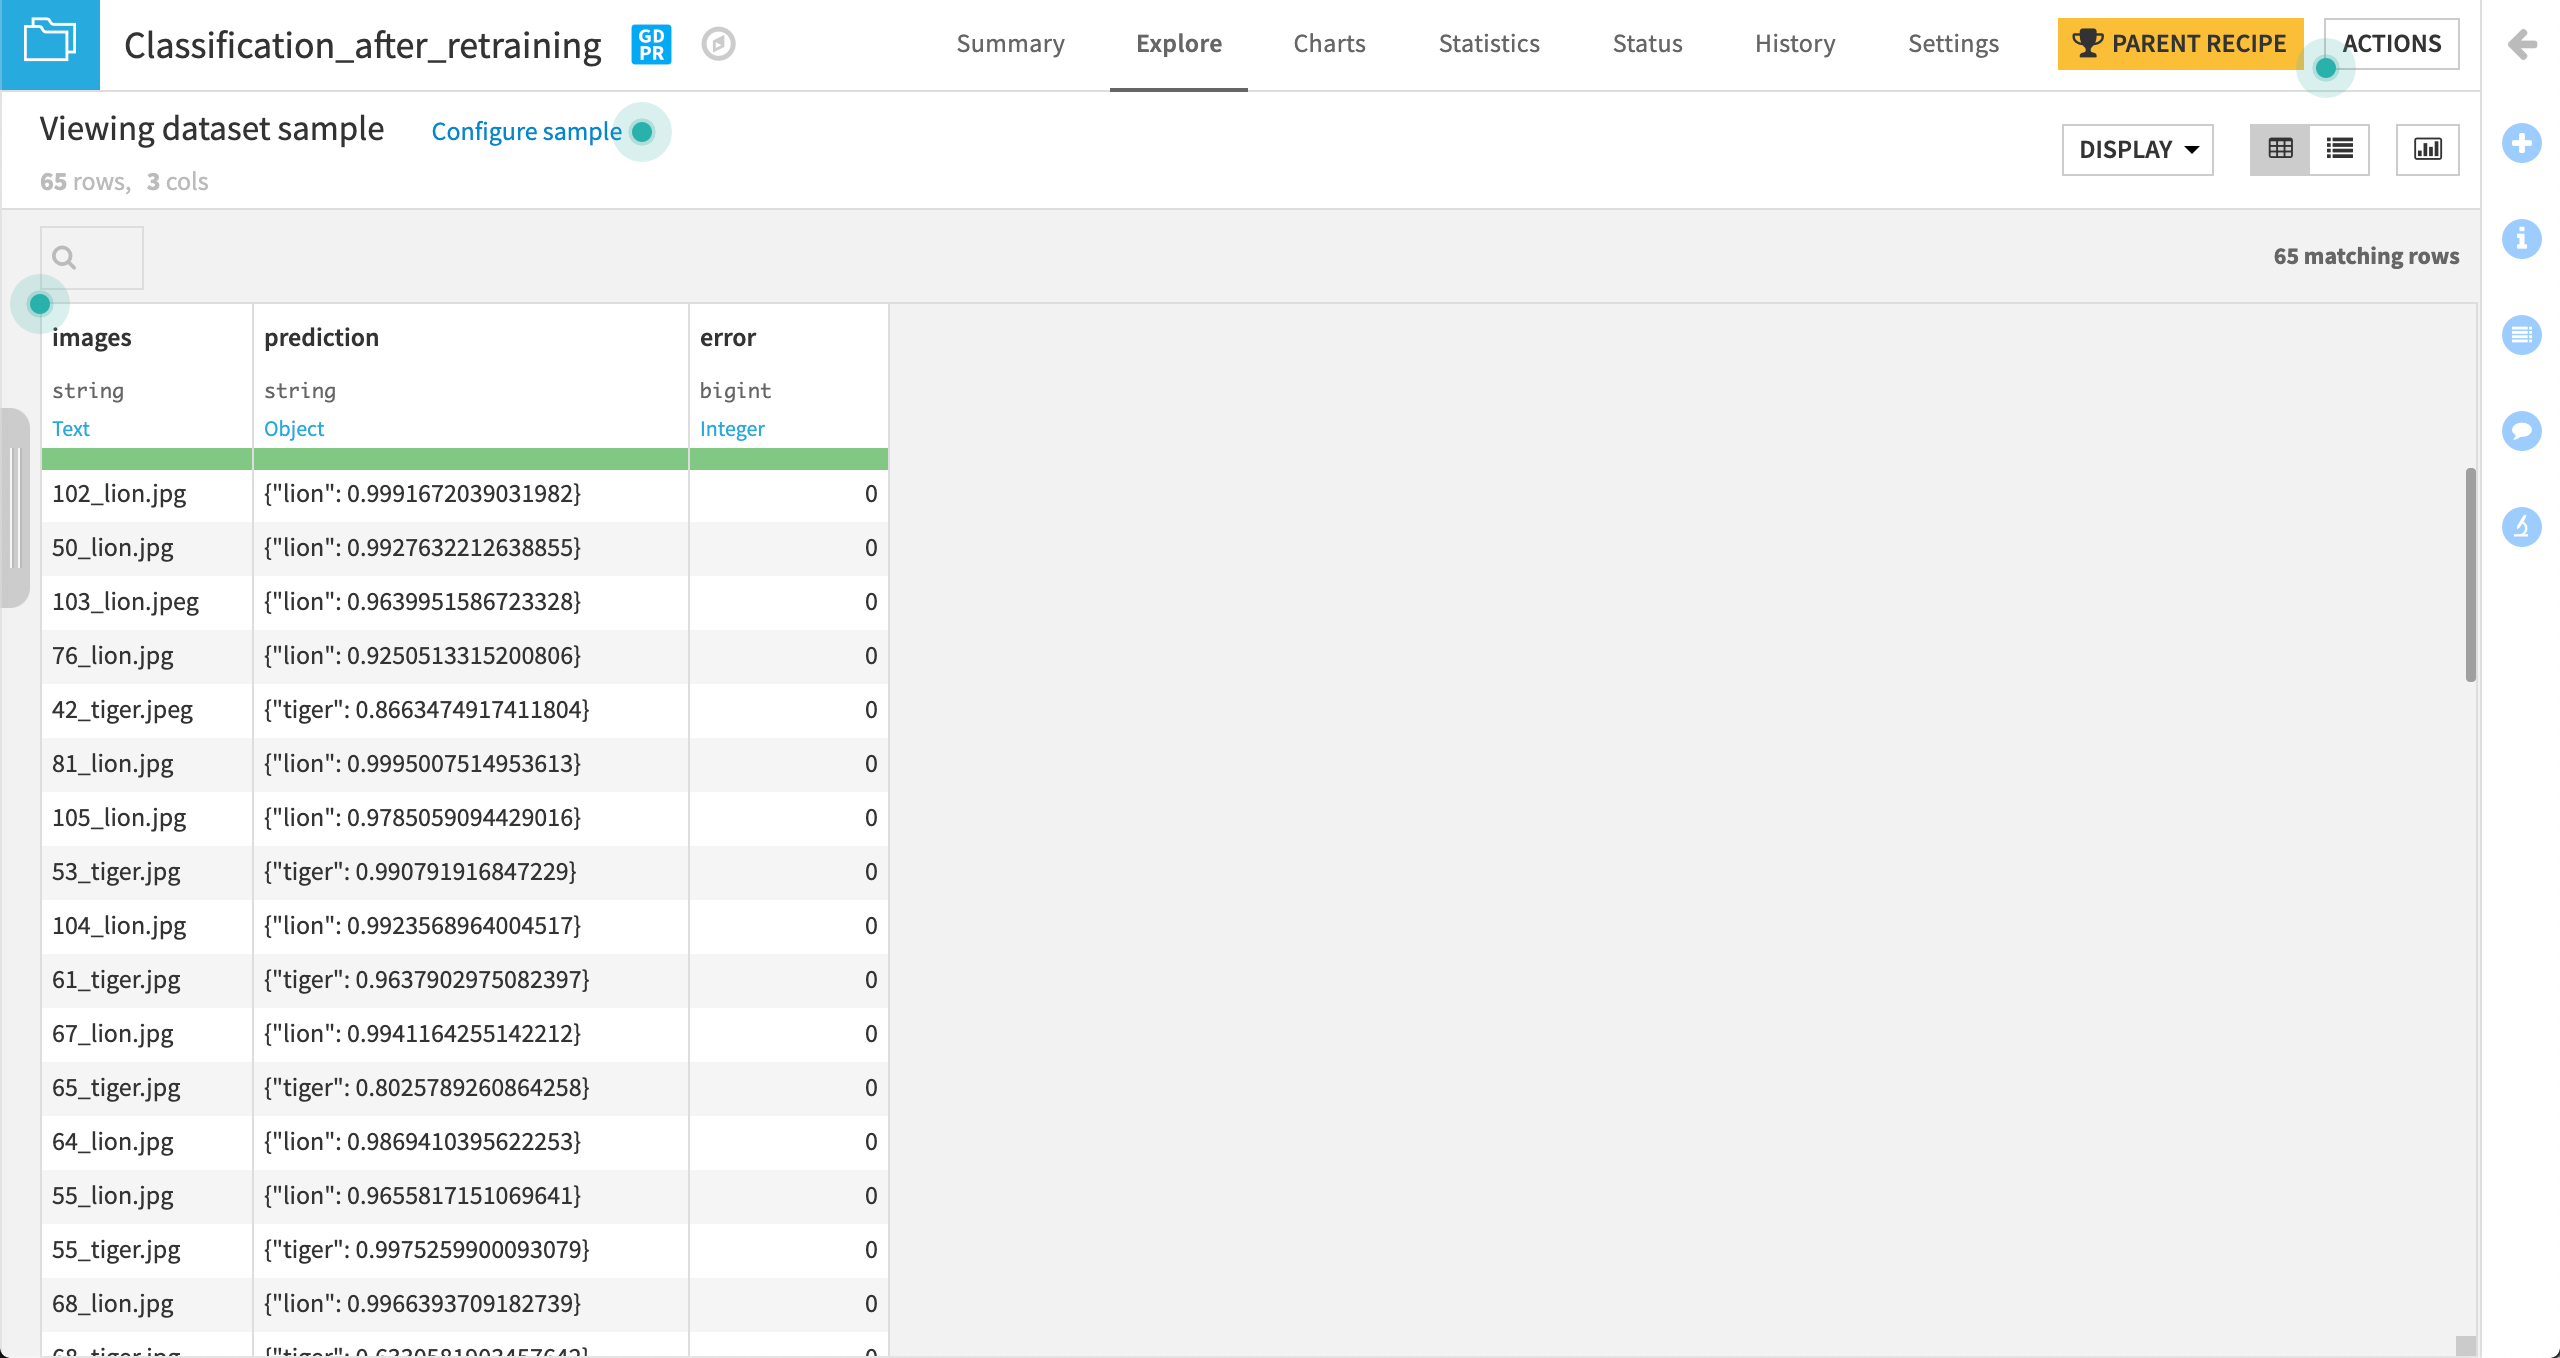
In the Image Classification dialog, set the Max number of class labels to 1. We want the model to make a single prediction for each image. Click Run, and then return to the Flow.
Manually scanning the predictions to see which are correct is time-consuming and error-prone, so we’ll use a Prepare recipe, as we did in a previous lesson, to find the correct and incorrect classifications.
In the Flow, select the Classification_after_retrain dataset and choose Prepare from the actions. In the recipe creation dialog, rename the output dataset Classification_after_retrain_results, then click Create Recipe.
From the images column dropdown, select More actions > Find and replace…. Type labels as the output column name. Select Regular expression as the matching mode. Type .*_(.*)\..* as the regular expression and $1 as the replacement value.
From the prediction column dropdown, select More actions > Find and replace…. Select Regular expression as the matching mode. Type \{'(.*)'.* as the regular expression and $1 as the replacement value.
Click Add a New Step and choose Formula from the processors library. Type good_prediction as the name of the output column. Type if(labels==prediction,1,0) as the expression.
Finally, click Run to create the output dataset and return to the Flow.
Results will vary each time you re-train the model. For example, the re-trained model might mis-classify some of the images. This is caused by using a small re-training dataset and the settings we reduced in order to decrease the re-training time.
What’s next
Now that you’ve classified the images using a pre-trained model and improved the model through transfer learning, you can learn more about the model itself using a web app, Tensorboard. In the next hands-on lesson, you’ll learn how to use the web app component of the plugin to monitor the re-training of your model. This can be particularly useful when using your own model but we can easily apply the concept to the pre-trained model.