Hands-On Tutorial: Deploying to Real-Time Scoring
Dataiku allows you to deploy predictive models for real-time scoring using its Dataiku API node.
Let’s Get Started!
In this tutorial, you will learn how to:
package an API service, which includes a model, for deployment;
deploy a service to the real-time scoring environment;
version service packages.
Note
We will work with the fictional retailer Haiku T-Shirt’s data. You can follow along with the instructions and screenshots. There are also short videos recapping the steps at the end of each section.
Prerequisites
This tutorial assumes that:
You have completed the Automation Quick Start tutorial (or at least have knowledge of metrics, checks, and scenarios).
You have access to a:
Dataiku Design node,
In addition, we assume that the Design node is connected to the API Deployer node, and the API Deployer node has a static infrastructure defined over the API node.
Create Your Project
You can use the completed project from the Automation Quick Start tutorial or the Flow Deployment tutorial.
Alternatively, you can create a new project at the same point:
From the homepage of your Design node, click +New Project > DSS Tutorials > Automation > Deployment (Tutorial).
Need Help Creating the Project?
Note
You can also download the starter project from this website and import it as a zip file.
For the purposes of this tutorial, the model is complete, and we simply need to package the model and deploy it to the API Scoring node.
Create an API Service and Package a Model
API services are defined in one or more Design or Automation nodes and pushed to the Dataiku API Deployer, which in turn deploys the services to (possibly many) Dataiku API nodes, which are individual servers that do the actual job of answering REST calls.
In this section, we are going to define a scoring service on a Design node.
In the next section, we will use the API Deployer node to deploy and activate it on an API Node.
Note
A Dataiku API Service consists of one or more endpoints, e.g. URIs to which HTTP requests are posted, and from which a response is thus expected. For example, getting a prediction score is accessible from an endpoint in a specific service.
Dataiku provides easy creation of such endpoints on Dataiku models (i.e. built in a Dataiku visual analysis), or on models generated with custom code.
A Dataiku Model is more than just a machine learning algorithm. It includes the entire pipeline starting from raw data, through cleansing of the visual preparation and feature preprocessing, and finally to the model scoring.
In order to be used in an API endpoint, a visual model needs to be deployed to the Flow.
Let’s start the actual work on the definition of the prediction service.
From the project Flow on the Design Node, select the High revenue prediction model, and click Create API.
In the “New scoring API from model” dialog, name the API service
Tutorial_Deployment, and name the endpointHigh_Revenue_Customers.Click Append.

Explore the Endpoint
The model for predicting whether a customer will become high-revenue is now part of the Tutorial_Deployment service and ready to be used. Before we package the service, let’s explore the endpoint a bit.
Note
Enrichments are used for feature enrichment using a lookup on an additional table. This is useful when the model includes features that might not be available to the client making an API request. For example, say our model incorporated information about demographic and economic indicators for the country a customer comes from. We would then want to do some real-time enrichment of the query.
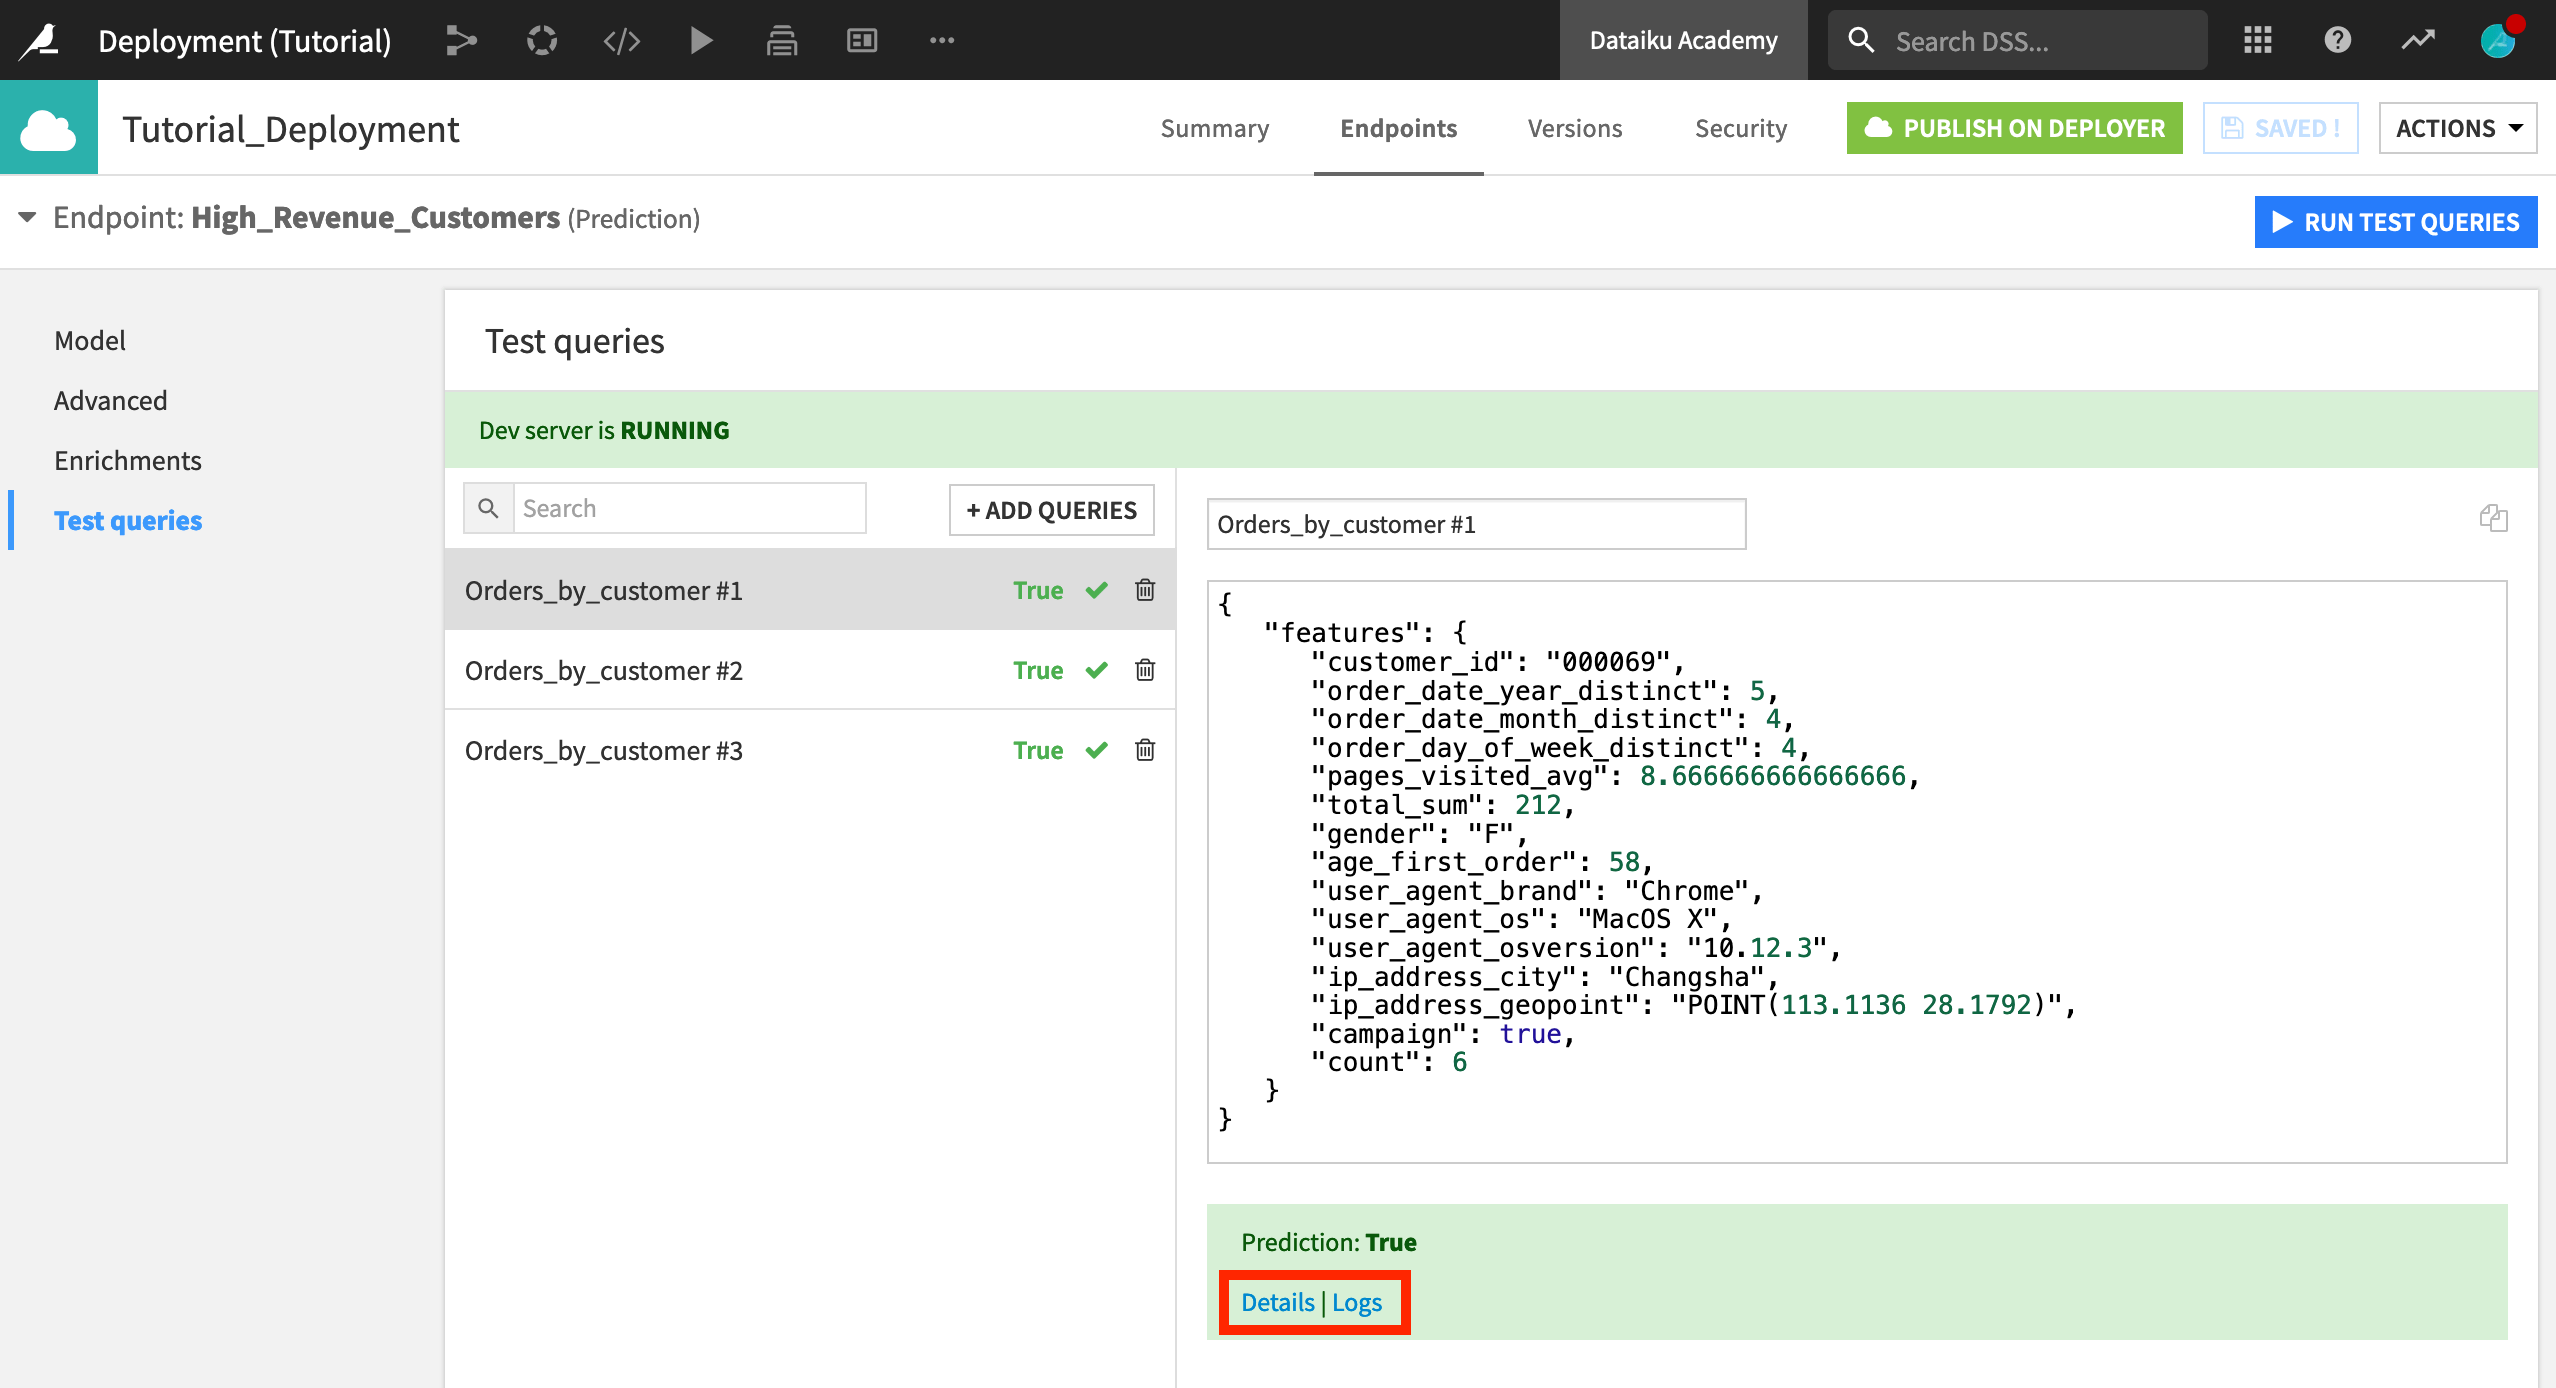
Test queries are useful to check that everything is working as expected and to understand how to query the endpoint.
On the Test queries panel, click +Add Queries.
Then add three queries from the Orders_by_Customer dataset.
Click Add, and then click Run test queries.
Clicking on the Details, you can see the results of the tests and whether they are correct according to your model. The Logs tab (next to Details) provides logging and can be used for debugging and troubleshooting purposes in case something fails.
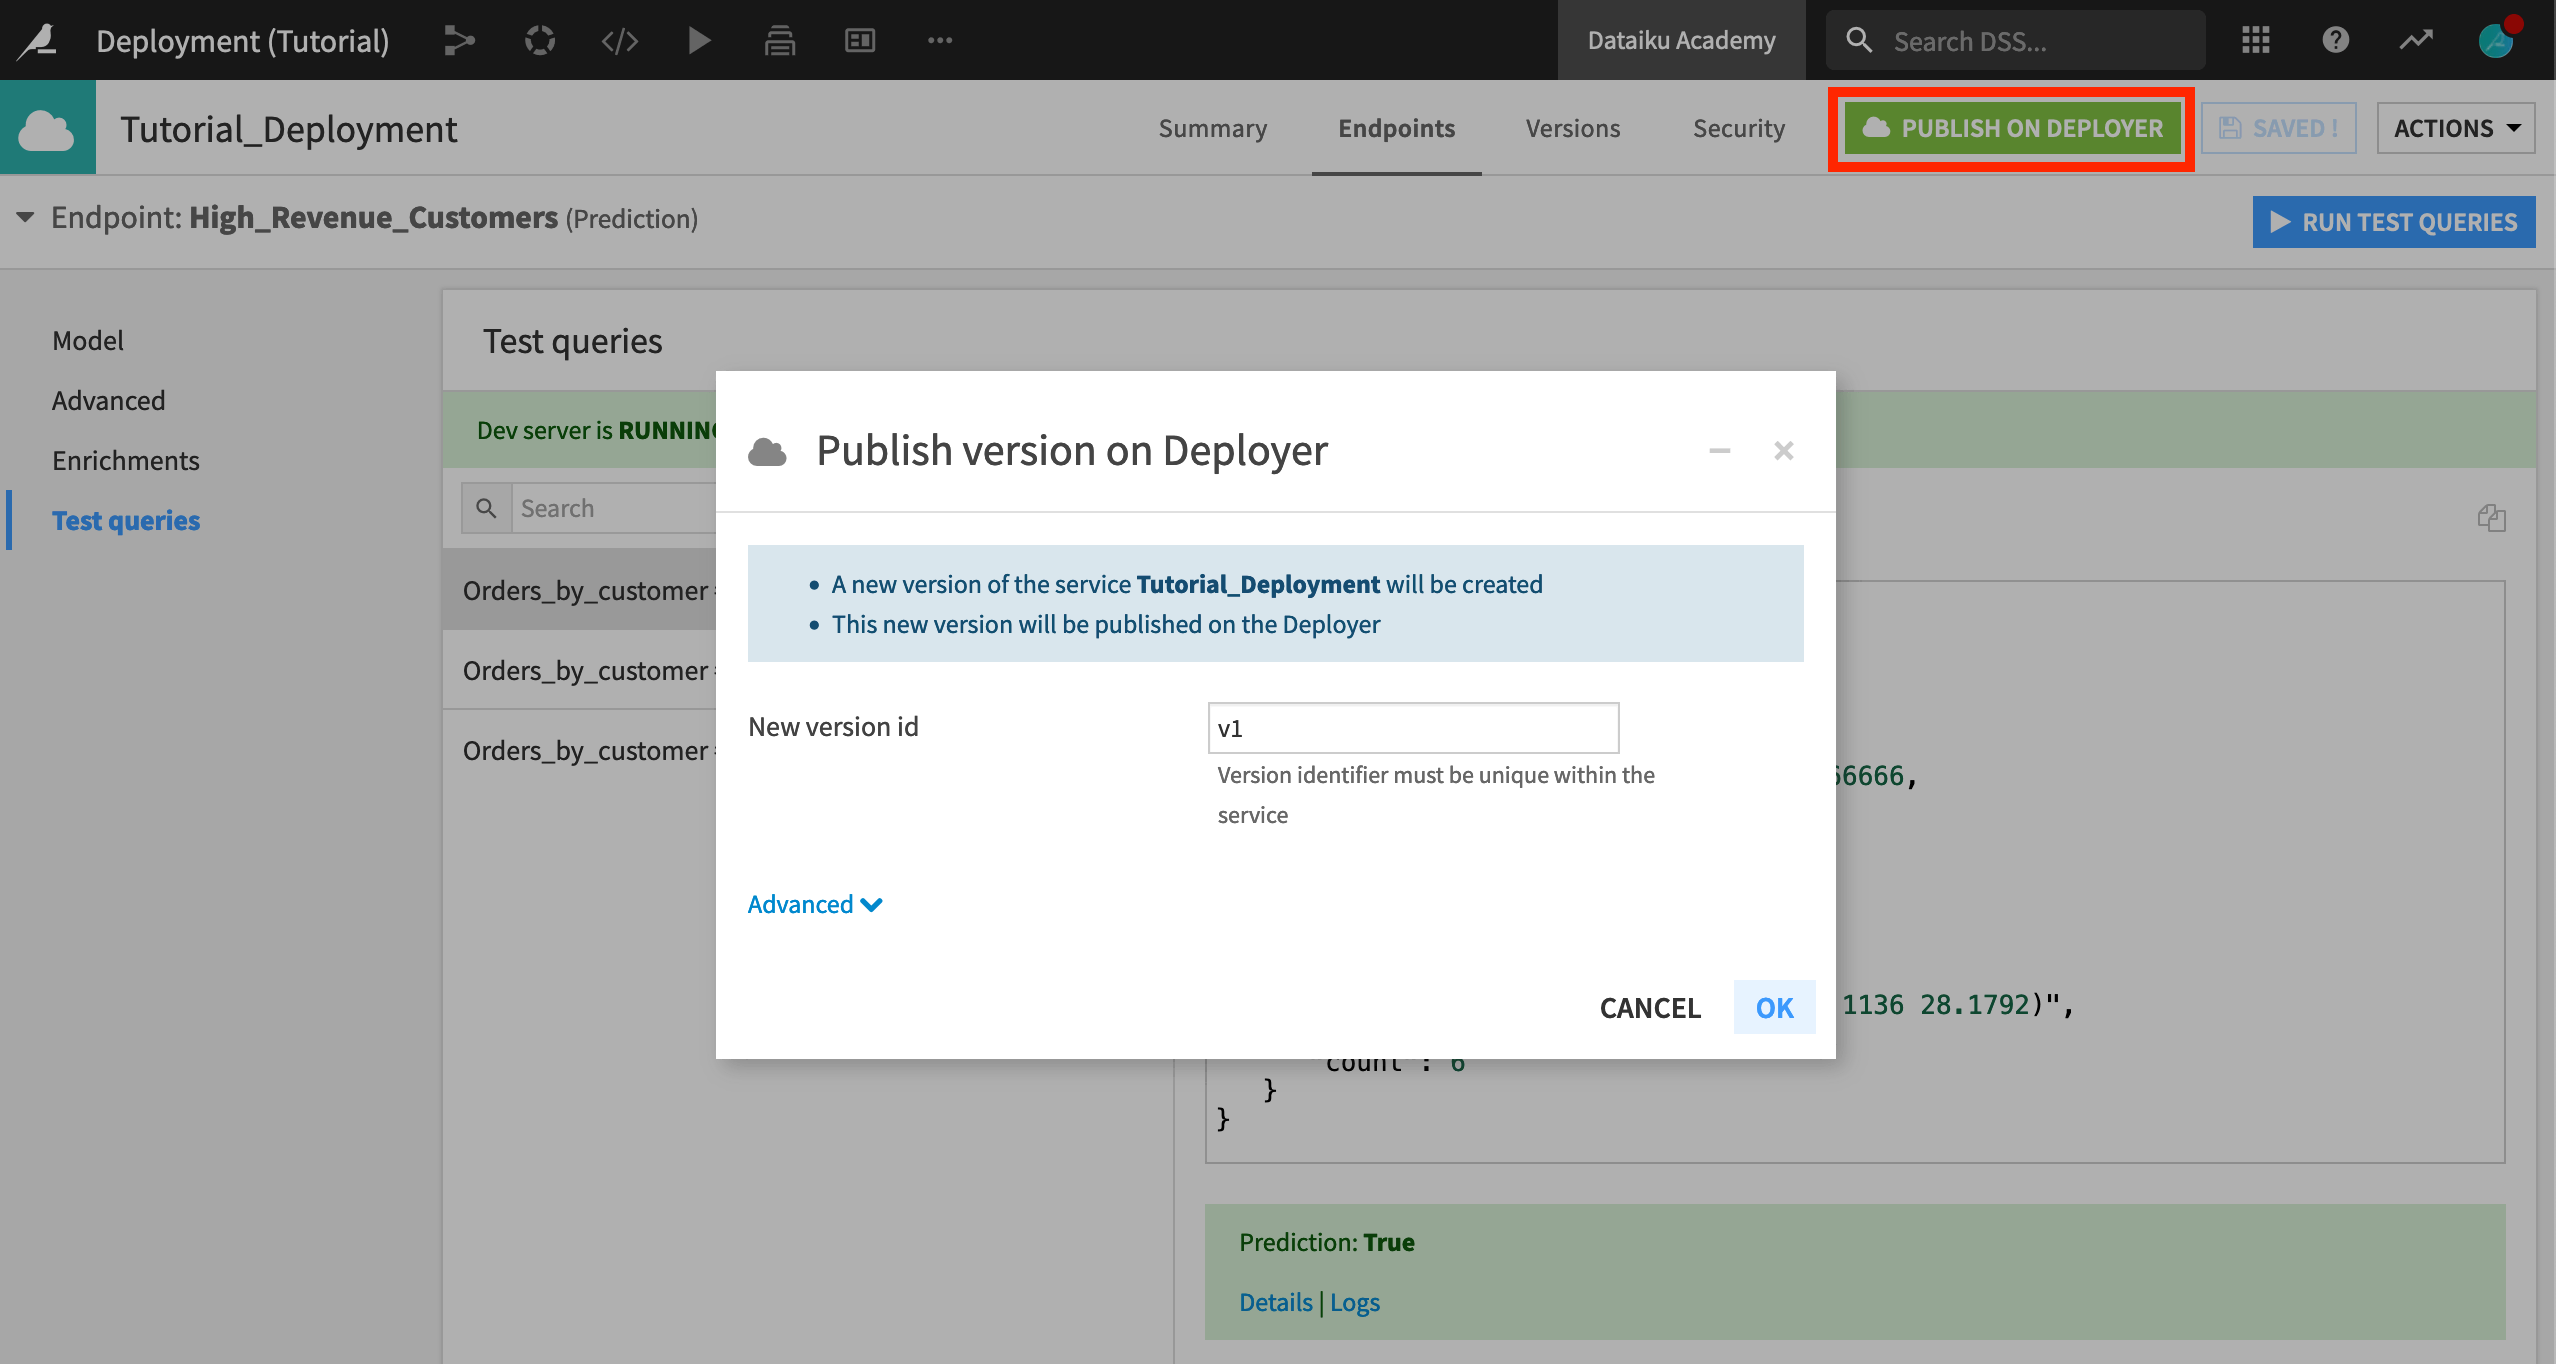
Your service is now ready.
Click the green Publish on Deployer button.
Accept the default version id name, and click OK.
Deploy a Service
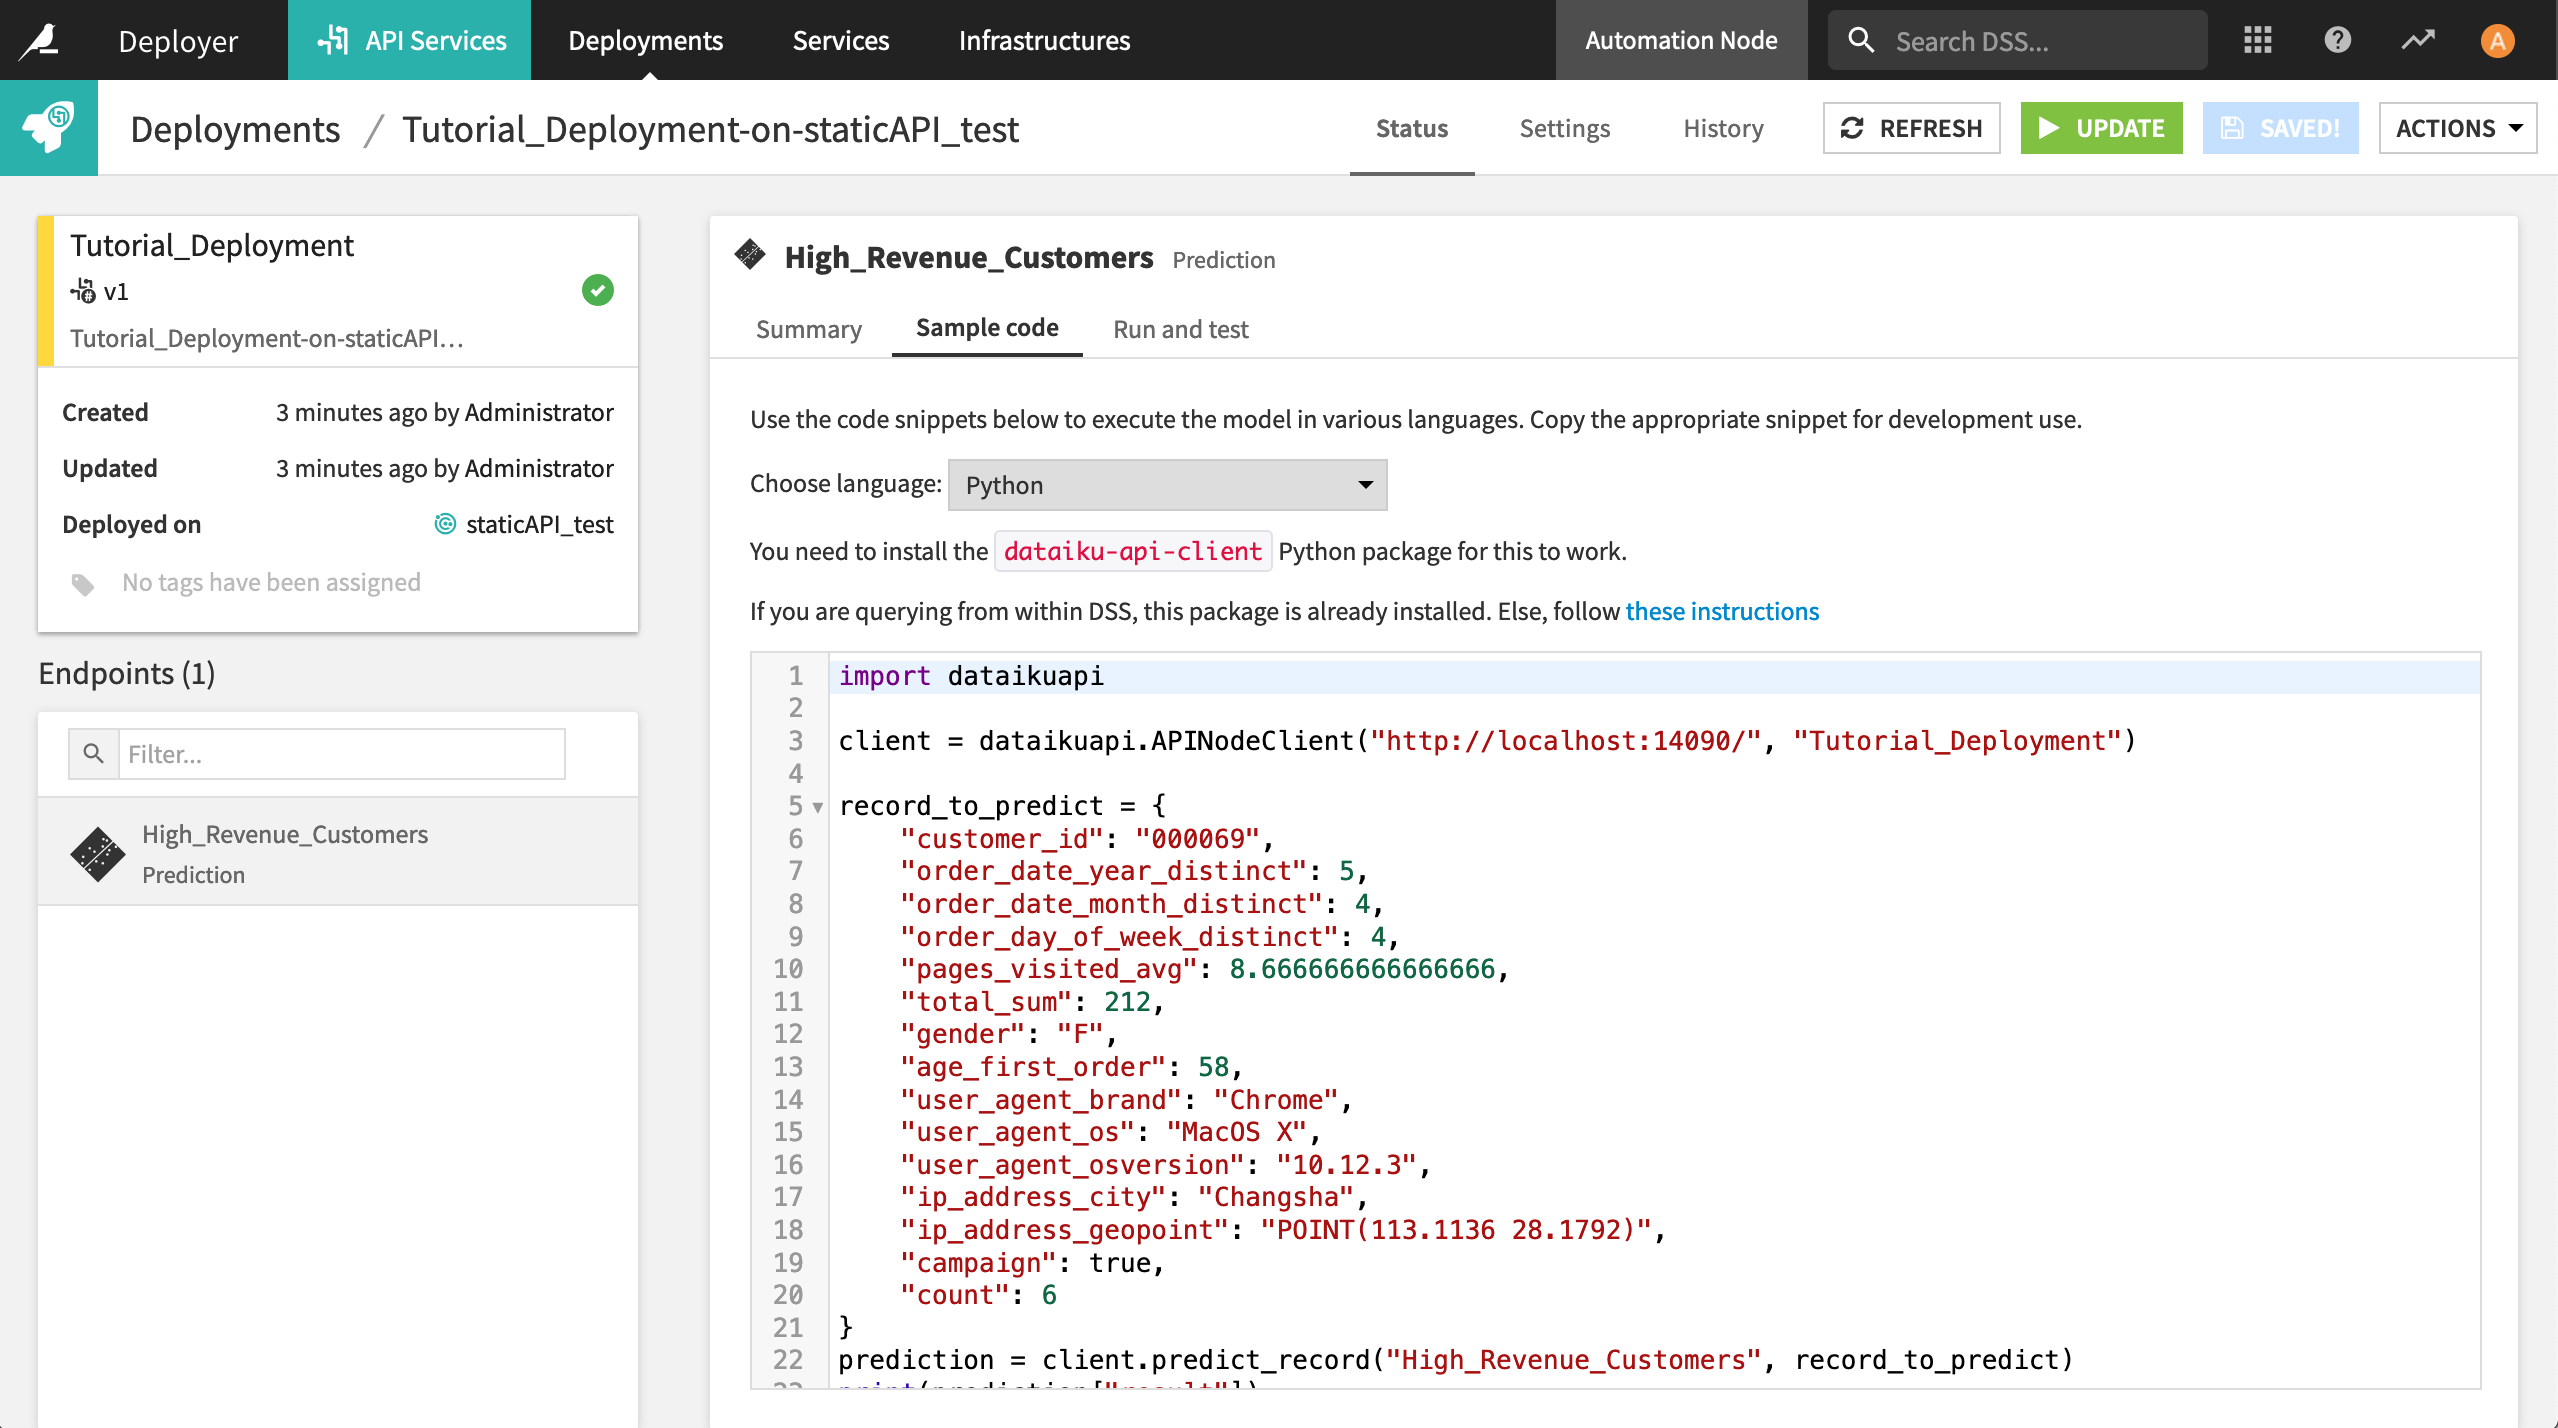
Login to your Dataiku API Deployer node. “Tutorial_Deployment” can now be found in the list of services available for deployment.
Click Deploy.

You can now submit queries to this service using the API node API. The Sample code tab provides snippets for calling the API in various languages.
As a test, you can run the following in a terminal window, substituting APINODE_SERVER with the proper hostname and APINODE_PORT with the port for your API node.
curl -X POST \
  http://localhost:14090/public/api/v1/Tutorial_Deployment/High_Revenue_Customers/predict \
  --data '{ "features" : {
    "customer_id": "000314",
    "order_date_year_distinct": 1,
    "order_date_month_distinct": 1,
    "order_day_of_week_distinct": 1,
    "pages_visited_avg": 7,
    "total_sum": 17.5,
    "gender": "F",
    "age_first_order": 30,
    "user_agent_brand": "Chrome",
    "user_agent_os": "Windows",
    "user_agent_osversion": "Windows 7",
    "user_agent_osflavor": "32 bits",
    "ip_address_city": "Guiyang",
    "ip_address_geopoint": "POINT(106.7167 26.5833)",
    "campaign": false,
    "count": 1
  }}'
Note
The model predicts “False” for this particular test customer!
You can also run the test queries previously defined in the Design node by navigating to the Run and test tab. Now these same queries are being run on the API node.
Version a Service
Now, let’s say that we want to make changes to the predictive model and put the new version into production. At a high level, to do this, we:
update the service on the Design node to use the new version of the model;
push the new version of the service to the API Deployer;
deploy the new version to the API node.
In greater detail:
In the project on the Design node, open the API Designer from the More Options menu.
Open the API service that you previously created.
Navigate to the Model panel of the endpoint, and click Go to model page. This takes you to a list of versions of the saved model that have already been built.
This time, select the logistic regression model, and click Make Active to make it the active version.
Now we need to push the new version of the service to the API Deployer.
Return to the Tutorial_Deployment service, and click Publish on API Deployer.
Let’s give the new package a more descriptive name,
v2-logistic-regression.Click OK.
Now just deploy the new version from the API Deployer.
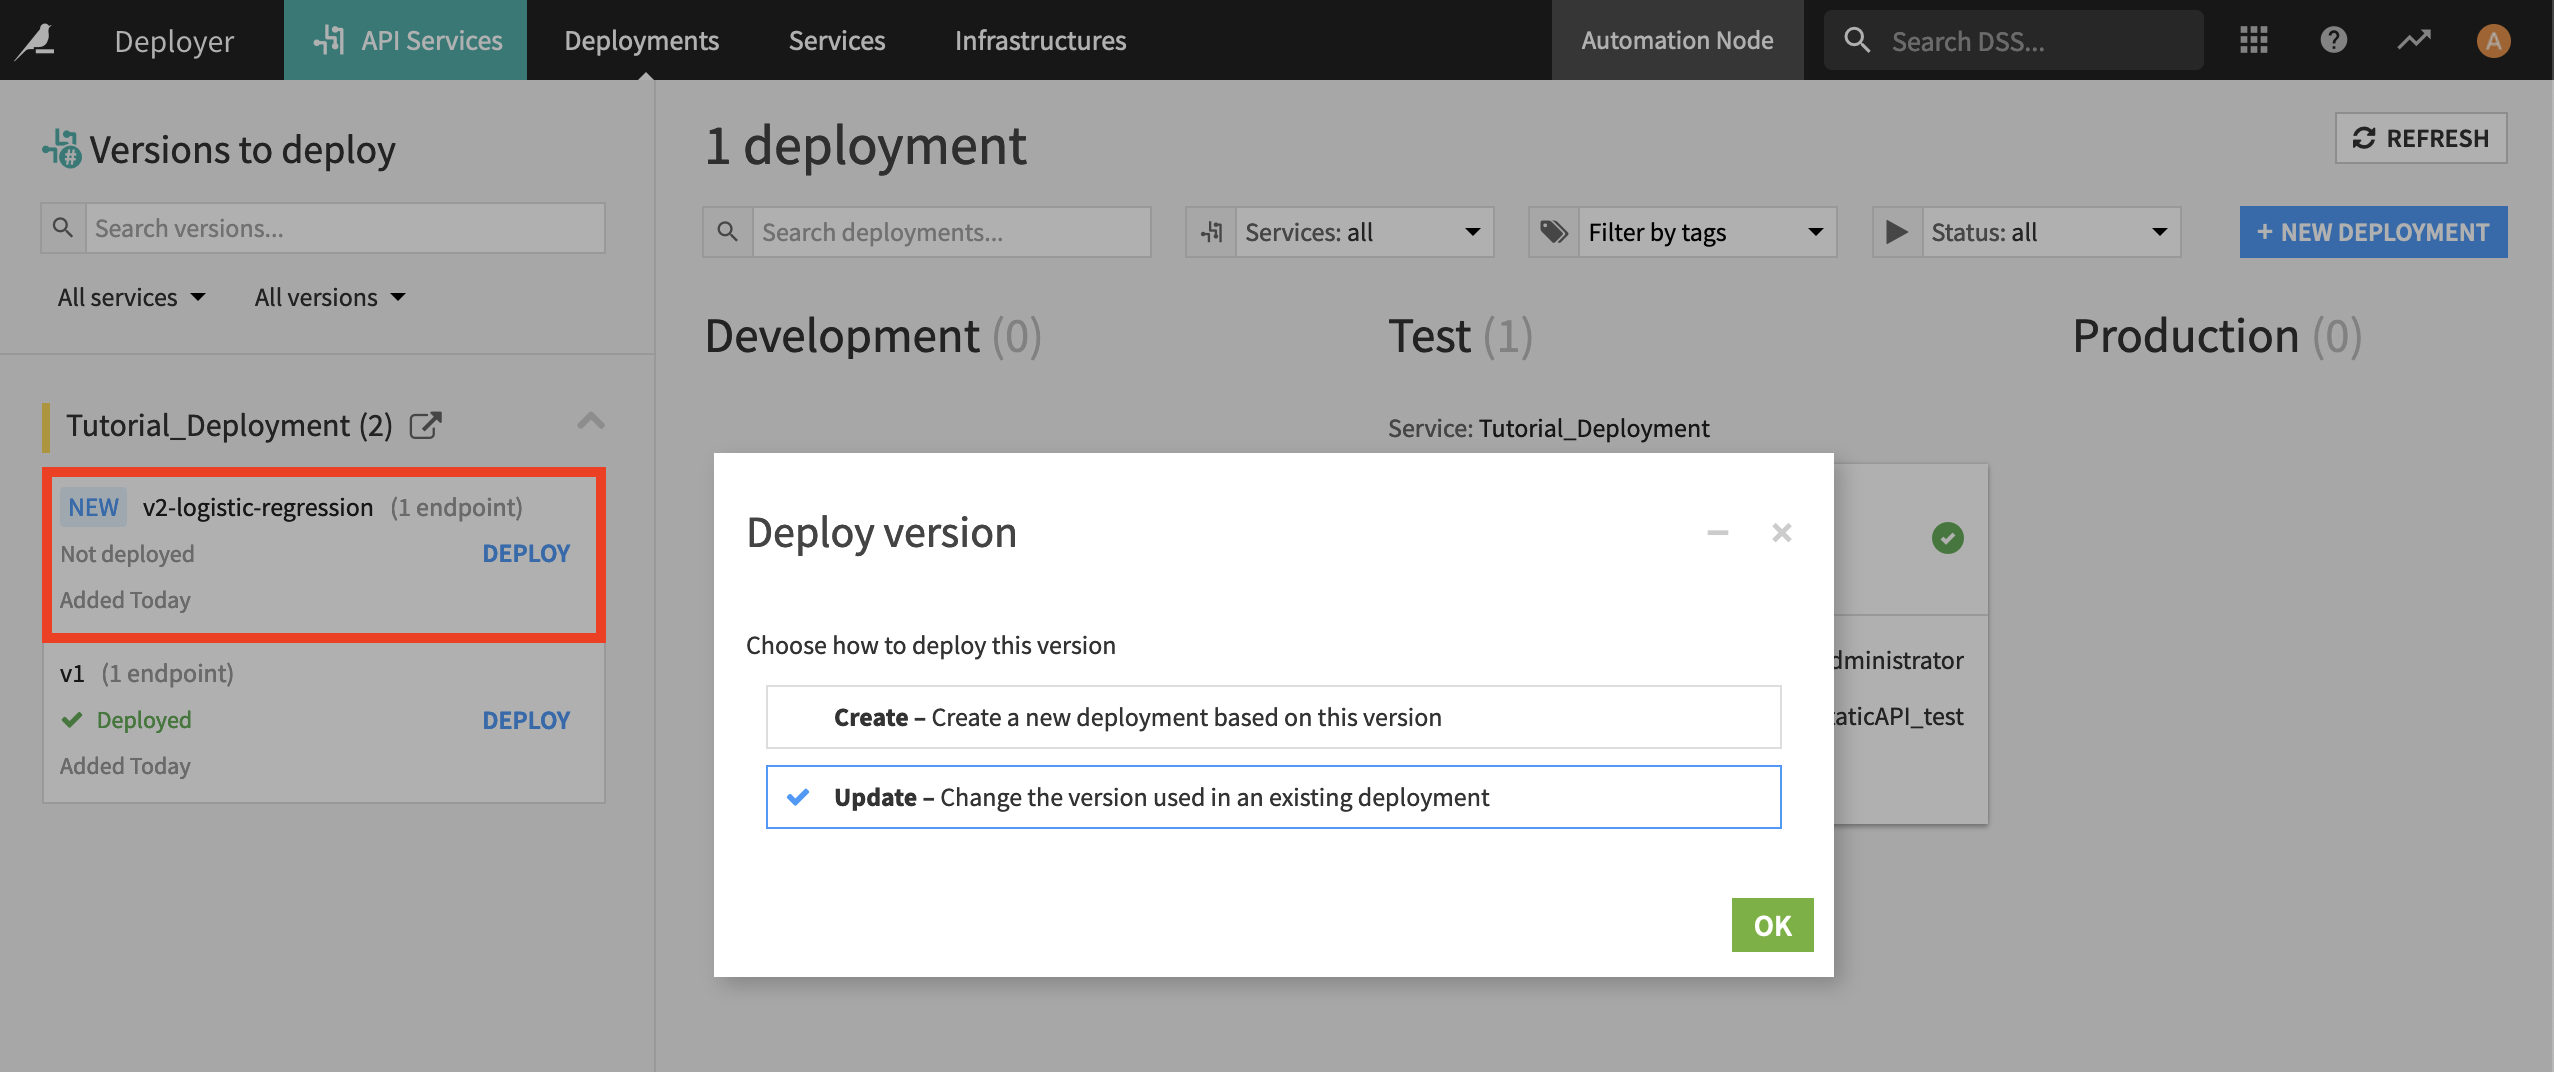
In the API Deployer node, navigate to the Deployments section, where you’ll see the updated version of the service.
Click Deploy.
Choose to Update the service, and click OK (twice).
The service won’t be completely updated until you click Update again (in the upper right corner this time).
Select the Light update option. Now the API node is running the latest version of the service.
Next Steps
Congratulations! Deploying a model to production for real-time scoring and managing versions of the model is easy to do in Dataiku.