Introduction to Deep Learning with Code
You can define a Deep Learning architecture using the Keras library to build a custom model in Dataiku’s Visual Machine Learning tool. You can then train, deploy, and score the model like any other model created and managed in Dataiku DSS.
Deep learning offers extremely flexible modeling of the relationships between a target and its input features, and is used in a variety of challenging applications, such as image processing, text analysis, and time series, in addition to models for structured data.
Objectives
This how-to walks through the Deep Learning interface in Dataiku DSS, using a simple multilayer perceptron (MLP) for classification.
Prerequisites
You should have some experience with Visual Machine Learning in Dataiku. We’ll use the project from that tutorial.
You should have some familiarity with Keras. While building a deep learning model in Dataiku requires some comfort with coding, its inclusion in the Visual ML tool means that the model lifecycle is managed by Dataiku.
You will need access to a code environment with the necessary libraries. When creating a code environment, you can add sets of packages on the Packages to Install tab. Choose the Visual Deep Learning package set that corresponds to the hardware you’re running on.
The Deep Learning Model
In a Visual Analysis for the dataset customers_labeled, create a new model with:
Prediction as the task,
high_revenue as the target variable
Expert mode as the prediction style
Deep learning as the Expert mode, then click Create

This creates a new machine learning task and opens the Design tab for the task. Like the ML task you worked with in the Visual ML tutorial, there are common settings for handling the target, features, train/test set, and evaluation metrics.
What is markedly different is that the Modeling section where you would specify algorithms settings has been replaced by a Deep Modeling section where you specify the Architecture and Training settings for your deep learning model.
Note
Dataiku should automatically discover the code environment you’ve created for deep learning, and set it as the runtime environment for this ML task. If, after creating this ML task, you receive a warning that no deep learning code environment is available, then you need to create one or ensure that you have permission to use the deep learning code environment.
Deep Learning Architecture
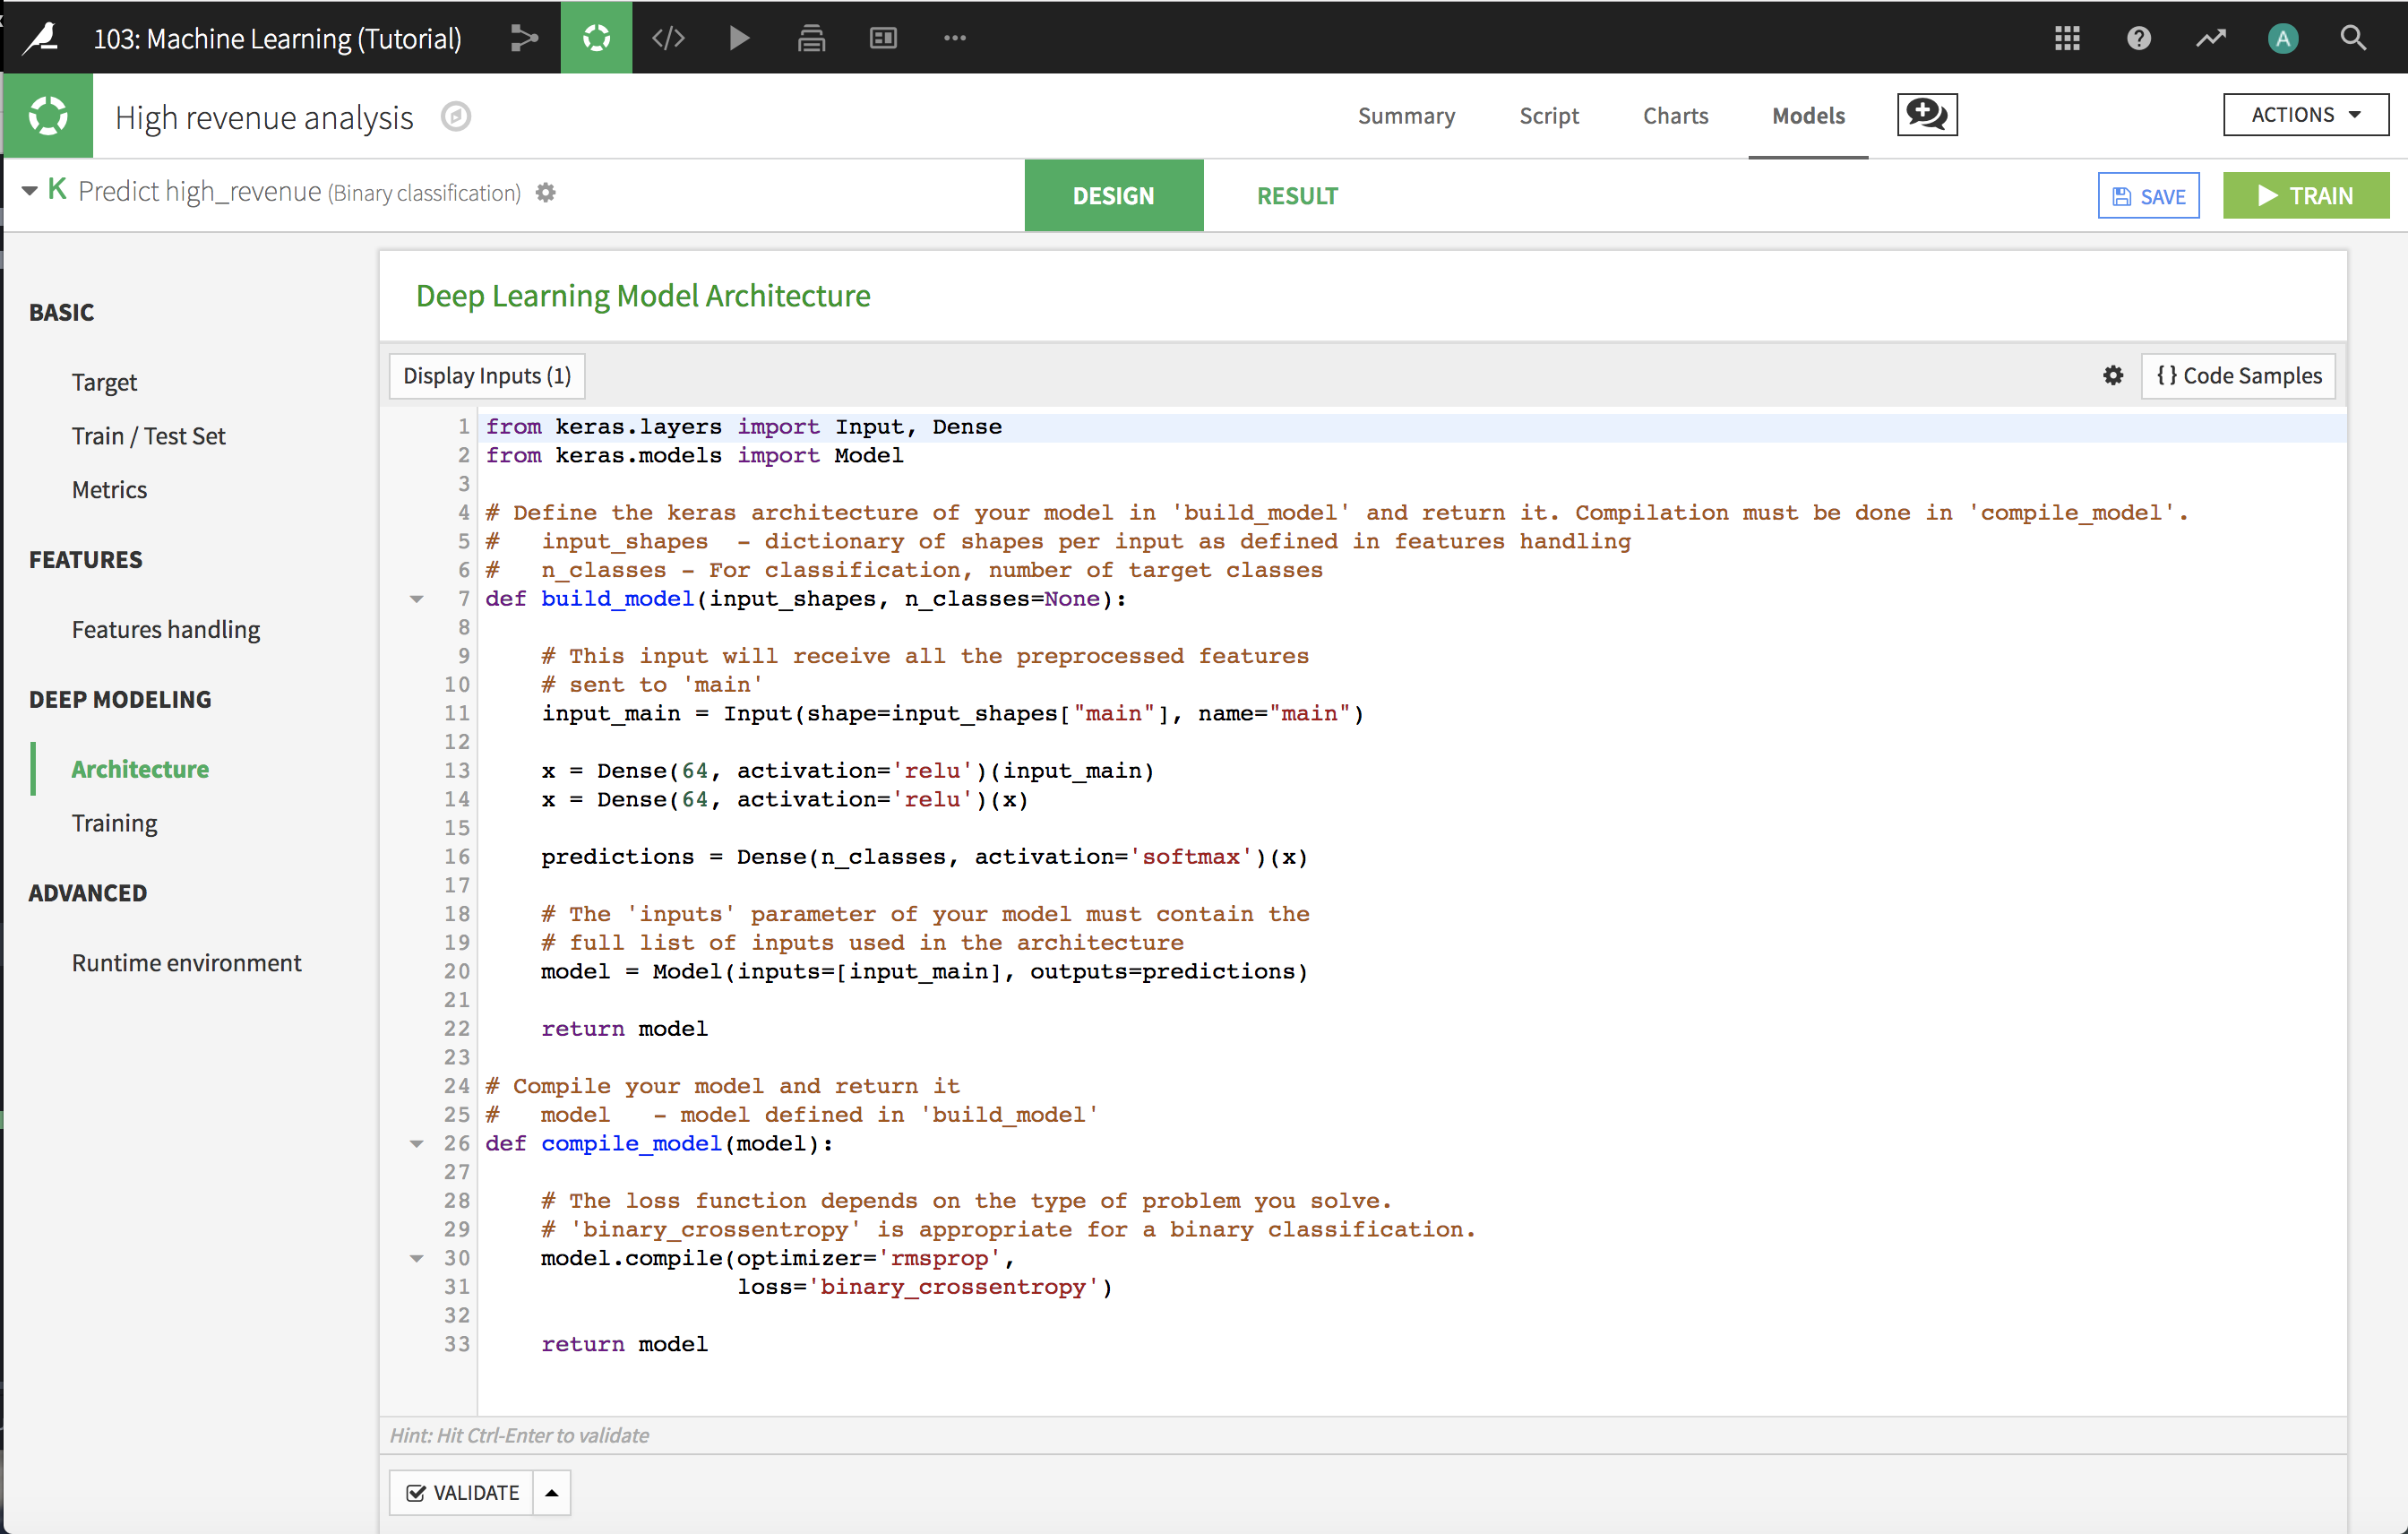
In the Deep Learning Model Architecture, you supply the Keras code that defines the architecture of your deep learning model and then compiles it. This is done through two functions, build_model() and compile_model, that are used to standardized how deep learning models are handled in the Dataiku DSS implementation.
build_model()
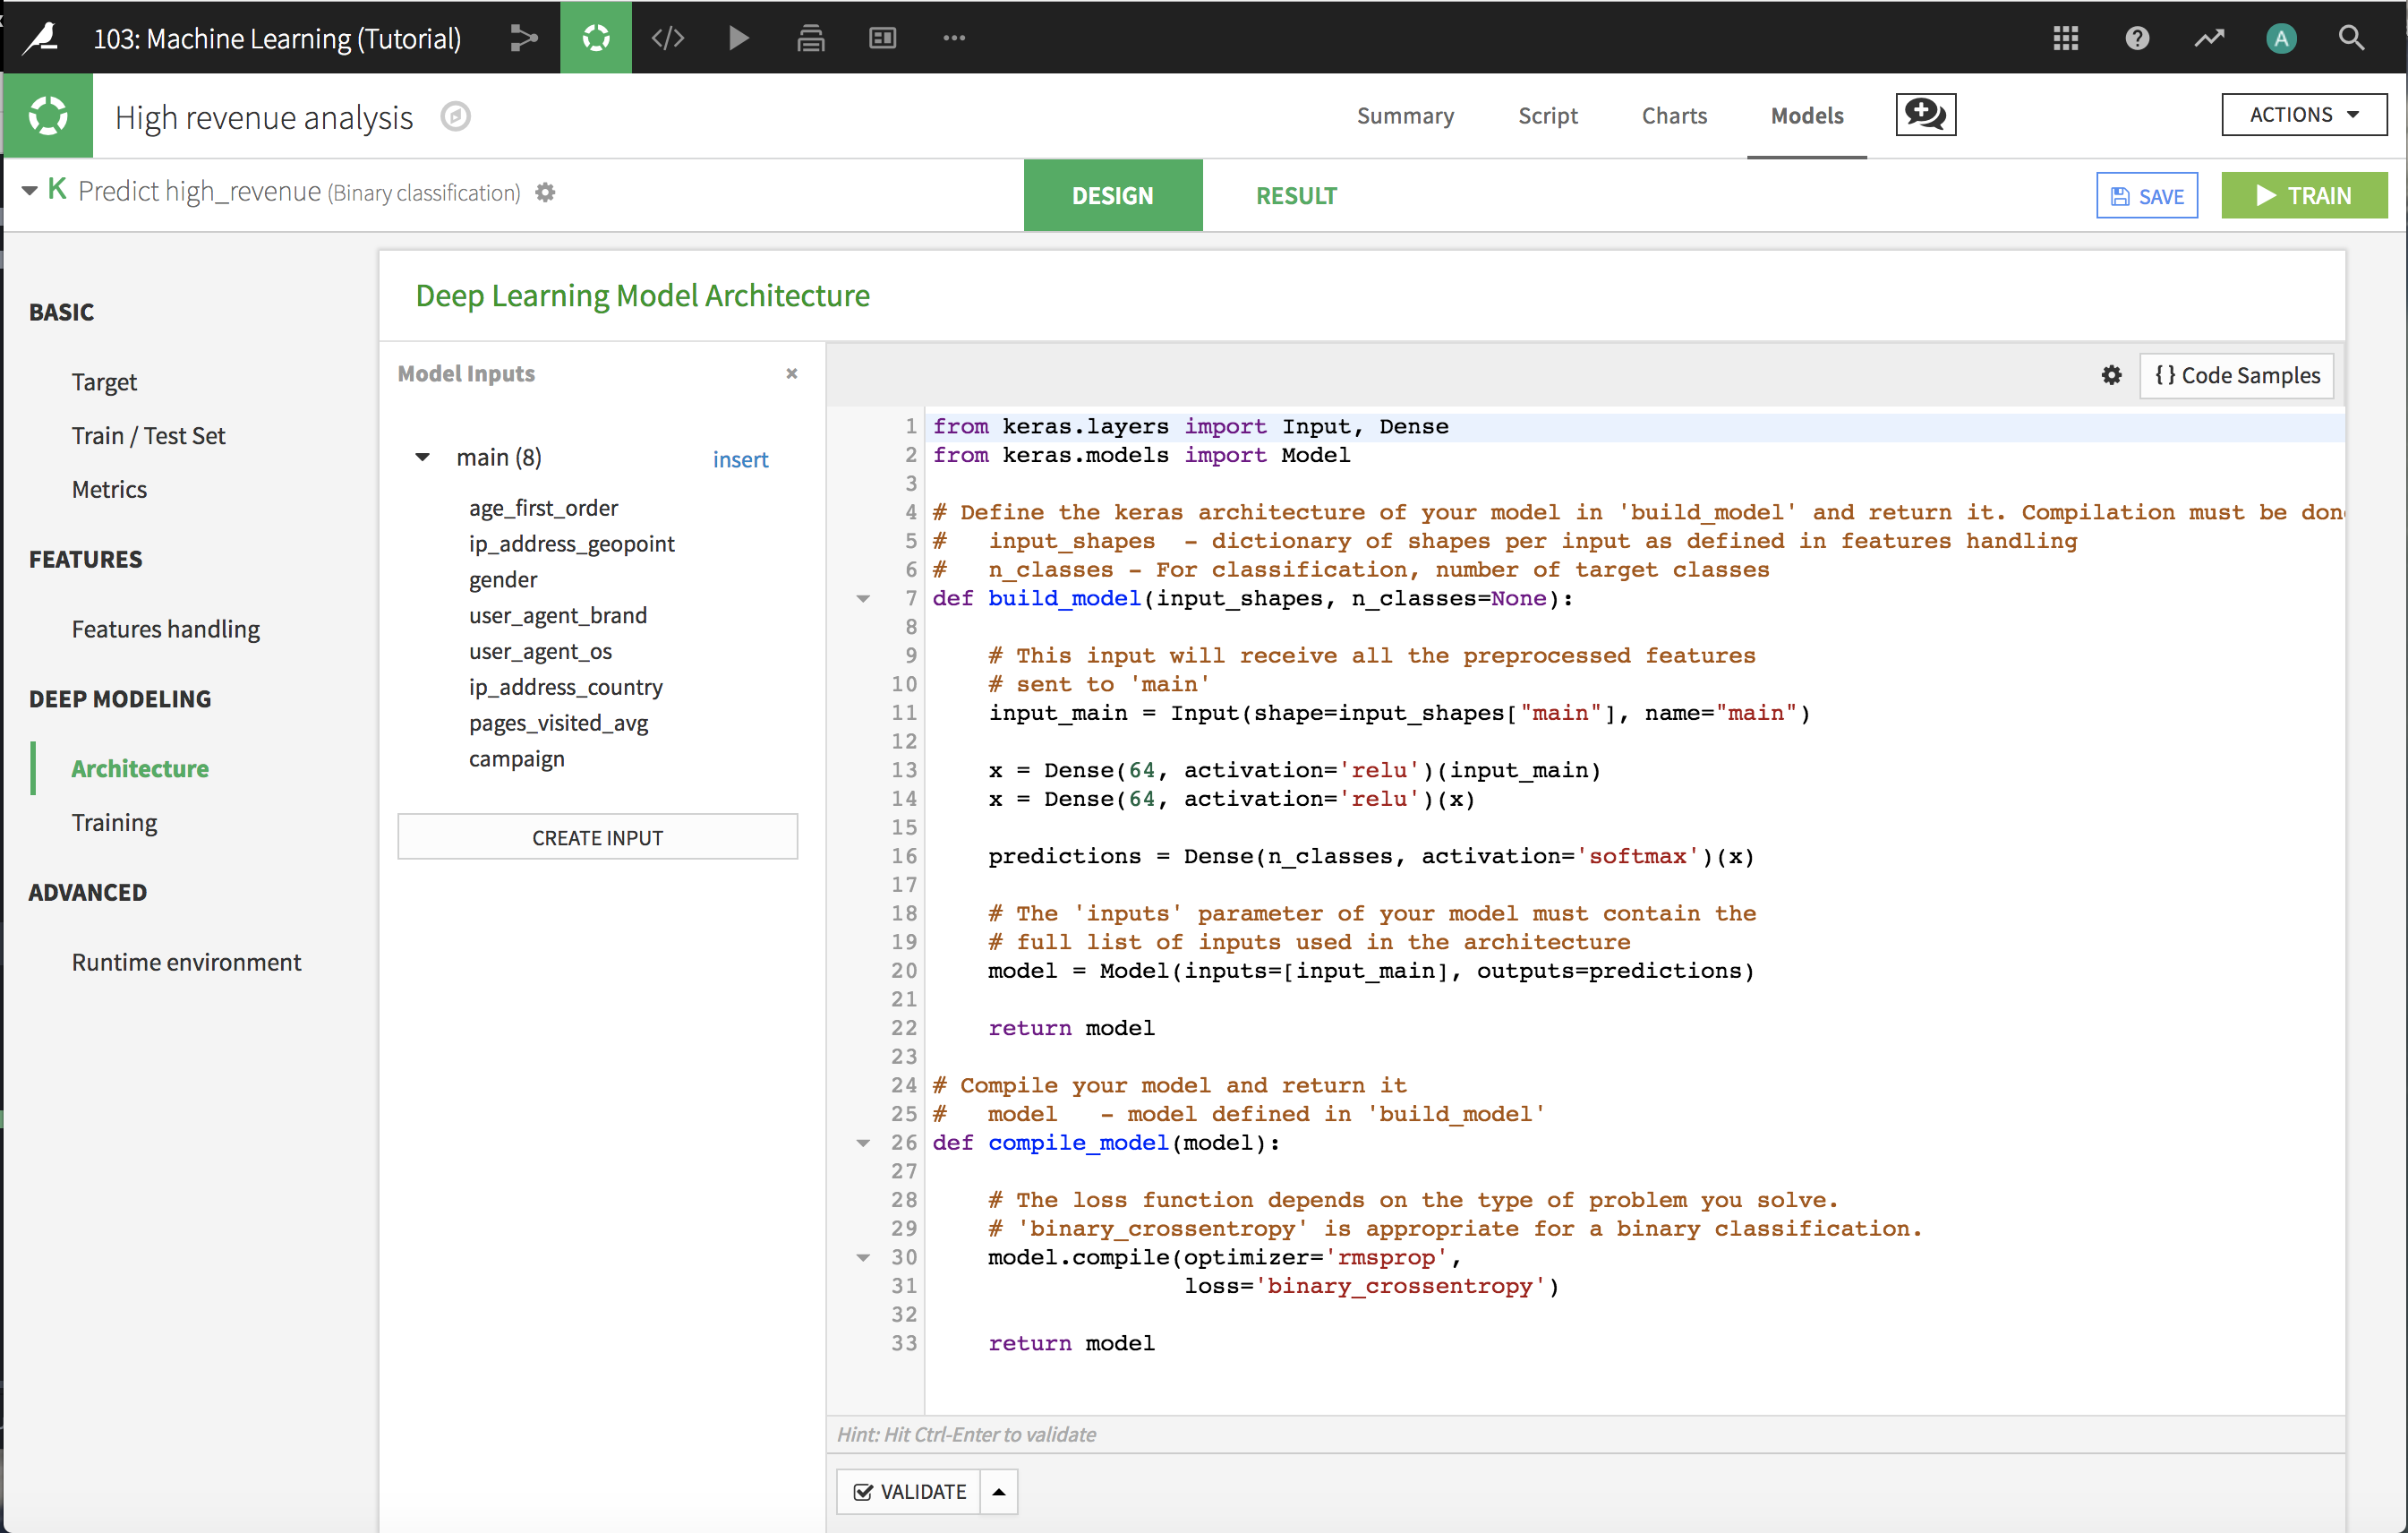
The build_model()` function is where you define the model architecture using the Keras functional API; the Sequential model API is not supported. It has two parameters that help you to define the architecture:
input_shapesis a dictionary of the model inputs. More complex architectures can accept multiple inputs, but for now, we’ll simply work with the main set of inputs that includes all the features.n_classesis the number of classes in a categorical target. Dataiku will supply this number when this function is called during model training; here, we are simply using it as a variable in the architecture definition
The default code provided by Dataiku defines a multilayer perceptron with two hidden layers.
The following snippet defines the input layer, extracting the main input from the dictionary of model inputs:
input_main = Input(shape=input_shapes["main"], name="main")
The following code defines the hidden layers. The first hidden layer is a Dense layer with 64 units, using the rectified linear unit Activation function to transform the input layer. The second hidden layer has similar parameters, but transforms the first input layer.
x = Dense(64, activation='relu')(input_main)
x = Dense(64, activation='relu')(x)
The following code defines the output layer, which is a Dense layer with a number of units equal to the number of classes in the target, using the softmax activation function.
predictions = Dense(n_classes, activation='softmax')(x)
Finally, we construct the Keras model object with the input and output layers, then return the model as the output of the function.
model = Model(inputs=[input_main], outputs=predictions)
return model
compile_model()
The compile_model()` function is where you specify the loss function to be optimized and the method for performing the optimization. While the Keras compile()` method includes metrics for evaluating the model, you don’t need to specify them here, because Dataiku DSS will pick them up from the common Metrics panel under the Basics model settings.
Deep Learning Training
In the Deep Learning Training panel, you specify the parameters that will be used in the call to the Keras model fit()` method. If you need greater control over training, you can click Advanced mode and supply the code specifications you want.
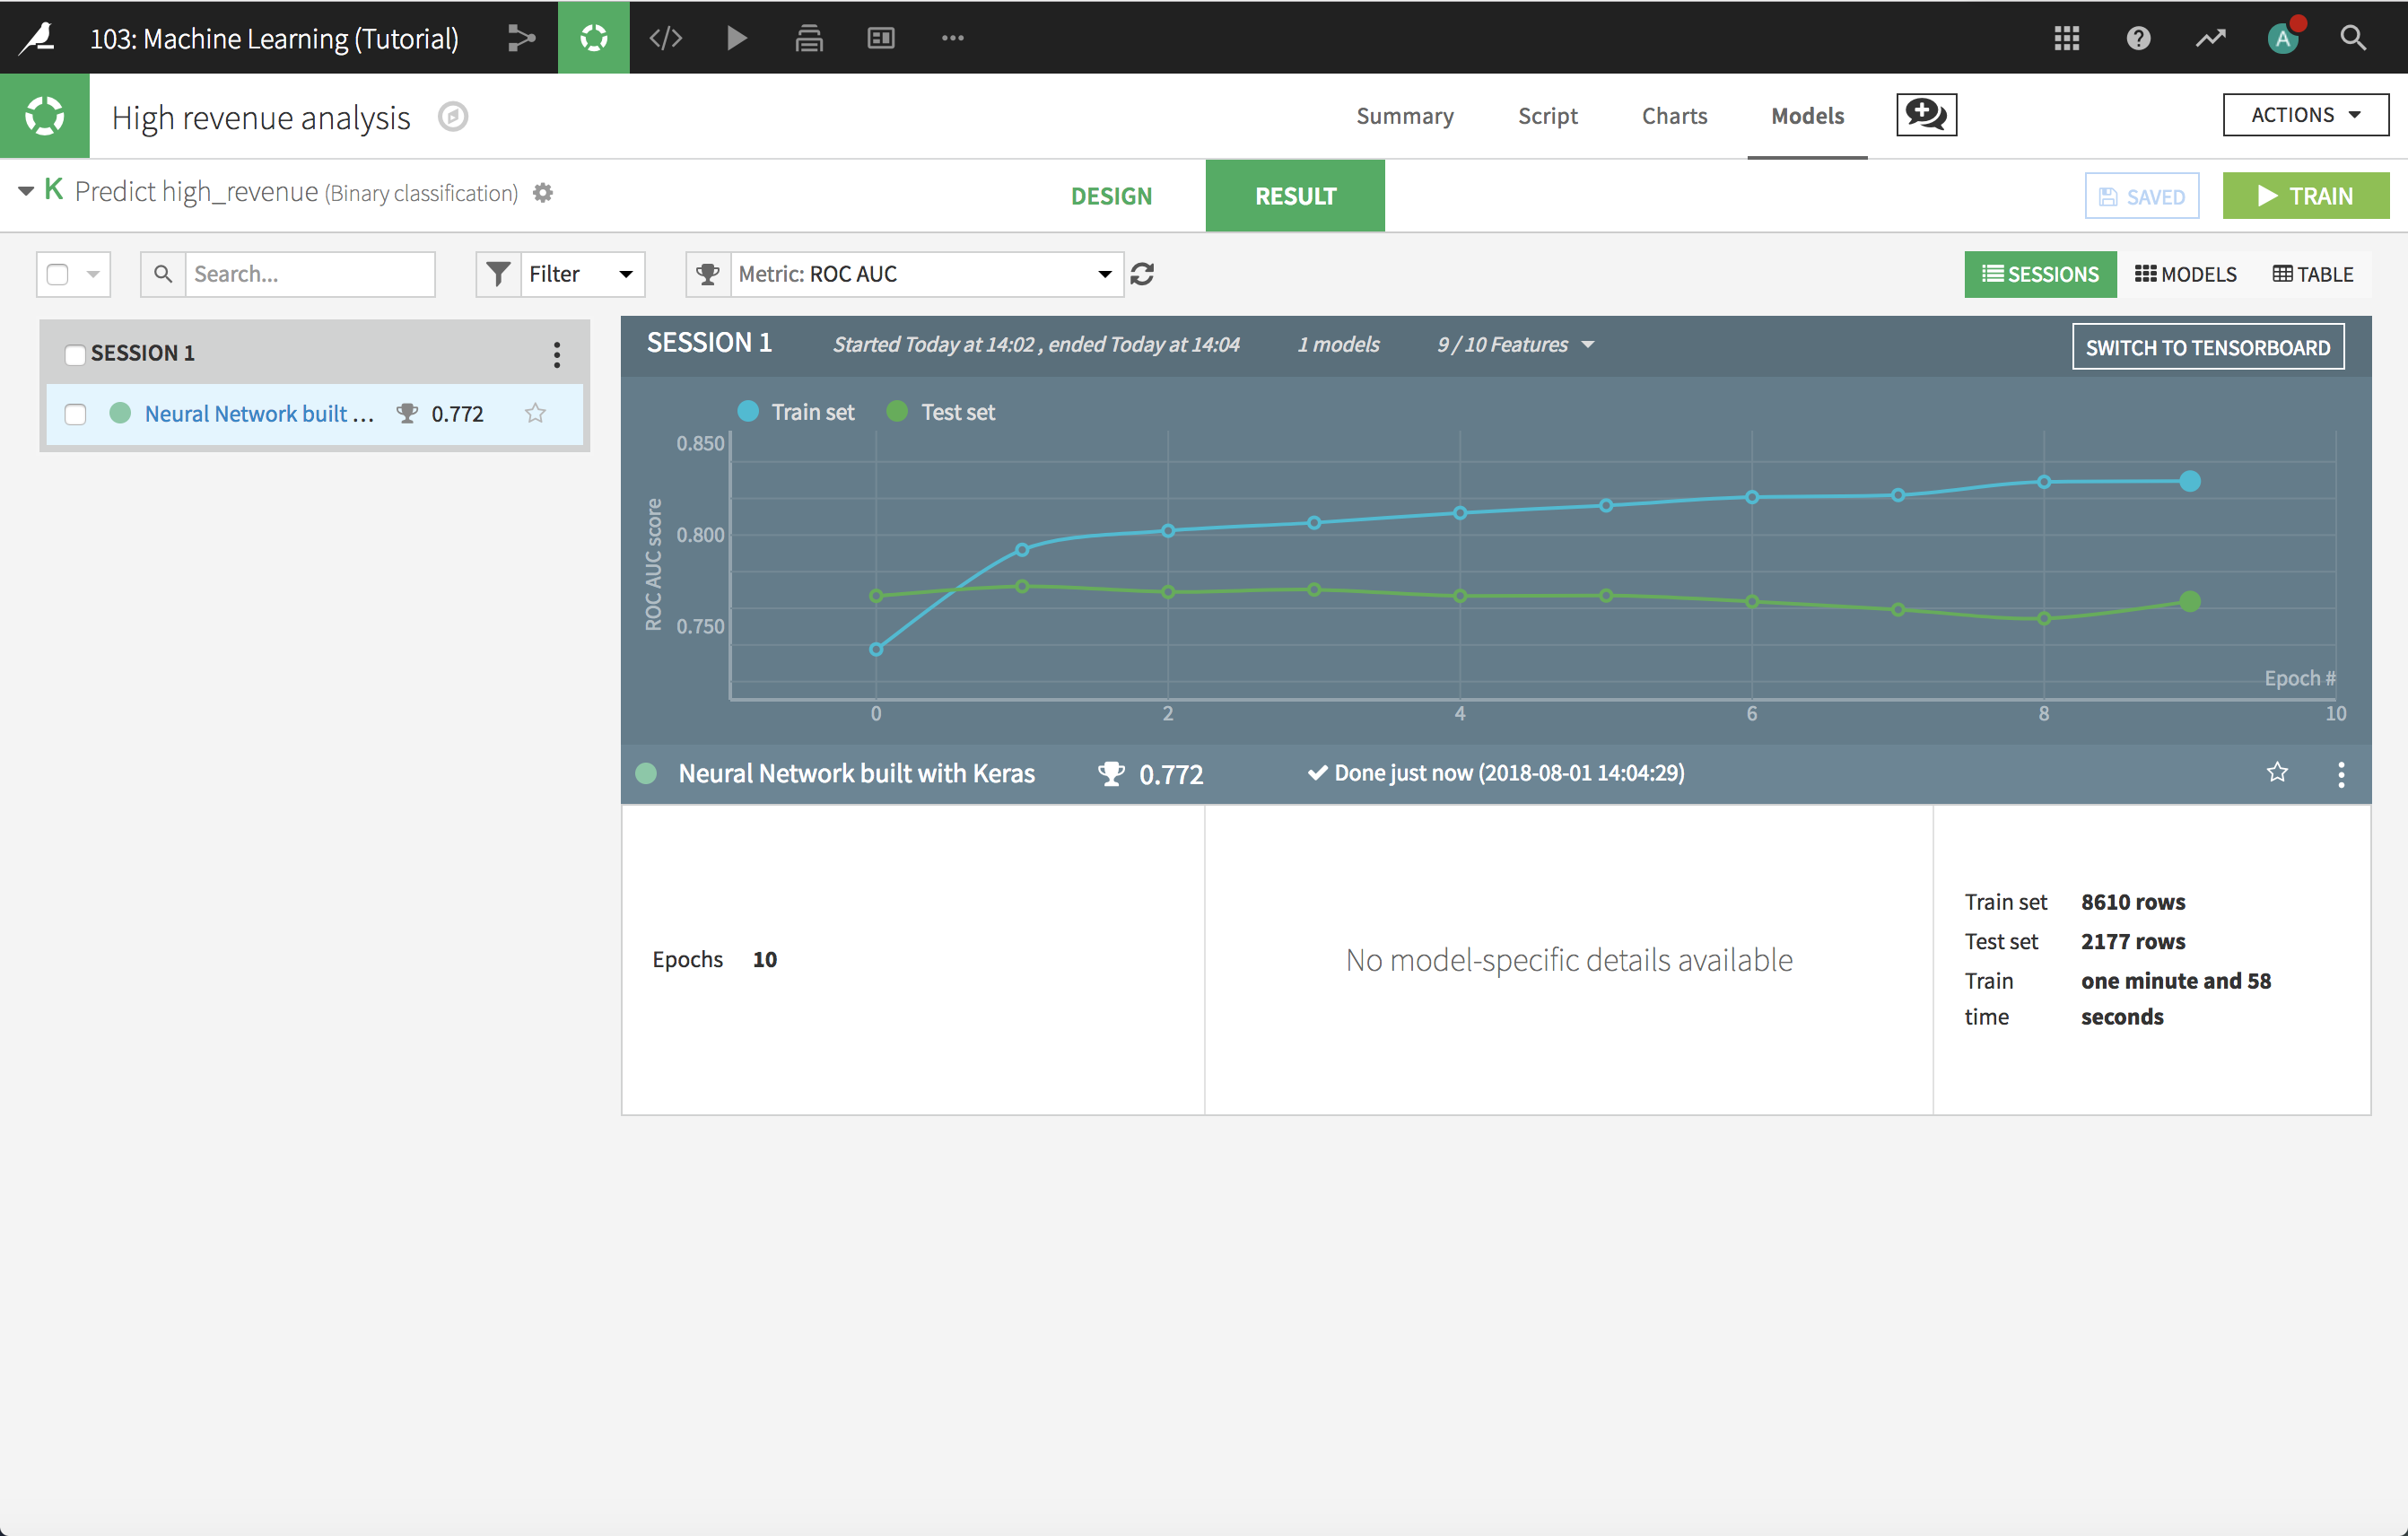
Model Results
Click Train and, when complete, Dataiku DSS shows the results as it would for any other machine learning model.
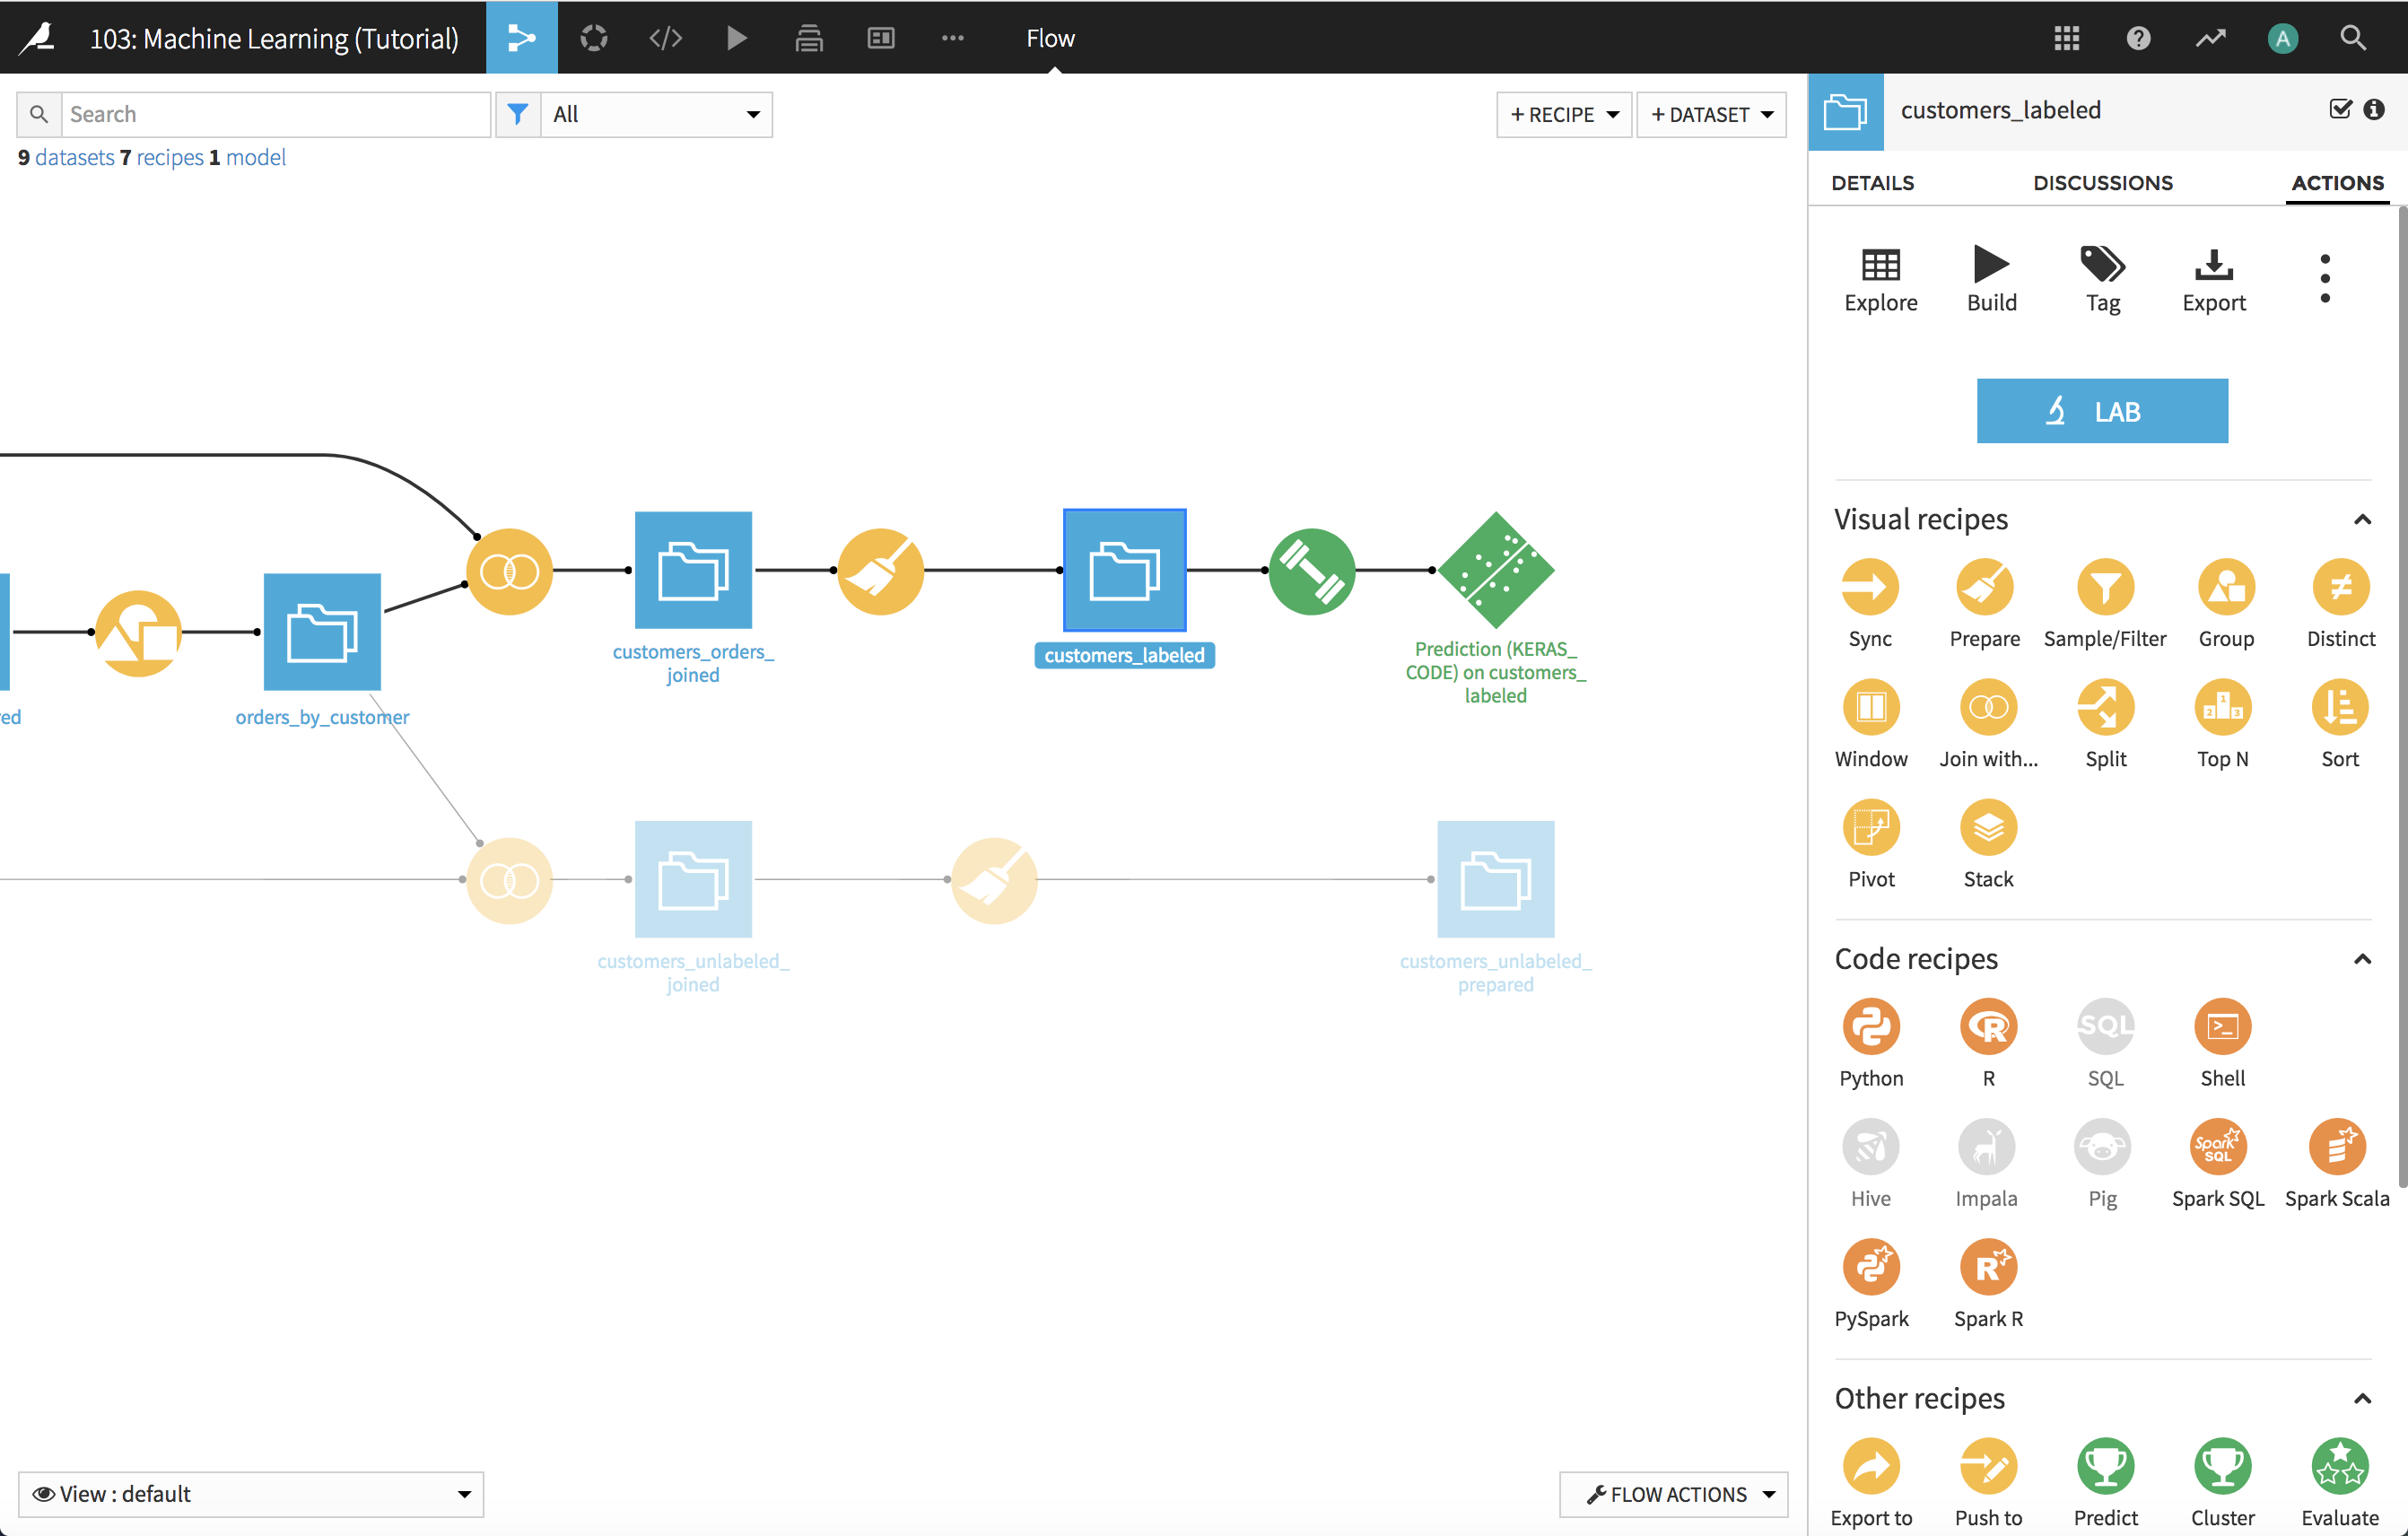
Deploy the Model to the Flow
As with any other model managed by Dataiku, you can deploy it to the flow, then add the deployed model to a dashboard, find it in the catalog, create an API service endpoint using it, and so on.
What’s next
See a completed version of this project on the Dataiku gallery.
See the Dataiku DSS reference documentation on deep learning.