Git for Projects
Dataiku DSS has three primary integrations with Git:
Code libraries
Plugin development
Projects
The first two integrations enable coders and developers to more effectively share their work across DSS projects and instances. Git integration for projects enables even the non-coders on the team to take advantage of version control.
Each change that you make in a DSS project is automatically committed to a local Git repository. Thus, any normal contribution to a DSS project passively uses the git integration for projects.
This tutorial will walk through the active use of the git integration to:
Connect a local project to a remote Git repository
Branch the project in order to do some “experimental” work without affecting the flow for other members of the data team
Push project changes from the local branch to the remote Git repository
Merge the branch into master
Pull the changes to master from the remote Git repository to the local project
Prerequisites
It is strongly recommended to have a good understanding of the Git model and terminology before using this feature.
Technical Requirements
Access to a remote Git repository where you can push changes. Ideally it should be an empty repository.
Access to a remote git repository and a DSS instance that has been set up to work with remote Git repositories. See Working with Git in the reference documentation.
A project to practice with. This tutorial will use the Haiku Starter project, which can be found by selecting +New Project > DSS Tutorials > General Topics > Haiku Starter.
Connect to a Remote Git Repository
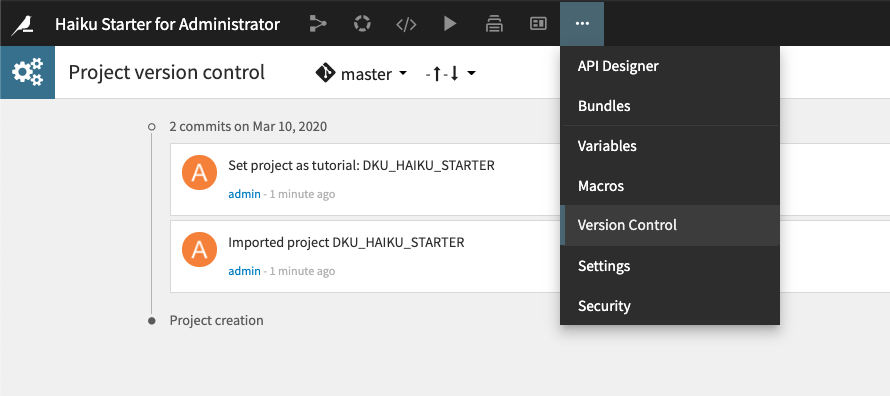
From the project menu in the top navigation bar, select Version Control. This shows that we are on the master branch of the project.
Click on the change tracking indicator and select Add remote.
Enter the URL of the remote and click OK.
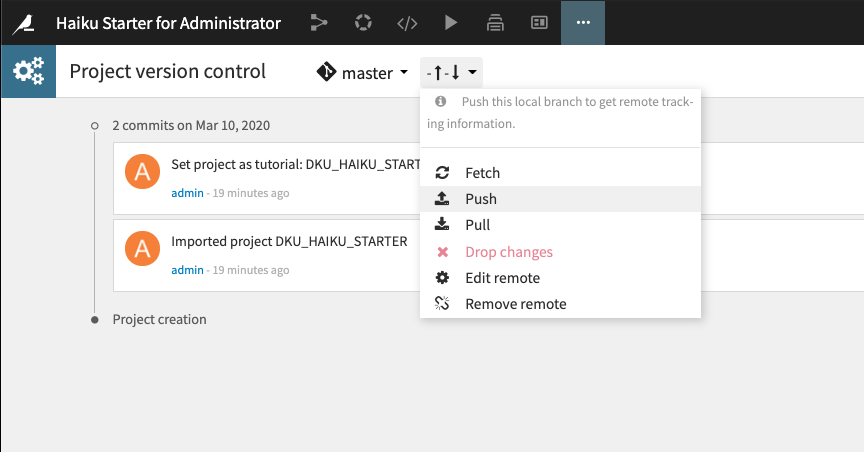
From the change tracking indicator, select Push.
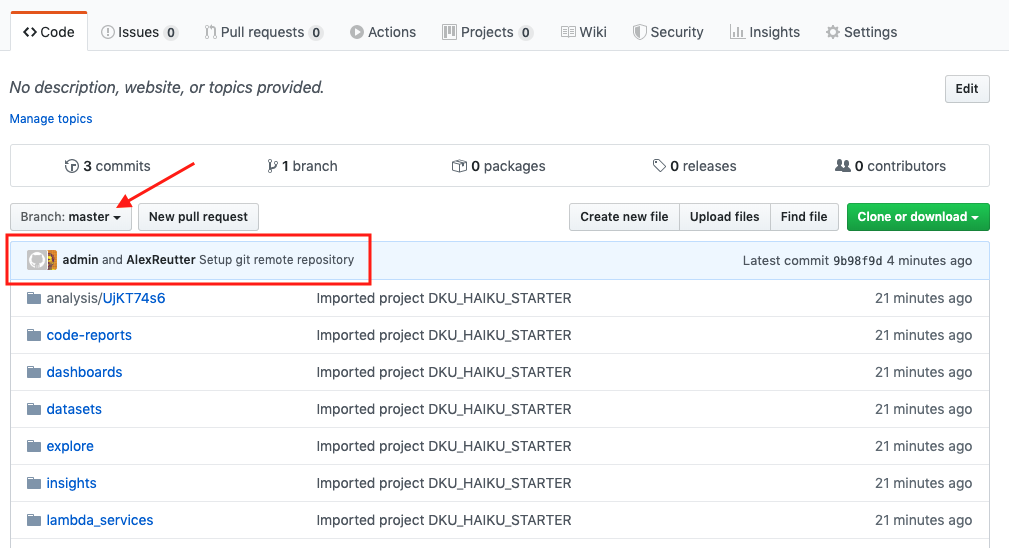
In your remote Git repo, you can see that the master branch has been successfully pushed.
Note
Each project must have its own repository.
Branch the Project
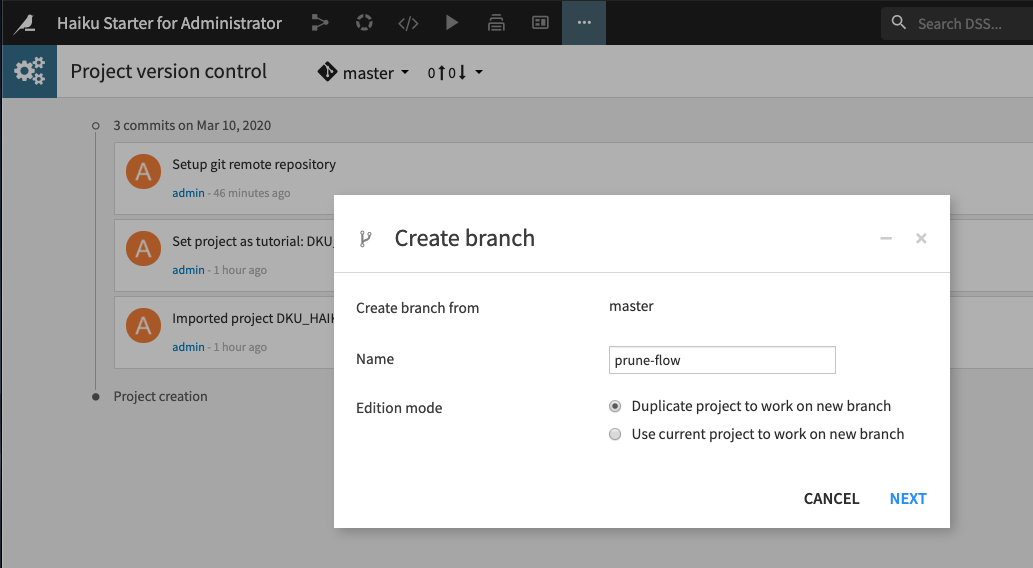
From the branch indicator, click Create new branch.
Name the new branch
prune-flowand click Next.Click Duplicate and Create Branch.
This creates a duplicate project working on the prune-flow branch.
Note
Key concept: Duplicated projects for branching
A given DSS project can only be on one branch at any given time. If you switch the branch of the current project, this will affect all collaborators, and you can’t work on multiple branches at once.
Now we can make our changes to the duplicate project on the prune-flow branch without disturbing the rest of the data team’s use of the master branch of the project. Go to the Flow of the project and see that the Flow forks three ways from the Orders_enriched_prepared dataset.
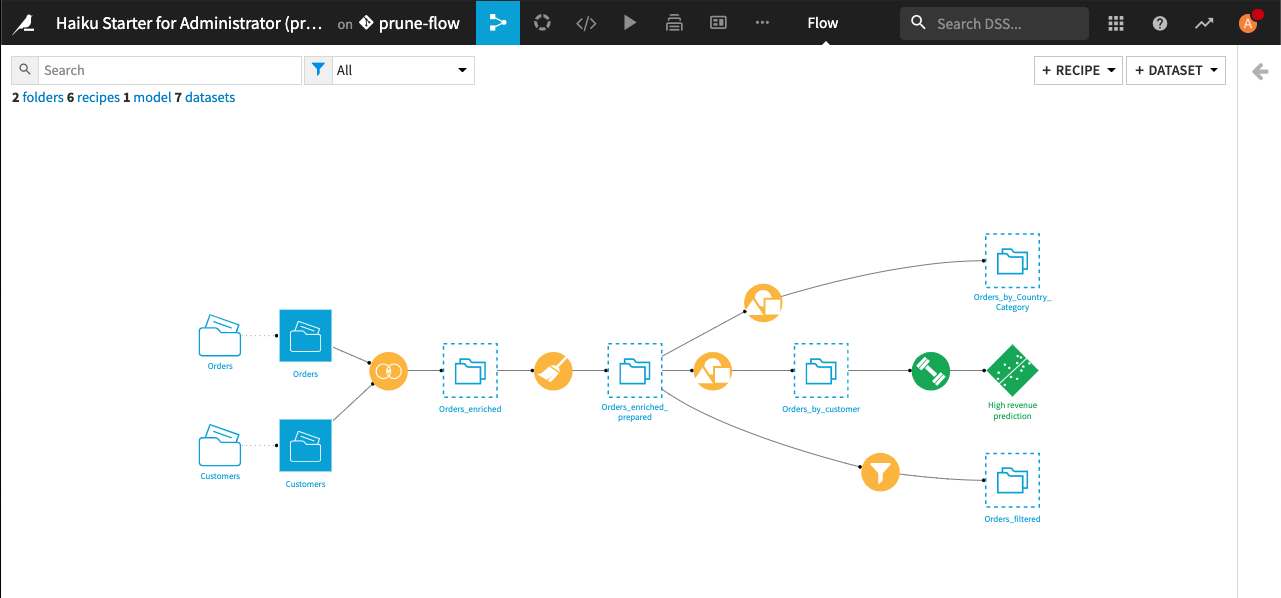
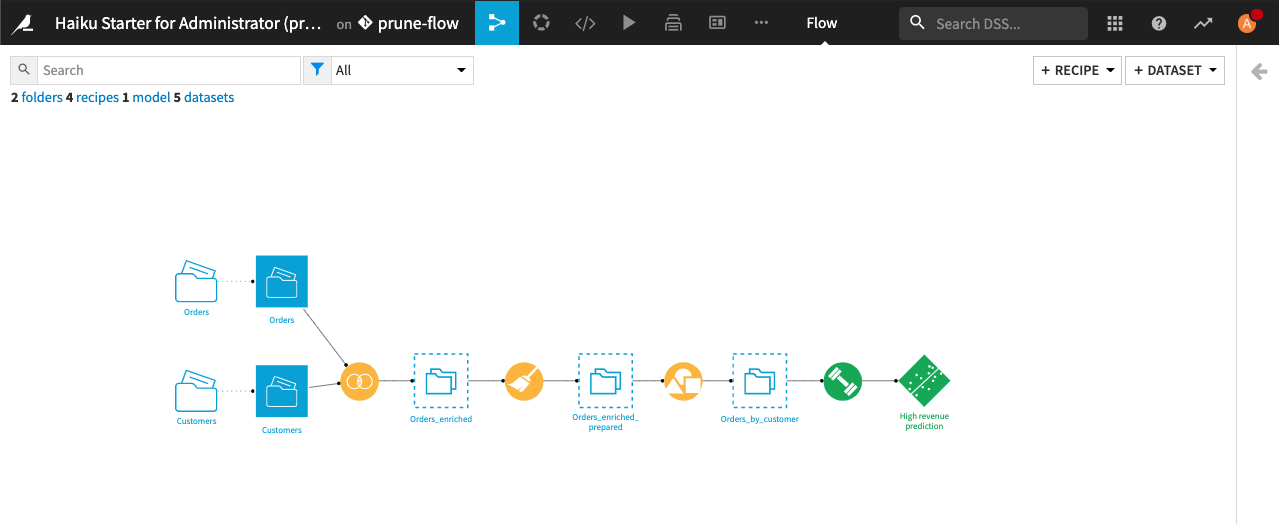
We will prune the flow by removing the Orders_by_Country_Category and Orders_filtered datasets.
Push Branch Changes to the Remote Repository
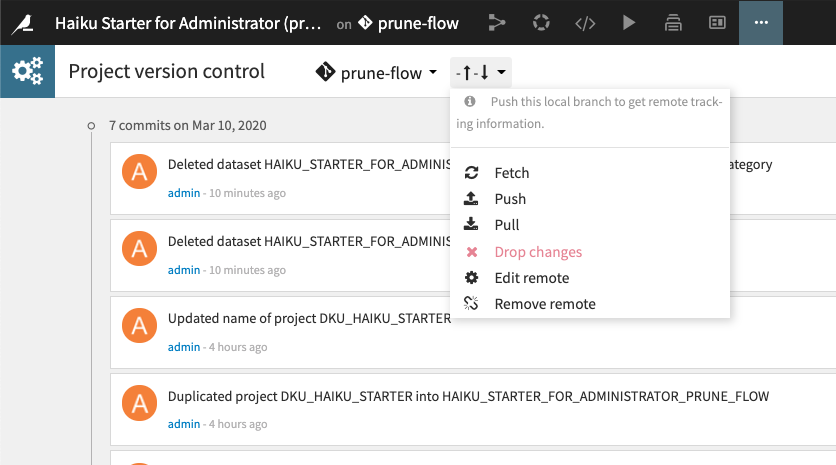
From the project menu in the top navigation bar, select Version Control.
From the change tracking indicator, select Push.
Merge Branch Changes to Master
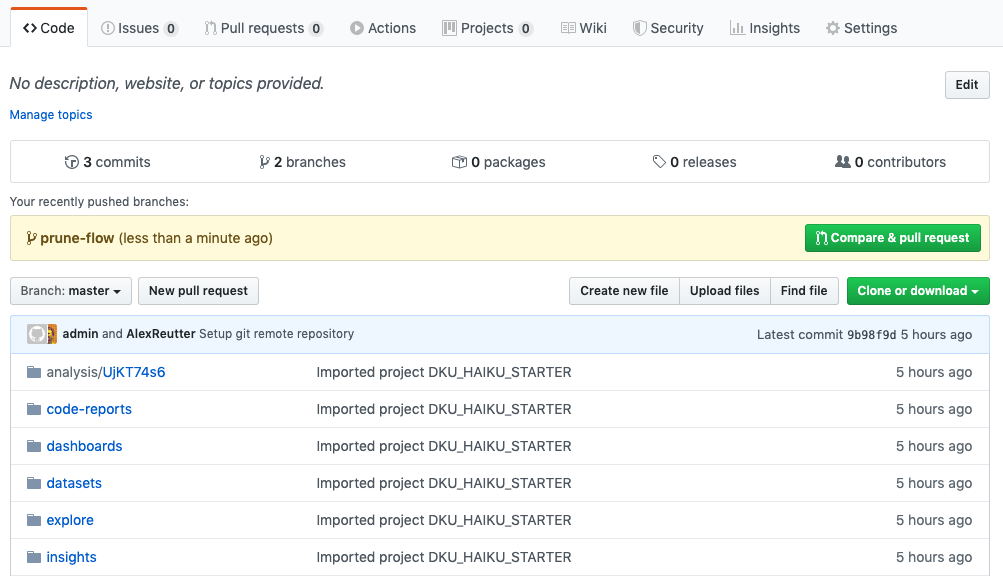
You can see the prune-flow branch has been pushed to your remote Git repo. In order to merge the changes with the master branch, do that in the normal way outside of Dataiku DSS.
Note
Branching and Merge Conflicts. This tutorial describes an extremely simple branch and merge. If multiple collaborators each create a separate branch off of master and then try to merge their separate branches back to master, they are likely to encounter Git merge conflicts. These can be difficult to resolve and we may not be able to solve them for you. Your data team should agree on a plan for how to collaborate on projects using Git, in order to avoid merge conflicts.
Pull Master Changes to Local
Finally, to see the merges reflected in Dataiku DSS, first return to the original project.
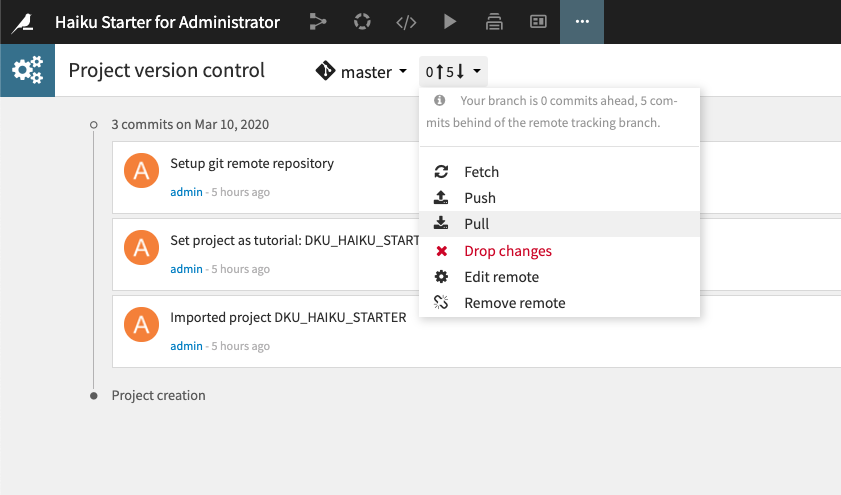
From the change tracking indicator, Fetch the changes from the remote Git repo, and then
Pull the changes to your local Git.
