Flow Zones
Flow Zones help you to organize large Flows so that they are easier to navigate. This tutorial will show you how to:
Create Flow Zones and move objects into zones to create a higher-level view of the Flow
Manage the contents and properties of existing Flow Zones
Use Flow Zones to isolate experimental branches of the Flow
Create the Project
We’ll use the Haiku Starter project
From the Dataiku homepage, click + New Project > DSS Tutorials > General Topics > Haiku Starter.
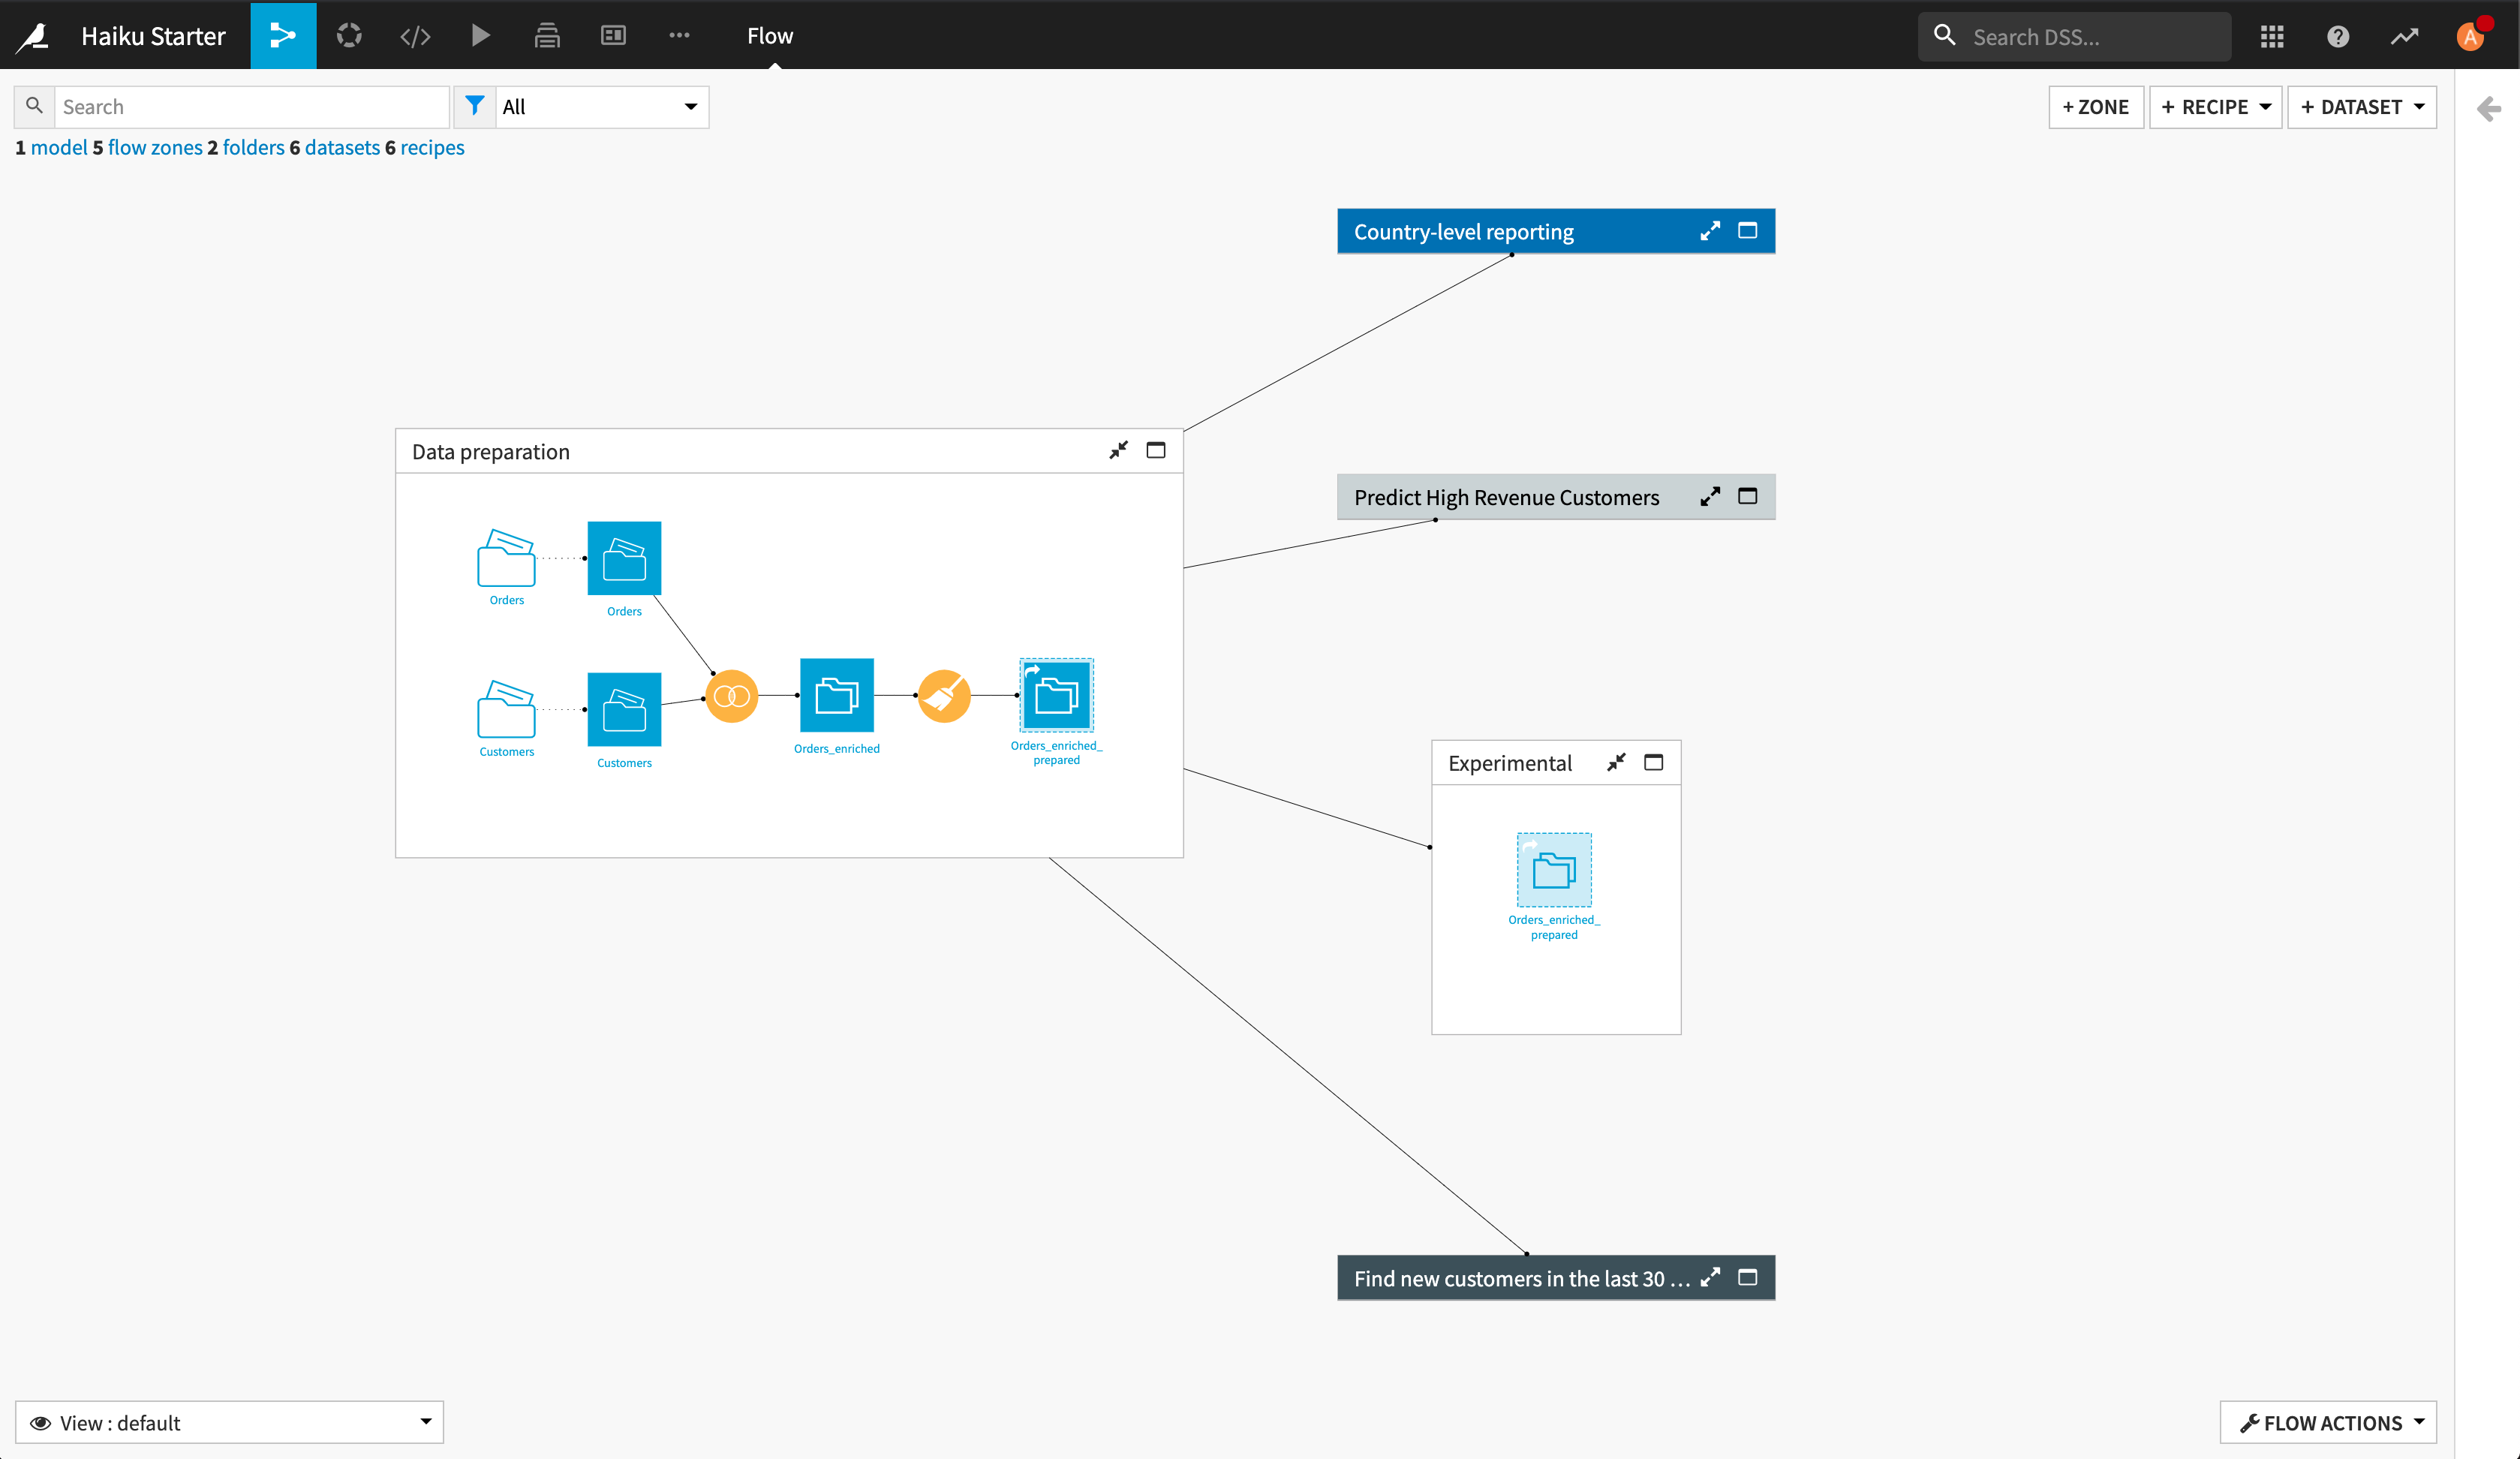
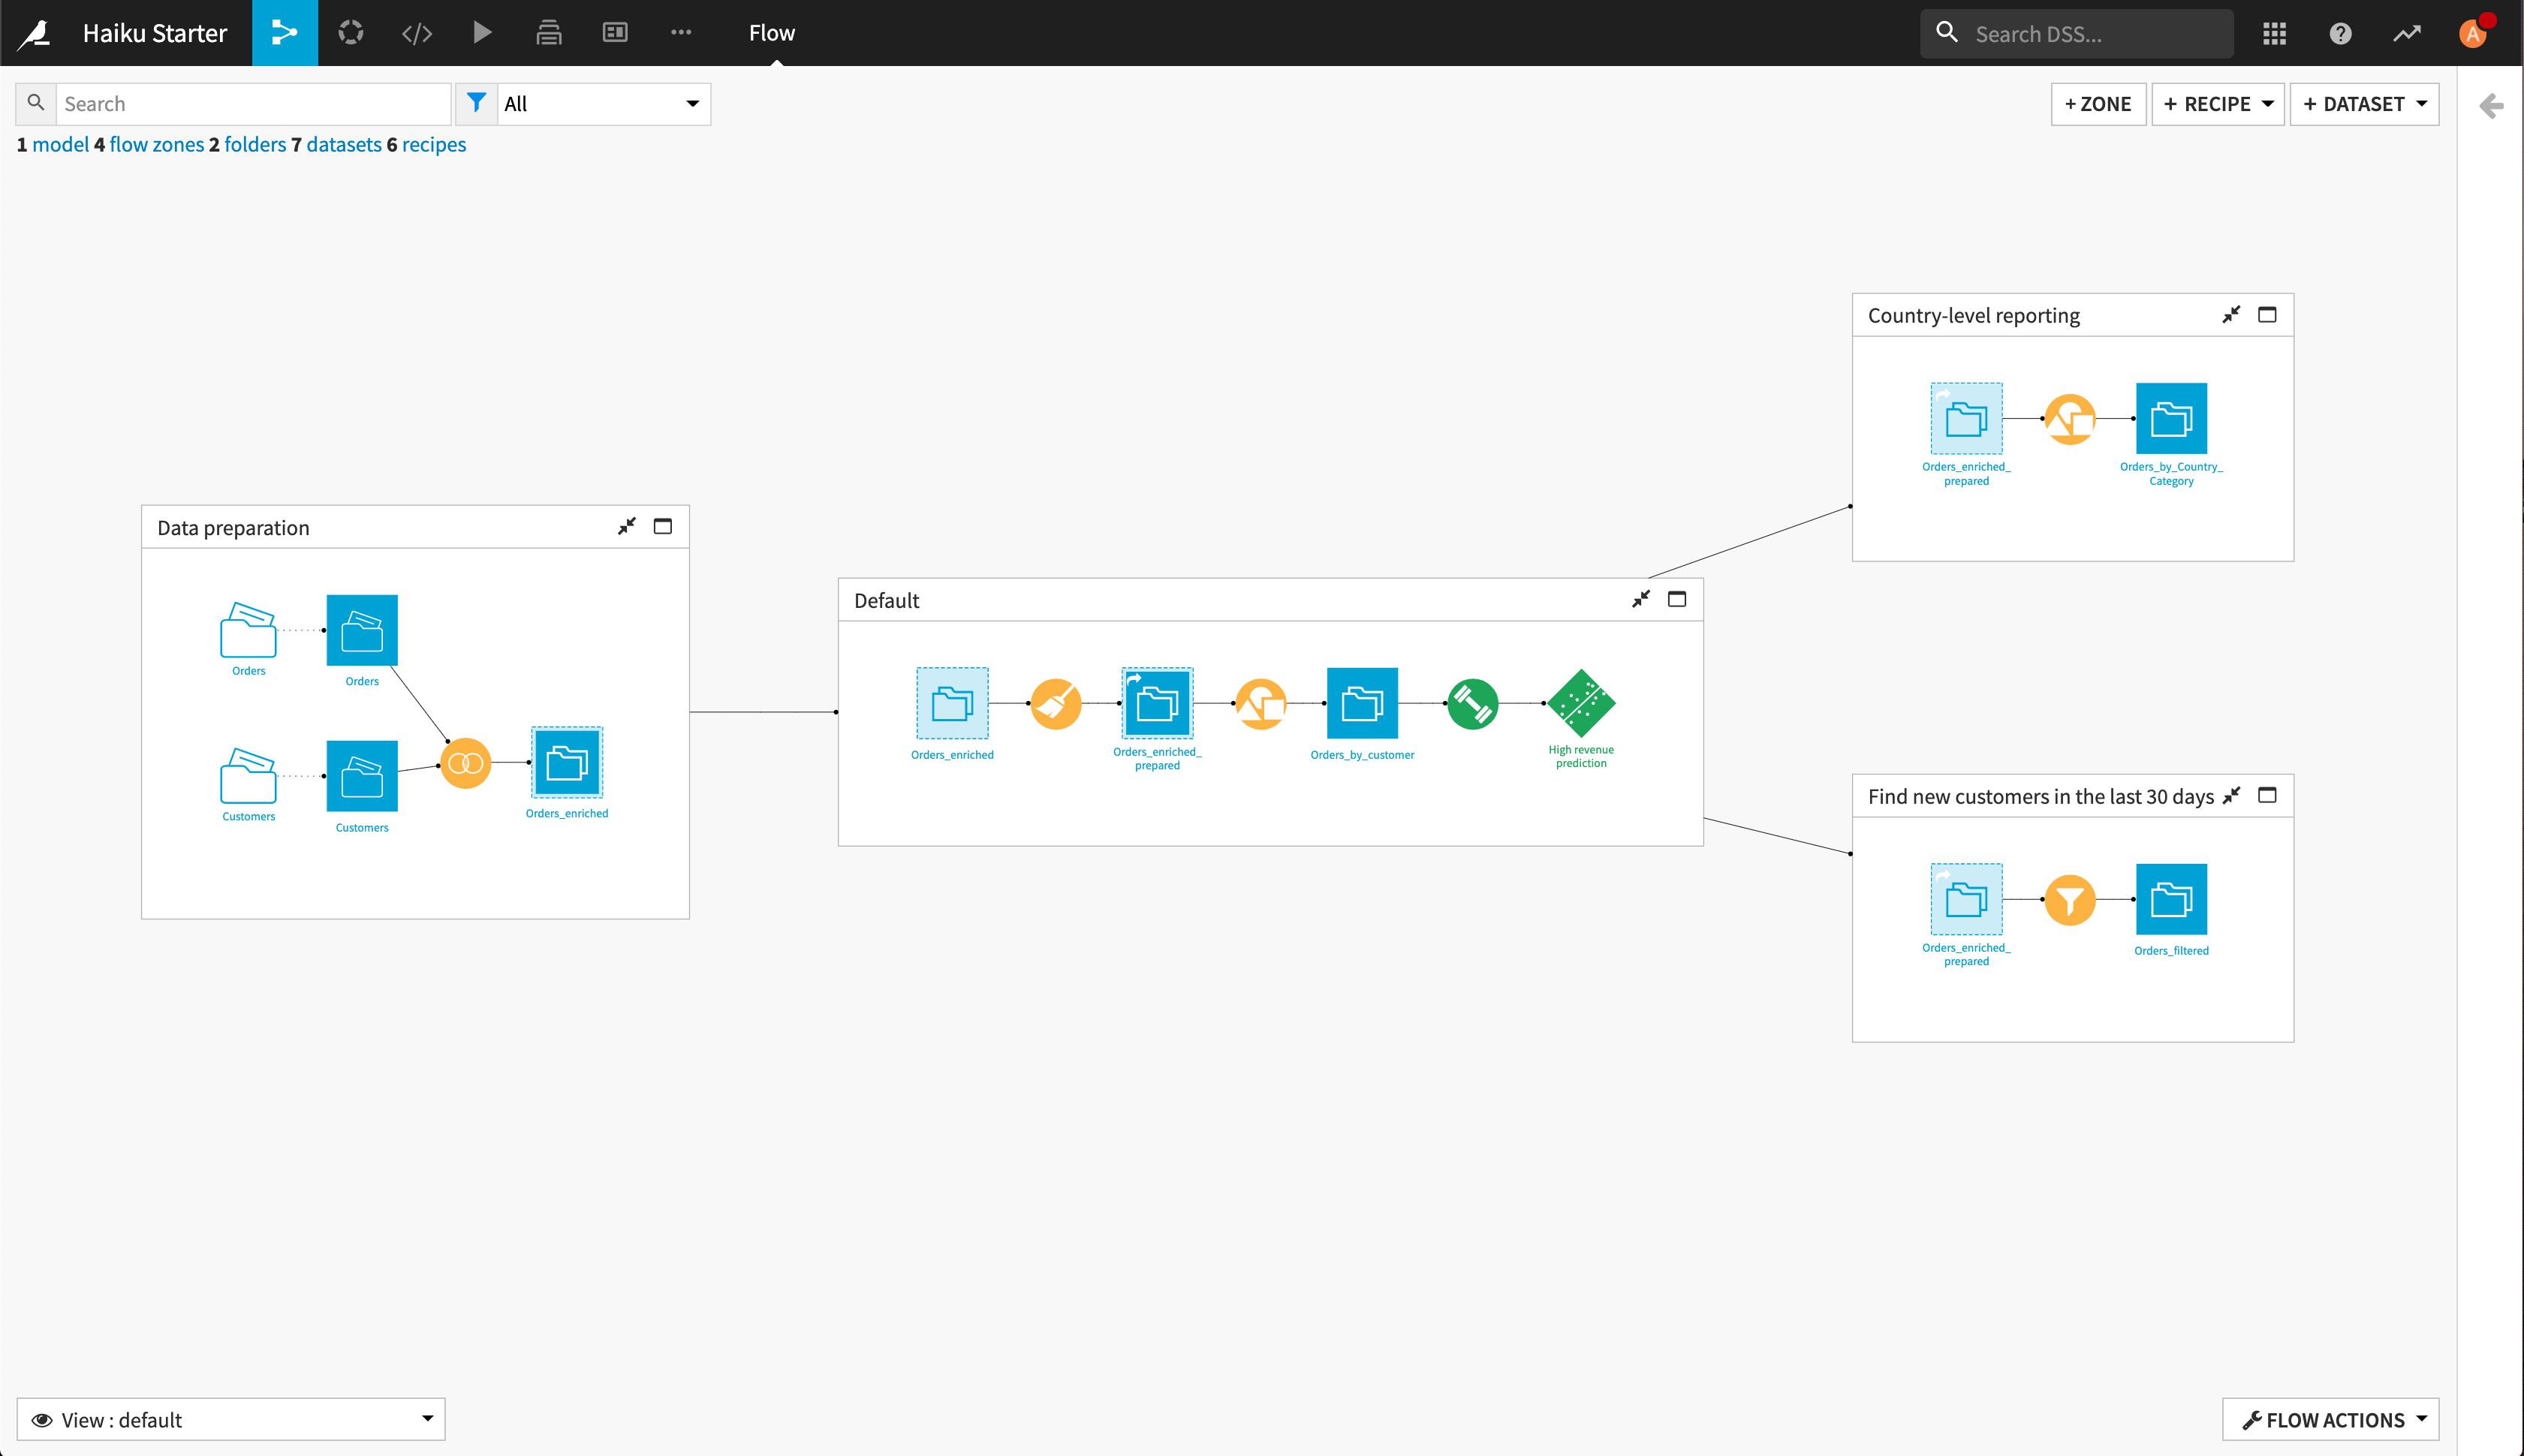
Looking at the Flow, our general plan for organizing the Flow into zones will be to create a zone for data preparation, and then zones for each branch of the Flow.
Create Flow Zones
To create your first zone:
From the top right corner of the Flow, click + Zone.
Type
Data preparationas the name of the zone.Click Confirm.

This creates an empty zone named Data preparation, and reveals the Default zone, which contains the rest of the Flow.
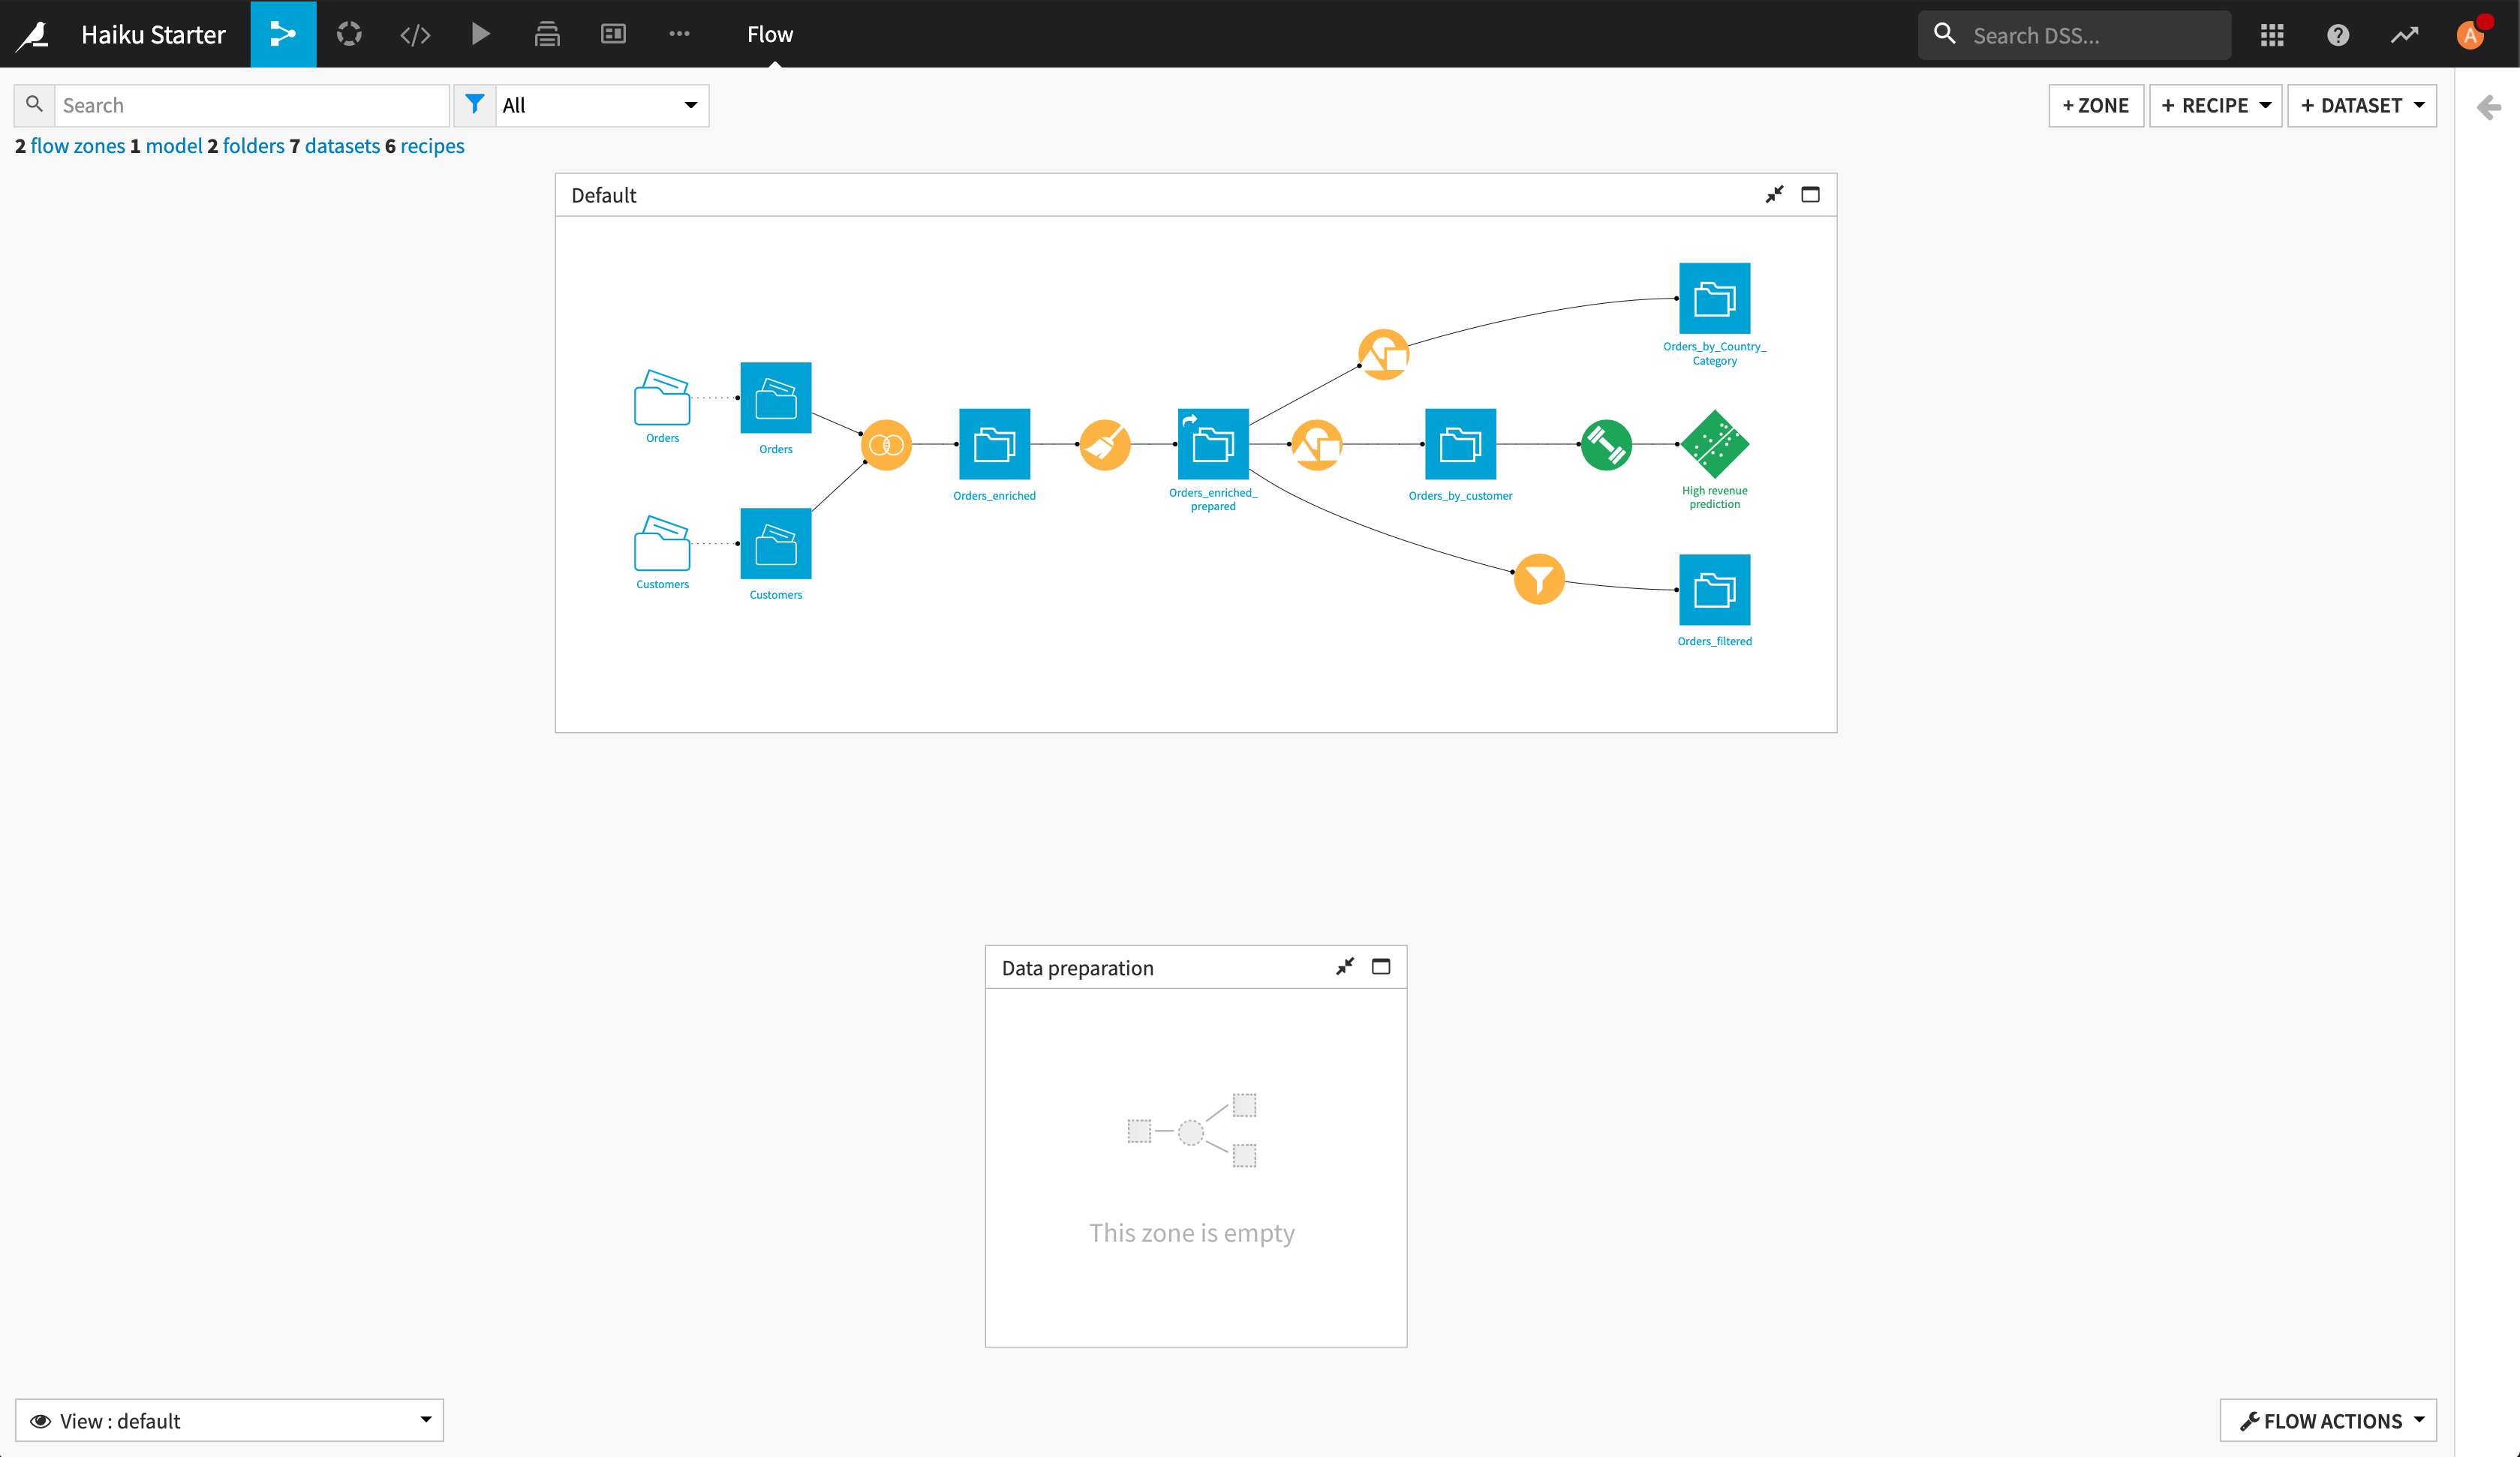
To move objects into the Data preparation flow zone:
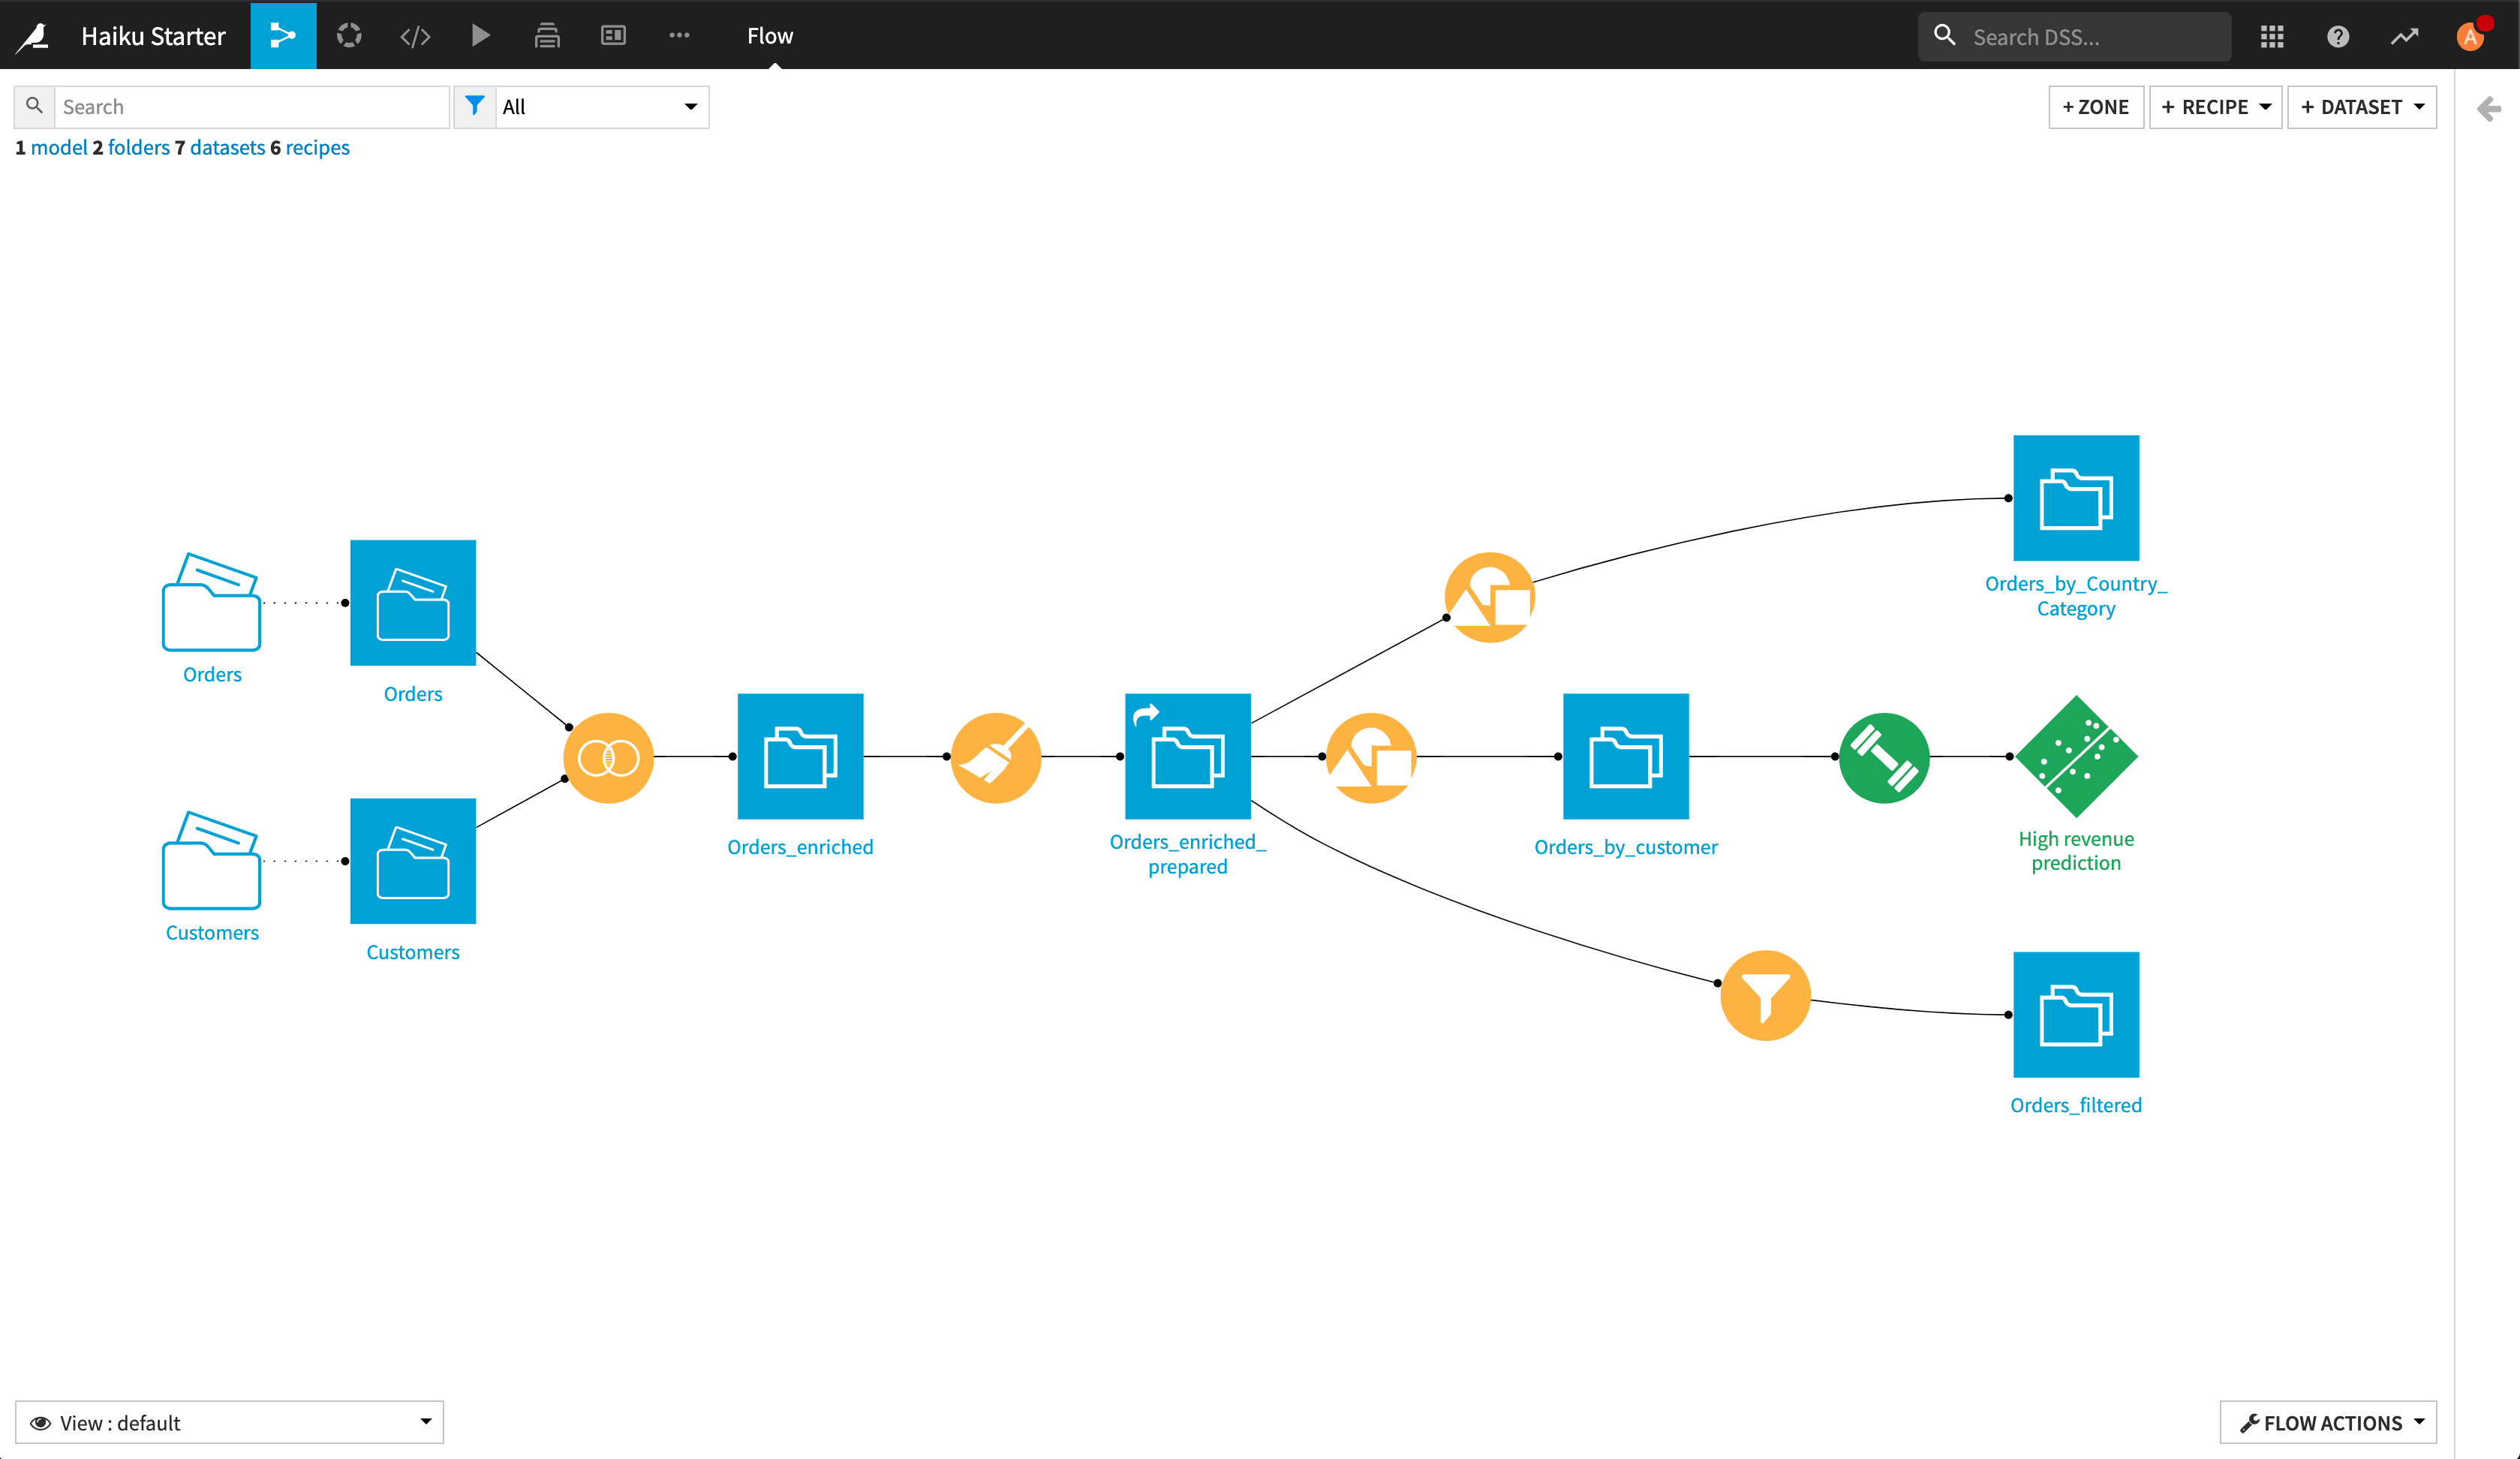
Select the Orders and Customers folders and datasets, the Join recipe, and the Orders_enriched dataset.
Right-click to open the context menu and select Move to a flow zone.
Confirm in the modal dialog that Data preparation is selected as the zone to move the objects to, then click Move.

You can create further zones in a similar fashion, or directly from selected objects in the Flow. For example:
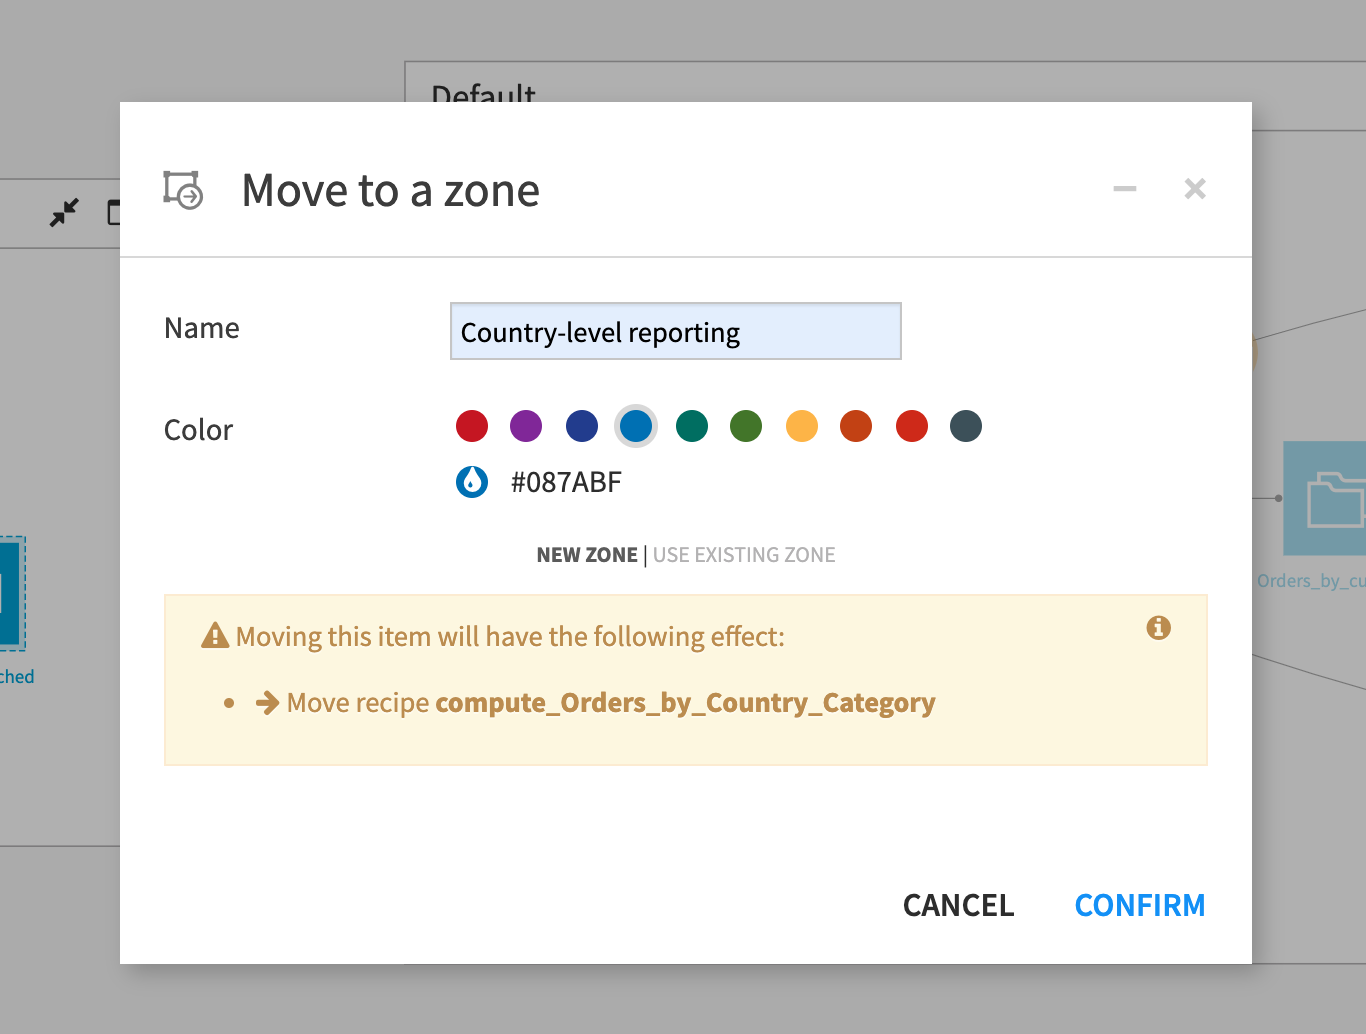
Select the dataset Orders_by_Country_Category.
From the context menu, select Move to a flow zone.
Within the modal dialog, click New Zone and type
Country-level reportingas the name.Click Confirm.
The dialog warns that moving this dataset will have the additional effect of moving the Group recipe, which is the parent of the Orders_by_Country_Category dataset, into the new zone. A recipe and its outputs always live in the same zone.
Now select the Filter recipe and the Orders_filtered dataset.
From the context menu select Move to a flow zone.
Within the modal dialog, click New Zone and type
Find new customers in the last 30 daysas the name.Click Confirm.
We can immediately see the labeling benefits of Flow Zones. While we may be able to infer the purpose of the datasets (Orders_by_Country_Category and Orders_filtered) from their names, the names of the zones (which contain the parts of the Flow that creates the datasets) provide more descriptive labels that immediately tell us their purpose.
Note
Admittedly, the name of the Find new customers in the last 30 days zone is not entirely accurate, since the Filter recipe finds new customers in the 30 days prior to March 1, 2017. We’ll let it slide now, and regret it in 6 months when we’ve forgotten that we never updated the recipe to use the current date with new data.
We now realize that we made a mistake when initially populating the Data preparation zone. The positions of the zones are slightly awkward, and the Orders_enriched_prepared dataset really belongs in the Data preparation zone. This is easy to fix by selecting the Orders_enriched_prepared dataset and its parent Prepare recipe and moving them to the correct zone.
Finally, we can rename the Default zone to something more descriptive.
Right-click on the Default zone and select Edit from the context menu.
Type
Predict High Revenue Customersas the new name.
Using Zones to break up the Flow allows you to see things at a higher level of abstraction. This can help to quickly onboard new team members to projects, as they will be able to grasp the overall purpose of the Flow before getting into the details.
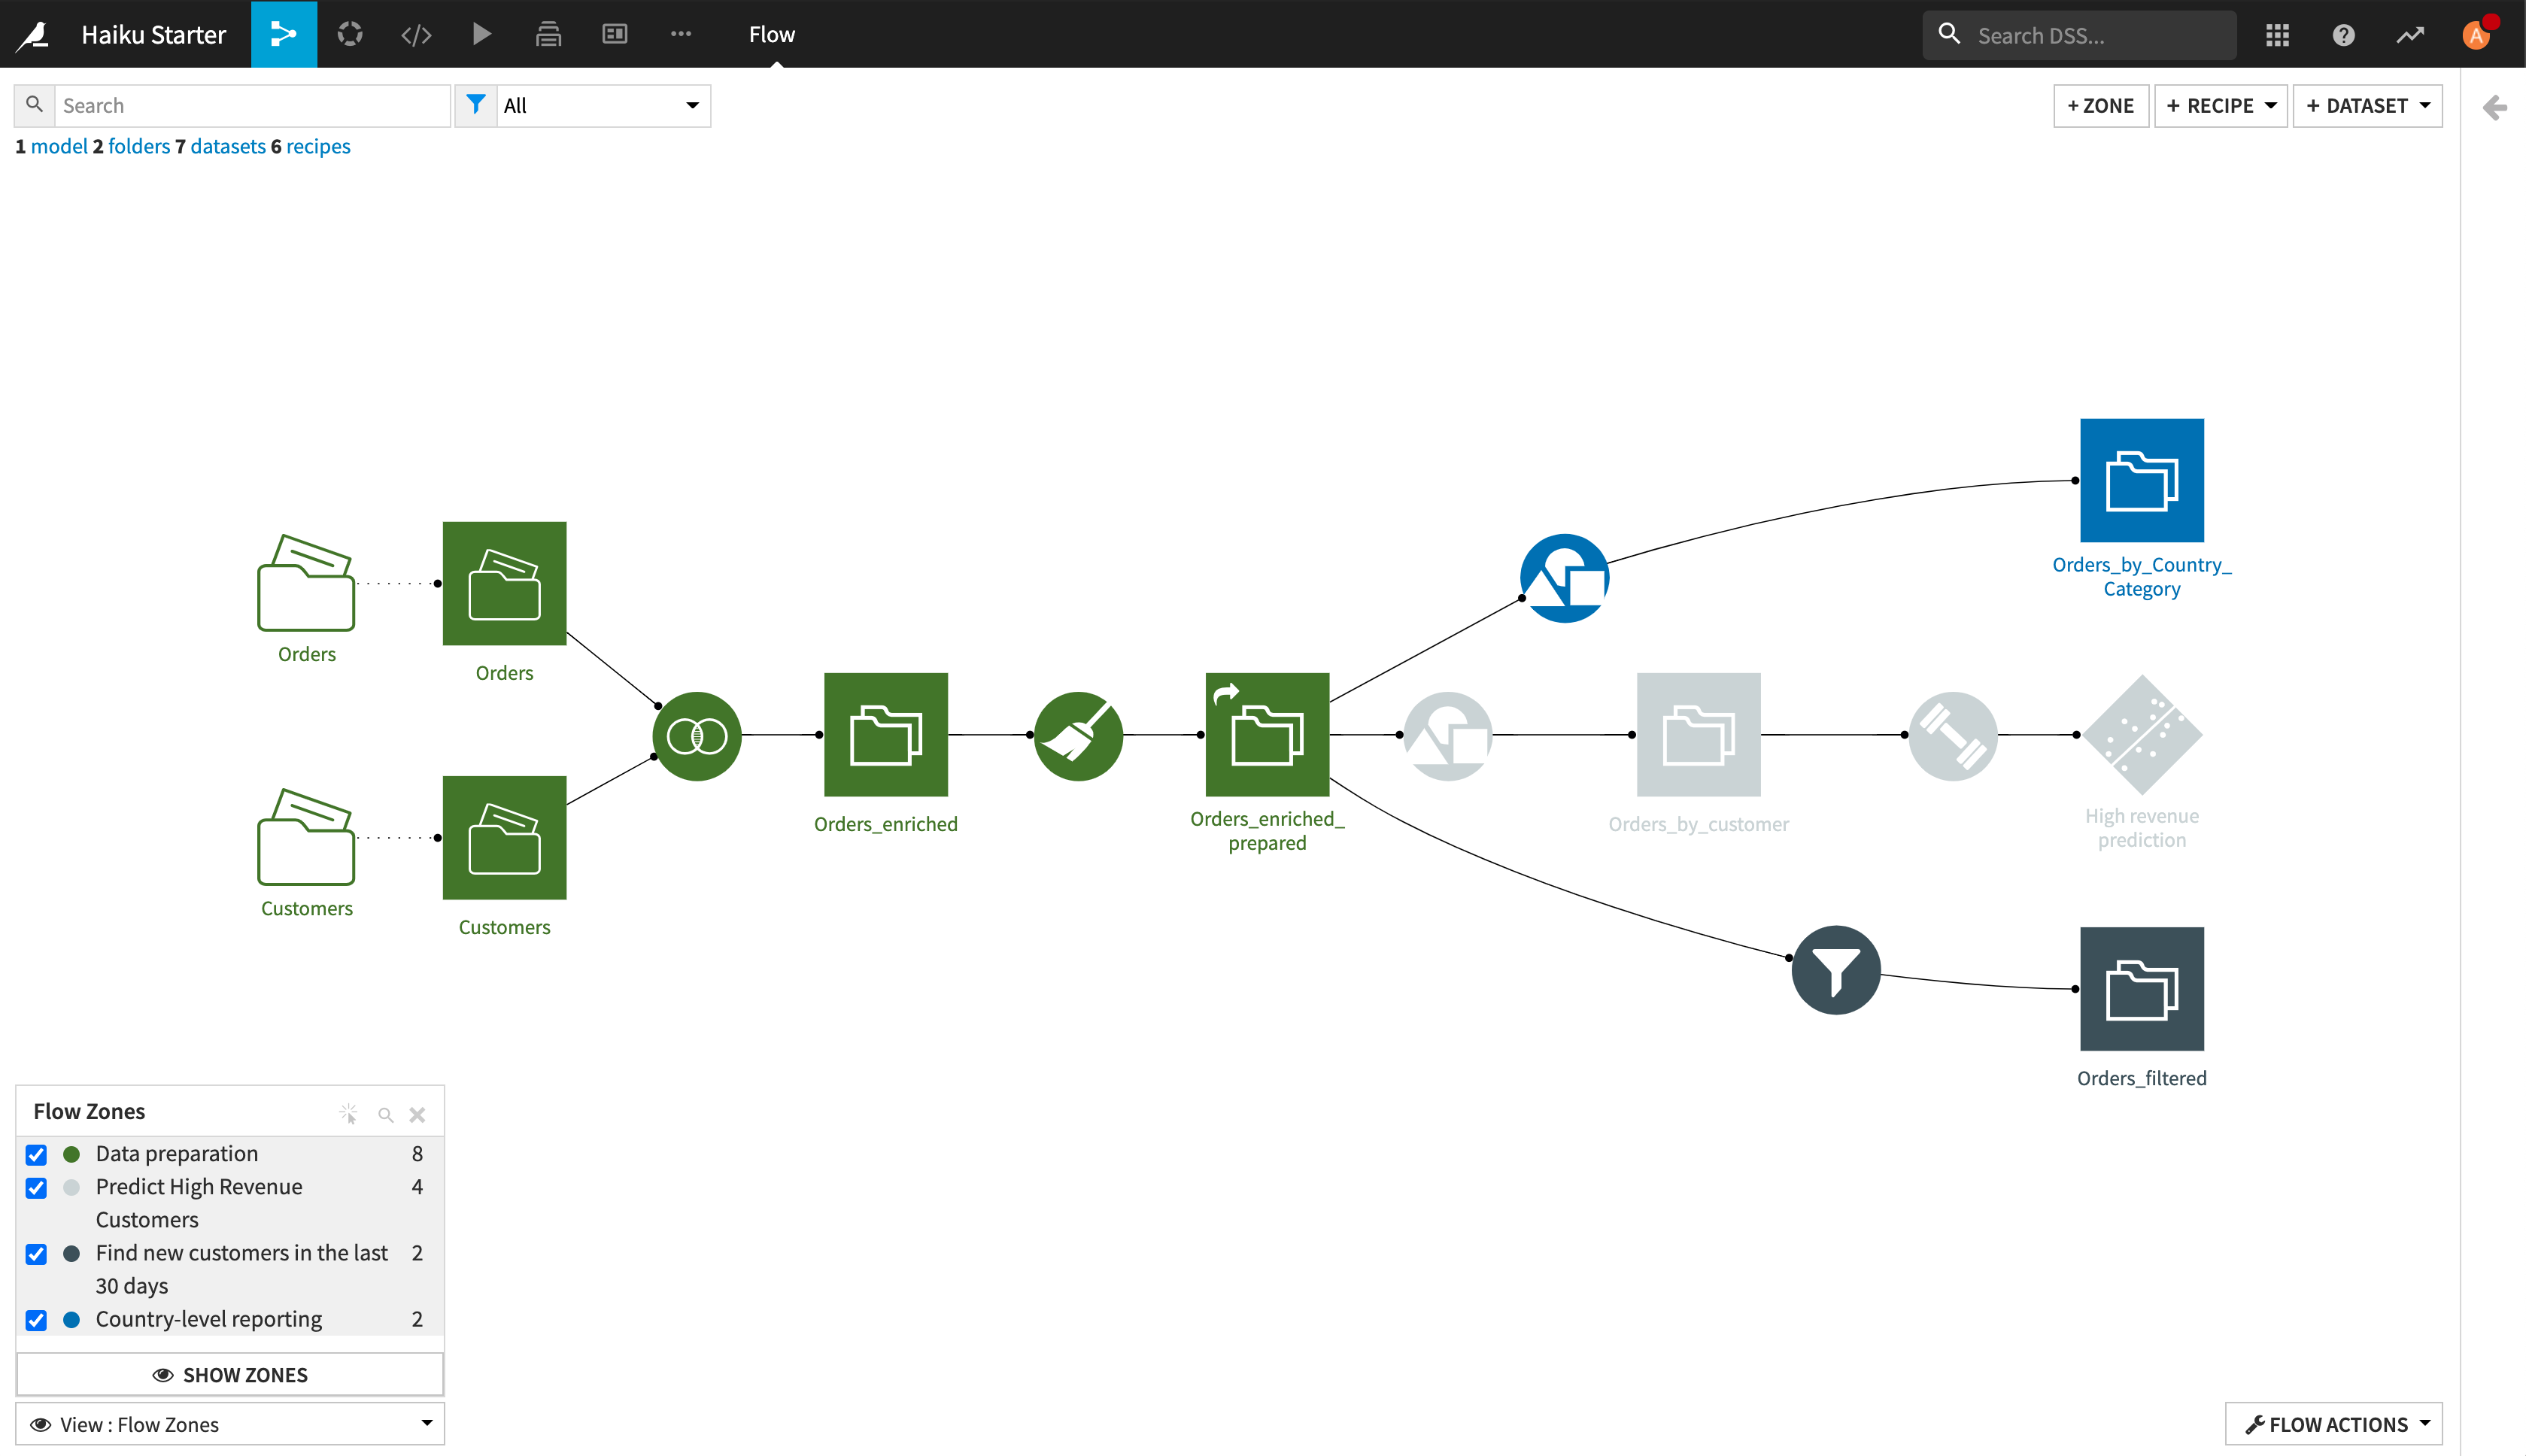
Flow Zone Views
There is a special Flow Zone view:
From the View menu in the lower left of the Flow, select Flow Zones.
Click Hide Zones.
You can thus get a view of the Flow with the zone boxes hidden, but with the Flow objects colored according to their assigned Zone.
Hiding Flow Details and Zooming Into Flows
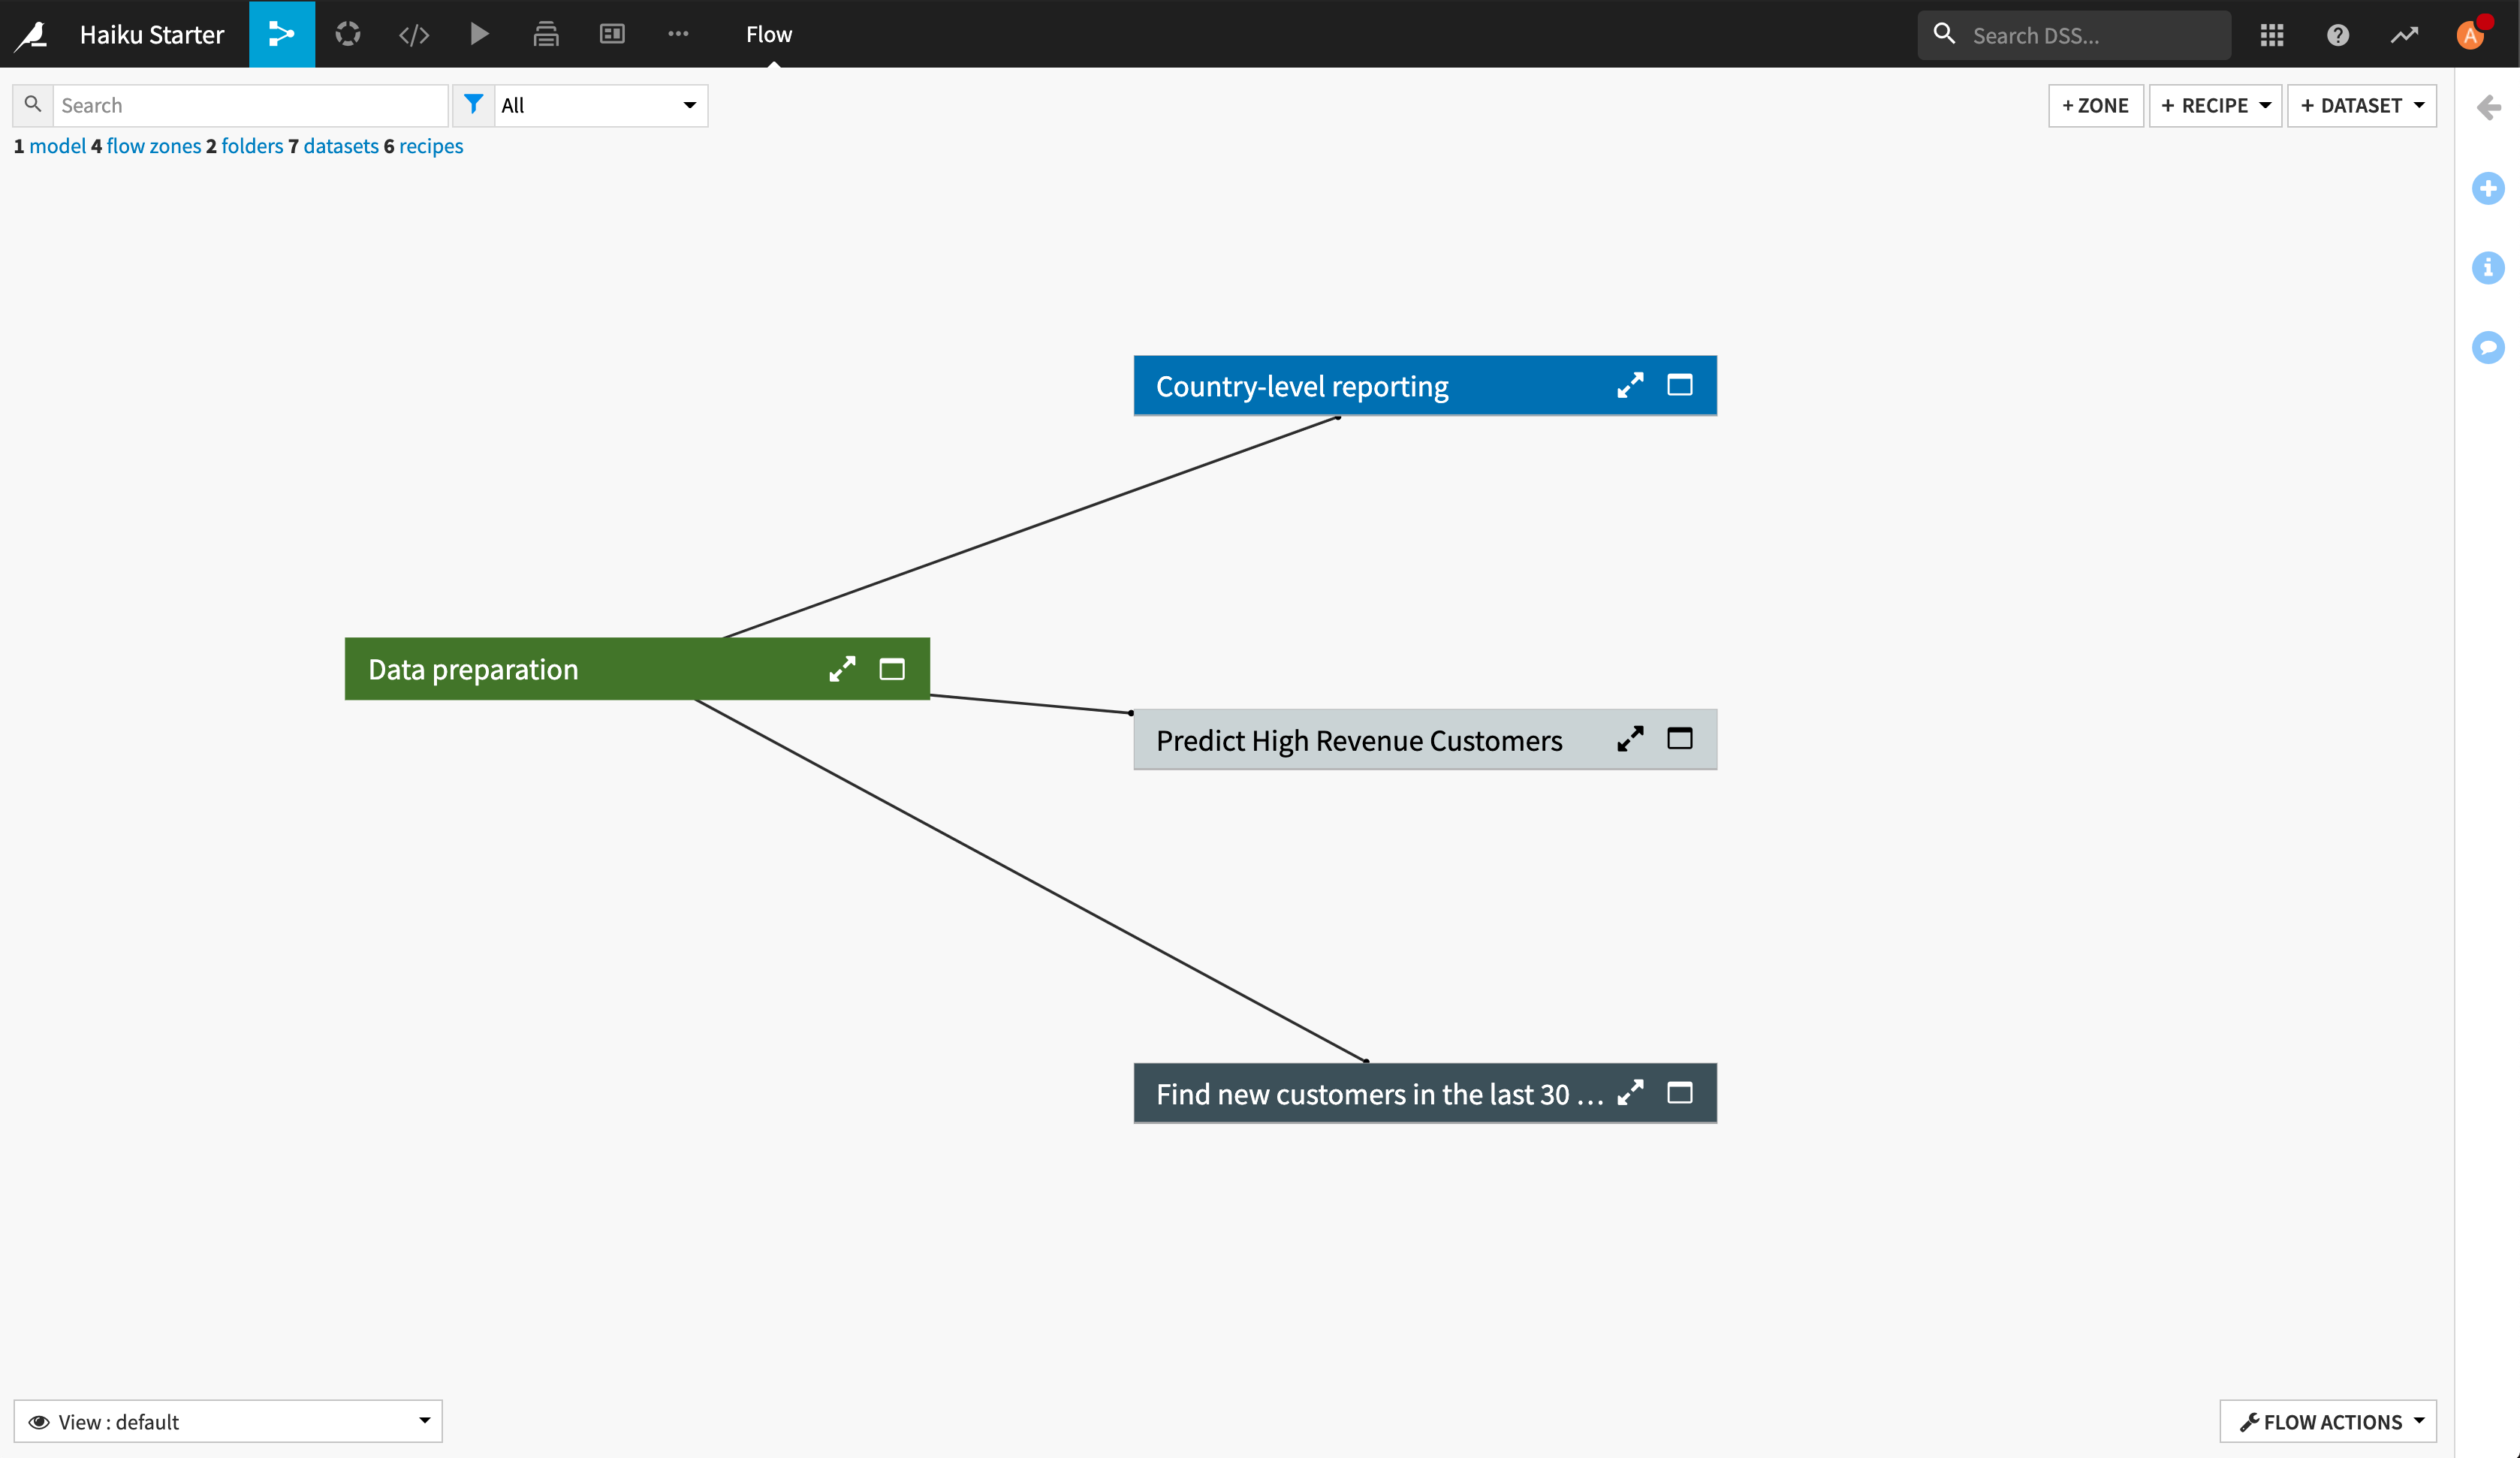
You can also hide the details of zones to avoid distracting from the high-level view of the Flow.
Close the Flow Zone view.
Right-click on any of the zones, then select Collapse all.
You can then expand individual Zones again when you want to see those details, or all at once. This feature is particularly useful in large Flows with many Zones.
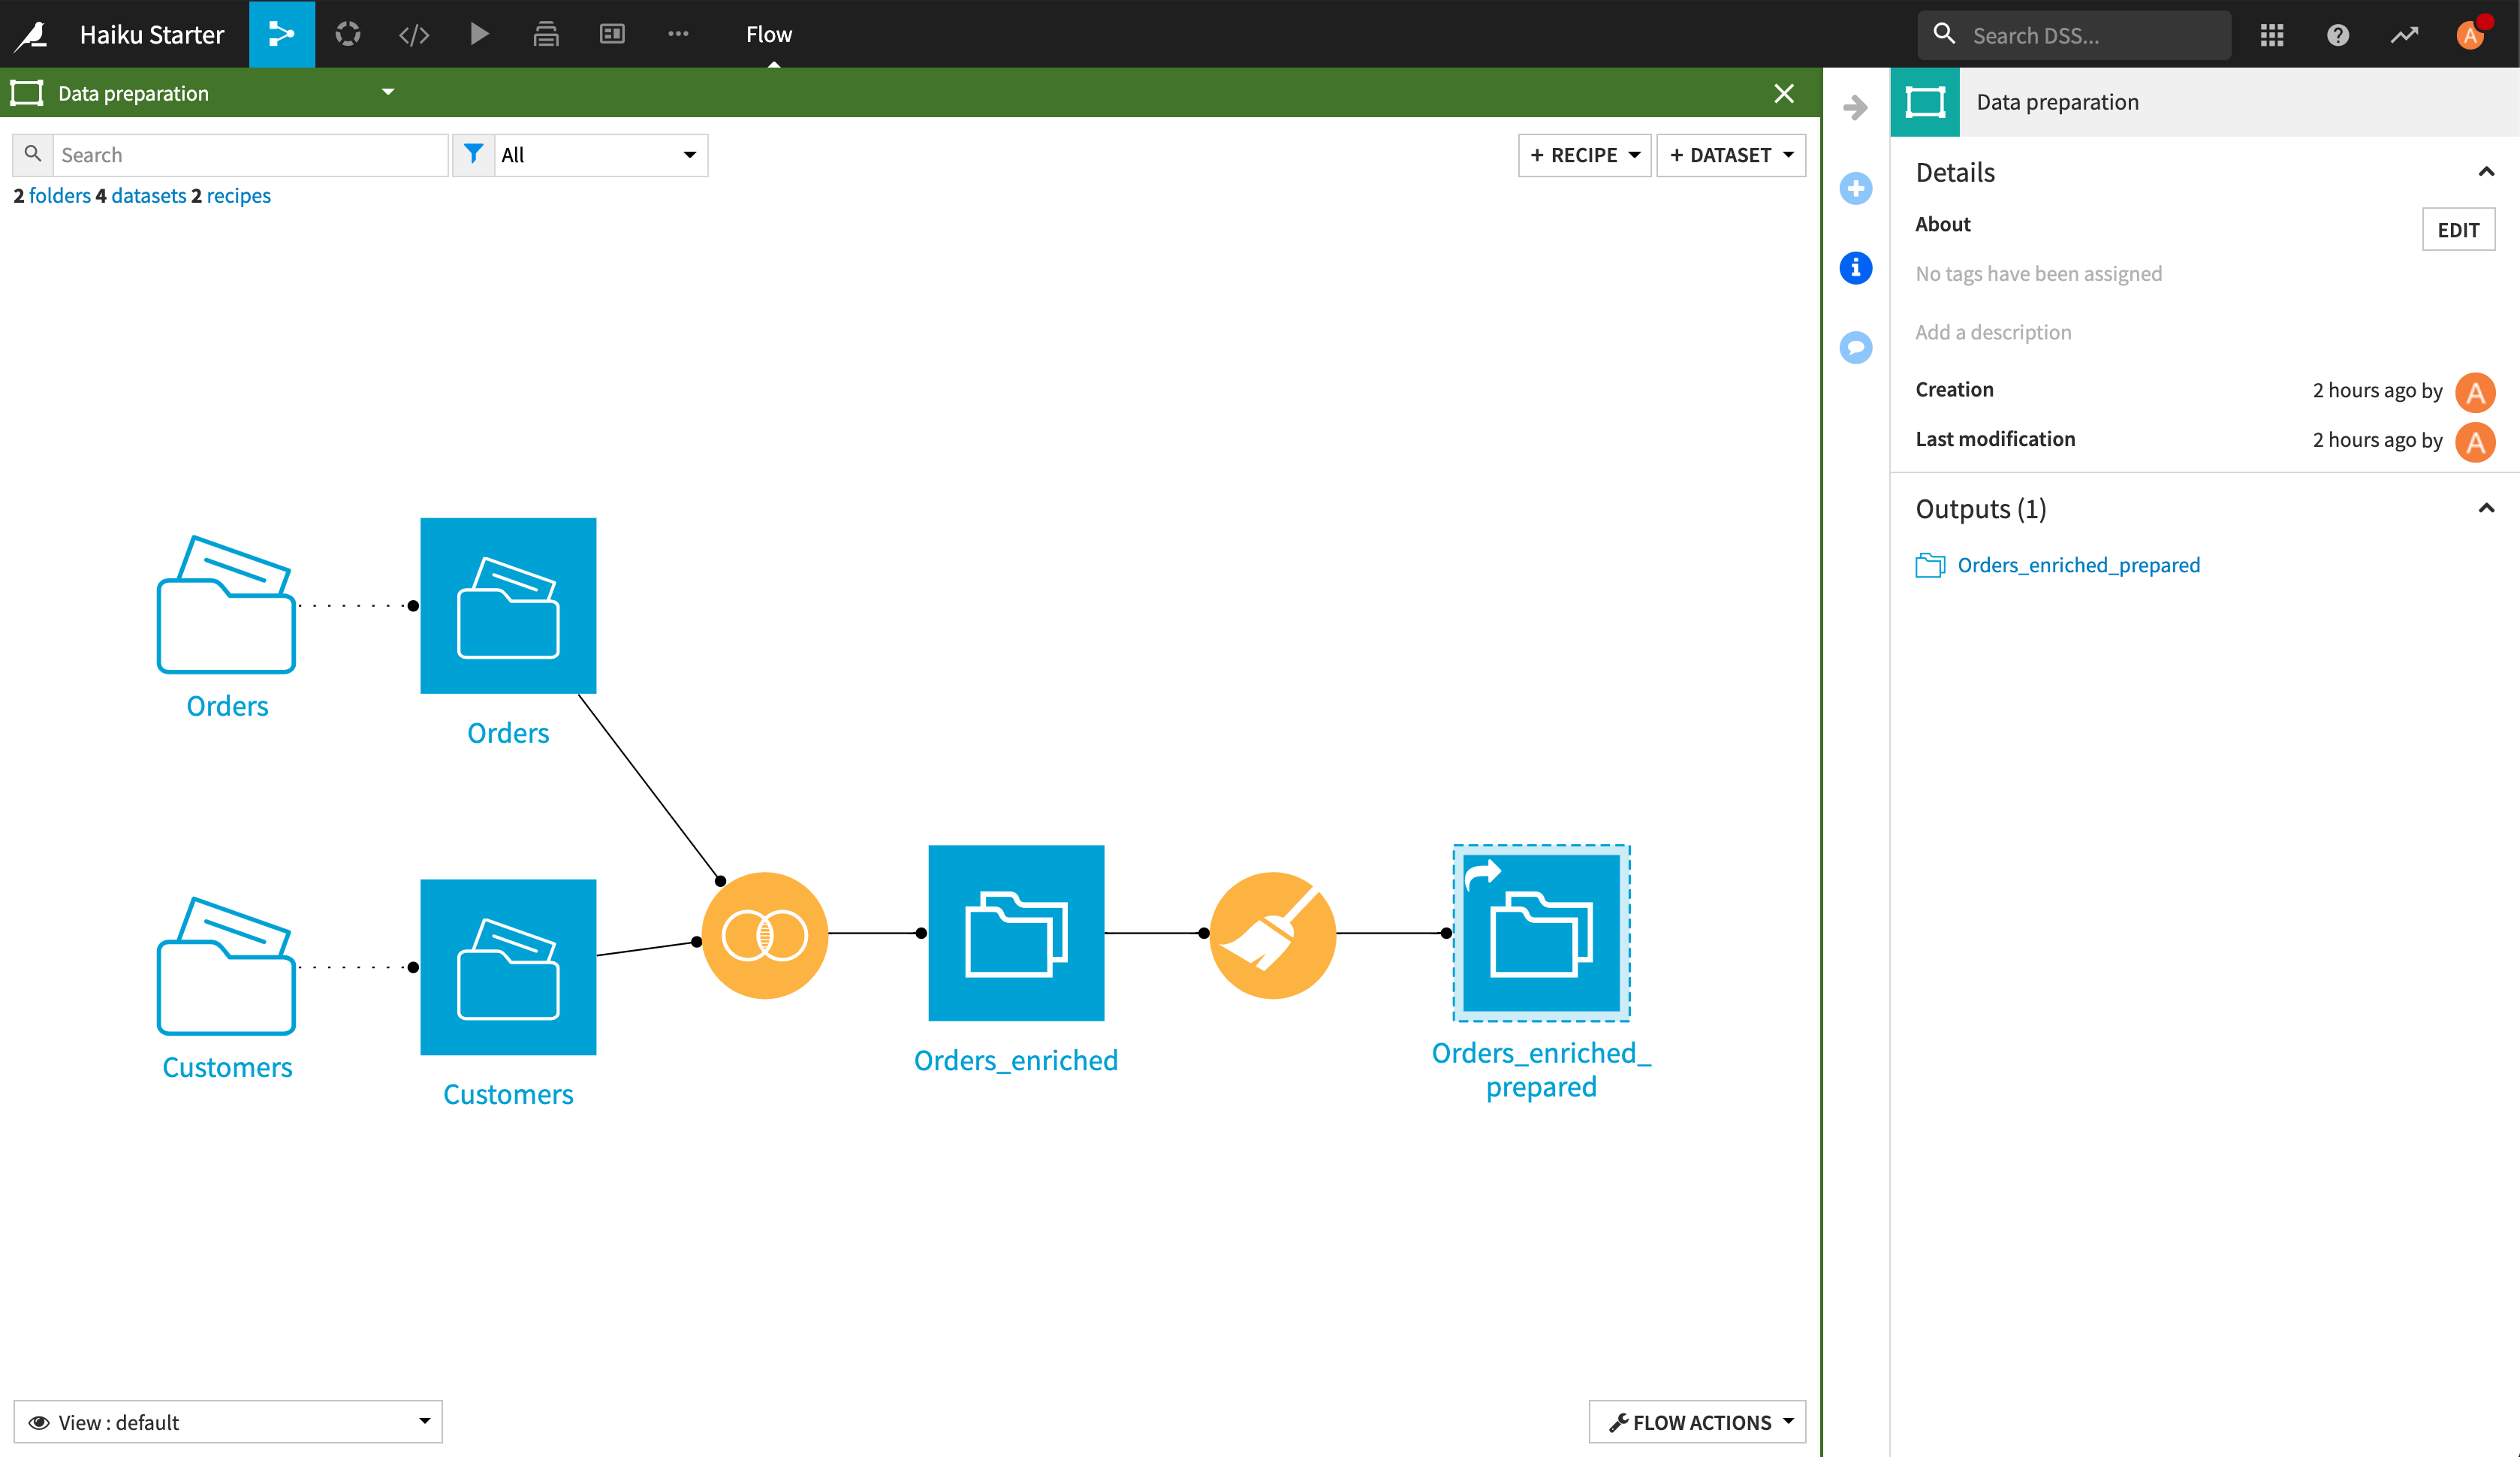
You can zoom in on a Zone to see the details of that part of the Flow.
In the title bar of the Data preparation zone, click the Open icon next to the expand/collapse icon.
While zoomed in to the Zone, it’s easier to work with the objects in this part of the Flow.
Note
Since they are DSS objects, you can give Flow Zones descriptions and tags, or hold discussions on them. You can access these functions in the right panel, as you can with other Flow objects.
Isolating Experimental Work
Lastly, you can also use Flow Zones to mark off “experimental” work within a Flow. Simply share, rather than move, the objects that you want to experiment with to a new zone.
Close the Data preparation Zone to return to the main view of the Flow.
In the Data preparation Zone, right-click on the Orders_enriched_prepared dataset.
From the context menu, select Share to a flow zone.
In the model dialog, click New Zone and type
Experimentalas the name.Click Confirm