Building CI/CD pipelines for Dataiku DSS
In this section of the Knowledge Base, you will find step-by-step articles on how to build a fully-operational CI/CD pipeline for Dataiku DSS in various situations.
Prerequisites
As an overview, we recommend reading our blog post on Continuous integration and continuous deployment (CI/CD) in Dataiku DSS that describes the concepts and questions in order to fully optimize CI/CD.
For you to be at ease with the content, you need to know about DSS flows and automation scenarios. We strongly recommend following the Operationalization series from the Dataiku Academy.
In addition, a good understanding of CI/CD orchestration, and some Python skills (including pytest ideally) are needed.
In this article, we will describe the common logic and the use case. Once familiar with it, you can proceed to the setup that is closest to your need:
Using Jenkins to deploy an API endpoint with API Deployer
Using Jenkins to deploy an analytics flow with Project Deployer
Using Azure pipelines to deploy an analytics flow with Project Deployer
Using Jenkins to deploy an analytics flow directly (i.e. without Project Deployer)
You’ll find the links to these articles at the bottom of the page.
Architecture
Operationalization requires a minimal setup of your platforms in order to leverage the different types of DSS nodes:
Design nodes are the all-around type of nodes where you can do almost everything. We will design the project and the API endpoints on a Design node so you need to have one available. See here for the full installation guide.
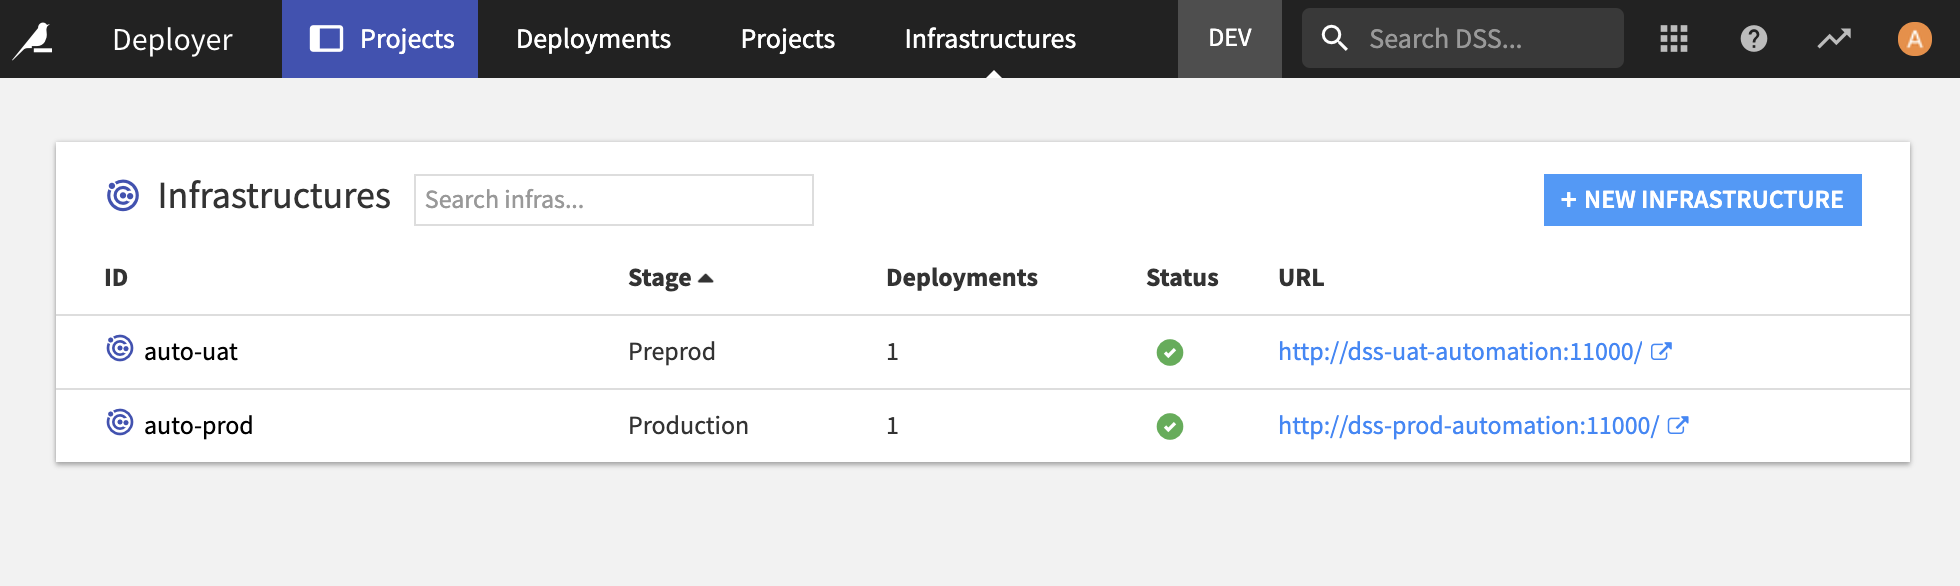
Automation nodes are made to run production analytics flows. You will find the installation guide in the documentation. If you are looking to deploy an analytics flow, you will need two of those. In reality, you only need one, but in our pipeline, we will leverage a pre-prod instance to run some tests before moving to a production one.
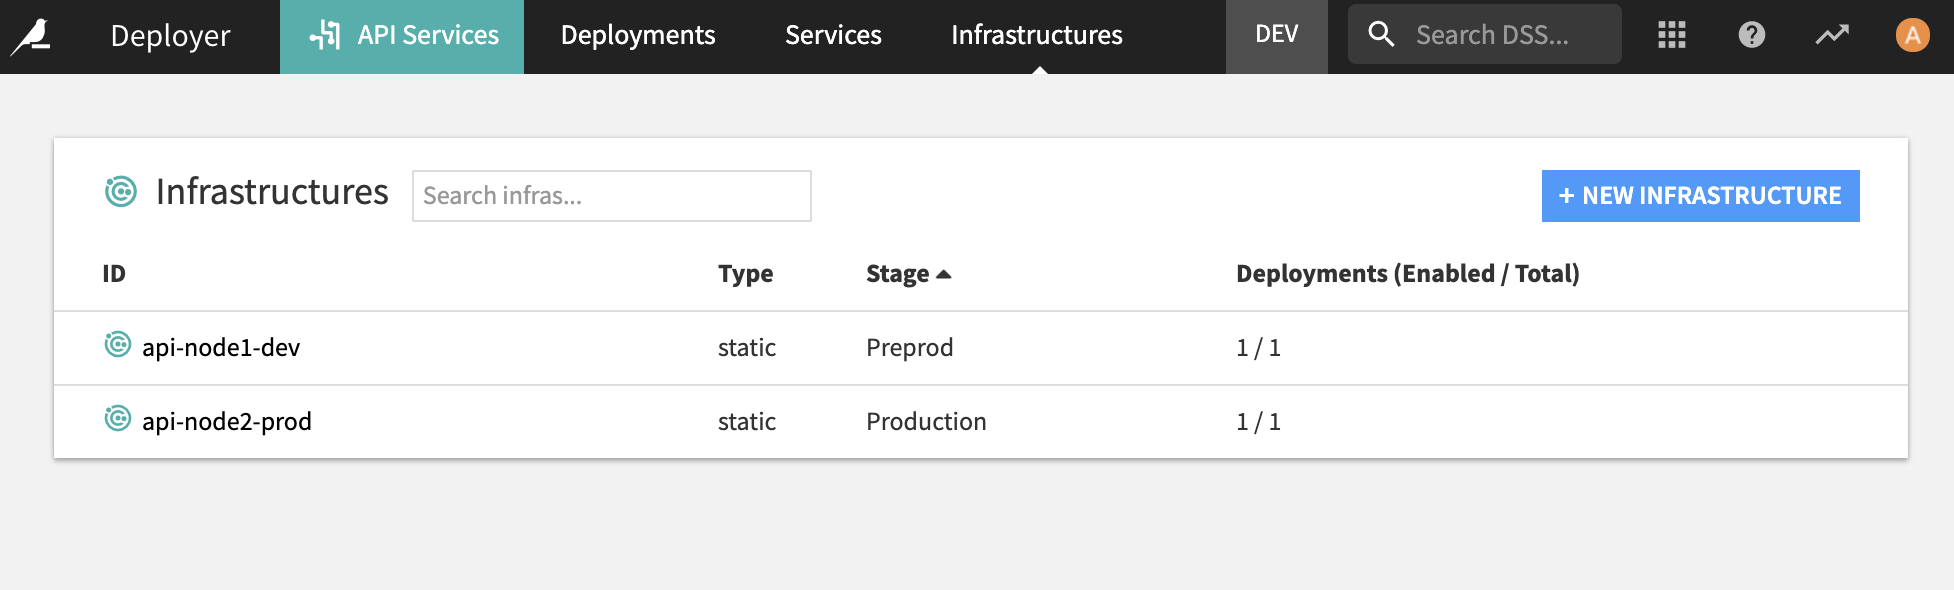
API nodes are made to serve live prediction requests. You can either deploy a single static API node or a kubernetes cluster of API nodes. In the examples related to API endpoints deployment, we need two static nodes, one for testing and one for production. See the documentation for the installation guide.
In the API node configuration, you will need to set up the API Deployer. You can see how to do that in the documentation.
In the Automation node configuration, if you want to use the Project Deployer, you will also need to configure it as well, as explained in the documentation.
In addition to these DSS requirements, you need an orchestrator with the ability to execute Python code. Our examples are using mostly Jenkins, but there is one on also on Azure Pipelines. Generally speaking, any pipeline tool will work, as long as you can execute Python code with it. (Technically, you can also use DSS HTTP REST APIs, but this will be much more complex so we strongly advise to go for the Python client).
We will also mention the usage of an Artifact repository, where we will archive the project file before moving it to production. We showcase using Artifactory, but any tool that you can push a zip file through the orchestrator will work as easily (such as Azure devops Artifacts, Maven, Nexus, or a file system such as AWS S3 or Google Cloud Storage)
Lastly, the code of our pipeline itself will be stored in a code repository. In the examples, we store it in GitHub, but this can be any code repository compatible with your orchestrator.

Note
Automation and API nodes require a specific commercial licence. If you are a customer and want to know more about those features, please contact your Customer Success Manager to see available options.
The Project
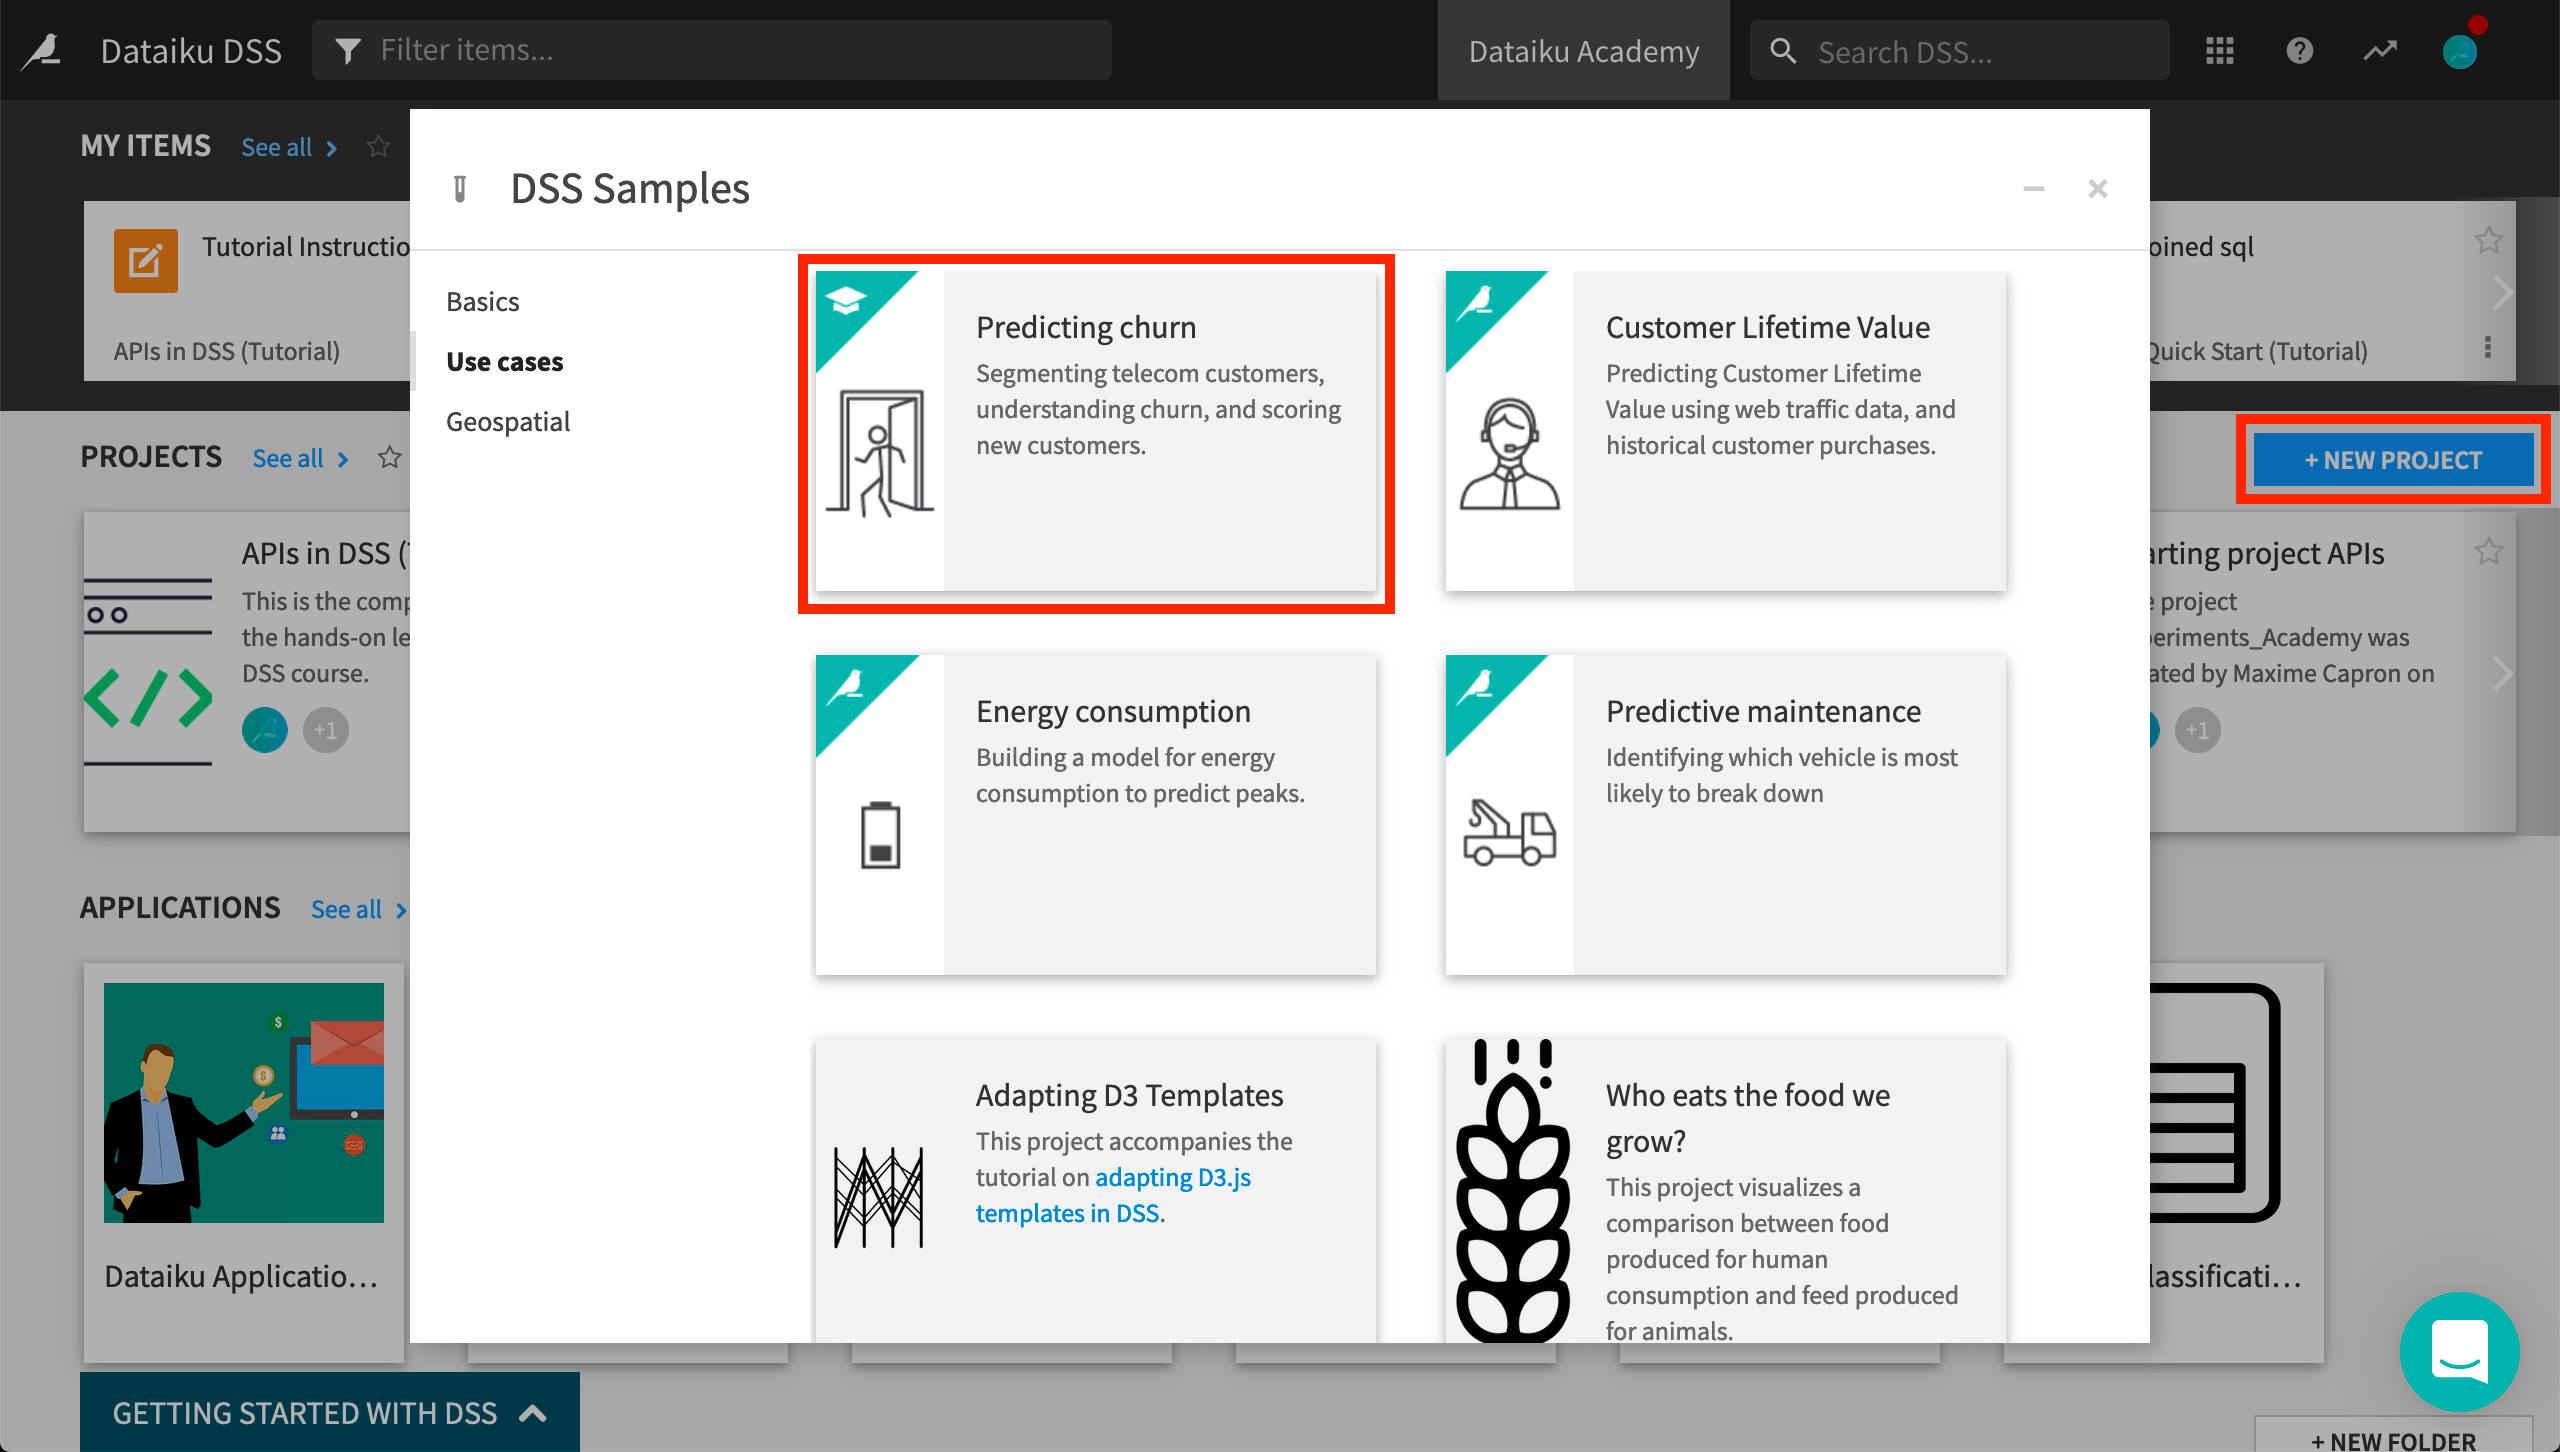
We will use the Prediction churn sample project. You can directly deploy it on your DSS instance. From the DSS homepage, click +New Project > Sample projects > Use cases > Predicting churn.
For the Analytics flow use case, you need to add a twist at the end with a Python recipe. The code itself is not really important. We just need it to showcase code analysis. You can even leave the default code generated at the recipe’s creation.
This is not required for the real-time prediction use cases where you will just need the model.

Lastly, make sure the Flow is working properly by building the output dataset. You may need to retrain and re-deploy the saved models depending on your configuration.
Pipeline Description
Our pipeline will always contain the sames stages:

Prepare
Get our pipeline environment ready. Usually, we will set up global variables, ensure the orchestration workspace is able to run our code, fetch the pipeline code, etc.
Validation
This stage checks that the project we want to operationalize is “good enough”. This greatly varies from one organization to another and you can check naming conventions, complexity rules, documentation, or anything that would prevent the project to be ready for production. This usually relies on specific code to write to fetch the data and control it.
Packaging
This stage build the consistent package of the artifact we want to move to production (a bundle in the case of an analytics flow, an API package in the case of a real-time prediction). This is also where we will archive this artifact for auditing/history purposes. This stage is simple but critical as this is where you need to make sure of what you are actually moving to production. Although there may be alternatives, we strongly suggest to use the bundle & API package artifacts as they are made exactly for such a use case.
Preprod
At this stage, the artifact will be deployed to a test instance. Then all tests will be run and checked for errors. In the case of errors, the pipeline will stop, otherwise, the move to production will occur. Note that you can stop your pipeline at this stage: instead of Continuous Deployment, you will then achieve Continuous Delivery. Up to you to manage the deployment after then (it can be through another tool or manually).
Production
This is the final stage where the artifact will be deployed to the production instance. We will limit the test to basic ones and incorporate a rollback mechanism.
What’s next?
Now, you have the big picture! Let’s dive in the specific use case you want to reproduce: