Create an Application-As-Recipe
Create Your Project
Let’s begin with the Haiku Starter project.
From the DSS homepage, click +New Project > DSS Tutorials > General Topics > Haiku Starter.
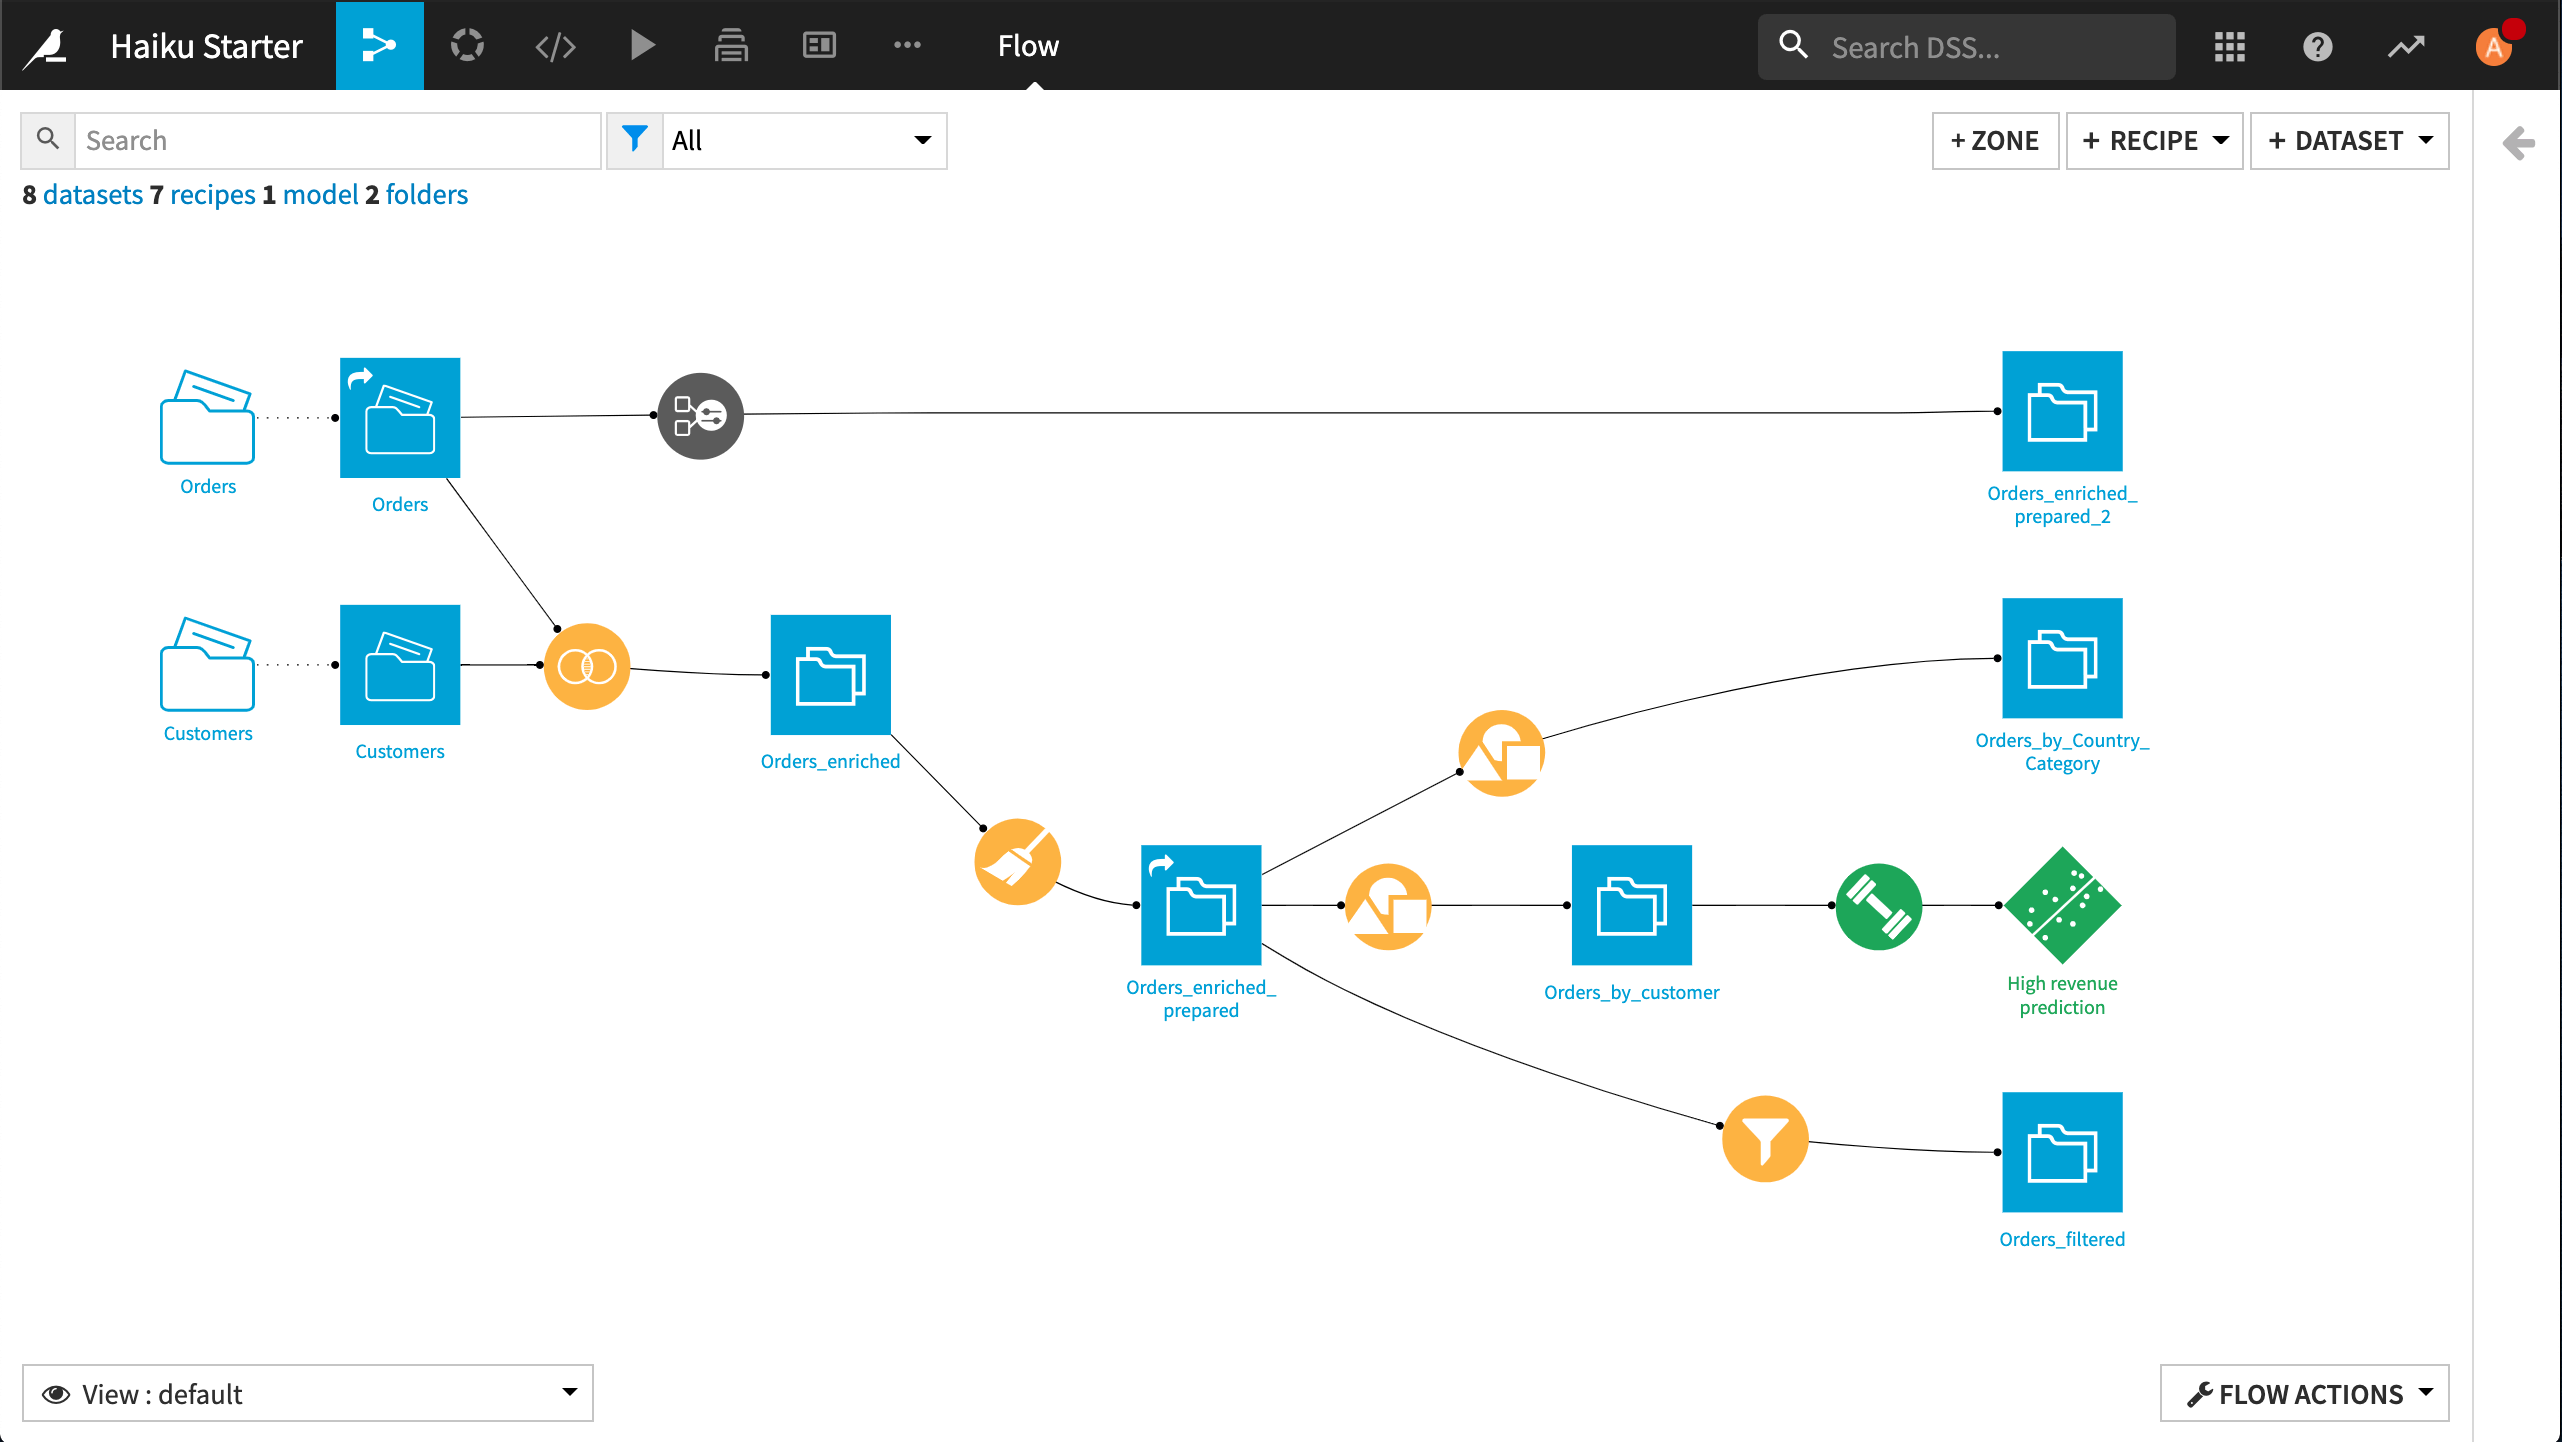
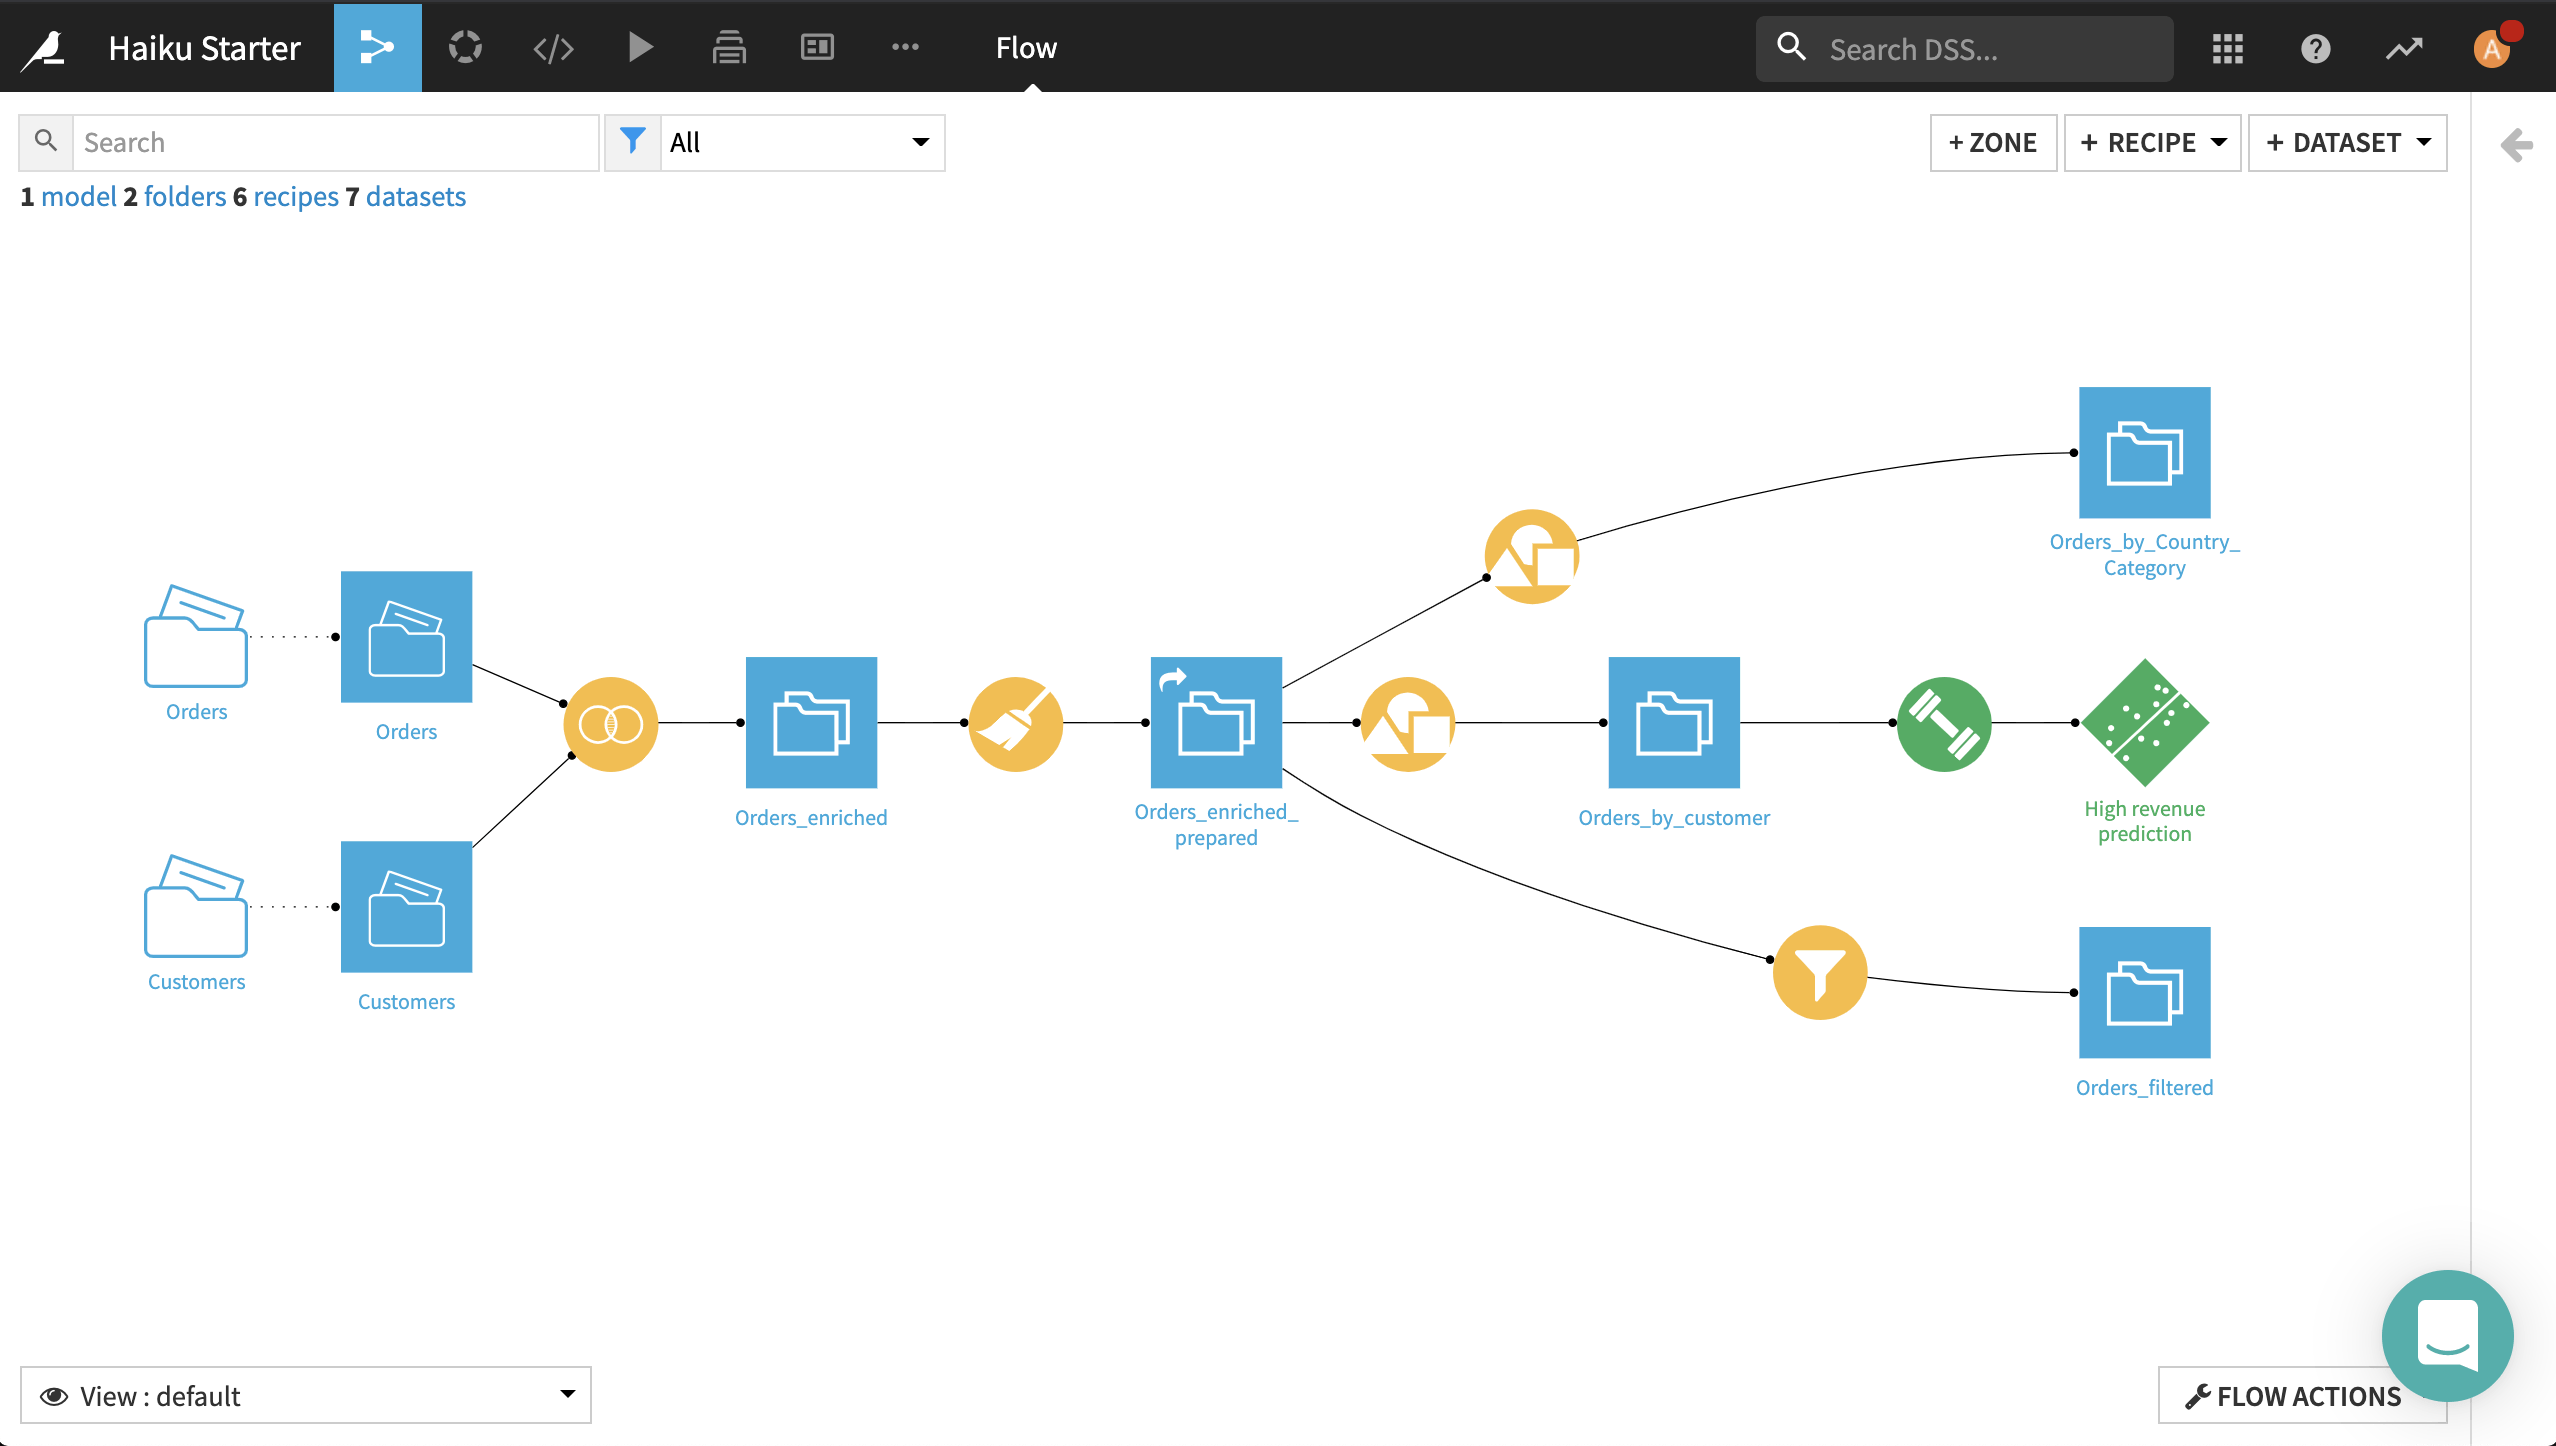
This project has a Flow that takes orders data, enriches it with customer data, and then performs various processing operations.
Some of our colleagues also need to process orders data. We could share this Flow with them, and they could duplicate this project or copy the recipes to their own project. As an alternative, we can create a Dataiku App-as-recipe so that our colleagues can make use of the project without needing to understand the details of the project.
We’ll want to come back to this original project later, so create a duplicate of it.
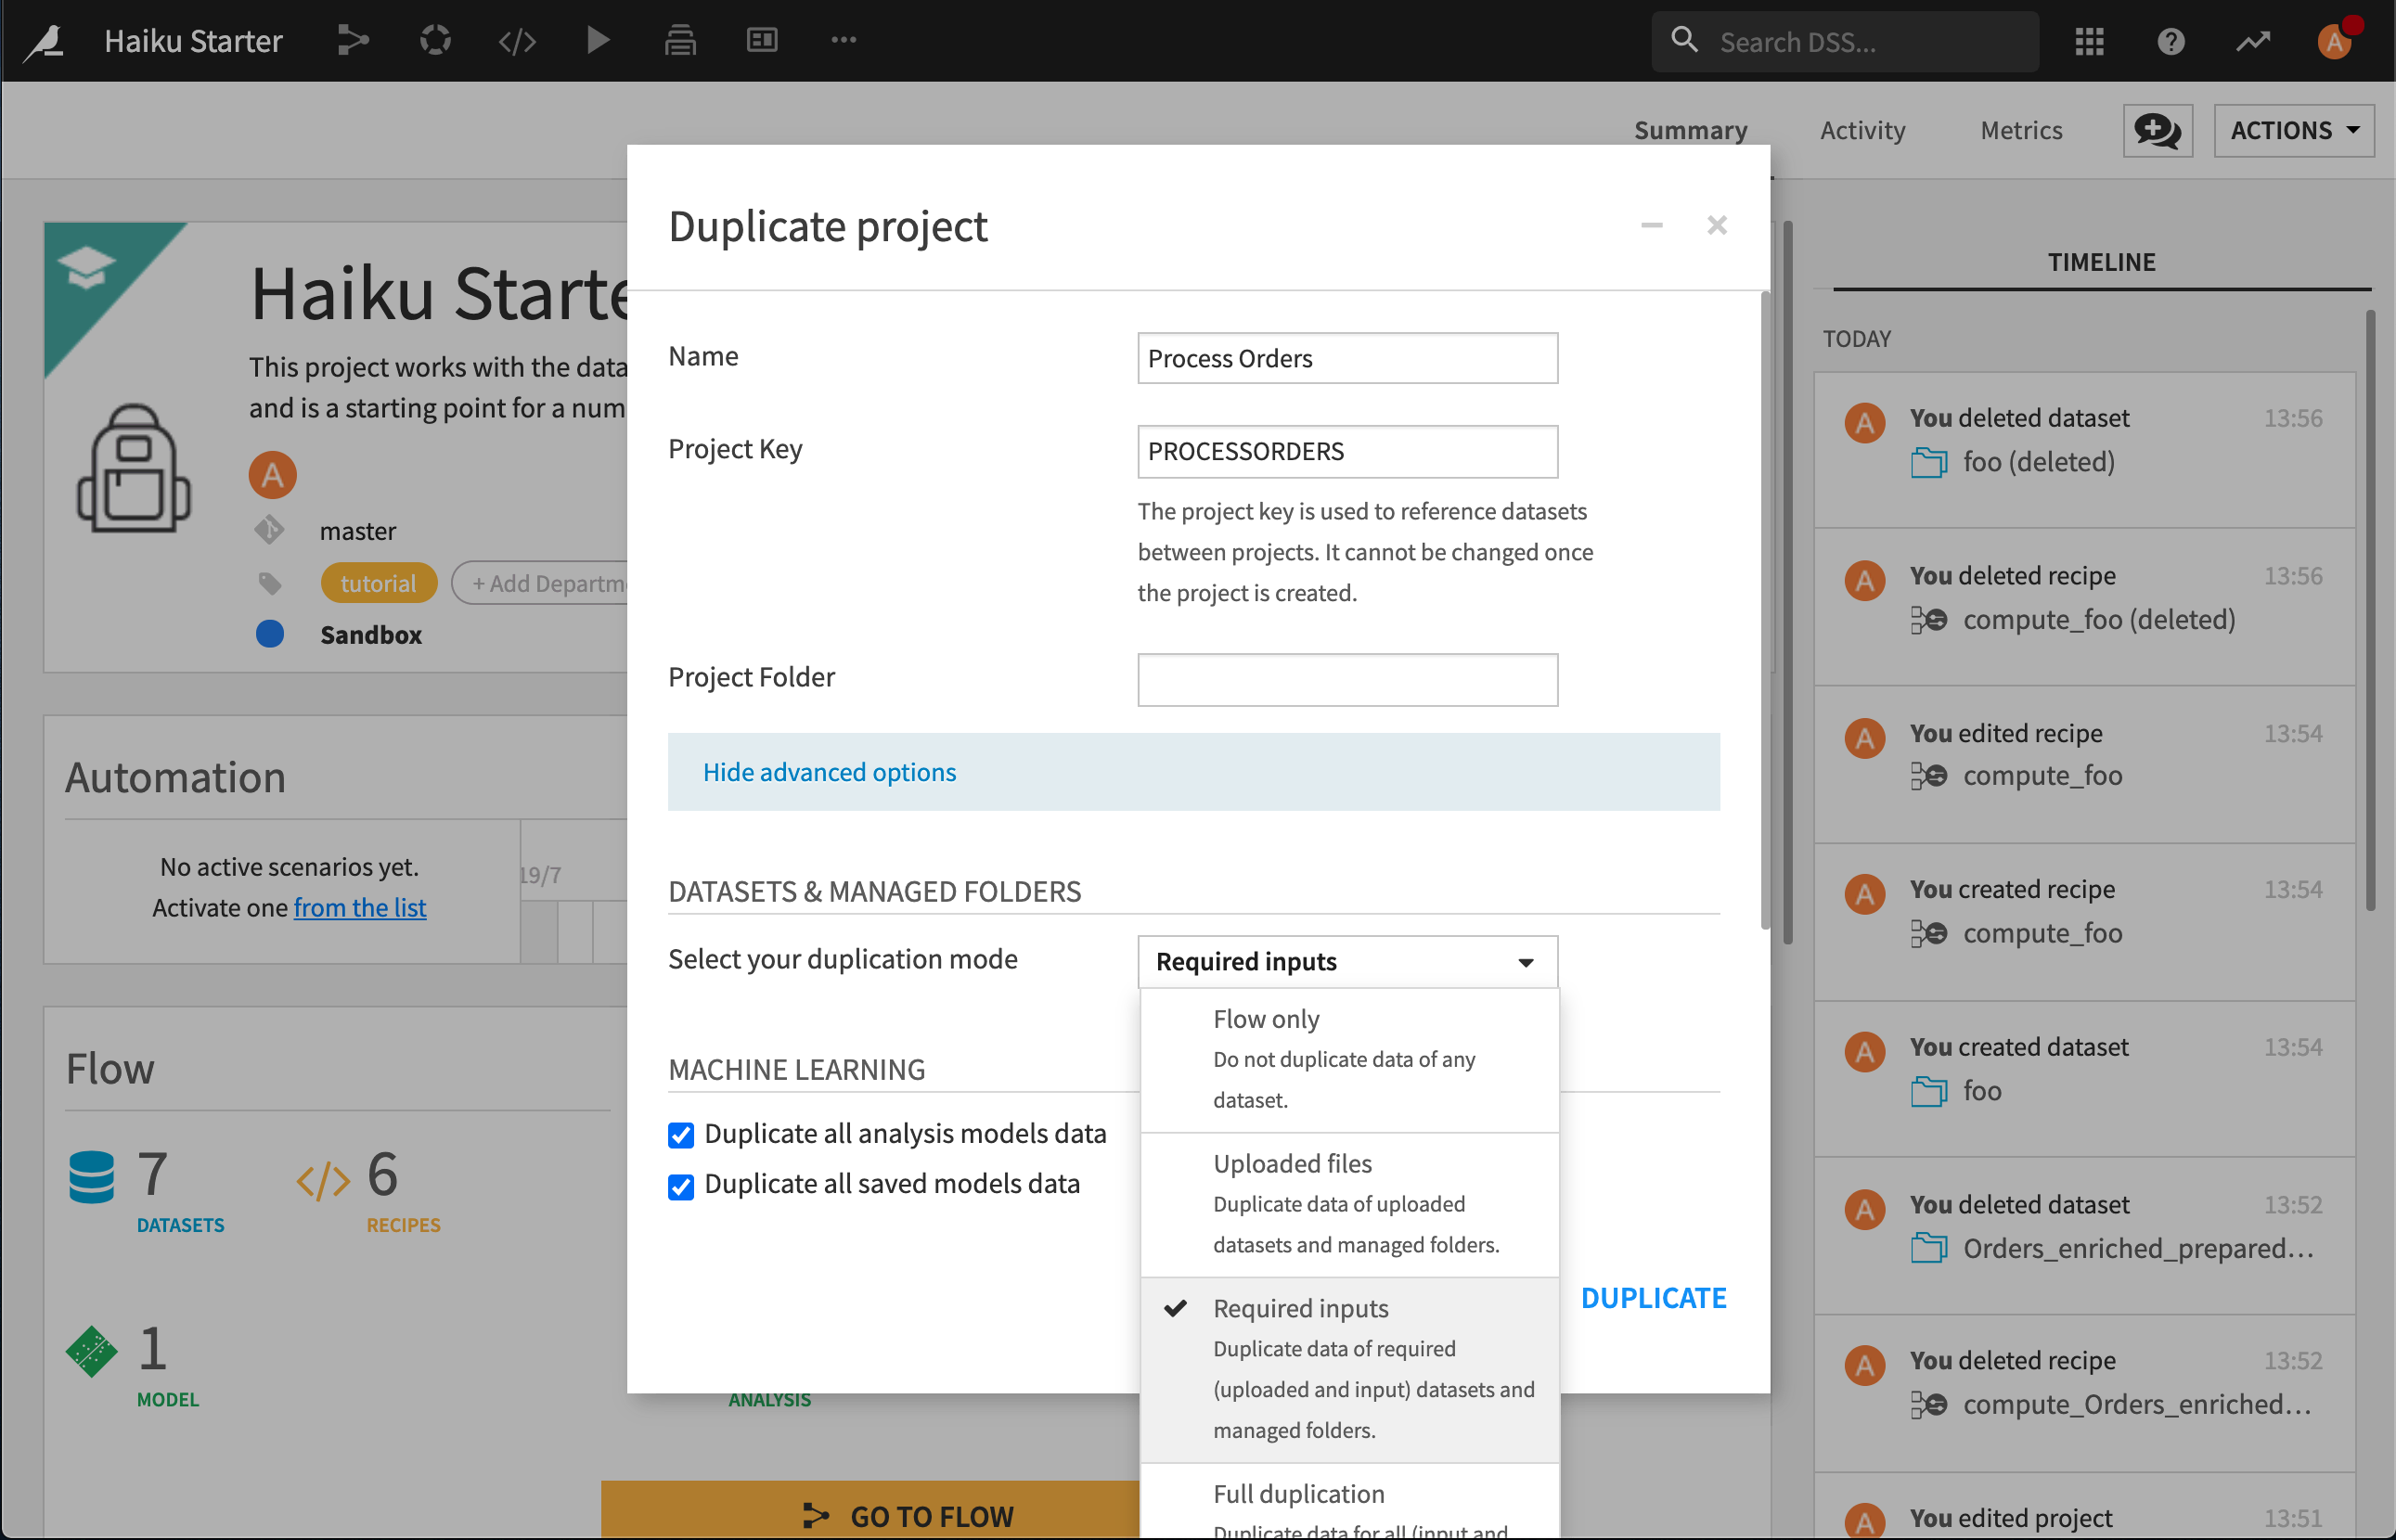
From the project homepage, click Actions > Duplicate this project.
Name the duplicate project
Process Orders.In the Advanced Options, select Required inputs as the duplication mode.
Convert to App-As-Recipe
In the Process Orders project:
From the top navigation bar, choose More Options (…) > Application Designer, and select Convert into application-as-recipe.
Give the app a description like
Enrich orders with customer data, then prepare for further analysis.
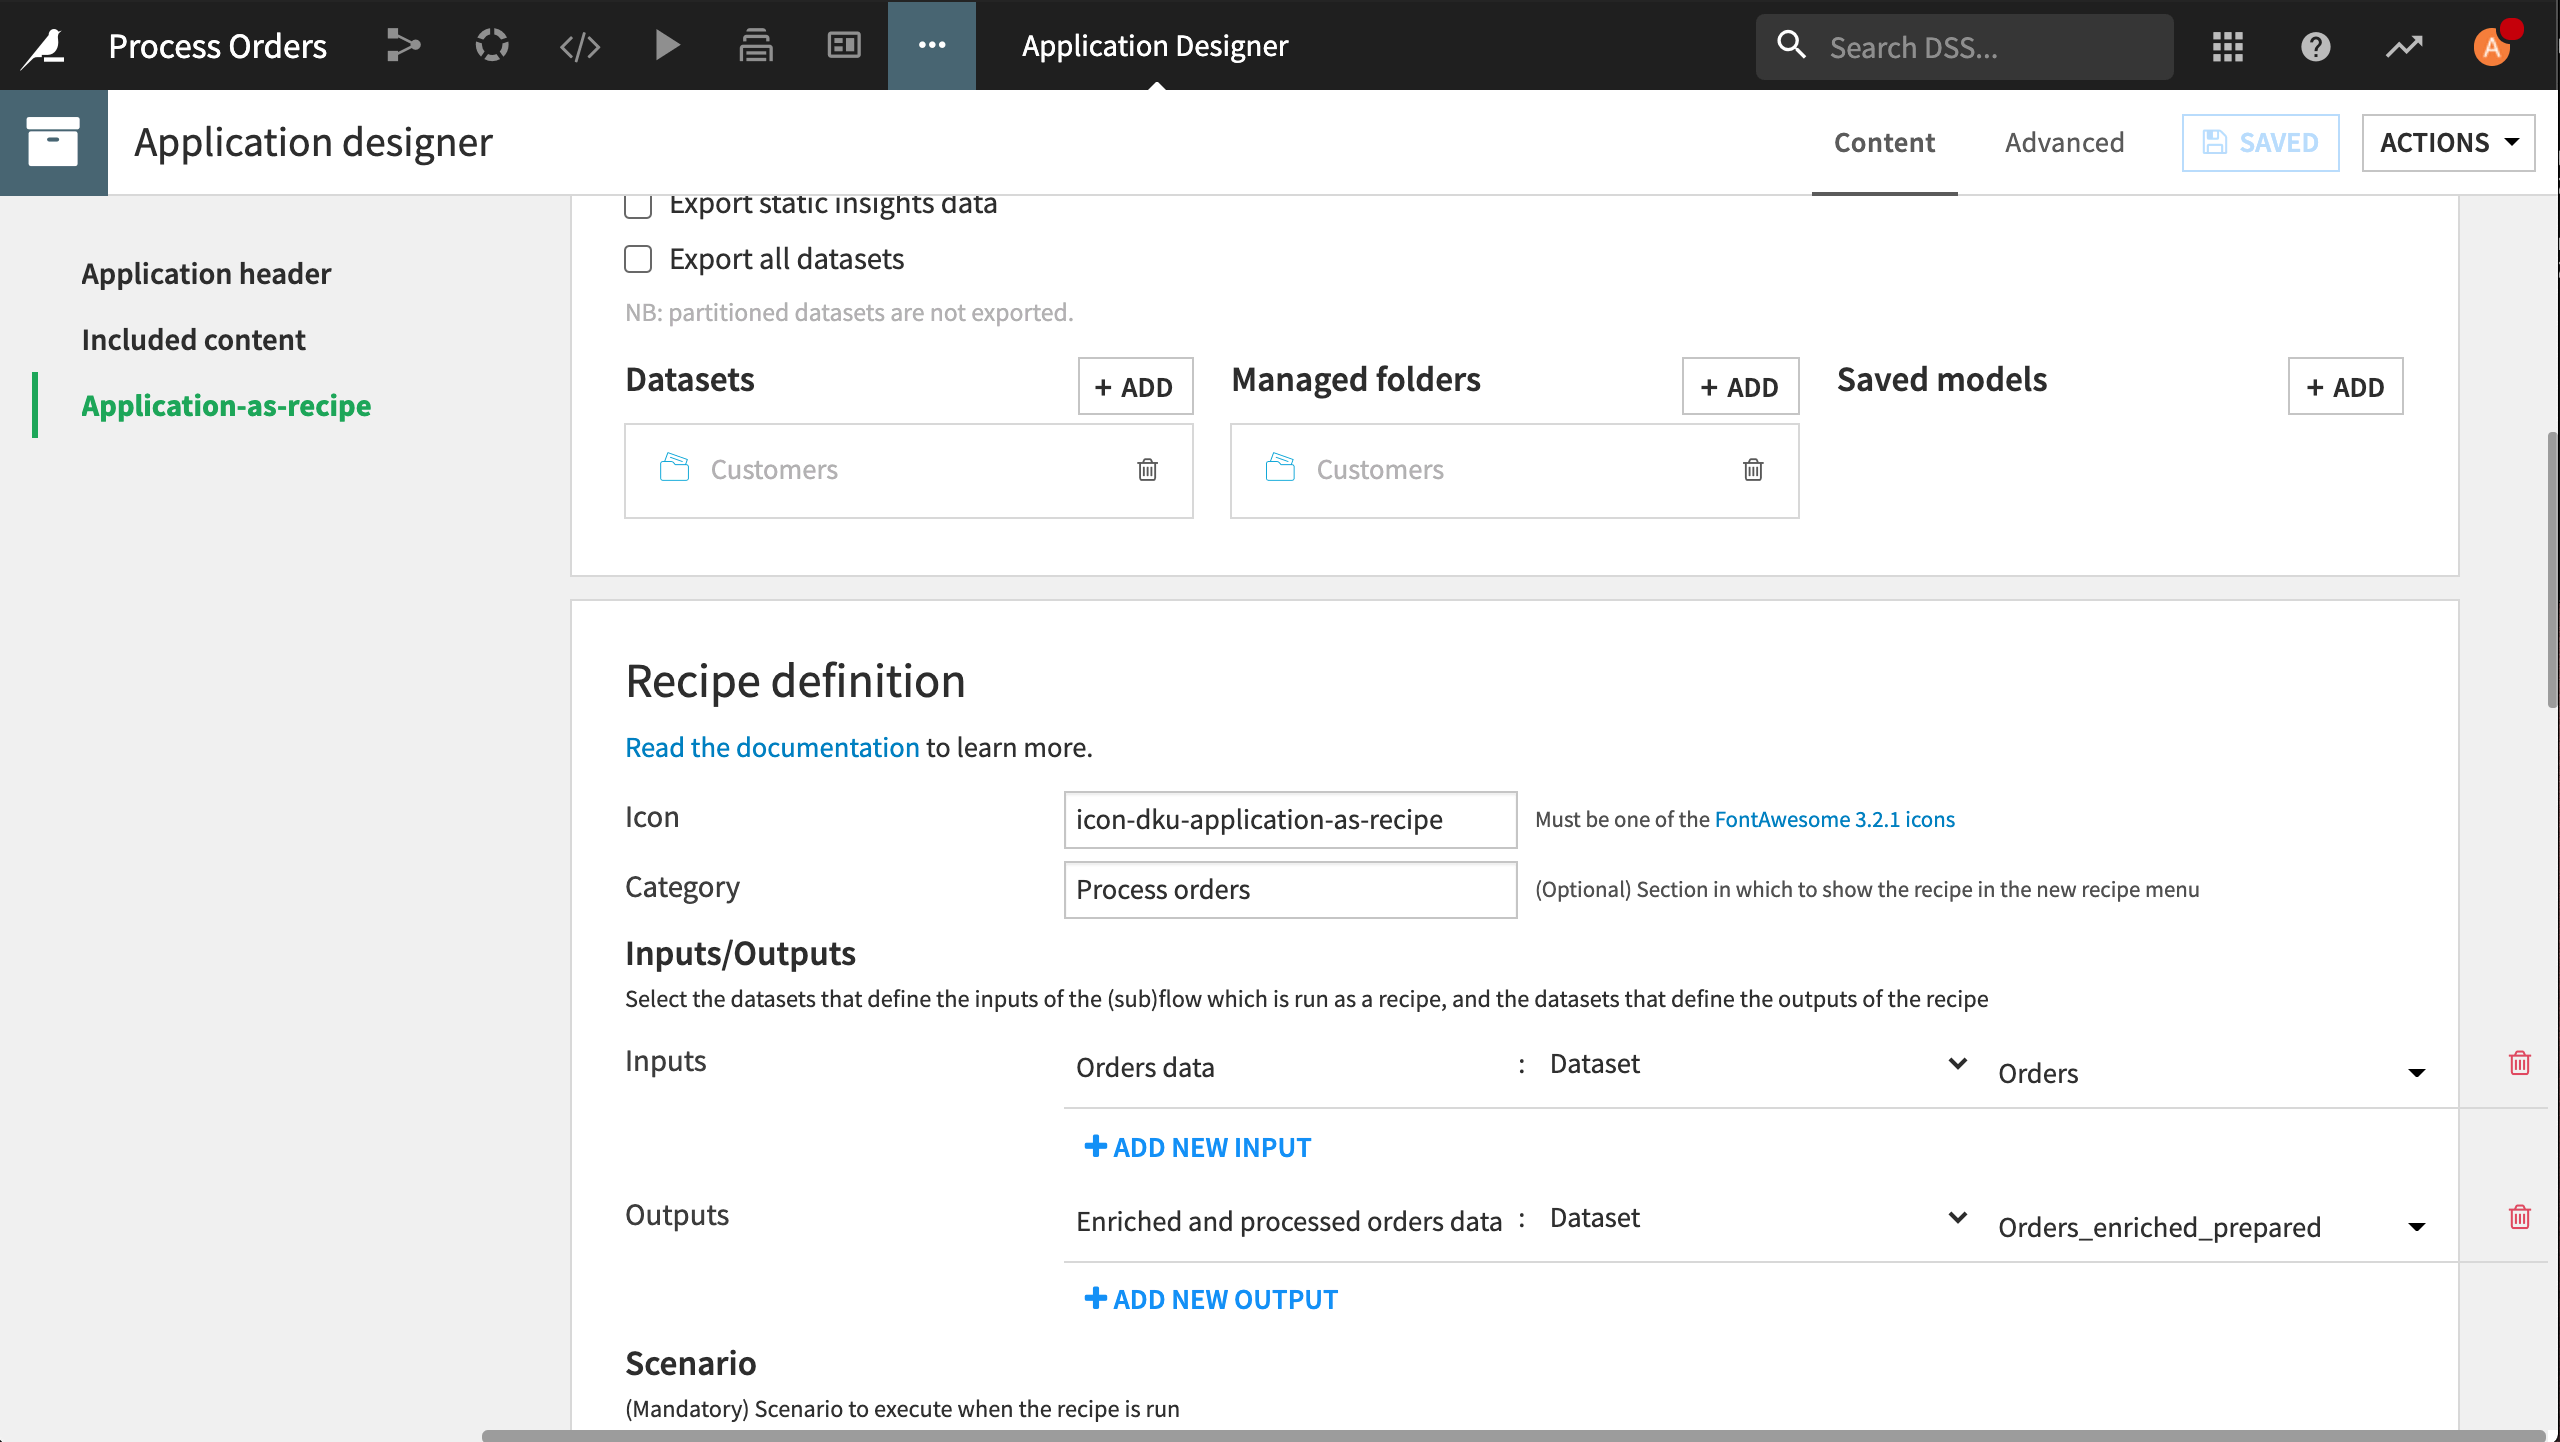
We need to make the folders and datasets available to the app.
In the “Included content” section, add Orders and Customers as included datasets.
Add Orders and Customers as included managed folders.
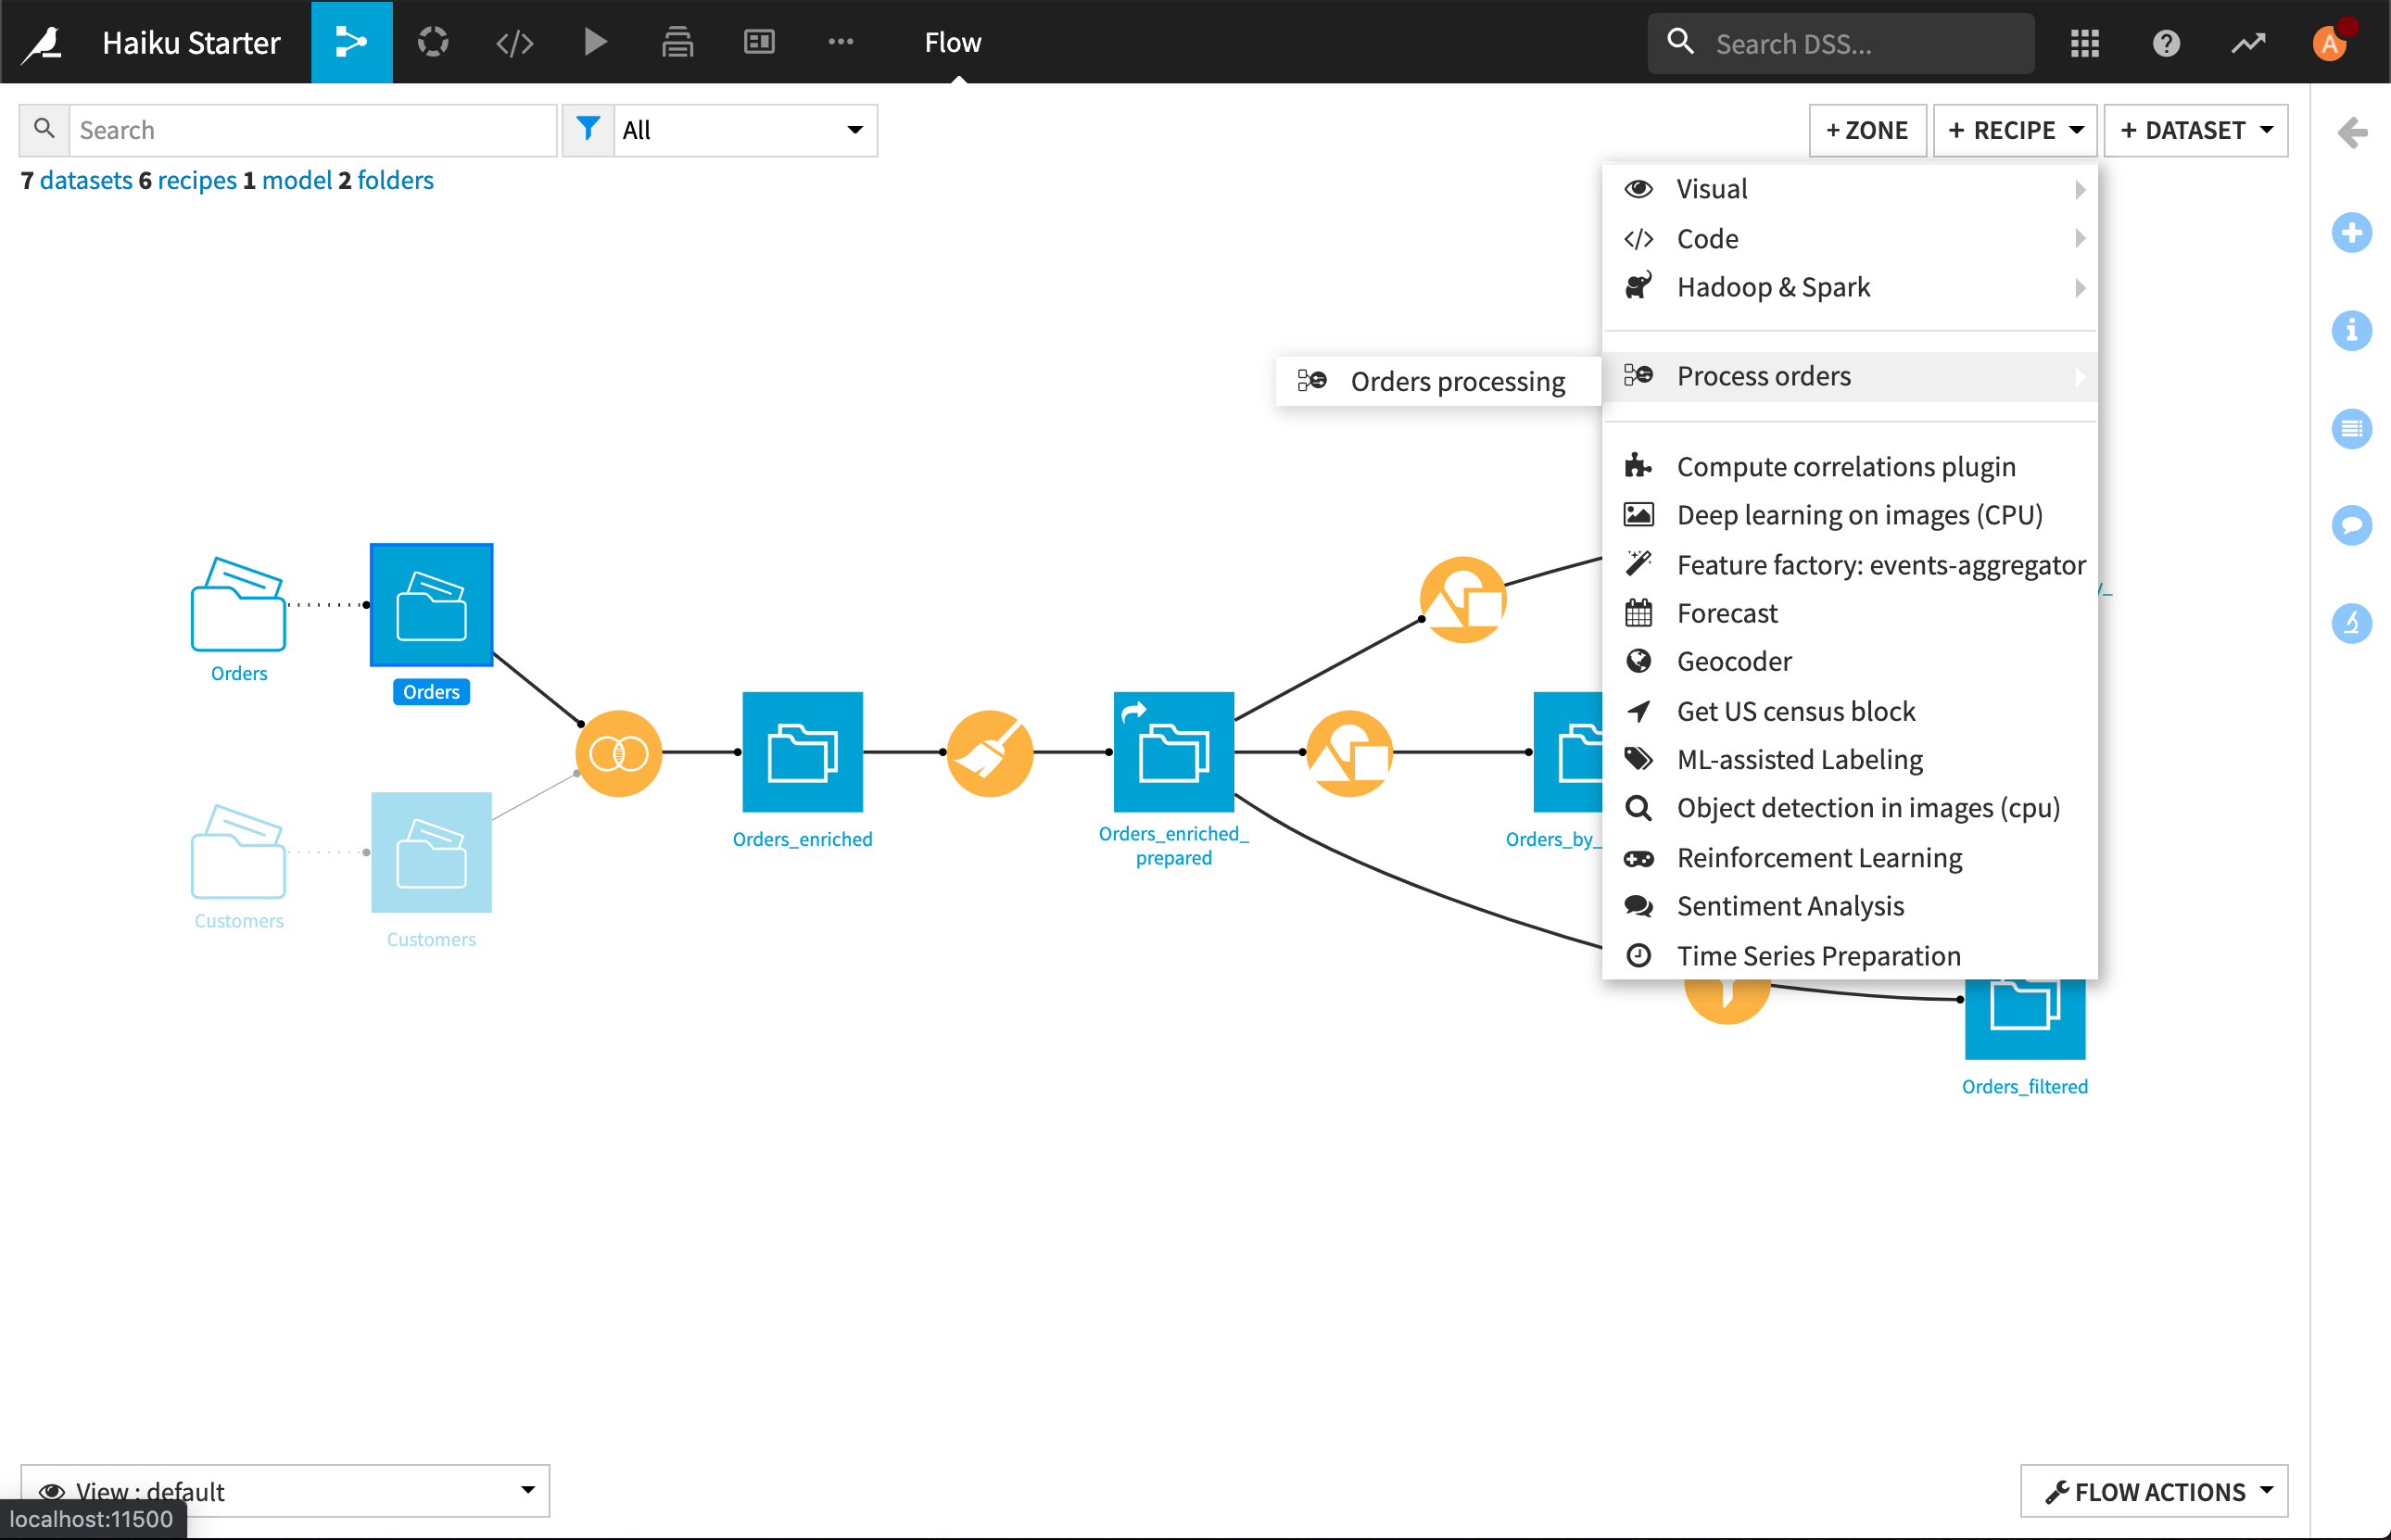
In the Application-as-recipe section, give the recipe a category like
Order processing. This is where you’ll find the recipe on the +Recipe menu in the Flow.Set an input dataset with label
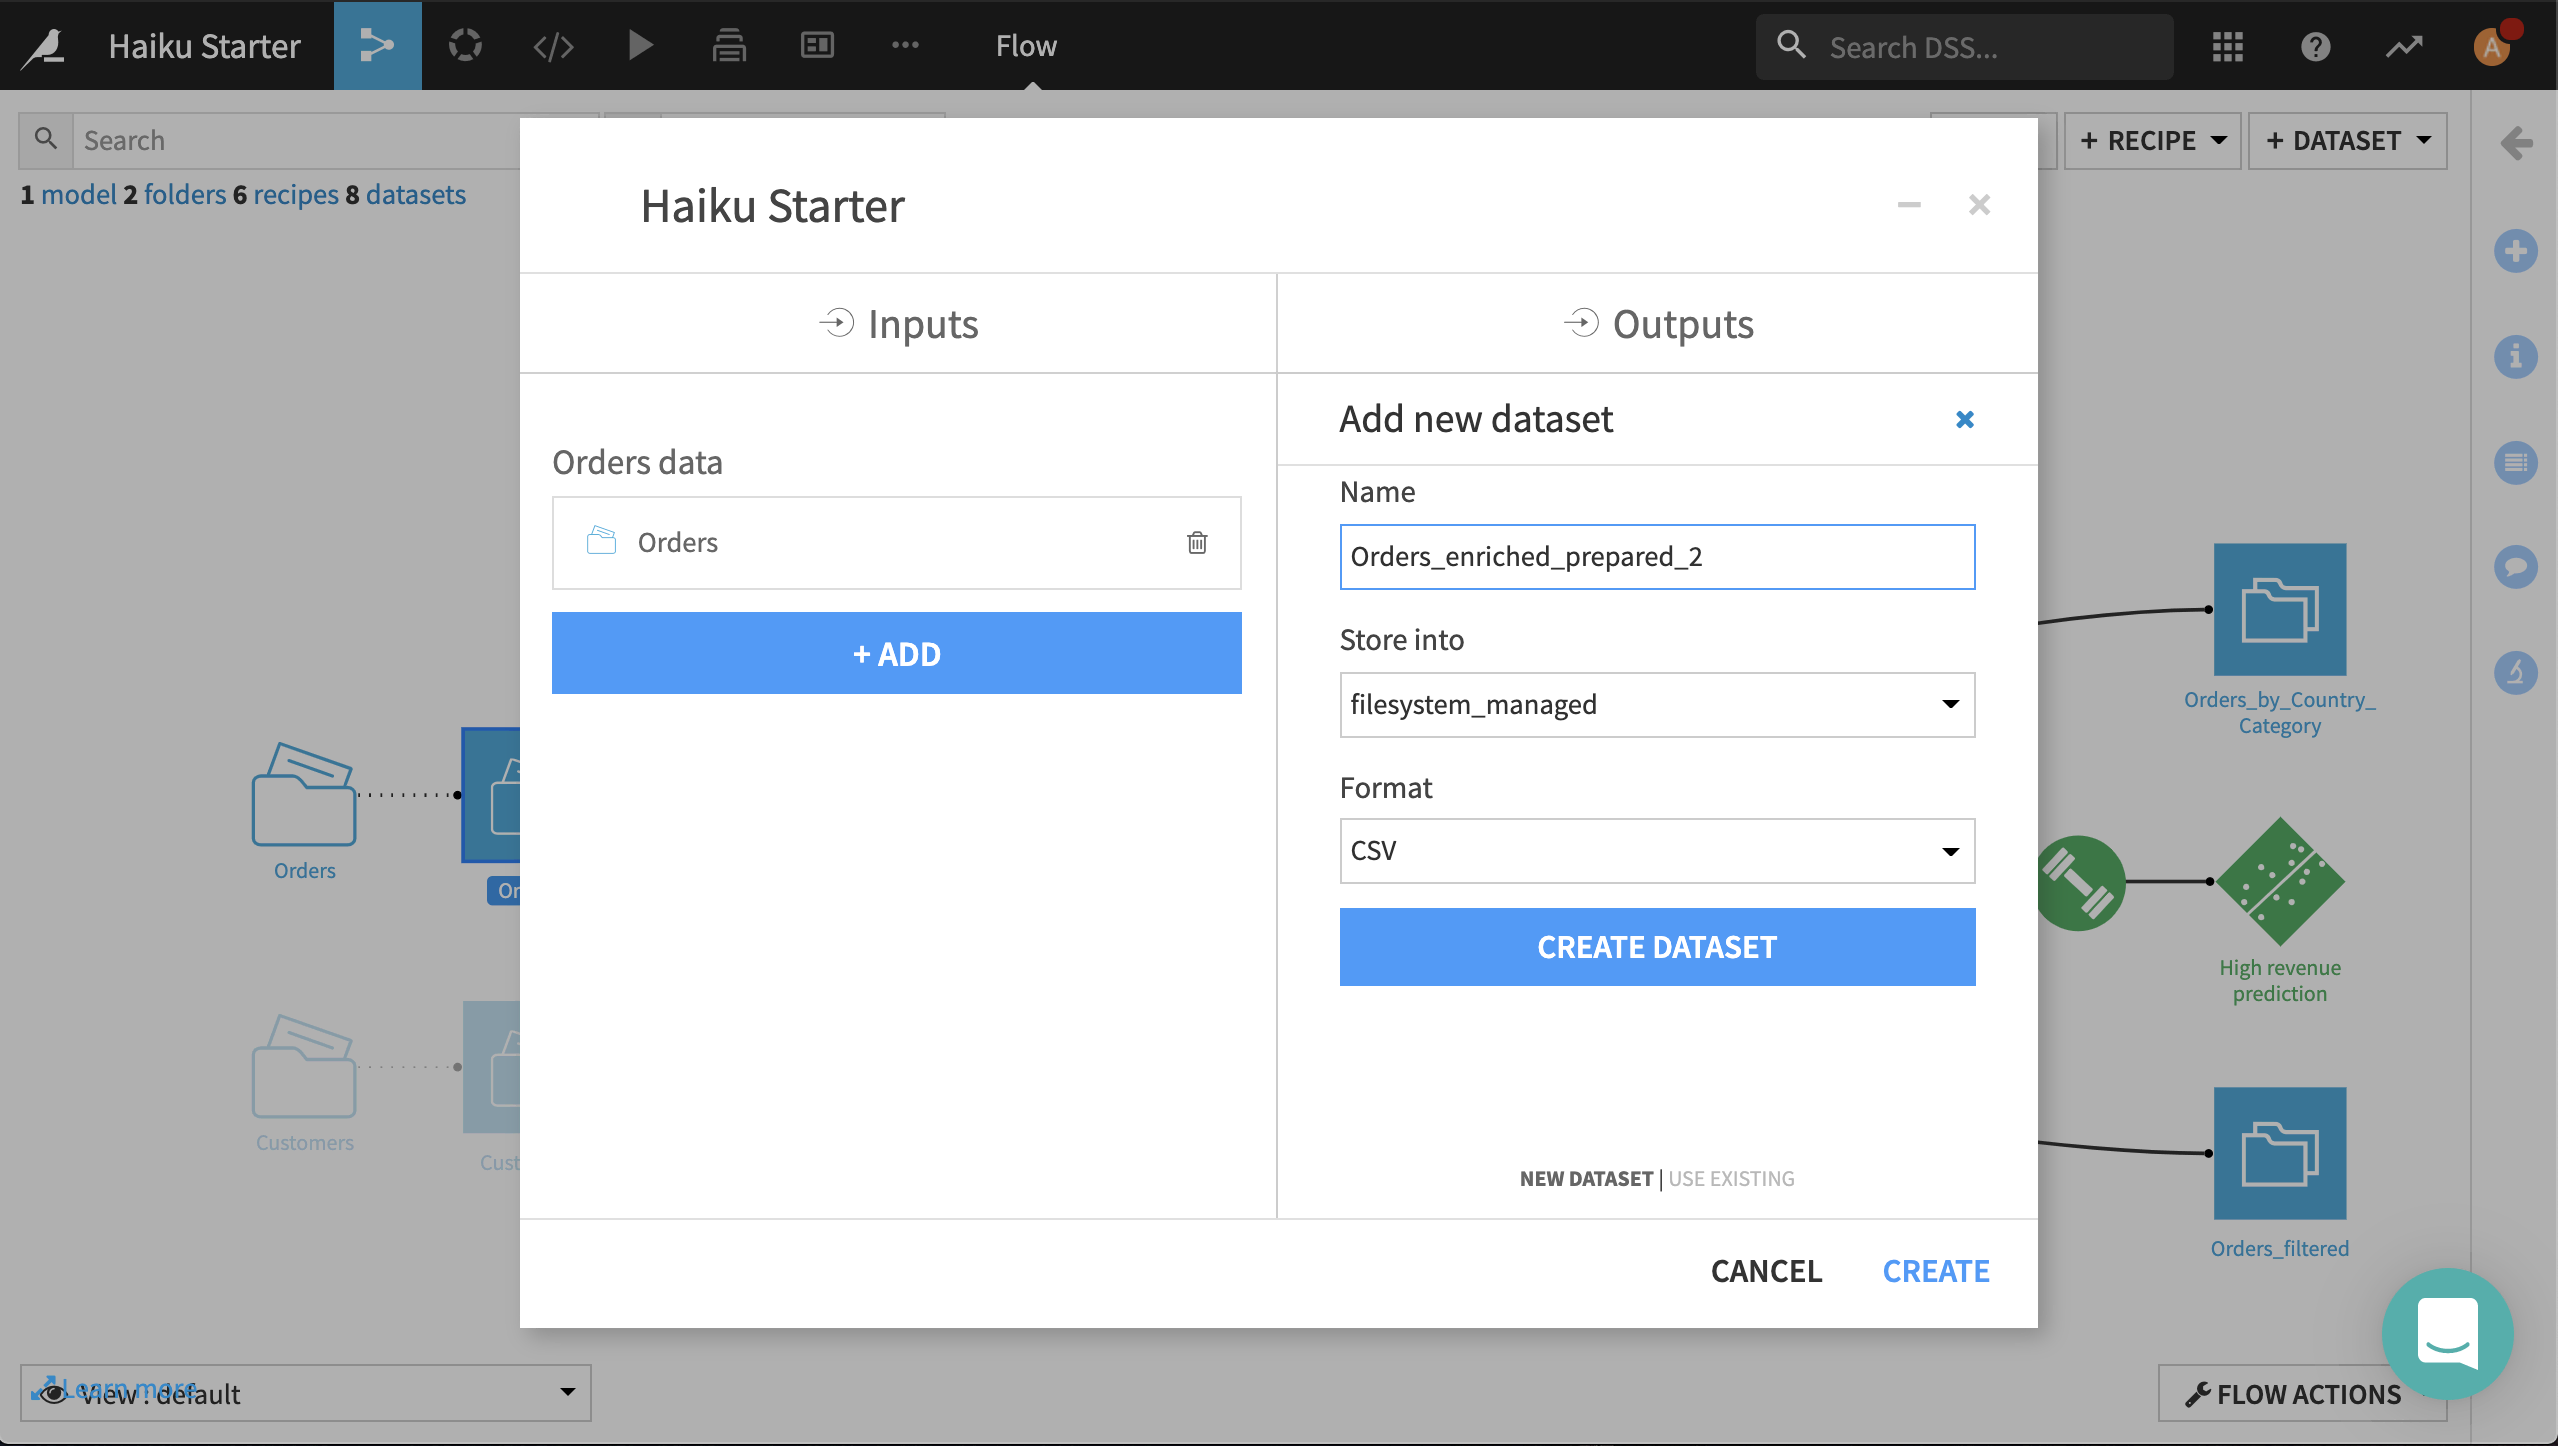
Orders data, and select Orders as the dataset.Set an output dataset with label
Enriched and prepared orders data, and select Orders_enriched_prepared as the dataset.
When a user of this recipe provides an input dataset with the Haiku orders schema, the recipe will enrich the orders data with customer data and then prepare it, and output the enriched and prepared orders data.
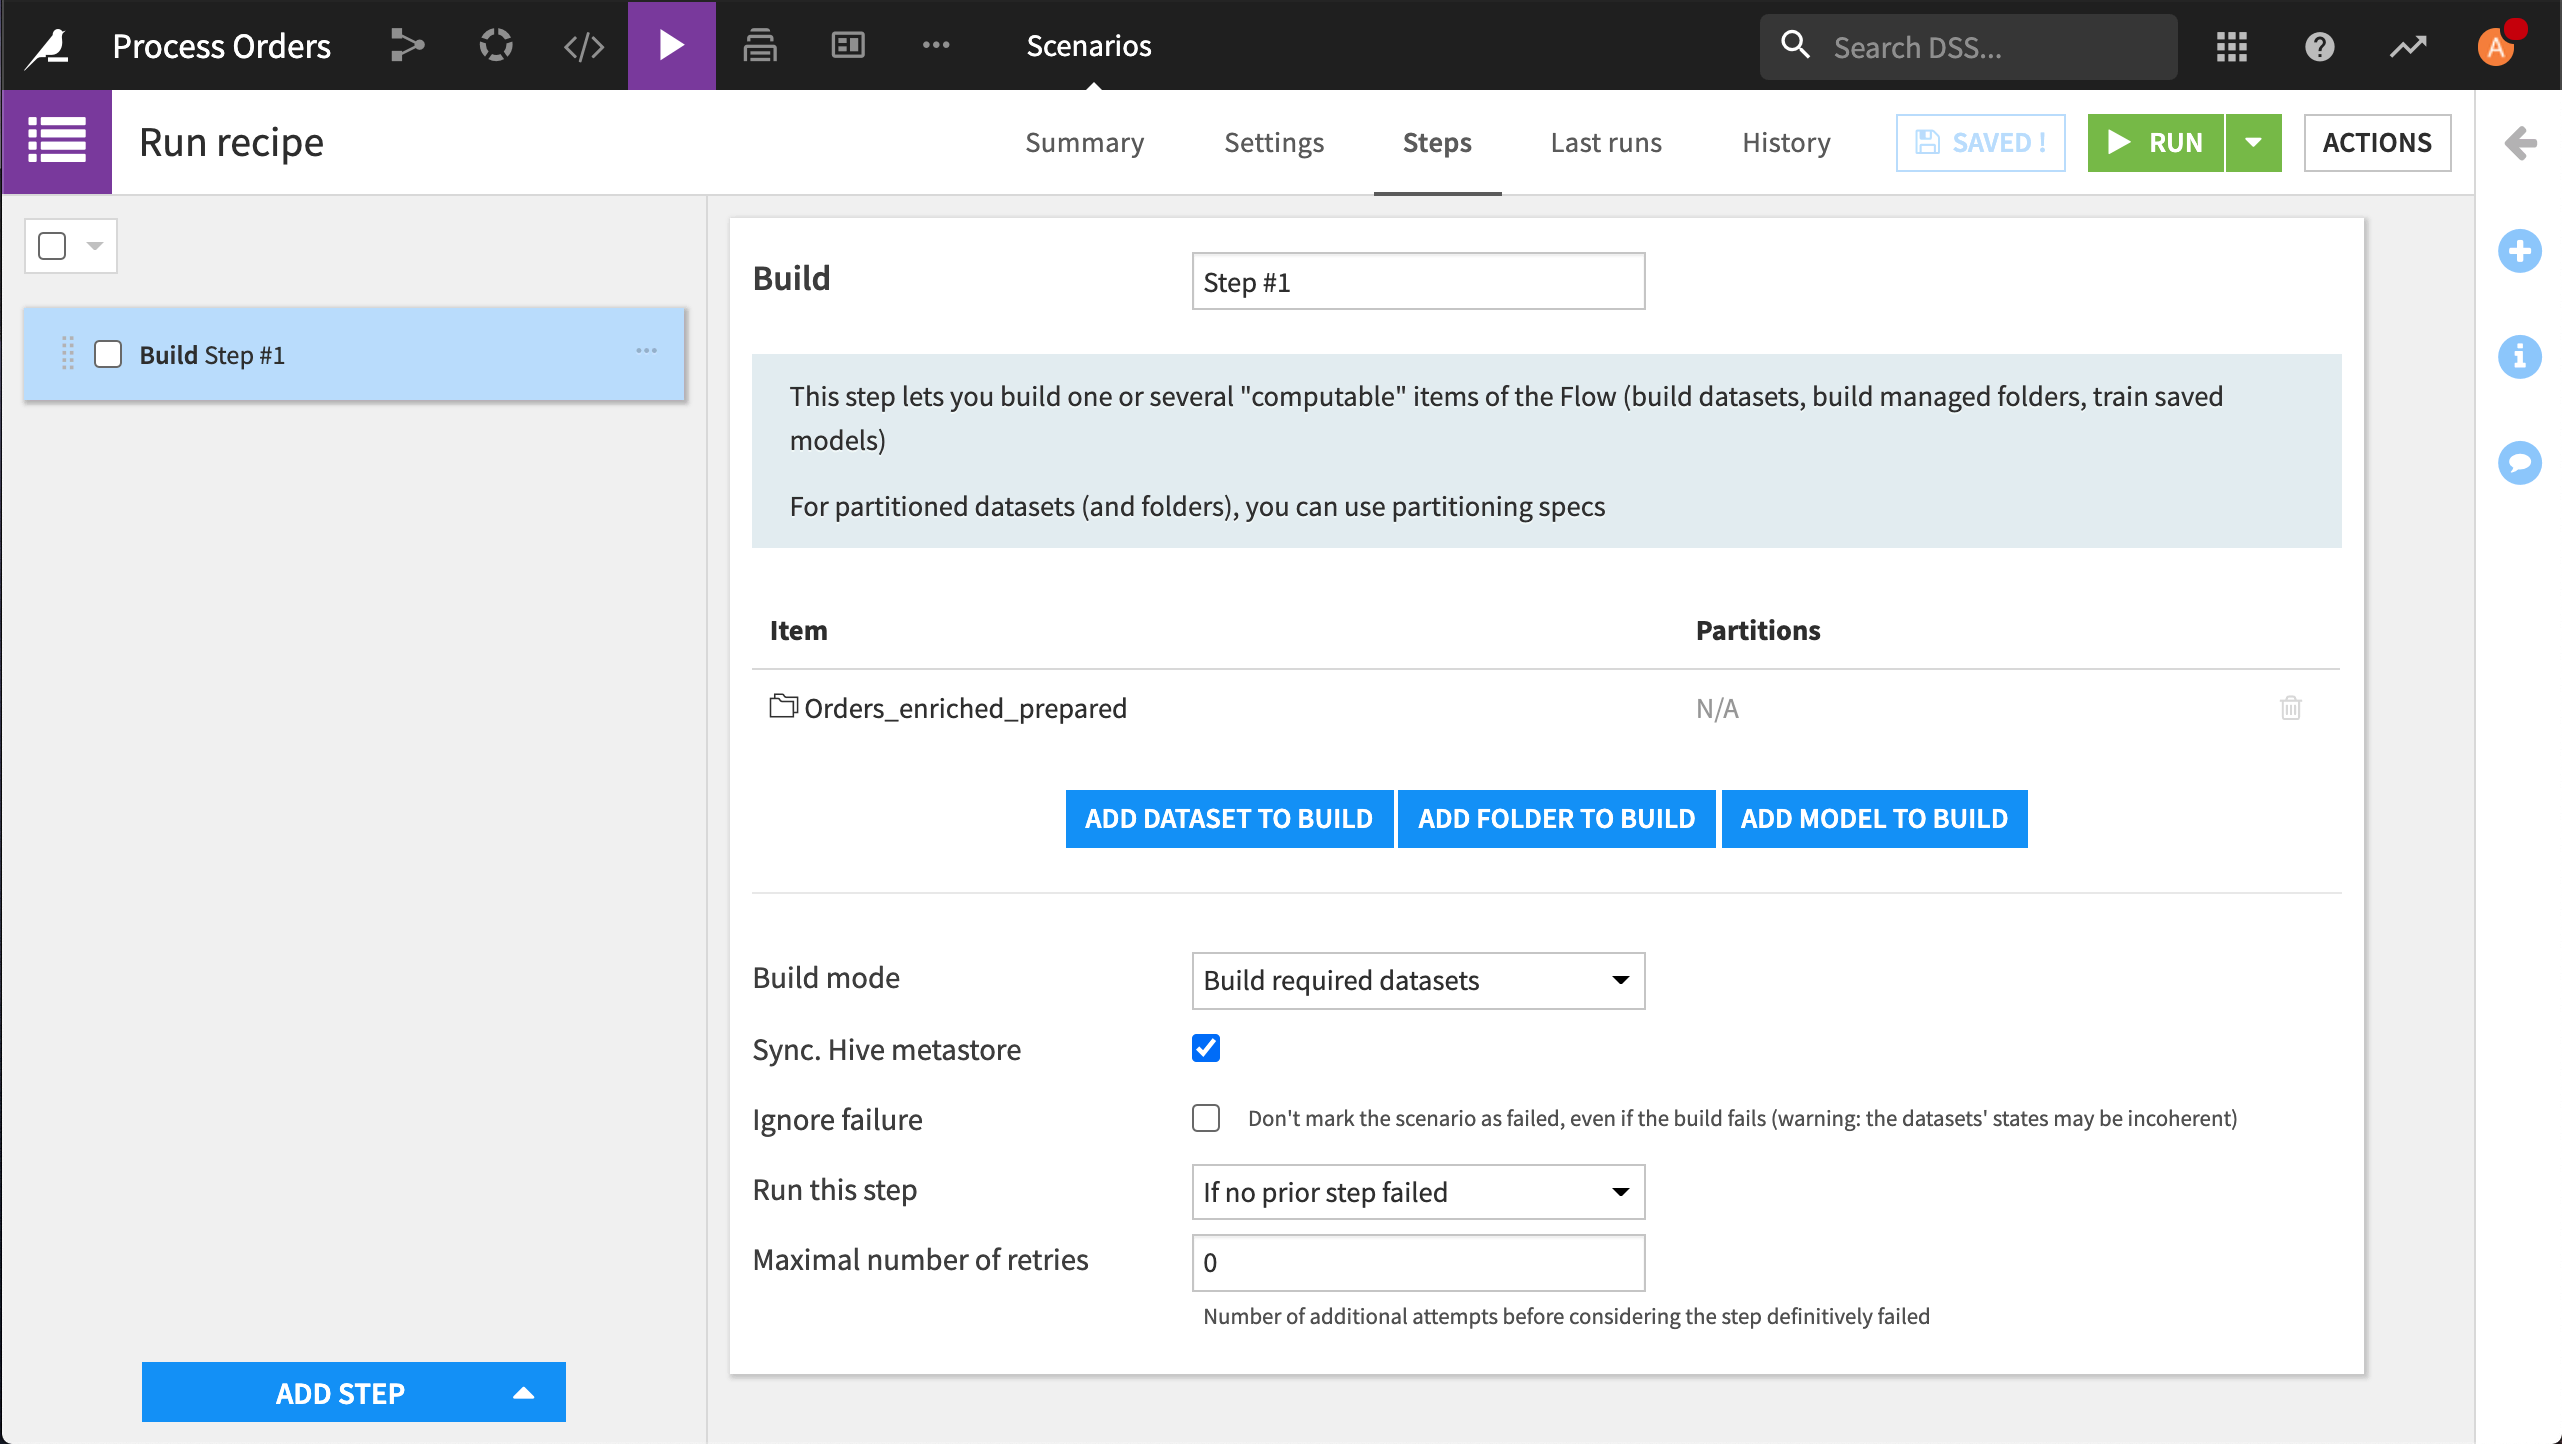
Now we need to create the scenario that is executed when the user of the recipe clicks Run.
Save the App.
From the Jobs menu, go to Scenarios > +New Scenario.
Name it
Run recipe, and click Create.On the Steps tab, click Add Step > Build/Train.
Click Add Dataset to Build, and select Orders_enriched_prepared.
Click Save.
Return to the Application Designer.
Select Run recipe as the scenario.
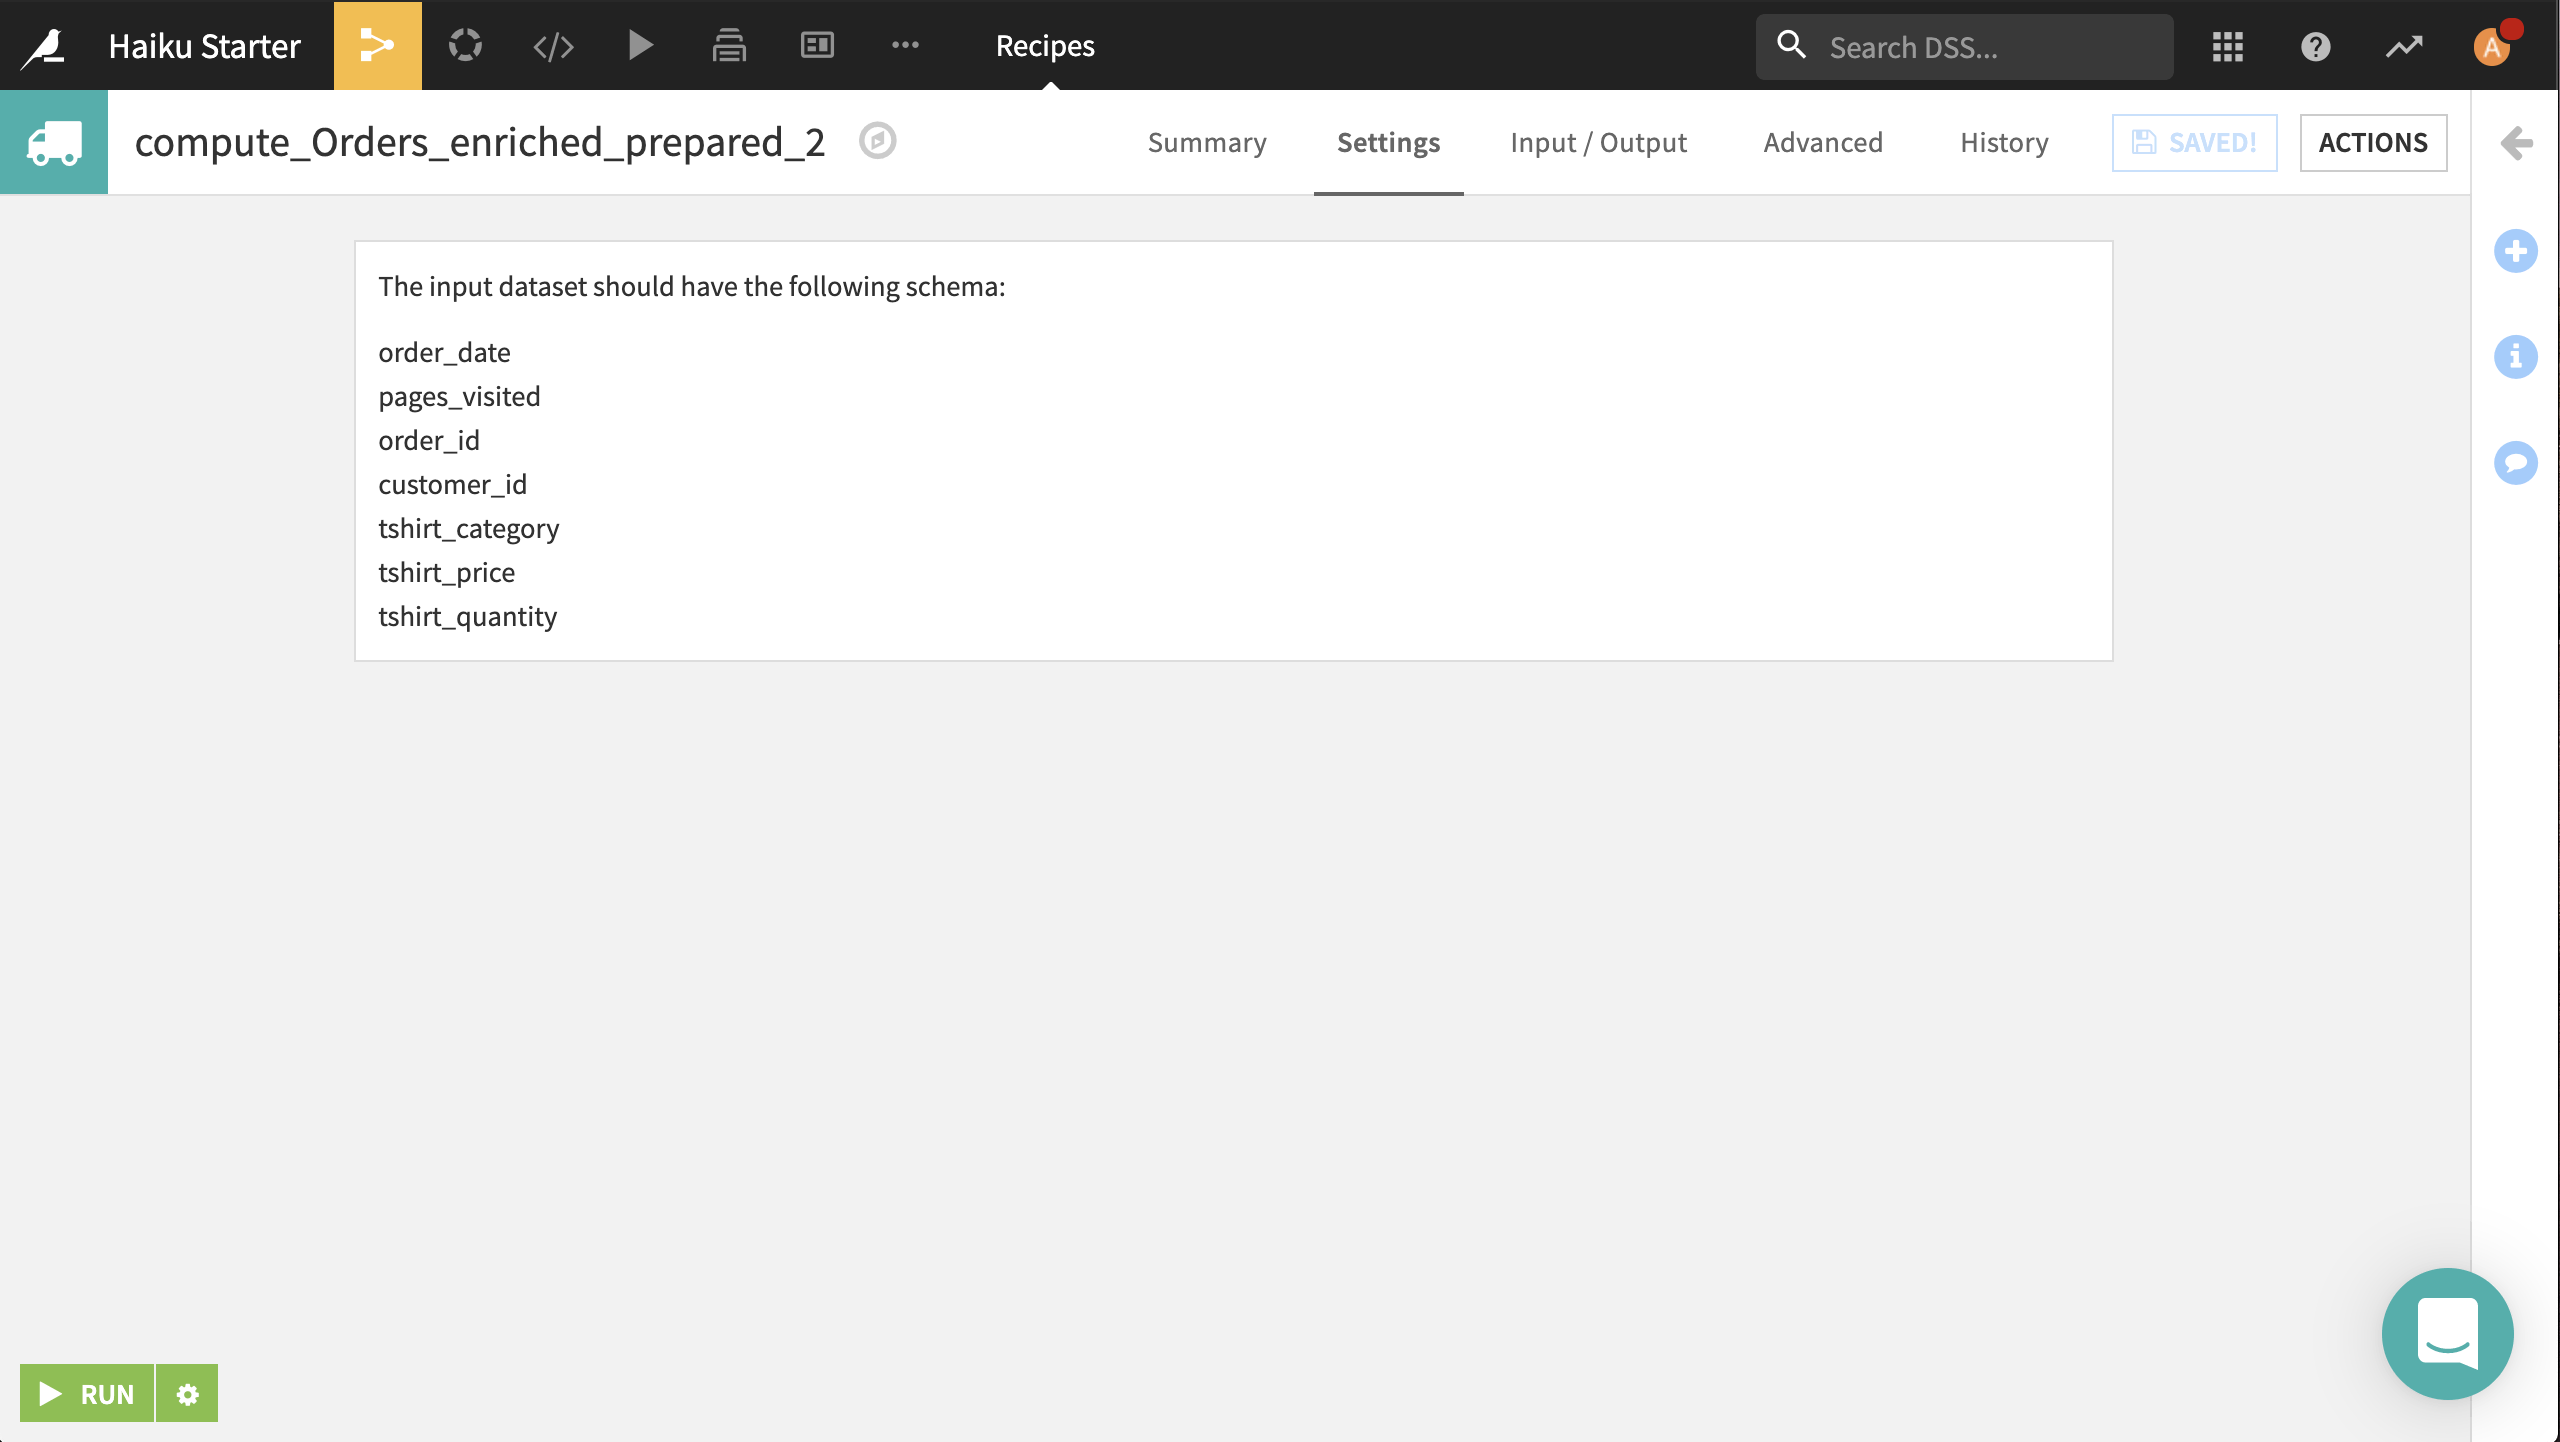
There are no parameters to be applied here, so there is no need for controls. Empty the auto-generated controls. This will leave the recipe blank, except for the Run button. In order to provide some instructions for the app user, click Use custom UI.
In the Custom UI HTML, type:
<p>
The input dataset should have the following schema:
</p>
<ul>
<li>order_date</li>
<li>pages_visited</li>
<li>order_id</li>
<li>customer_id</li>
<li>tshirt_category</li>
<li>tshirt_price</li>
<li>tshirt_quantity</li>
</ul>
Save the application-as-recipe. It’s now ready for use.
Use the Recipe in Another Project
Go back to the original Haiku Starter project.
In the Flow, choose + Recipe > Process Orders > Order processing.
Select Orders as the input dataset and create Orders_enriched_prepared_2 as the output dataset.
Click Create.
The recipe tells us the expected schema of the input dataset.
Click Run.
The application-as-recipe and its output are now visible in the Flow.