Active Learning for object detection problems
Note
This tutorial describes how to create a project for labeling objects on images using active learning from scratch. For pre-configured solution check Active Learning for object detection problems using Dataiku Apps.
Prerequisites
You should be familiar with the basics of machine learning in Dataiku DSS.
Technical Requirements
Access to a DSS instance of version higher than 7.0 where the ML-assisted Labeling and Object detection plugin plugins are installed.
Setting Up
Suppose you need to detect the location of different playing cards on the images. We’re going to download a set of unlabeled images and label them manually using active learning in a specific webapp.
Supporting Data
We will use a set of images of playing cards. In total (train + test sets) it contains 363 images of playing cards of 6 types: nine, ten, jack, queen, king and ace.
We’re going to use both train and the test set images together since we’re going to ignore the test set labels and label the data manually.
Create the Project and Set the Code Environment
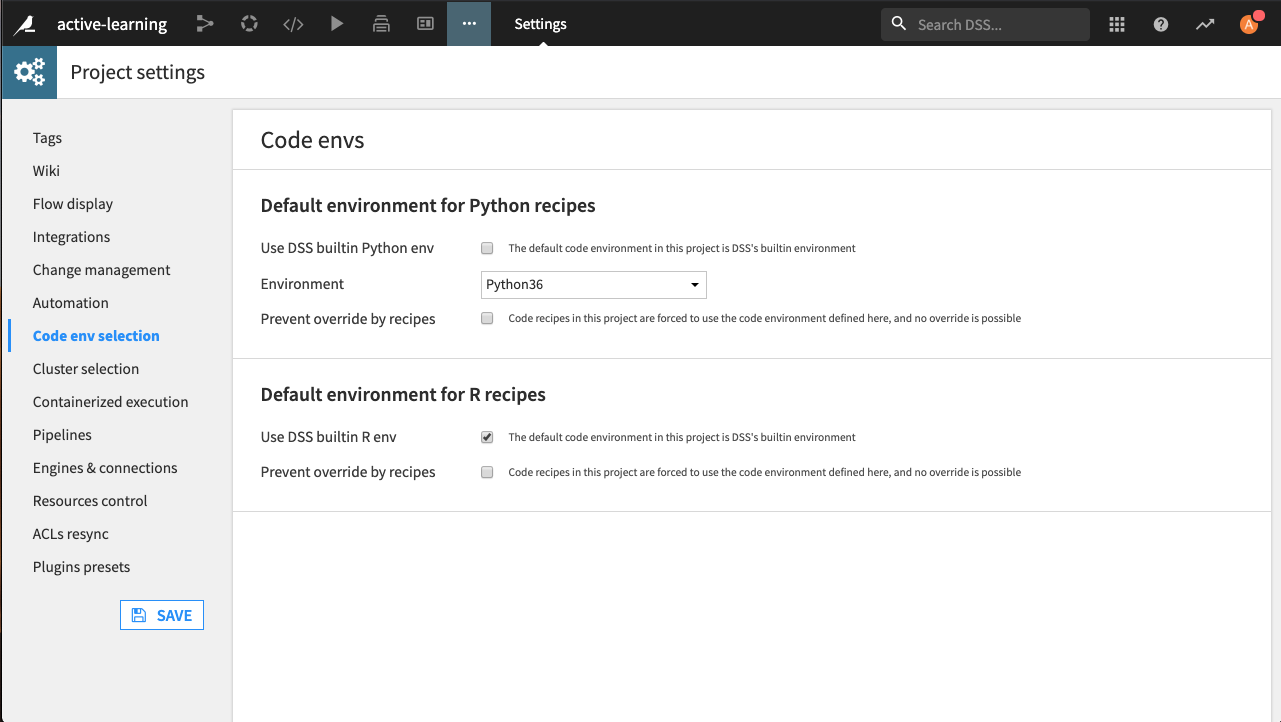
Create a new project and within the new project go to … > Settings > Code env selection.
Deselect Use DSS builtin Python env and select an environment that has Python3 support.
Click Save.
Prepare the Data
Create a new managed folder and call it images
Upload the pictures from the train and test directories into the newly created managed folder
Label the data
Now that you have 363 unlabeled images before you can start training a deep learning model to detect cards you first have to label them. To do so go to “Webapps” -> “New webapp”, select “Image object labeling” and create it. Select the images folder in the “Images to label” field. Enter the 6 categories, create labels and metadata datasets.
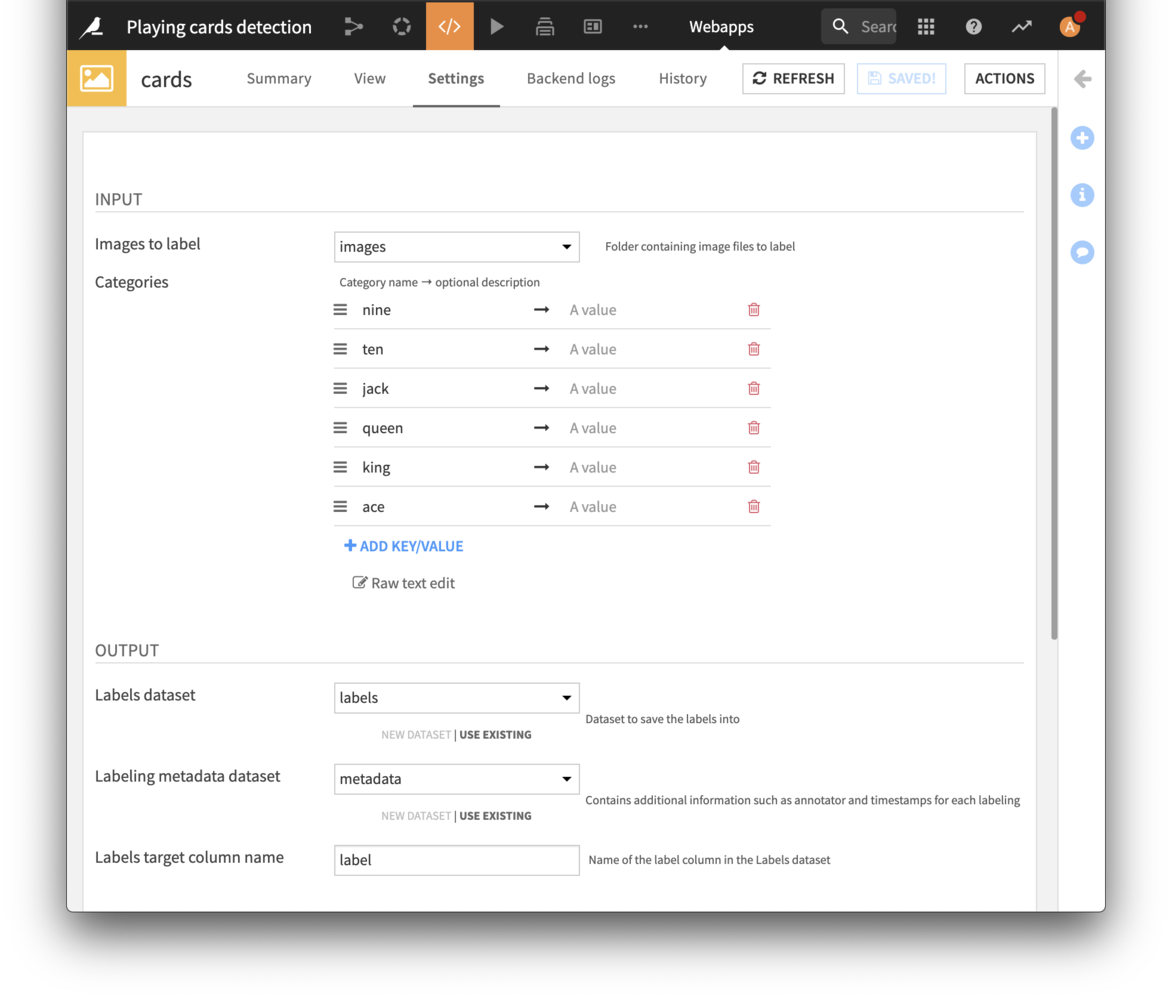
The labels dataset will contain information about objects labeled in the images. Metadata will contain additional information such as the name of the labeler, comments and date.
For now you can leave the Active learning specific part untouched.
Click “Save” and navigate to the “View” tab.
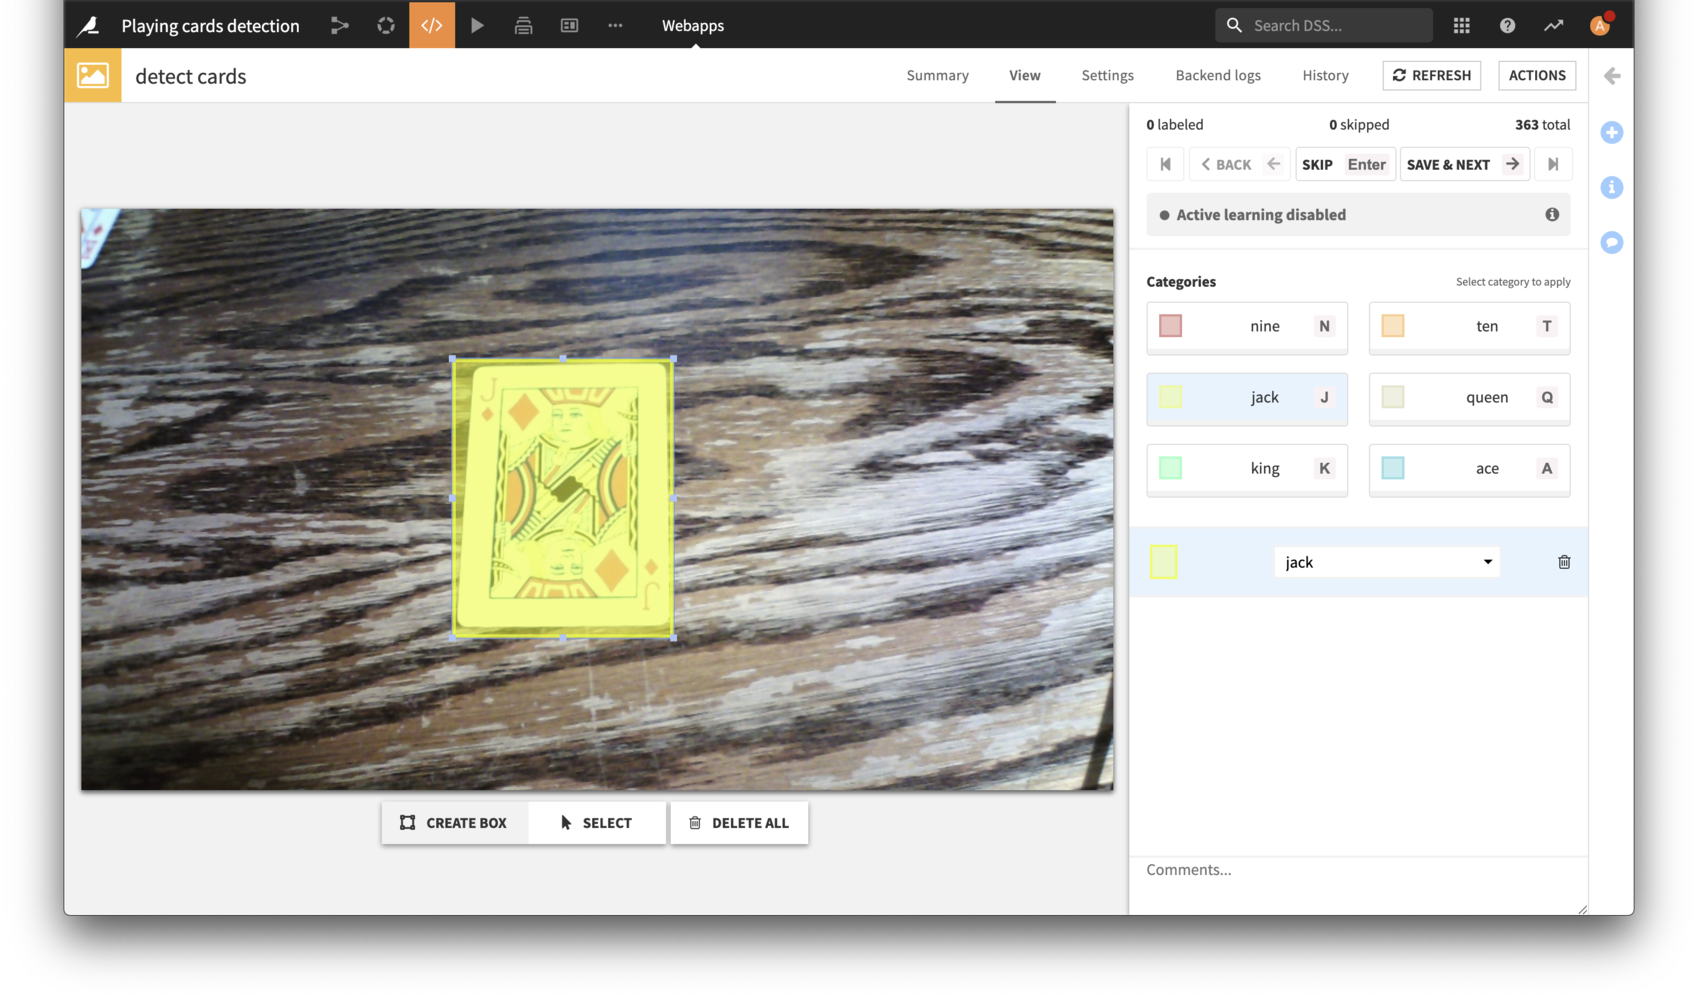
In order to start labeling select a category by clicking on it or pressing a corresponding hotkey. Then draw a rectangle around an object on the image. If the category needs to be changed, select a bounding box and then choose the right category from a drop down list on the right. Once all of the objects are selected on the image you can proceed to the next one by using the most convenient option:
pressing the right arrow key
clicking on “Save and next” button
pressing a space key
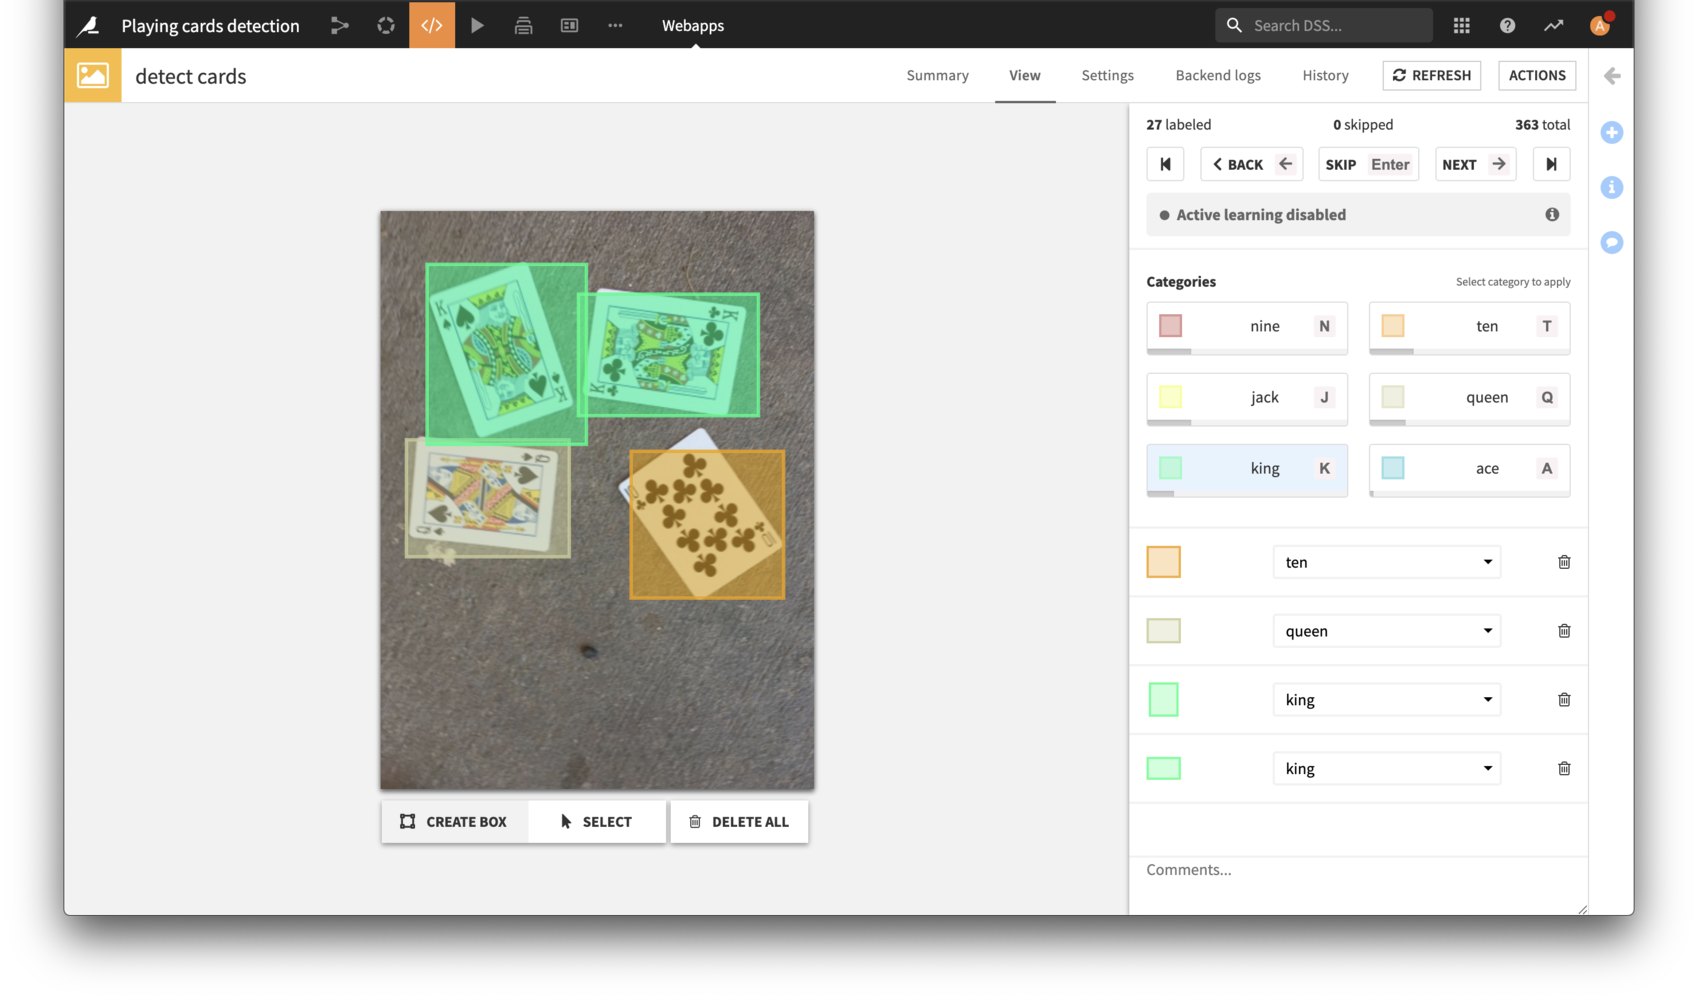
Label a few samples, make sure that you have at least one label per category (grey progress bar under a category button). Once you have enough labeled samples you can start training your model.
Training the model
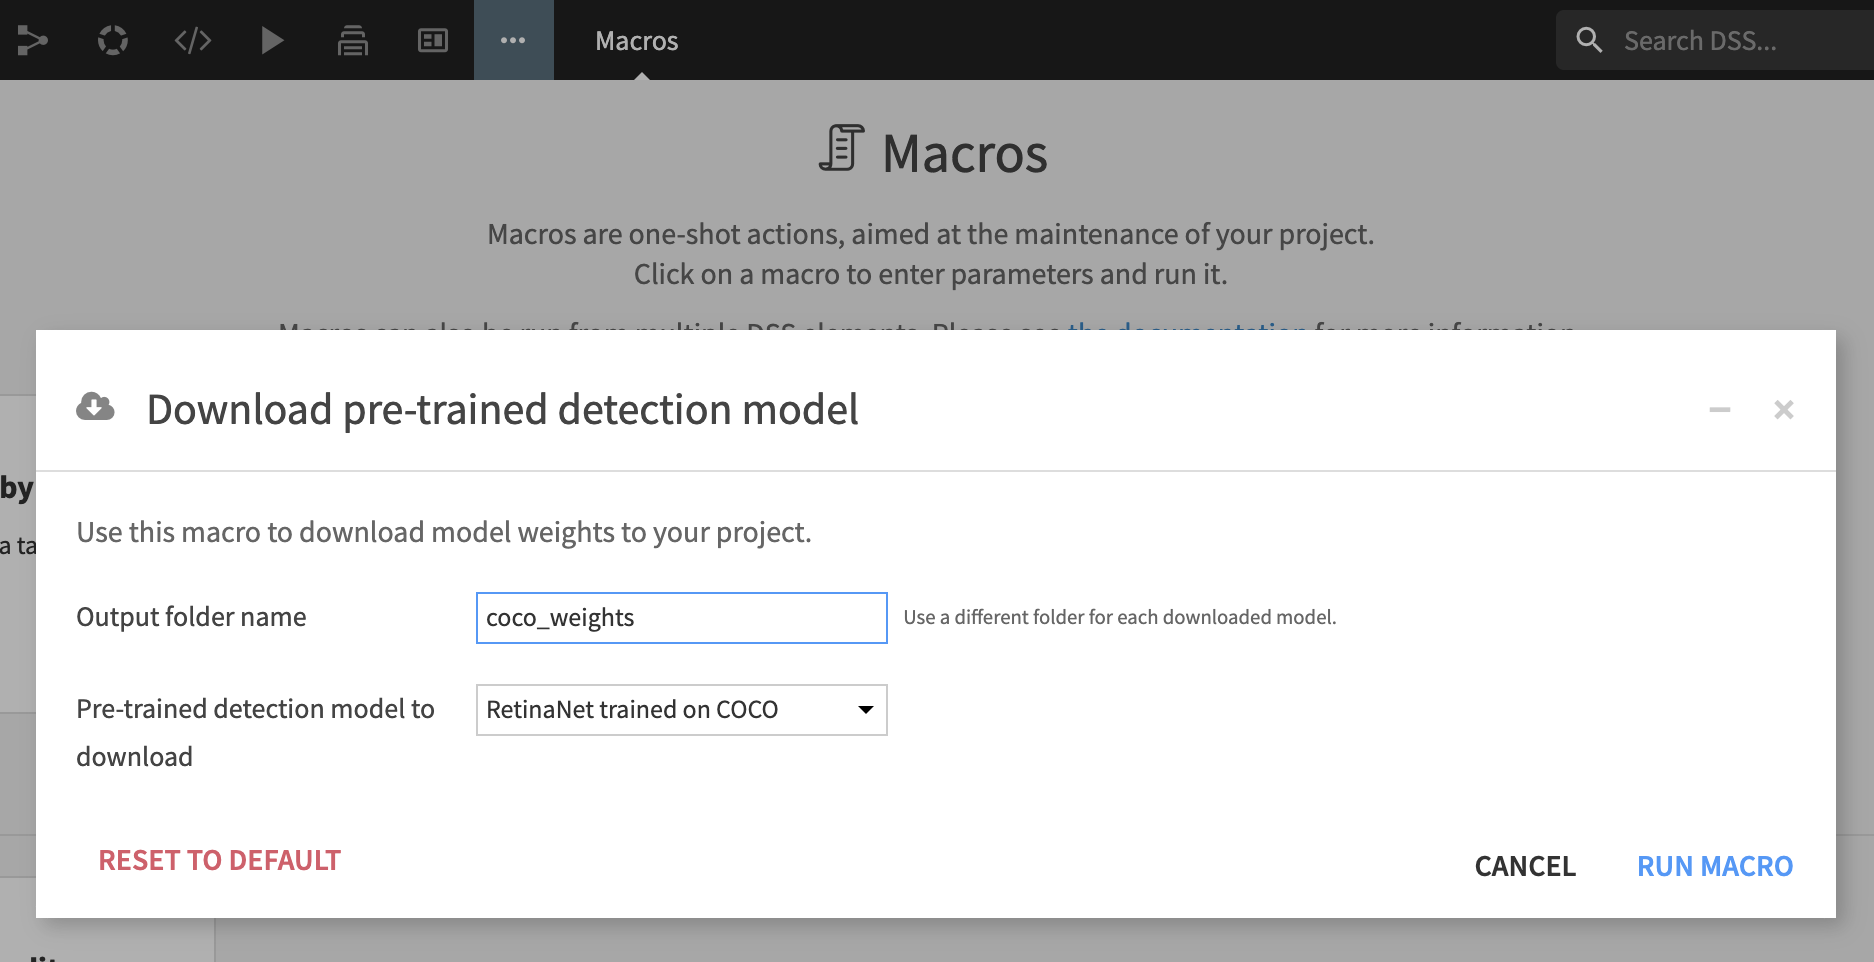
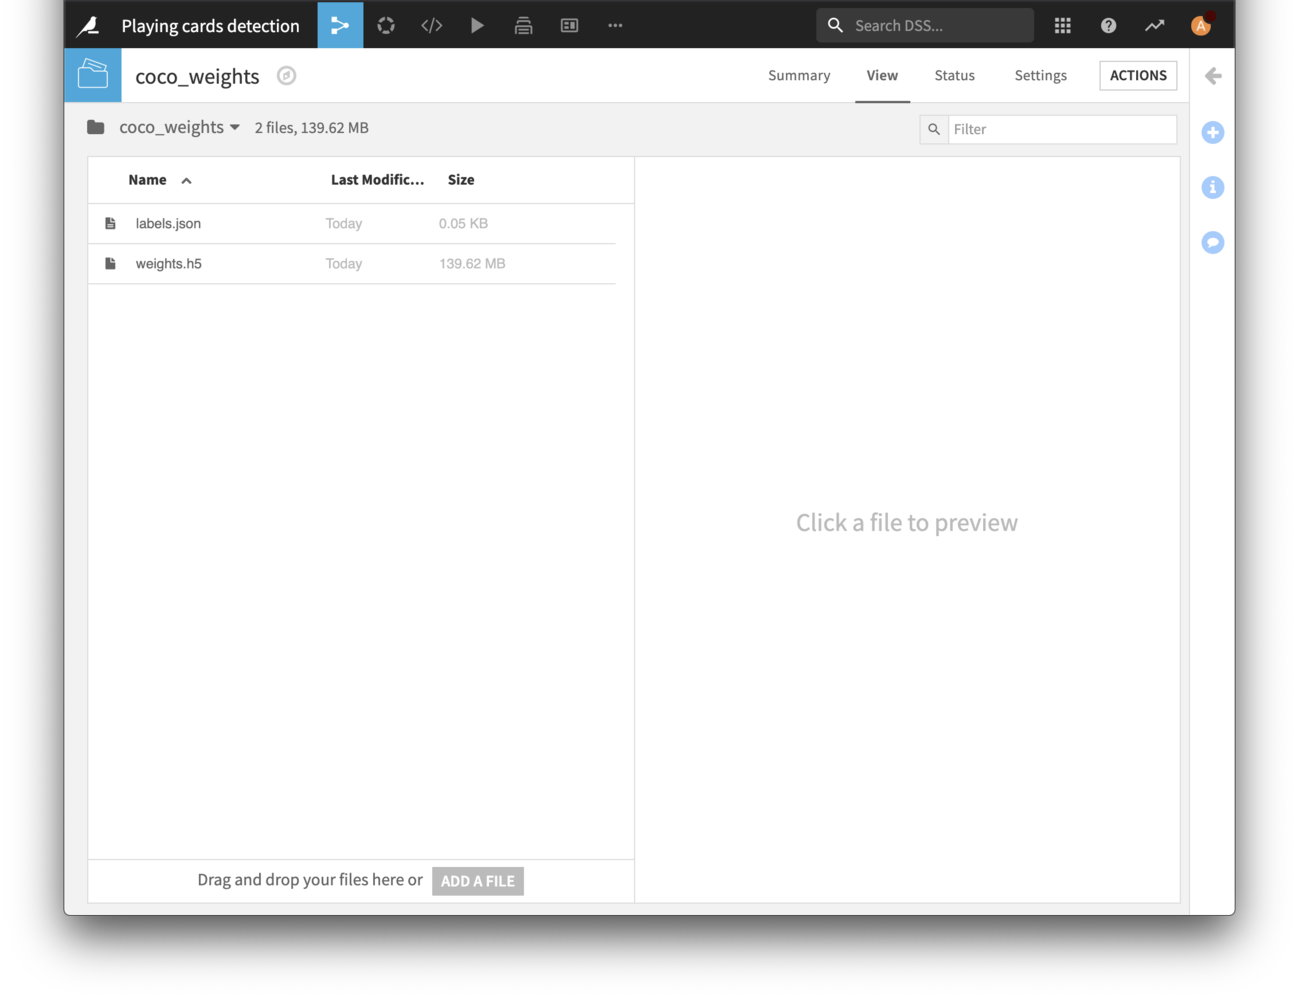
In order to train a model we’re going to use an Object detection plugin. First thing to do is to download some related files into a coco_weights managed folder using a Download pre-trained detection model macro:
weights.h5- Keras retinanet model pretrained on the full COCO datasetlabels.json- original COCO dataset labels
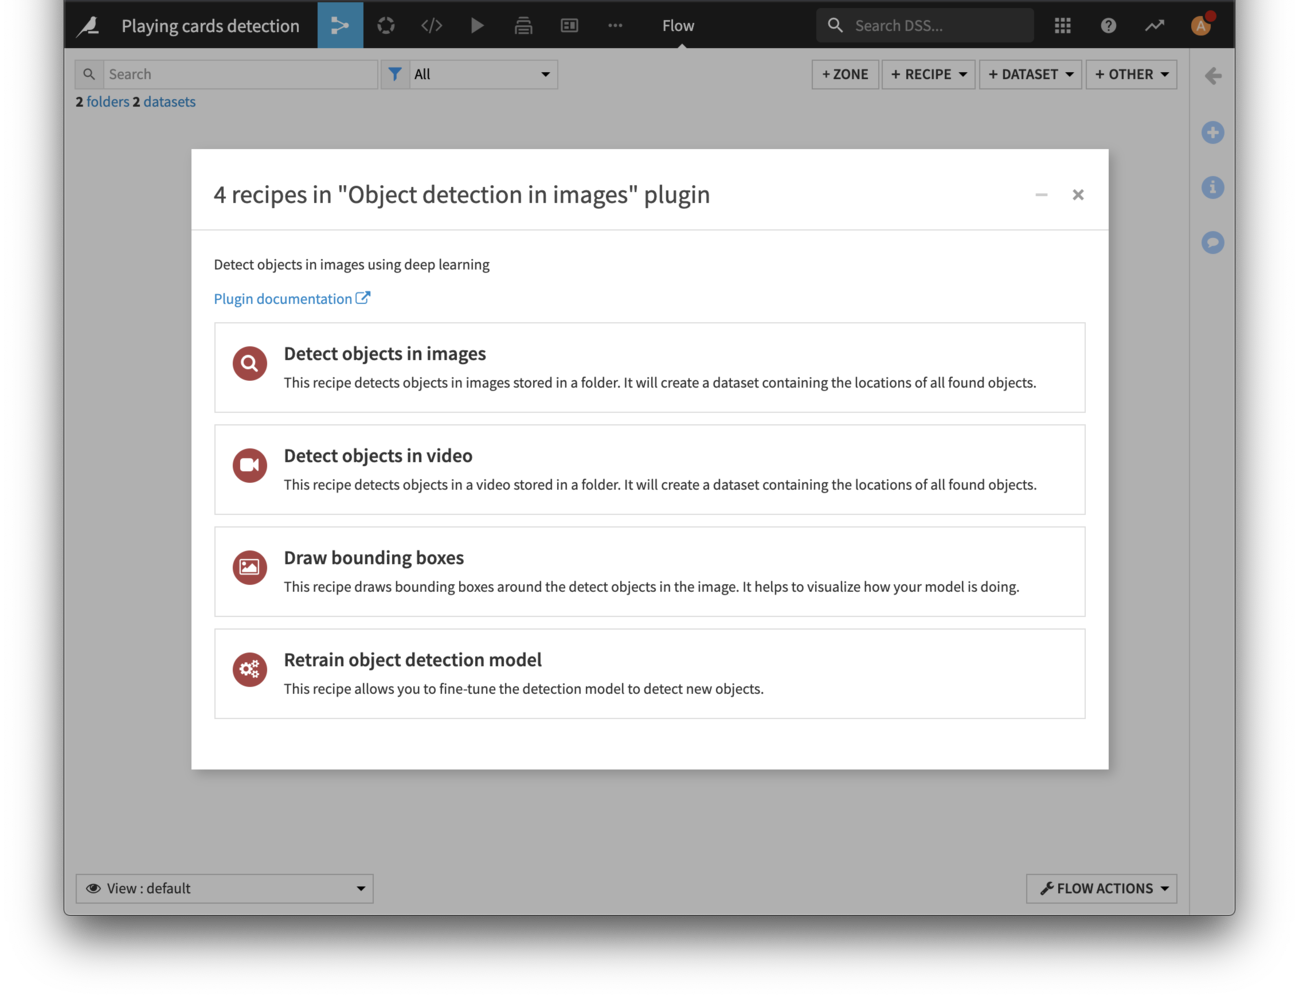
Now you can create a visual recipe of type “Object detection in images”, select the “Retrain object detection model” option
Fill in the following parameters:
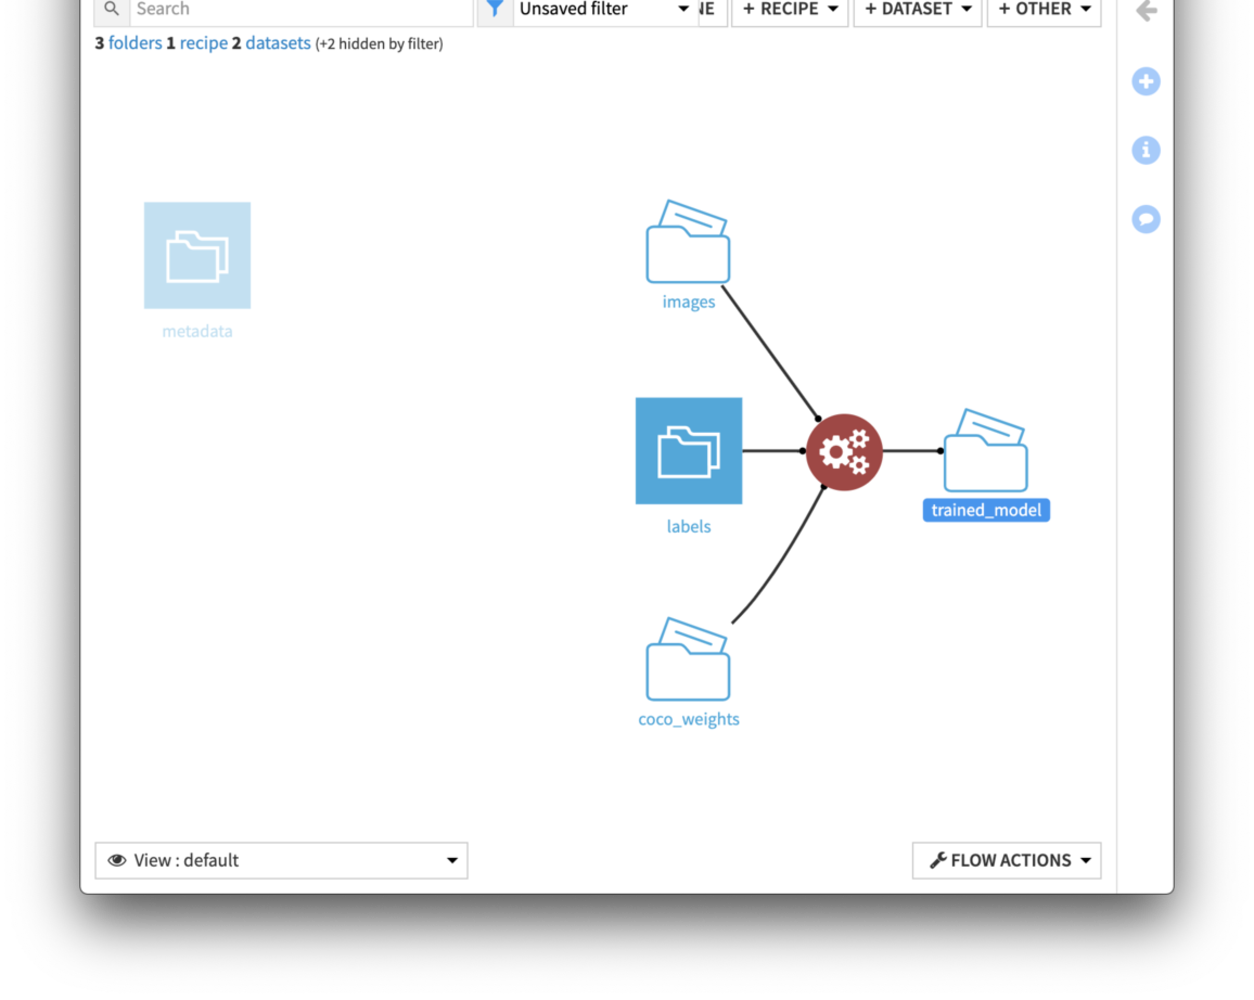
Folder containing the images - images
Dataset of bounding boxes - labels
Initial weights - coco_weights
For the trained model create a new folder called trained_model
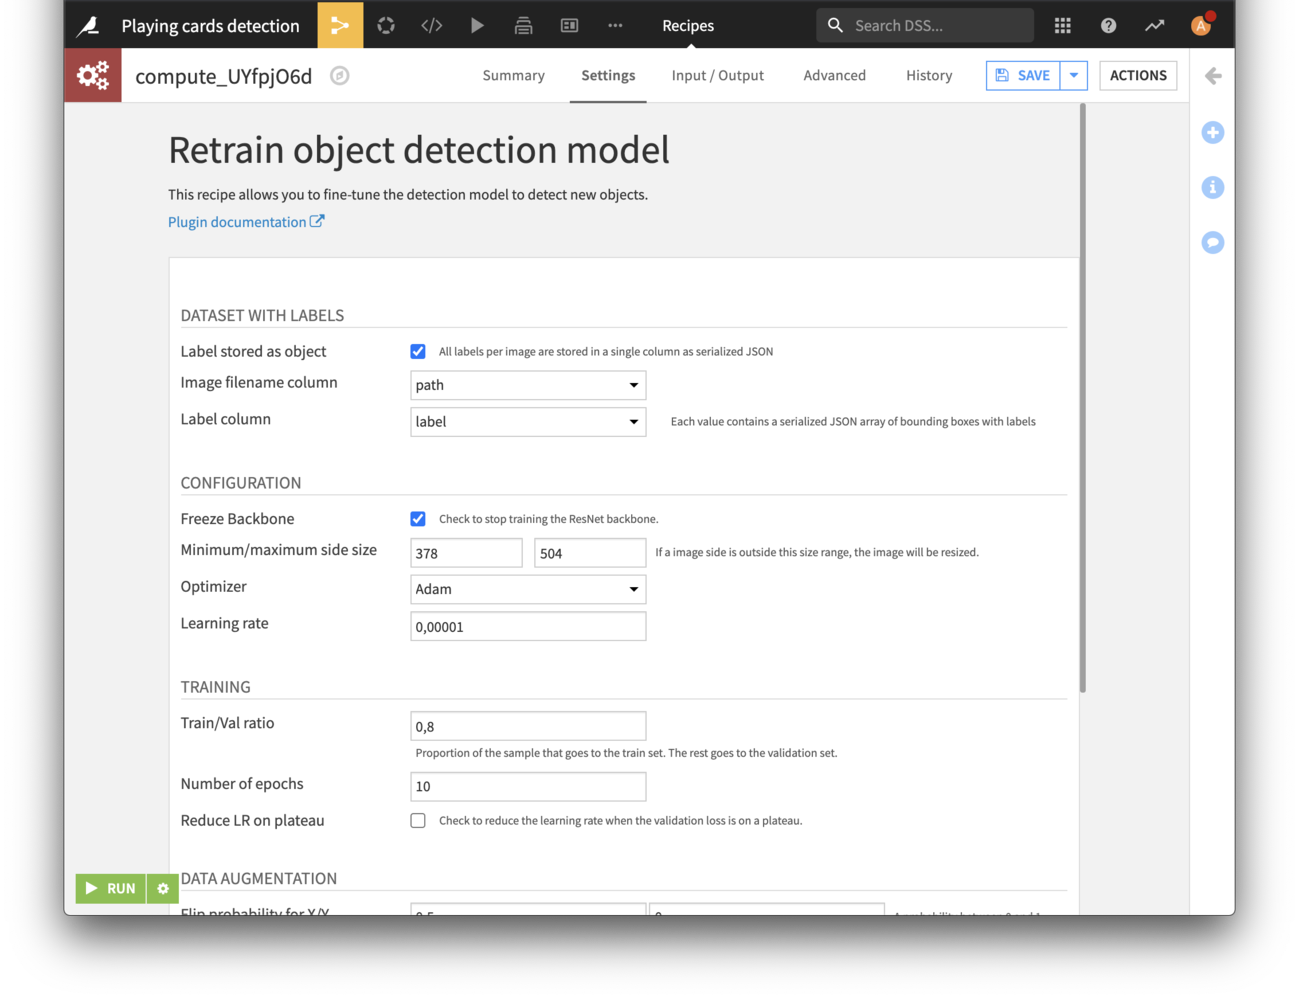
In the recipe settings click on the “Label stored as object” checkbox and fill the parameters:
Image filename column - path
Label column - label
Note
If you have GPUs available and you’ve installed a GPU version of the Object detection plugin, you may choose to check the “Use GPU” option in the bottom of the settings
This is what your flow should look like by now:
Putting Active Learning in Place
We would like to improve the model performance by labeling more rows and adding them to the training set. This is where active learning comes into play. We will:
Set up the recipe that uses the retinanet model to determine the order in which rows should be manually labeled.
Configure the labeling webapp to use a queries dataset.
Set up a scenario that automates the rebuilding of the ML model and then updates the the order in which rows should be manually labeled.
Set Up the Query Sampler Recipe
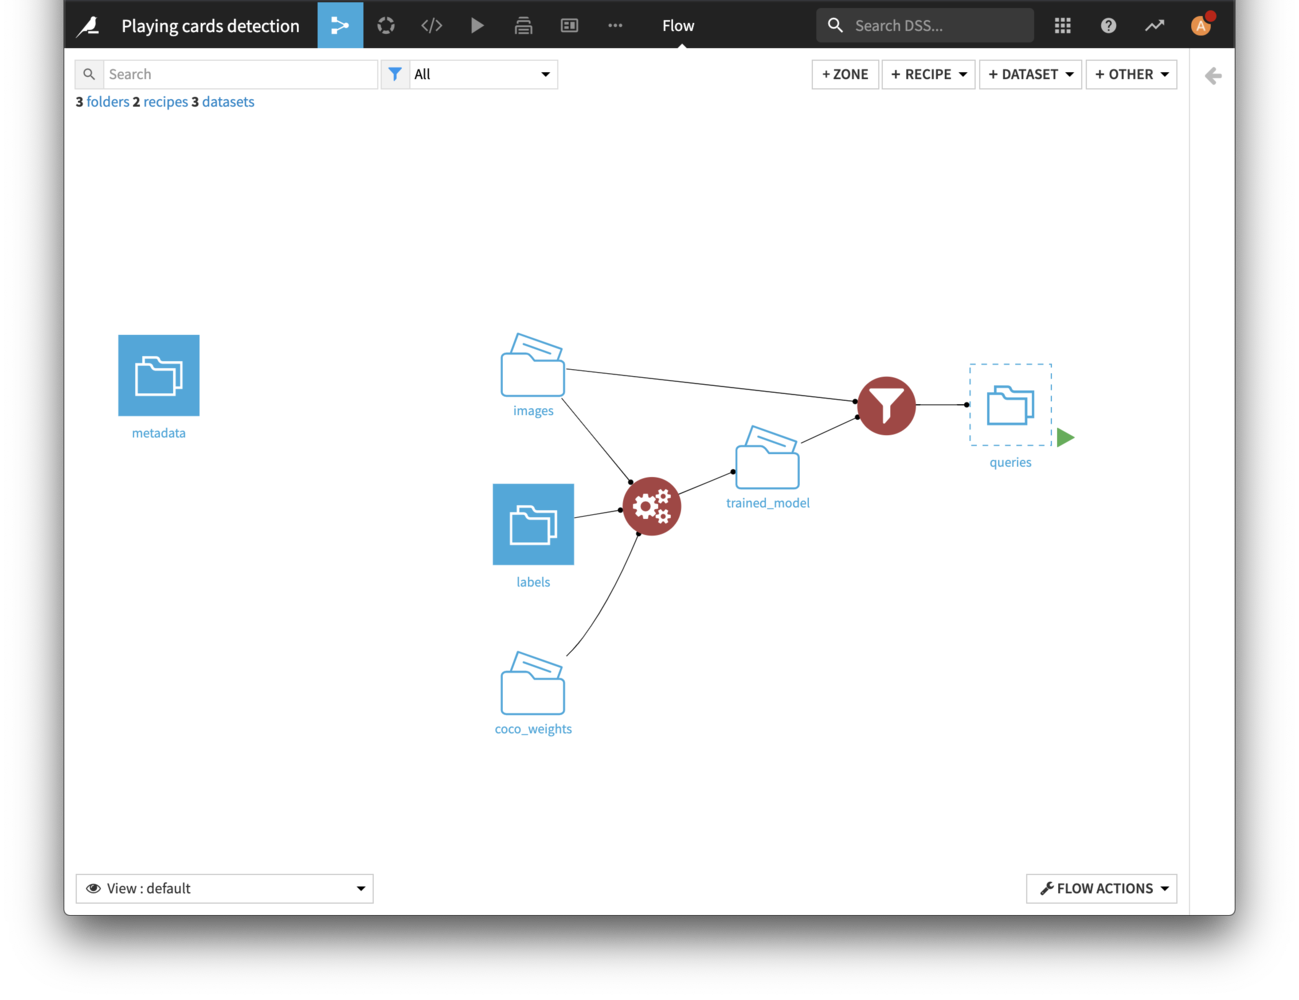
Click + Recipe > ML-assisted Labeling > Object detection query sampler.
For the Managed folder with model weights, select trained_model.
For the Unlabeled Data, select images.
For the output Data to be labeled, create a new dataset called
queries.Click Create.
Ensure that Smallest confidence sampling is selected as the Query strategy. Run the recipe.
Configure Labeling Application to use the queries dataset
Start by creating a web application to label images:
Go to webapp that you’ve created on the previous steps
Select the queries dataset in the settings under the ACTIVE LEARNING SPECIFIC section
Save the settings, the webapp will reload.
Now, if you open the View tab again you will see that the active learning is now enabled, thanks to the generated queries dataset.
The goal of active learning is to provide a labeler first with samples that the model had most difficulties with. There’s a widget with a color scale showing how efficient current sampling is compared to random. If the tick is on the right side of the widget it means that the model should be retrained and the queries dataset needs to be regenerated.

From here on the iterative labeling process starts:
Label few samples
Retrain the model
Regenerate the queries
Restart the webapp
This process may be automated by a scenario.
Set Up the Training Scenario
The Flow is now complete; however, the model must be manually retrained in order to generate new queries. The active learning plugin provides a scenario trigger to do it automatically. Let’s set it up.
From the Jobs dropdown in the top navigation bar, select Scenarios.
Click + New Scenario
Name it
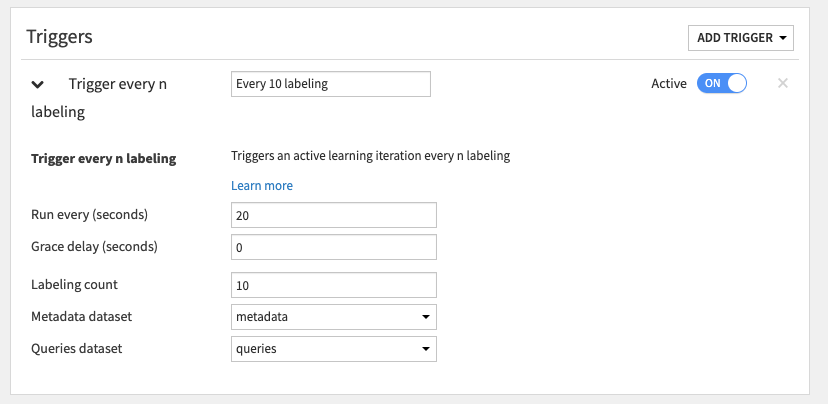
Retrain cards detectionand click Create.Click Add Trigger > ML-assisted Labeling > Trigger every n labeling.
Name the trigger
Every 10 labeling.Set Run every (seconds) to
20.Set Labeling count to
10.Set the Metadata dataset to metadata.
Set the Queries dataset to queries.
In the Steps tab:
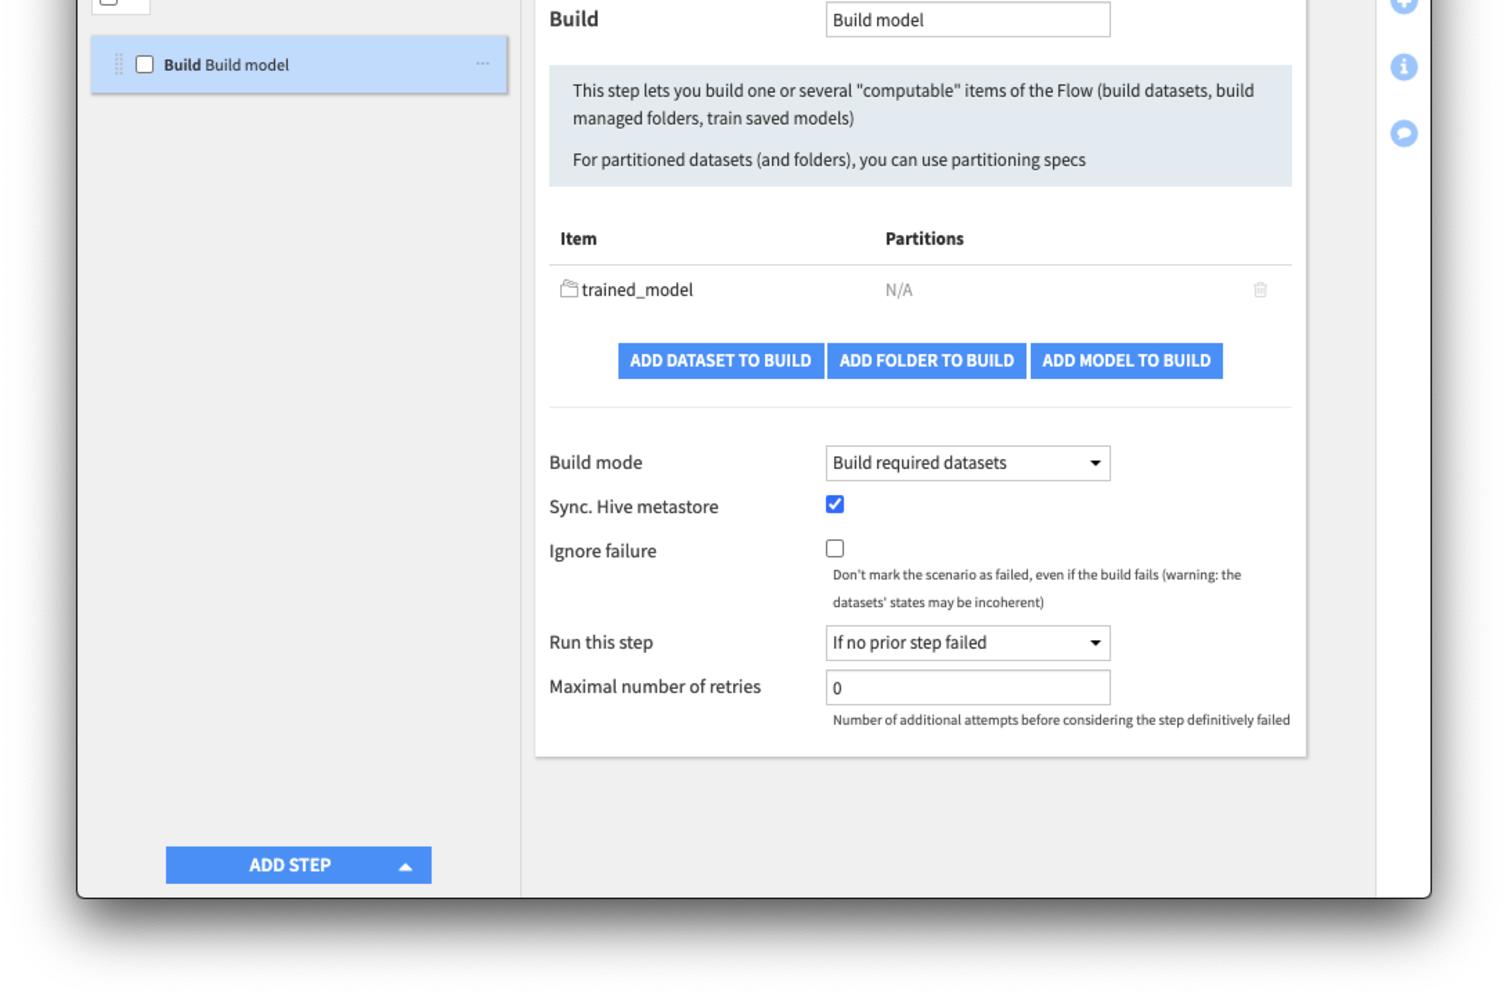
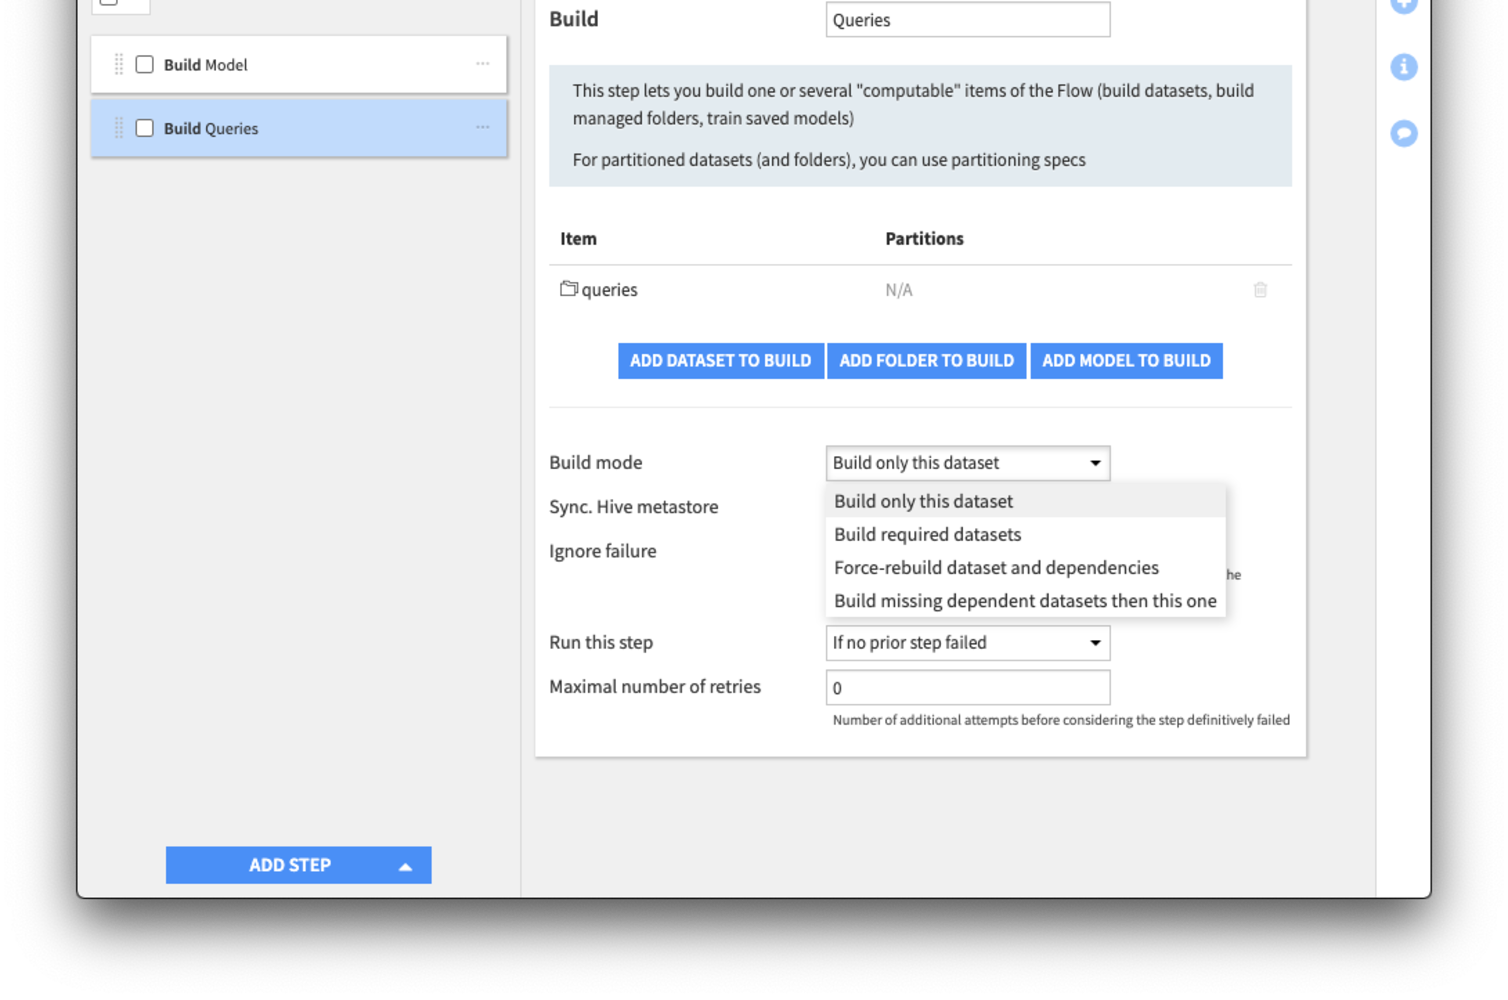
Click Add Step > Build/Train.
Name it
Rebuild model.Click Add Folder to Build and add trained_model
For the Build mode, select Build only this dataset.
Click Add Step > Build/Train.
Name it
Queries.Click Add Dataset to Build and add queries.
For the Build mode, select Build only this dataset.
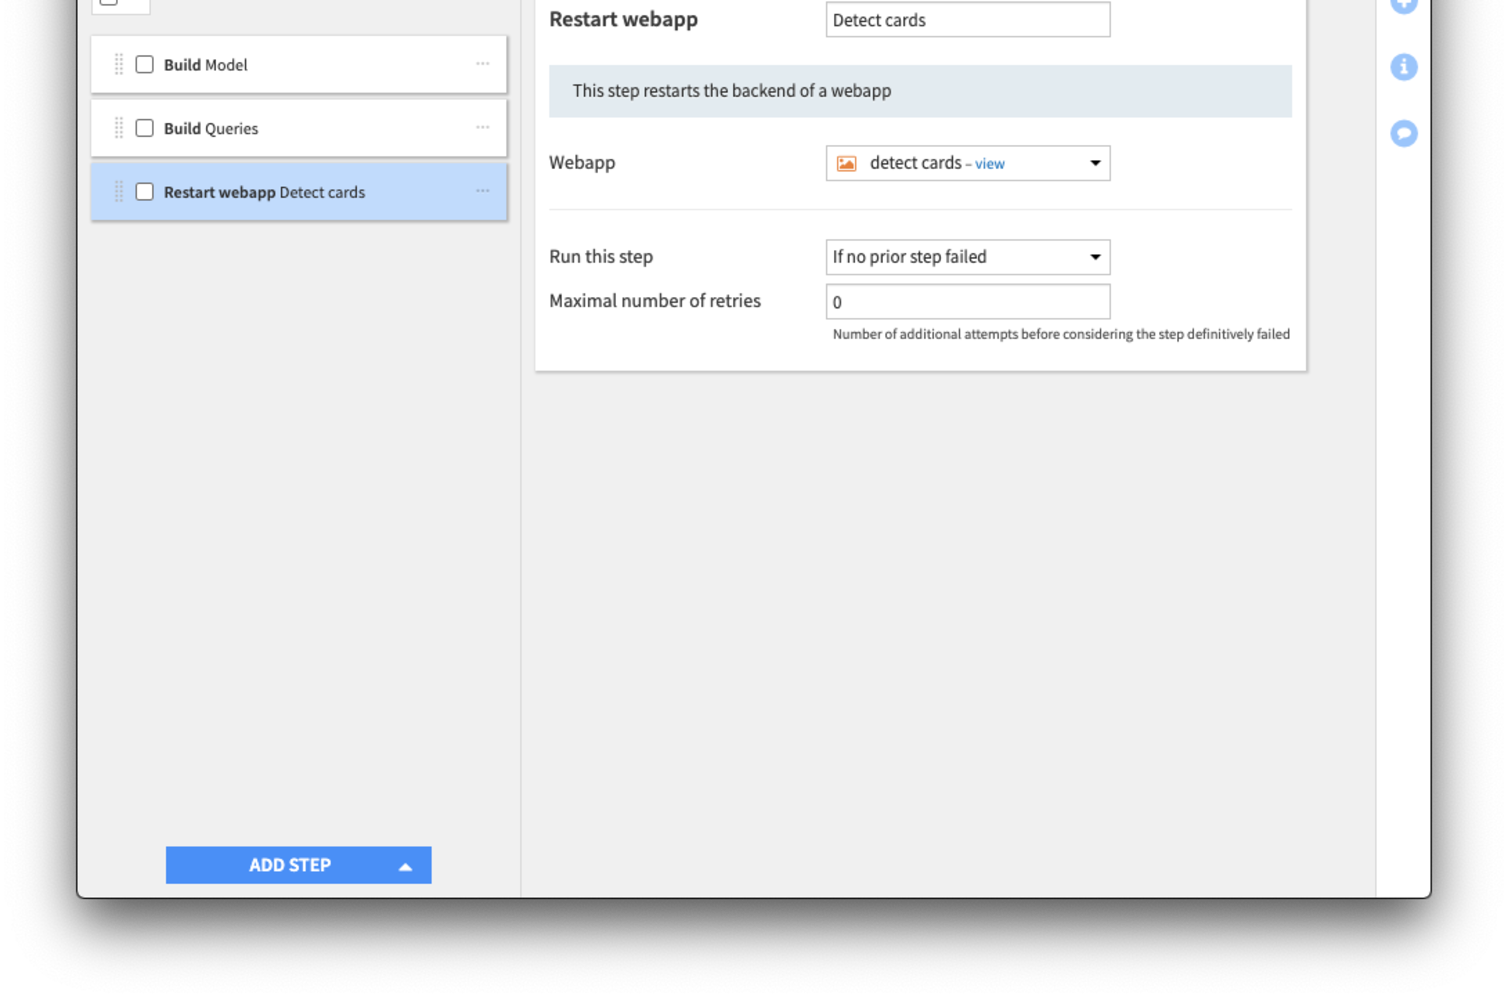
Click Add Step > Restart webapp.
Name it
Detect cards.Select detect cards as the web app to restart.
In the scenario Settings tab, set the auto-trigger of the scenario on. What happens now is that the scenario will trigger the generation of new queries every time 10 samples are labeled.
Label data
This is it! You can use the webapp by going to its View tab. Start labeling cards. Notice that you can use keystrokes to select categories faster. Simply hit j or n, on your keyboard to select the category and draw the bounding box of the corresponding type. You may also hit Space or right arrow button to confirm your labels and proceed to a next sample.
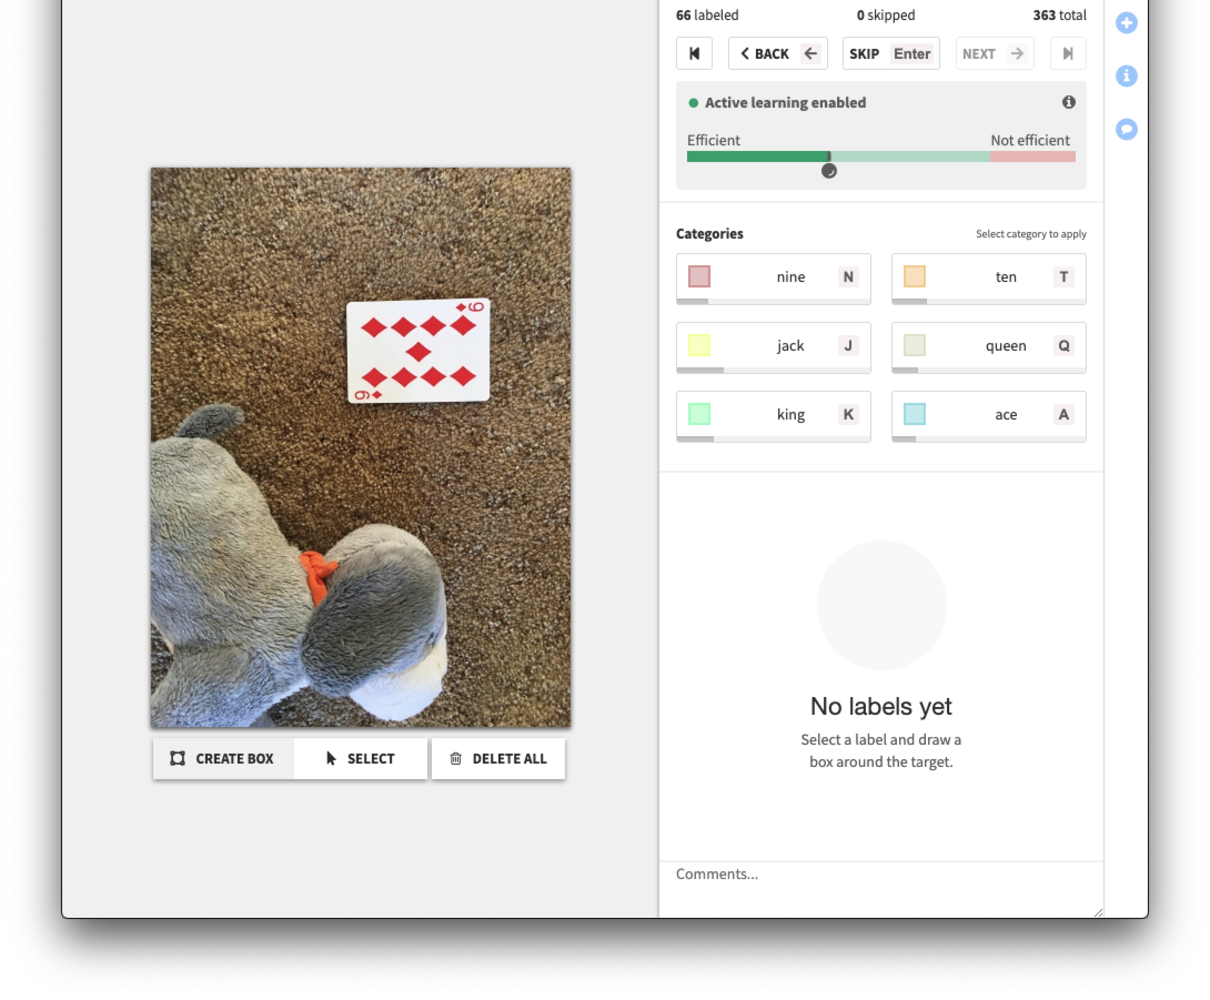
As you label, you will see notifications pop every 10 labels.
What’s Next
For more on active learning, see the following posts on Data From the Trenches:
References