Concept: Scenarios
In Concept: Metrics & Checks, we cover how we can ensure the quality of a workflow with metrics and checks. Now, let’s see how we can automate the steps of our workflow using scenarios.
In this lesson, we’ll discover:
the purpose of scenarios,
their components, and
how to create them in Dataiku DSS.
Tip
This content is also included in a free Dataiku Academy course on Automation, which is part of the Advanced Designer learning path. Register for the course there if you’d like to track and validate your progress alongside concept videos, summaries, hands-on tutorials, and quizzes.
Why Scenarios?
Automation scenarios are a set of actions that are scheduled to run when certain conditions are satisfied. They are most useful when automating various kinds of tasks when a project is in production. For example:
If you have new data that comes in regularly, you can create a scenario that runs the workflow once per day, or each time it detects a dataset change.
Another scenario could automatically detect the performance drift of a machine learning model and retrain it.
You can even automate some administrative tasks such as cleaning logs, or starting and stopping a cluster.
Scenario Types
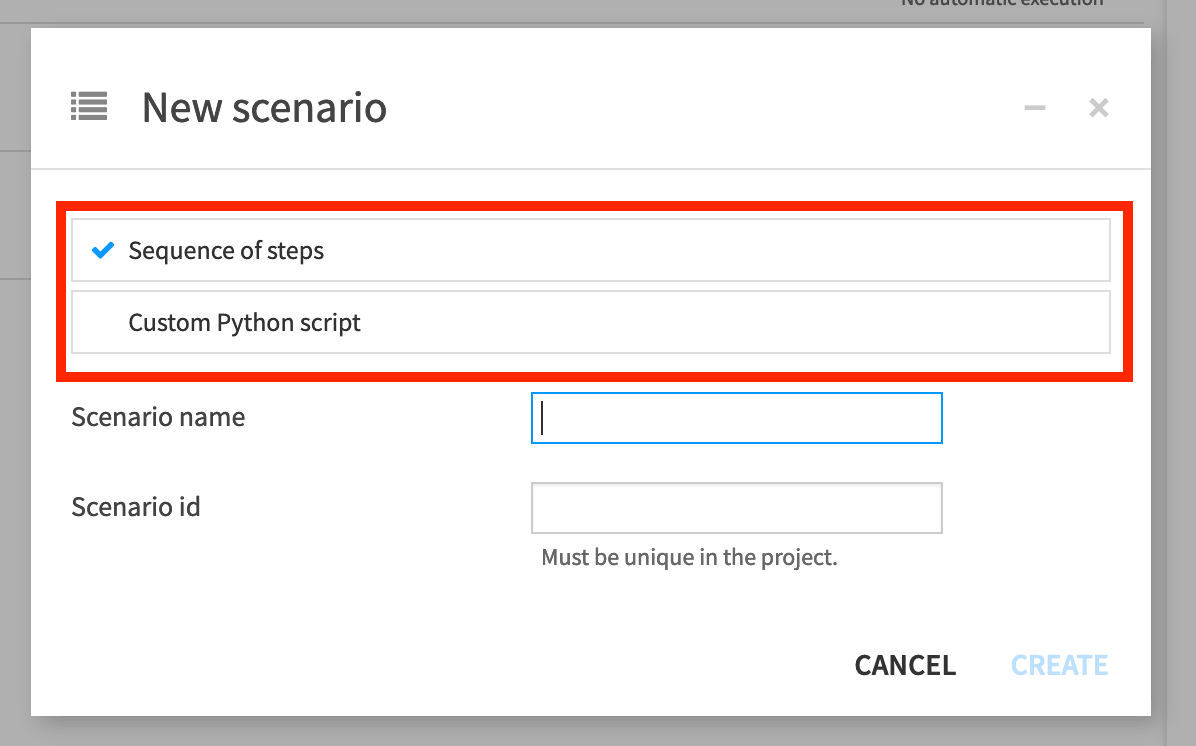
There are two types of scenarios in Dataiku DSS.
The first one is step-based, where we can configure the scenario steps using the visual interface.
It is also possible to create a scenario where the set of actions performed are fully defined by Python code. This type of scenario is called a custom Python script and will be presented in another lesson.
Scenario Components
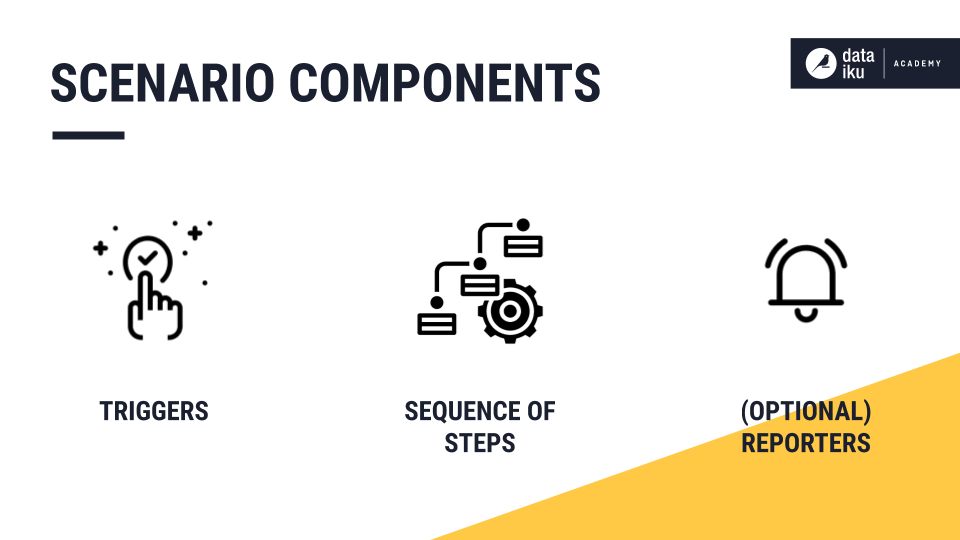
Scenarios consist of three main components:
Triggers, which define when to execute a scenario;
A sequence of steps, or actions, configured by the user. The steps are all run, and always in the same order.
Optional reporters to send information or alerts about a scenario (such as success or fail alerts, warnings or custom step details) via a variety of channels.
We’ll start by looking at what triggers are and how they are used in scenarios.
Scenario Triggers
Triggers allow users to define a condition or set of conditions that, if and when satisfied, start a scenario. Each trigger can be enabled or disabled.
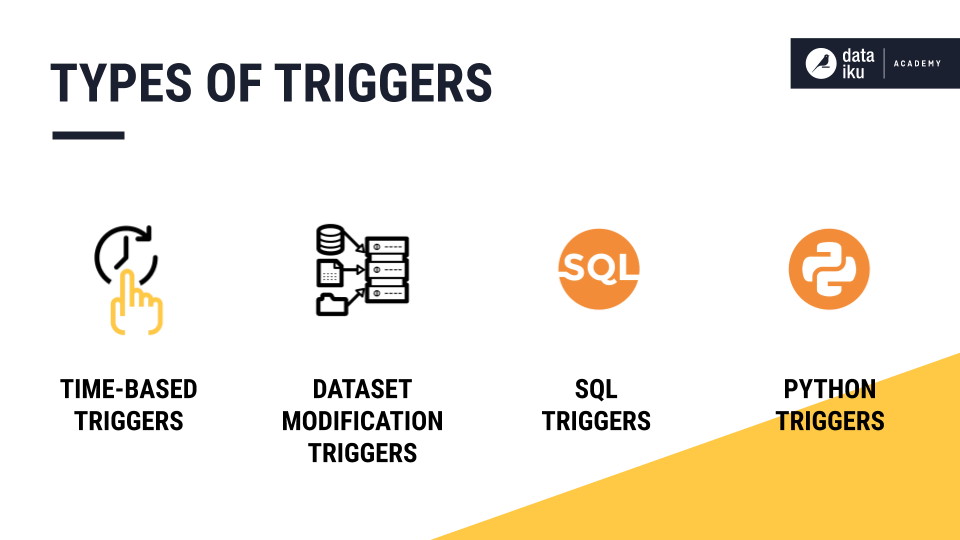
Several types of triggers exist:
Time-based triggers, which launch scenarios at regular intervals defined by the users (for instance every day at midnight).
Dataset modification triggers, which start a scenario whenever a change is detected in the dataset. This type of trigger is used for filesystem-based datasets.
For SQL-based datasets, however, changes to the data are not detected, and a SQL trigger should be used. SQL triggers check changes by running a query and activating when the output of the query changes (with respect to the last execution of the query).
Finally, where a fully flexible approach is required, a Python trigger can be set up. This type of trigger executes a Python script, and the script can decide to activate the trigger. Setting up custom Python-based scenarios and triggers will be presented in the next lesson.
Now, let’s look at the different steps, or actions that are available in scenarios.
Scenario Steps
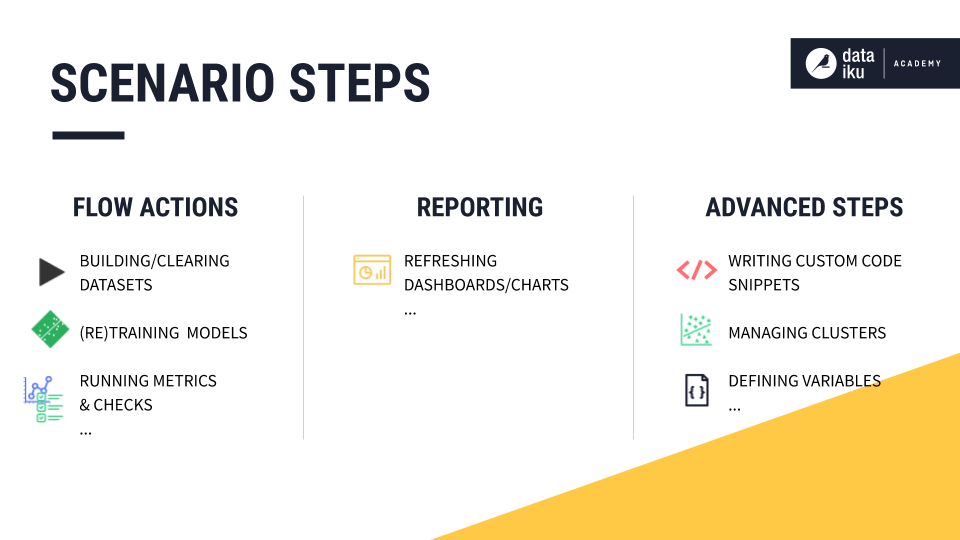
There are scenario steps available for most Flow actions, such as:
building or clearing a dataset,
training a model, and
running metrics and checks.
There are also different steps for reporting, such as refreshing the cache of charts and dashboards.
Finally, there are various advanced actions that can be automated through scenario steps, such as:
Writing custom code snippets in Python or SQL,
Managing clusters,
Defining variables at different levels,
Deployment-related actions, and more.
Reporters
Dataiku DSS also provides the means to add reporters to a scenario. These reporters can be used to inform users about scenario activities through email and other channels. For example, scenario reporters can update users about the training of models.
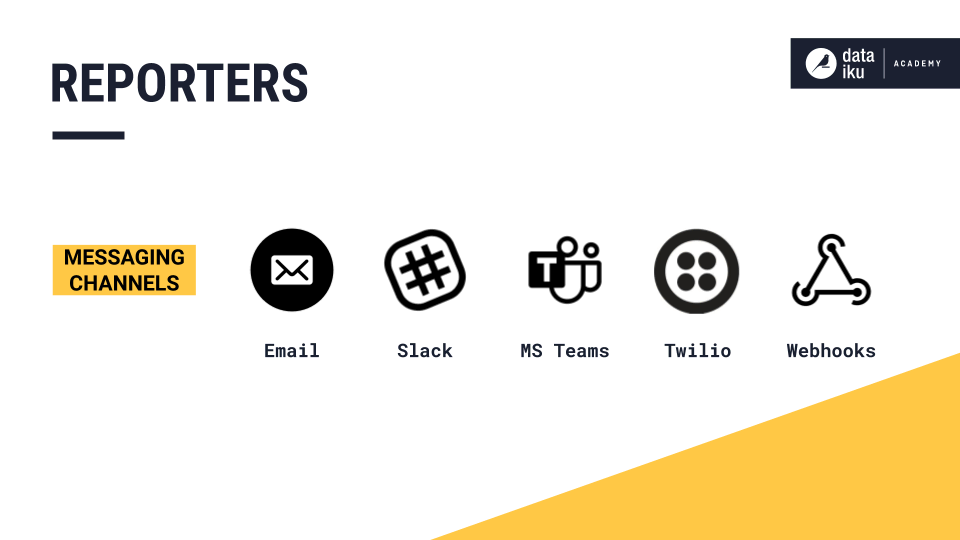
Reporters can create actionable messages that users can receive within several messaging channels:
Mail,
Slack,
Microsoft Teams,
Webhook, and
Twilio.
Reporters are optional. An administrator for a Dataiku DSS instance can configure connections to messaging channels in the Administration section.
It is also possible to run a pre-configured shell script, and to send reports to a Dataiku DSS dataset.
Configuring Scenarios
Note
The associated concept video walks through the configuration of the scenario described here.
Let’s now see how we can configure scenarios in Dataiku DSS. To create a scenario, navigate to the Automation menu, select Scenarios from the dropdown, and click on + New Scenario.
We’ll start by adding scenario triggers, which define the conditions for when to execute a scenario.
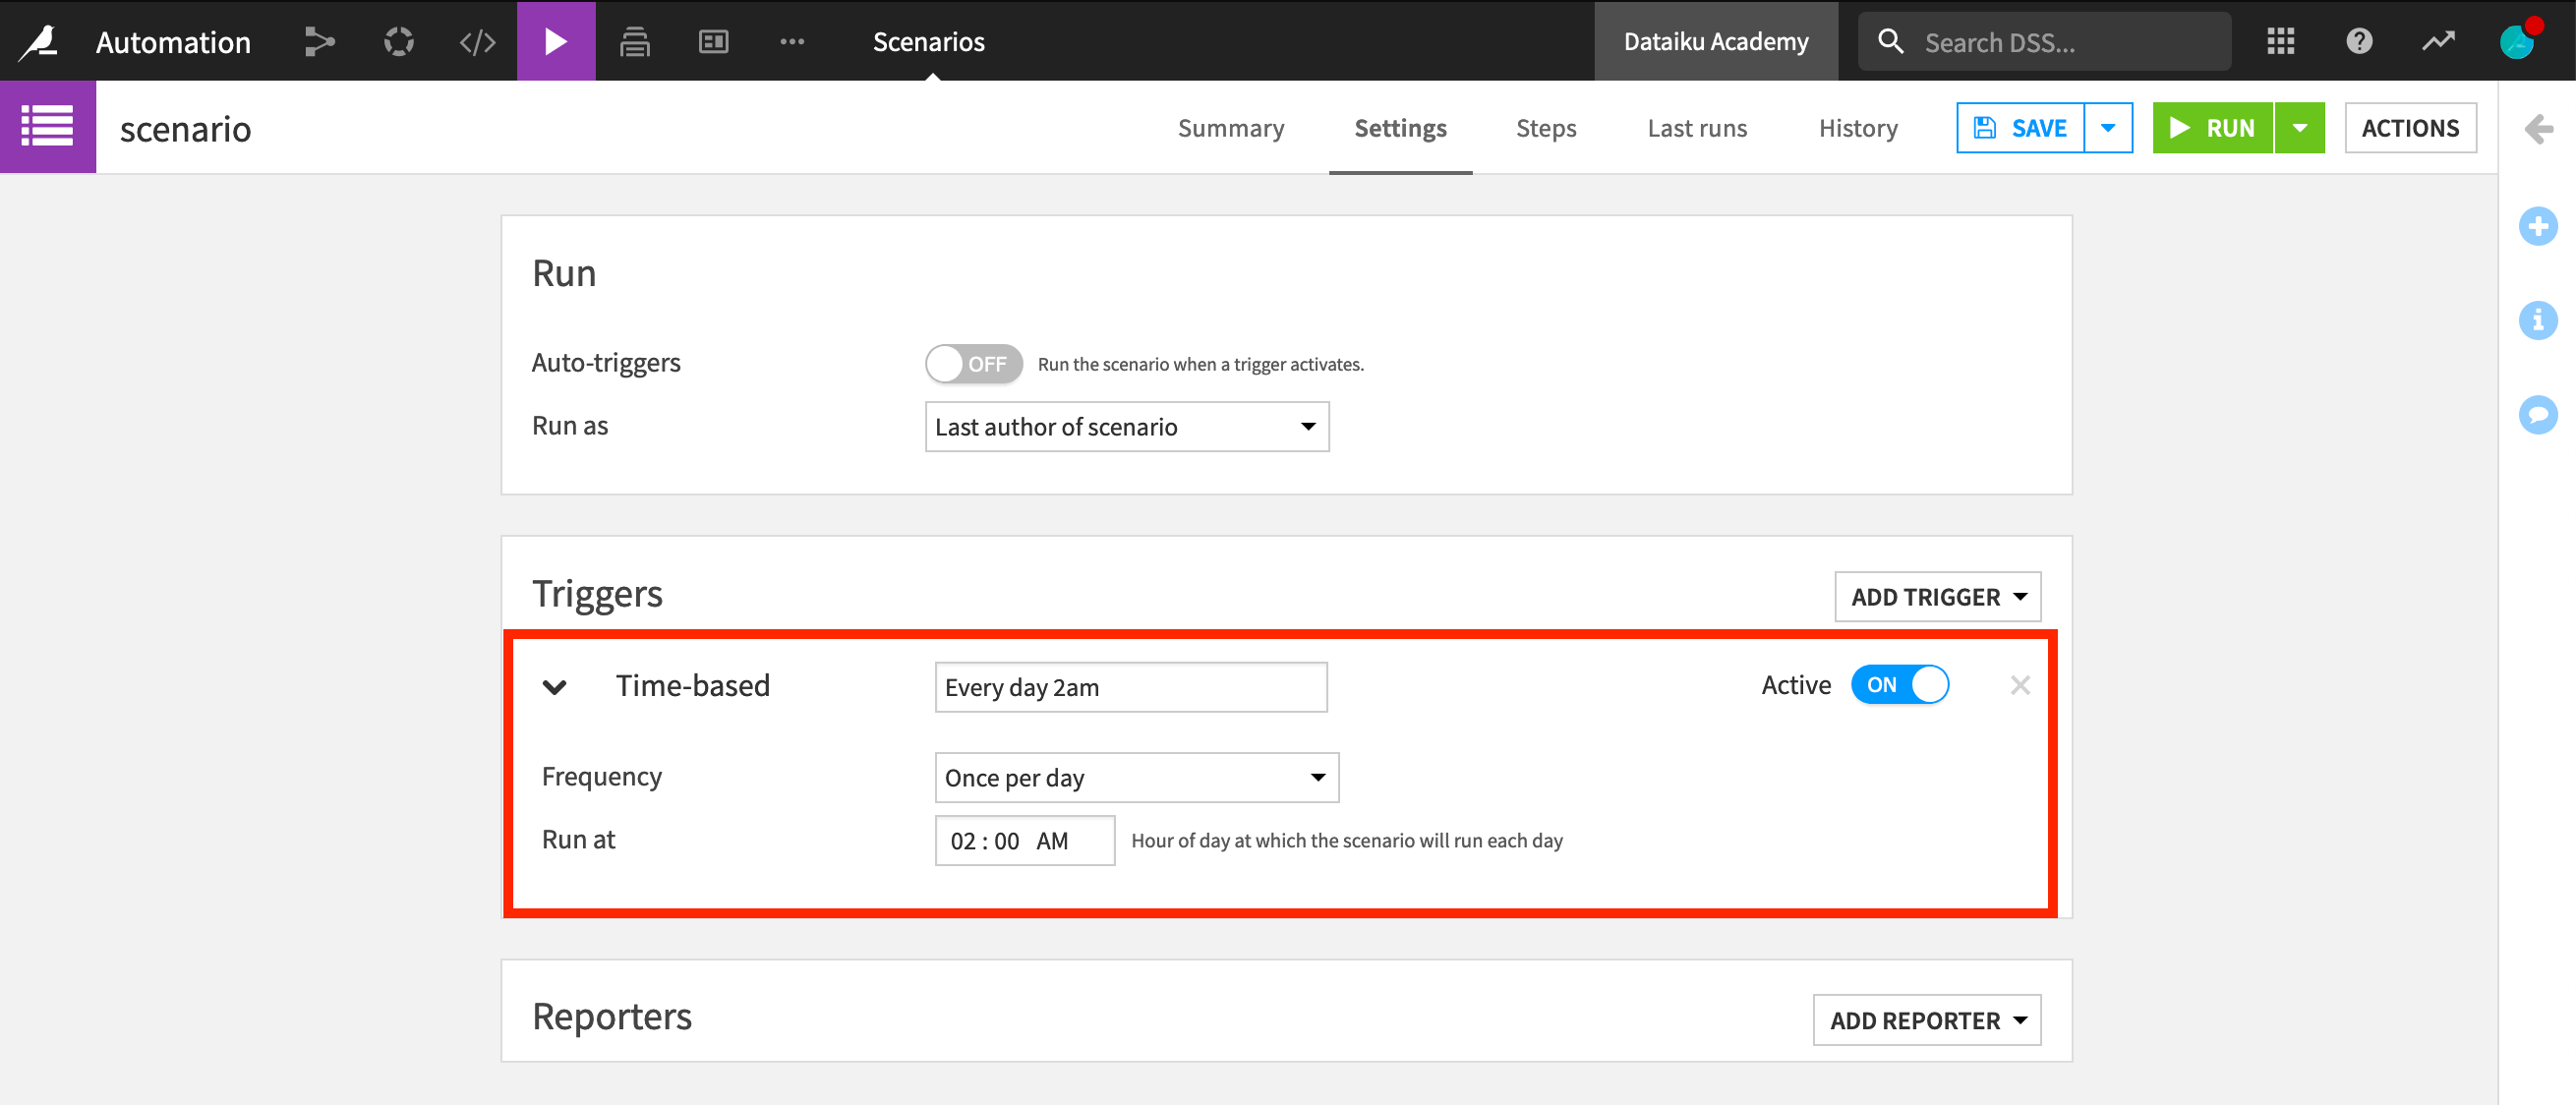
Adding Triggers
Triggers can be configured from the Settings tab of a scenario. Let’s first see how to create a time-based trigger. This type of trigger is the most popular and easiest to use. To configure it, we simply choose how frequently we want the scenario to run. For instance, we can set it to run every day at 2 AM.
We can also configure a trigger to be based on a change in a Dataiku DSS object. To do this, we create a new dataset modification trigger. Then, we need to add the dataset, folder or model that we want to monitor and specify the frequency at which we want it to check for Dataiku DSS object changes.
Let’s select to monitor the transactions dataset, and set it to run once every 600 seconds (every 10 minutes).
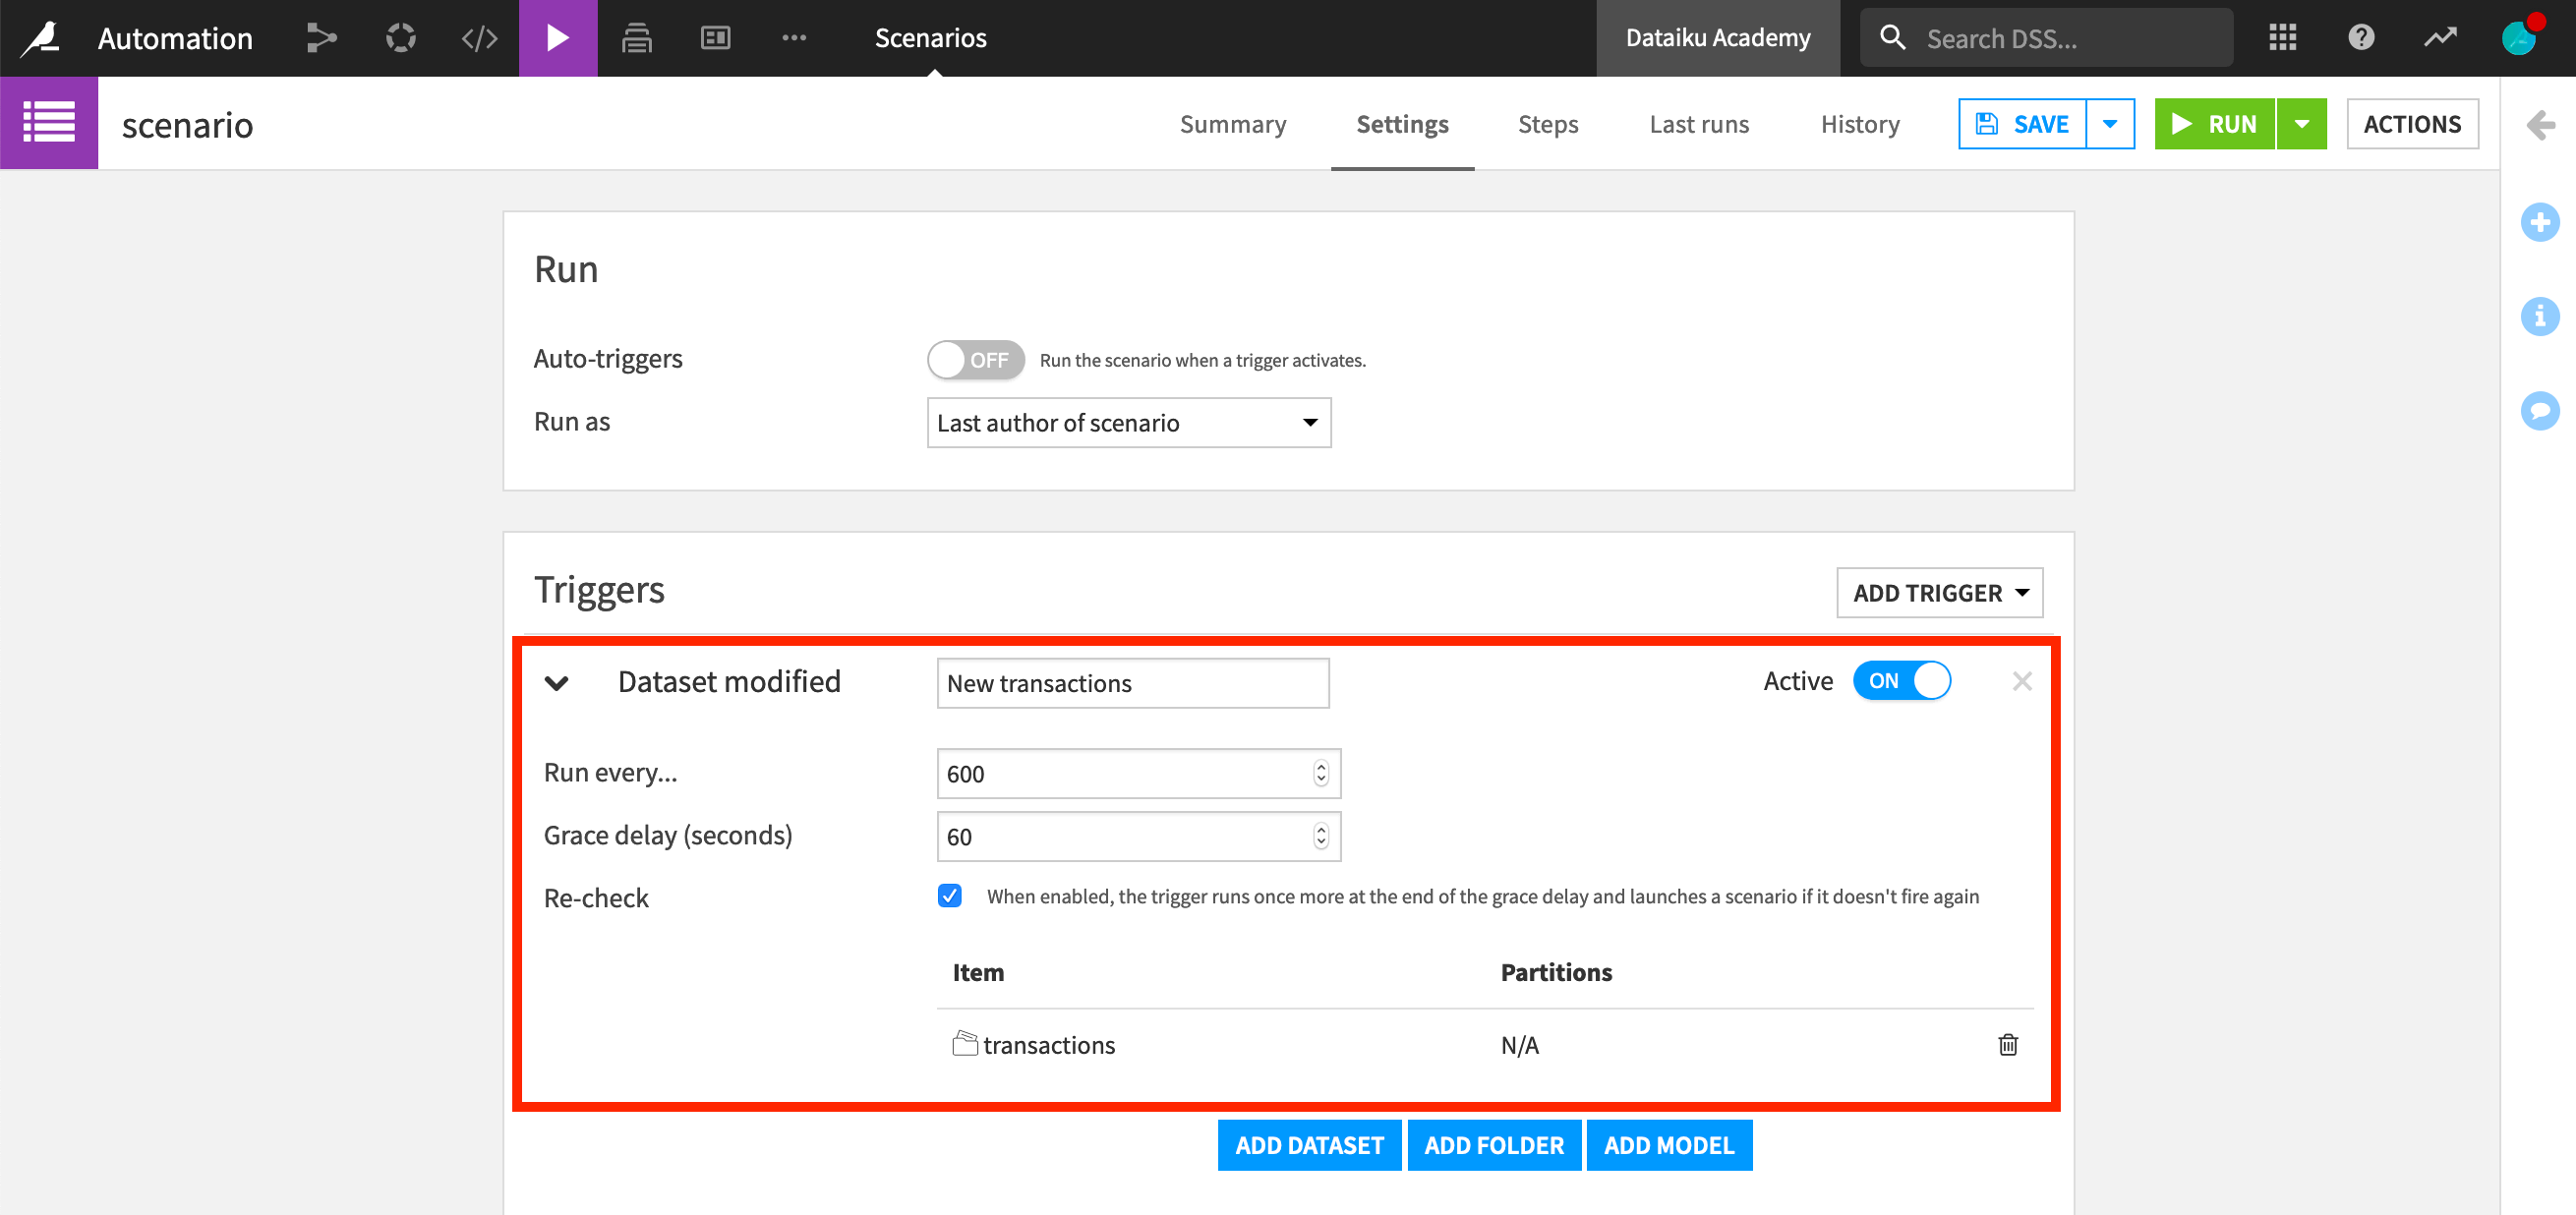
However, what happens if the trigger runs while a change is still occurring, for instance while new rows are being added to the dataset? We’d probably want to wait until the end of the change before the scenario launches.
To do this, we can set an interval of time, or “grace delay”, between the moment the change was detected and the scenario launch. In other words, when the trigger detects an object change, the scenario will wait for the grace delay before launching. Let’s set a grace delay of 60 seconds.
Finally, if we tick the “Recheck” box, the trigger will run once more after the grace delay in order to make sure that no change has occurred since. If a change has occurred, it will once again wait for the grace delay, and so on, until the modification is complete.
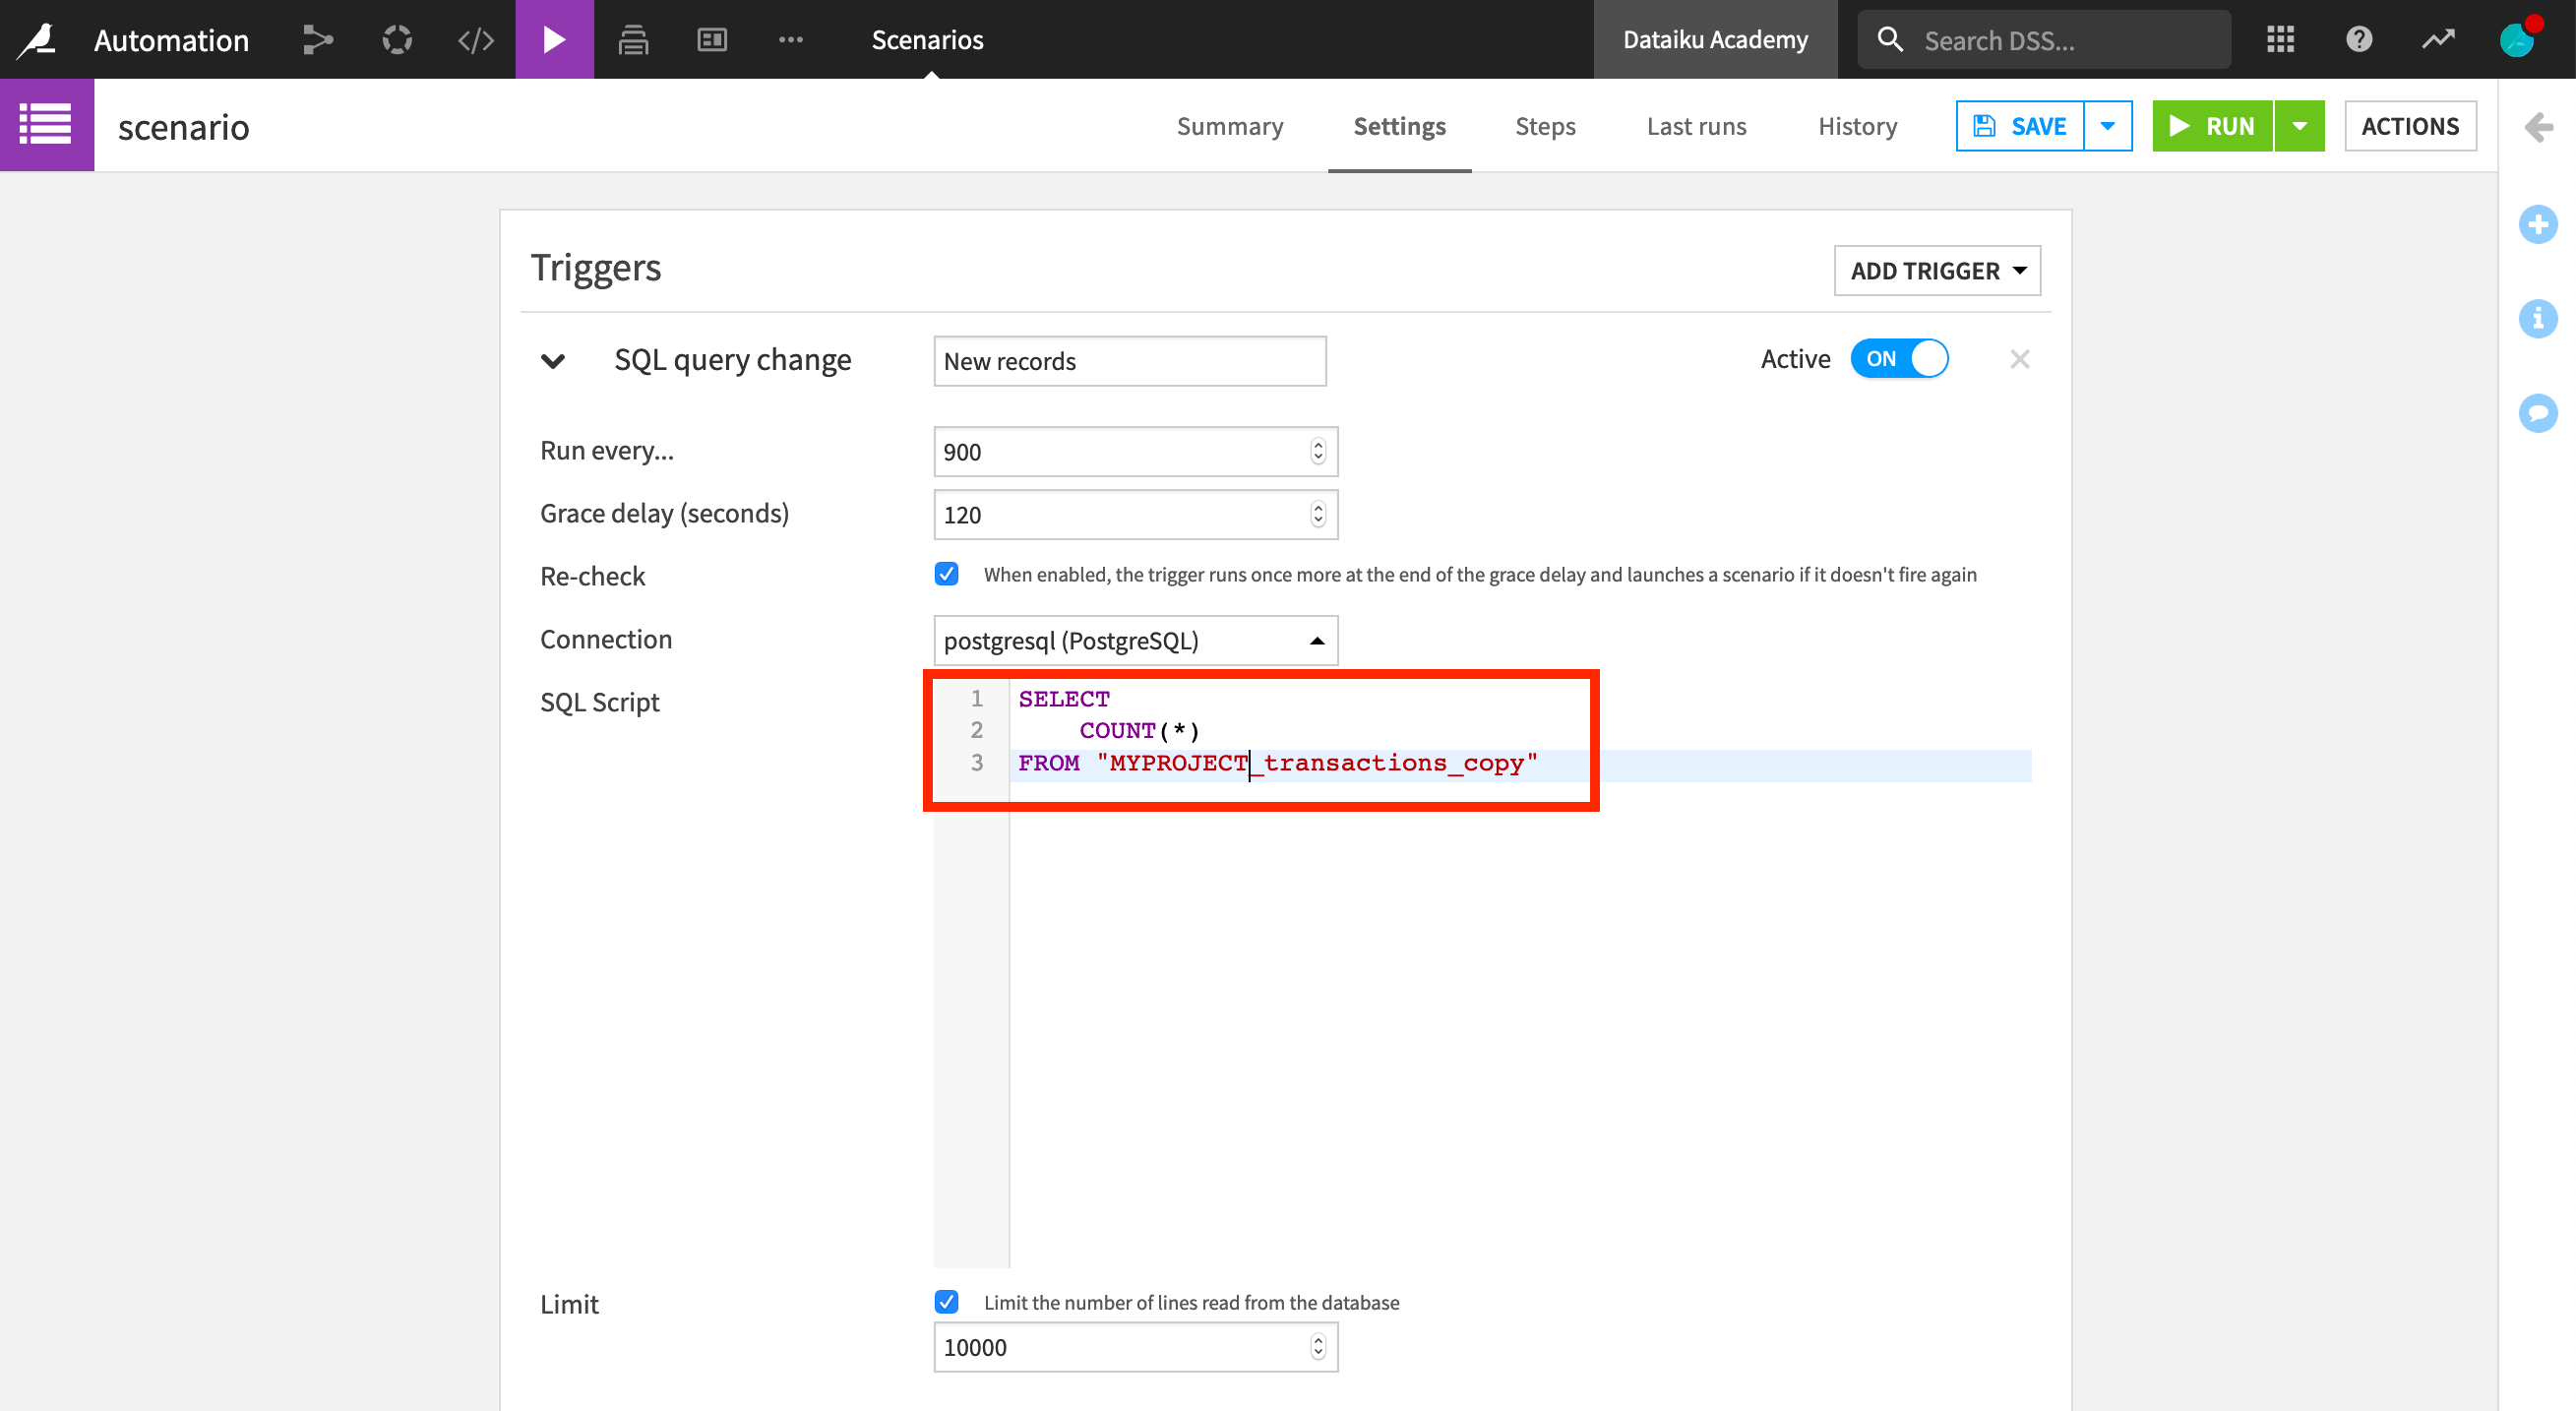
Next, let’s create a trigger on an SQL query change. To set up an SQL trigger, we select our database connection and write a query on tables stored in this database. For instance, we can choose to compute the number of rows of the transactions_copy dataset, in order to check if new records have been added to the dataset.
We could also set a trigger that is fired after another scenario has launched, or we could select to set up a trigger based on Python code.
As we have seen, a scenario can have multiple triggers. For a trigger to be operational, we need to activate it. We also need to enable auto triggers in order for a scenario to run when a trigger is fired. If at least one of the triggers is fired, then the scenario will launch.
Now that we have configured the triggers of our scenarios, let’s create the steps, or actions, that it will execute.
Adding Steps
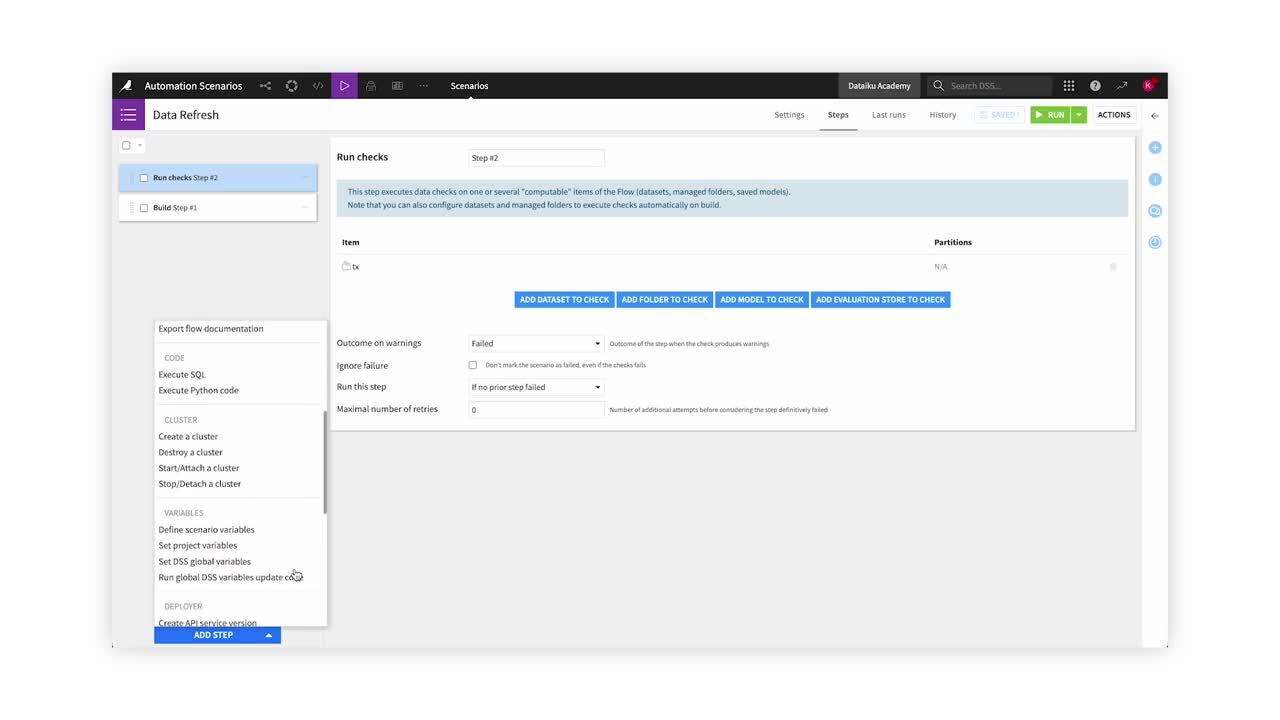
As we saw earlier, metrics and checks are often used in scenarios as a way to ensure that our data flow respects certain conditions before running a given sequence of steps.
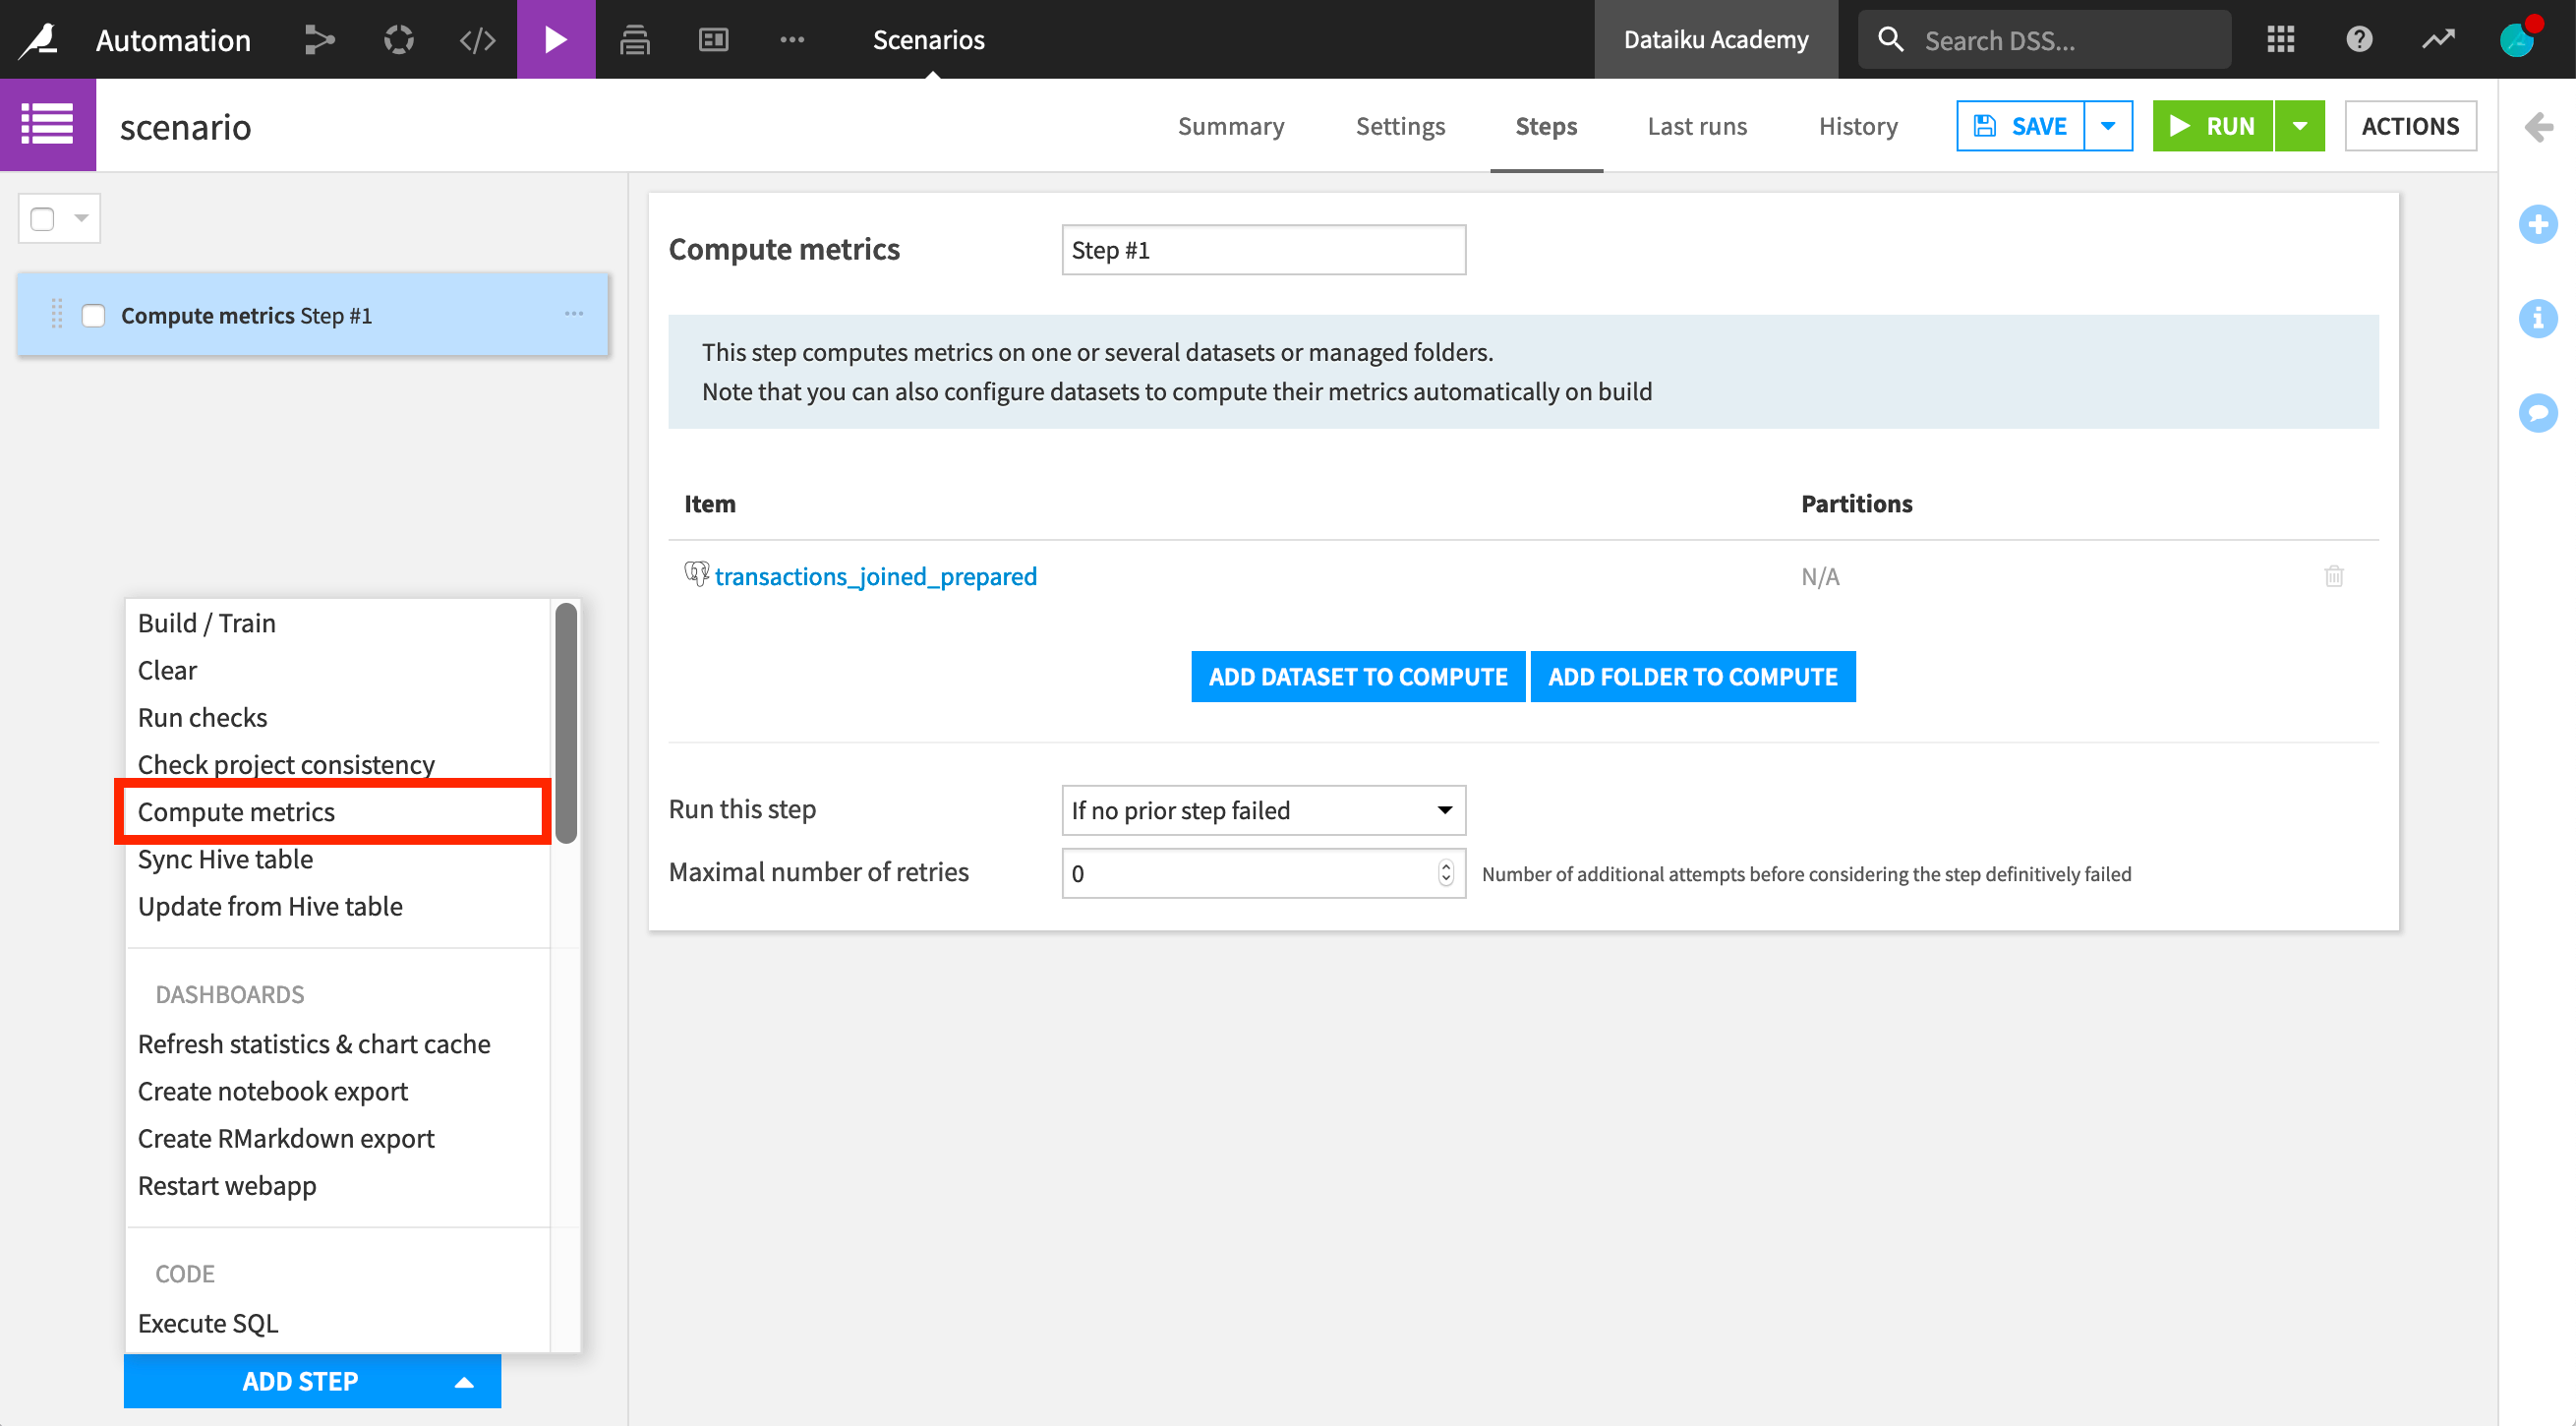
Let’s go ahead and create a step to compute metrics. We select the object that we want to compute metrics on, in this case, the transactions_joined_prepared dataset.
Next, we need to select when, or on which conditions, the step will be executed. Here, we choose for it to run “if no prior step has failed”.
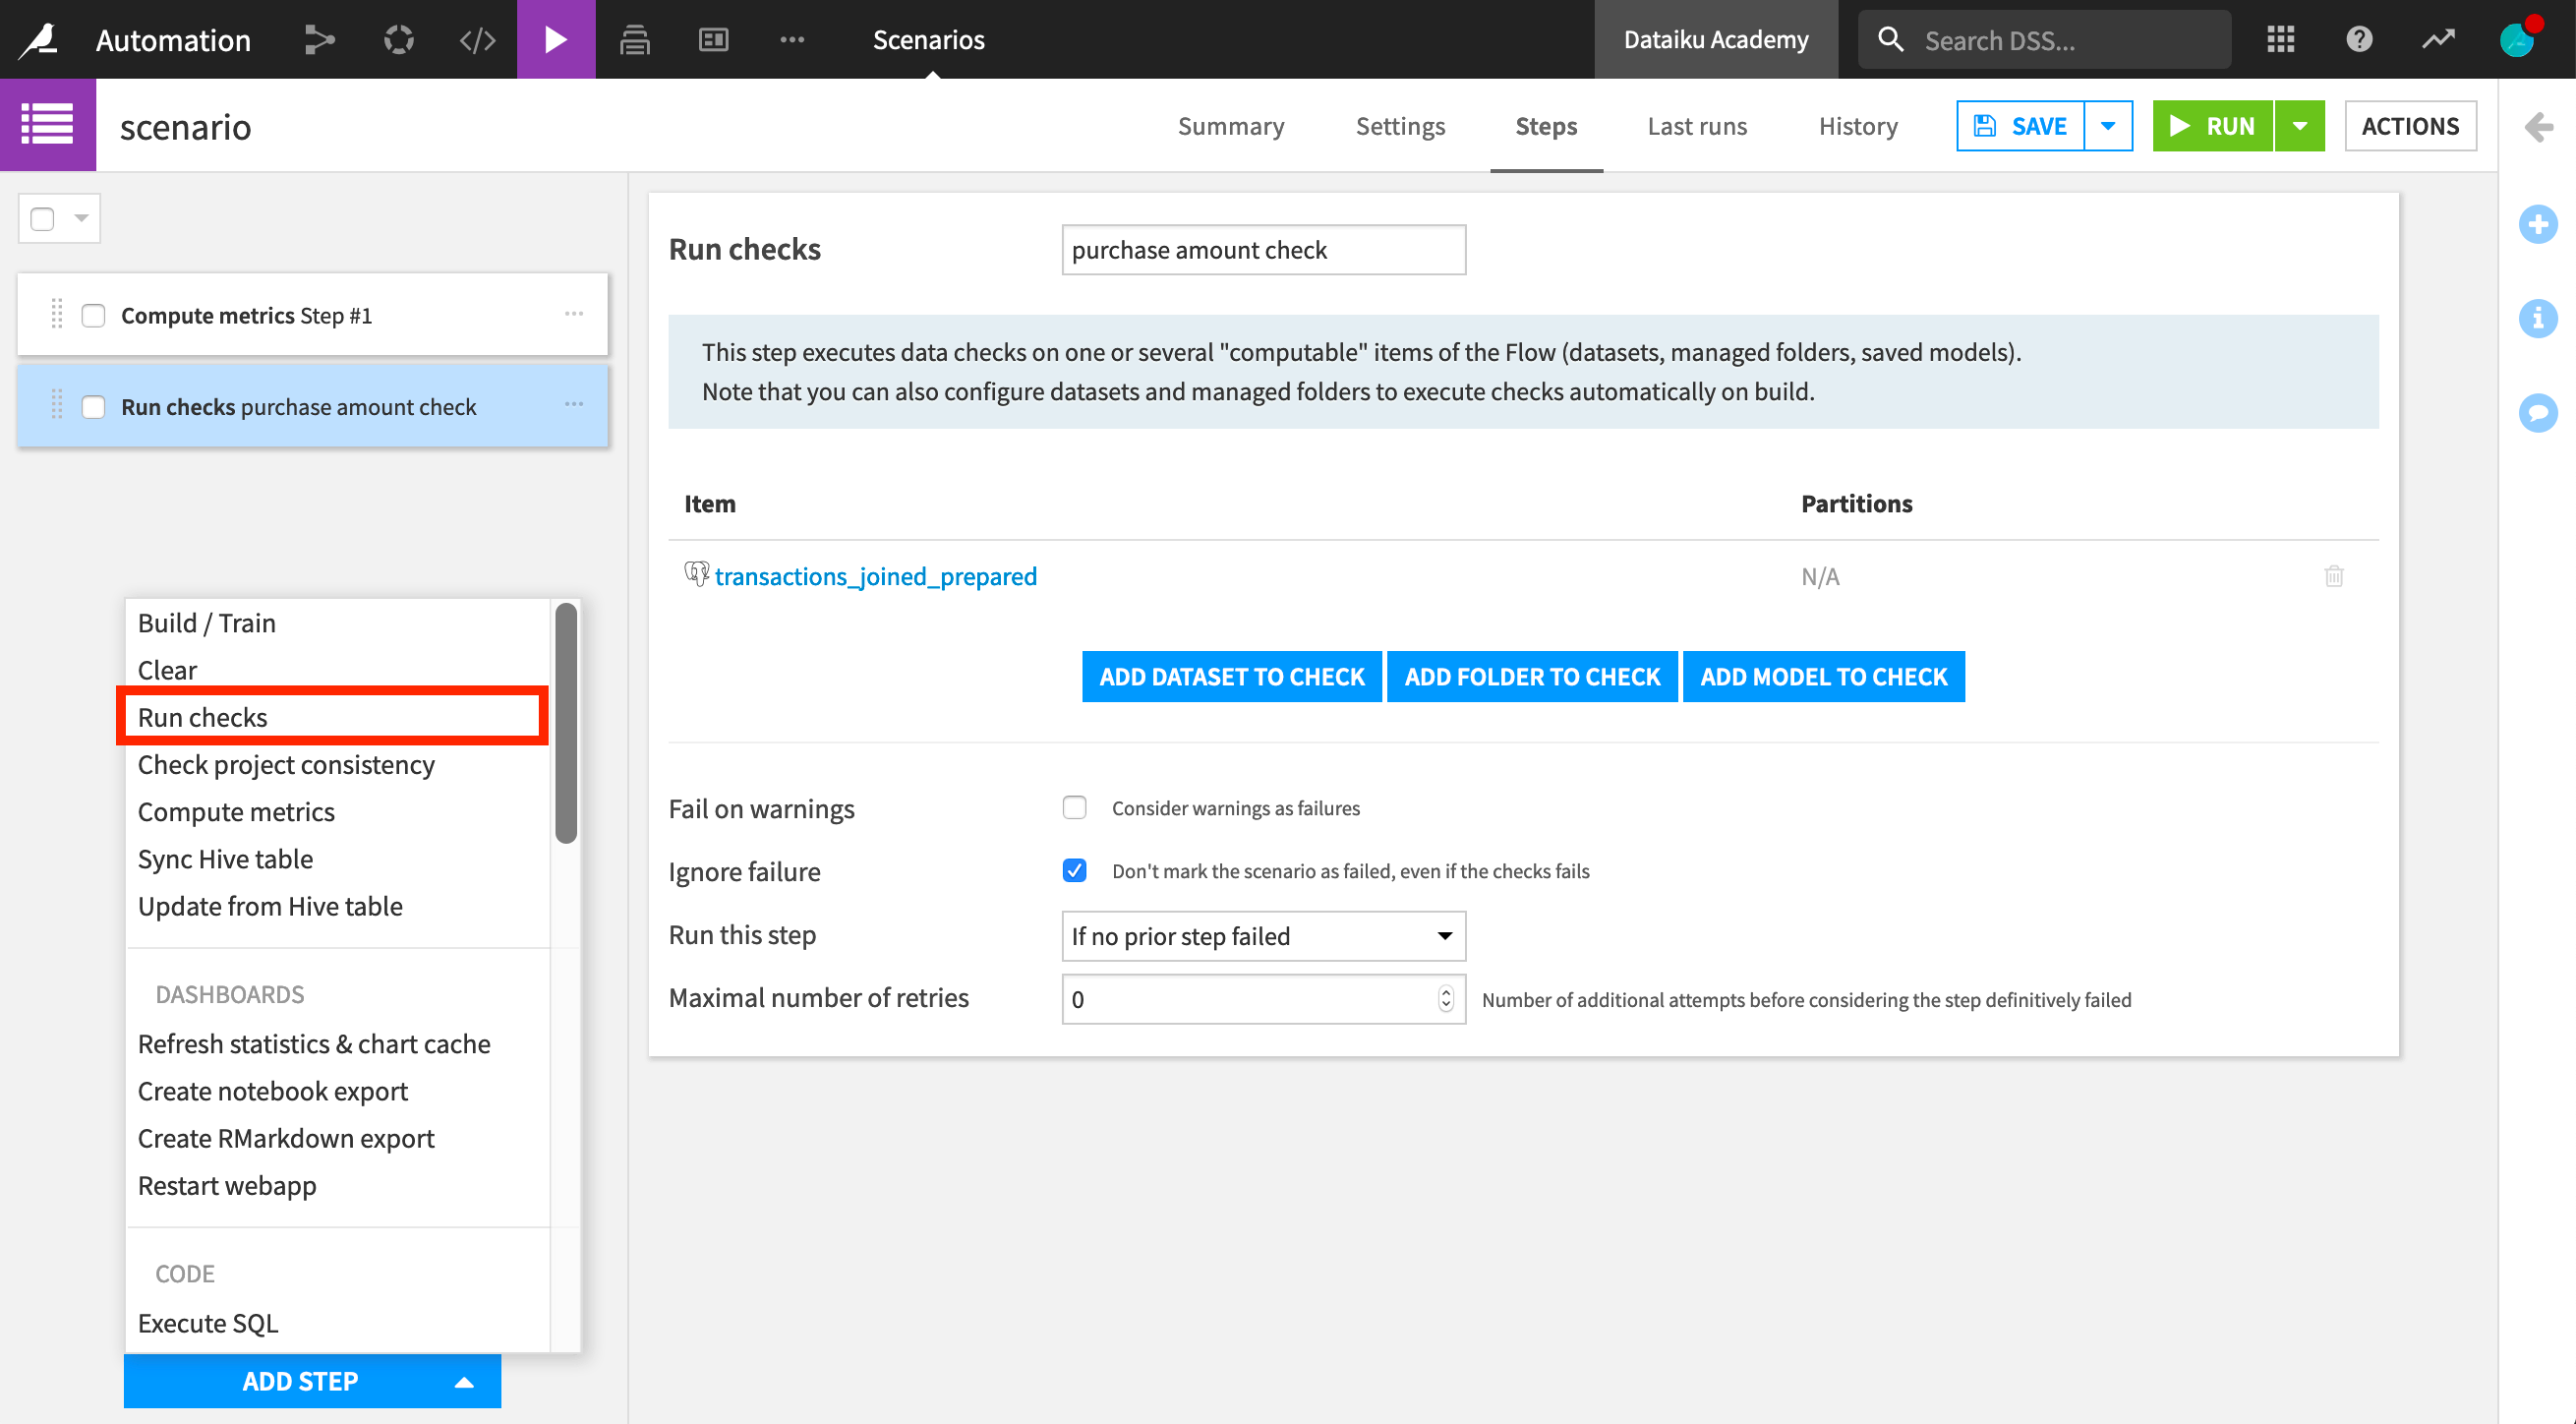
Let’s now add a step to run checks. We select to run it if no prior step has failed.
Note that one of the checks we had previously defined for this dataset checks whether the minimum value of the purchase_amount column is positive. However, there are negative purchase amount values in the dataset. This means that this check, and therefore the compute checks scenario step, will fail. Let’s select to ignore the fail and proceed to the next step.
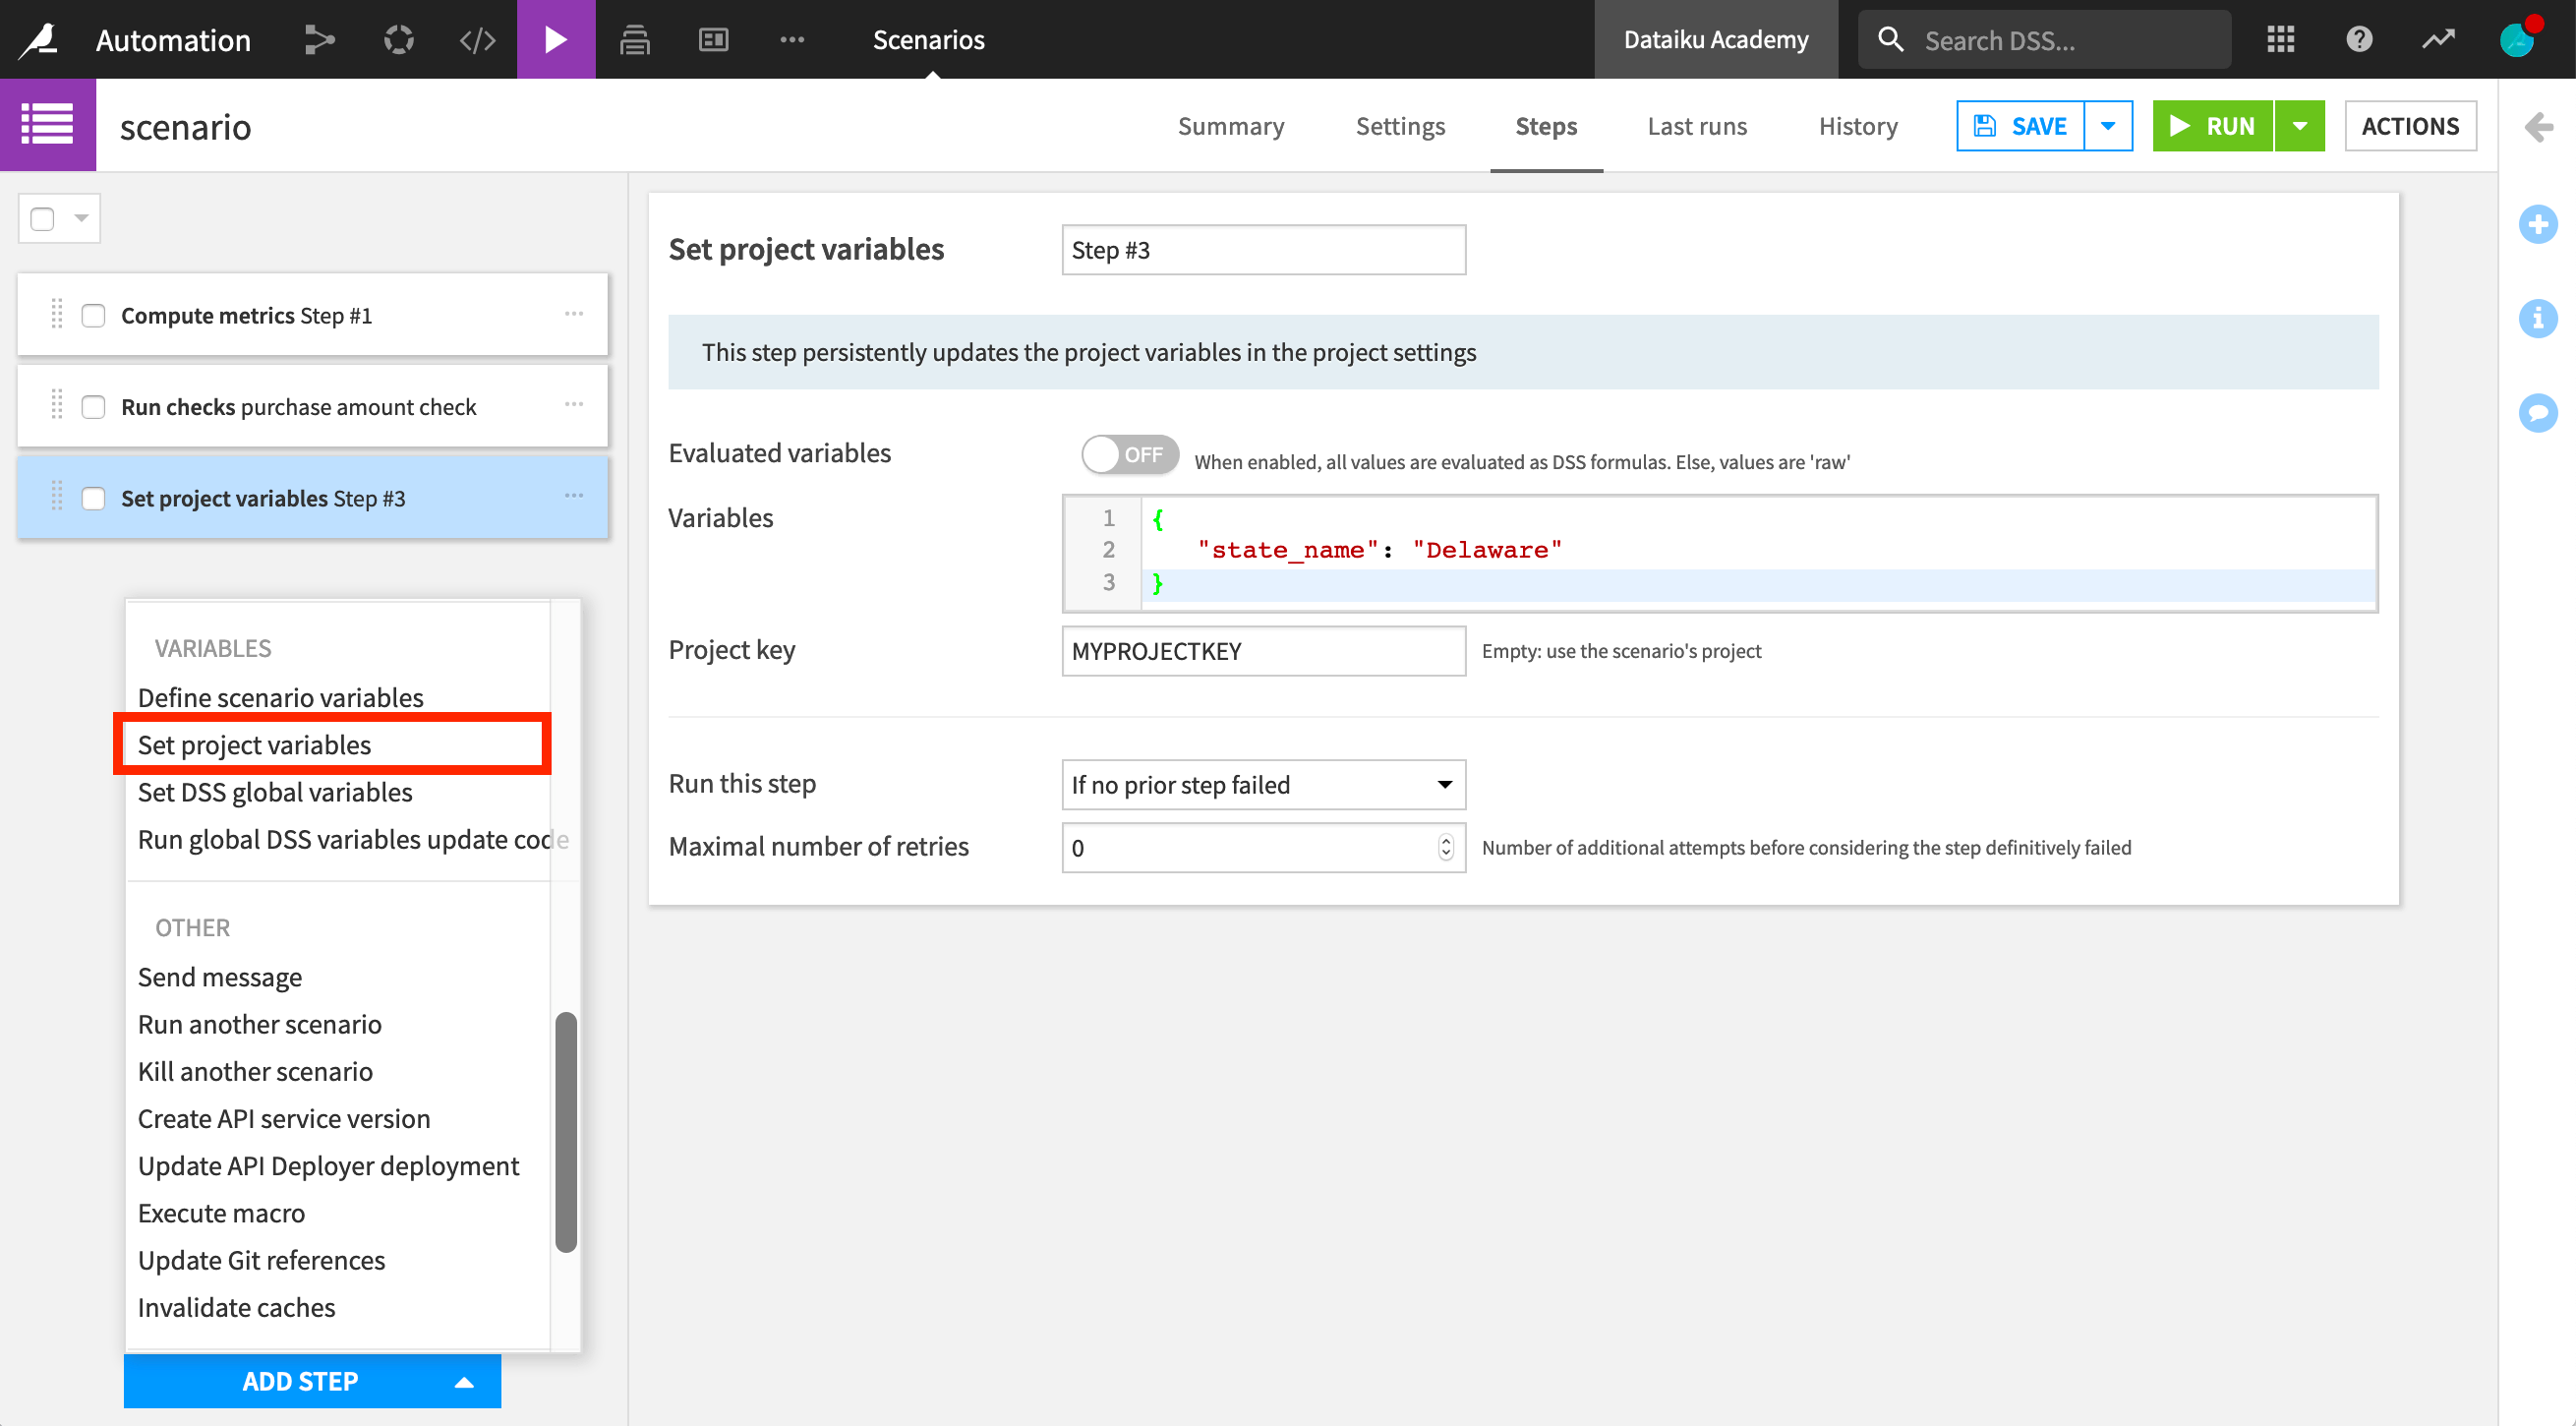
We can also leverage variables in Dataiku DSS scenario steps. Let’s define a step to modify a project variable. We can define a hard-coded json variable. Let’s update this state_name variable and enter the project key.
Another option is to use evaluated variables to have more dynamic variables. We’ll be able to use Dataiku DSS formula functions such as now(), which retrieves the current date value.
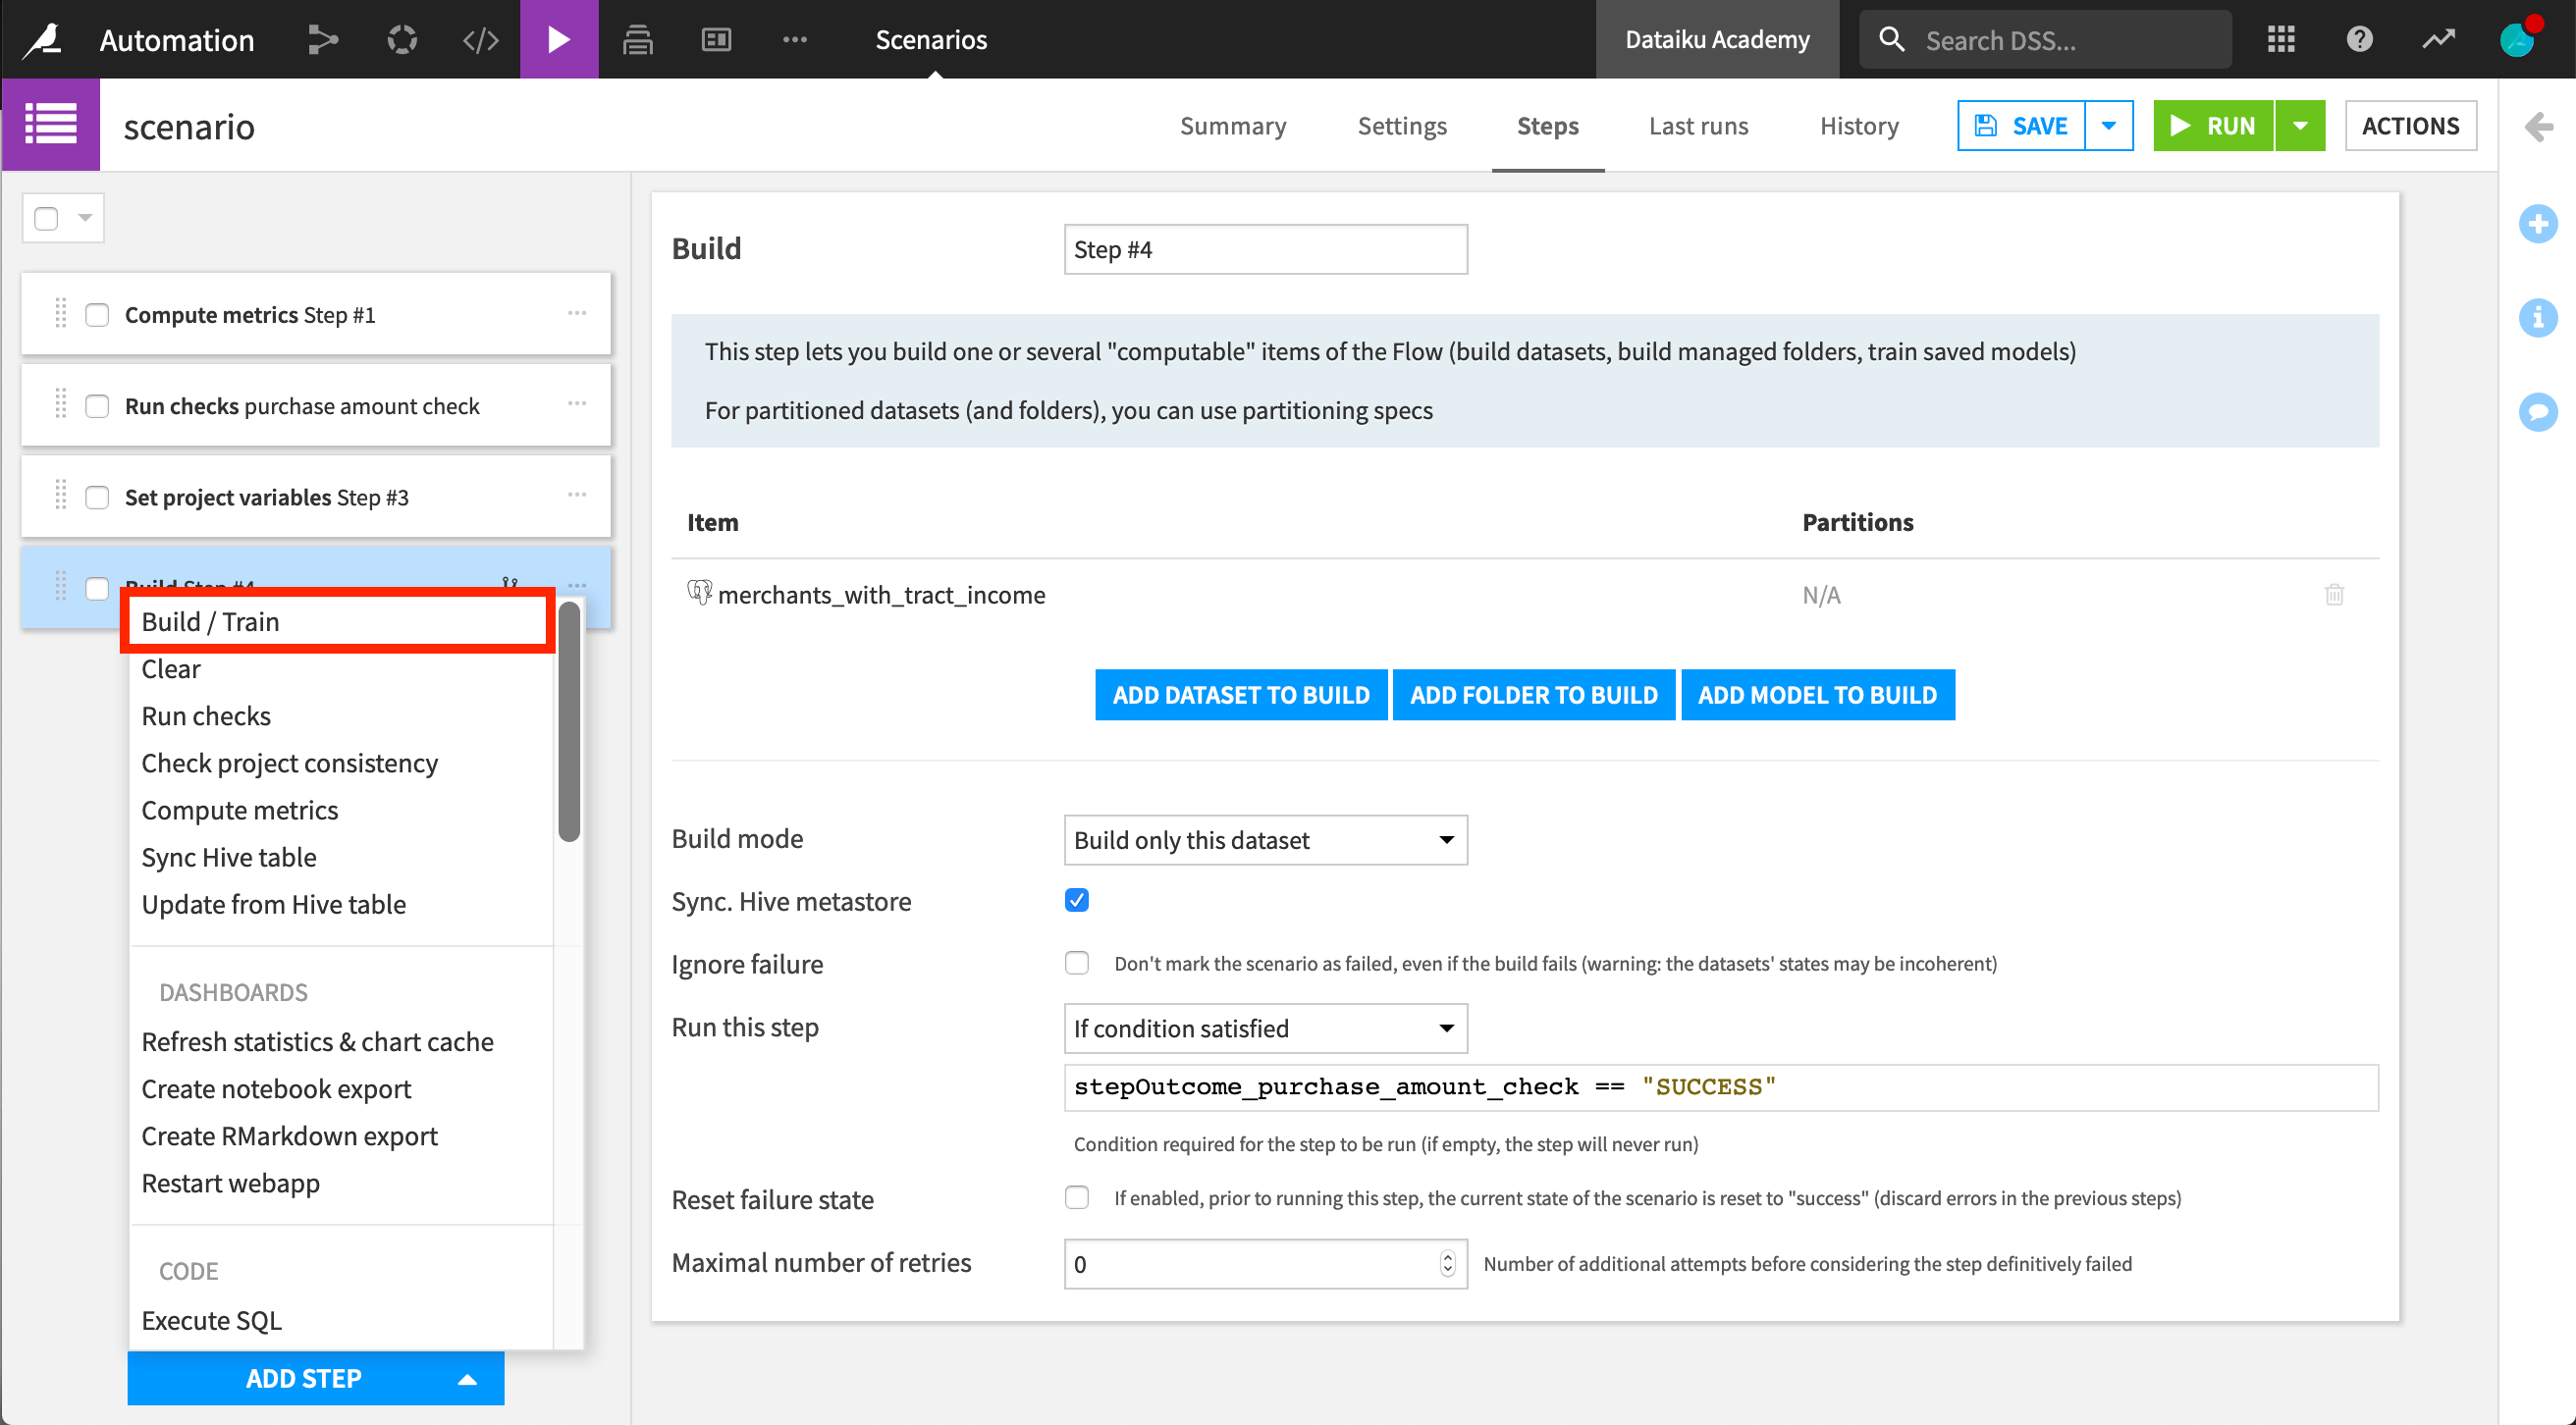
Finally, let’s create a step to rebuild our dataset. The build step lets us build a dataset or folder, or train a model. We can choose between different build modes. We’ll choose “Rebuild only this dataset”.
We can also control the execution of scenarios based on the outcome of a specific step. Let’s see that in practice. Let’s say we want our rebuild to happen only if the check step was a success.
In order to access a previous step result, the step must have a name. If naming the “Run checks” step, “purchase amount check”, we can then define a condition on this specific check outcome. The dataset will be rebuilt only if the stepOutcome_purchase_amount_check == SUCCESS.
We can also choose the maximum number of retries before Dataiku DSS considers that the step has failed.
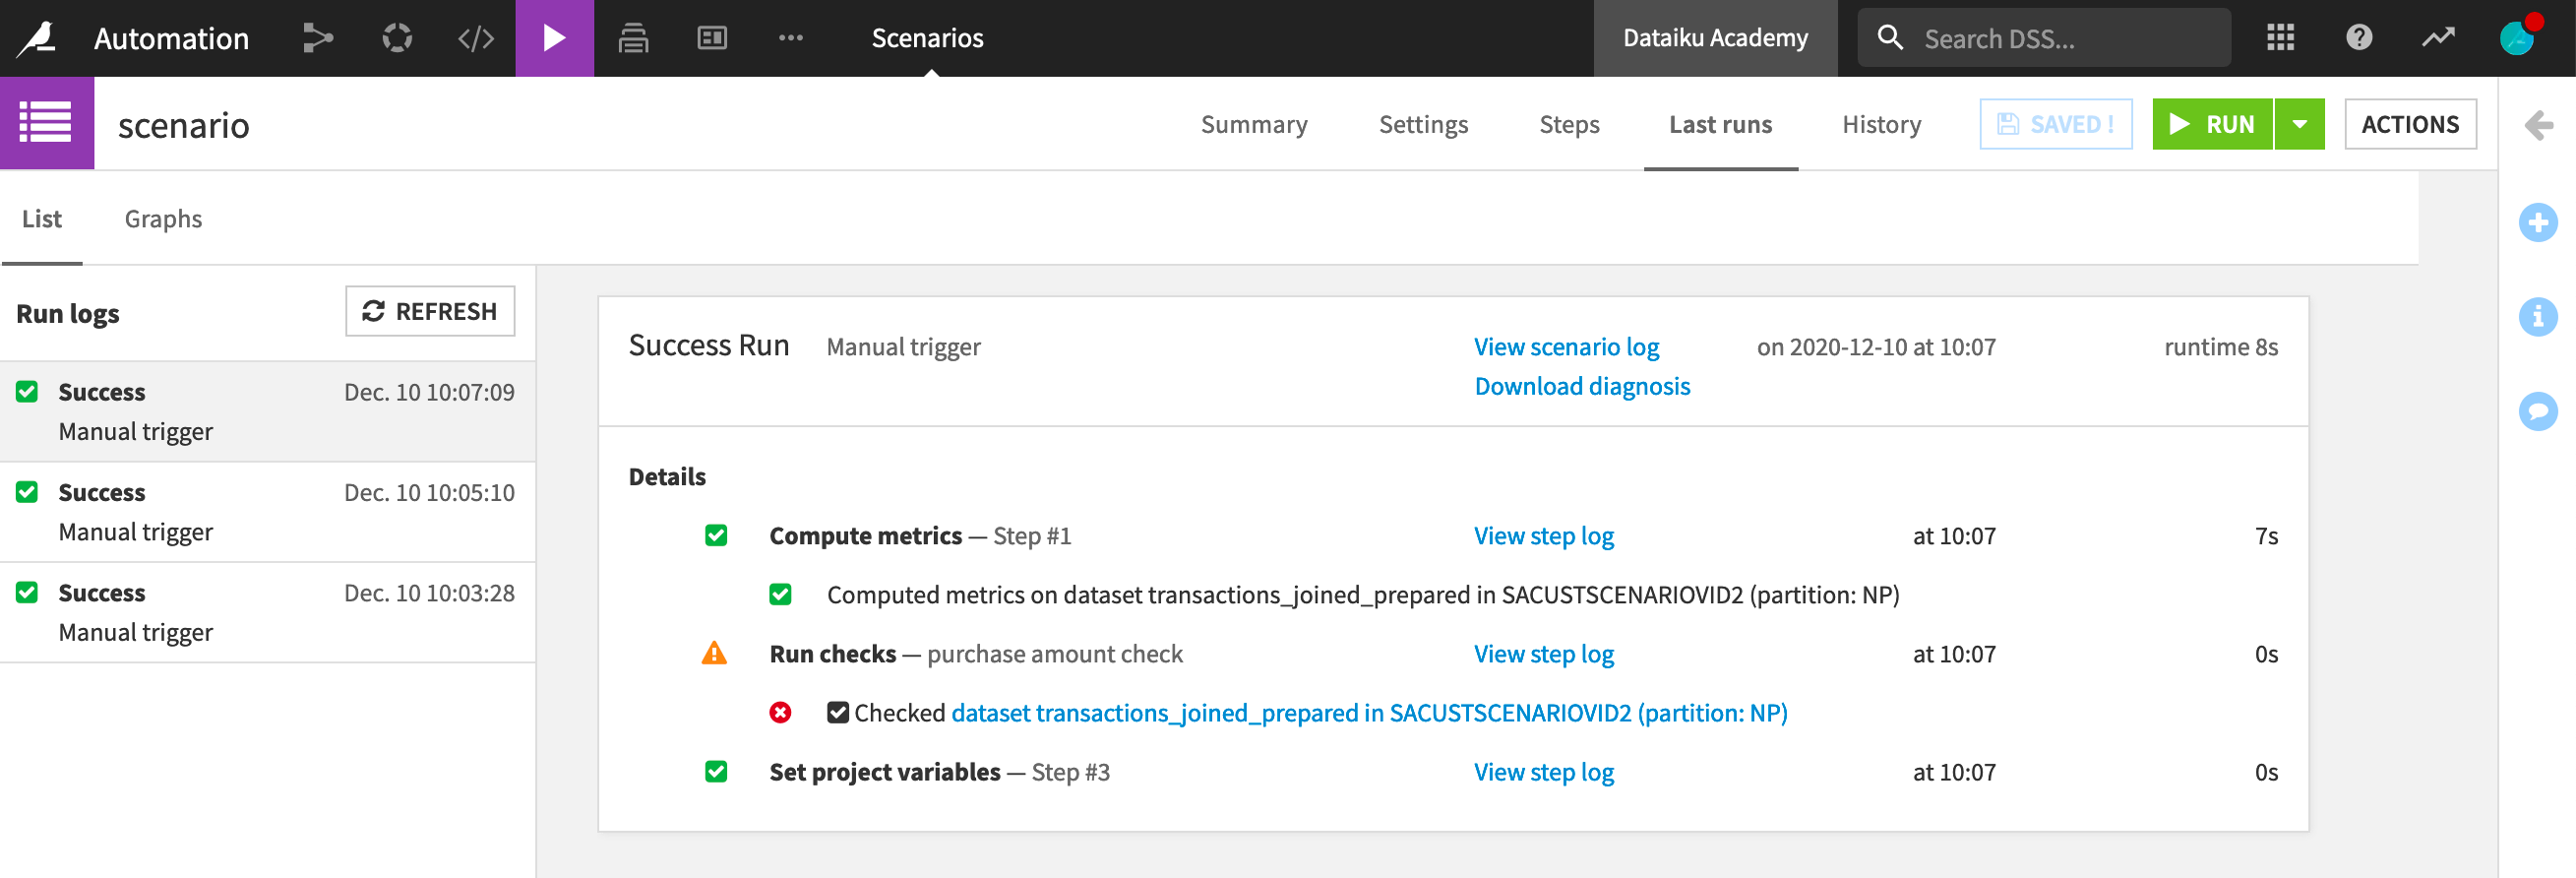
Let’s manually launch our scenario. When creating scenarios to automate a workflow, an essential feature is to monitor the different runs of the scenario and retrieve the log in the Last runs tab.
We can see here that our scenario finished running. In particular, we can see that the check was not successful, but the next step continued running as we had selected to ignore failure. The last build step didn’t run as we specified to run it only if the check was successful.
Learn More
To learn more about scenarios, including through hands-on exercises, please register for the free Academy course on this subject found in the Advanced Designer learning path.
You can also learn more about scenarios in the product documentation.