Hands-On Tutorial: Deploying a Flow to Production
Introduction
Once you have designed a Flow and automated updates to it, you can deploy the project to a production environment.
Note
Development and Production Environments
A development (or sandbox) environment is where you test new analyses in your project. Failures in this environment are an expected part of its experimental nature.
A production environment is where serious operational jobs are run. This environment should be available whenever necessary and may serve external consumers for their day-to-day decisions, whether those consumers are humans or software. Failure is not an option in production, and the ability to roll-back to a previous version is critical.
Dataiku provides two dedicated nodes to handle development and production:
The Design Node is used for the development of data projects.
It provides capabilities for the creation of data pipelines and models, plus the definition of how they are meant to be reconstructed. Projects developed in the Design Node are packaged and handed off to the Automation Node.
The Automation Node is used to import packaged projects defined in the Design Node and run them in the production environment.
When you make updates to the project in the Design node, you can create an updated version of the project package, import the new package into the Automation node, and control which version of the project runs in production.
Development work from the Design node flows to the Automation node, and while it is technically possible to make changes to a project in the Automation node, those changes don’t flow back to the Design node, so it’s best practice to do all development in the Design node.
Let’s Get Started!
In this tutorial, you will learn how the Design and Automation Nodes work together by:
Packaging flows for deployment
Versioning flows
Deploying packages in a production environment
Note
We will work with the fictional retailer Haiku T-Shirt’s data. You can follow along with the instructions and screenshots. There are also short videos recapping the steps at the end of each section.
Prerequisites
This tutorial assumes that:
You have completed the Automation Quick Start tutorial (or at least have knowledge of metrics, checks, and scenarios).
You have access to a:
Dataiku Design node (version 9.0 or above). Dataiku Online is not compatible.
Dataiku Deployer, which has either been set up locally on the Design node or as a separate node.
An infrastructure has been defined on the Deployer to connect the Design node to the Automation node.
Create Your Project
You can use the completed project from the Automation Quick Start tutorial.
Alternatively, you can create a new project from the same point:
From the homepage of your Design node, click +New Project > DSS Tutorials > Automation > Deployment (Tutorial).
Need Help Creating the Project?
Note
You can also download the starter project from this website and import it as a zip file.
Packaging a Flow into a Bundle
For the purposes of this tutorial, the Flow and automation scenarios are complete, and we simply need to package the Flow and deploy it to the Automation node.
In order to package the flow into a bundle, from the More Options (…) menu in the top navigation bar, choose Bundles.
Click Create Your First Bundle.
Note
A bundle is a snapshot of a complete Dataiku project.
The bundle includes the project configuration so that it can be deployed to an Automation node. In addition, sometimes, in your Flow, the data for some datasets (such as enrichment data) or models (that are retrained in the development and not the production environment) need to be transported to the production environment.
A bundle can contain data for an arbitrary number of datasets, managed folders, and saved models. A bundle thus acts as a consistent packaging of a complete flow.
On the Automation node, you then activate a bundle to switch the project to a new version. Bundles are versioned, and you can revert to a previous bundle in case of a production issue with the new bundle.
You can set up multiple Automation nodes to create continuous delivery pipelines (for example with a pre-production automation node, a performance test one, and the production one).
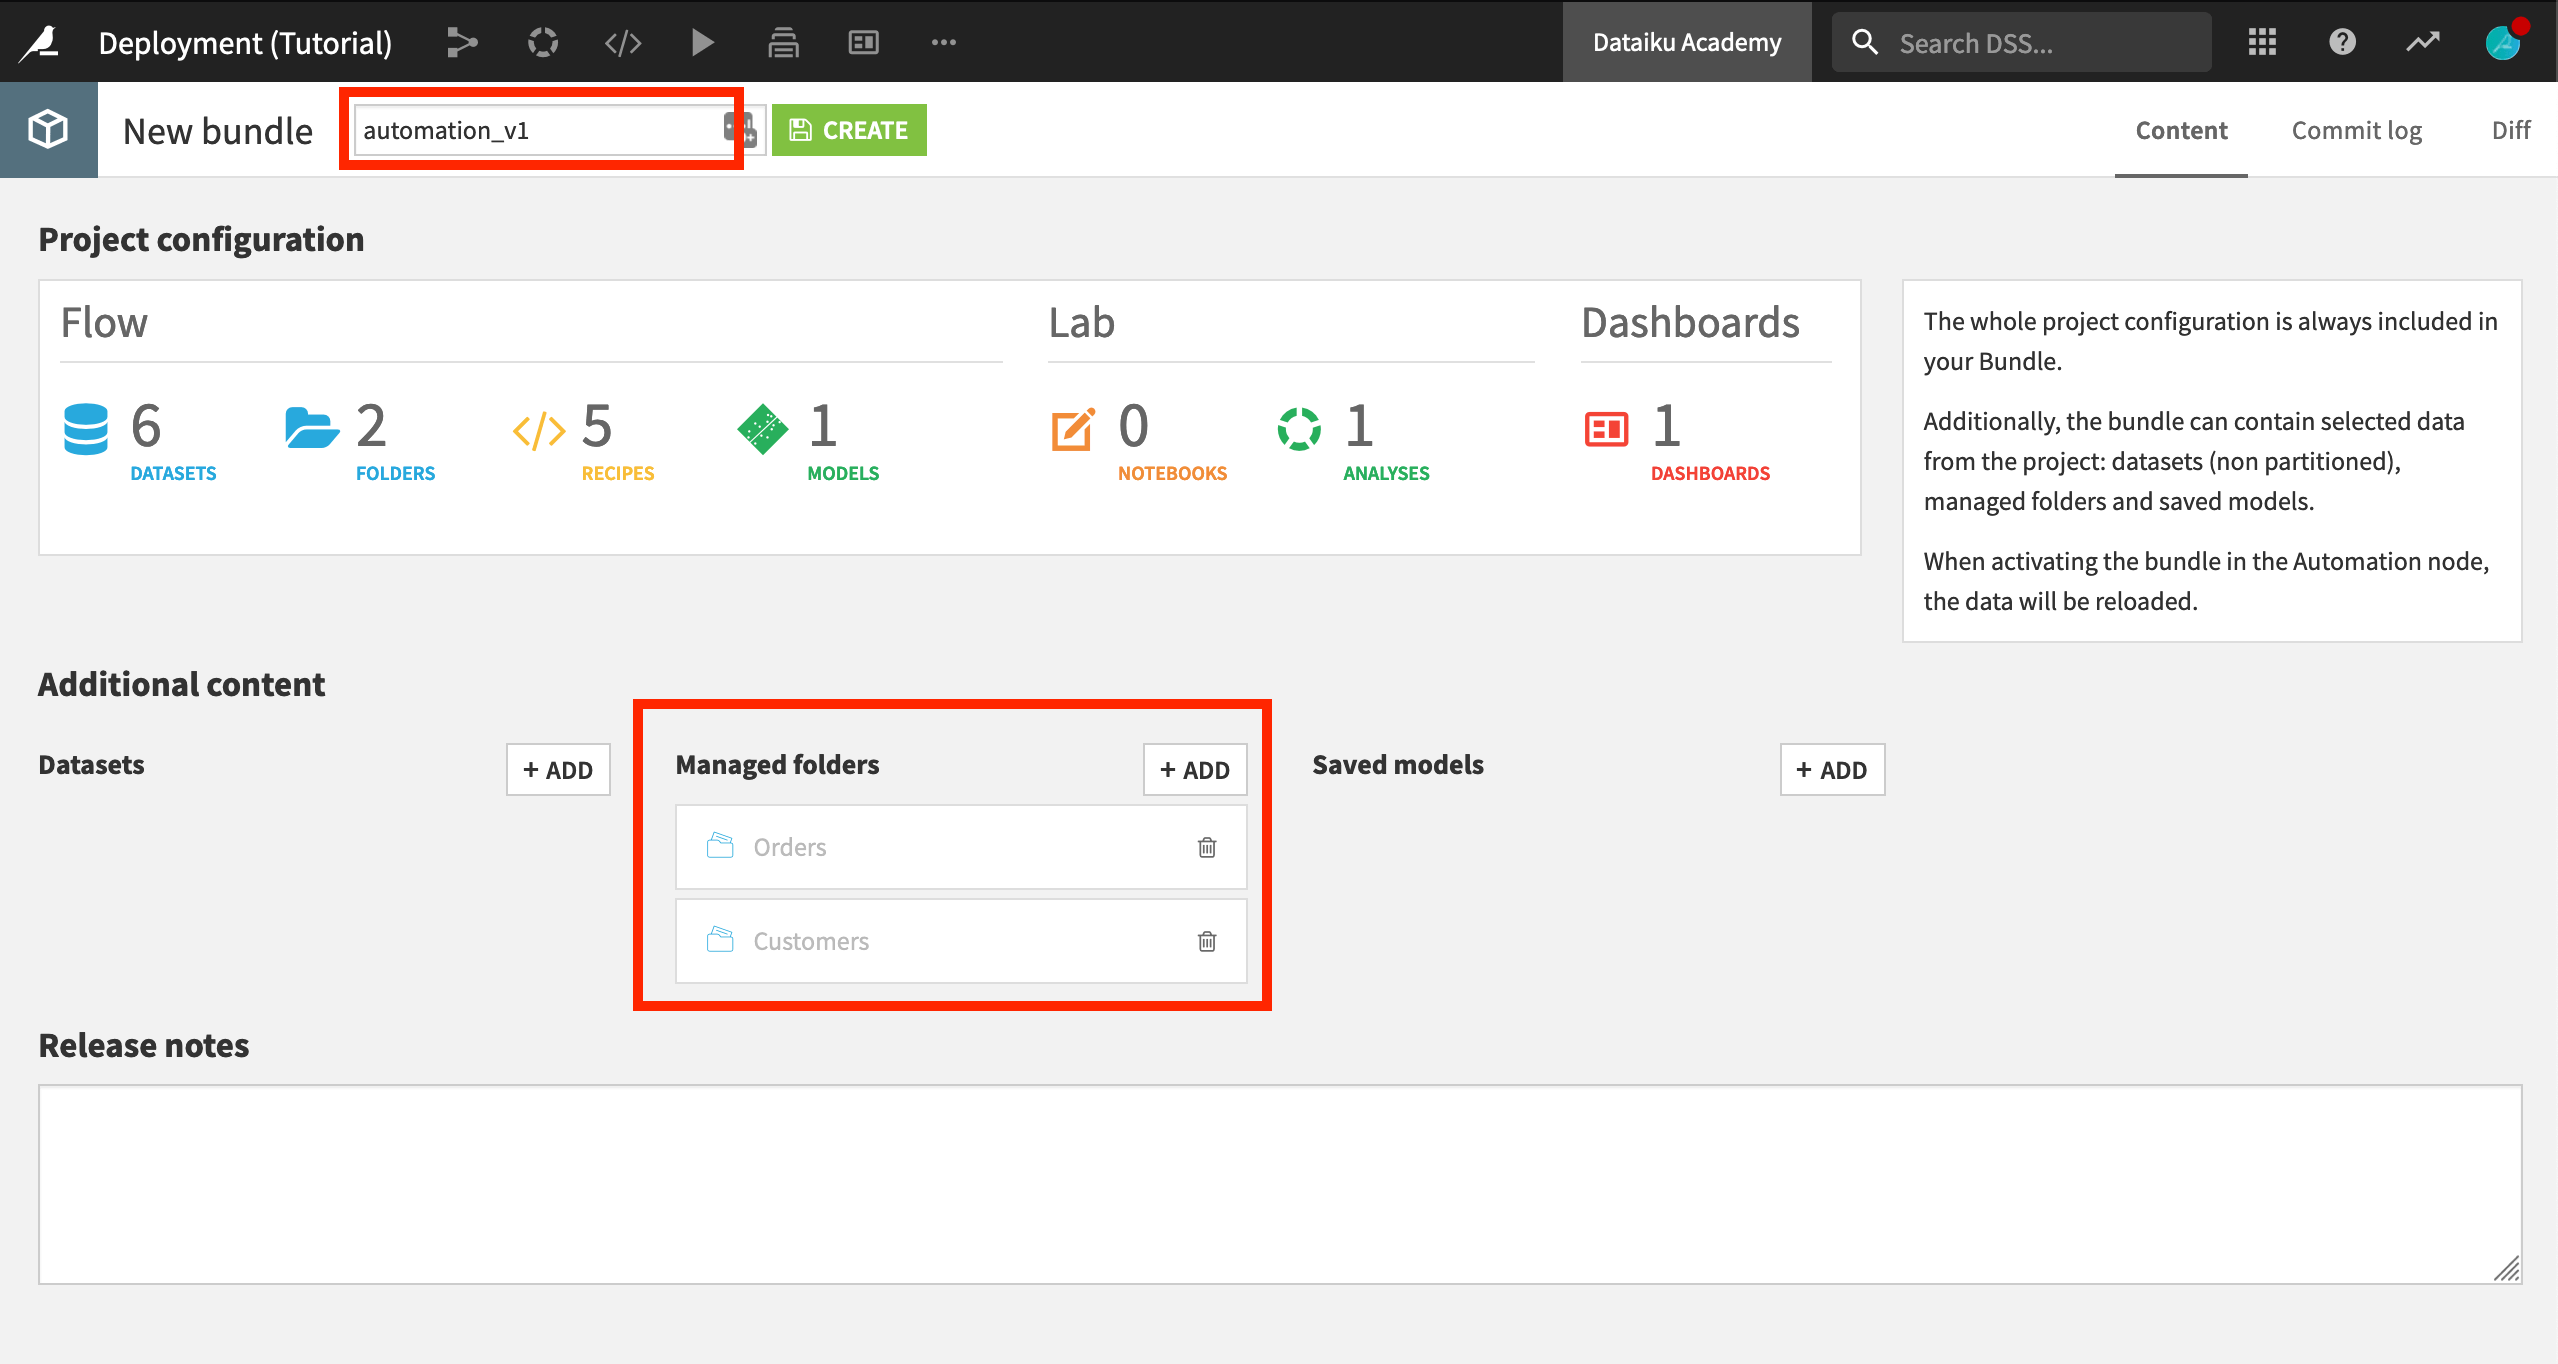
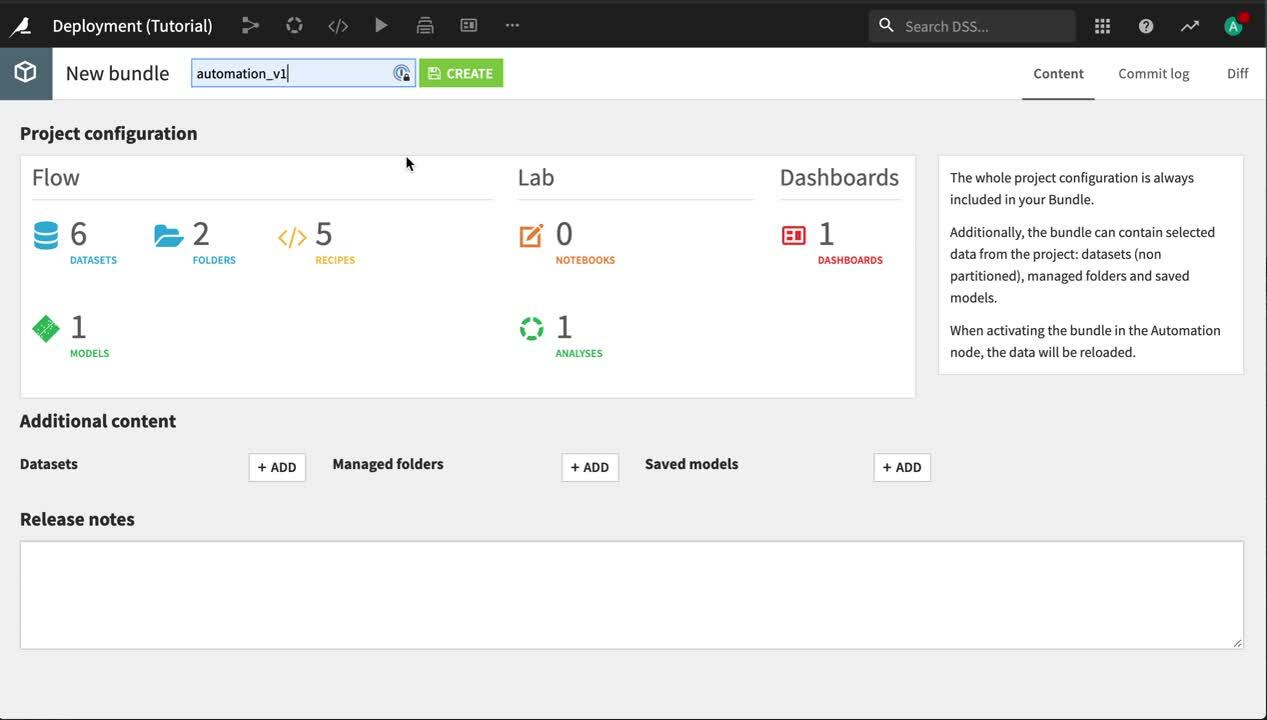
For this tutorial, we will include the data for the Orders and Customers managed folders. In a real-life setting however, these primary data sources would be different on the development and production environments.
Under Additional content, add the Customers and Orders managed folders.
Name the bundle
automation_v1, and click Create.
Deploying a Bundle
Select the bundle you’ve just created.
In the Actions panel, click Publish on Deployer, and publish the automation_v1 bundle.
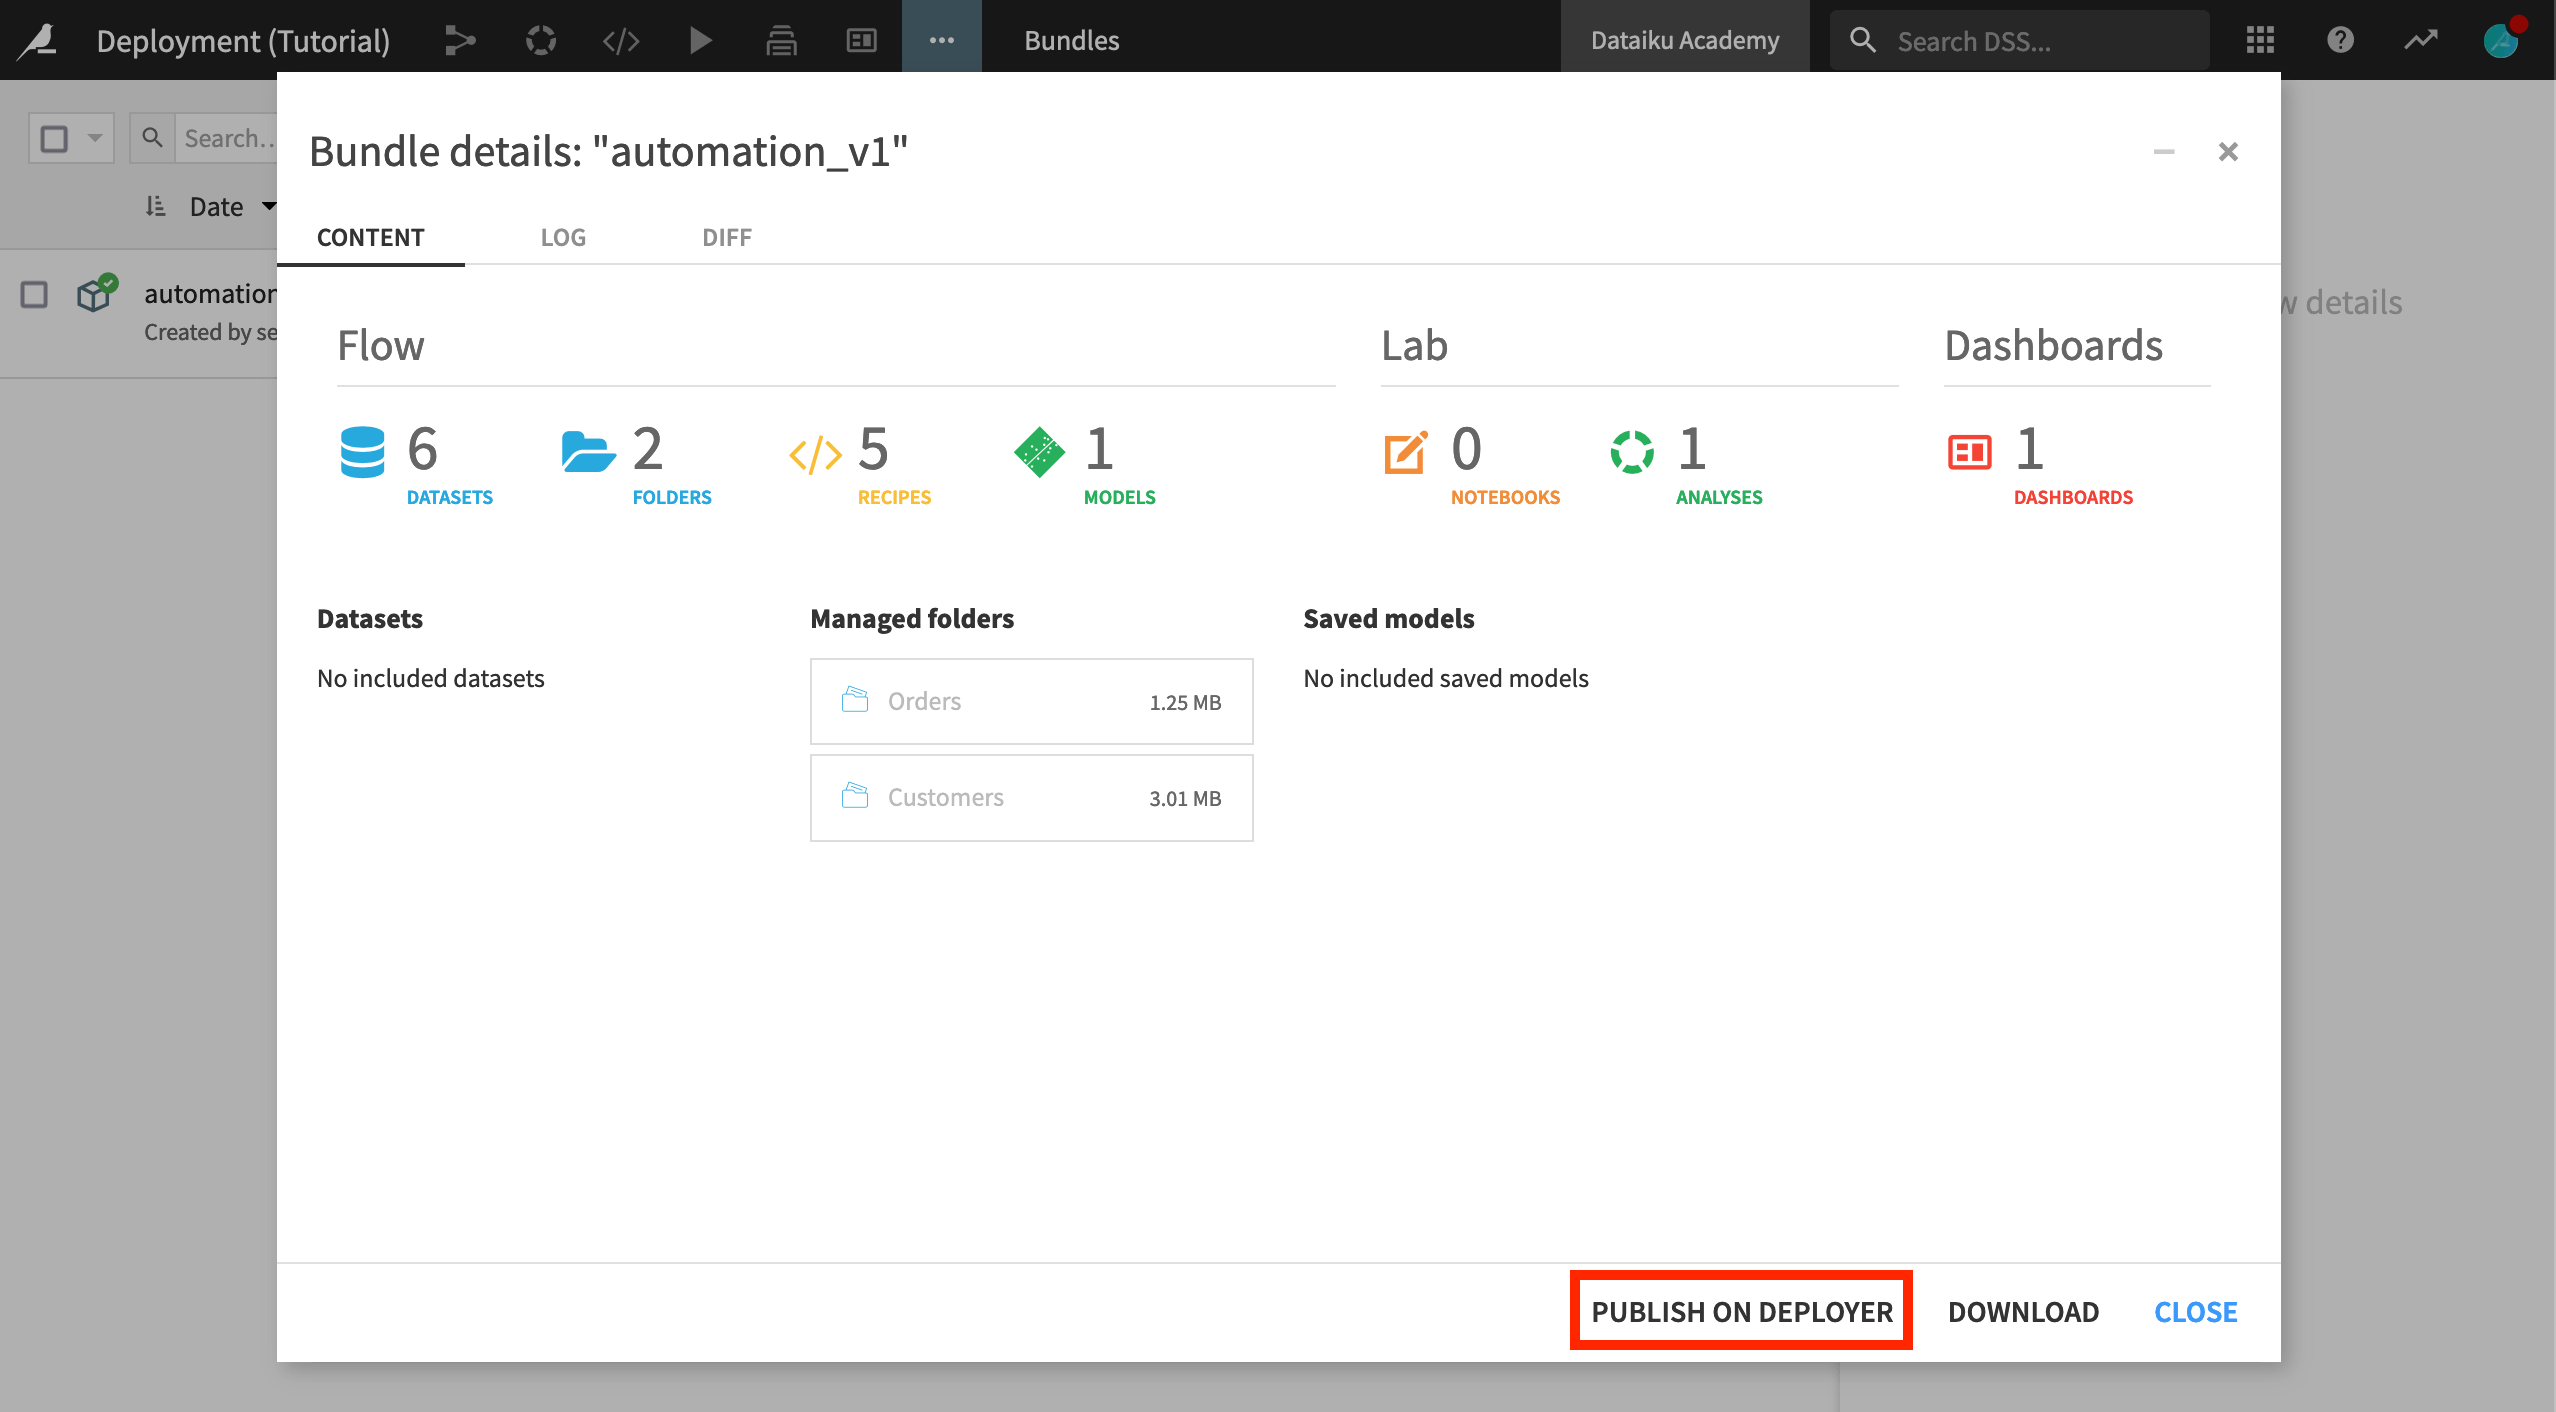
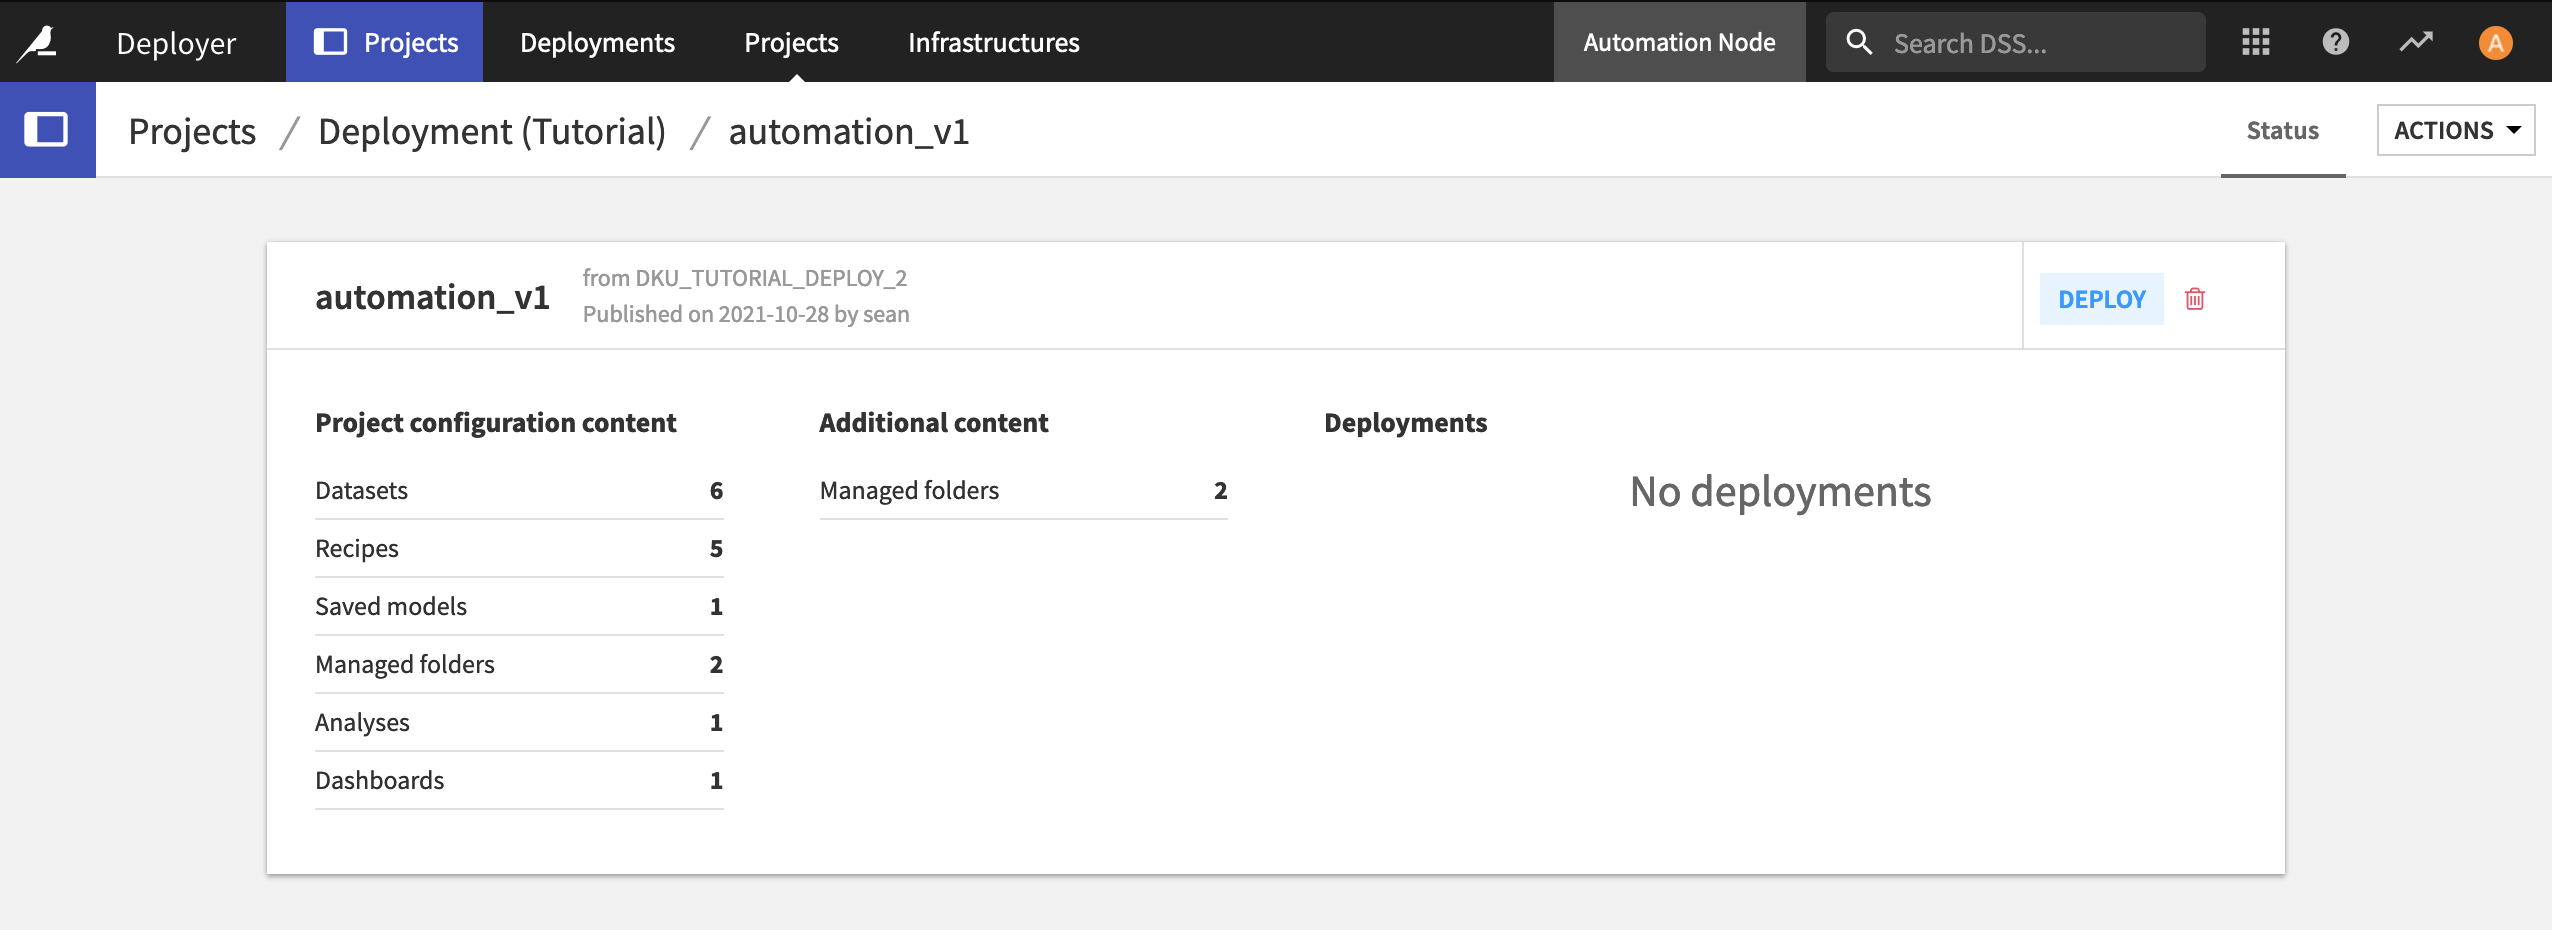
When it completes, open the bundle on the Deployer. Now it’s time to create a new Deployment and push the bundle to the Automation node.
Note
Deployments
The bundle contains the information about the project from the Design node. When combined with information on a production infrastructure, this becomes a Deployment that can be pushed to an Automation node.
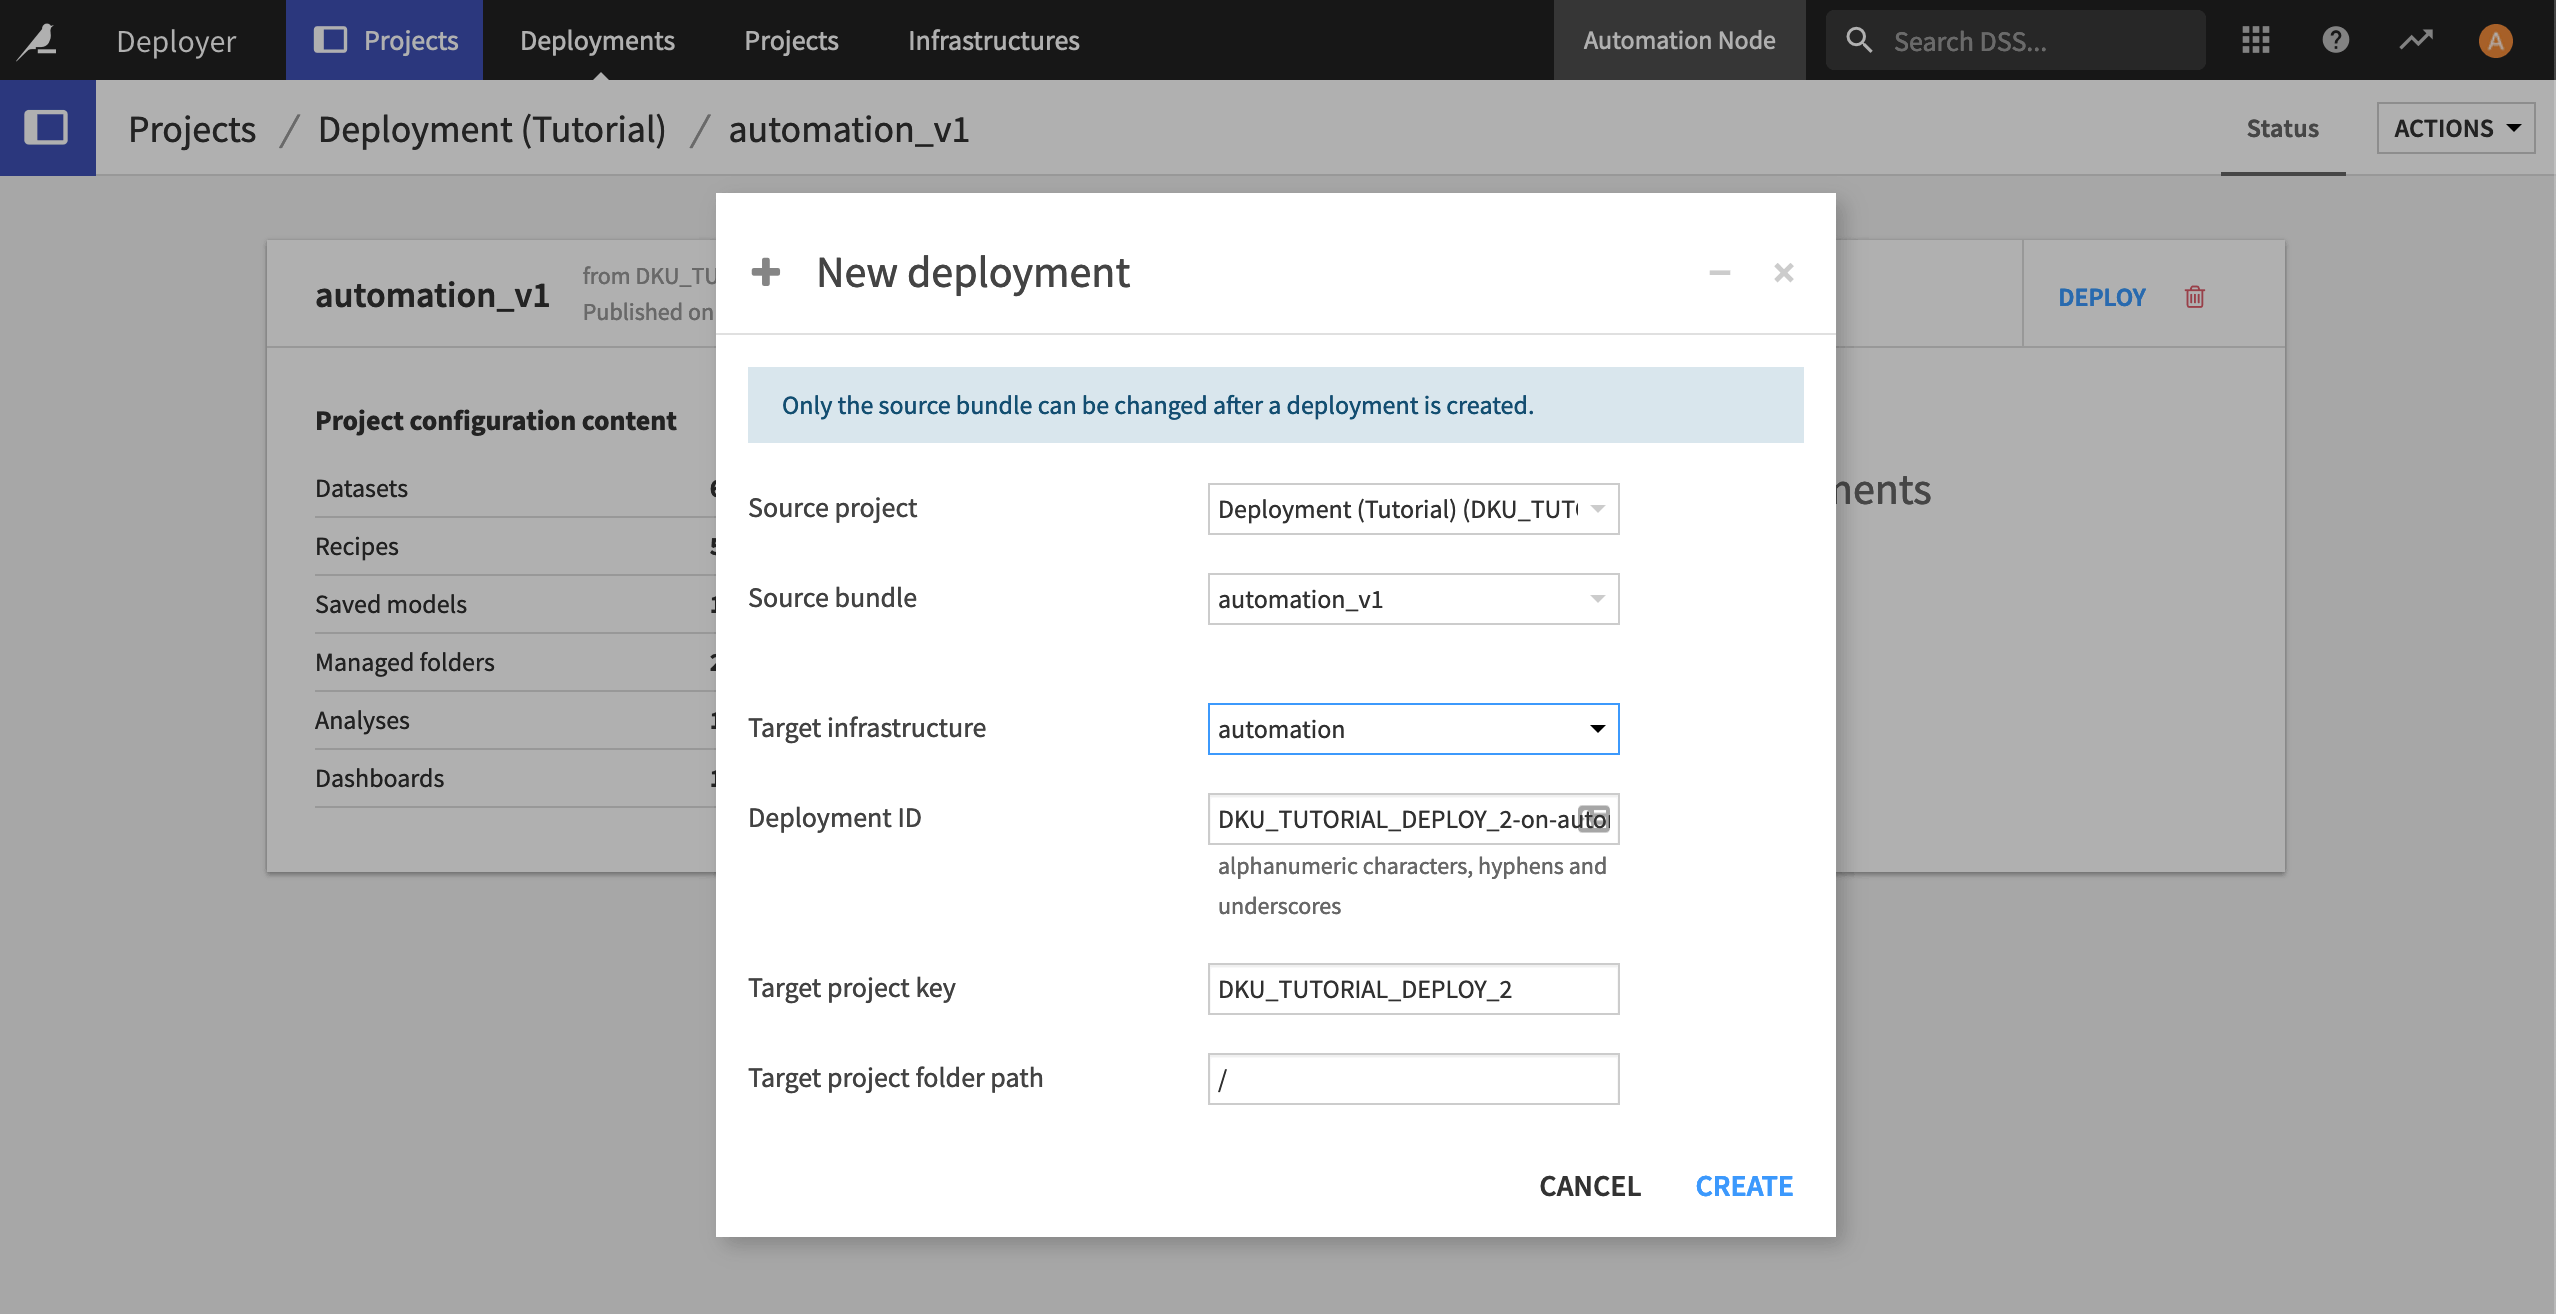
Click Deploy.
In the New Deployment dialog, select the target infrastructure for the Automation node, and click Create.
In the Status tab of the new deployment, click Deploy and Activate.
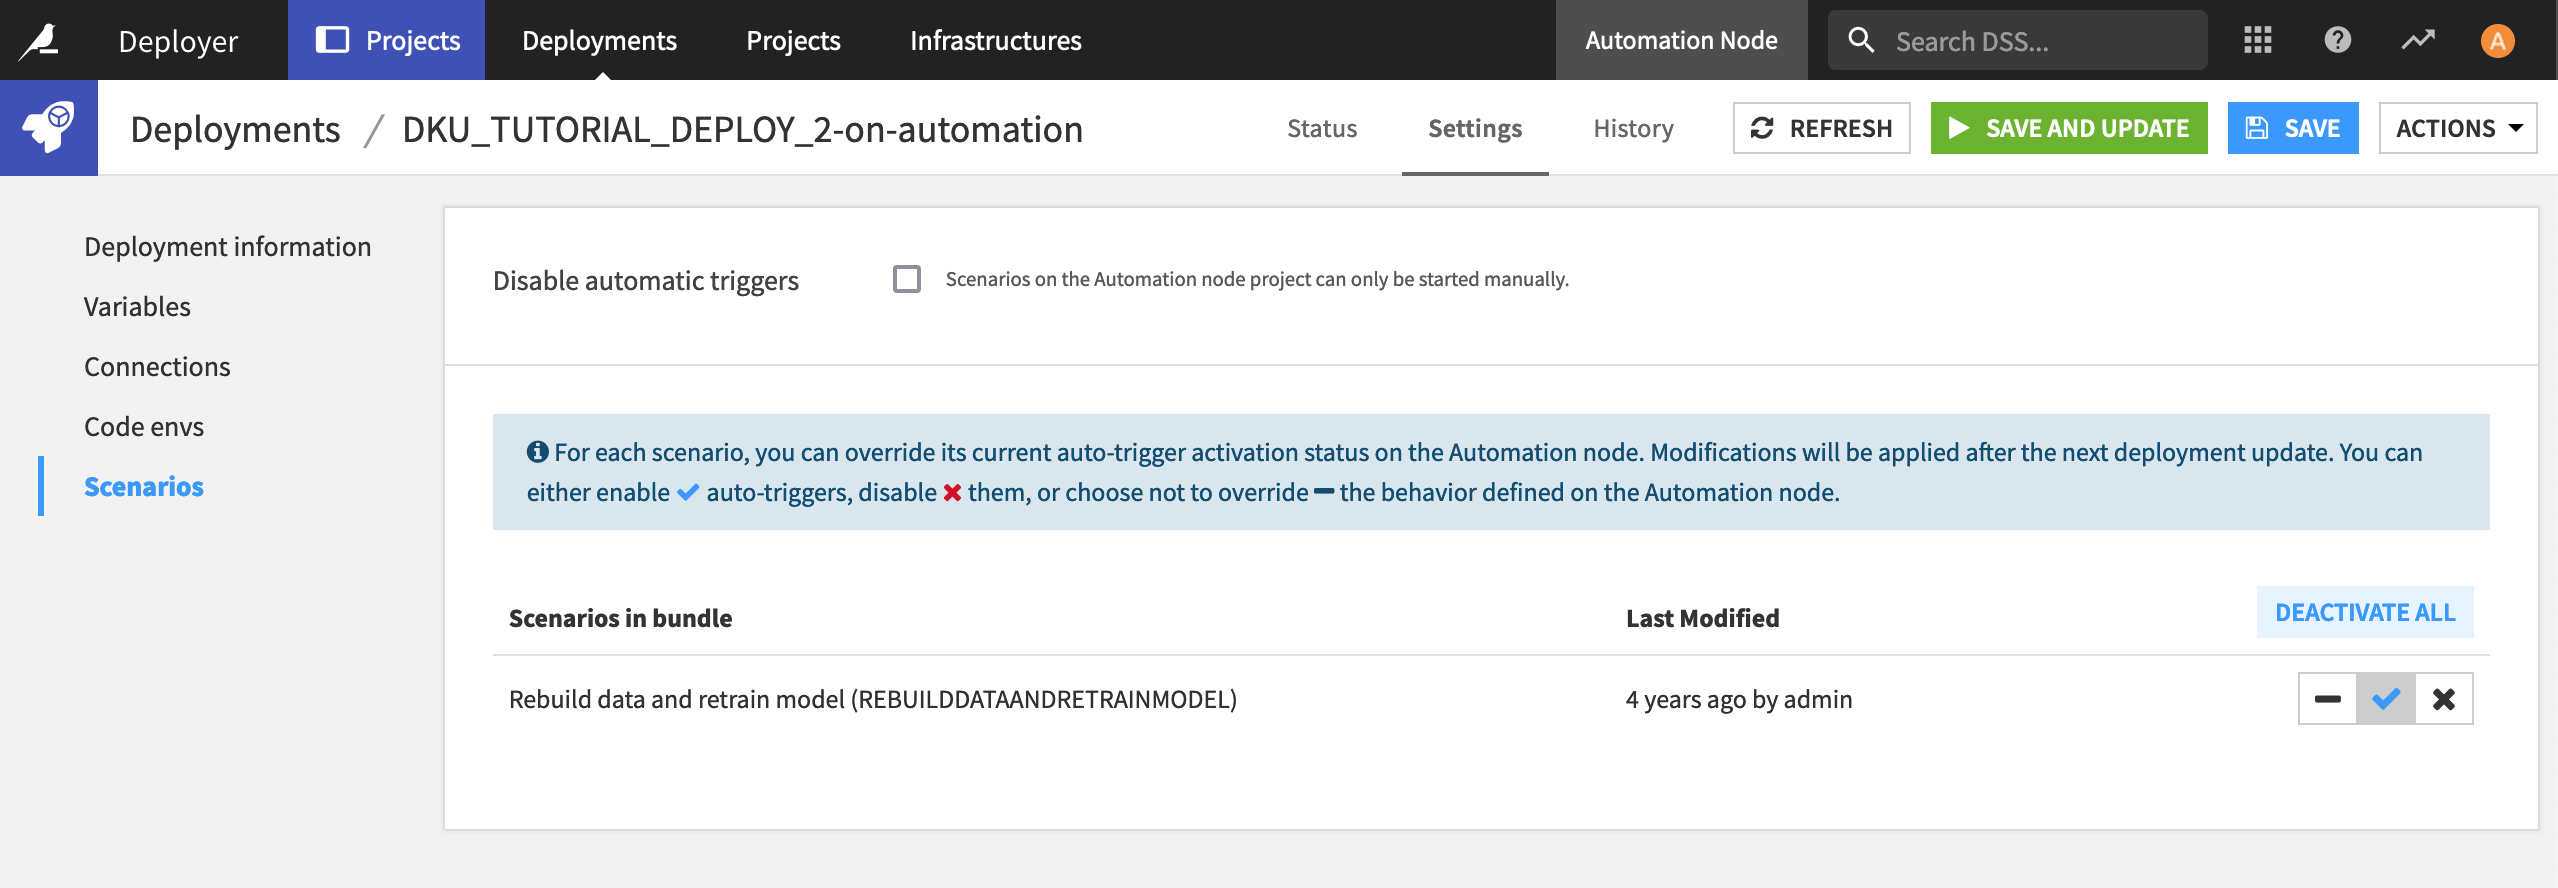
Within the deployment, you can change the deployment parameters on the Settings tab. For example, by default, scenarios are not activated upon deployment.
Navigate to the Scenarios panel of the Settings tab, and click Activate All.
Click Save and Update.
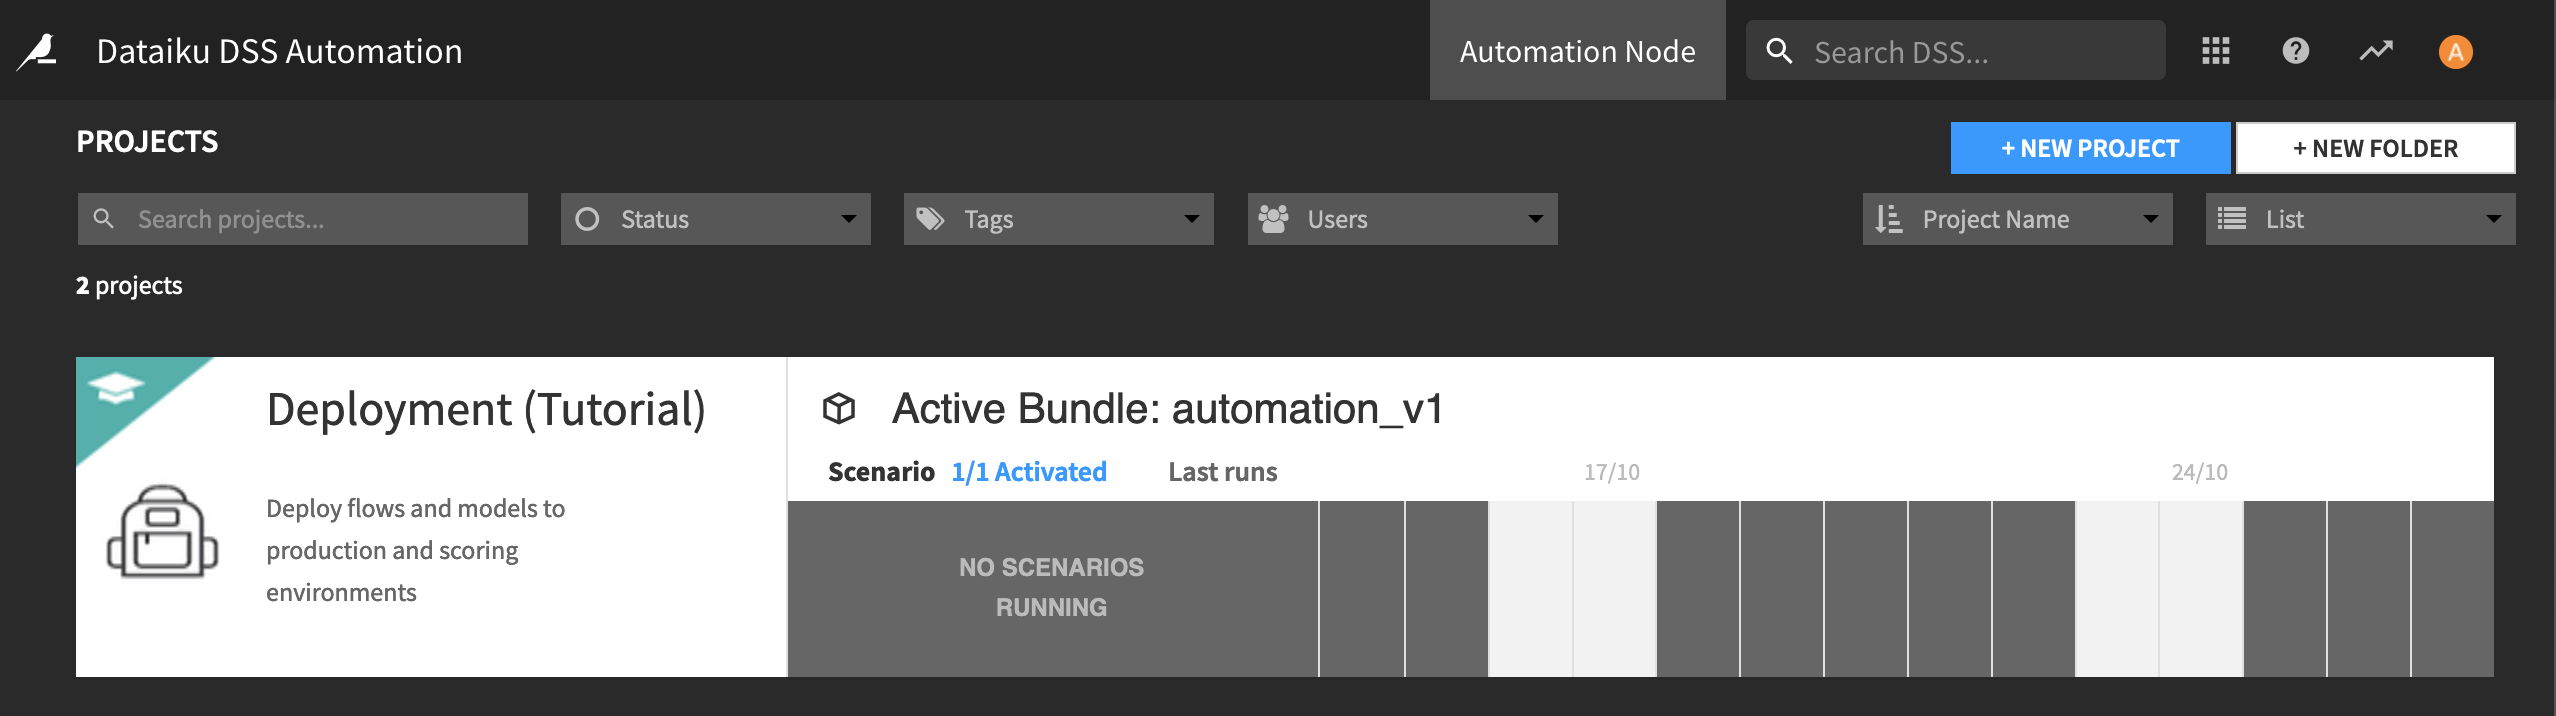
That’s it! The Flow you set up in the Design node is now running in production. If you open your Automation node, you’ll see the project has been deployed.
Note
Connections mapping
Note that you may need to re-map connections to data sources that exist in the Design node to how they should or will exist on the Automation node. Dataiku DSS will prompt you if this is necessary.
In the Automation node, you need to have connections of the proper type, but their definition can change.
A simple example of this is a SQL database: you’ll have a production database separate from the development database, so when deploying the bundle, you’ll need to reattach the SQL datasets to the production database.

Versioning a Flow
Now, let’s say that we want to change the scenario in the Flow so that it runs on a monthly basis, rather than when the underlying data sources are updated. At a high level, to do this, we need to:
update the project on the Design node;
repackage the project into a new bundle version; and
deploy the new bundle to the Automation node.
Here are the detailed steps:
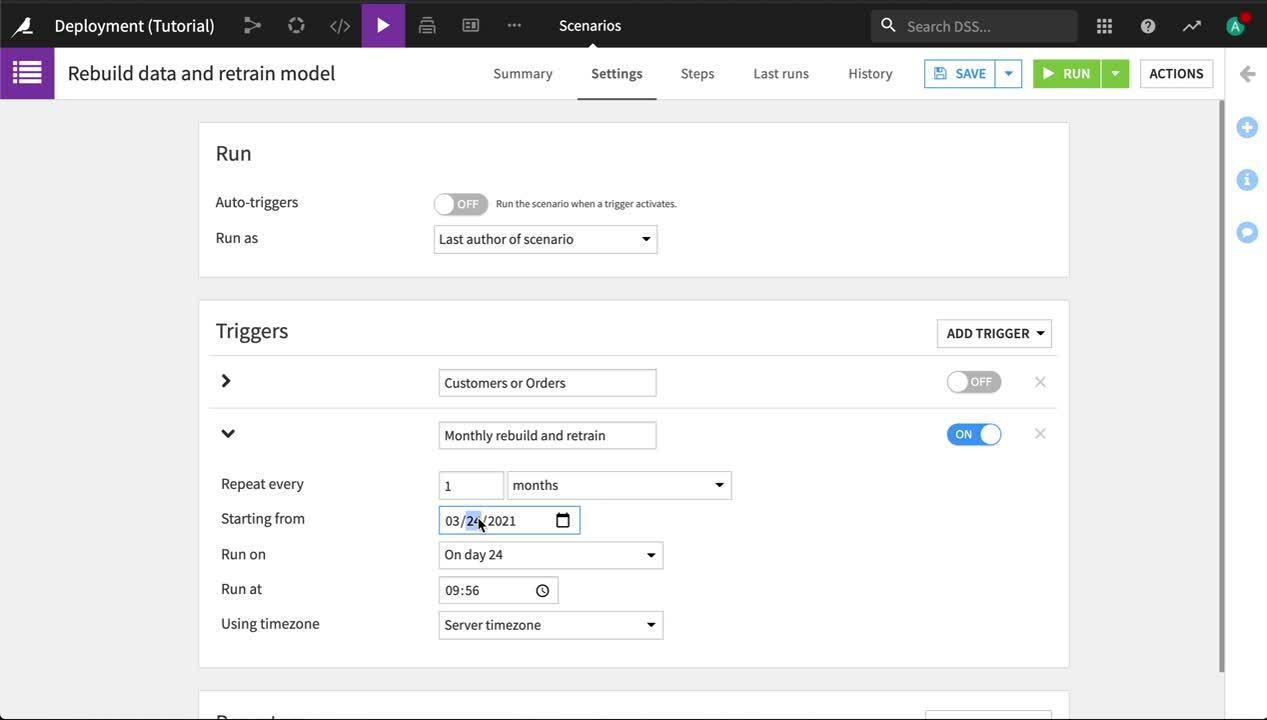
Open the original project on the Design node. Navigate to the Scenarios tab, and open the Rebuild data retrain model scenario.
Rather than deleting it, in case you want to switch back to this trigger later, turn off the existing trigger. Then click Add trigger > Time-based trigger.
Name the trigger
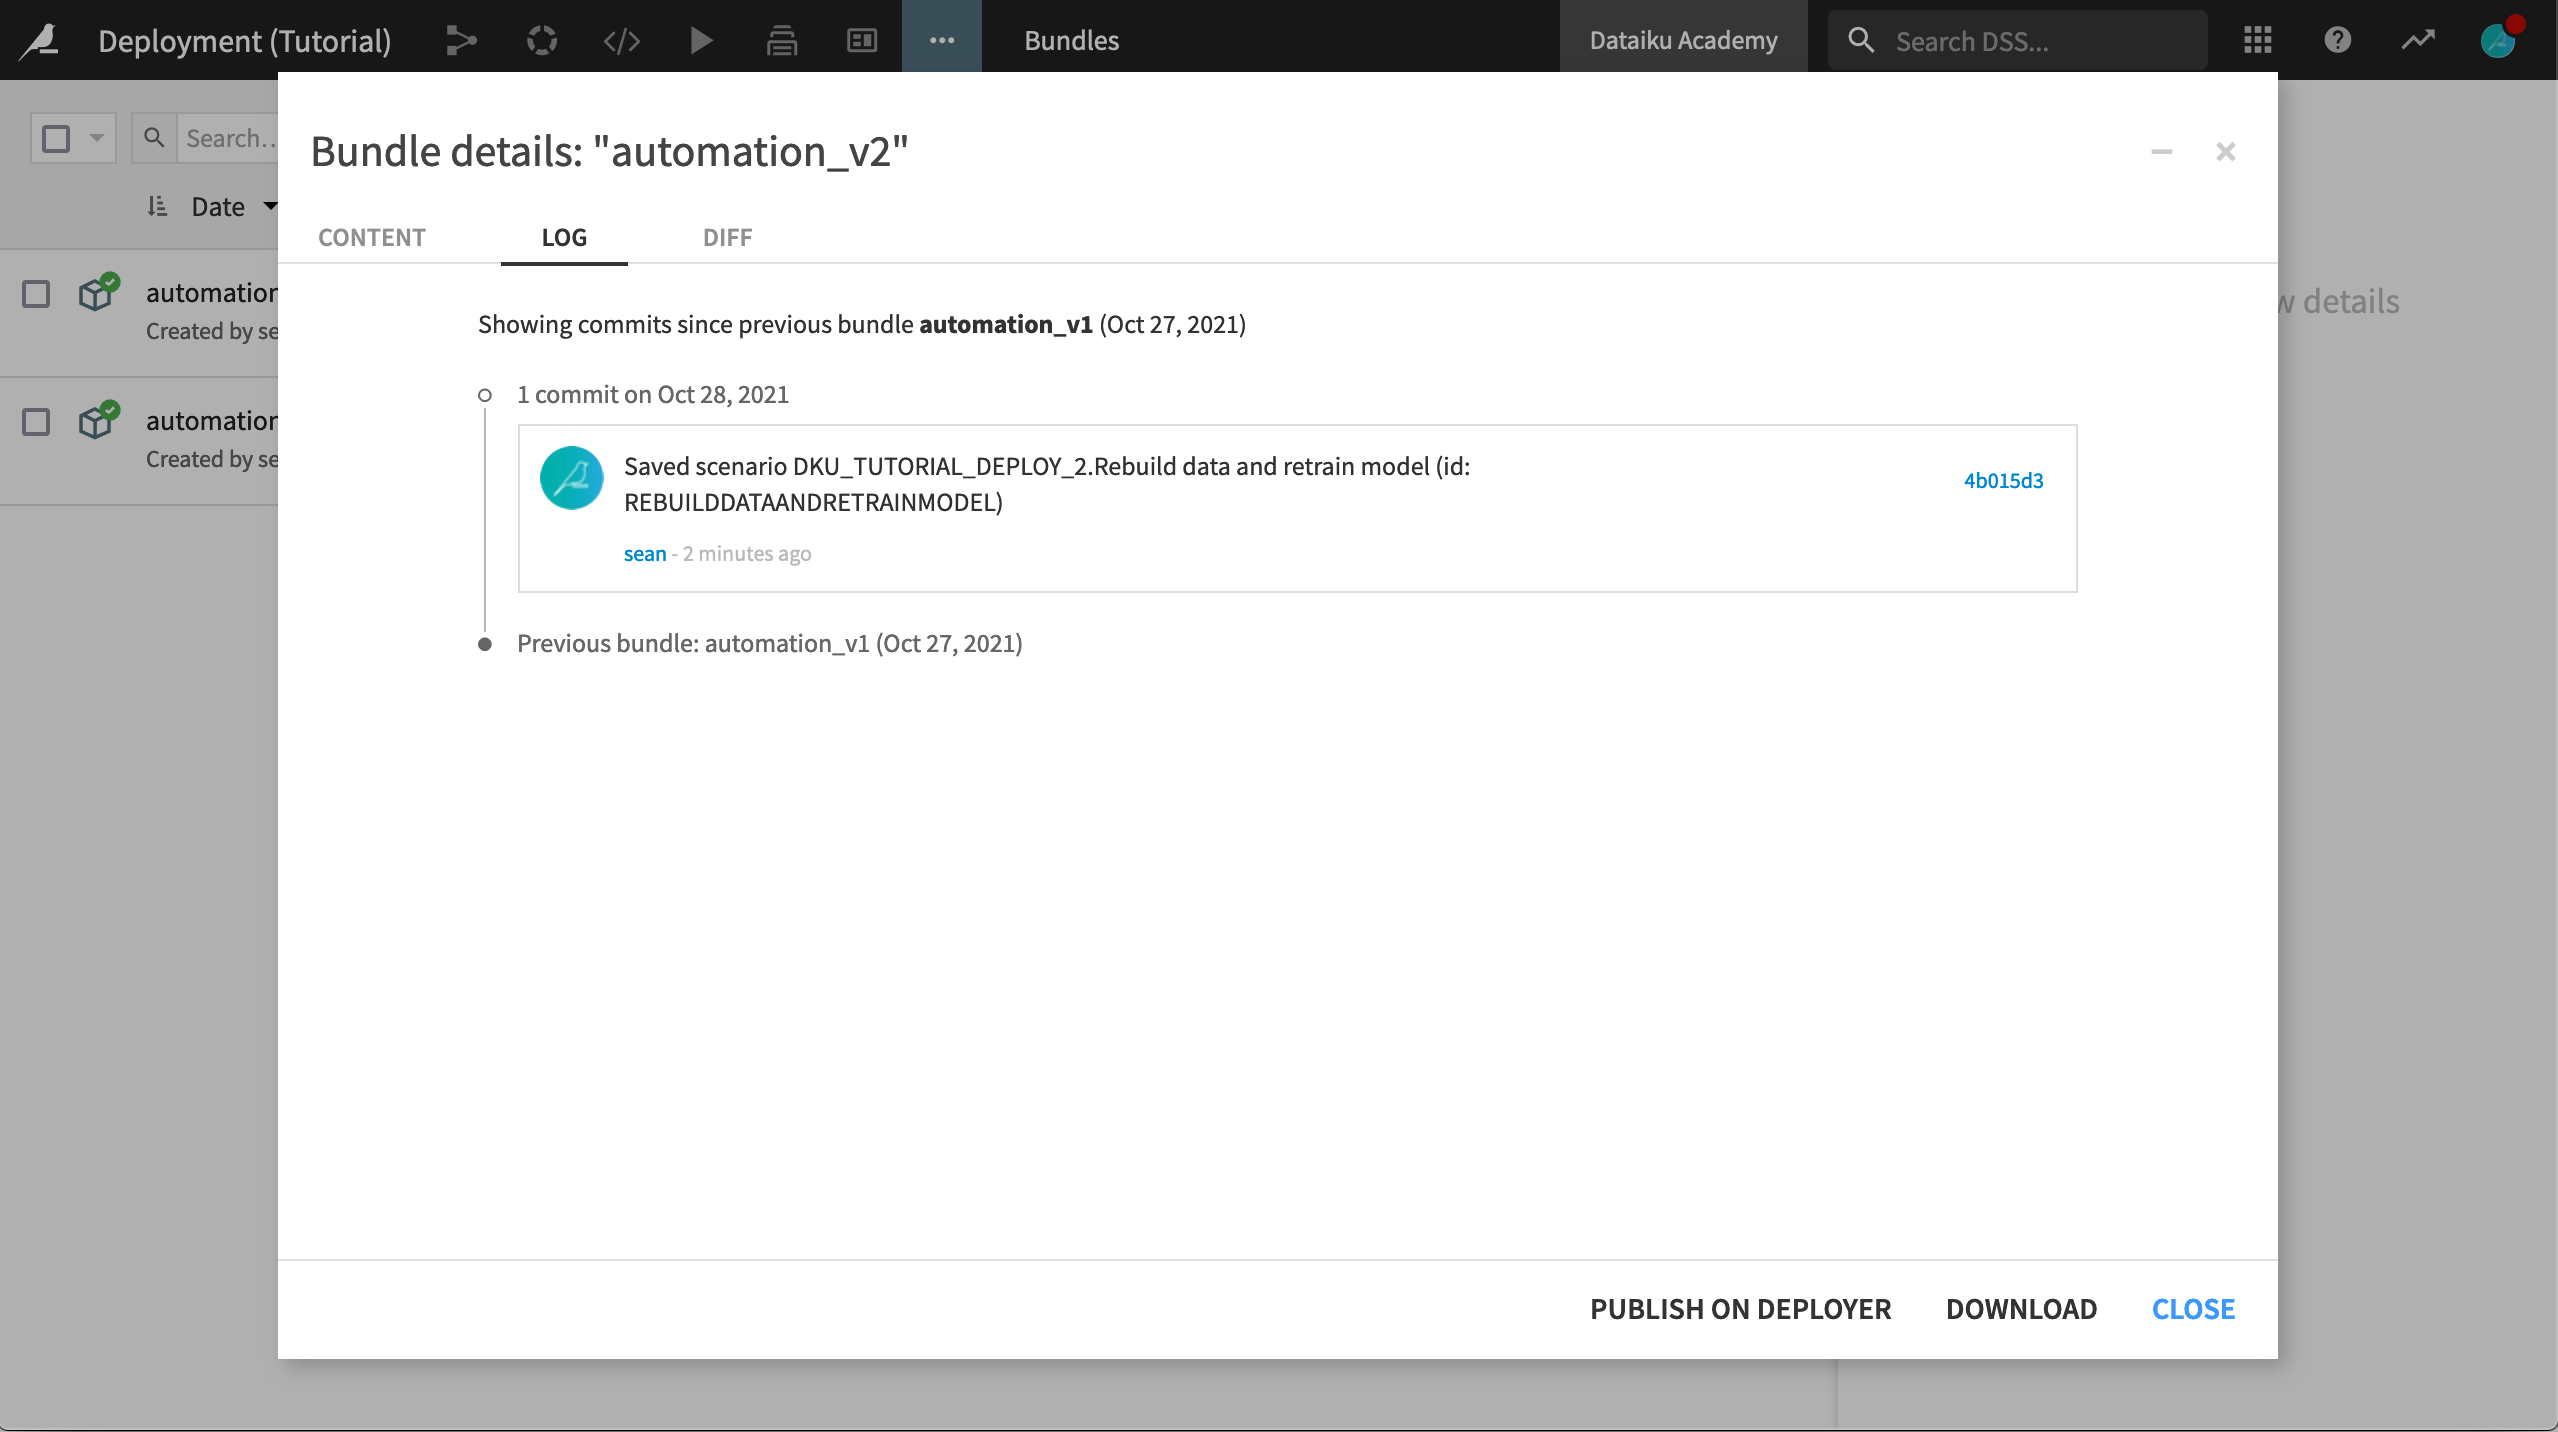
Monthly rebuild & retrain. Have the trigger repeat every 1 month, starting on day 1 of the closest month. Save your scenario.Navigate to the Bundles page. Click + New Bundle, and name it
automation_v2.Leave a descriptive release note for your colleagues in charge of the production environment, like
Changed the scenario trigger to be monthly. These changes are now visible in the bundle’s commit log and diff tabs (accessible in the upper right), both here on the Design node and when the bundle is redeployed on the Automation node.Click Create.
See a video to recap the steps in this section.
<!– Vidyard Lightbox video embed –> <script type=”text/javascript” async src=”https://play.vidyard.com/embed/v4.js”></script>
<!– Put this wherever you would like your player to appear –> <div style=”width: 100%; margin: auto; display: block;”>
- <p>
- <img
class=”vidyard-player-embed” src=”https://play.vidyard.com/xEcnWm7qL3dxicHj1vLgF9.jpg” data-uuid=”xEcnWm7qL3dxicHj1vLgF9”; data-v=”4” data-type=”inline”/>
</p>
</div>
Updating a Deployment
Now we want to update our Deployment with the new project bundle, and then push the changes to the Automation node.
With the new bundle selected, click Publish on Deployer, and then Open in Deployer.
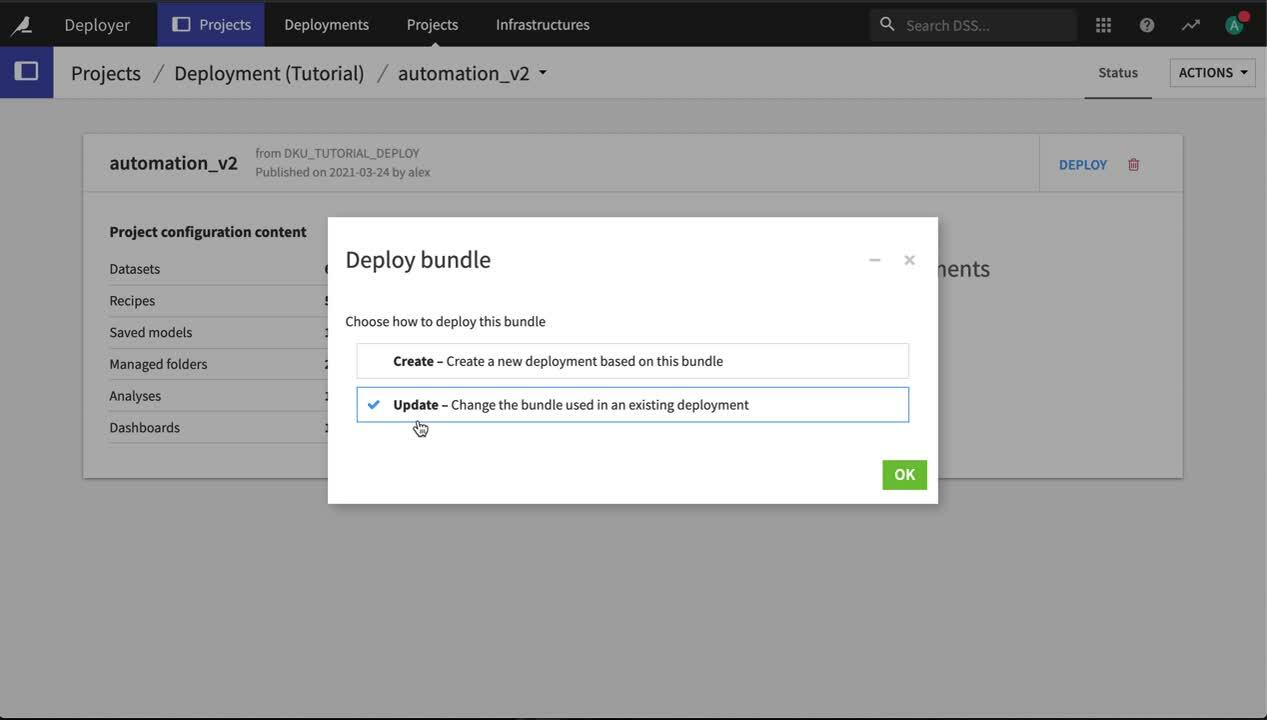
The Deployer opens with the new bundle. Click Deploy once again.
We want to update the existing Deployment, so ensure that the Update option is selected and then click OK.

Confirm the Deployment to update, and click OK.
Click Update to push the changes to the Automation node.
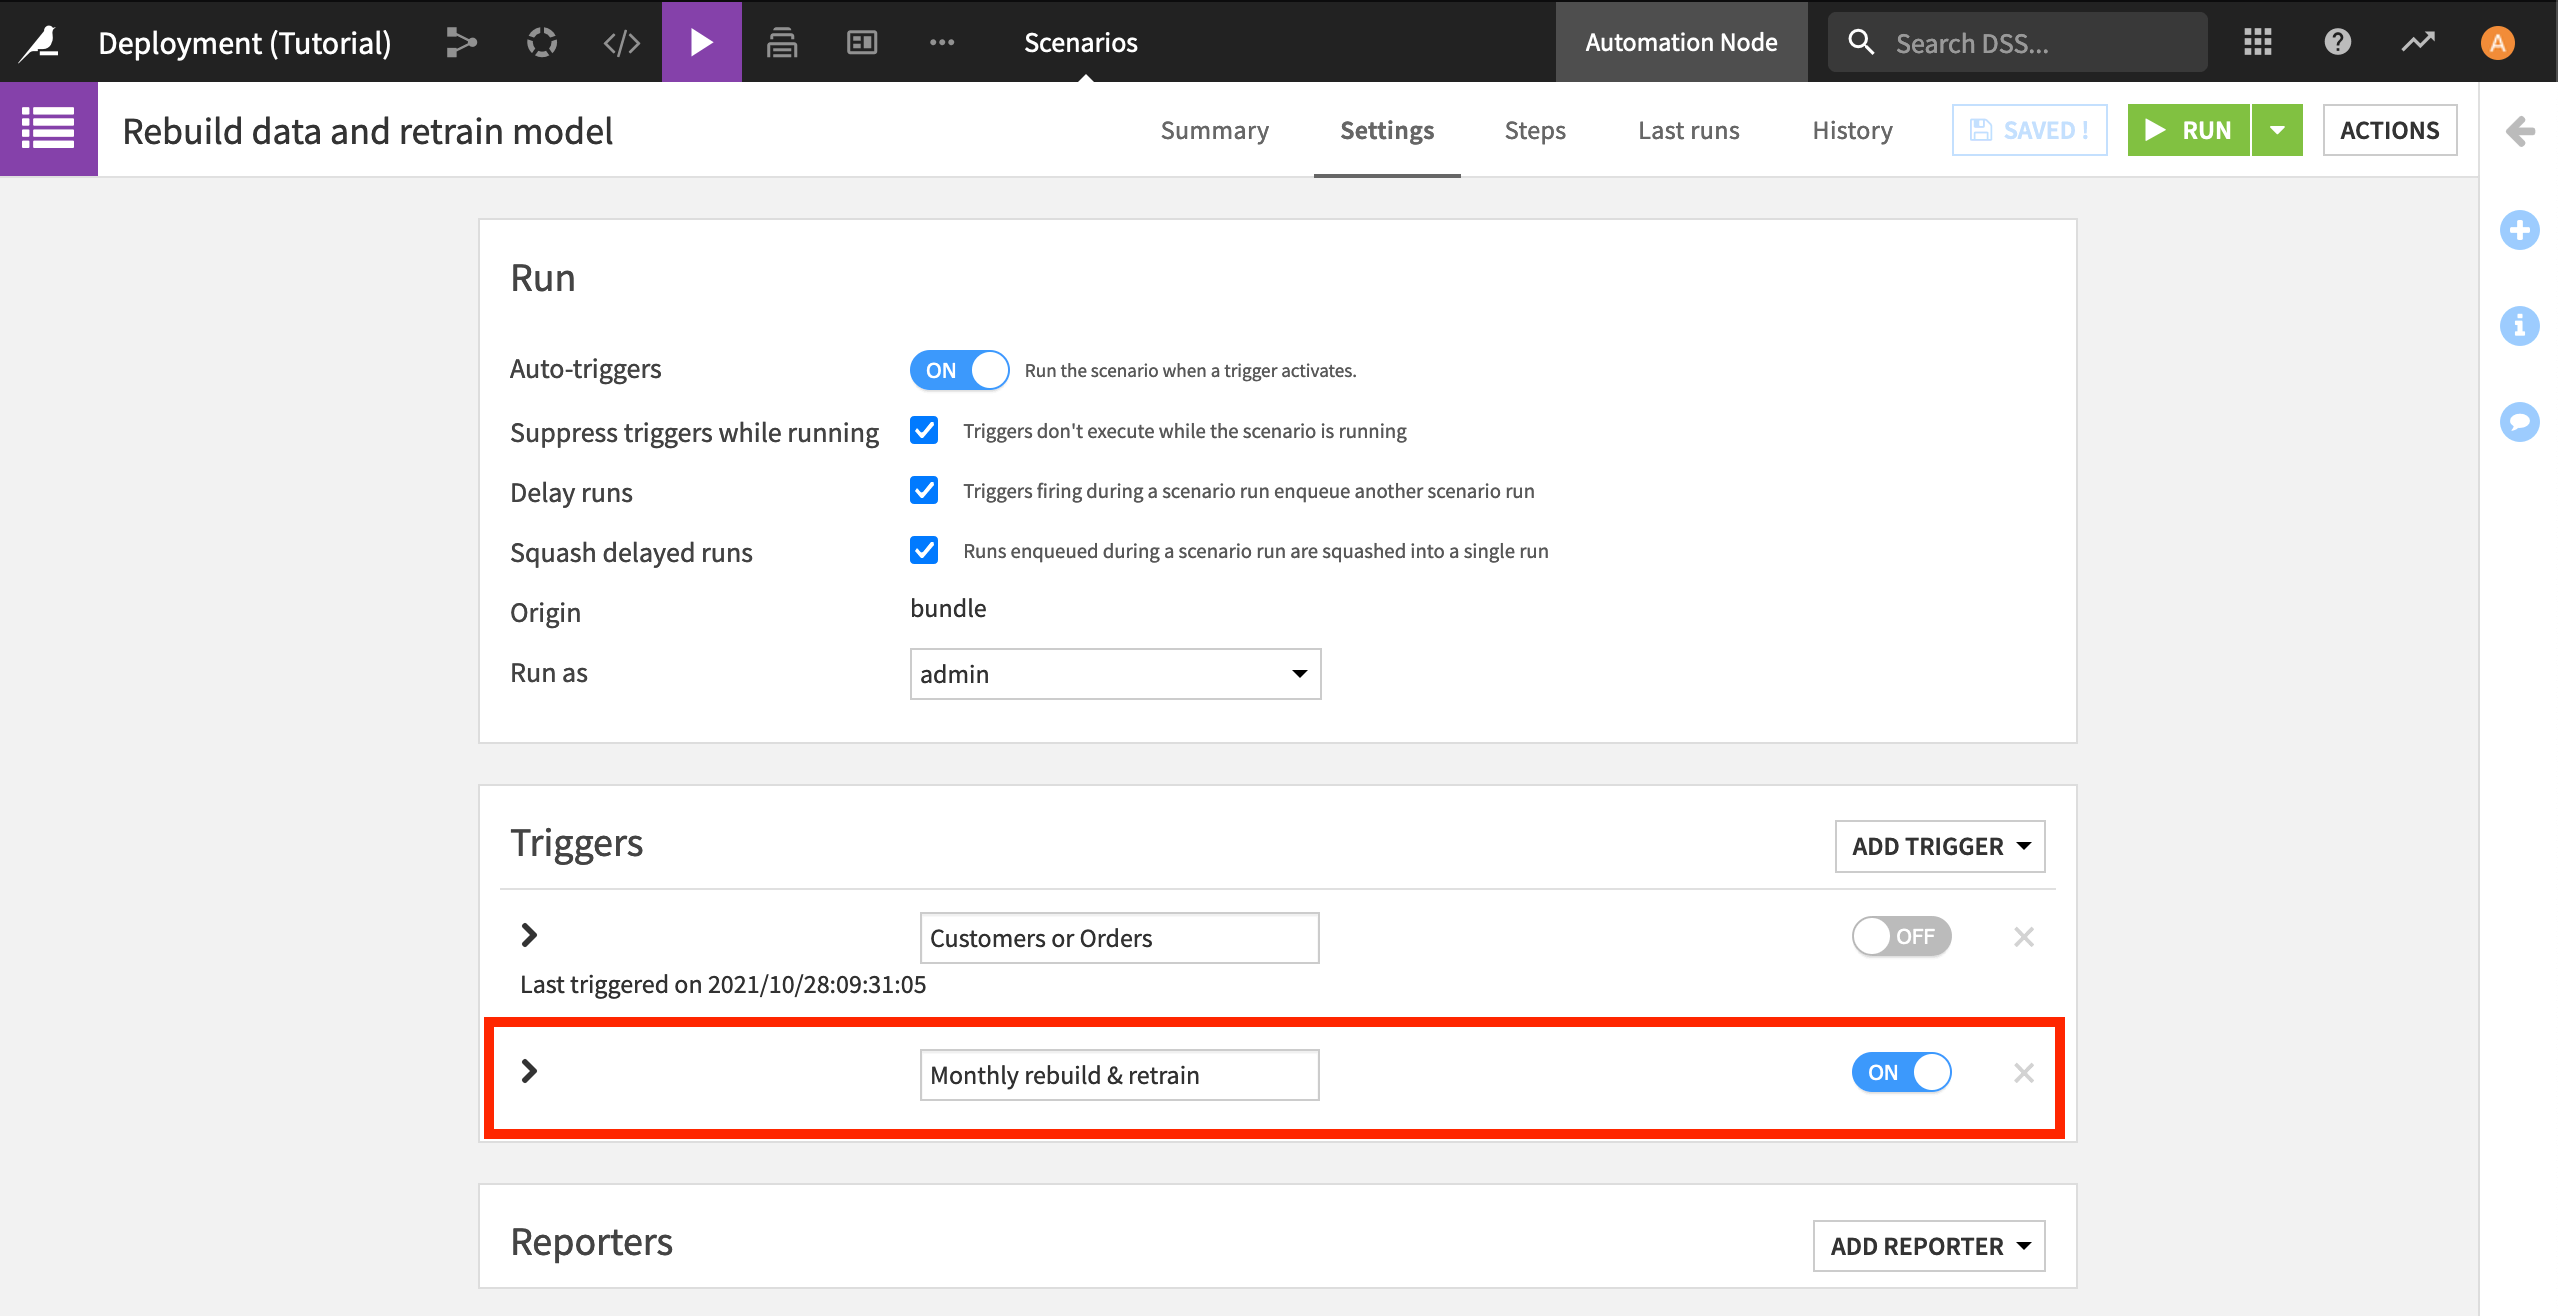
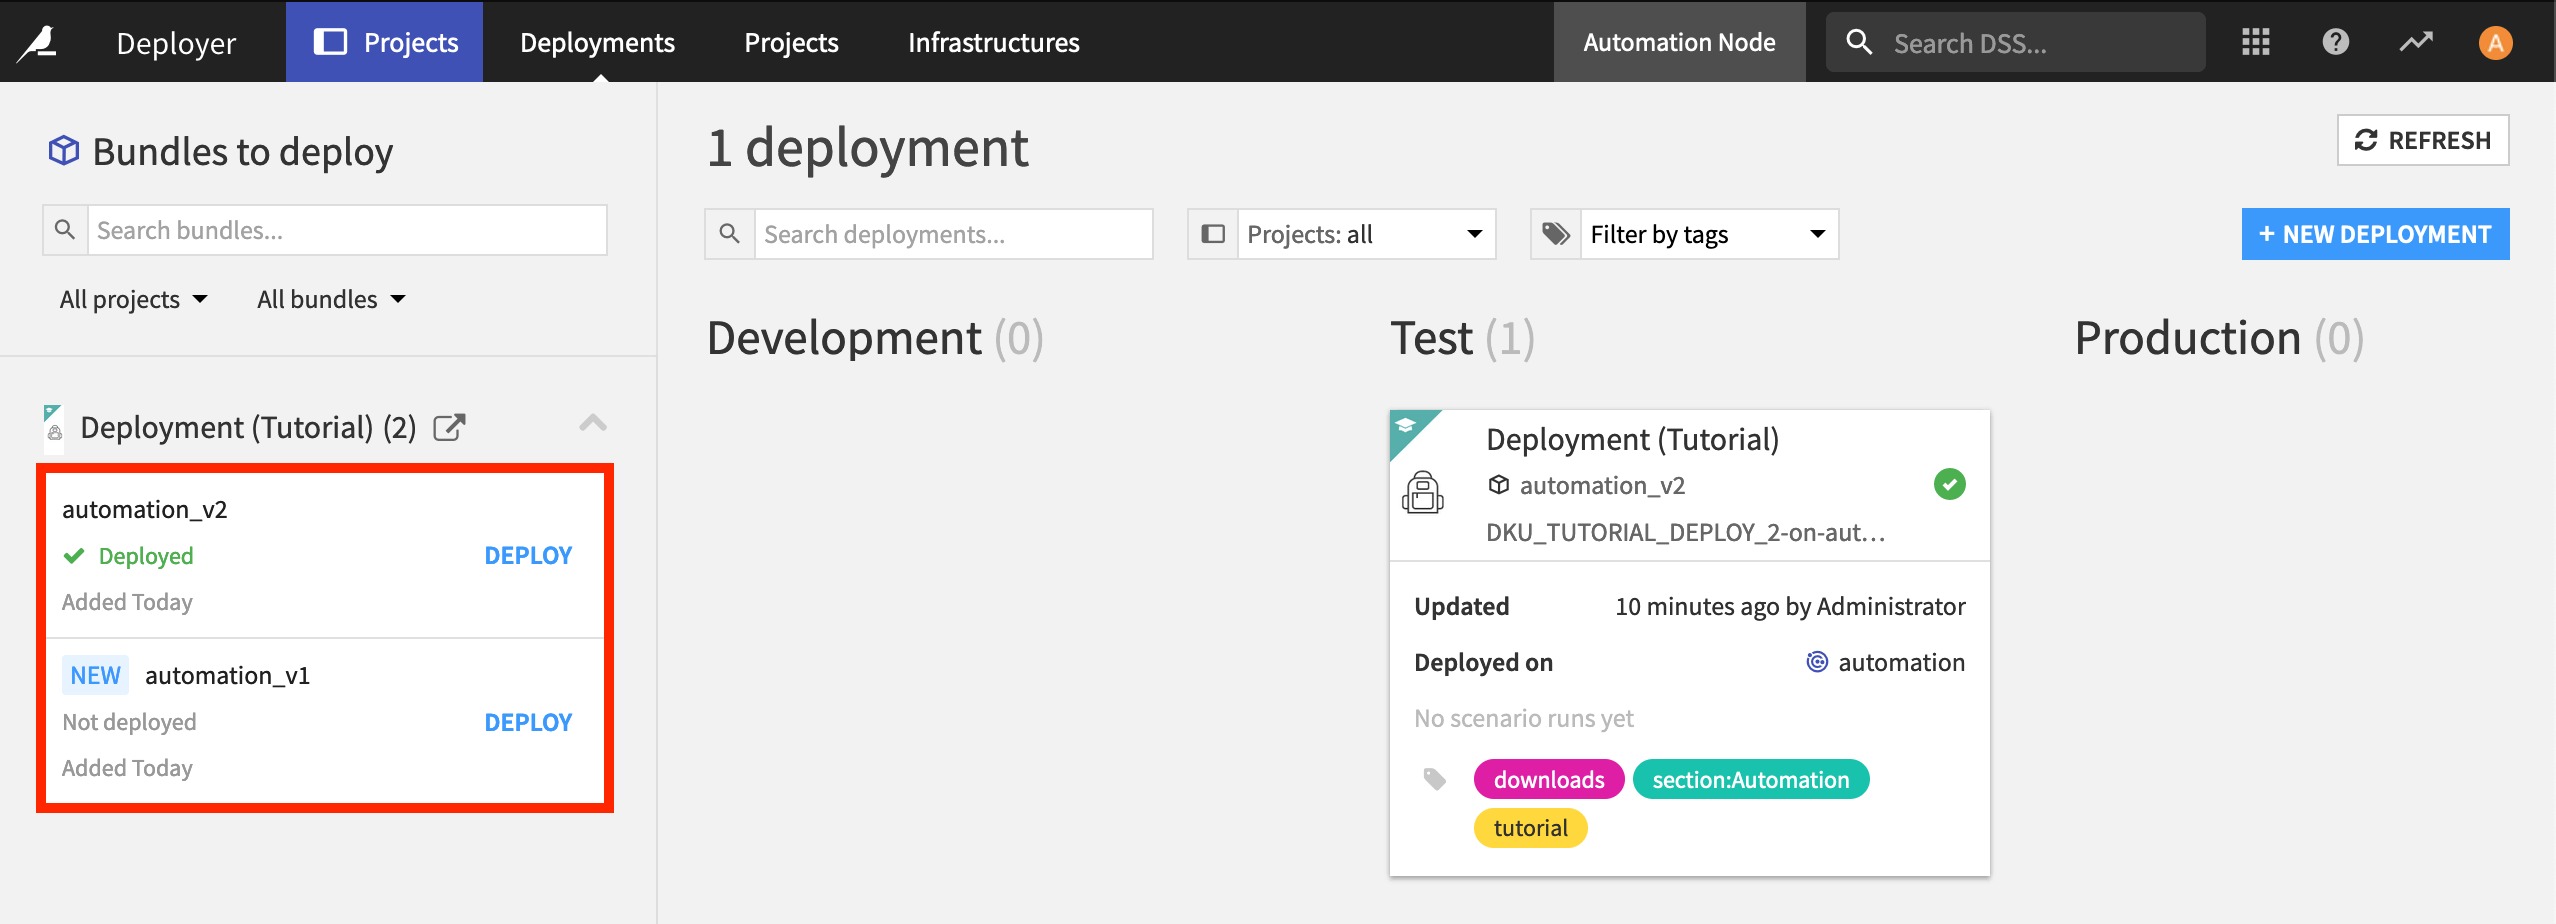
The project in production has been updated to execute on a monthly basis. You can check this by navigating to the Scenarios of the project on the Automation node and seeing that the changes you made on the Design node are visible in the Automation node.
If you ever need to roll back to a previous bundle version, go to the Deployer, select the version you want, and Deploy it as an update.
What’s Next?
Congratulations! Deploying a Flow to production and managing versions is easy to do with Dataiku.
Next, you might be interested in the course on Real-Time Deployment to learn how to deploy predictive models for real-time scoring using the Dataiku API Node.