Natural Language Processing with Code
Binary Sentiment Analysis is the task of automatically analyzing a text data to decide whether it is positive or negative. This is useful when faced with a lot of text data that would be too time-consuming to manually label. In Dataiku you can build a convolutional neural network model for binary sentiment analysis.
Objectives
This how-to walks through how to build a convolutional network for sentiment analysis, using Keras code in Dataiku’s Visual Machine Learning. After building an initial model, we’ll use pre-trained word embeddings to improve the preprocessing of inputs, and then evaluate both models on test data.
Prerequisites
You should have some experience with Deep Learning with code in Dataiku.
You should have some familiarity with Keras.
You will need to create a code environment, or use an existing one, that has the necessary libraries. When creating a code environment, you can add sets of packages on the Packages to Install tab. Choose the Visual Deep Learning package set that corresponds to the hardware you’re running on.
Preparing the Data
We will be working with IMDB movie reviews. The original data is from the Large Movie Review Dataset, which is a compressed folder with many text files, each corresponding to a review. In order to simplify this how-to, we have provided two CSV files:
Download the these CSV files, then create a new project and upload the CSV files into two new datasets.
The Deep Learning Model
In a Visual Analysis for the training dataset, create a new model with:
Prediction as the task,
polarity as the target variable
Expert mode as the prediction style
Deep learning as the Expert mode, then click Create
This creates a new machine learning task and opens the Design tab for the task. On the Target panel, verify that Dataiku DSS has correctly identified this as a Two-class classification type of ML task.
Features Handling
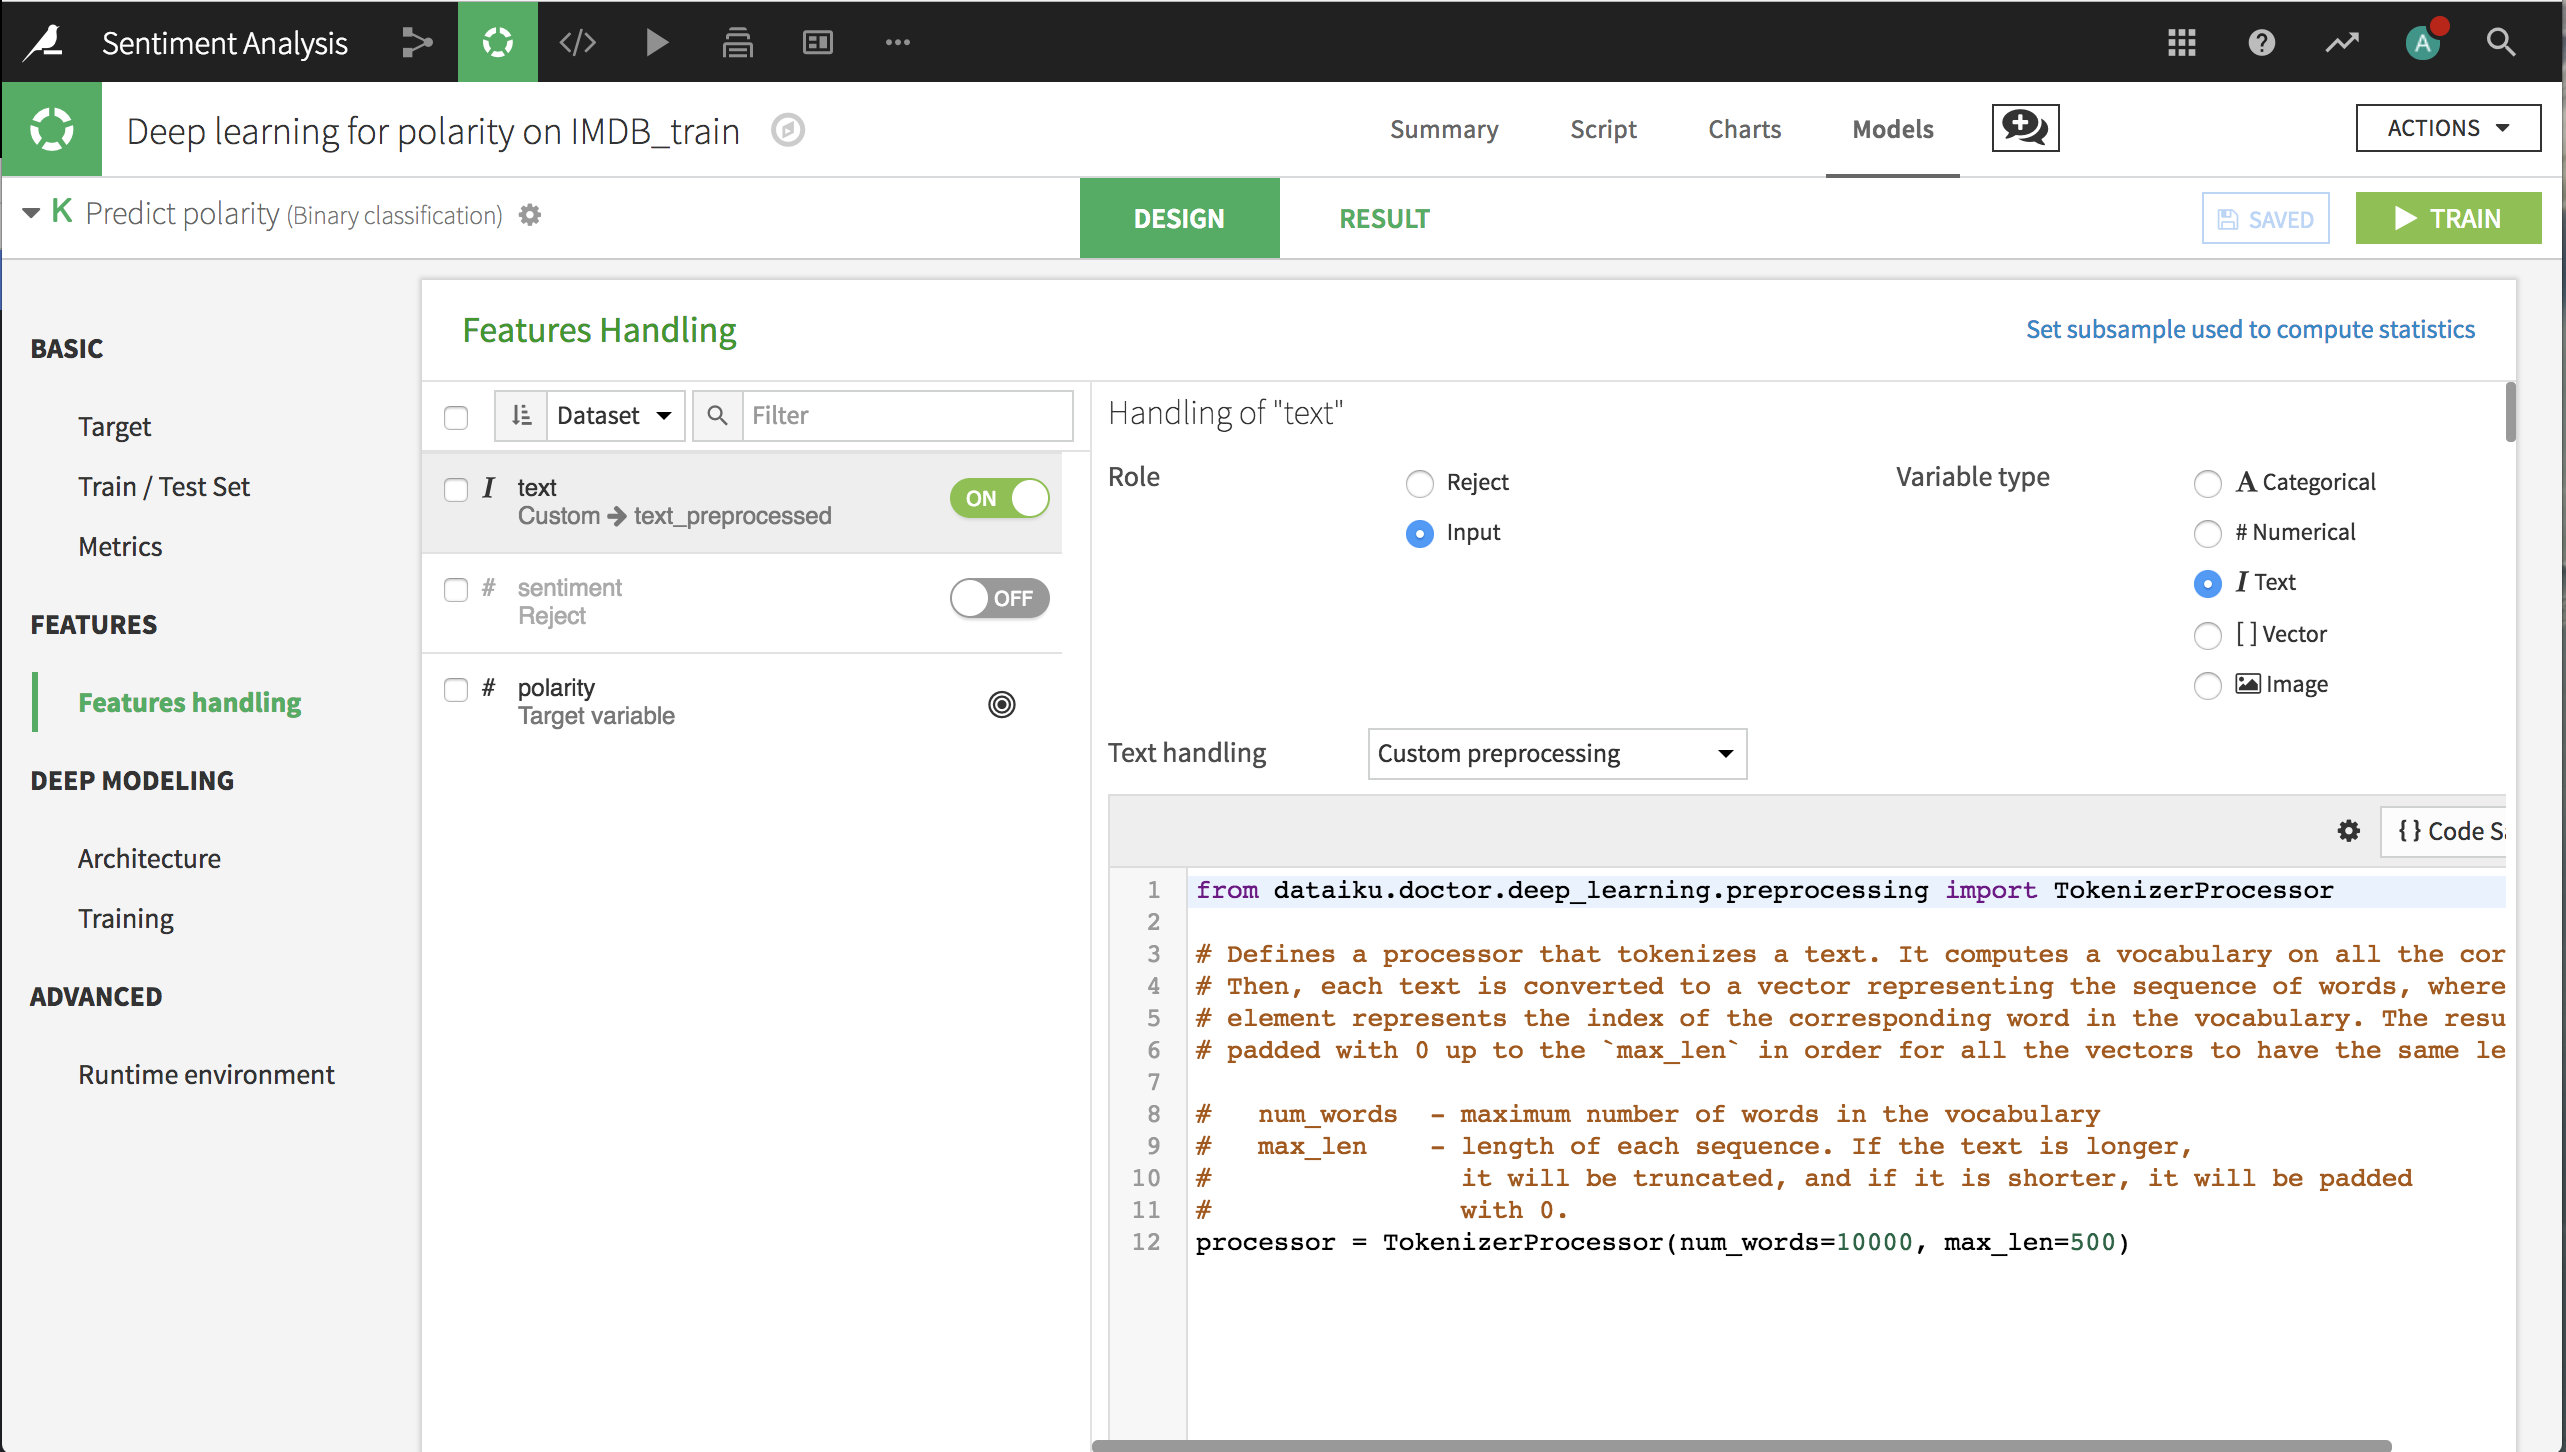
On the Features Handling panel, turn off sentiment as an input, since polarity is derived from sentiment.
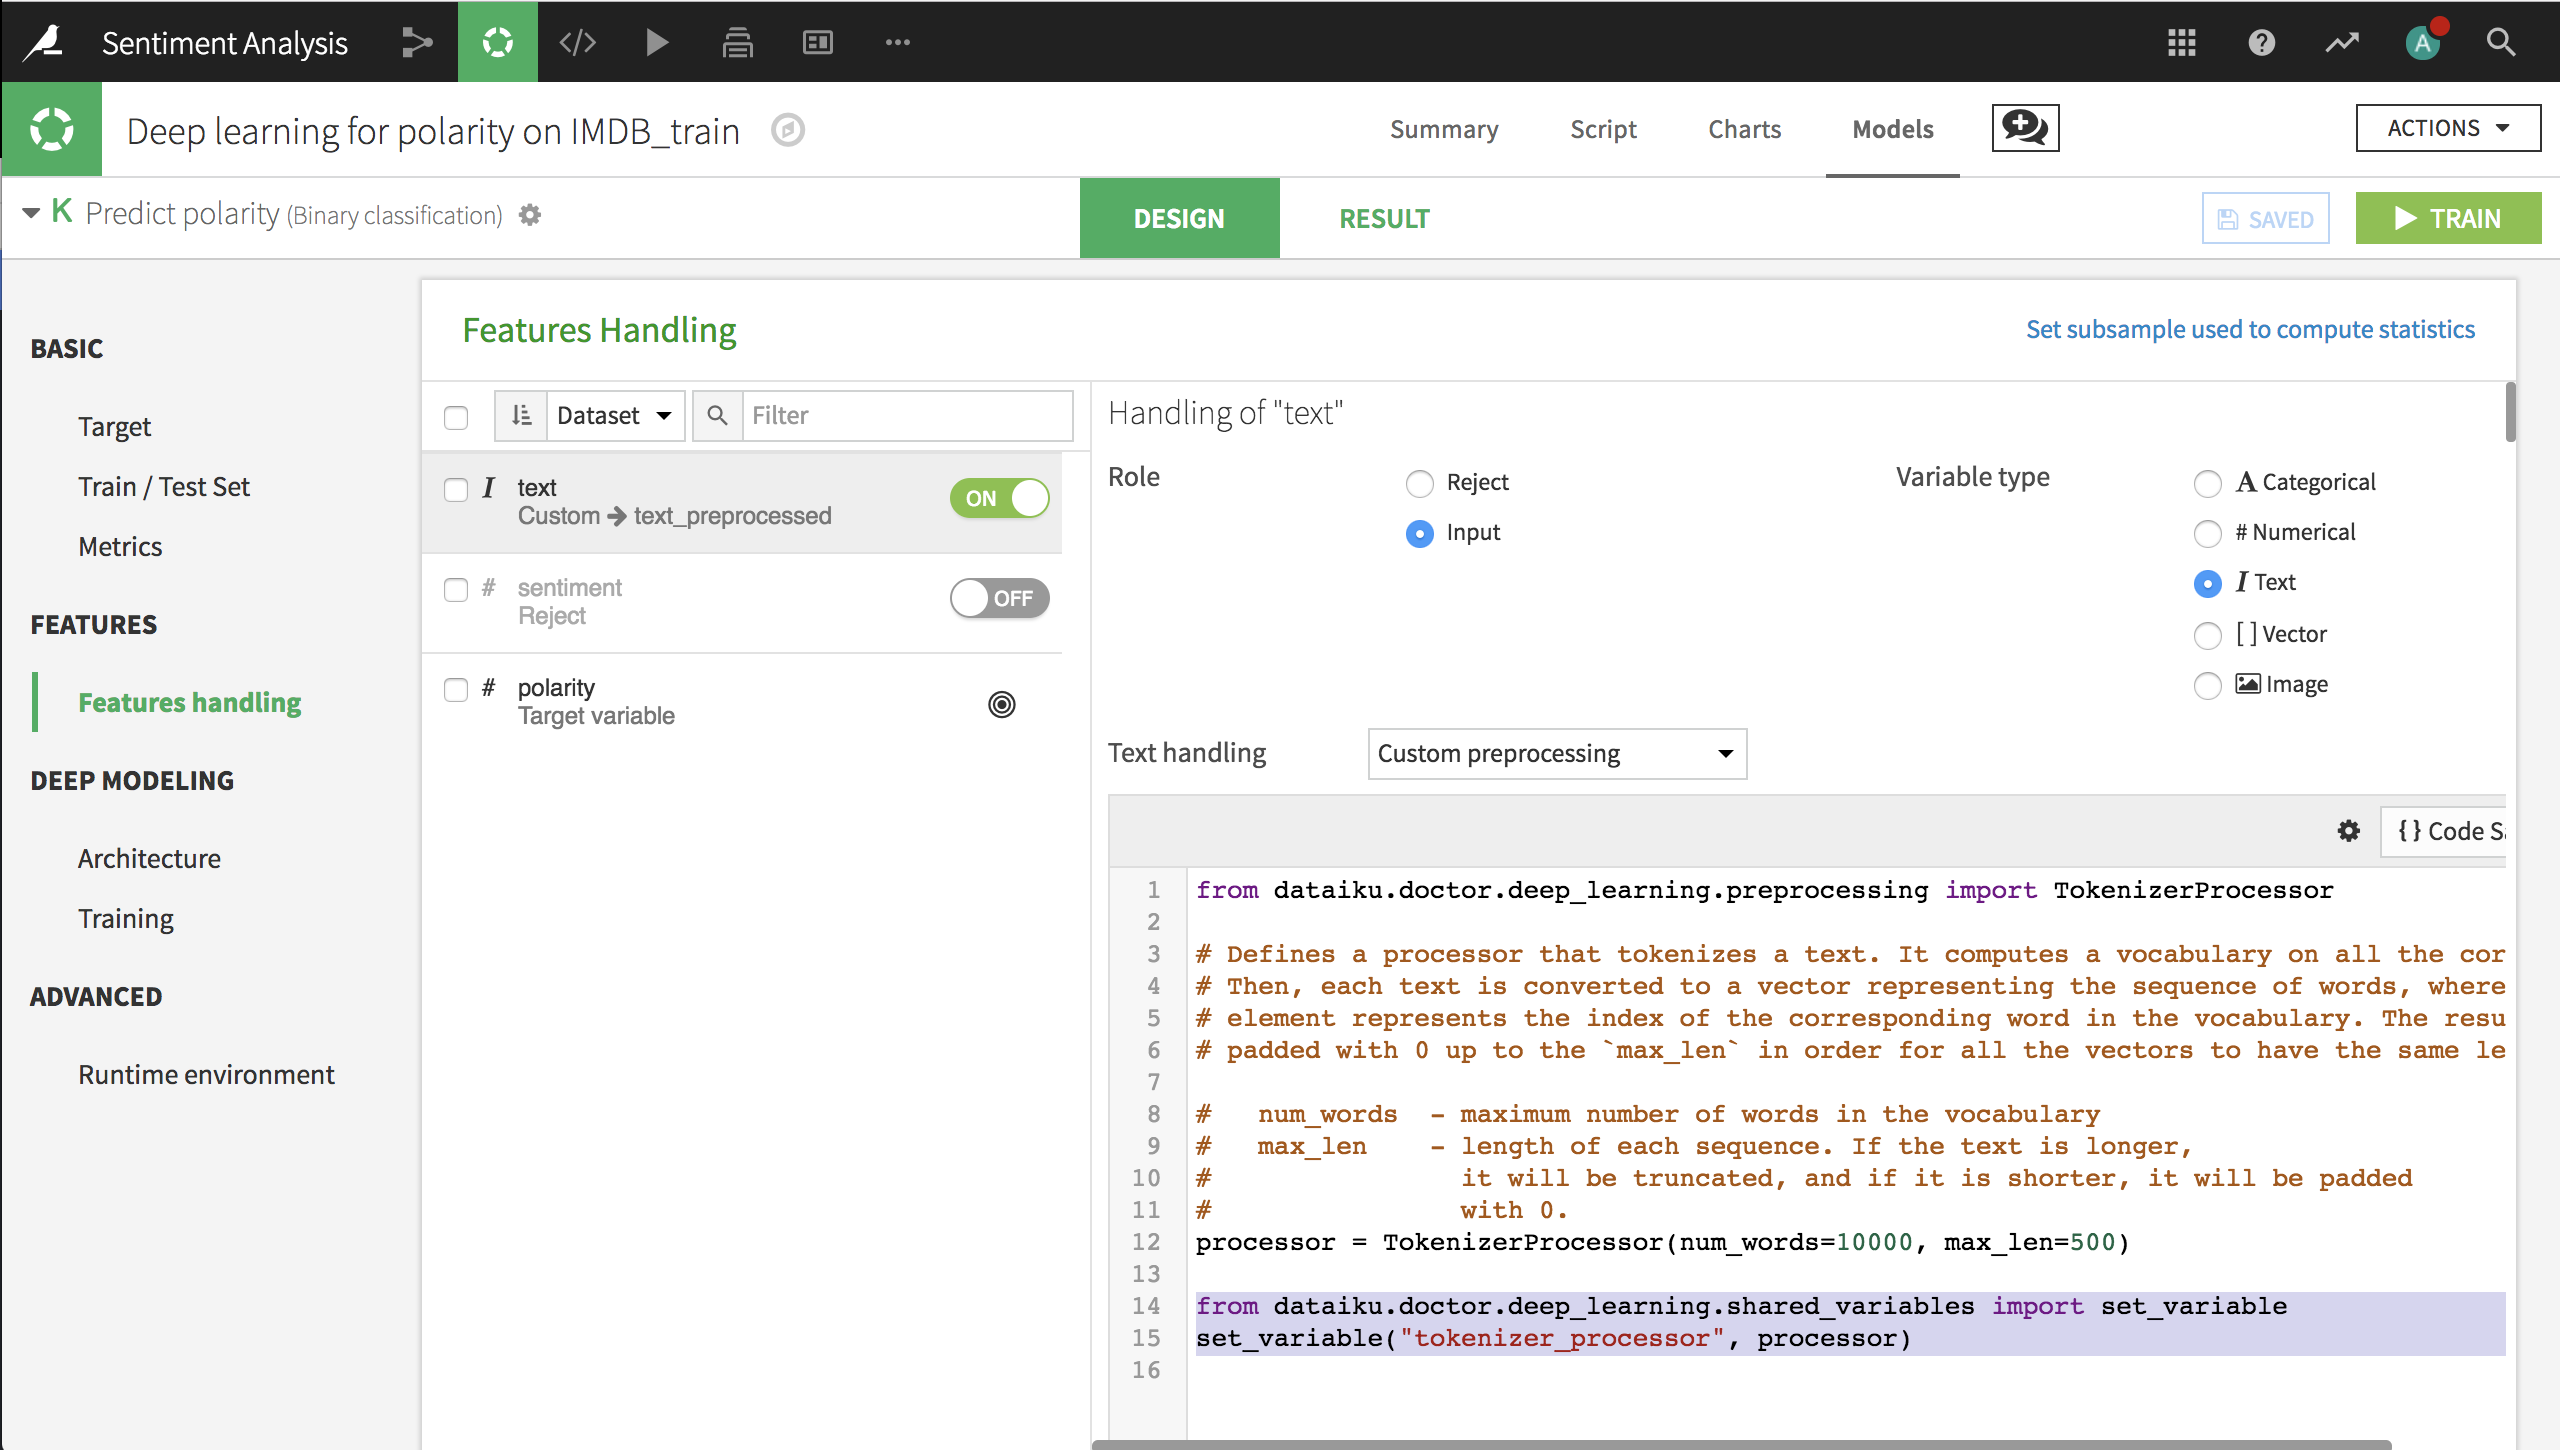
Dataiku should recognize text as a column containing text data, set the variable type to Text, and implement custom preprocessing using the TokenizerProcessor.
We can set two parameters for the Tokenizer:
num_words is the maximum number of words that are kept in the analysis, sorted by frequency. In this case we are keeping only the top 10,000 words.
max_len is the maximum text length, in words. 32 words is too short for these reviews, so we’ll raise the limit to the first 500 words of each review.
Deep Learning Architecture
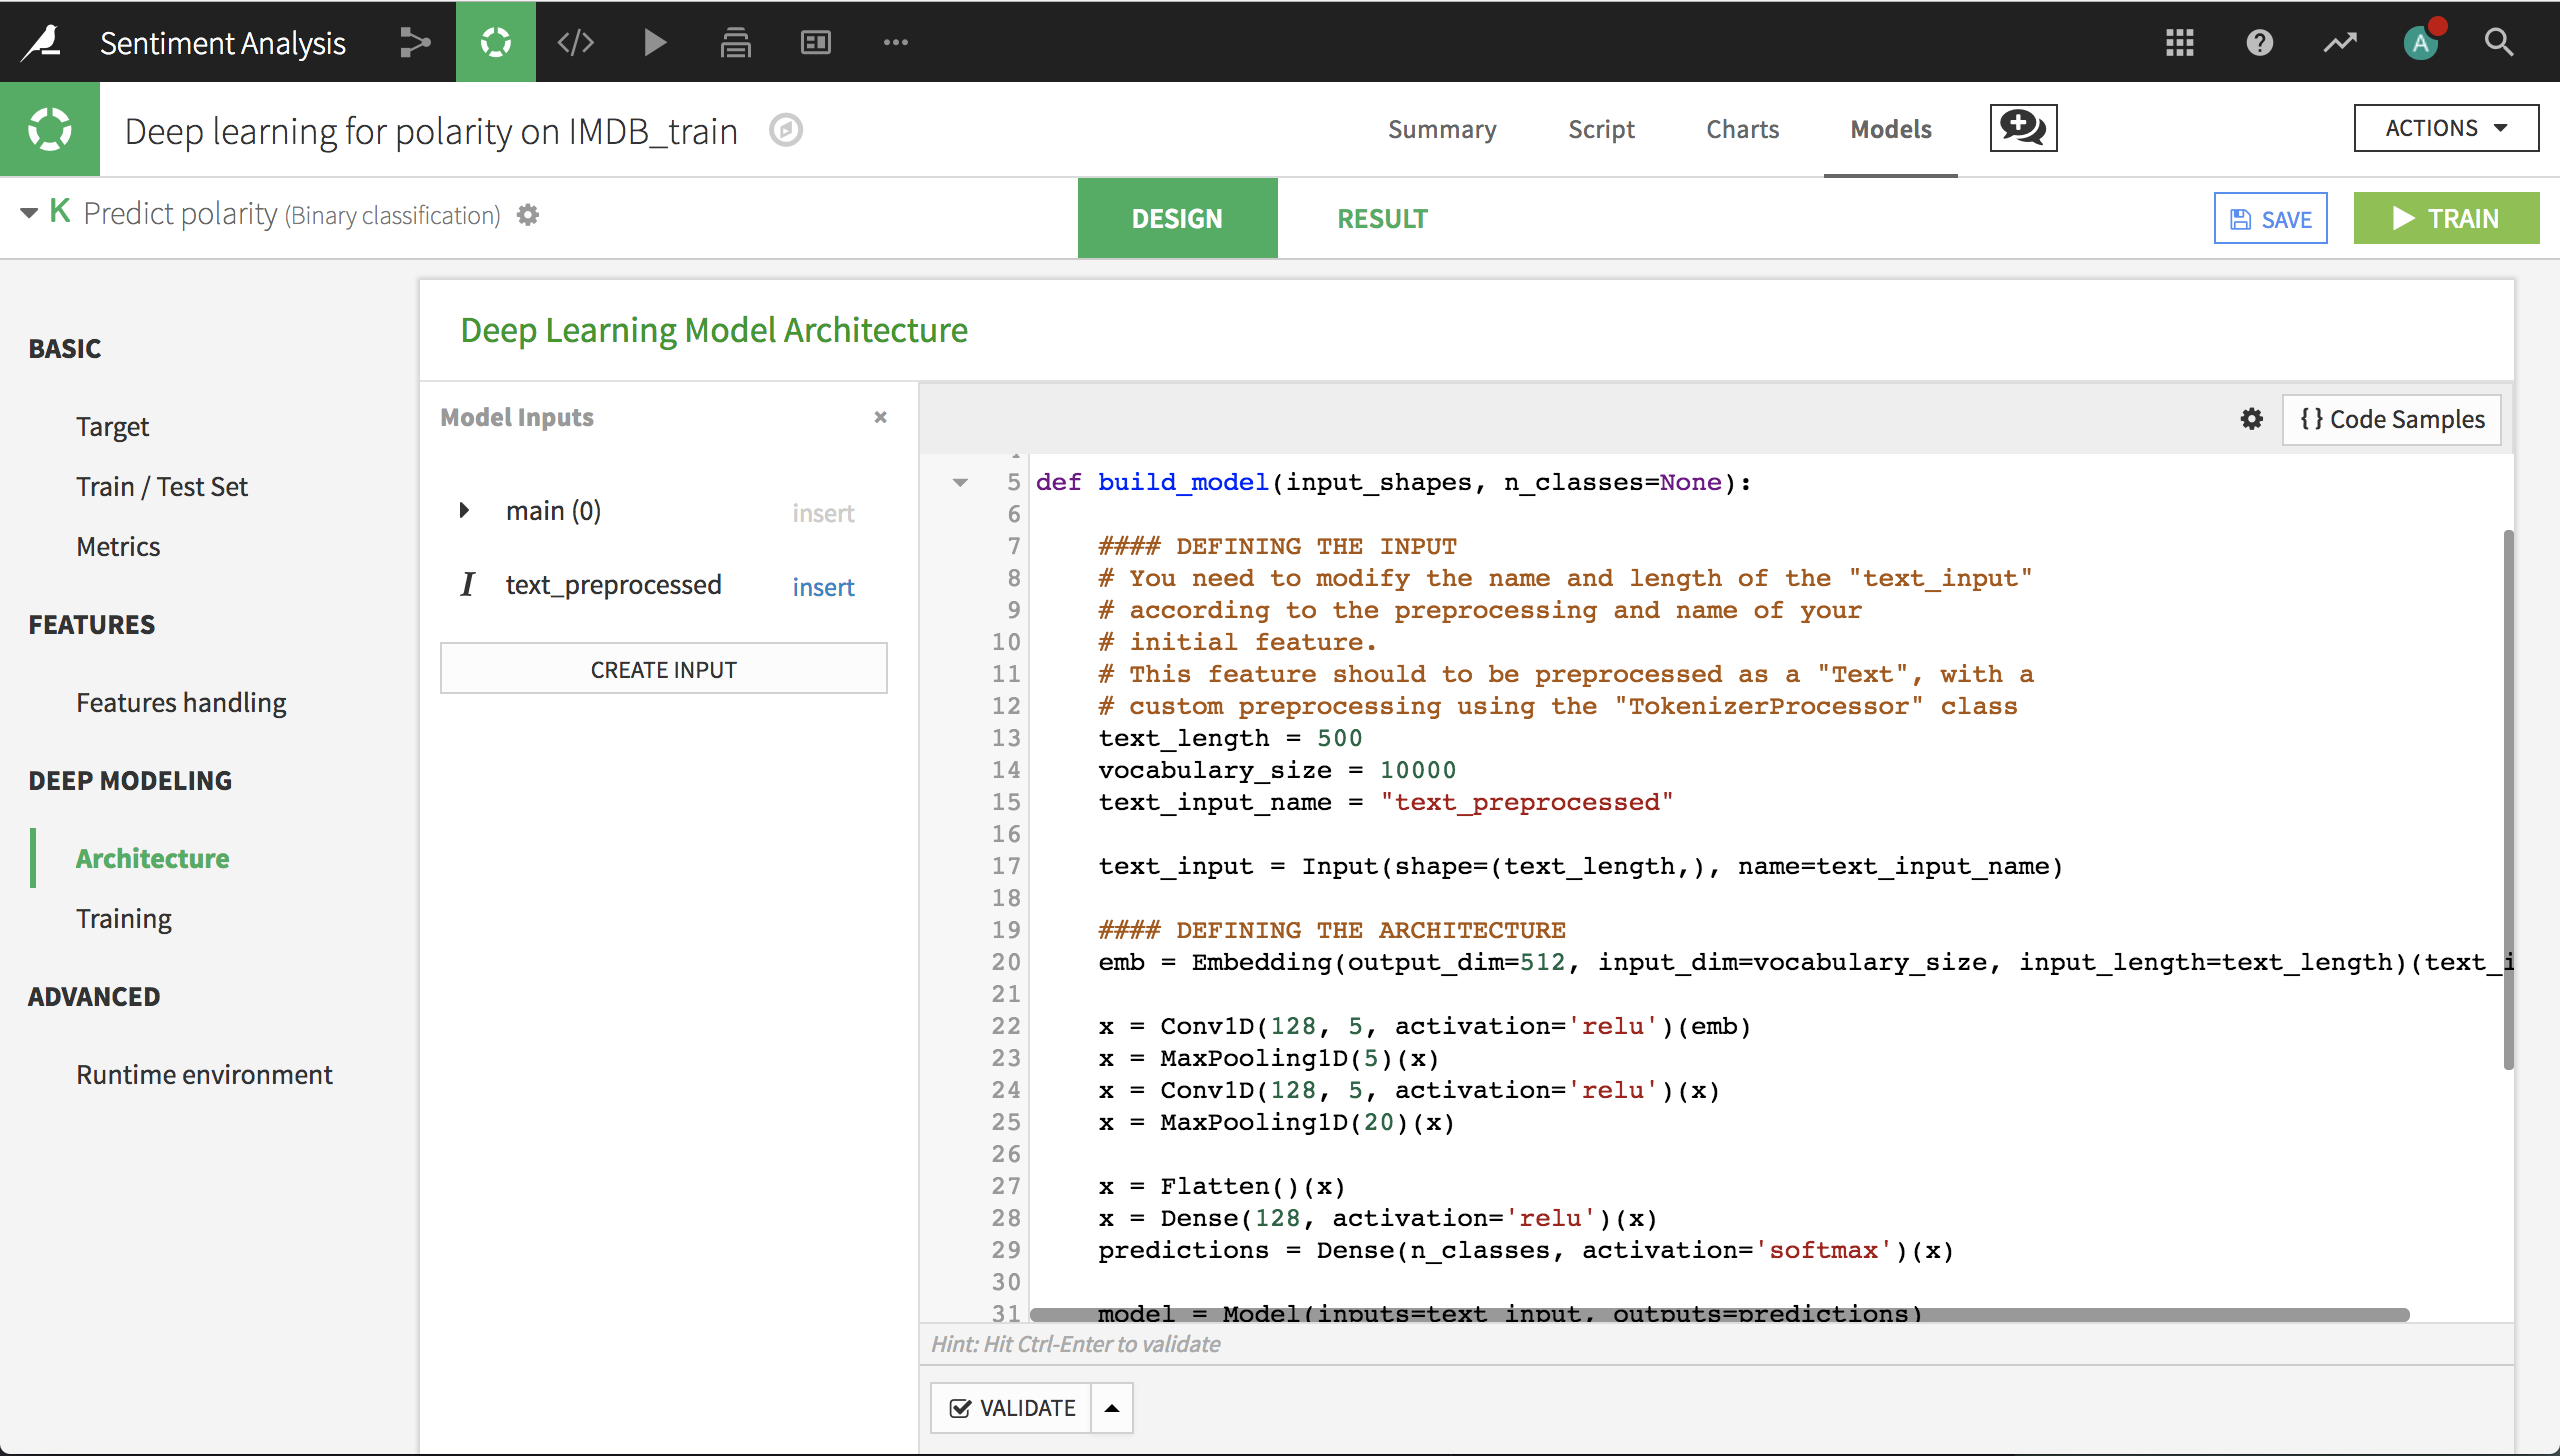
We now have to create our network architecture in the build_model() function. We won’t use the default architecture, so just remove all the code. Then, click on {} Code Samples on the top right and search for “text”. Select the CNN1D architecture for text classification.
Insert the CNN1D code then click on Display inputs on the top left. You should see that the “main” feature is empty because we are only using the review text, which is in the input text_preprocessed.
In order to build the model, we only need to make a small change to the code. In the line that defines text_input_name, change name_of_your_text_input_preprocessed to text_preprocessed.
Model Results
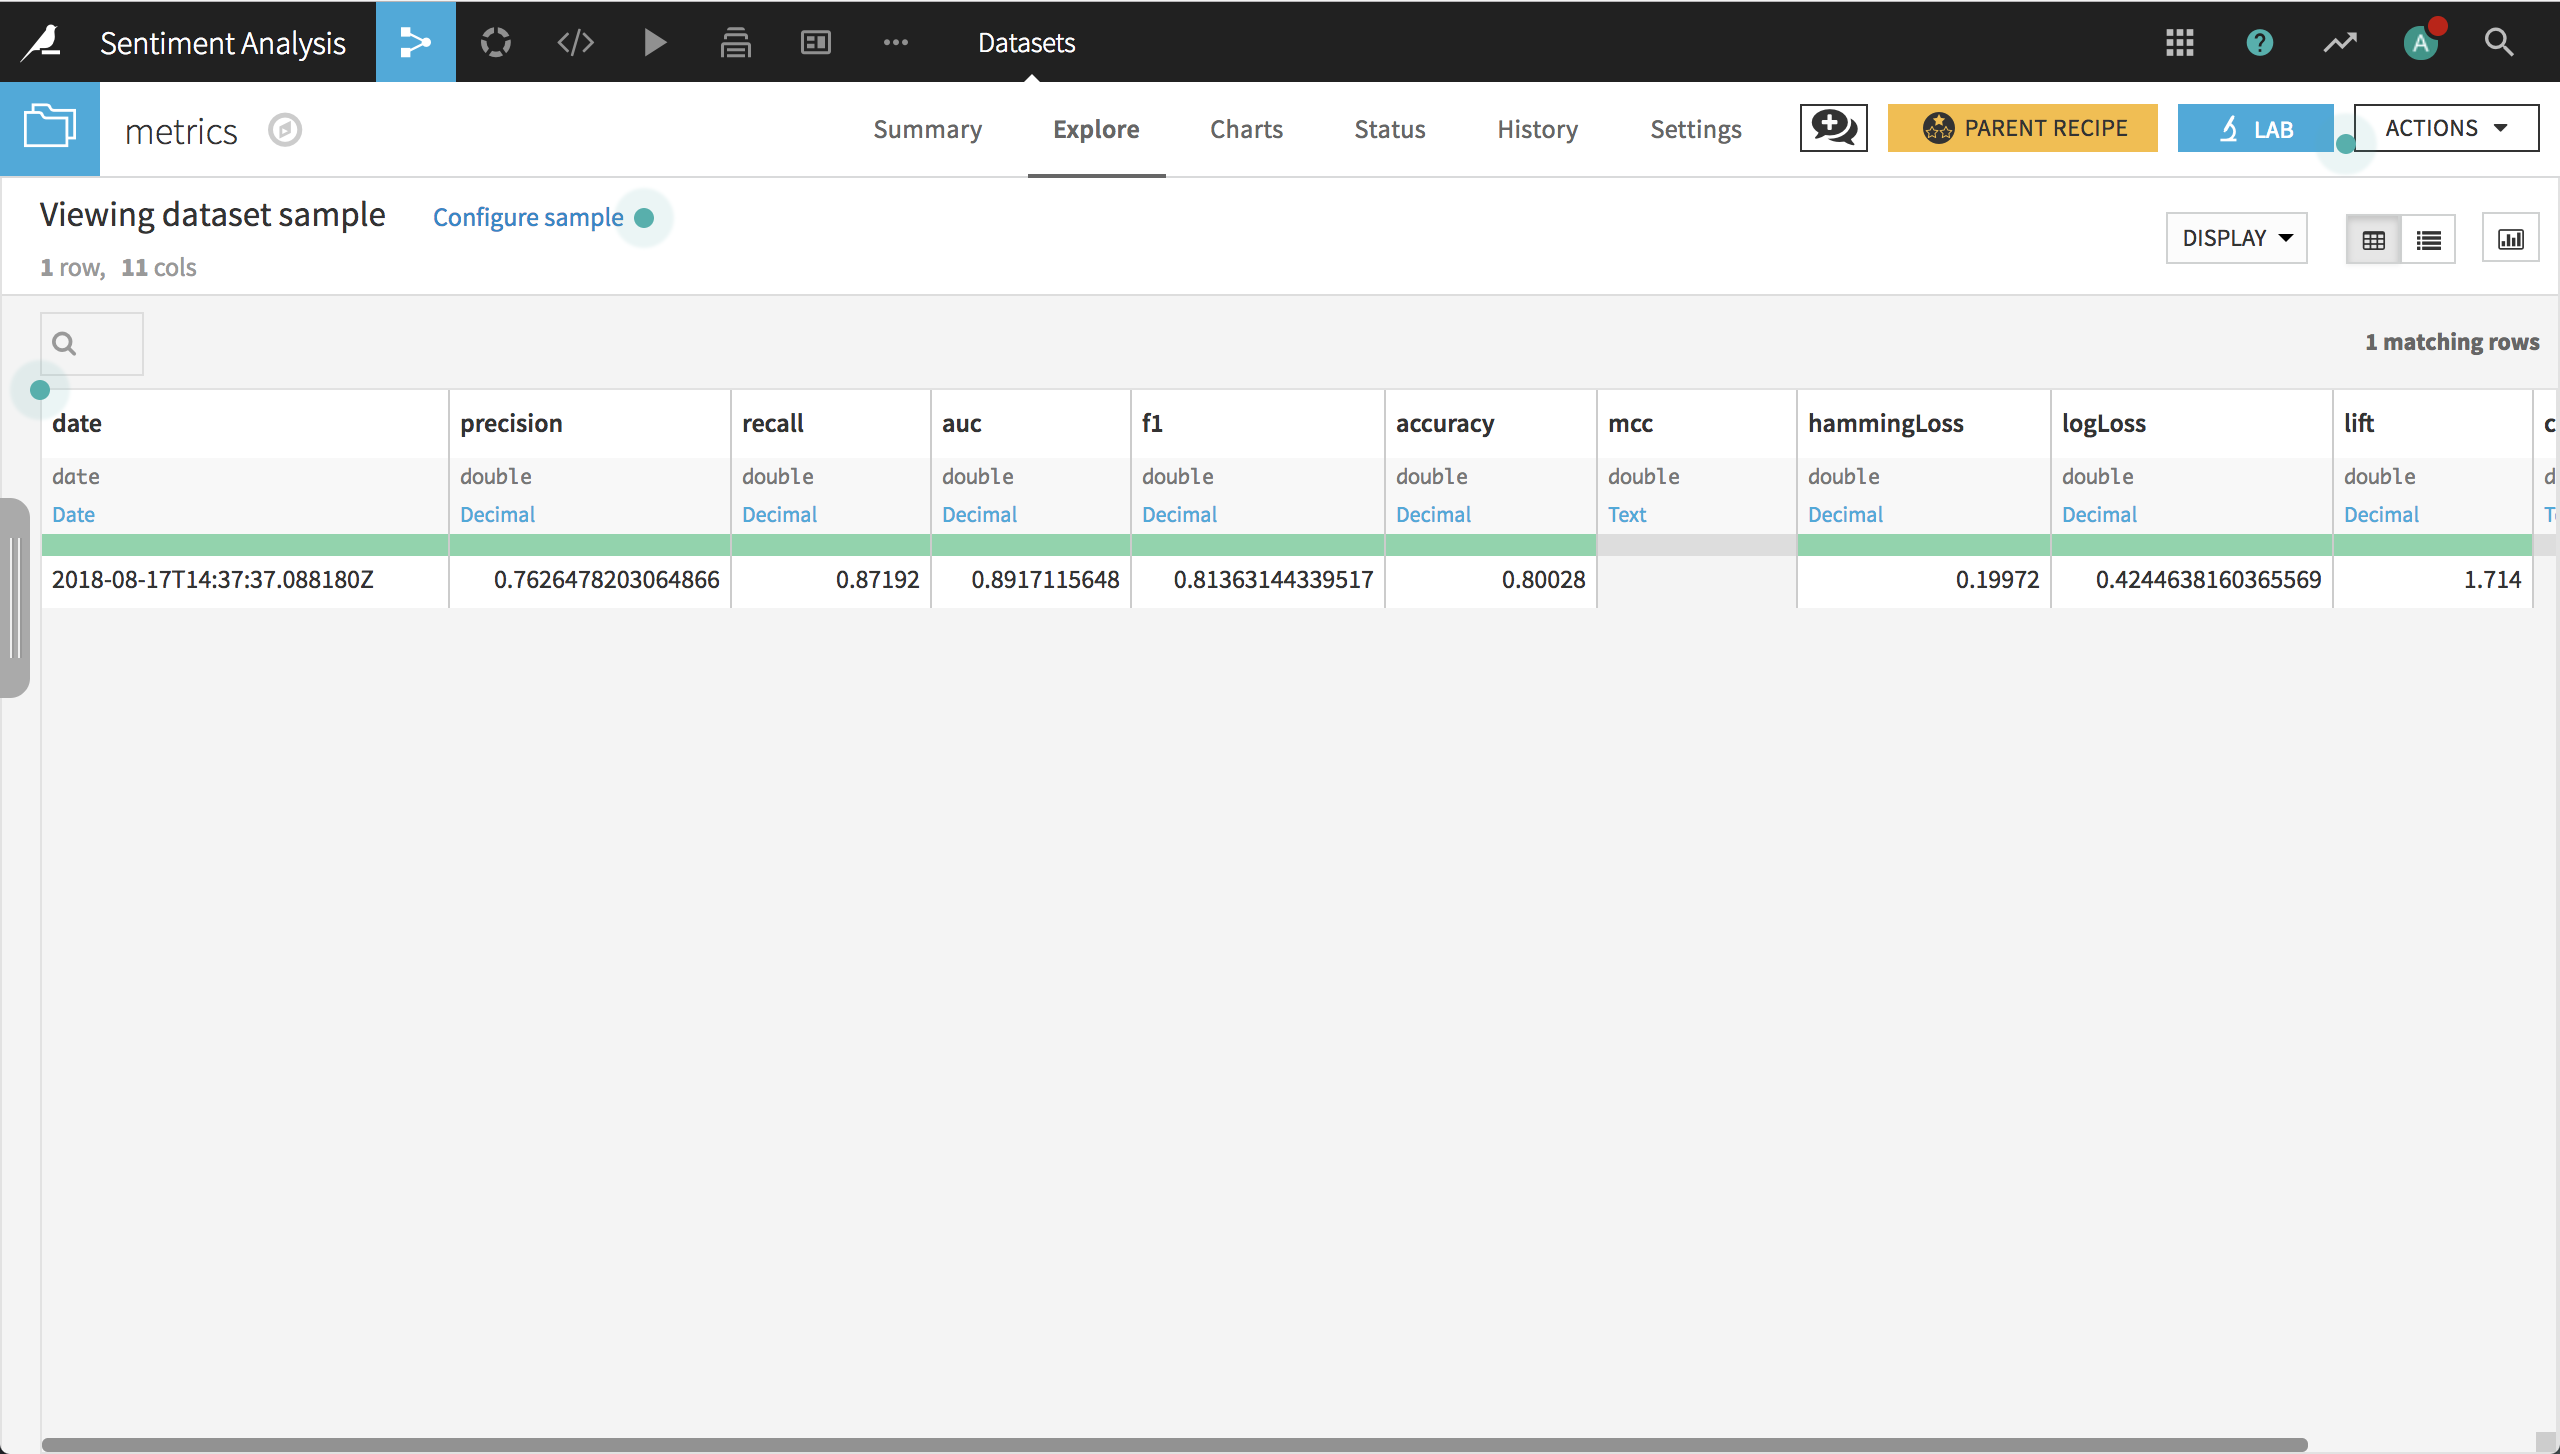
Click Train and, when complete, deploy the model to the flow, create an evaluation recipe from the model, and evaluate on the test data. In the resulting dataset, you can see that the model has an accuracy of about 80% and an AUC of about 0.89. It’s possible that we can improve on these results by using pre-trained word embeddings.
Building a Model using Pre-Trained Word Embeddings
The fastText repository includes a list of links to pre-trained word vectors (or embeddings) (P. Bojanowski, E. Grave, A. Joulin, T. Mikolov, Enriching Word Vectors with Subword Information). In order to use the fastText library with our model, there are a few preliminary steps:
Download the English bin+text word vector and unzip the archive
Create a folder in the project called fastText_embeddings and add the wiki.en.bin file to it
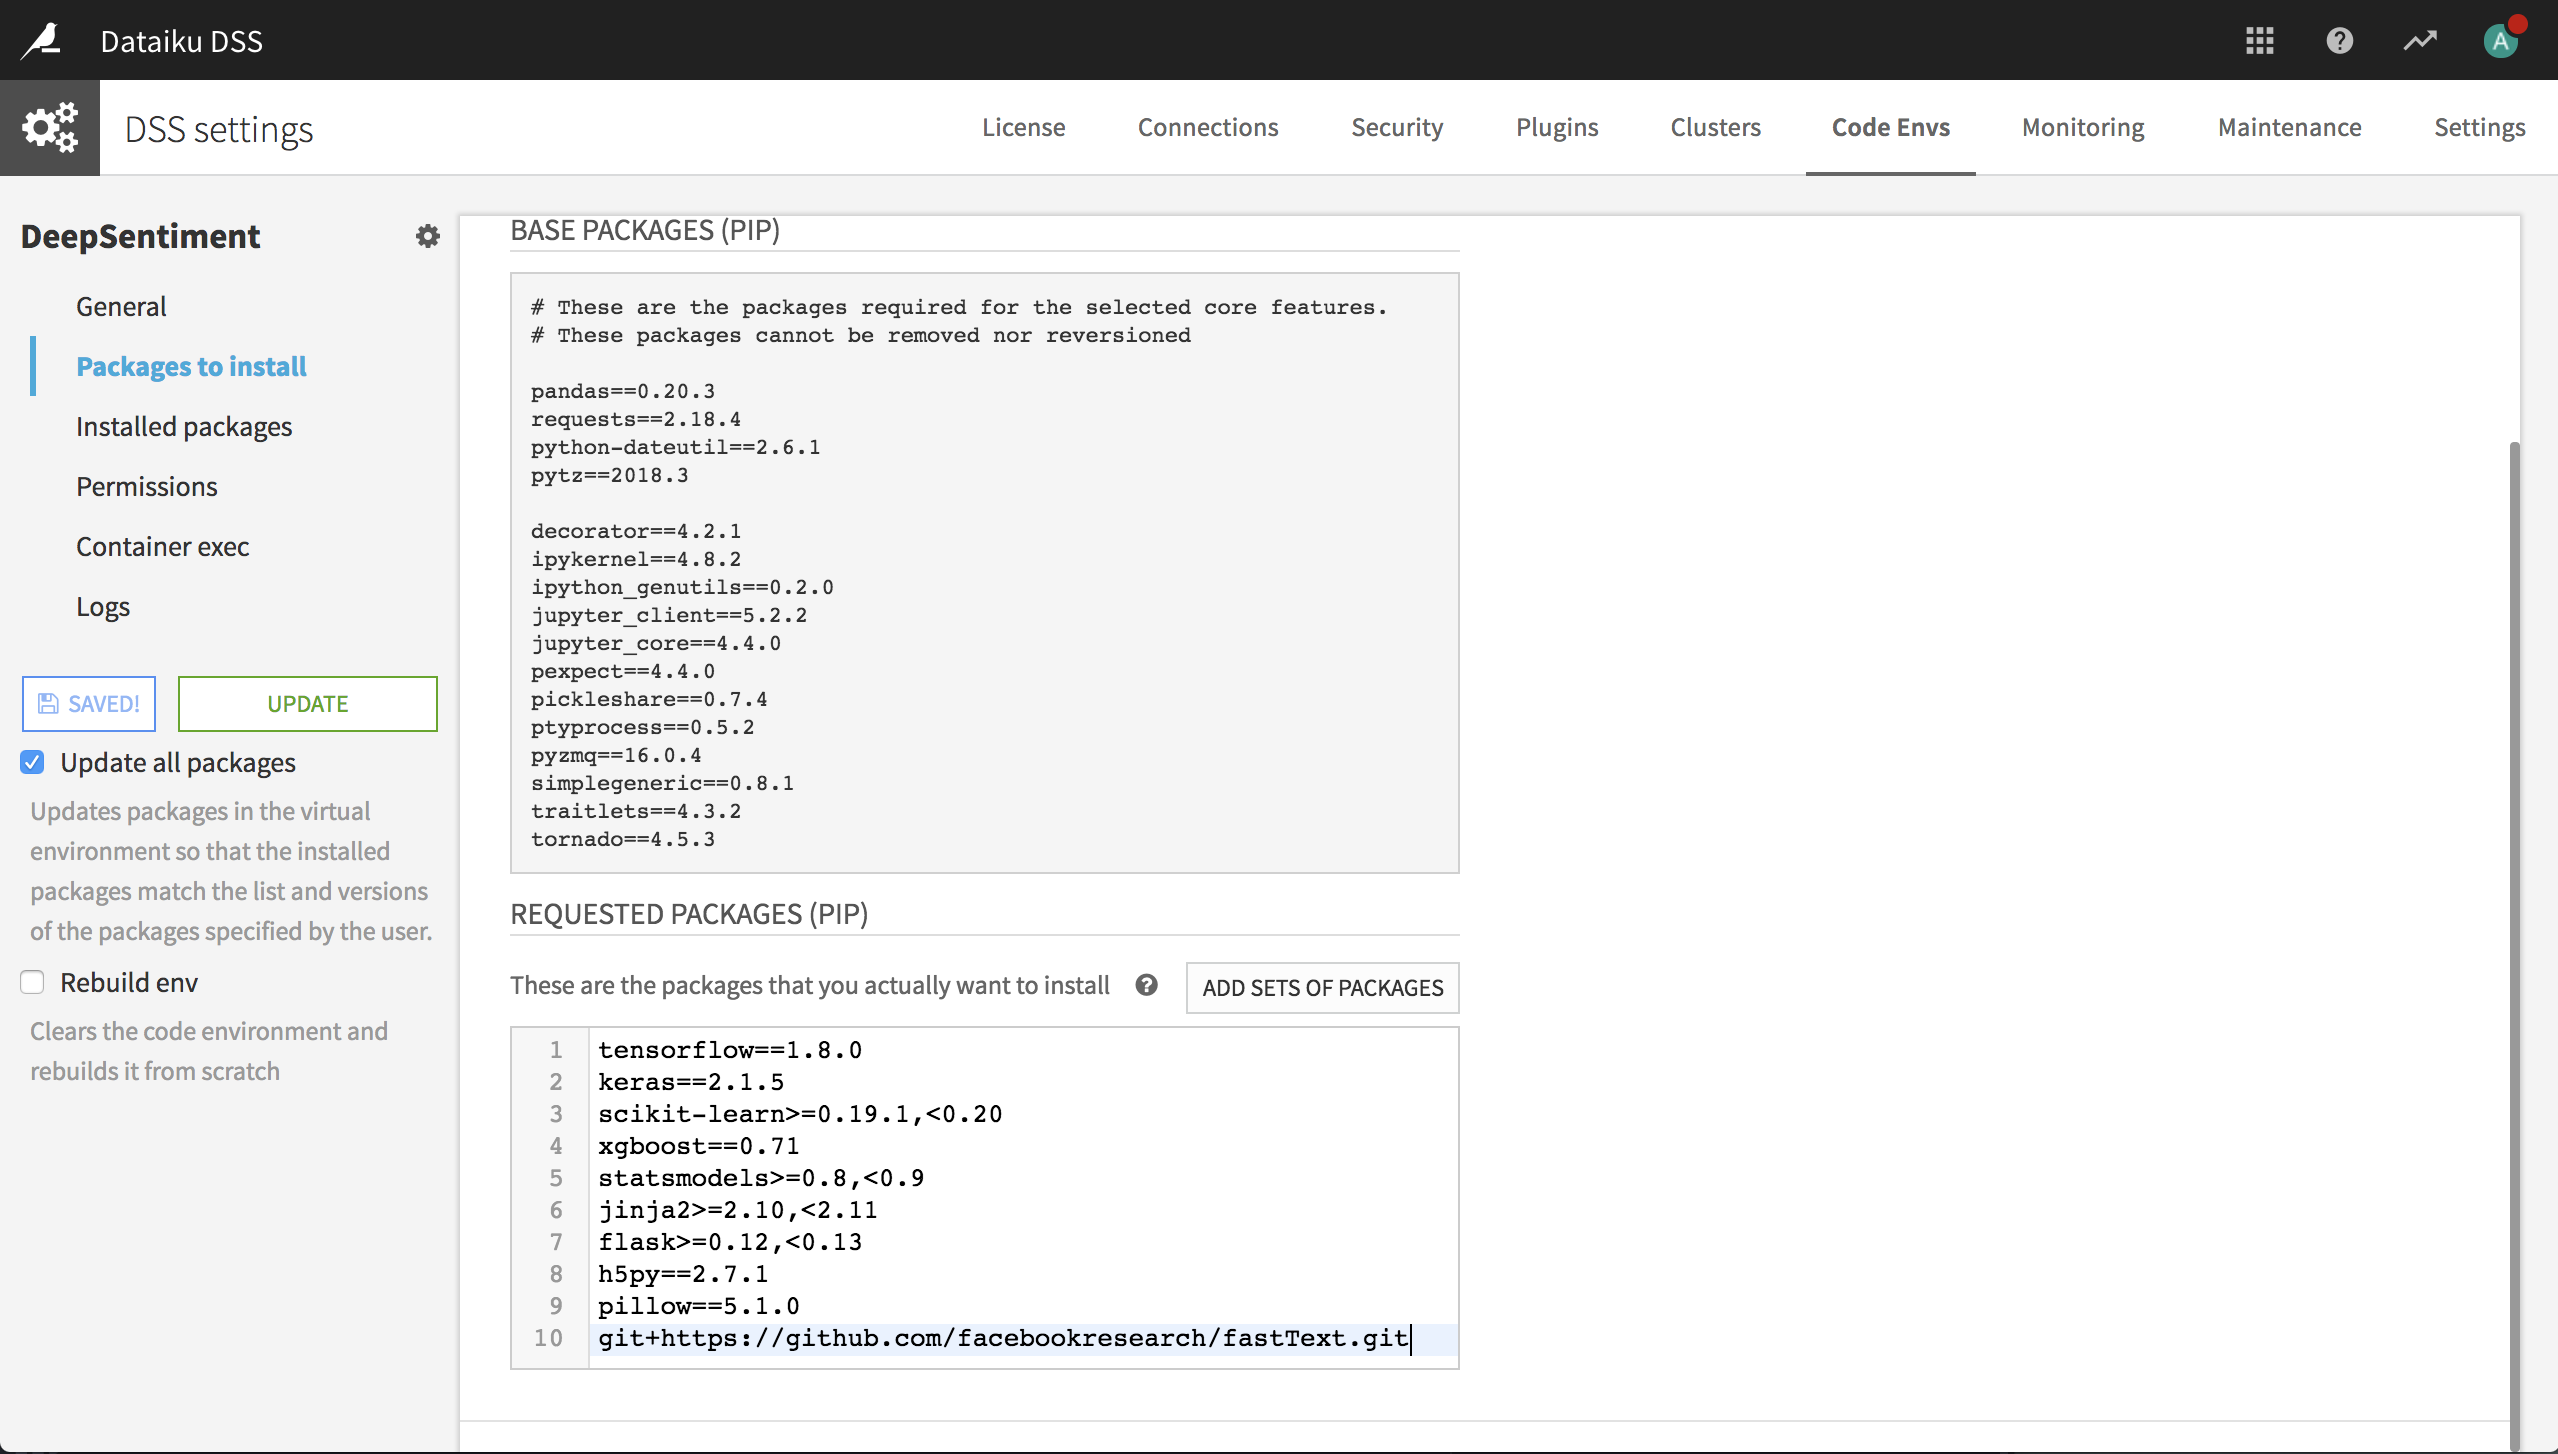
Add the fastText library to your deep learning code environment (or create a new deep learning code environment that includes the fastText library). You can add it with
git+https://github.com/facebookresearch/fastText.gitin the Requested Packages list, as shown in the following screenshot.
Features Handling
In the Features Handling panel of the Design for our deep learning ML task, add the following lines to the custom processing of the text input.
from dataiku.doctor.deep_learning.shared_variables import set_variable
set_variable("tokenizer_processor", processor)
Model Architecture
We need to make few changes. Add the following imports to the top of the code.
import dataiku
from dataiku.doctor.deep_learning.shared_variables import get_variable

import os
import fasttext
import numpy as np
Within the build_model() specification, add the code for loading the embeddings and making the embedding matrix. This needs to occur before the line that defines emb.
folder = dataiku.Folder('fastText_embeddings')
folder_path = folder.get_path()

embedding_size = 300
embedding_model_path = os.path.join(folder_path, 'wiki.en.bin')
embedding_model = fasttext.load_model(embedding_model_path)
processor = get_variable("tokenizer_processor")

sorted_word_index = sorted(processor.tokenizer.word_index.items(),
                           key=lambda item: item[1])[:vocabulary_size-1]

embedding_matrix = np.zeros((vocabulary_size, embedding_size))
for word, i in sorted_word_index:
    embedding_matrix[i] = embedding_model.get_word_vector(word)
Change the definition of the embedding layer as follows, in order to use the fastText pre-trained word embeddings.
emb = Embedding(vocabulary_size,
  embedding_size,
  input_length=text_length,
  weights=[embedding_matrix],
  trainable=False)(text_input)
Change the second MaxPooling layer for a GlobalMaxPooling layer.
x = GlobalMaxPooling1D()(x)
Finally, remove the x = Flatten()(x) line.
Model results
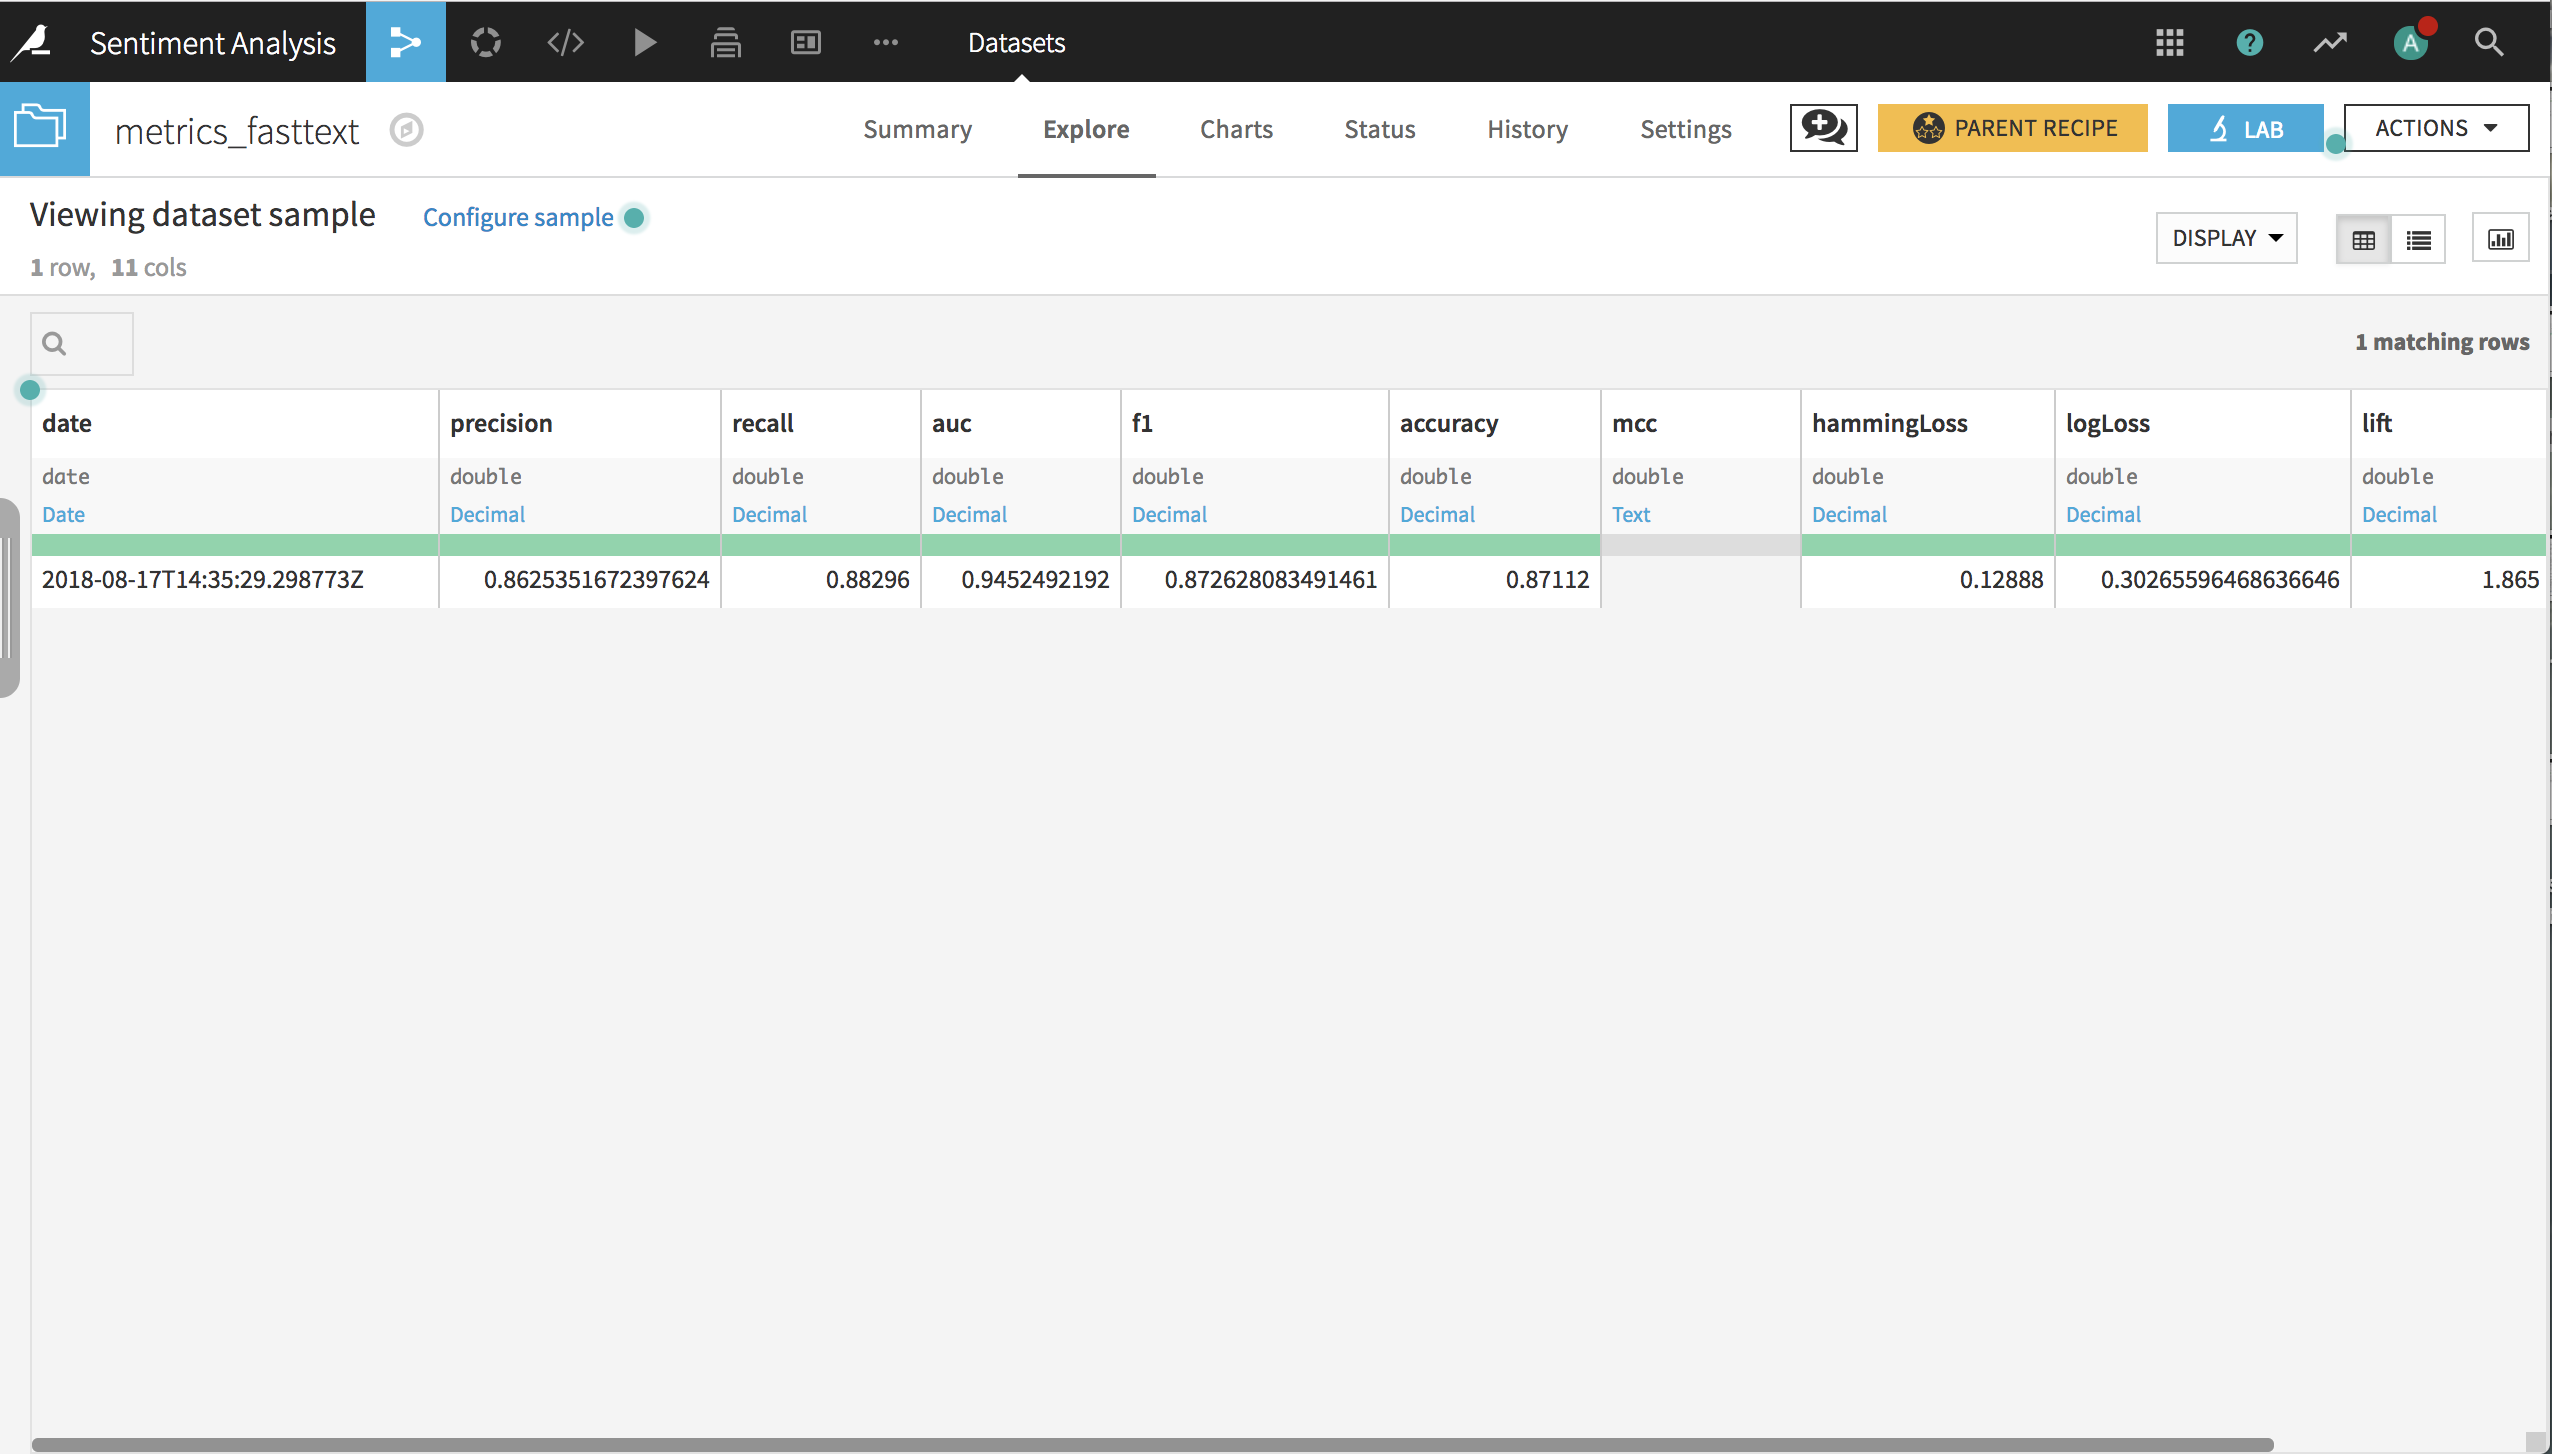
Click Train and, when complete, redeploy the model to the flow, and reevaluate on the test data. In the resulting dataset, you can see that the model has an accuracy of about 87% and an AUC of about 0.94.
Wrap Up
See a completed version of this project on the Dataiku gallery.
See the Dataiku DSS reference documentation on deep learning.