How-To: Filter and Process Dates Interactively
This how-to article gives a practical step-by-step overview of the interactive date filter released in Dataiku DSS 9, as well as its associated processors, which facilitate and improve date handling.
Prerequisites
Some familiarity with basic data preparation in Dataiku DSS (we recommend having completed the Core Concepts course series beforehand);
An instance of Dataiku DSS - version 9.0 and above.
Explore Date Columns With Interactive Date Ranges
To explore and filter a preview of a dataset with interactive date ranges, click the dropdown arrow of a date column and select Filter.
The interactive filter allows you to view a subset of the dataset filtered on an exact date and time range, and enter the range values according to your preferred time zone.

In addition, the filter allows you to filter on a relative range or a date part.
To filter on a relative range, simply click the Filter on dropdown and select Relative range.
By default, the Year date part is selected. The filter displays relative range options such as “This Year”, “Last X Year(s)”, and “Next X Year(s)”. You can change the date part and the length of the selected period. For example, you can choose to display rows from the last 9 months, as shown below.
The number of rows for each date part (in this case, month) is also displayed next to the date part options, between parenthesis.
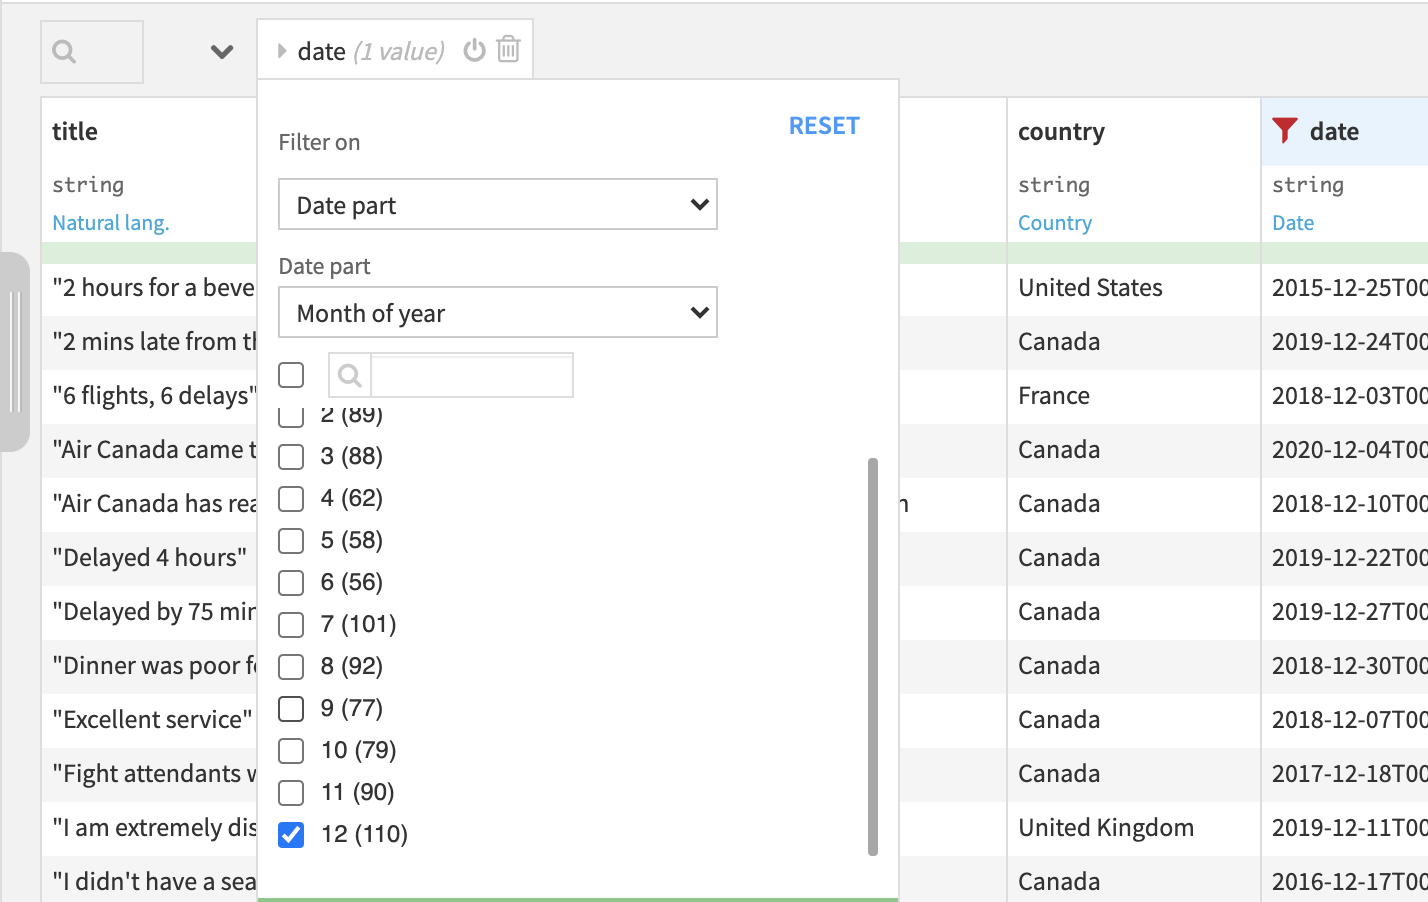
This type of filtering can be useful to get a quick overview of the number of rows in a given recurring period. In the example shown above, which is using flight reviews data, we choose to display only the reviews submitted in December to see how the busy holiday season impacts travellers’ flying experience.
Filter a Dataset Based on Interactive Date Ranges
In addition to exploring and filtering a dataset sample in the Explore tab, the interactive date filter can also be leveraged within a Prepare recipe.
The interactive date filter can be used in the dataset preview inside a Prepare recipe the same way as in the Explore tab of a dataset. Additionally, selected filters can be easily added as a step in the recipe.
To filter a dataset using the interactive date filter:
Open a Prepare recipe.
Click on the dropdown arrow of a date column and select Filter.
Click the Filter on dropdown and select the filtering type (exact date, relative range, or date part).
Modify the selected time period and its length.
Click + Add as a Step.
In the example shown below, we choose to filter on the relative range Last 2 years.
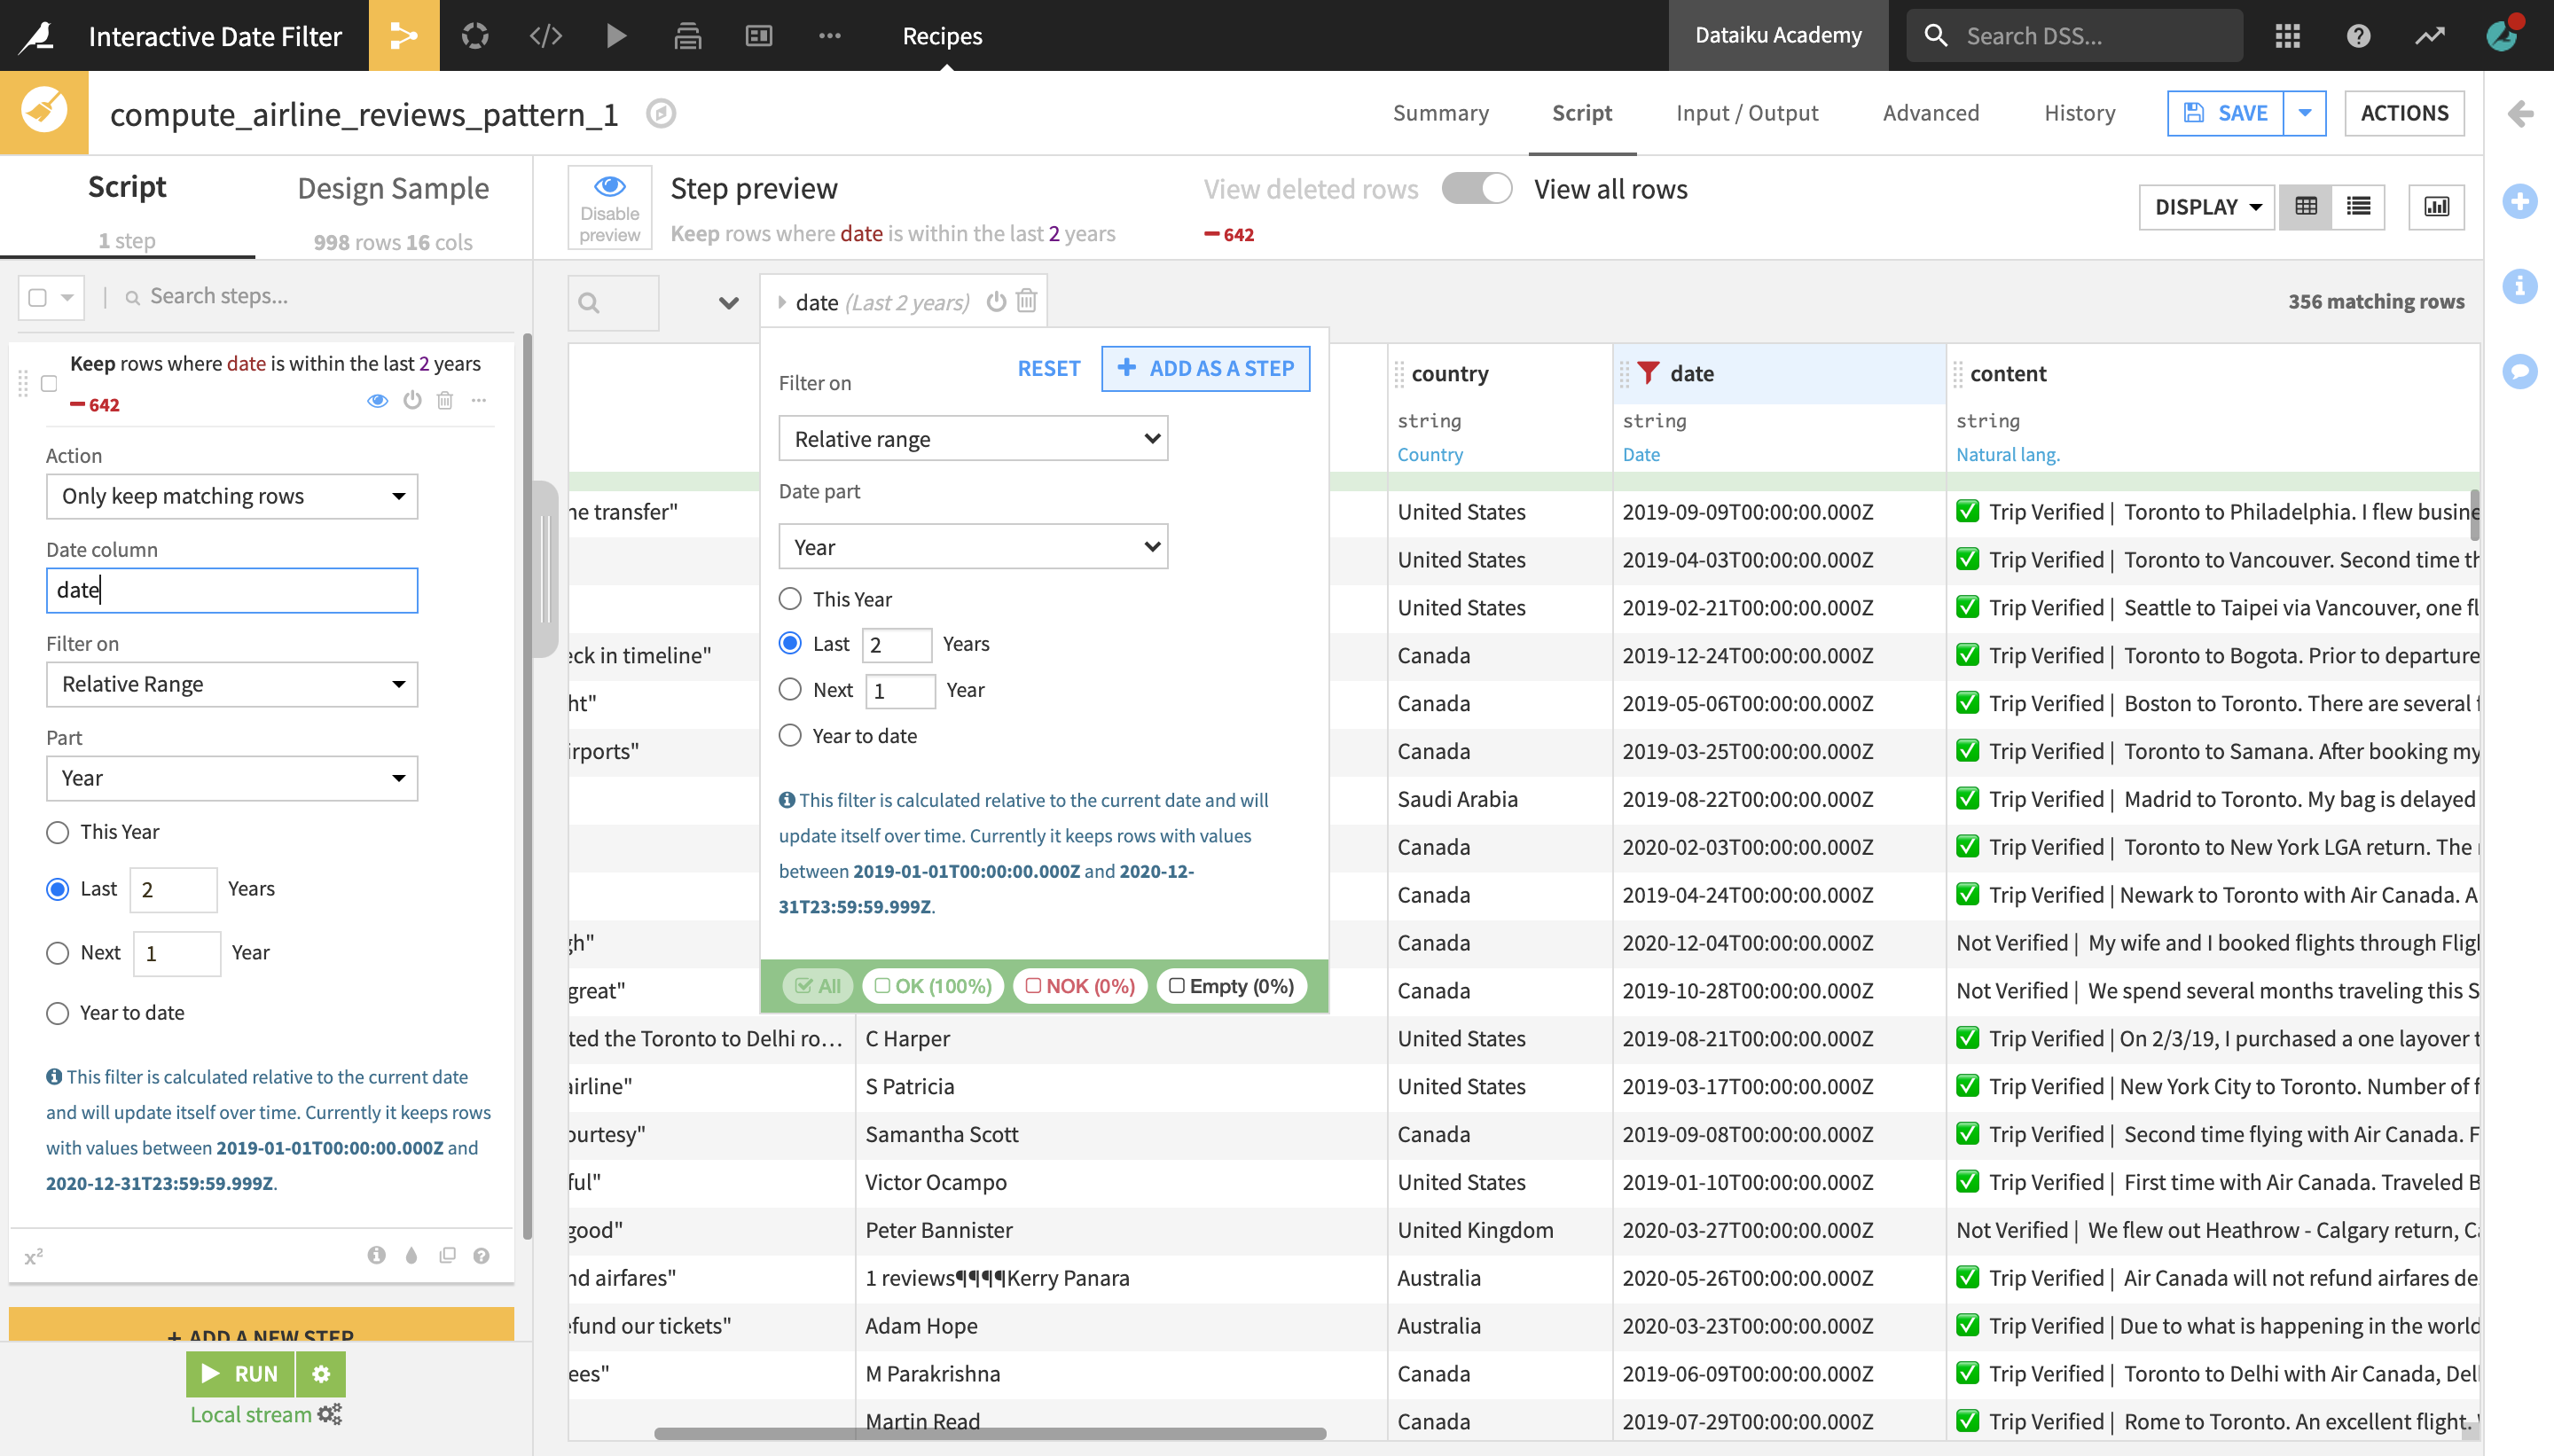
After clicking + Add as a Step, a new step is added to the Prepare recipe script,, which filters the dataset on the relative range we selected. By default, it is set to “Only keep matching rows”, and thus only keeps rows containing reviews from the last 12 months from today’s date.
It is also possible to change the recipe step so that it removes or clears either all matching rows or all non-matching rows.
Increment a Date to Compute a Deadline
In addition to interactive date filtering, Dataiku DSS 9 introduced additional date processing features, such as the Increment date processor, which allows you to compute future (or past) dates based on a user-defined interval.
This processor can be particularly useful for calculating rolling deadlines. Let’s imagine that an airline company wants to use the current flight reviews dataset to attribute a gift voucher to everyone who has submitted a review, and that the voucher would be valid for one year from the date of submission.
As the dates of submission vary for each review, we could calculate this by using a formula, but now it’s even easier to do it with the Increment date processor.
Click + Add a New Step and select Dates > Increment date with a specific value.
In the Column field of the recipe step, select the date column that you want to increment on.
From the Date part dropdown, select the date part that you want to increment on (in this example, we choose Year).
In the Increment field, set the length of the period (in this example, we set it to 1 Year). It is also possible to enter a negative value, if you want to increment a period in the past.
In the Output column field, type the name of the column you want to store the increment date value in (or leave empty to increment in-place).
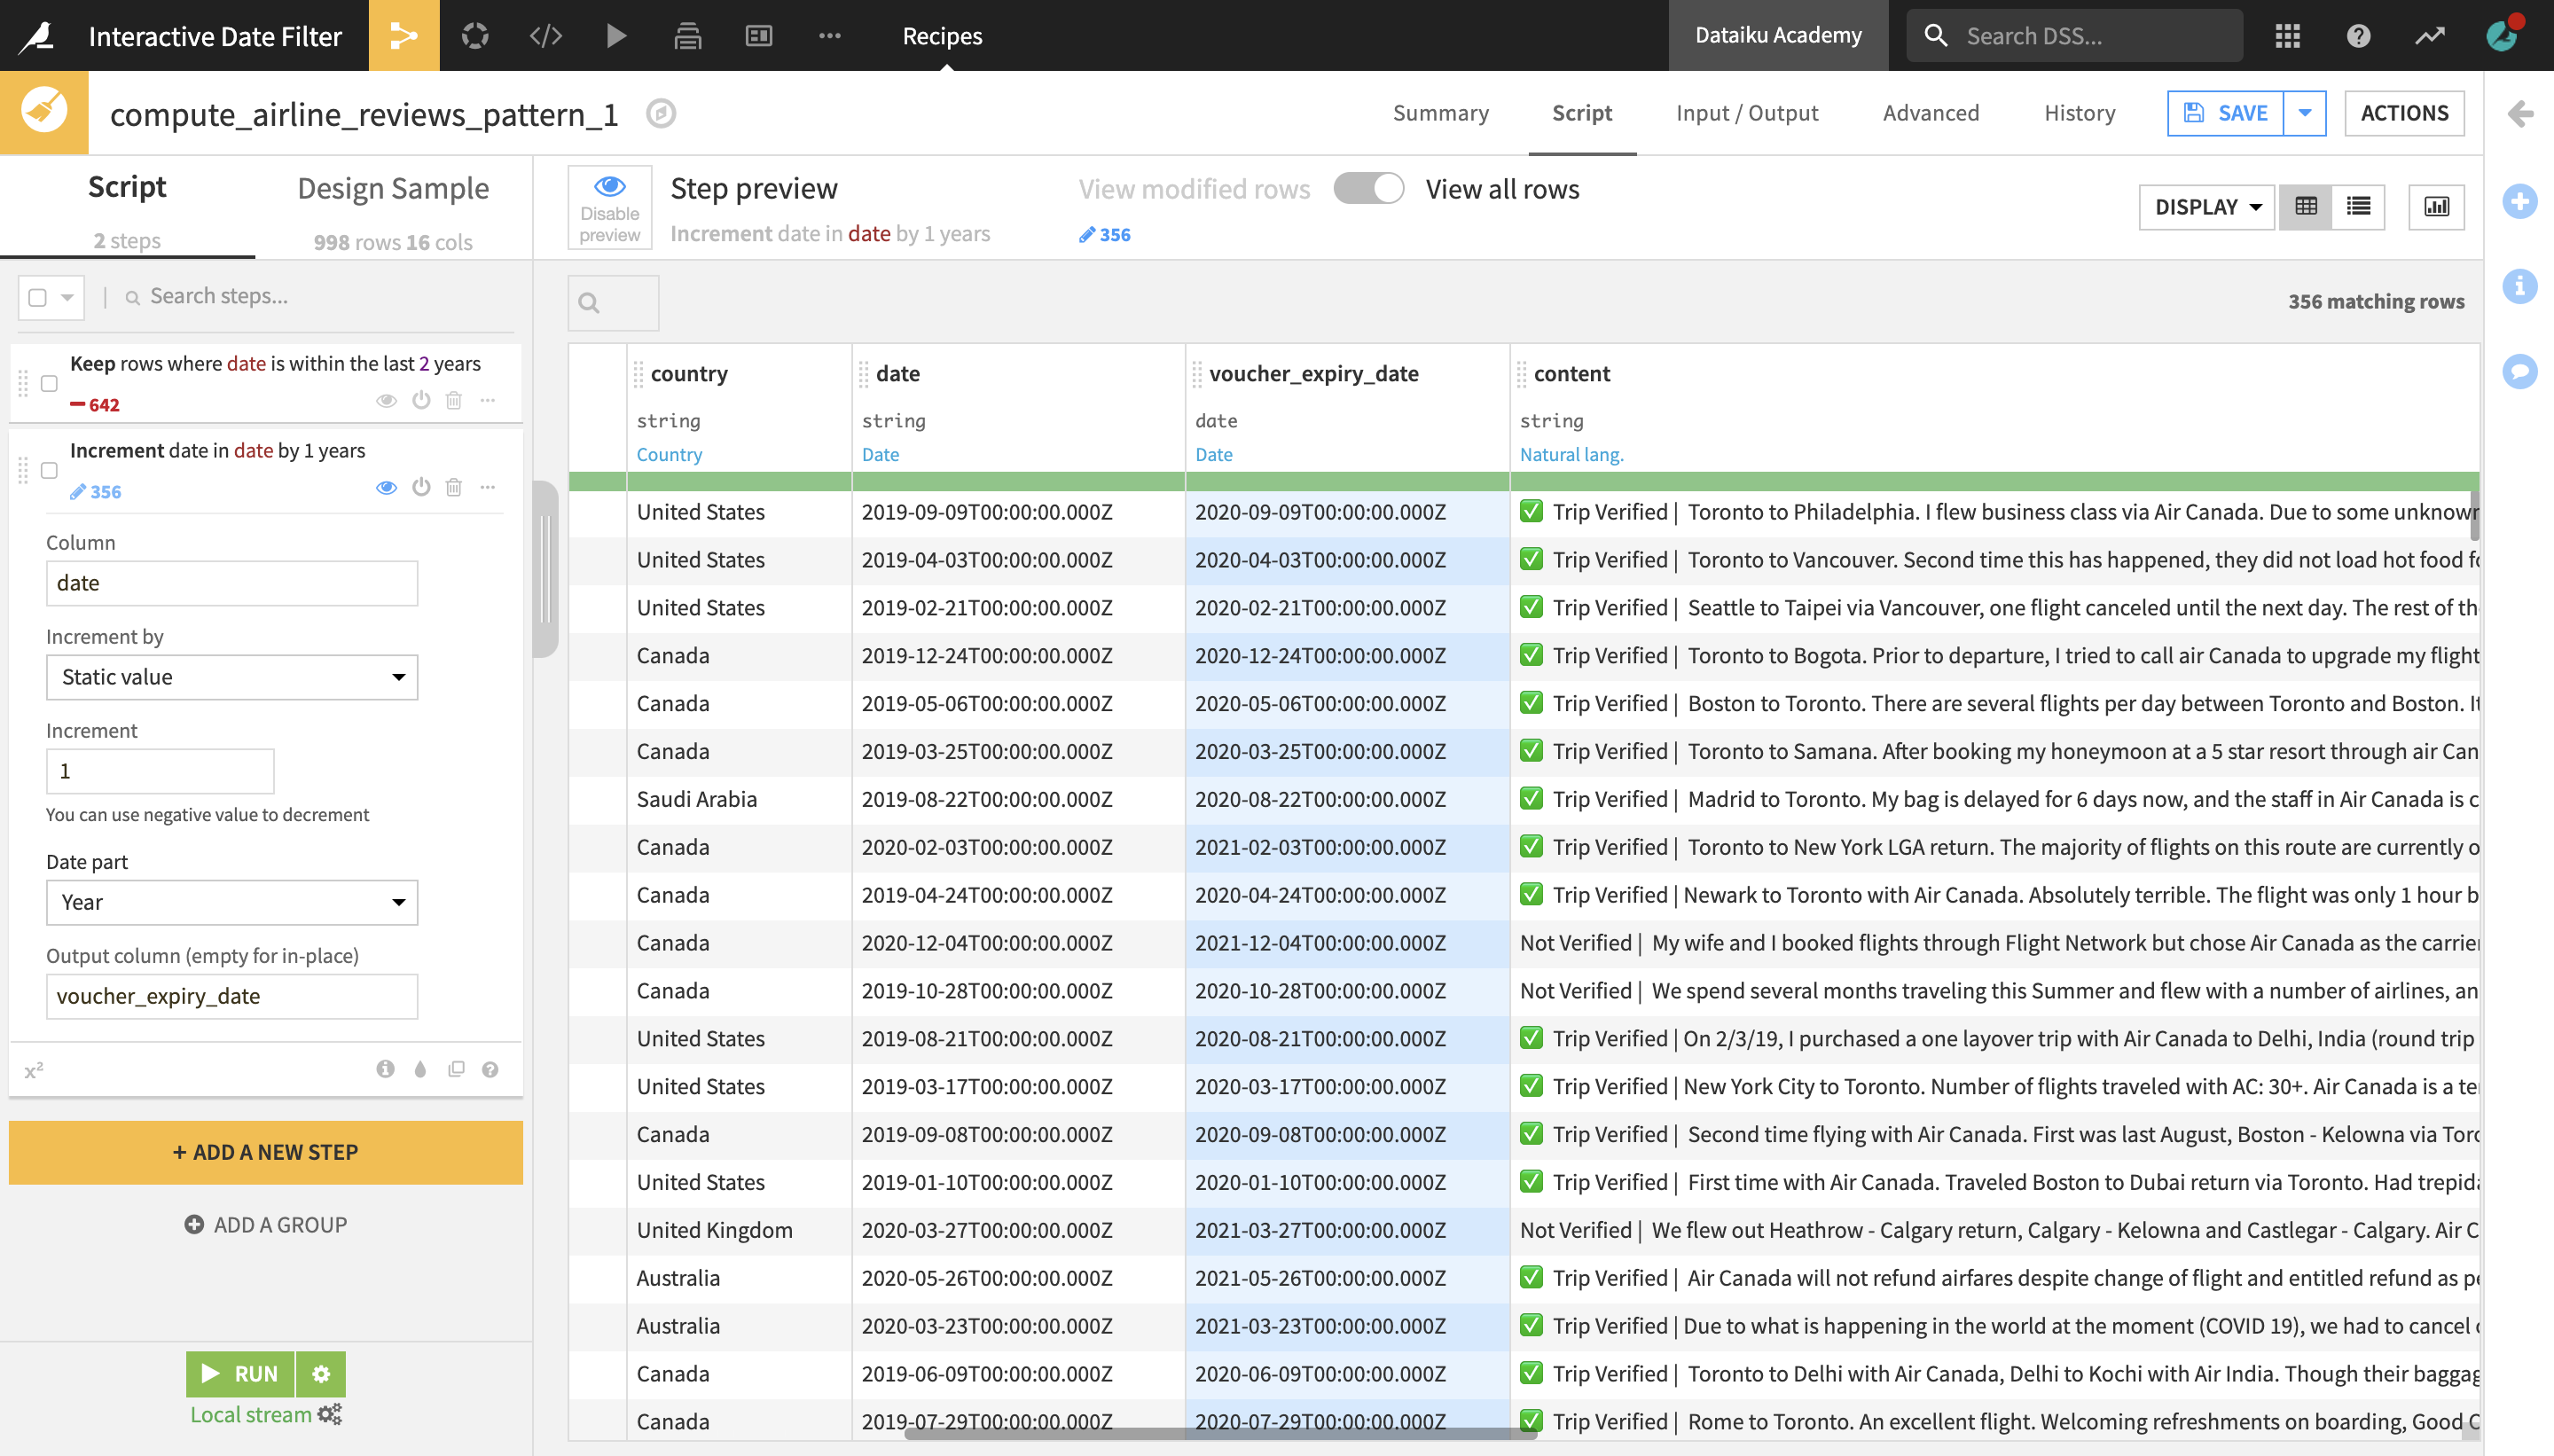
In the example above, we choose to store the output in a new column named voucher_expiry_date, which now appears next to the date column and contains, for each row, a timestamp that is exactly one year after the date stored in the date column.
Truncate a Date
Another useful date processor introduced in Dataiku DSS 9 is the Truncate date processor, which truncates a date based on a given date part. This can be useful to remove the date parts that we don’t need, for example to easily compute the first or last date of a given period.
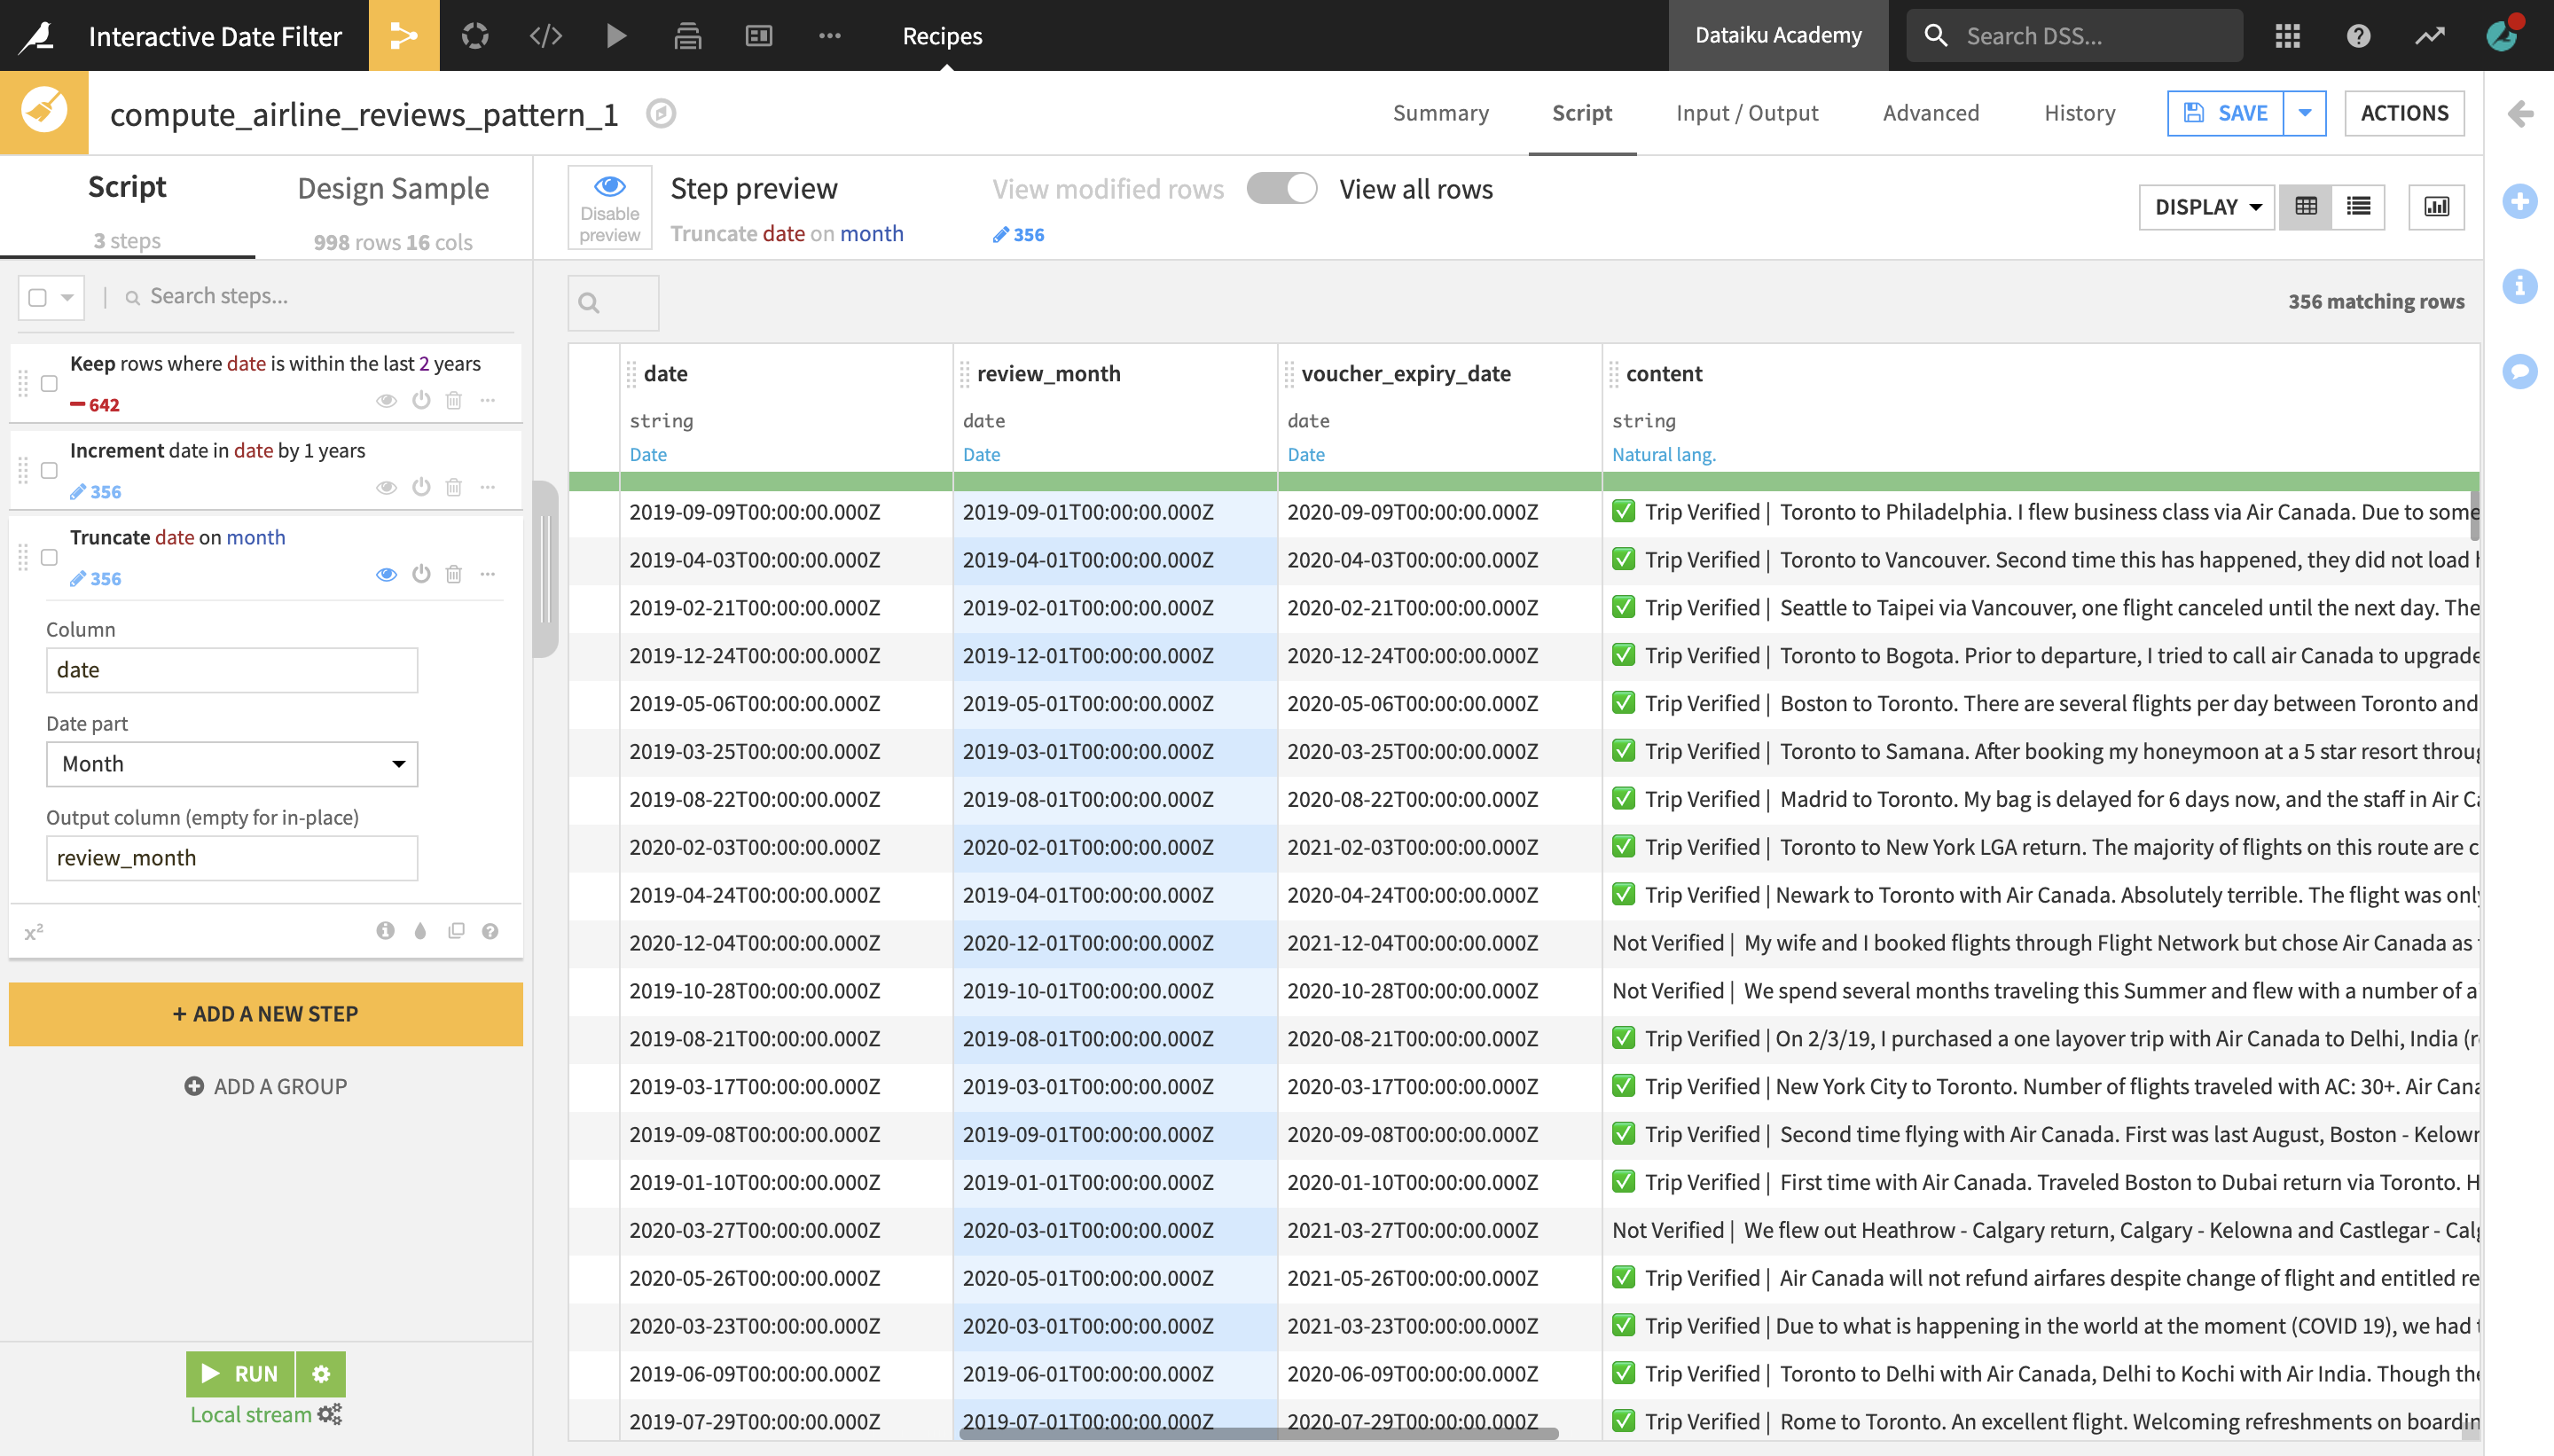
Click + Add a New Step and select Dates > Truncate date at a specific value;
In the Column field of the recipe step, select the date column that you wish to truncate;
From the Date part dropdown, select your preferred date part (in the example below, we select Month);
In the Output column field, type the name of the column you wish to store the truncated date value in (in this example, we choose to store it in a new column named review_month).