Hands-On Tutorial: Custom Metrics, Checks & Scenarios (Part 3)
In the sections above, we saw how to use built-in metrics, checks, and scenarios to automate workflows in Dataiku DSS.
The built-in options cover a wide range of common actions. However, for certain objectives, you may need greater flexibility than what is possible with the built-in tools. In these cases, you can customize all of these components with your own code.
Create a Custom Metric
In addition to the built-in probes, we can also create our own:
Python probes,
SQL query probes (where applicable), or
a custom probe from a plugin.
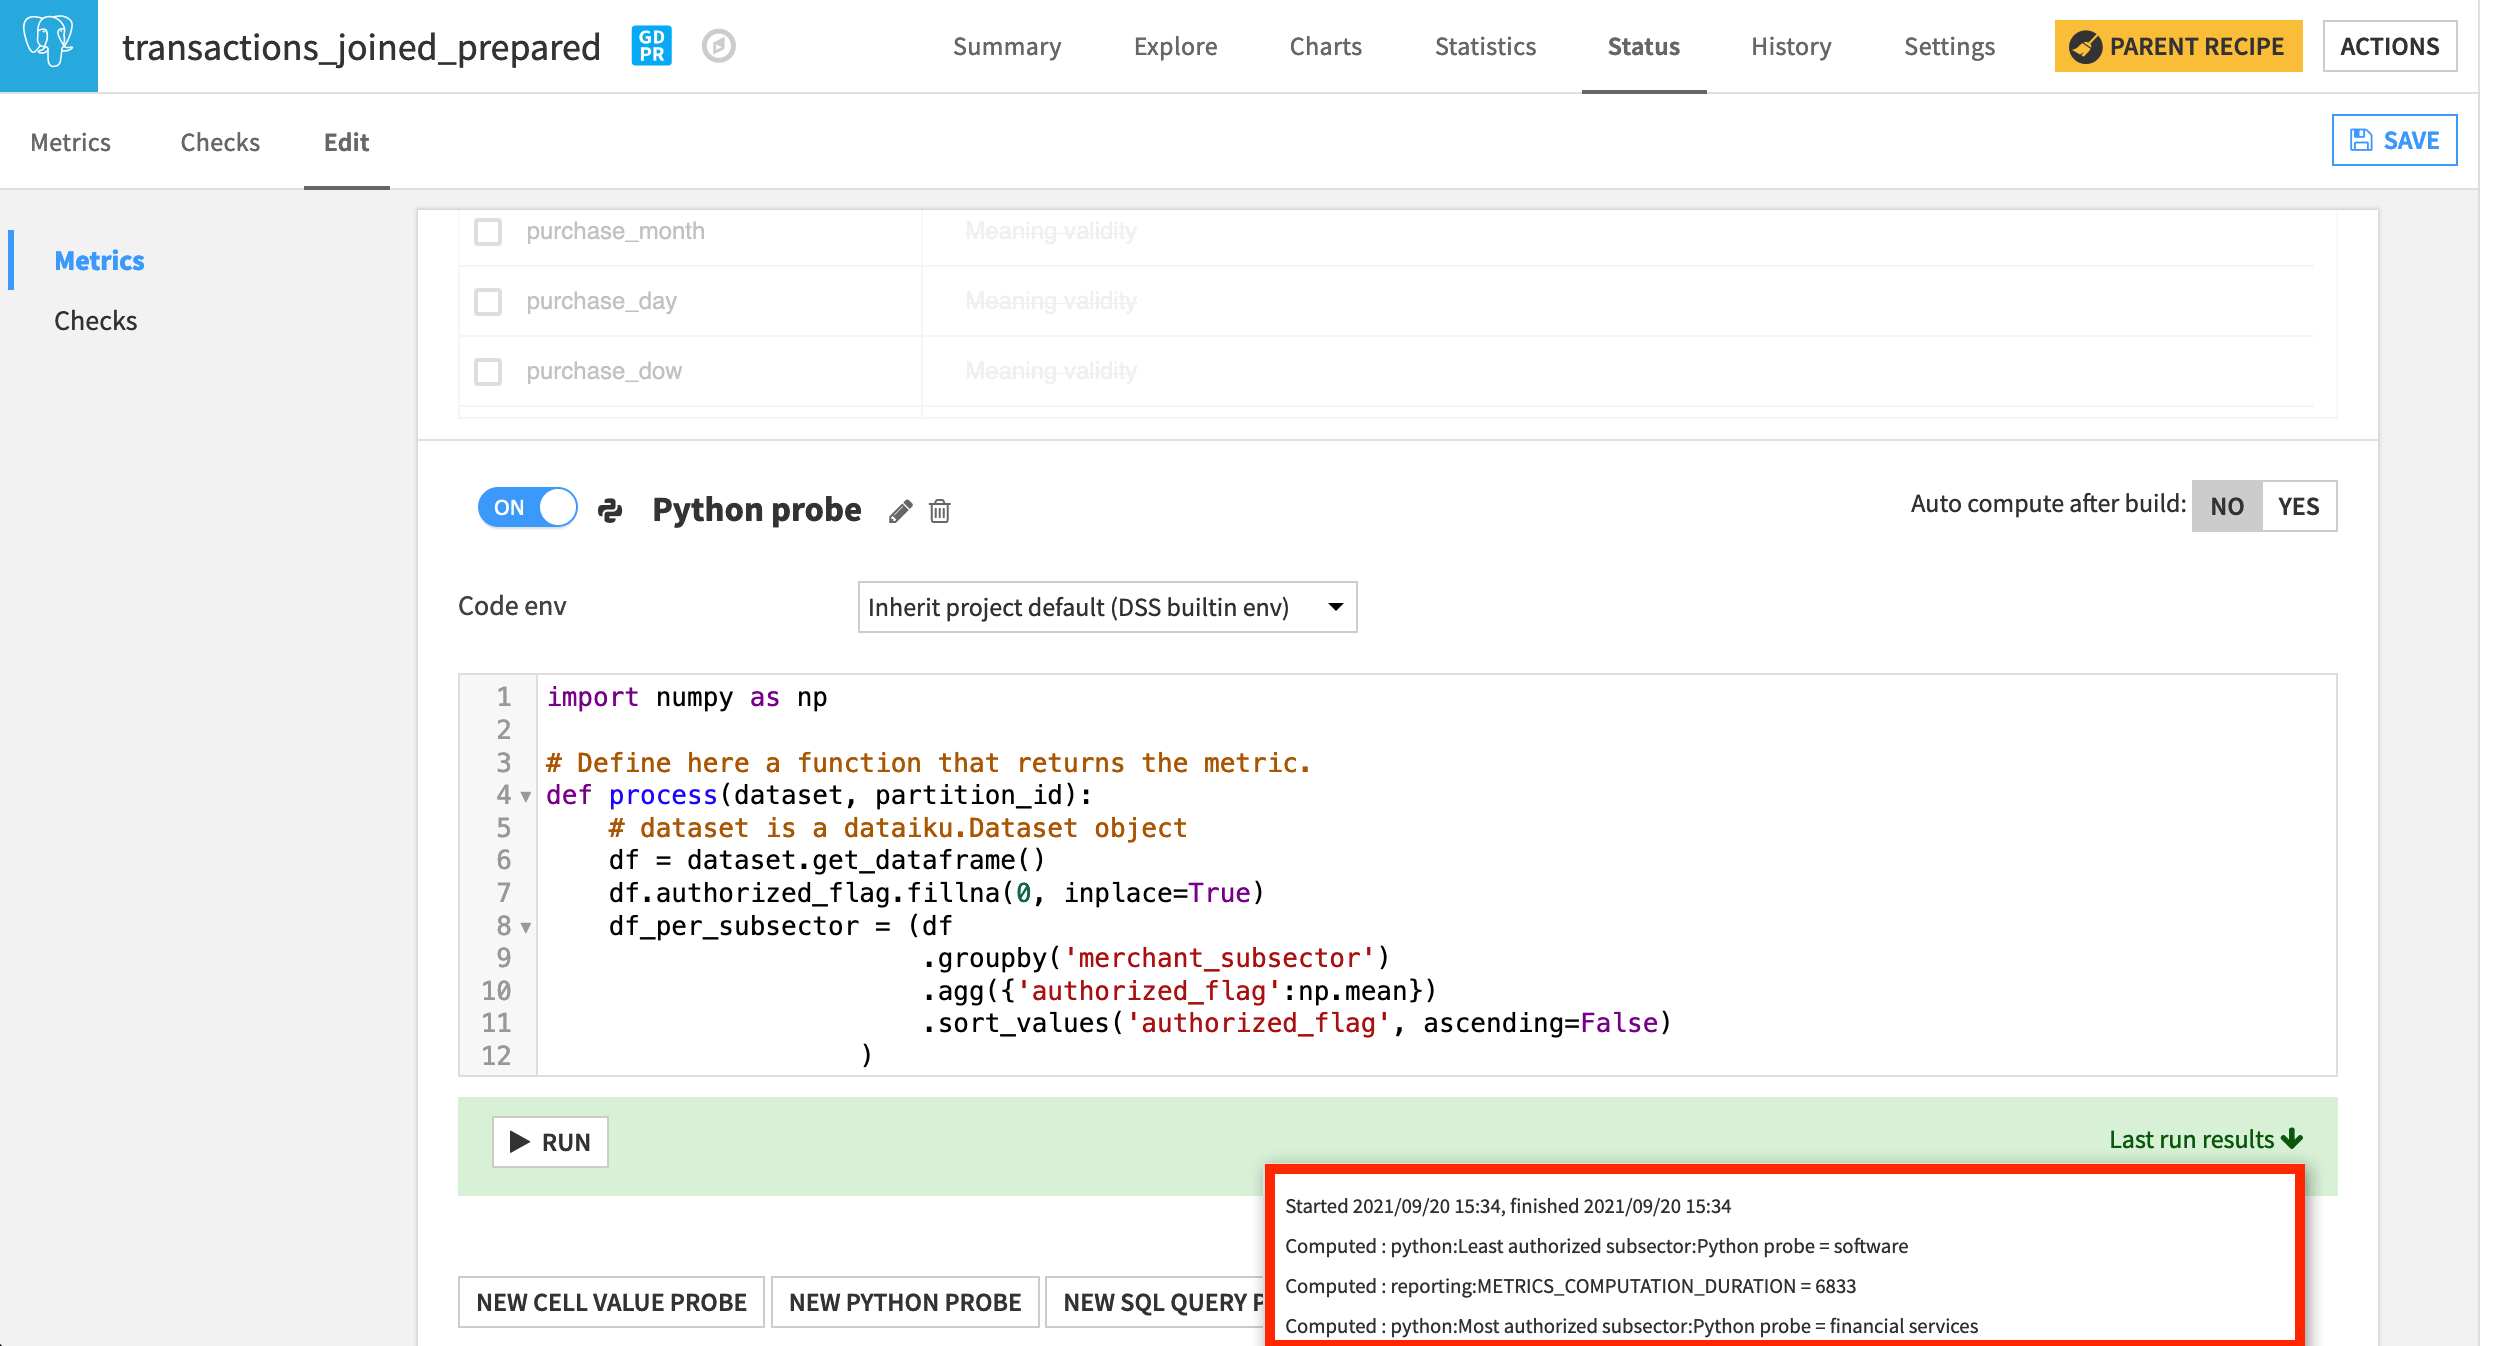
For example, we may want a metric to track the most and least authorized merchant subsectors. Let’s achieve this with a Python probe.
In the Status tab of the transactions_joined_prepared dataset, navigate to the Edit subtab.
At the bottom of the Metrics panel, create a New Python Probe.
Turn it on, and replace the starter code with the following snippet.
Note
In this tutorial, we’ll just copy and paste code snippets for the purposes of demonstration, but in a real situation, you’d want to test it interactively in a code notebook.
import numpy as np

# Define here a function that returns the metric.
def process(dataset, partition_id):
    # dataset is a dataiku.Dataset object
    df = dataset.get_dataframe()
    df.authorized_flag.fillna(0, inplace=True)
    df_per_subsector = (df
                        .groupby('merchant_subsector')
                        .agg({'authorized_flag':np.mean})
                        .sort_values('authorized_flag', ascending=False)
                    )

    most_authorized_subsector = df_per_subsector.index[0]
    least_authorized_subsector = df_per_subsector.index[-1]
    return {'Most authorized subsector' : most_authorized_subsector,
            'Least authorized subsector' : least_authorized_subsector}
Run the probe. The most authorized subsector should be “financial services”, and the least should be “software”.
Create a Custom Check
The same kind of flexibility code brings to custom metrics can also be brought to custom checks.
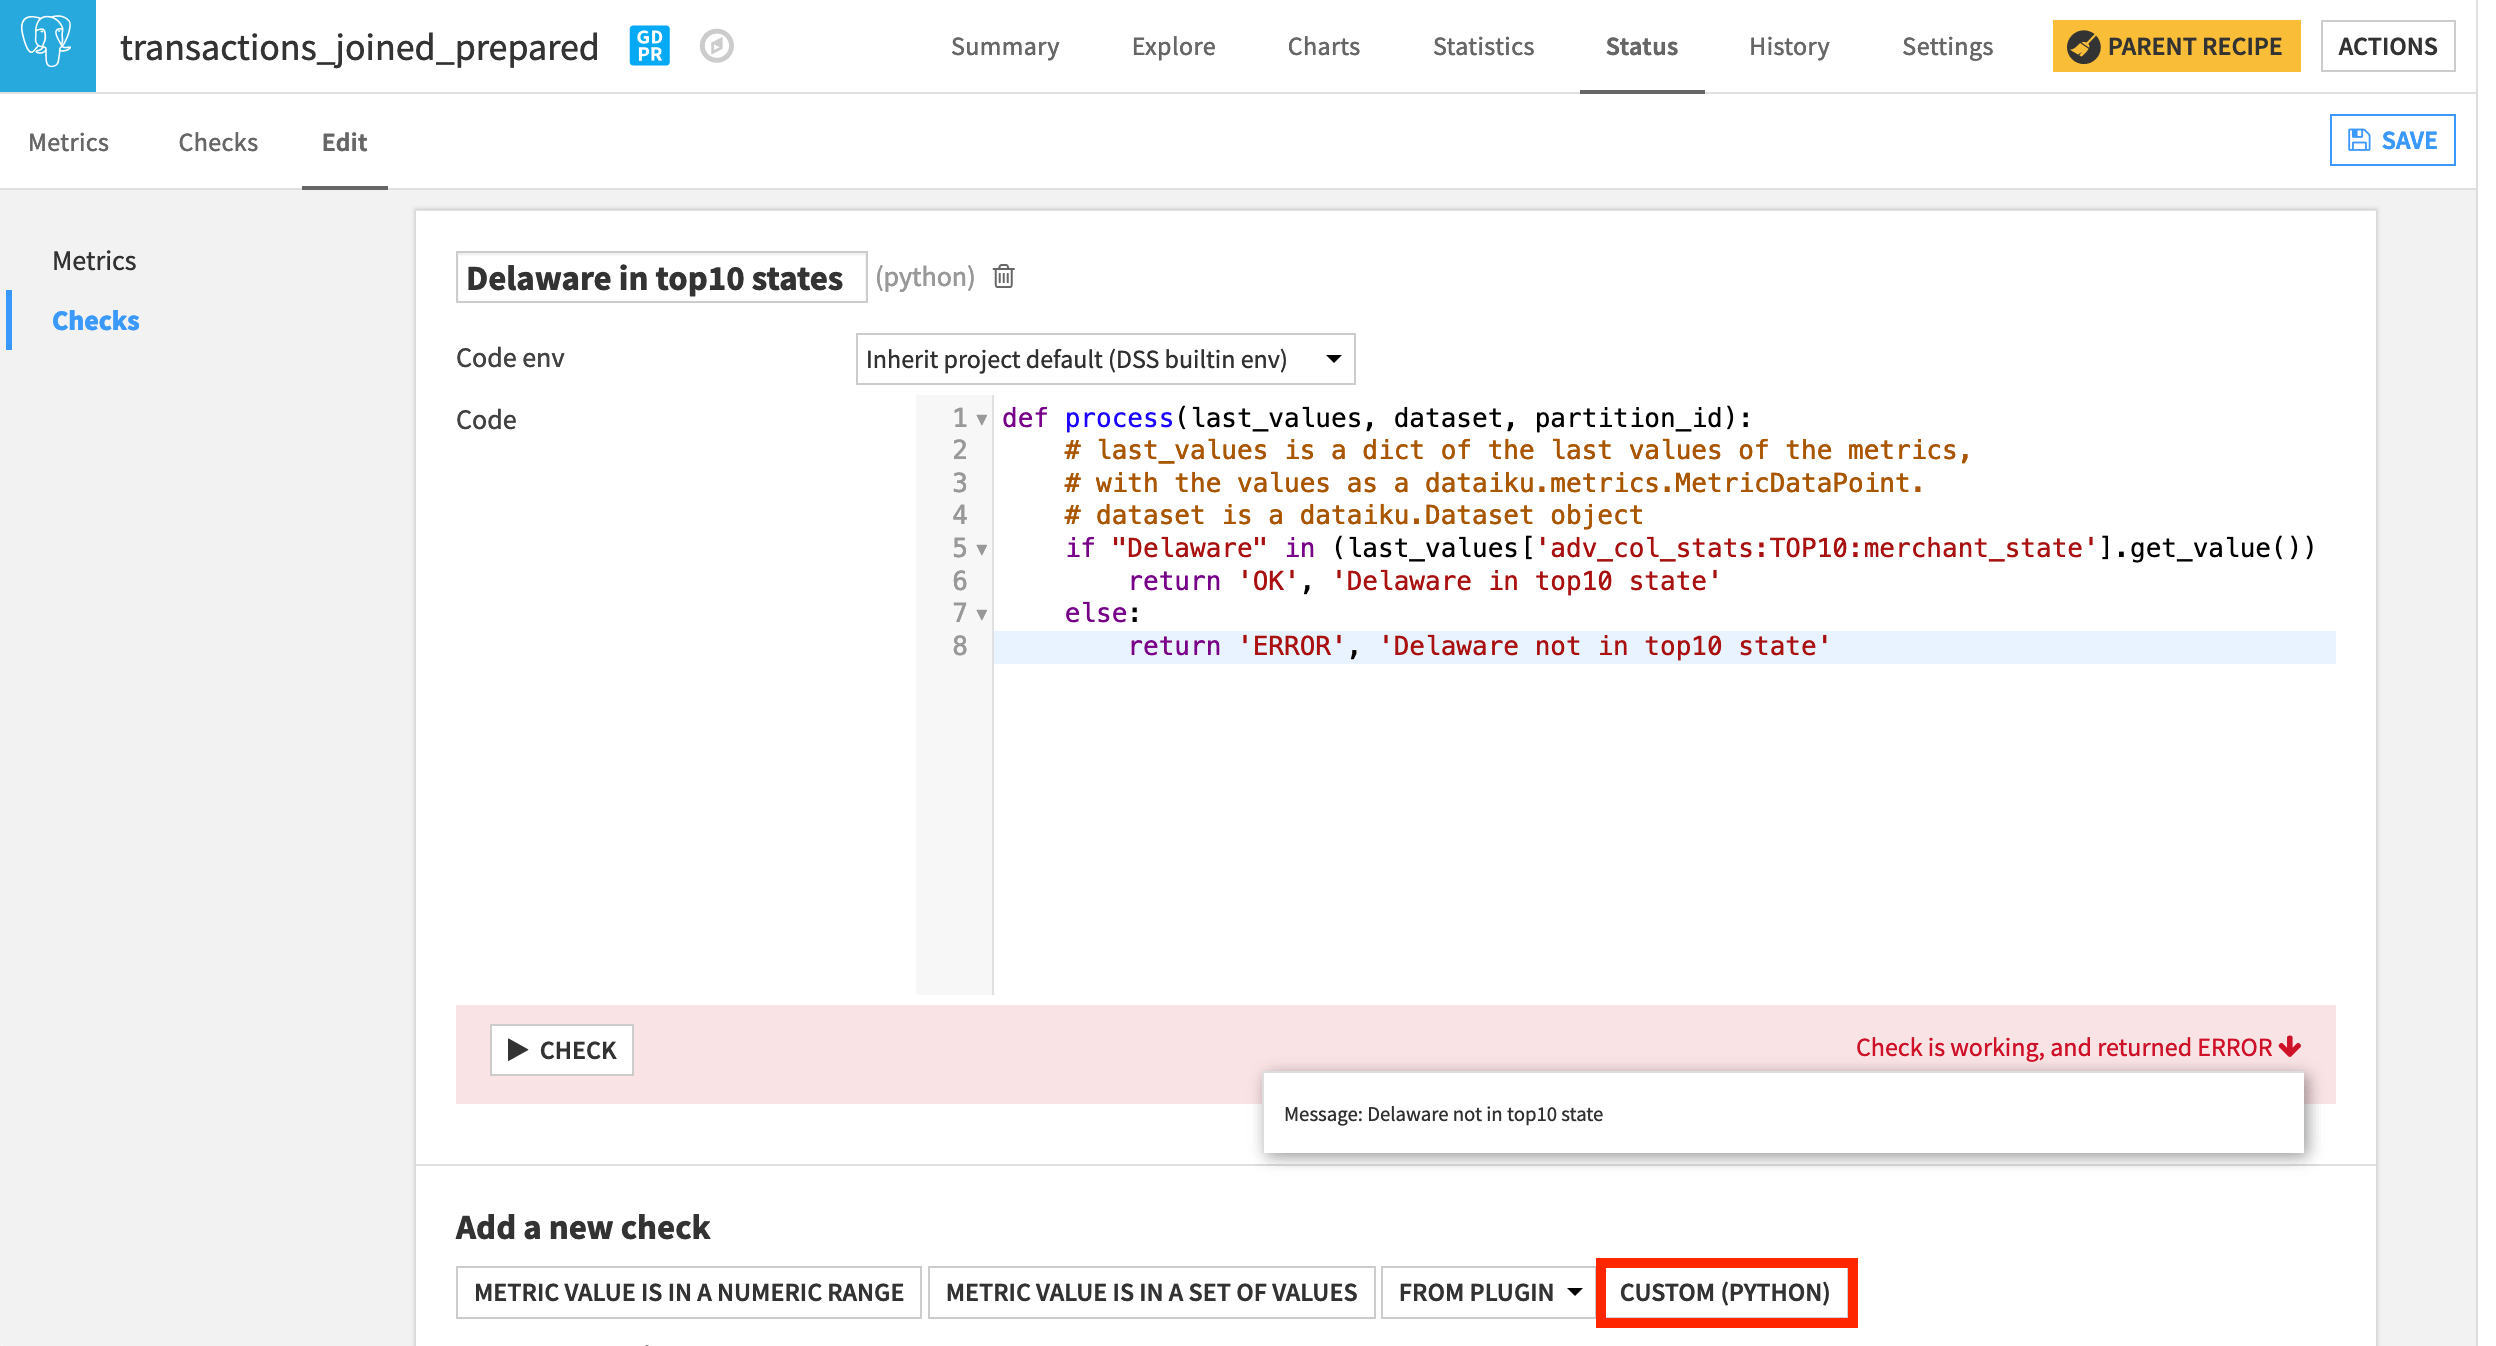
In another section, we added a metric to report the top ten most frequent states found in the data. We can use this built-in metric in a custom check to verify if a specific state is in that group.
Navigate from the Metrics panel to the Checks panel of the Edit subtab.
At the bottom of the screen, choose a new Custom (Python) check.
Name it
Delaware in top10 states.Replace the starter code with the following snippet.
def process(last_values, dataset, partition_id):
    # last_values is a dict of the last values of the metrics,
    # with the values as a dataiku.metrics.MetricDataPoint.
    # dataset is a dataiku.Dataset object
    if "Delaware" in (last_values['adv_col_stats:TOP10:merchant_state'].get_value()) :
        return 'OK', 'Delaware in top10 state'
    else:
        return 'ERROR', 'Delaware not in top10 state'
Running the check should return an error. Using the Analyze tool in the Explore tab, we could verify this to be true.
Create a Custom Scenario
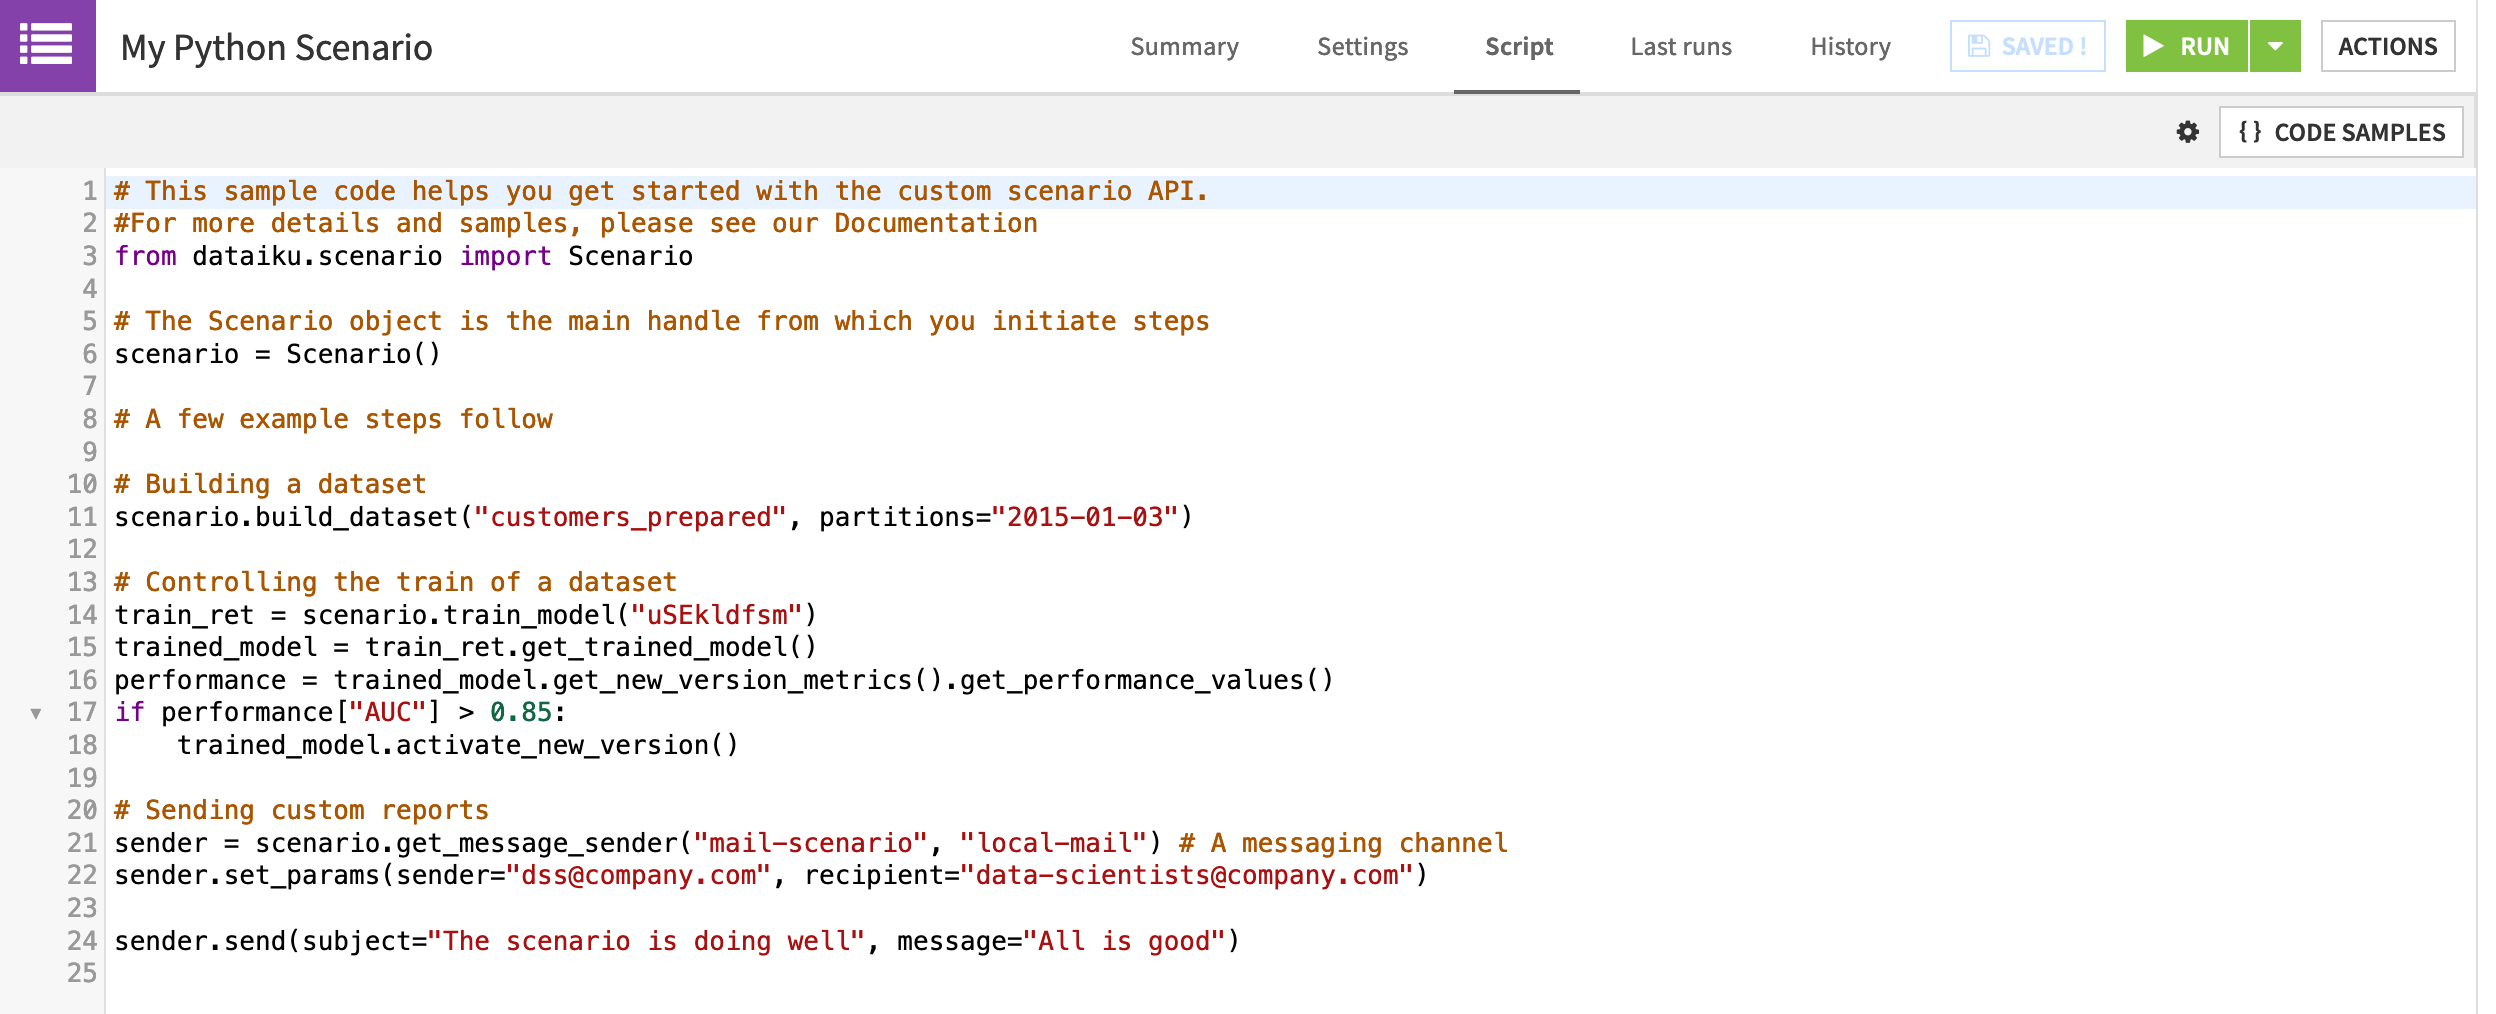
In Dataiku DSS, we can introduce custom code to a scenario in two ways. We can create a custom Python scenario where a Python Script tab with starter code replaces the usual Steps tab.
Alternatively, we can add custom steps (SQL, Python, plugin) to a standard step-based scenario. We’ll focus on this option.
Create a new step-based scenario.
Name it
My Custom Scenario.
Create a Custom Trigger
Dataiku DSS provides a large amount of flexibility with built-in triggers. For example, just in terms of time-based triggers, we can trigger a scenario once every few minutes, once per day, once per month, or on specific days of the week.
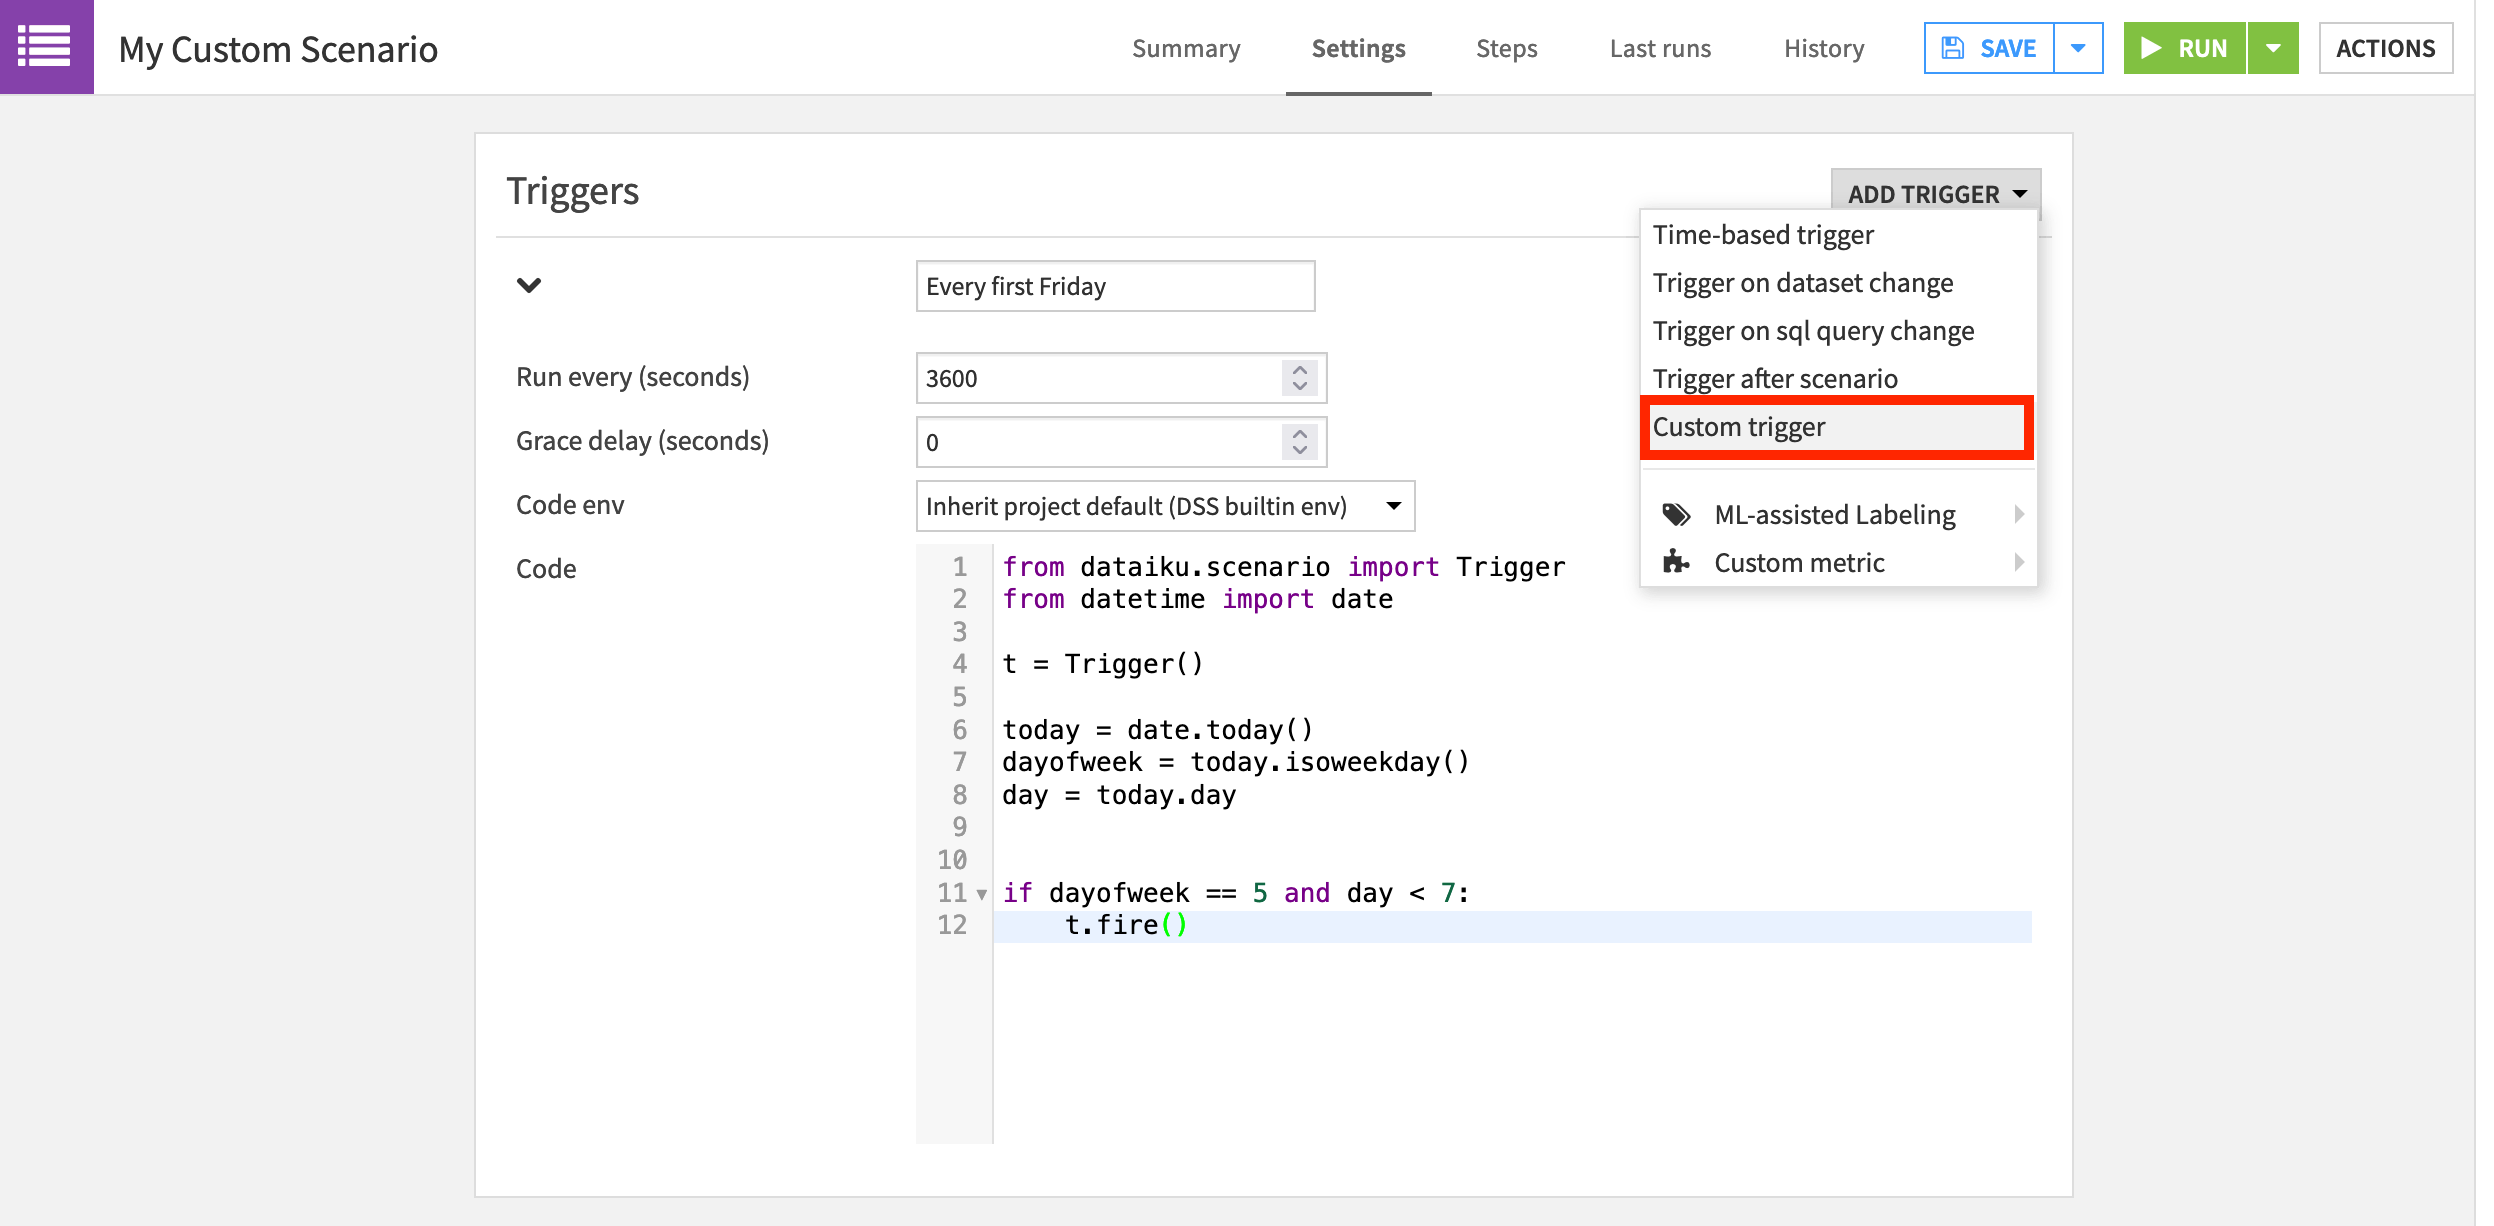
However, if we wanted to launch a scenario on only the first Friday of the month, we’d need to code our own solution. Let’s do this with a custom Python trigger.
Custom Triggers for Dataiku Online Users
Tip
Dataiku Online users will need to skip this step. Orbit subscribers can use any time-based trigger, and free trial users can trigger the scenario manually.
On the Settings tab of the newly-created scenario, add a “Custom trigger” from the Add Trigger dropdown.
Name it
Every first Friday.Normally, we’d increase the “Run every (seconds)” parameter, but we can leave the default for demonstration purposes.
We won’t need any special libraries so the default built-in code environment can remain.
Replace the starter code with the following Python code snippet.
from dataiku.scenario import Trigger
from datetime import date

t = Trigger()

today = date.today()
dayofweek = today.isoweekday()
day = today.day


if dayofweek == 5 and day < 7:
    t.fire()
Add Custom Steps to a Scenario
What actions should we instruct Dataiku DSS to take on the first Friday of every month? Earlier we rebuilt part of the Flow by hard coding a variable change in a scenario step. Now let’s rebuild the same part of the Flow, but change the variable based on the result of a custom step.
These steps will differ depending on the type of storage connection you are using. If you’re using SQL datasets, you’ll use an “Execute SQL” step. If you’re using file-based datasets, you’ll use an “Execute Python” step.
SQL-based step
If you’re using a SQL-based connection, we’ll start with a SQL query step to find the most transactions.
On the Steps tab, add an “Execute SQL” step.
Name it
top_merchant_state.Choose the connection you’re using.
Copy and paste the SQL query below.
SELECT
    COUNT(*) AS "state_transactions",
    "merchant_state"
FROM "${projectKey}_transactions_joined_prepared"
WHERE "merchant_state" IS NOT NULL
GROUP BY "merchant_state"
ORDER BY "state_transactions" DESC
LIMIT 1
Now we’ll use the result of this SQL query step to update a project variable.
Add a “Set project variables” step.
Turn Evaluated variables ON.
Add a variable:
The key is
state_name.The value is
parseJson(stepOutput_top_merchant_state)['rows'][0][1].
File-based Step
If you are using a file-based connection, you won’t be able to use an “Execute SQL” step like the example above. Instead, you can combine both the SQL query step and the “Set project variables” step into one custom Python step.
On the Steps tab, add an “Execute Python code” step.
Copy and paste the code snippet below into the script field.
import dataiku
from dataiku.scenario import Scenario

# Defining scenario object
s = Scenario()

# Defining python client for public API
client = dataiku.api_client()
p = client.get_default_project()

# Computing state with most transactions
dataset = dataiku.Dataset("transactions_joined_prepared")
df = dataset.get_dataframe()
state_name = (df
            .groupby("merchant_state")
            .agg({"transaction_id": "count"})
            .sort_values('transaction_id', ascending=False)
            .index[0]
            )

# Set variable
variables = p.get_variables()
variables["standard"]["state_name"] = state_name

p.set_variables(variables)
Clear and Build Datasets
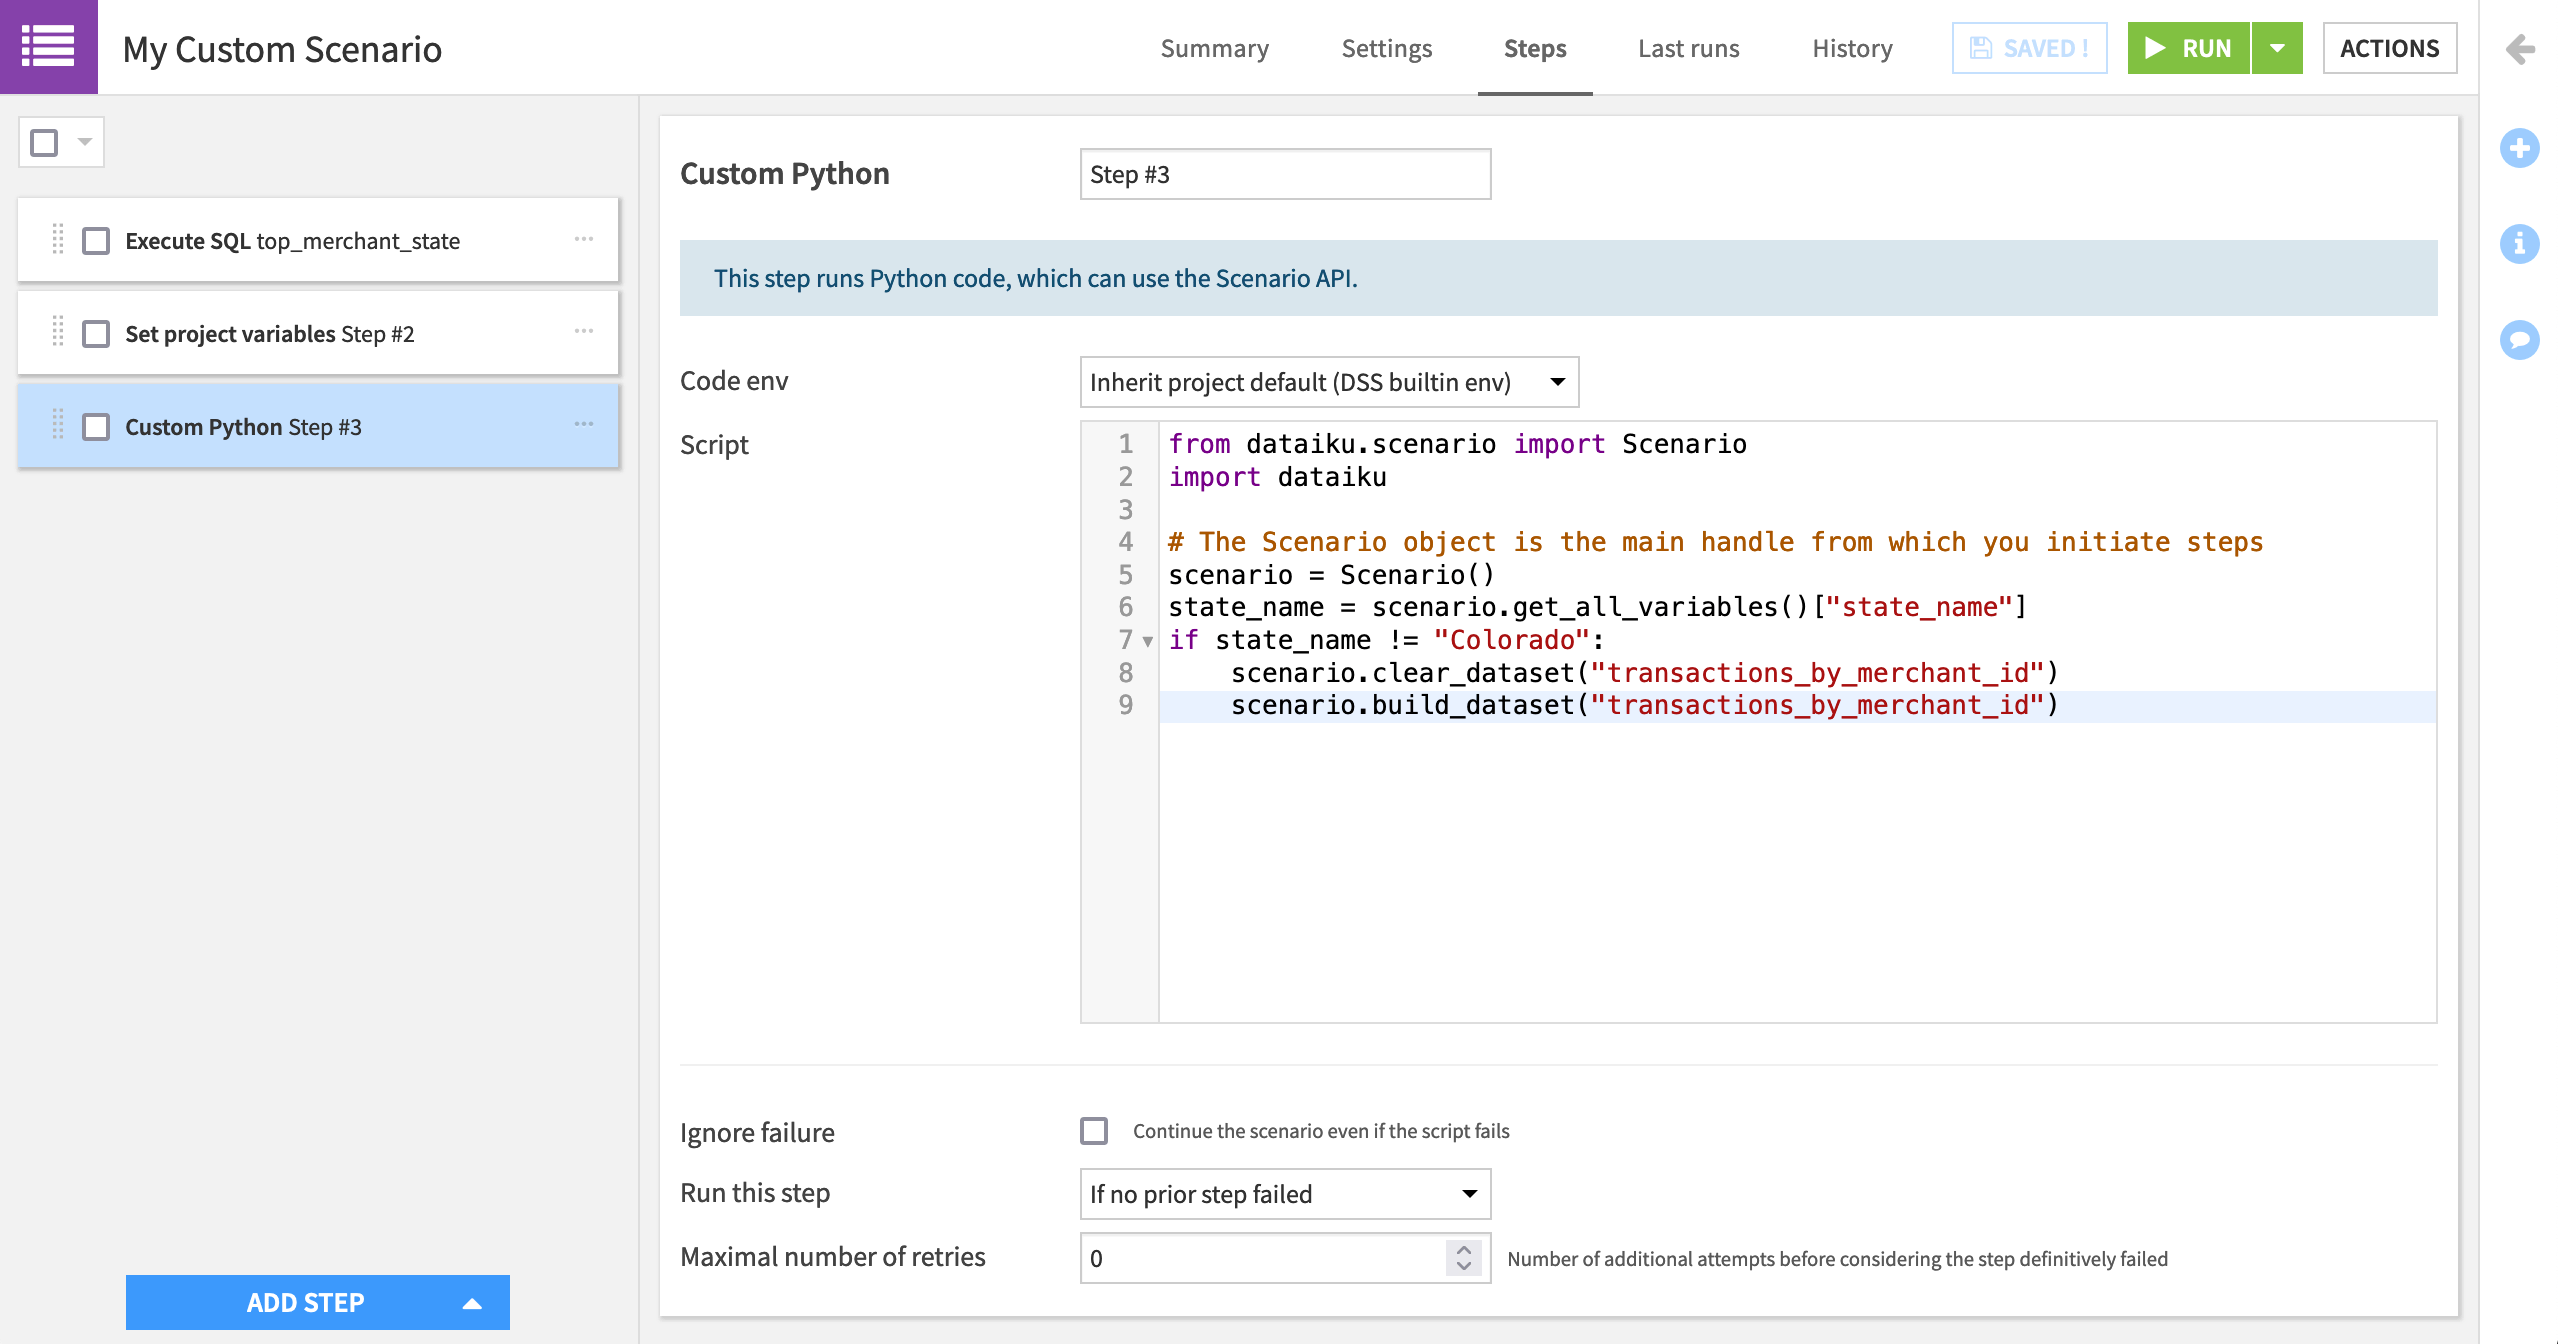
Once that variable is updated (either through a SQL query + “Set project variables” step or one Python step), we can clear and build just like we did in the previous scenario. Instead of using the built-in steps, however, let’s use a Python step.
For example, instead of a “Clear” step, we can use the clear_dataset() function. Instead of a “Build / Train” step, we can use the build_dataset() function.
Add an “Execute Python code” step.
Copy and paste the code snippet below into the script field.
from dataiku.scenario import Scenario
import dataiku

# The Scenario object is the main handle from which you initiate steps
scenario = Scenario()
state_name = scenario.get_all_variables()["state_name"]
if state_name != "Colorado":
    scenario.clear_dataset("transactions_by_merchant_id")
    scenario.build_dataset("transactions_by_merchant_id")
Running this scenario, even though it has custom steps and triggers, is no different from a fully built-in scenario.
Instead of waiting for the first Friday of a month, manually trigger the scenario by clicking Run.
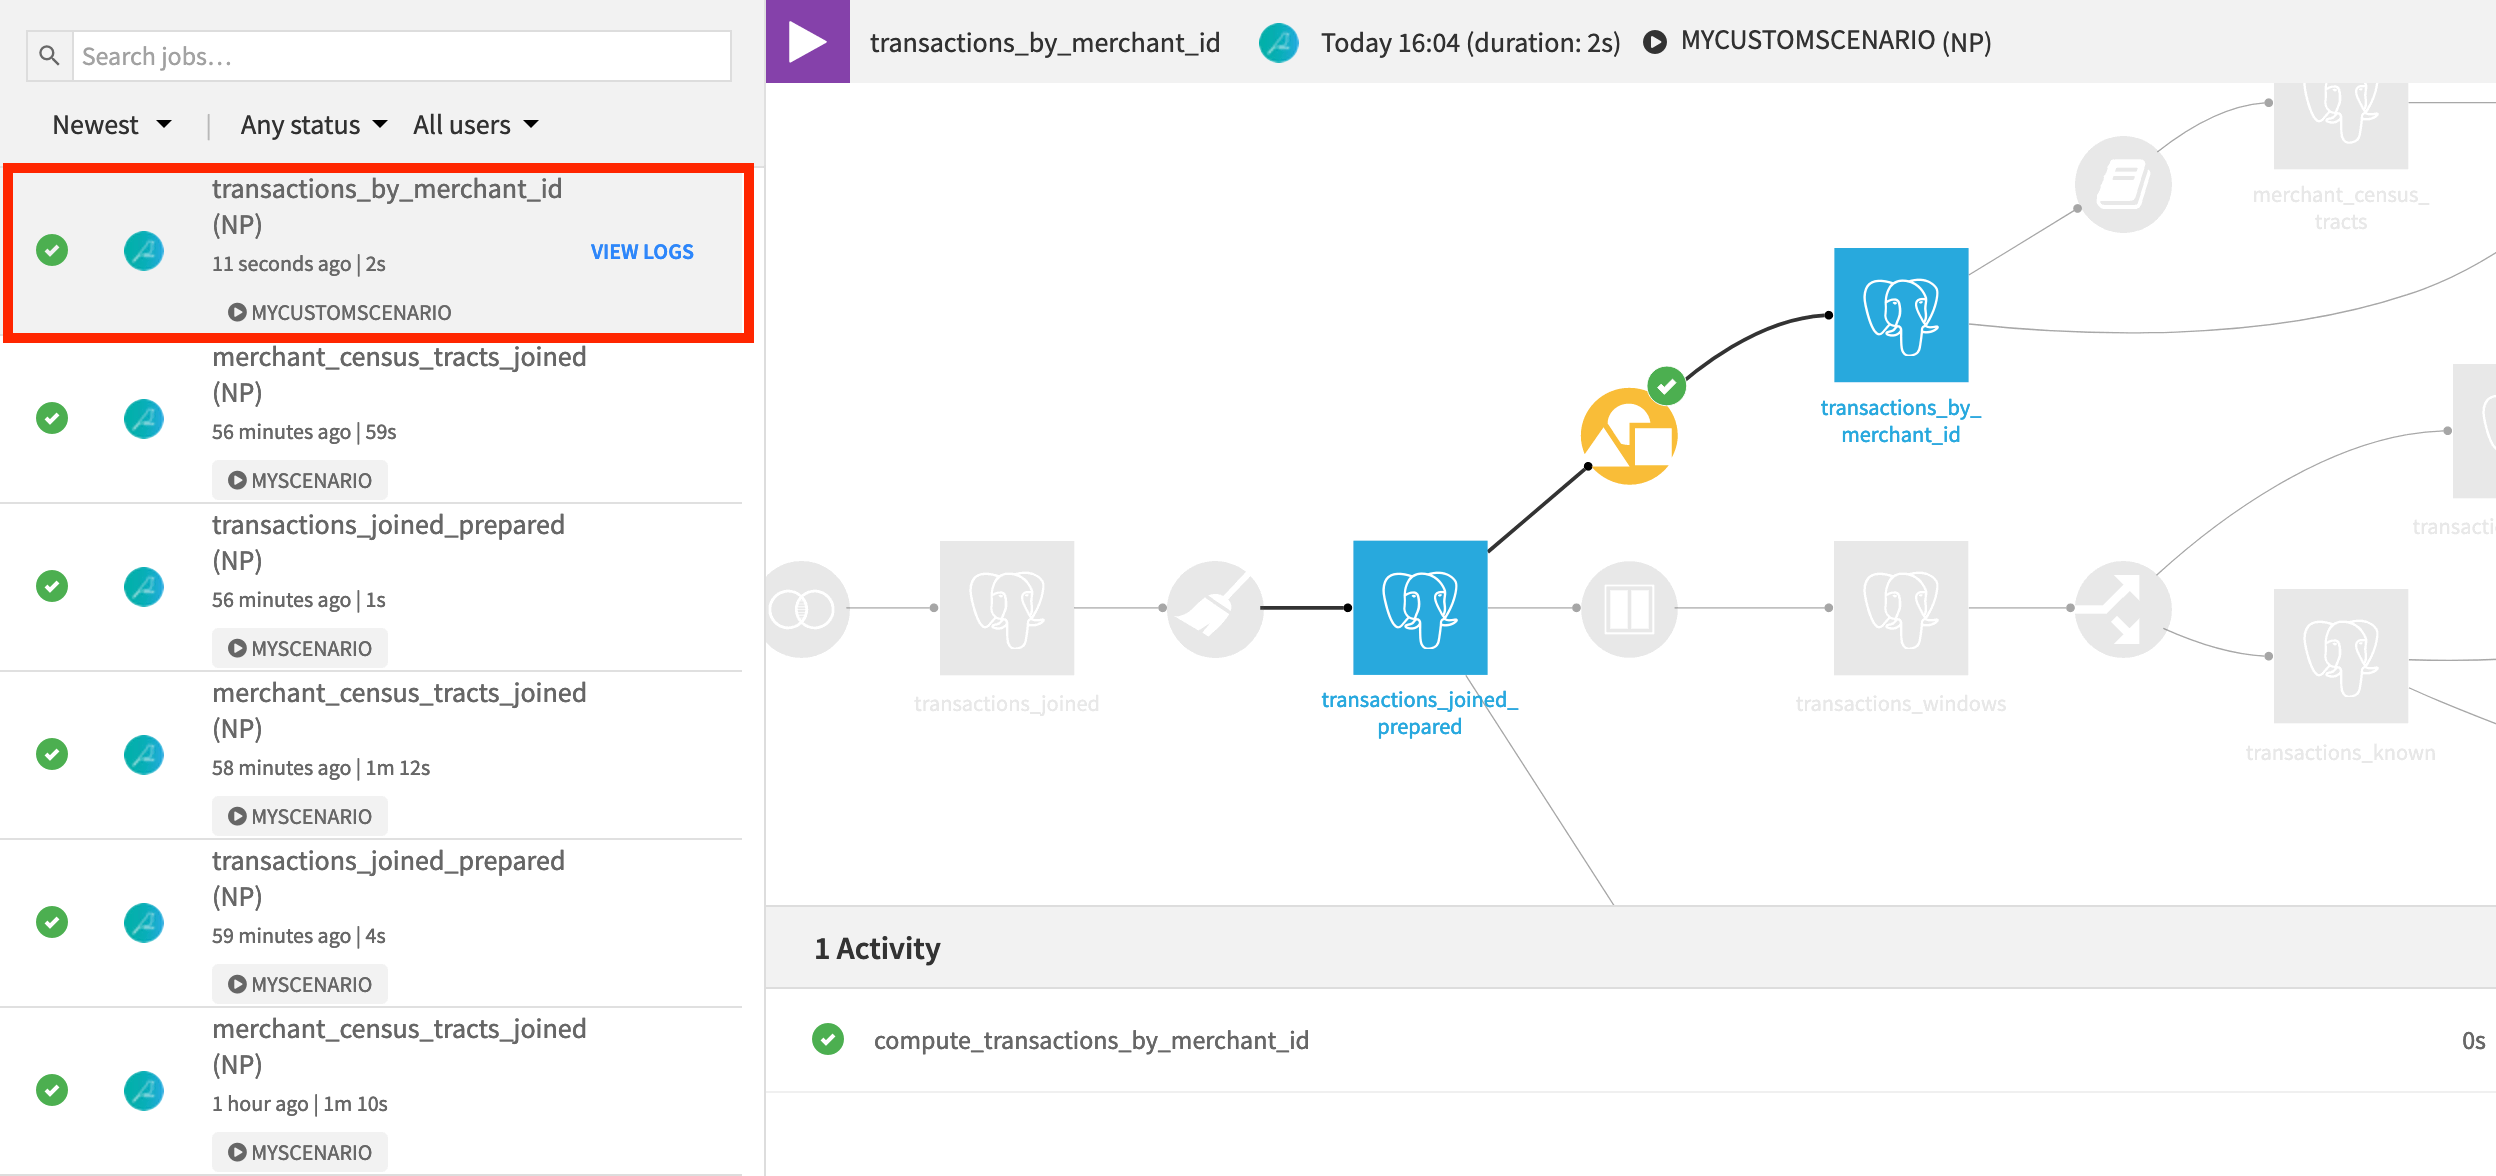
When the scenario finishes, open the transactions_by_merchant_id dataset to observe the change in output. It turns out that “Colorado” is the state with the most transactions.
What’s Next?
Congratulations on taking your first steps using metrics, checks, and scenarios in Dataiku DSS!
If you have not already done so, register for the Academy course on Automation to validate your knowledge of this material.
For more information on these topics, consult the product documentation.
Once you have become familiar with automating workflows, you may be ready to begin putting pipelines into production. Among other courses in the Operationalization section, the course on Flow Deployment will teach you how to take a Flow like this one and deploy it to a production environment.