Hands-On Tutorial: Custom Modeling in the Visual ML Tool
The visual ML tool in Dataiku DSS comes with built-in models. You can even extend this functionality by creating your own custom models.
Let’s Get Started!
In this hands-on lesson, you will build custom models on a dataset. In the process, you’ll learn the requirements for custom models used in the visual ML tool and implement some of the different ways to create custom models.
Prerequisites
This lesson assumes that you have the basic knowledge of working with the visual ML tool in Dataiku DSS. If you do not have this prerequisite, we recommend completing the Machine Learning Basics course.
Additionally, you’ll need access to Dataiku DSS version 8.0 or above (the free edition is compatible). You can download it here.
Create the Project
If you previously completed the hands-on tutorial on Custom Preprocessing in the Visual ML Tool, you can continue working with the project from that lesson.
Alternatively, you can create a new project with these steps already completed.
From the Dataiku homepage, click +New Project > DSS Tutorials > Developer > Custom Modeling in Visual ML (Tutorial).
Explore the Project
The starting Flow of the project consists of an ecommerce_reviews dataset and a vocabulary folder.
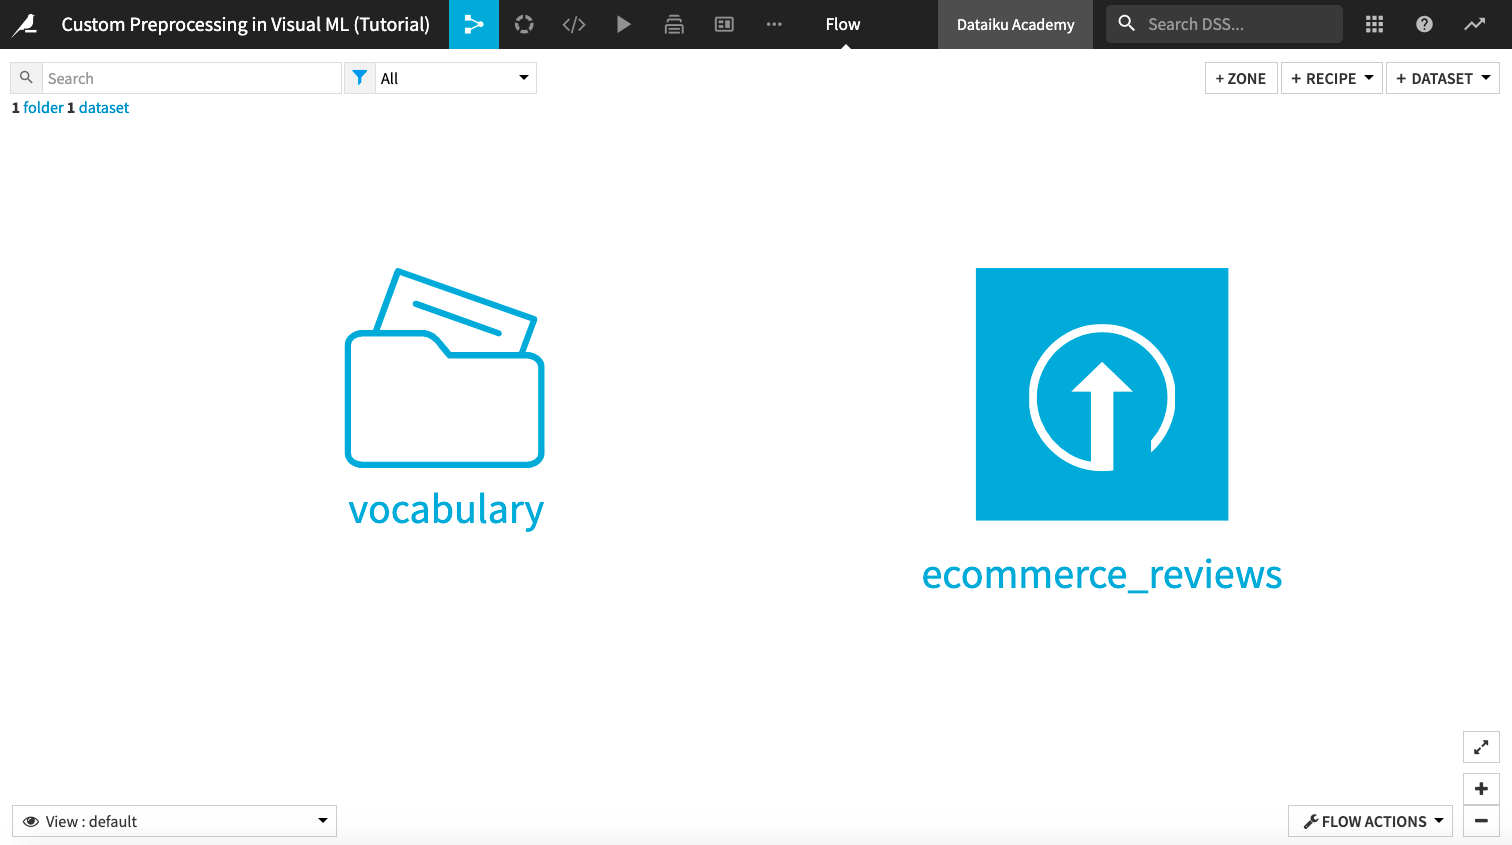
The ecommerce_reviews dataset consists of a text feature Review Text which contains customer reviews about women’s clothing items. There is also a Rating feature that indicates the final customer ratings on a scale of 1 to 5. The source of this dataset is Women’s E-Commerce Clothing Reviews.
The vocabulary folder consists of a text file vocabulary.txt with a list of words.
The project also contains a visual analysis Quick modeling of Rating on ecommerce_reviews that performs:
custom preprocessing of the Review Text feature, and
training of a Random Forest classifier and a Logistic Regression classifier, using Rating as the target.
Specify Custom Models in the Visual ML Tool
We will begin by going to the visual analysis Quick modeling of Rating on ecommerce_reviews.
From the Flow, click the Visual Analysis icon in the top navigation bar.
Click Quick modeling of Rating on ecommerce_reviews to open the visual analysis.
Click Models at the top of the visual analysis page to open the model Result page.
Click Design to go to the model design page.
On the Design page, click the Algorithms panel.
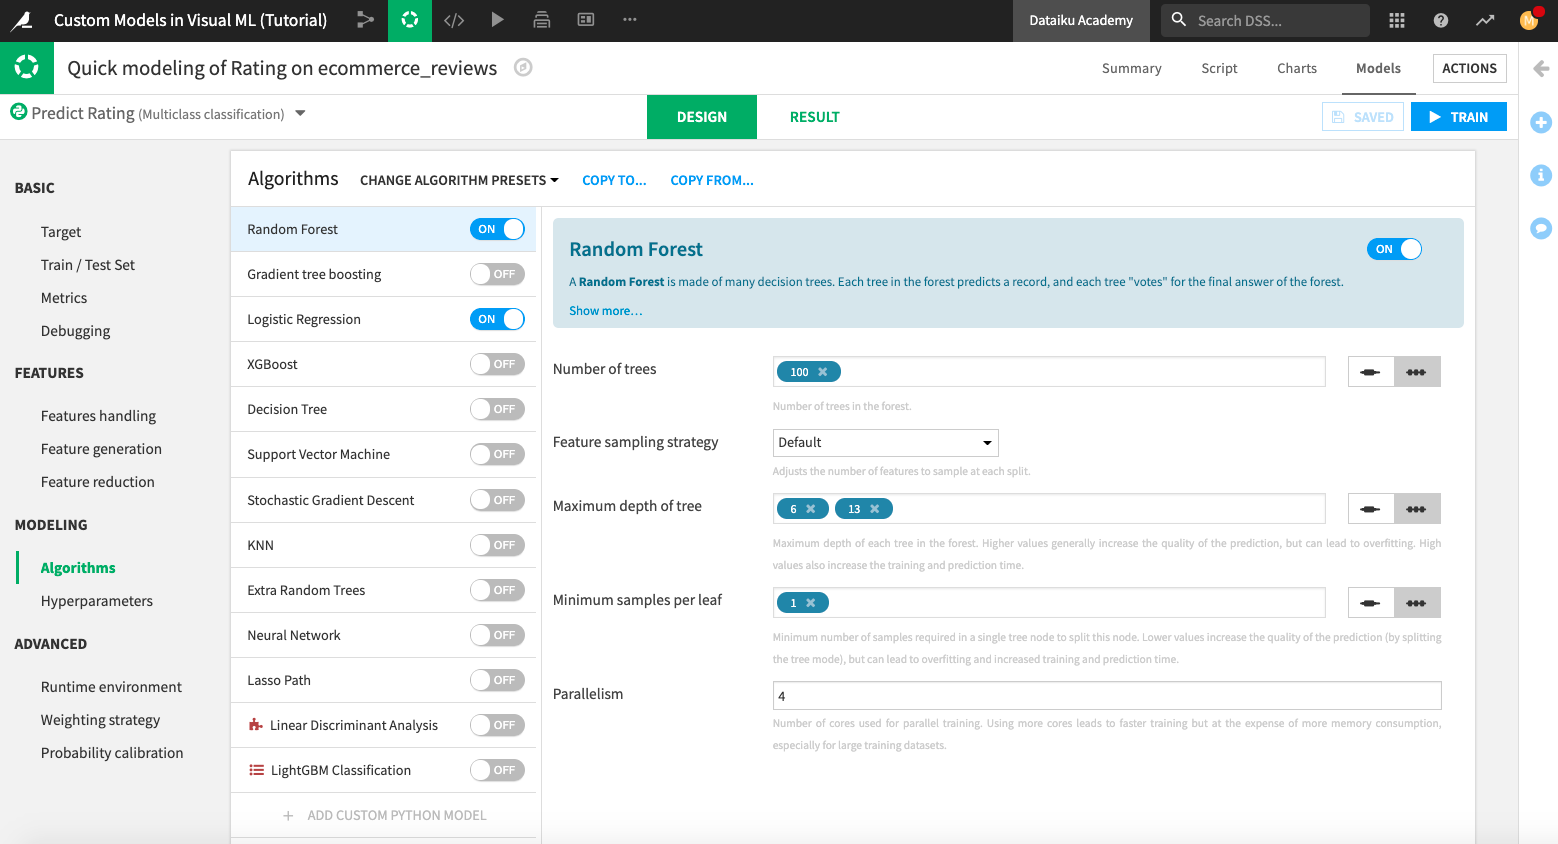
The list of algorithms begins with the built-in models. You can add custom Python models at the bottom of the list.
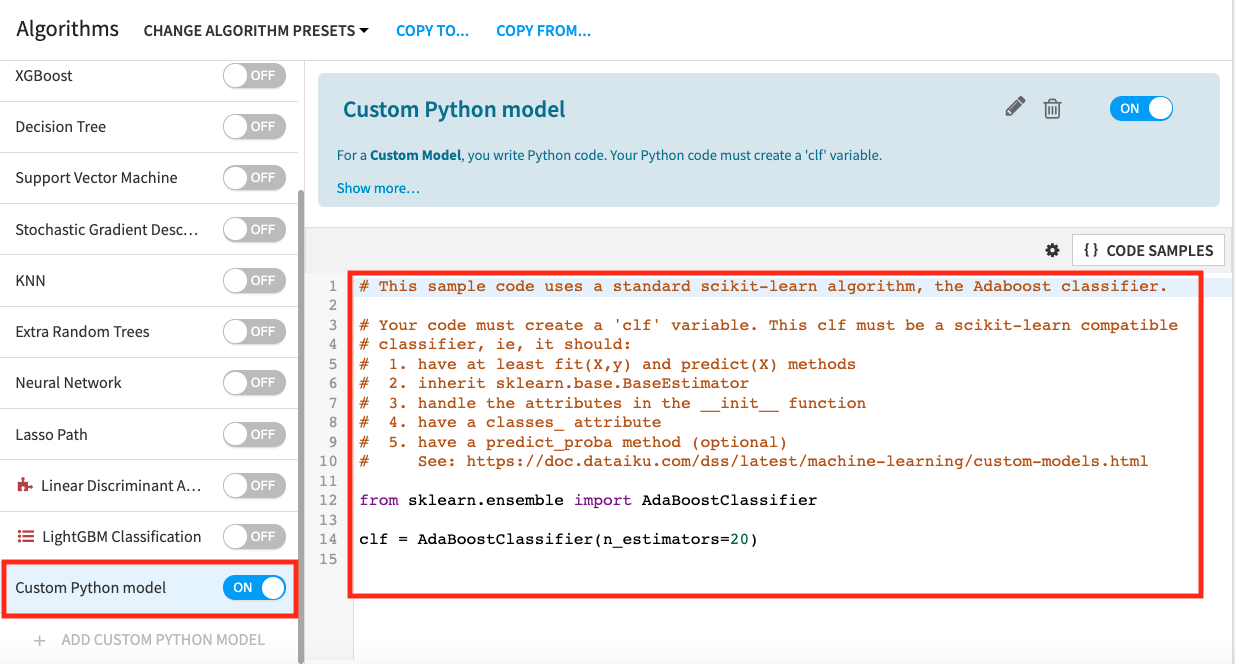
Click +Add Custom Python Model at the bottom of the list.
A Python code editor opens with a code template to get you started.
Note
The code in the editor must follow some constraints depending on the backend you’ve chosen (in-memory or MLlib). In this example, we’re using the Python in-memory backend, therefore:
The algorithm must be scikit-learn compatible, that is, it needs to have the
fitandpredictmethods.In addition to these methods, classifiers must have a
classes_attribute and can implement apredict_probamethod.
The code template lists some additional constraints when creating the custom model.
Import an Algorithm From Scikit-learn
Let’s import a Multi-layer Perceptron classifier from one of the scikit-learn modules. The default code environment (DSS built-in environment) used by the visual ML tool includes scikit-learn, therefore we don’t need to create a new code environment for this.
Note
If you want to import algorithms from different modules (or packages), you first need to create a code environment that includes this module and set the “Runtime environment” of the visual ML tool to this new code environment.
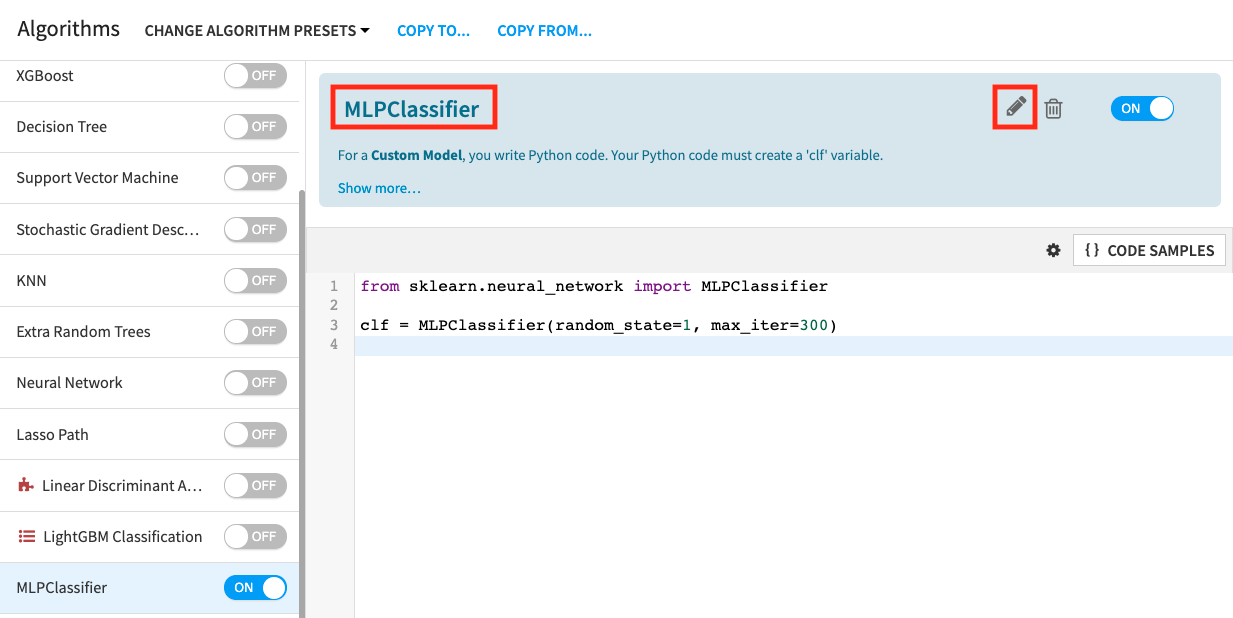
Delete the template code, and paste the following Python code into the code editor to instantiate the MLP classifier.
from sklearn.neural_network import MLPClassifier

clf = MLPClassifier(random_state=1, max_iter=300)
Click the pencil icon next to the custom model’s name to rename it from “Custom Python model” to
MLPClassifier.Click Save in the top right-hand corner.
Import an Algorithm From The Project Library
Here, we’ll import an algorithm that we’ve defined in the Project Library.
Go to the code icon (</>) in the top navigation bar, and click Libraries.
Click the dropdown arrow next to the “python” folder to see the “custom_models.py” file.
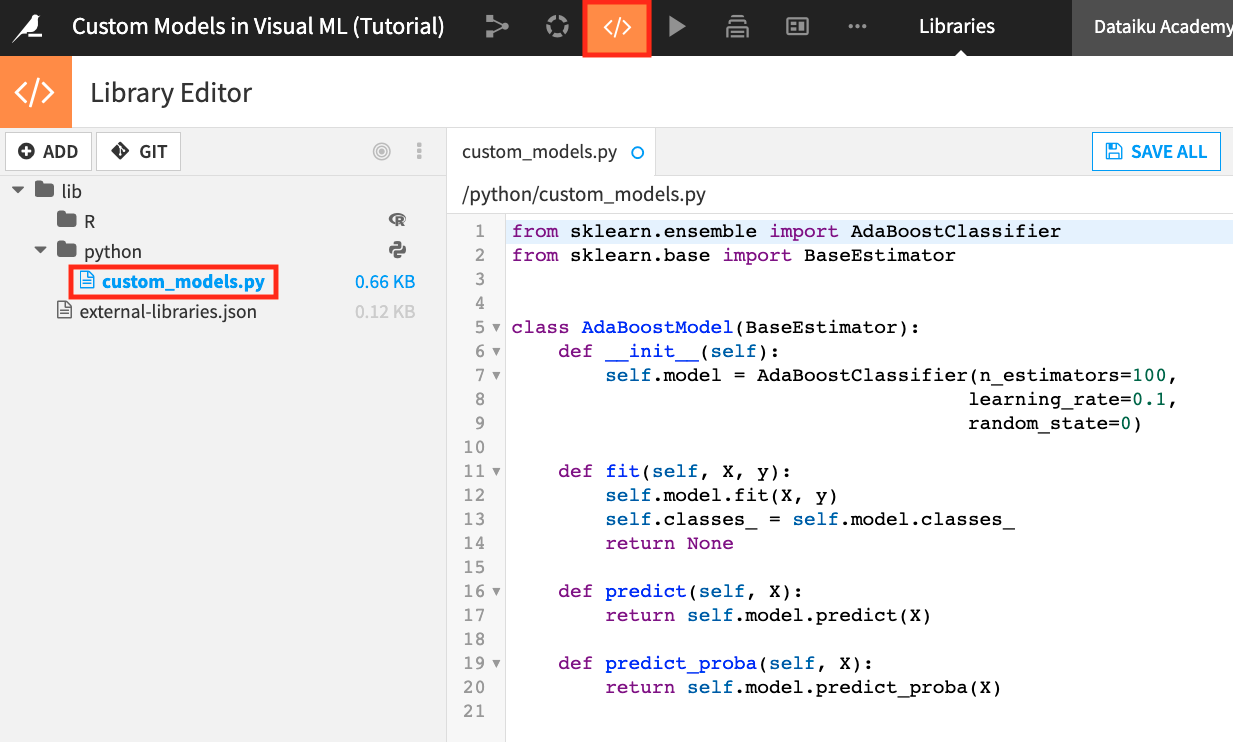
The file contains the definition for an “AdaBoostModel” classifier. Notice that this classifier is scikit-learn compatible. We will import and use this classifier to create another custom model.
Return to the Design page of the visual ML tool (you can do this quickly by clicking the back arrow in your browser window).
Click +Add Custom Python Model at the bottom of the list.
Rename the model to
AdaBoostModel.Replace the code in the editor with:
from custom_models import AdaBoostModel

clf = AdaBoostModel()
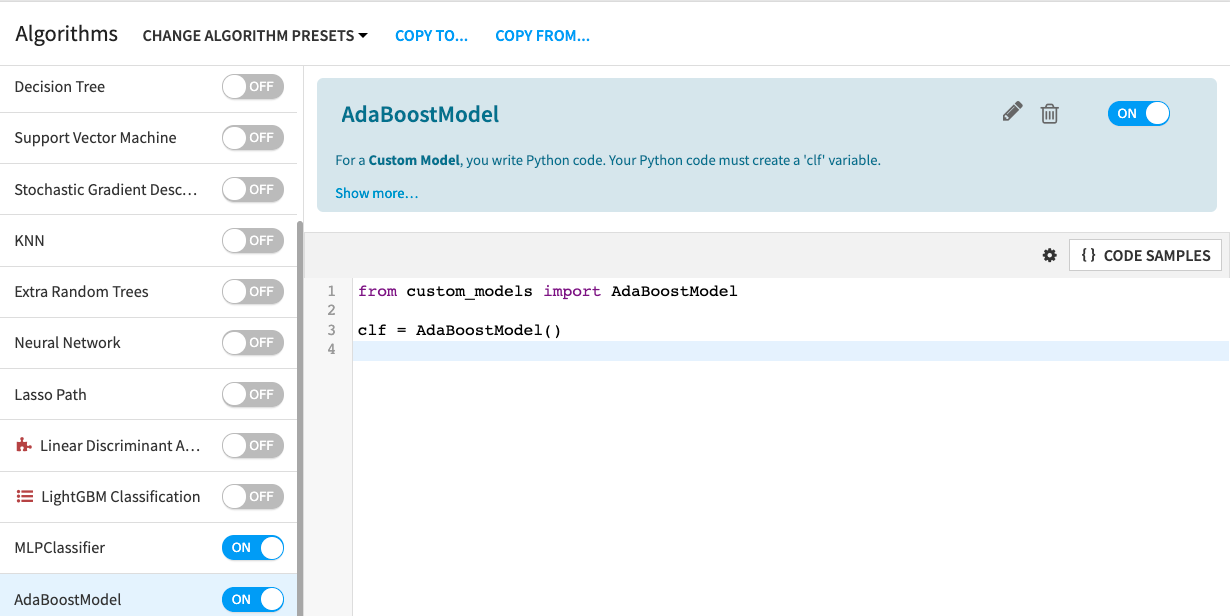
Click Train to train the models.
Name the session
Custom modelsand click Train.
View Session Output With Custom Models
During training, the Result tab displays a graph of the evolution of the ROC AUC metric during grid search. The grid search option isn’t available to the custom models. However, you can still see the custom models listed along with the other models built during the session.
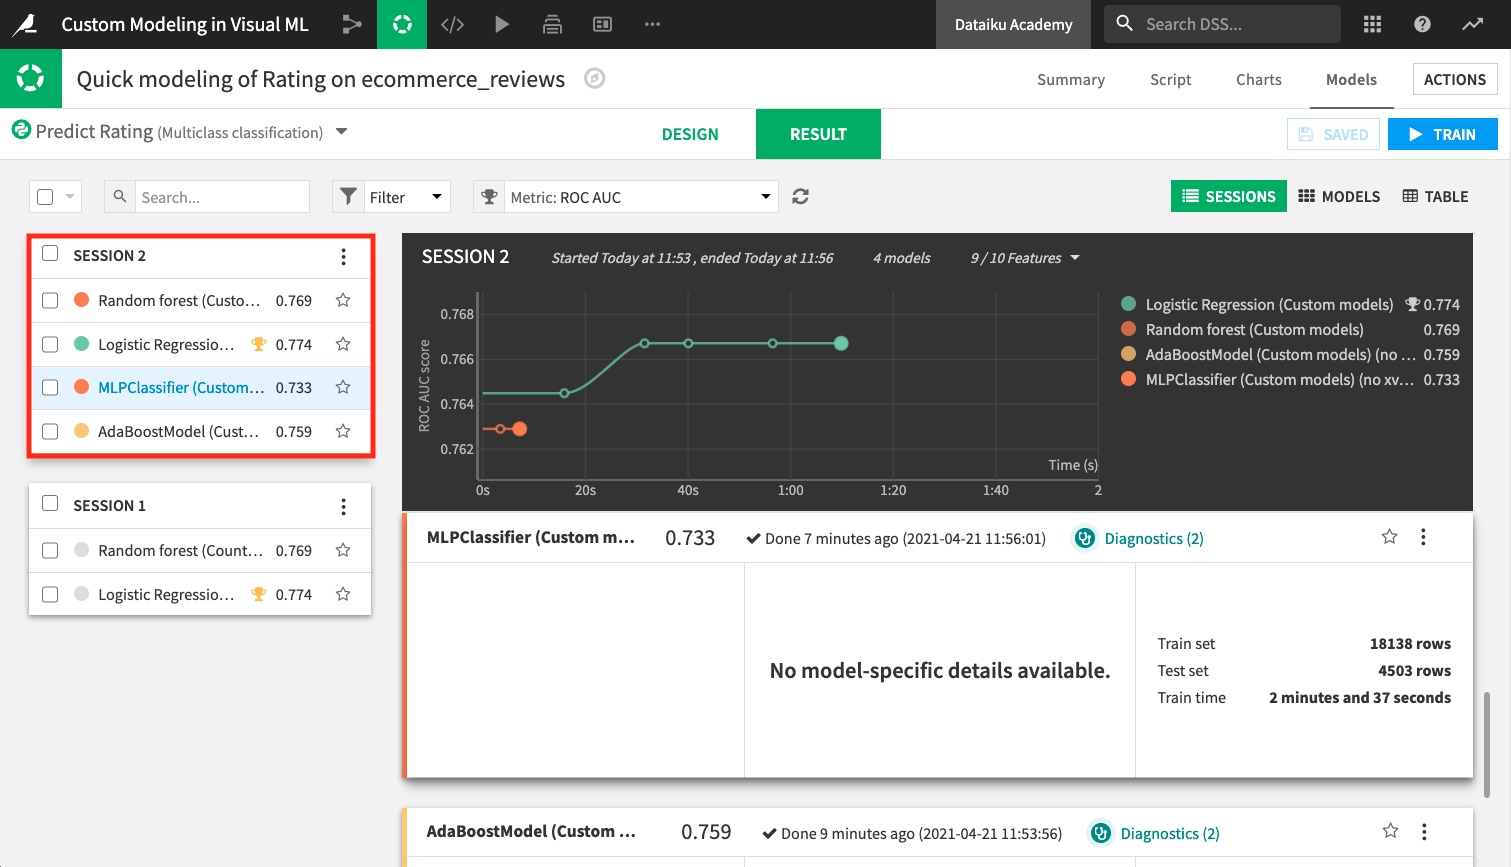
Assess Performance of The Custom Models
Now we’ll open one of the custom models to visualize its performance and all associated visual insights, just as we would do with a built-in model.
Click the MLPClassifier (Custom models) model to open its Report page.
Under Performance, click ROC curve to view the performance metric.
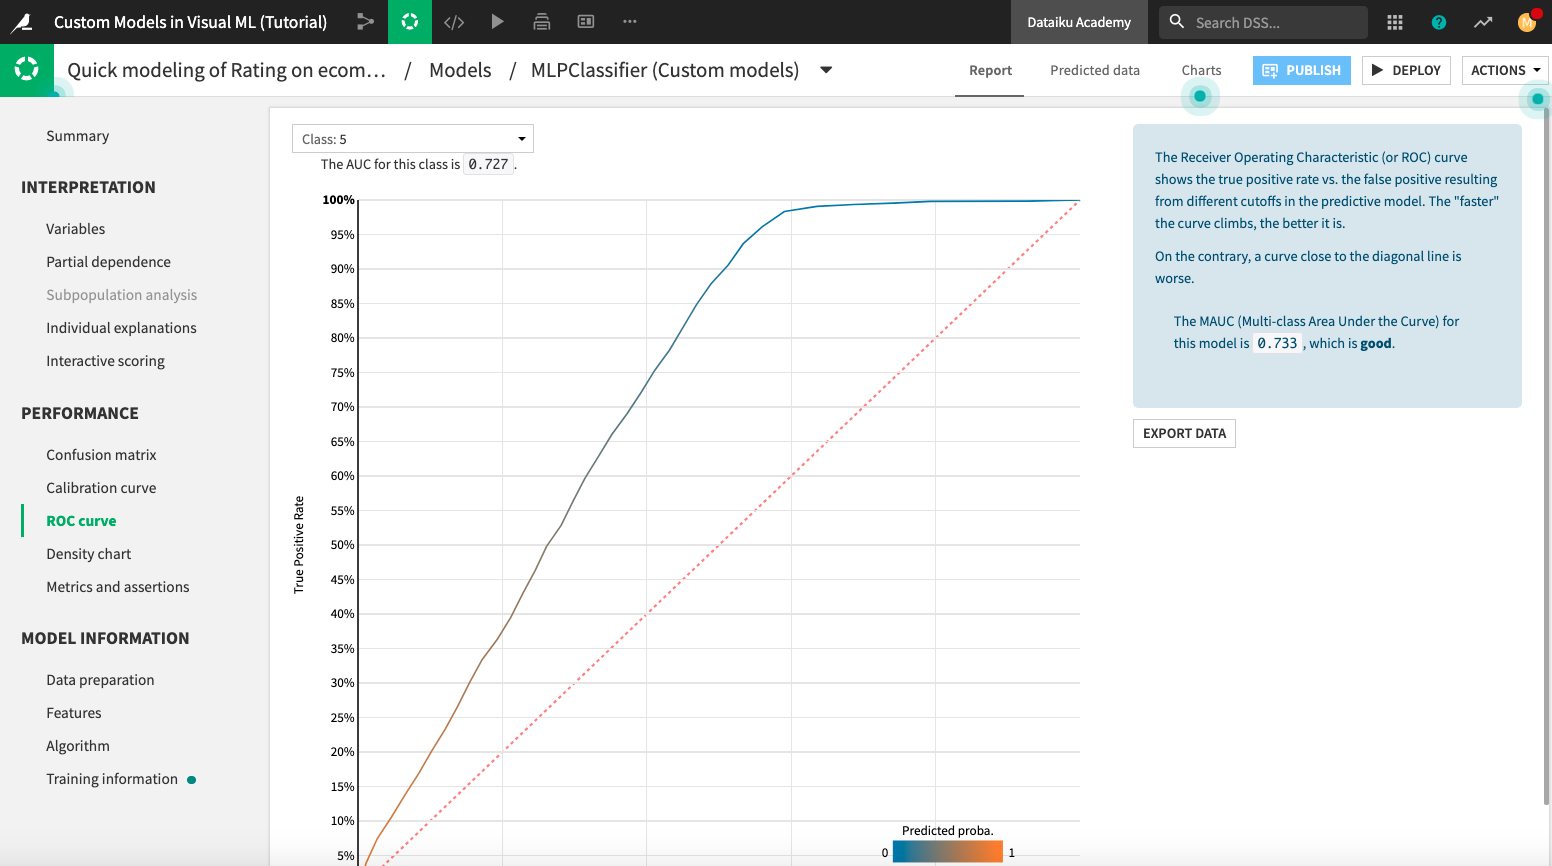
You can visualize the custom model’s training details such as the individual explanations, confusion matrix, calibration curve, ROC curve, and view metrics such as the F1 score. Dataiku DSS is able to create these metrics and visualizations because the custom model is scikit-learn compatible!
The custom model can now be deployed in the flow and used just like a standard built-in model!
What’s Next?
Congratulations! You’ve completed the hands-on lesson for Custom Modeling!
You learned to:
Create custom models that are scikit-learn compatible.
Use these custom models in the visual ML tool.
Import custom models from packages such as scikit-learn and from the Project library.
View training details of a custom model in the visual ML tool.
To learn more about using custom models, in particular, how to implement your own MLlib models in Scala while still using Dataiku DSS modeling in the Visual ML tool, see the product documentation.