Hands-On Tutorial: Custom Preprocessing in the Visual ML Tool
Dataiku DSS provides a powerful visual ML tool that comes with built-in feature preprocessing. You can even extend this functionality by using code to implement custom feature preprocessing.
Let’s Get Started!
In this hands-on lesson, you will implement custom preprocessing on a text column of a dataset. In the process, you’ll learn the requirements for processors that can be used in the visual ML tool.
Prerequisites
This lesson assumes that you have the basic knowledge of working with AutoML in the visual ML tool of Dataiku DSS. If you do not have this prerequisite, we recommend completing the Machine Learning Basics course.
Additionally, you’ll need access to Dataiku DSS version 8.0 or above (the free edition is compatible). You can download it here.
Create the Project
The first step is to create the project.
From the Dataiku homepage, click +New Project > DSS Tutorials > Developer > Custom Preprocessing in Visual ML (Tutorial).
Click Go to Flow.
Explore the Project
The starting Flow of the project consists of an ecommerce_reviews dataset and a vocabulary folder.
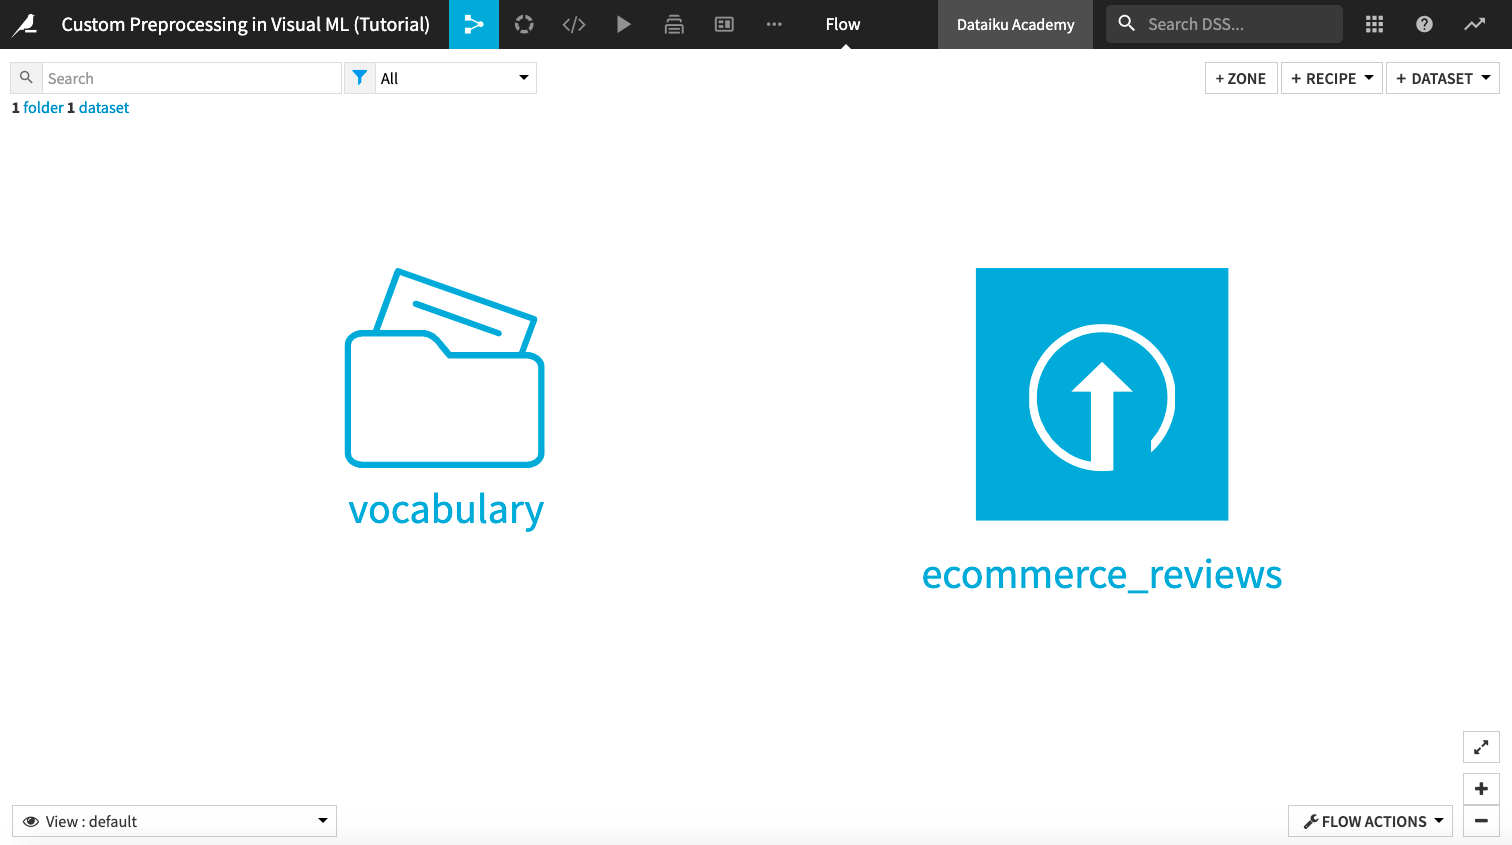
The ecommerce_reviews dataset consists of a text feature, Review Text, which contains customer reviews about women’s clothing items. There is also a Rating feature that indicates the final customer ratings on a scale of 1 to 5. The source of this dataset is Women’s E-Commerce Clothing Reviews.
The vocabulary folder consists of a text file vocabulary.txt, which lists words that we will use to perform count vectorization on the Review Text feature.
Preprocess Features in the Visual ML Tool
Let’s begin our analysis by using the visual ML tool to build a prediction model. This model will predict the Rating assigned to a particular Clothing ID using the other features in the ecommerce_reviews dataset.
Tip
In this hands-on tutorial, we will focus only on the custom preprocessing of features in the dataset.
From the Flow, click the ecommerce_reviews dataset to select it.
Open the right panel and click LAB.
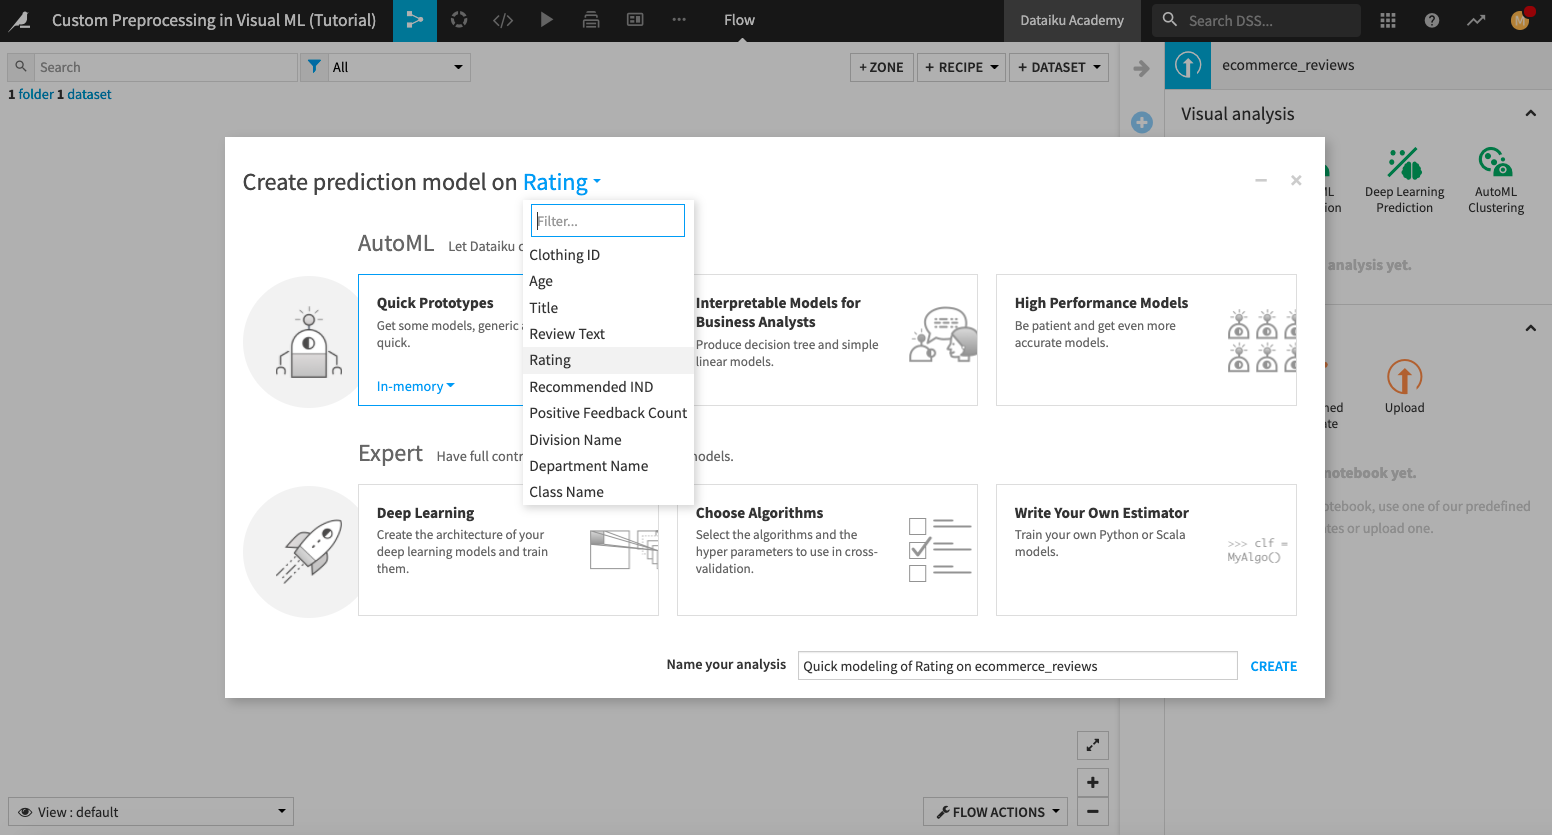
Click AutoML Prediction and select Rating as the target feature.
Click Quick Prototypes.
Click Create.
Dataiku has selected some algorithms that are ready to be trained in the visual ML tool. However, we’ll first explore feature preprocessing before training the selected algorithms.
Explore the Built-in Preprocessing
The visual ML tool of Dataiku DSS has several built-in feature preprocessing methods. To access the preprocessors,
Click the Design tab, and then click the Features Handling panel.
Select any feature from the list to see its built-in feature handling methods, along with some summary statistics.
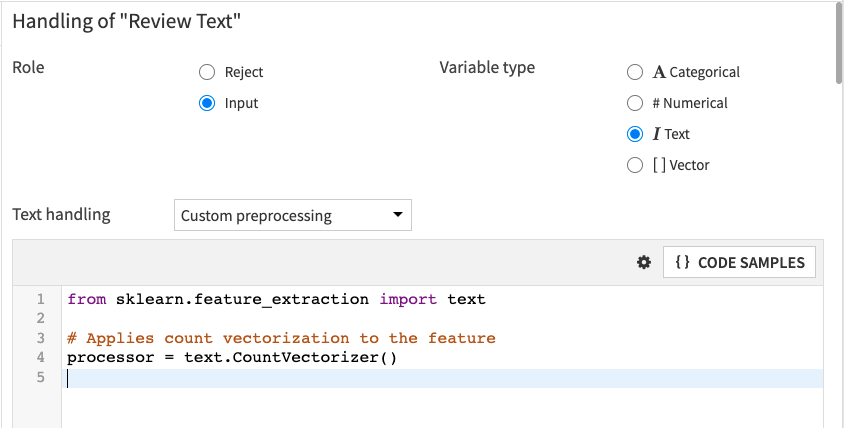
By default, the visual ML tool rejects text features. Therefore, the two text features, Title and Review Text have been rejected; however, let’s enable the Review Text feature for use.
Click the “On/Off” slider next to Review Text to enable this feature.
The default text handling method is “Tokenize, hash and apply SVD”. Next, we’ll apply a custom preprocessing method to handle this feature.

Apply Custom Preprocessing
Instead of using the default selection for preprocessing the Review Text feature, let’s apply count vectorization to transform the text into numeric values.
Notice that Dataiku DSS has an option “Count vectorization” that you can select. If we select this option, we can specify values for parameters such as “Stop words”, “Ngrams”, etc., that will be used to implement the count vectorization preprocessing.
However, we’ll demonstrate the coding approach to implementing count vectorization by using the “Custom preprocessing” option.
Click the dropdown menu next to “Text handling”, and select Custom preprocessing. Dataiku DSS displays a code editor with template Python code. We will replace this code with our custom preprocessing Python code.
Let’s write custom Python code to use the CountVectorizer processor from scikit-learn. We will use the list of words in the vocabulary.txt file so that only these words will be considered by the count vectorizer.
Note
When writing custom preprocessing Python code, the processor must be scikit-learn compatible. That is, it needs to have the fit and transform methods.
The
fitmethod must modify the object in place if a fitting is necessary.The
transformmethod must return one of these: a Pandas DataFrame, a 2-D NumPy array, or a SciPy compressed sparse row matrix (scipy.sparse.csr_matrix) containing the preprocessed result. If thetransformmethod returns a NumPy array or a SciPy compressed sparse row matrix, then the processor should also have anamesattribute containing the list of the output feature names.The processor must be assigned to a variable named
processor. Dataiku DSS looks for this variable to apply the processor to the desired feature.
For more details, see the product documentation.
Delete the template code, and paste the following Python code into the code editor. Then click Save.
from sklearn.feature_extraction.text import CountVectorizer
import dataiku
fold = dataiku.Folder("vocabulary")
print("folder found")

with fold.get_download_stream('vocabulary.txt') as f:
   voc = f.read().decode()
voc = voc.split('\n')

# A custom code vectorizer must define the 'transformer' variable
processor = CountVectorizer(
            min_df = 10, # Tokens must appear at least in 3 documents
            max_df = 0.6, # Tokens that appear in more than 80% of documents are ignored
            ngram_range = (1,2),
            vocabulary = voc,
            # Here we override the token selection regexp
            token_pattern = u'(?u)\\b\\w\\w\\w\\w\\w+\\b')
The preprocessing code does the following:
Imports the
CountVectorizerpreprocessing method from one of the scikit-learn modules.Tip
The default DSS built-in code environment includes the scikit-learn package. However, suppose you want to import a package that is not included in the default DSS built-in environment. In that case, you can first create a new code environment that contains this package and call it from the “Runtime environment” panel of the visual ML tool.
You can also call classes that are defined in the project library.
Opens the vocabulary.txt file and creates a list of words from it.
Instantiates the
CountVectorizer, assigns the list of words to the “vocabulary” parameter, and stores the processor in a variable calledprocessor.
Train the Selected Algorithms
Now that we’ve written the code for custom preprocessing, we can proceed to train the selected algorithms in the visual ML tool.
Click the Algorithms panel on the left-hand side of the page to see that Dataiku DSS has selected “Random Forest” and “Logistic Regression” for training.
Click the Train button in the top right corner of the page to train the models.
Name the session
Count Vectorization Preprocessing, and click Train.Once training is completed, click the Random forest (Count Vectorization Preprocessing) model to open the Report page.
On the Report page, you can click the panels on the left-hand side to see model interpretations, performance charts, and model information.
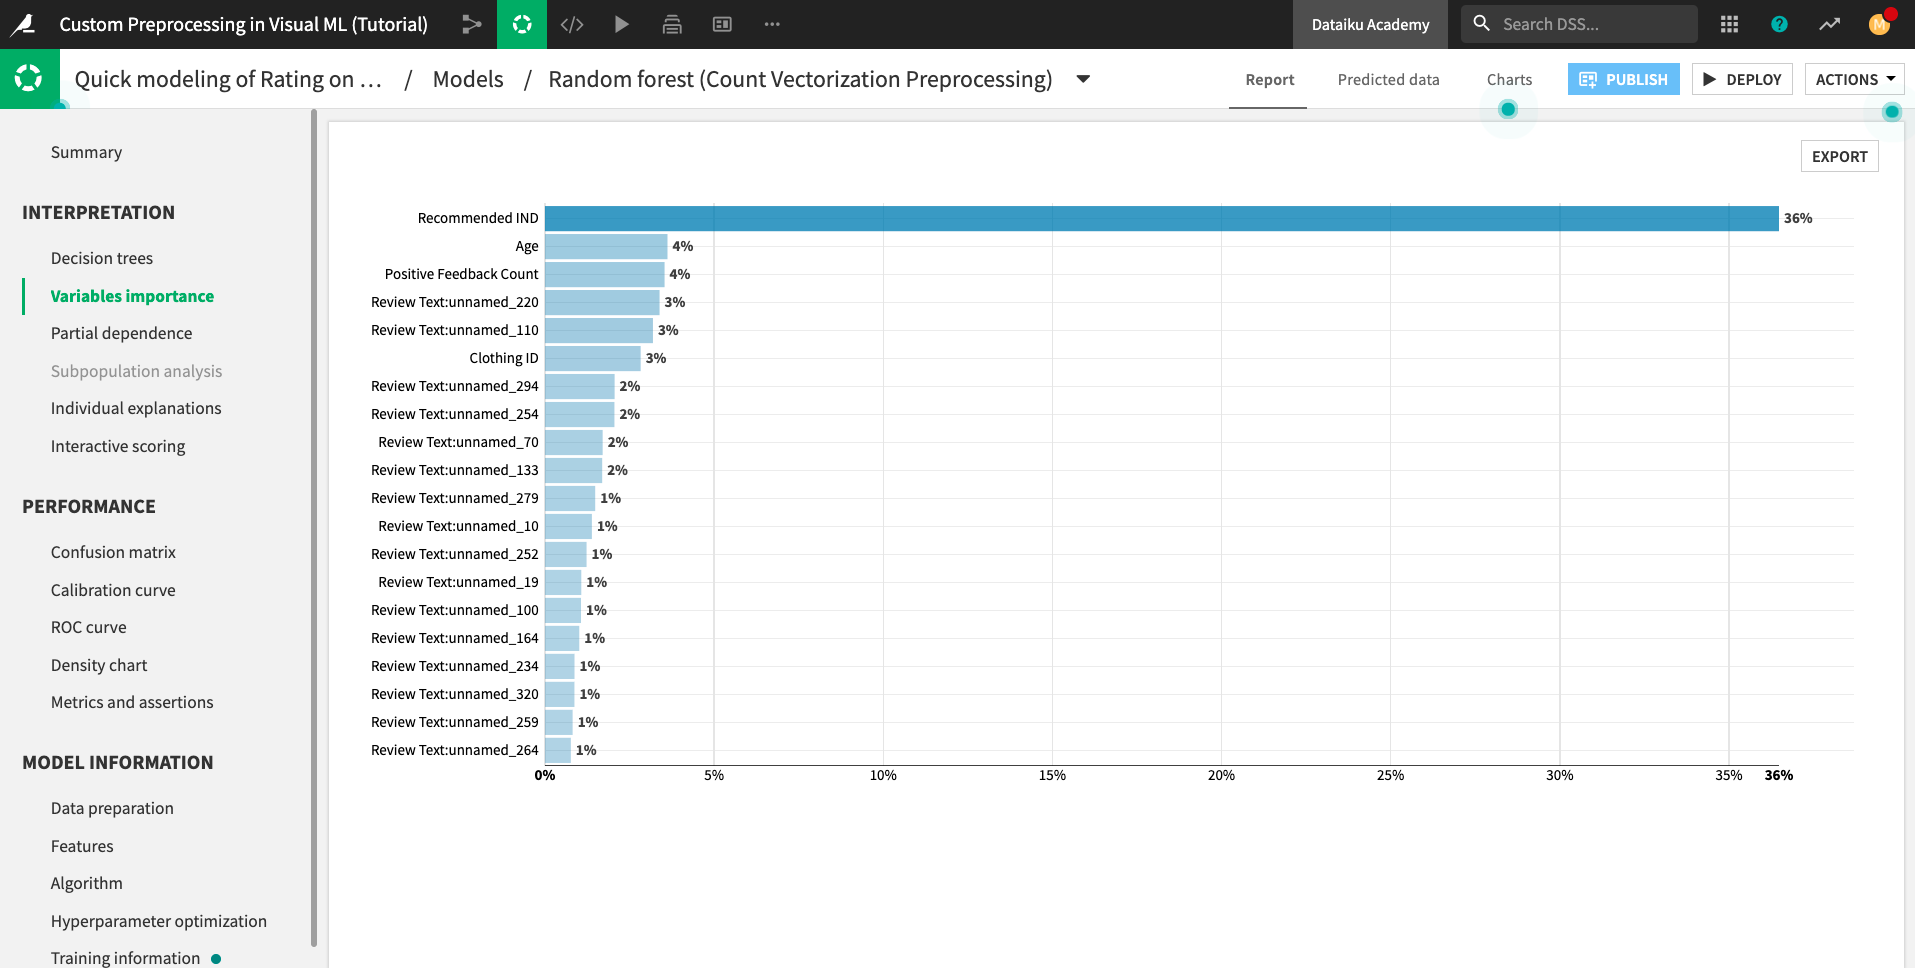
For example, the Variables importance chart shows many features that begin with the prefix Review Text:unnamed_. These features correspond to the words from the vocabulary.txt file used to perform count vectorization on the Review Text feature.
What’s Next?
Congratulations! You’ve completed the hands-on tutorial for Custom Preprocessing!
You have seen how to perform custom preprocessing in the visual ML tool. You also learned that any custom processor you use must be scikit-learn compatible.
You can continue this project with the next hands-on lesson, “Custom Modeling in the Visual ML Tool”.