Automate Active Version of Deployed Model
In this section, we’ll examine Dataiku’s automation features by using a custom scenario. As a data scientist, you’ll find scenarios in Dataiku DSS useful for automating tasks that include: training and retraining models, updating active versions of models in the Flow, building datasets, and so on.
Automate ML Tasks by Using a Scenario
The Project comes with an existing scenario called Automate. To access scenarios in your project,
From the Flow, go to the Jobs icon in the top navigation bar and click Scenarios. This opens the Scenarios page where you can see existing scenarios and create new ones.
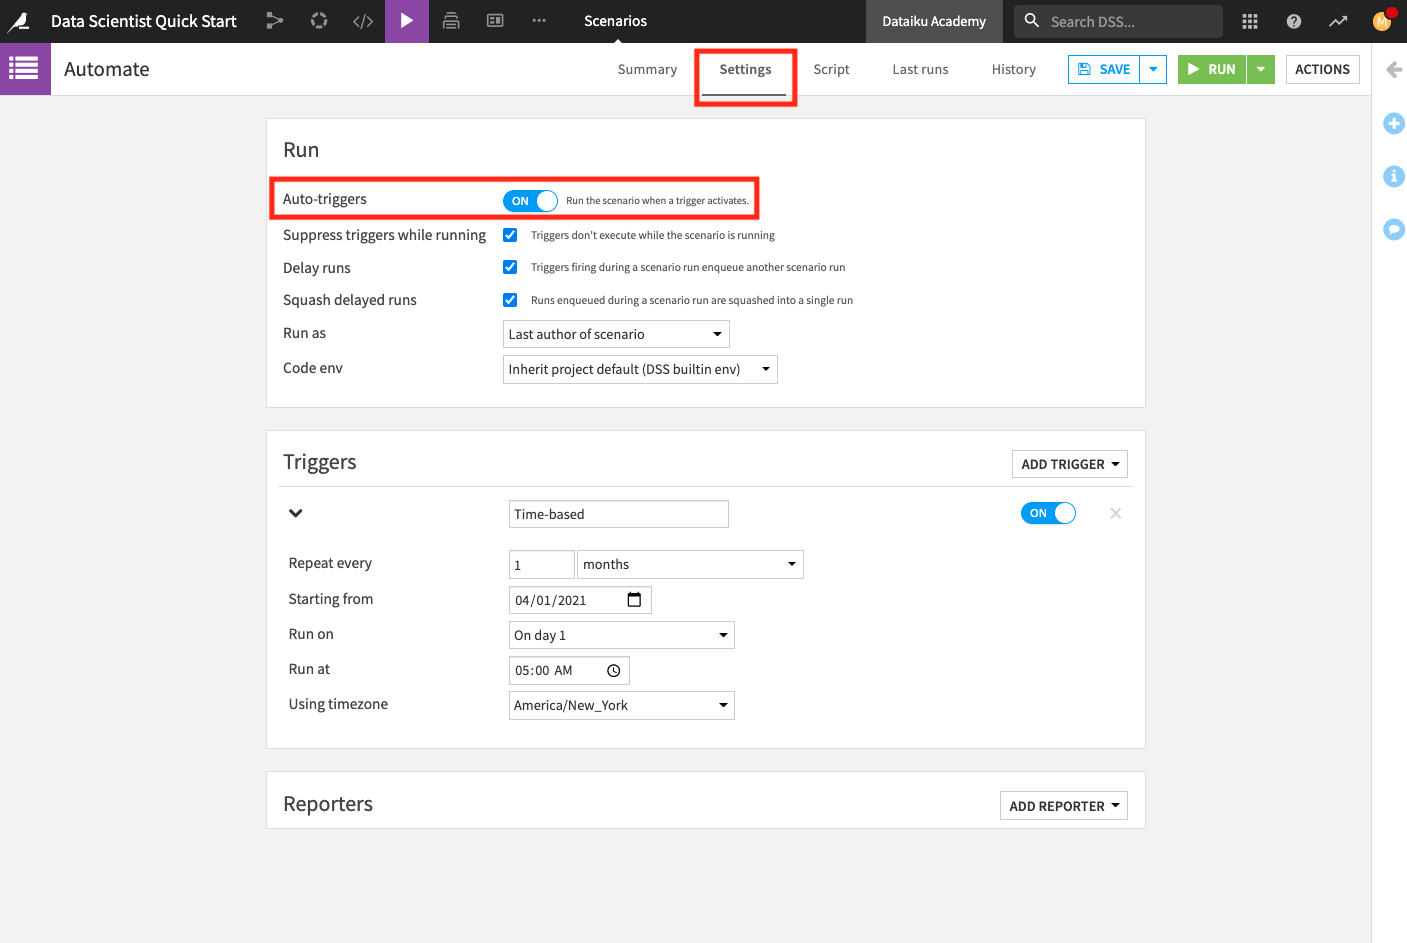
Click Automate to open the scenario. This opens the scenario’s Settings page. The Settings page is where you define triggers and reporters.
Optionally, you can enable the “Auto-triggers” so that the scenario automatically runs when the trigger activates. Note that this setting may be disabled in the Dataiku Online edition.
Click Save.
Note
A scenario has two required components:
Triggers that activate a scenario and cause it to run, and
steps, or actions, that a scenario takes when it runs.
There are many predefined triggers and steps, making the process of automating Flow updates flexible and easy to do. For greater customization, you can create your own triggers and steps using Python or SQL.
Reporters are optional components of a scenario. They are useful for setting up a reporting mechanism that notify of scenario results (for example: by sending an email if the scenario fails).
The Automate scenario already has a monthly trigger set up so that the scenario runs every first day of the month.
Dataiku DSS allows you to create step-based or custom Python scenarios. The Automate scenario is Python-based. Let’s explore the script.
Click Script at the top of the page to see the scenario’s script.
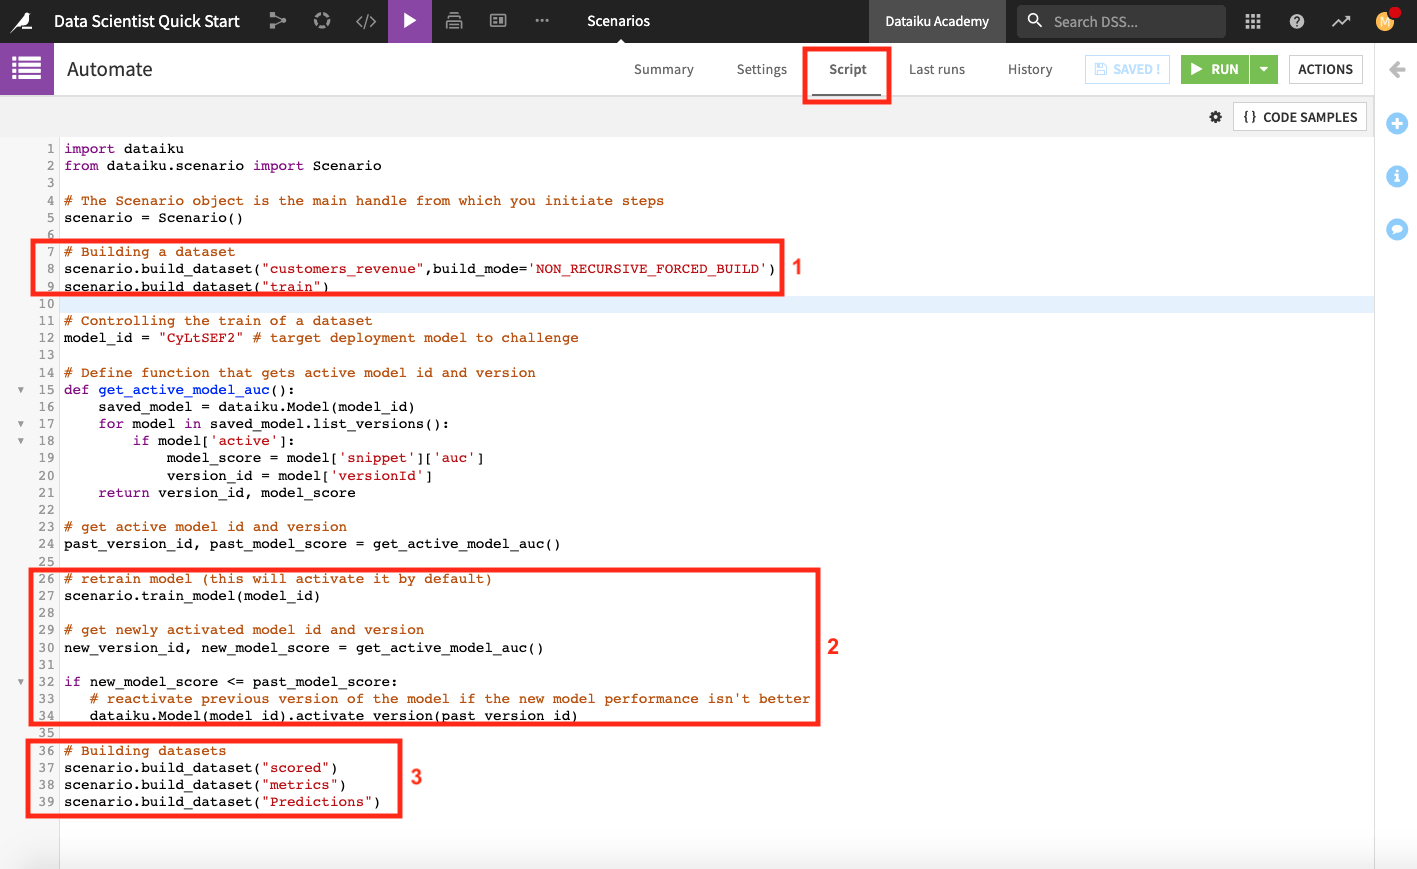
The scenario script is a full-fledged Python program that executes scenario steps. This script uses the Dataiku API to access objects in the project. The script also uses the scenarios API within the scenario in order to run steps such as building a dataset and training a model.
Note
The scenario API is exclusive to Scenarios, and cannot be used on a Python notebook.
When we run the scenario, it will perform the following tasks.
Build the customers_revenue and train dataset. To build the train dataset, the scenario runs its parent recipe (the Split recipe) and therefore builds the test dataset also.
Retrain the deployed model and set this new model version as the active version in the Flow only if the new version has a higher AUC score than the previous model version. This step overwrites the default behavior of Dataiku DSS.
Tip
If you go to the “Settings” tab of a model’s page, you can see that by default, Dataiku DSS activates new model versions automatically at each retrain (that is, the most recent model version is set as the active version). However, you have the option of changing this behavior to activate new model versions manually.
Build the scored, metrics, and Predictions datasets
Before we run the scenario, we’ll make two changes to the project:
Replace the model ID on line 12 with that of the deployed model and click Save.
Tip
To find the model ID for your deployed model, return to the Flow and open the model. The URL is of the format: INSTANCE_URL/projects/projectKey/savedmodels/modelID/versions/. You can copy the model ID number from here.
Change the value of the project variable “revenue_value” from
170to100. Because the customers_revenue dataset depends on the value of “revenue_value”, changing the value of “revenue_value” will change the data in customers_revenue.
Recall that you can access the project variable by going to the More actions … menu in the top navigation bar.
The scenario is now ready to use. To test it,
Return to the Automate scenario from the Jobs menu.
Click Run and wait for the scenario to complete its jobs.
Tip
You can switch to the Last runs tab of the scenario to follow its progress. Here, you can examine details of the run, what jobs are triggered by each step in the scenario, and the outputs produced at each scenario step.
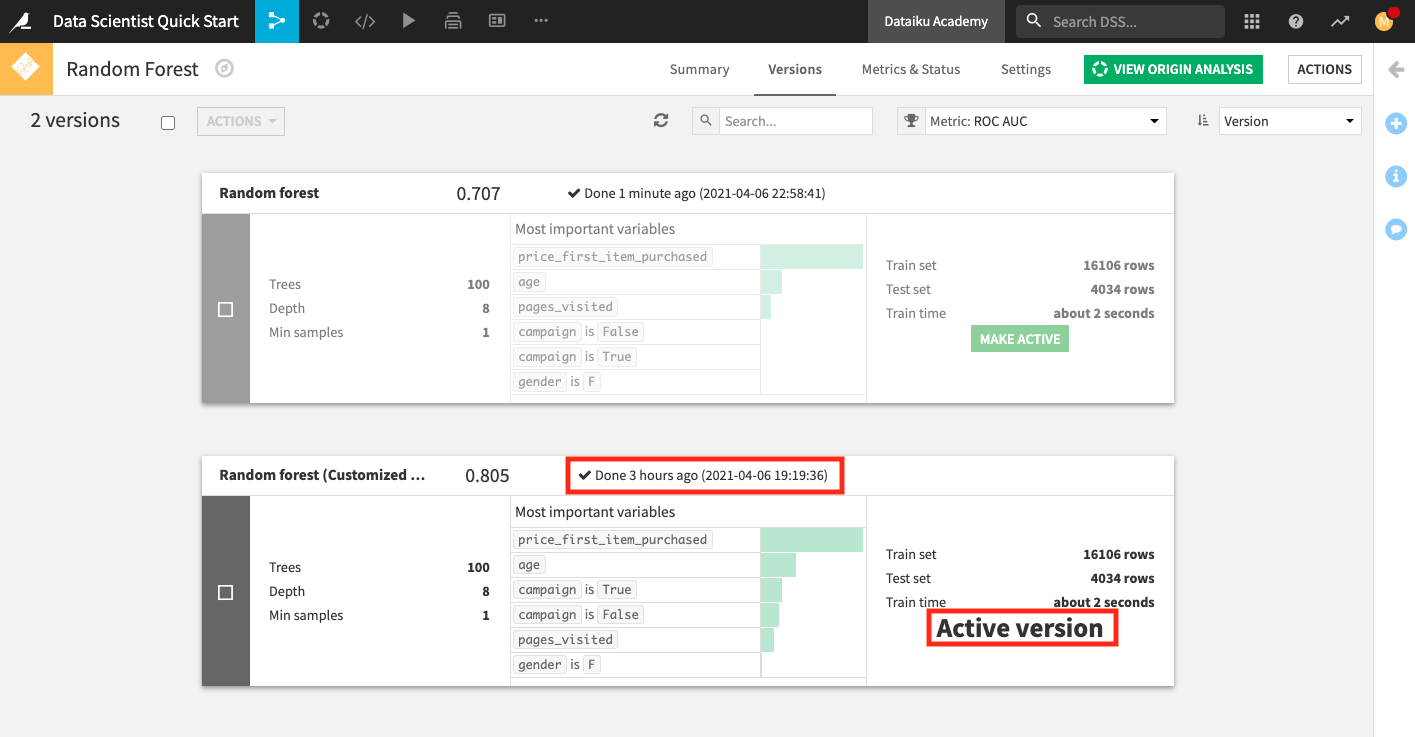
Upon returning to the Flow and opening the deployed model, notice that the older model version remains active as long as its ROC AUC score is not worse than the new version’s ROC AUC score (a consequence of the Python step in the scenario).
Change the value of the project variable “revenue_value” from
100to220.Return to the Automate scenario from the Jobs menu.
Click Run and wait for the scenario to complete its jobs.
Open the deployed model to see that the new model version, with a higher AUC score than the previous active version, is now active.

Open the metrics dataset to observe that an additional row of test metrics was added for the active model version each time the scenario ran.
Tip
Over time, we can track scenarios to view patterns of successes and failures. To do so, go to the Jobs menu in the top navigation bar and select Automation Monitoring.