Customize the Design of Your Predictive Model
The kinds of predictive modeling to perform in data science projects vary based on many factors. As a result, it is important to be able to customize machine learning models as needed. Dataiku DSS provides this capability to data scientists and coders via coding and visual tools.
In this section, you’ll see one way that Dataiku DSS makes it possible for you to customize aspects of the machine learning workflow using code notebooks.
Split the Training and Testing Data
Before implementing the machine learning part, we first need to split the data in customers_revenue into training and testing datasets. For this, we’ll apply the Split Recipe in Dataiku DSS to customers_revenue.
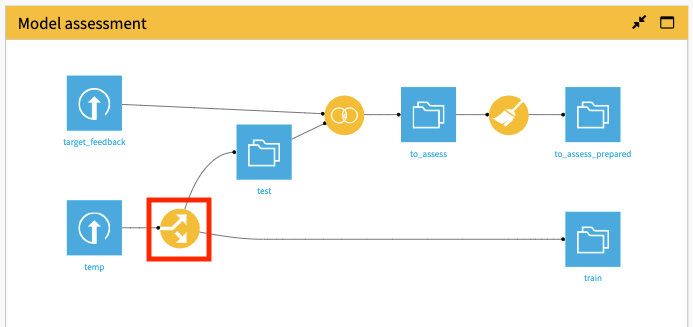
For convenience, we won’t create the Split recipe from scratch. Instead, we’re going to use the existing Split recipe that is currently applied to the temp dataset in the Model assessment Flow zone. To do this, we’ll change the input of the Split recipe to customers_revenue.
In the Model assessment Flow Zone, open the Split recipe.

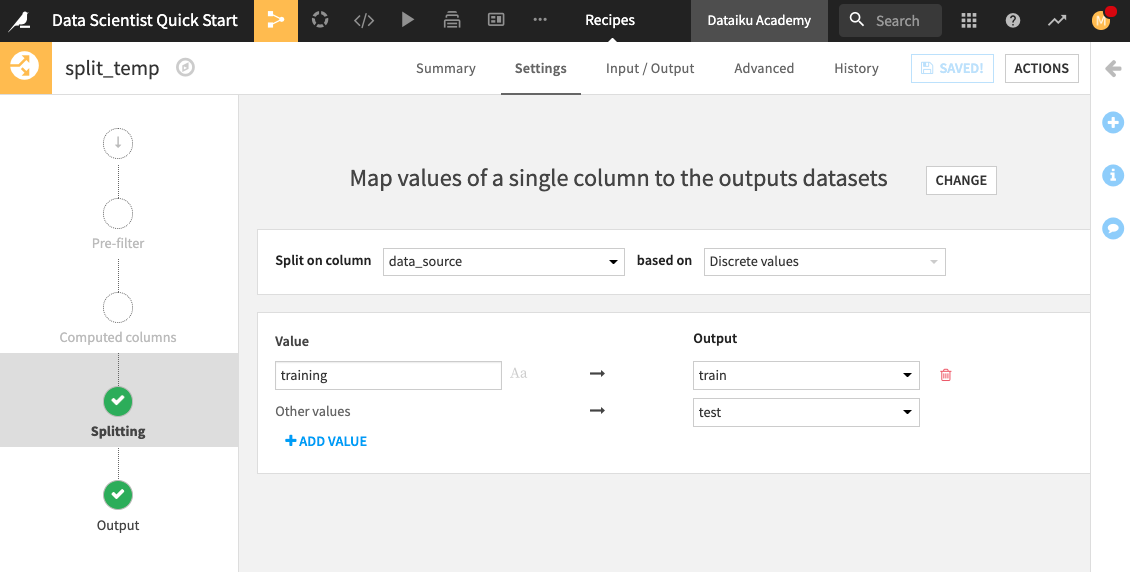
Switch to the Input/Output tab of the recipe.
Click Change and select customers_revenue.
Click Save, accepting the Schema changes, if prompted.

Click Settings to return to the recipe’s settings.
Notice that the customers_revenue dataset is being split on the data_source column. The customers with the “training” label are assigned to the train dataset, while others are assigned to the test dataset.

Click Run to update the train and test datasets.
Return to the Flow.
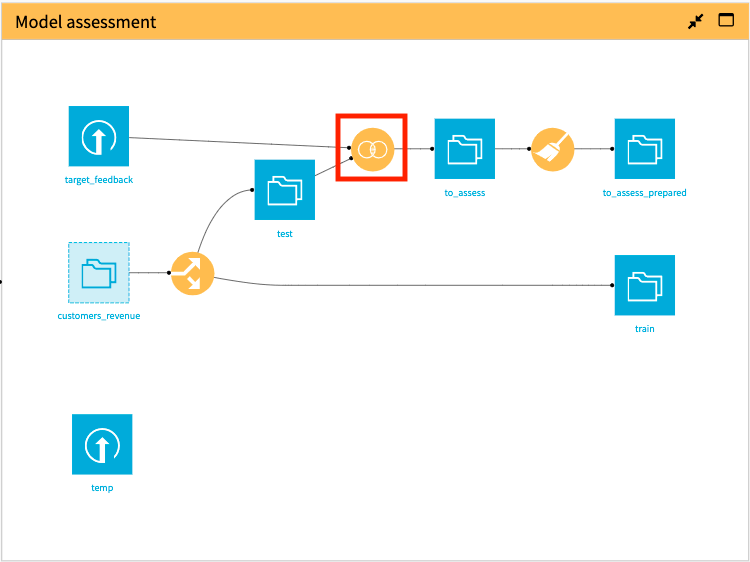
In the “Model assessment” Flow Zone, notice that the updated train and test datasets are now the outputs of splitting customers_revenue.
Because we updated the train and test datasets, we need to propagate these changes downstream in the “Model assessment” Flow Zone. By doing this, we will update the preliminary data cleaning that the data analyst previously performed.
In the Model assessment Flow Zone, right-click the Join recipe, then select Build Flow outputs reachable from here.
Click Build.

Let’s build out our machine learning pipeline. We’ll start by exploring the option of using a Jupyter notebook.
Customize the Design of Your Predictive Model Using a Notebook
As we saw in previous sections, we can create Python notebooks and write code to implement our processing logic. Now, we’ll see how Dataiku DSS allows the flexibility of fully implementing machine learning steps. Let’s explore the project’s custom random forest classification notebook.
Click the Code icon (</>) in the top navigation bar.
Click custom random forest classification to open the notebook.
This notebook uses the dataiku API and imports functions from various scikit-learn modules.
A subset of features has been selected to train a model on the train dataset, and some feature preprocessing steps have been performed on this subset.
To train the model, we’ve used a random forest classifier and implemented grid search to find the optimal model parameter values.
To score the model, we’ve used the to_assess_prepared dataset as the test set because it contains the test data and the ground truth prediction values which will be used after scoring to assess the model’s performance.
Run the cells in the notebook to see the computed AUC metric on the test dataset.
Tip
When you’re done exploring the notebook used in this section, remember to unload it so that you can free up RAM. You can do this by going to the Notebooks page and clicking the “X” next to a notebook’s name.
Note
You can also build your custom machine learning model (preprocessing and training) entirely within a code recipe in your Flow and use another code recipe for scoring the model. For an example that showcases this usage, see the sample project: Build a model using 5 different ML libraries.