Engineer Features Using Code Notebooks and Code Recipes
As a data scientist, you’ll often want to perform feature engineering in addition to the data cleaning and preparation done by a data analyst. Dataiku provides various visual and code recipes that can help to engineer new features quickly.
This section will explore code notebooks further and show how to convert them to code recipes. We’ll also demonstrate how Dataiku DSS helps speed you to value through the use of some important features, namely:
APIs that allow you to easily interact with objects in your project via code; and
Project variables that can be reused in Dataiku objects.
Explore a Python Notebook
Here we’ll explore a notebook that creates a target column based on the customers’ revenue. To access the notebook,
Go to the project’s notebooks by clicking the code icon (</>) in the top navigation bar.
Open the existing compute_customers_revenue notebook.
Dataiku DSS comes with a complete set of Python APIs.
Note
In parts of DSS where you can write Python code (e.g., recipes, notebooks, scenarios, and webapps) the Python code interacts with DSS (e.g., to read, process, and write datasets) using the Python APIs of DSS.
Dataiku DSS also has APIs that work with R and Javascript. See Dataiku APIs to learn more.
We’ve used a few of these Python APIs in this notebook, some of these include:
The
dataikupackage that exposes an API containing modules, functions, and classes that we can use to interact with objects in our project.The
Datasetclass that is used to read the customers_web_joined dataset and create an object.The
get_dataframemethod that is applied to the object and used to create a dataframe.
The Dataiku API is very convenient for reading in datasets regardless of their storage types.
Additionally, this project uses a project variable revenue_value which we’ve defined to specify a revenue cut-off value of 170.
Tip
To see the project variable, go to the More Options (…) menu in the top navigation bar and click Variables.
Note
Variables in Dataiku DSS are containers for information that can be reused in more than one Dataiku DSS object (e.g., recipes, notebooks, and scenarios), making your workflow more efficient and automation tasks more robust. Variables can also be defined, called, and updated through code, such as in code-based recipes.
Lastly, the create_target function in the notebook computes a target column based on the revenue column, so that customers with revenue values that meet or exceed the cut-off value are labeled as high-value customers.
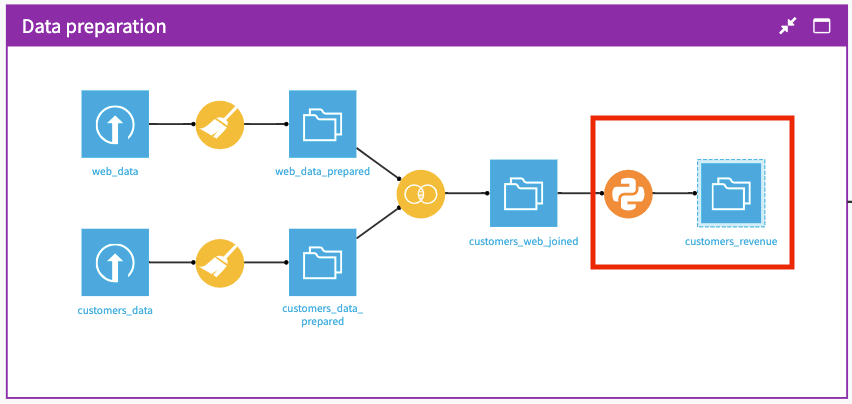
Convert a Notebook to a Code Recipe
One of the powerful features of notebooks is that we can convert them to recipes, thereby applying them to datasets in our Flow and producing outputs. This feature provides value to coders and non-coders alike, as the visual representation of the recipe in the Flow makes it easy for anyone to understand the data pipeline.
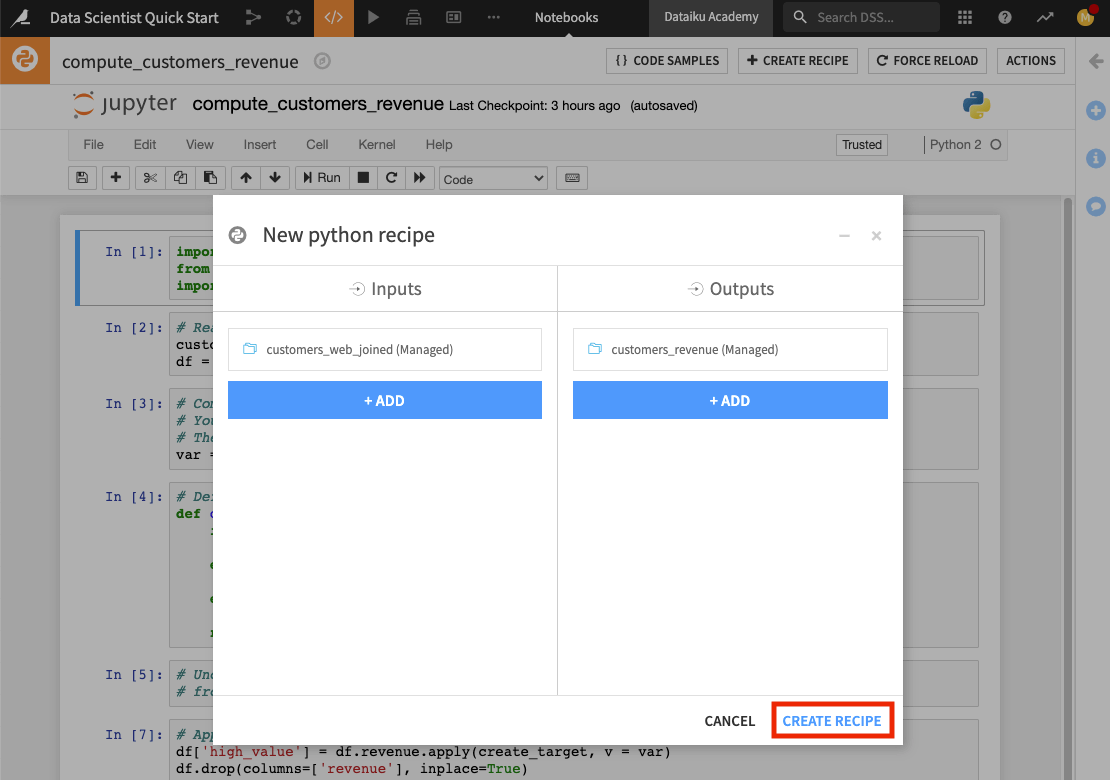
We’ll convert the compute_customers_revenue notebook to a Python recipe by applying it to the customers_web_joined dataset. To do this:
Click the + Create Recipe button at the top of the notebook.
Click OK to create a Python recipe.
Click + Add in the “Inputs” column and select customers_web_joined.
In the “Outputs” column, click + Add to add a new dataset, then name it
customers_revenue.Specify the CSV format and click Create Dataset.
Click Create Recipe
The code recipe editor opens up, and here we can see the code from the Python notebook. Notice that in creating the recipe, Dataiku DSS has included some additional lines of code in the editor. These lines of code make use of the Dataiku API to write the output dataset of the recipe.
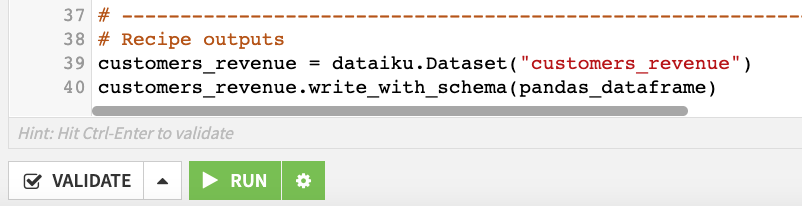
Modify the code to provide the proper handle for the dataframe.
Scroll to the last line of code.
Change it to
customers_revenue.write_with_schema(df).Click Save.
You can also explore the tabs at the top of the Python recipe to see some of its additional features. In particular, the Advanced tab allows you to specify the Python code environment to use, container configuration, and more. We’ll keep the default selections in the “Advanced” tab.
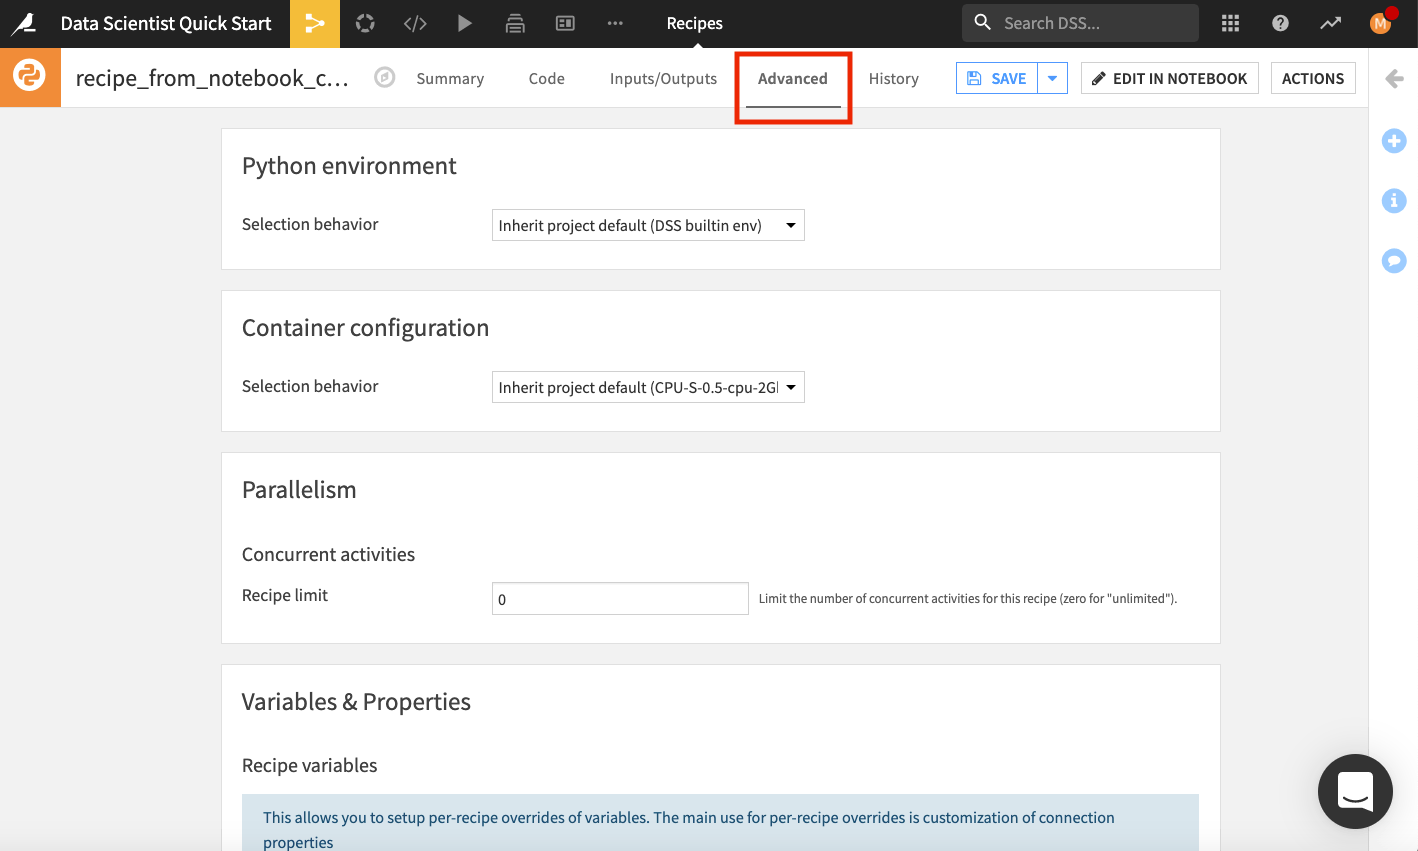
The History tab also tracks changes that are made to the recipe.
Back in the Code tab of the recipe, the left panel lists the input and output datasets. We can also inspect all the variables that are available for use in this recipe. To do so,
In the left panel, go to the Variables tab.
Click Validate at the bottom of the editor.
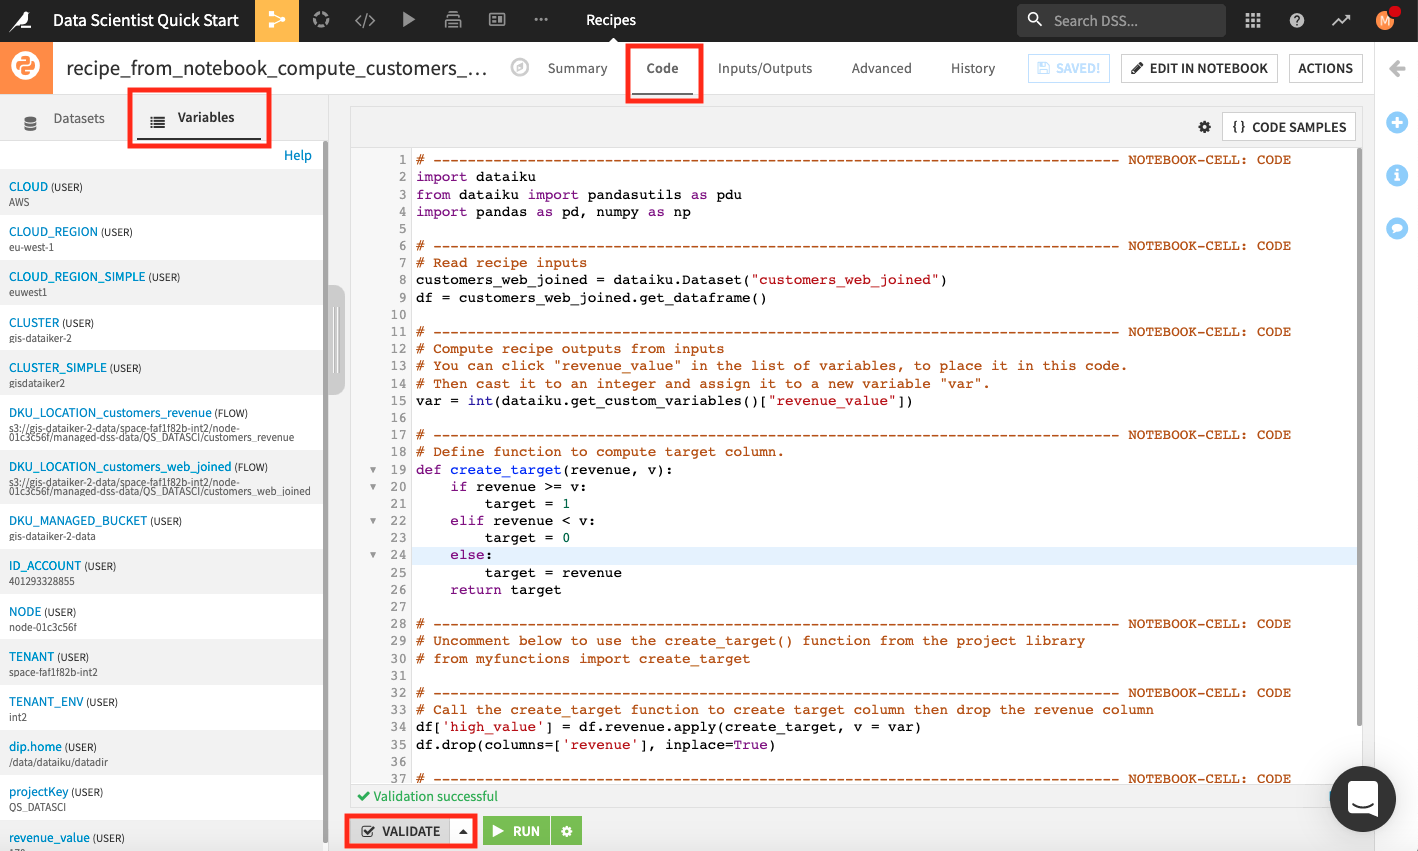
Dataiku DSS validates the script in the code editor and populates the left panel with a list of variables that we can use in the recipe.
Click Run to run the recipe.
Wait while the job completes, then open the new dataset called customers_revenue to see the new column high_value.
Return to the Flow to see that the Python recipe and output are now added to the “Data preparation” Flow Zone.
Tip
When you’re done exploring the notebook used in this section, remember to unload it so that you can free up RAM. You can do this by going to the Notebooks page and clicking the “X” next to a notebook’s name.