Concept: Scoring Data
Now that our model has been successfully deployed to the Flow, it is ready to be used to predict new, unseen data. In our case, we trained a model on historical patient data and are now ready to predict whether new patients will be readmitted to the hospital.
We’ll use the Score recipe to apply our model to this new, unseen data.
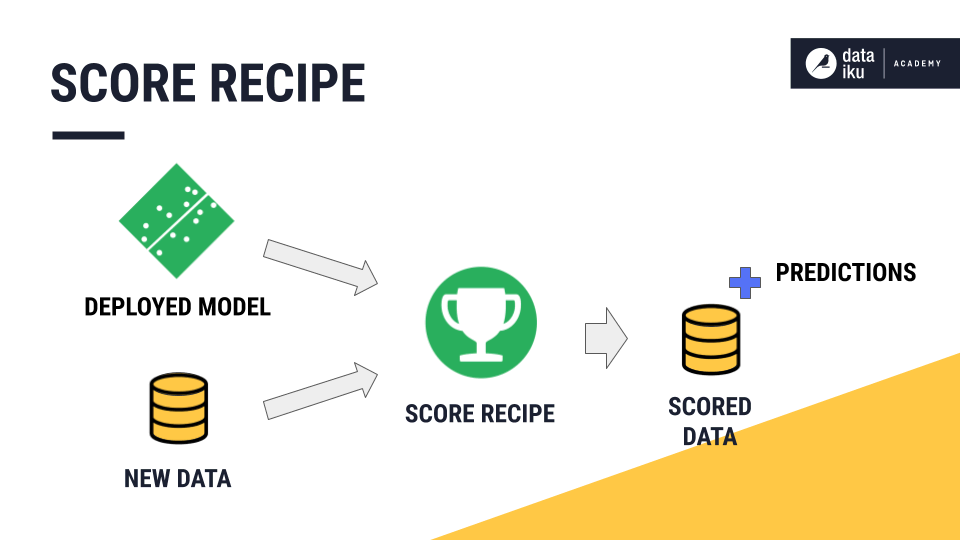
The inputs to the Score recipe are a deployed model and a dataset of new, unlabelled records that we want to score.
The output is a scored dataset showing predictions for each record.
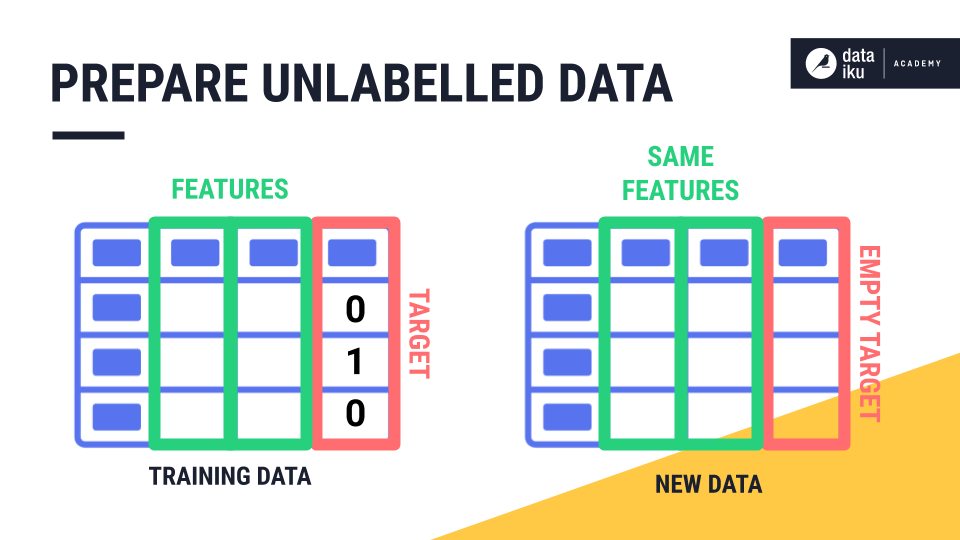
Preparing Unlabelled Data
However, before using the Score recipe, you’ll usually need to carefully prepare the dataset to be scored. Recall that our model was trained on a very specific set of features. If we want the model to perform as we expect on new data, we need to provide the model the exact same set of features, with the same names, prepared in the same manner.
In DSS, this means that the data to be scored must pass through the same Flow recipes used to create any features found in the training set. For example, this Prepare recipe did some processing on the Age feature when creating the training set.
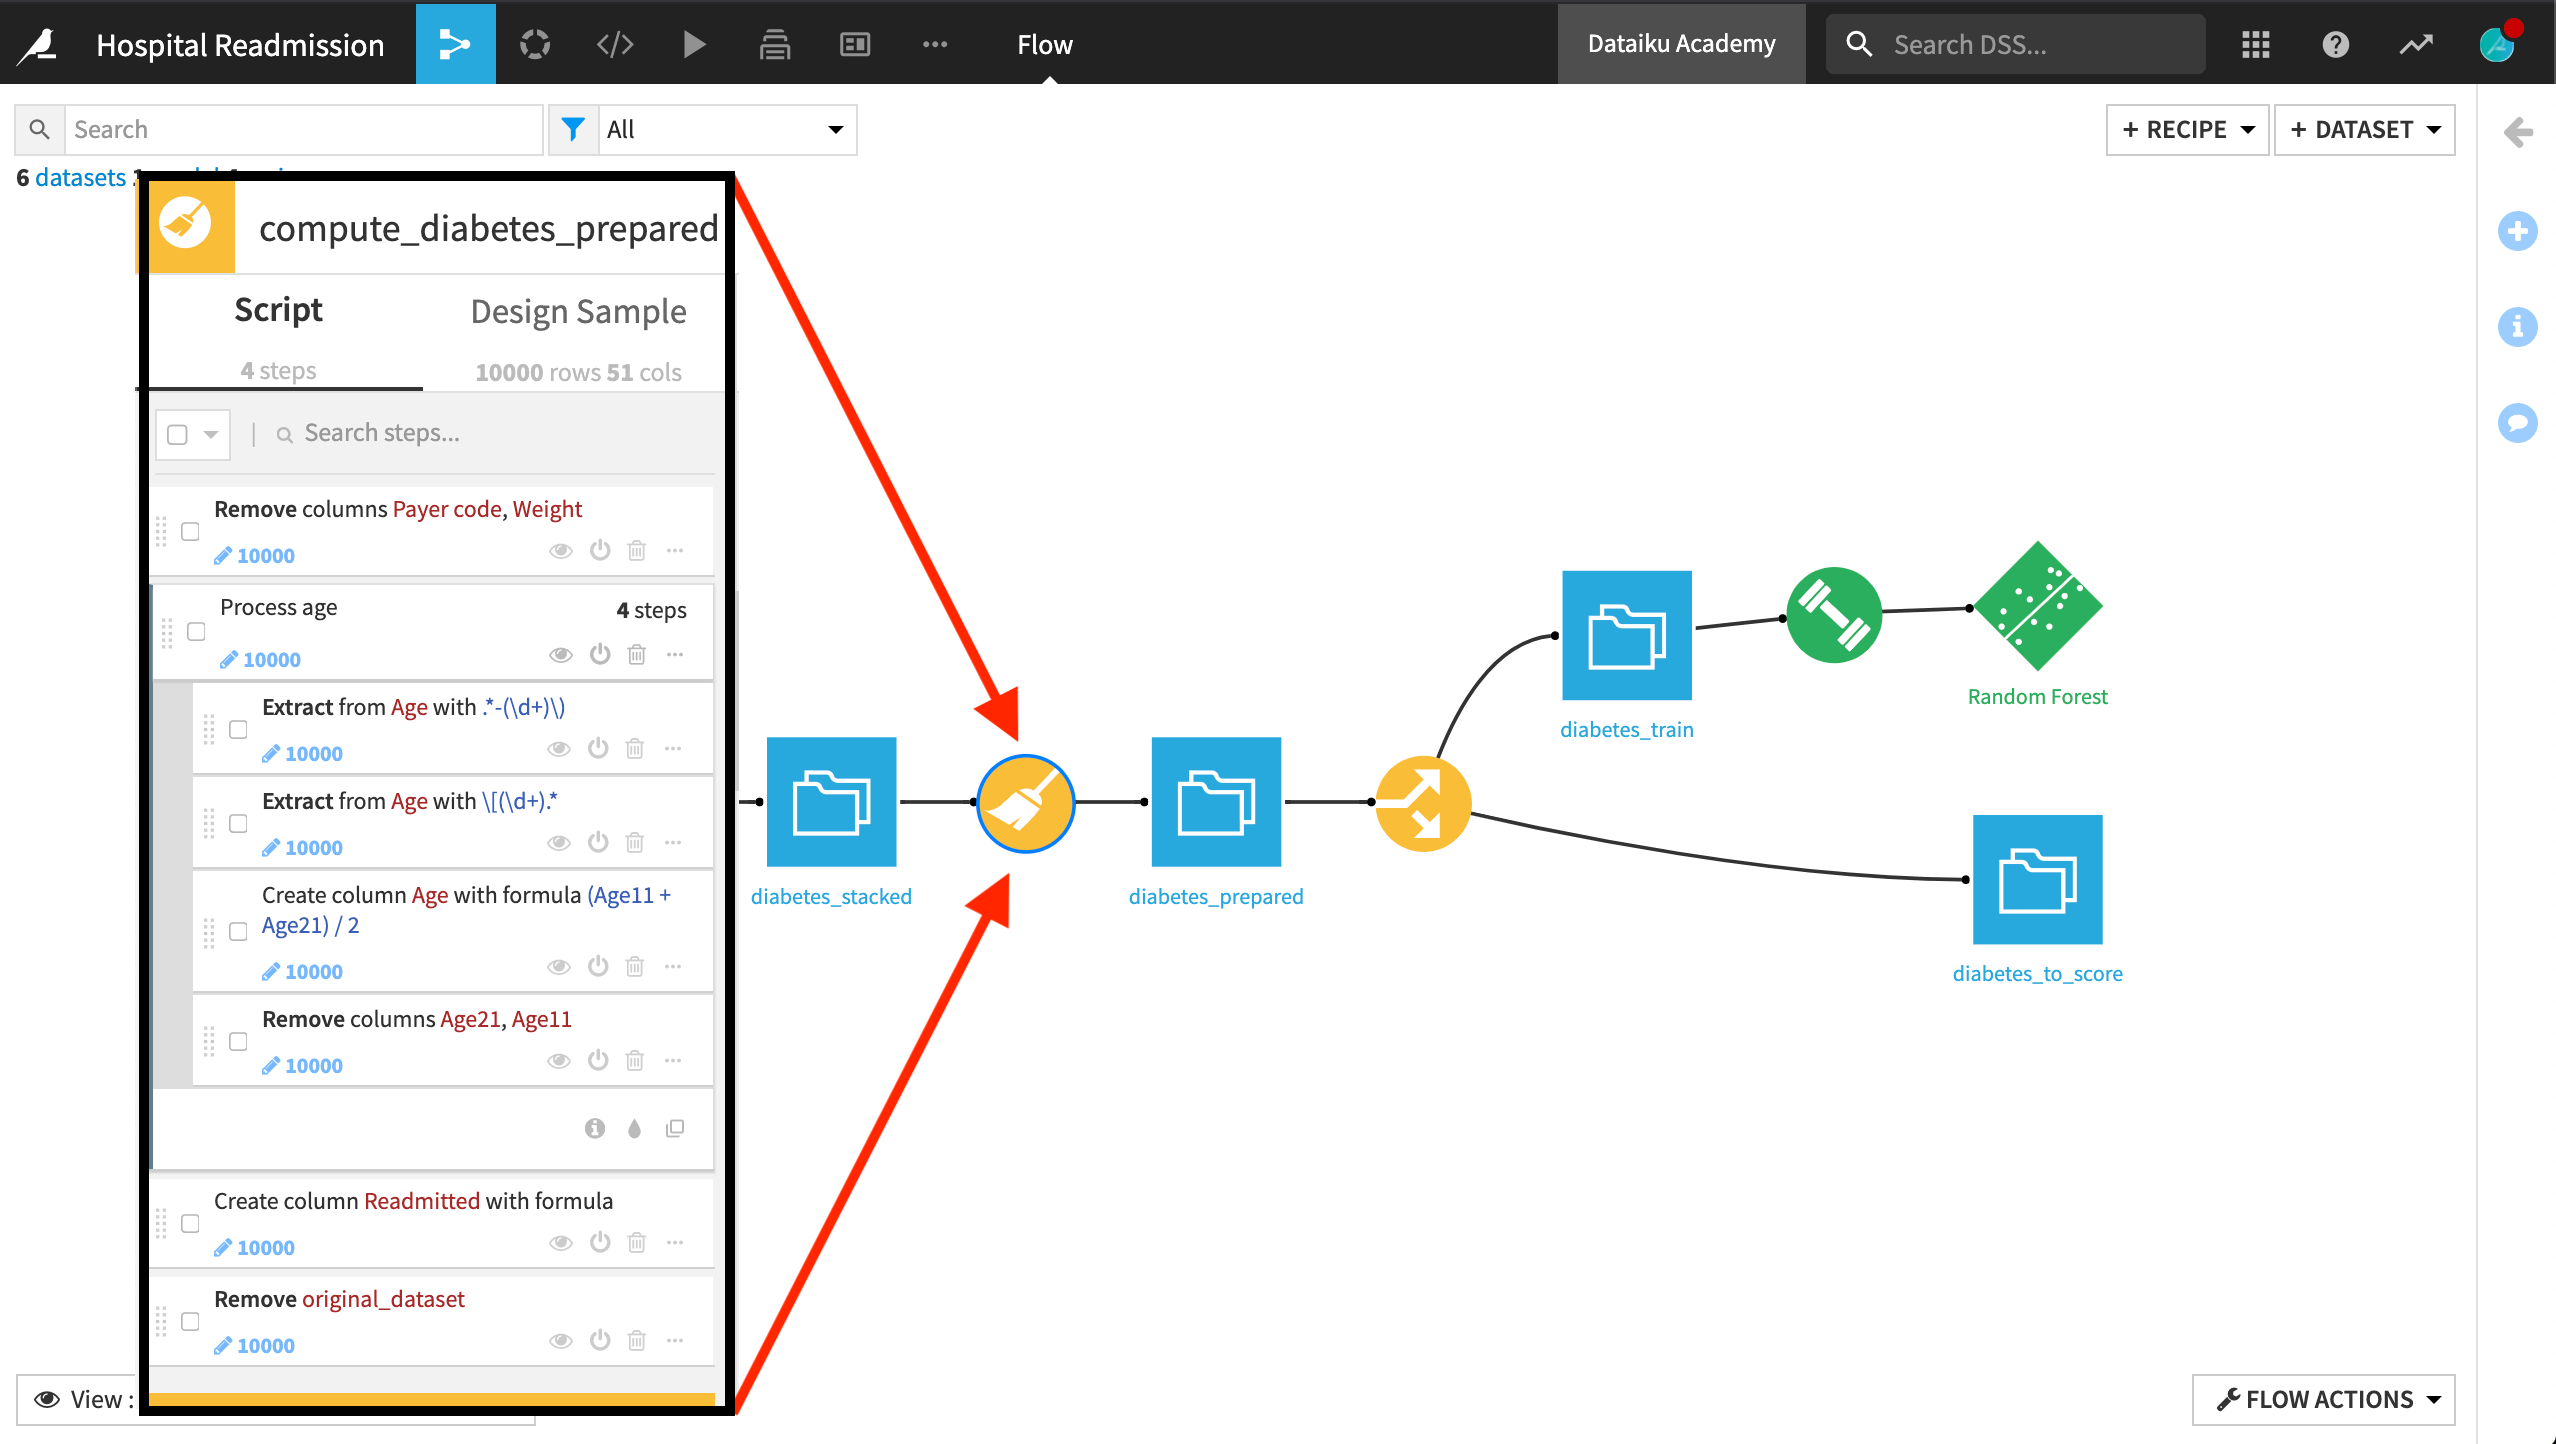
Sending the new data through these same steps is the best way to ensure that the model behaves similarly on new patients as it did during the modeling training and evaluation phase with the historic data. One efficient way to do this in DSS is to use a Stack recipe to combine your training and unlabelled datasets.
From that point, we can build features using Flow recipes and finally use a Split recipe to split back the patient data into historical data for training and new, unlabelled, patients to be scored.
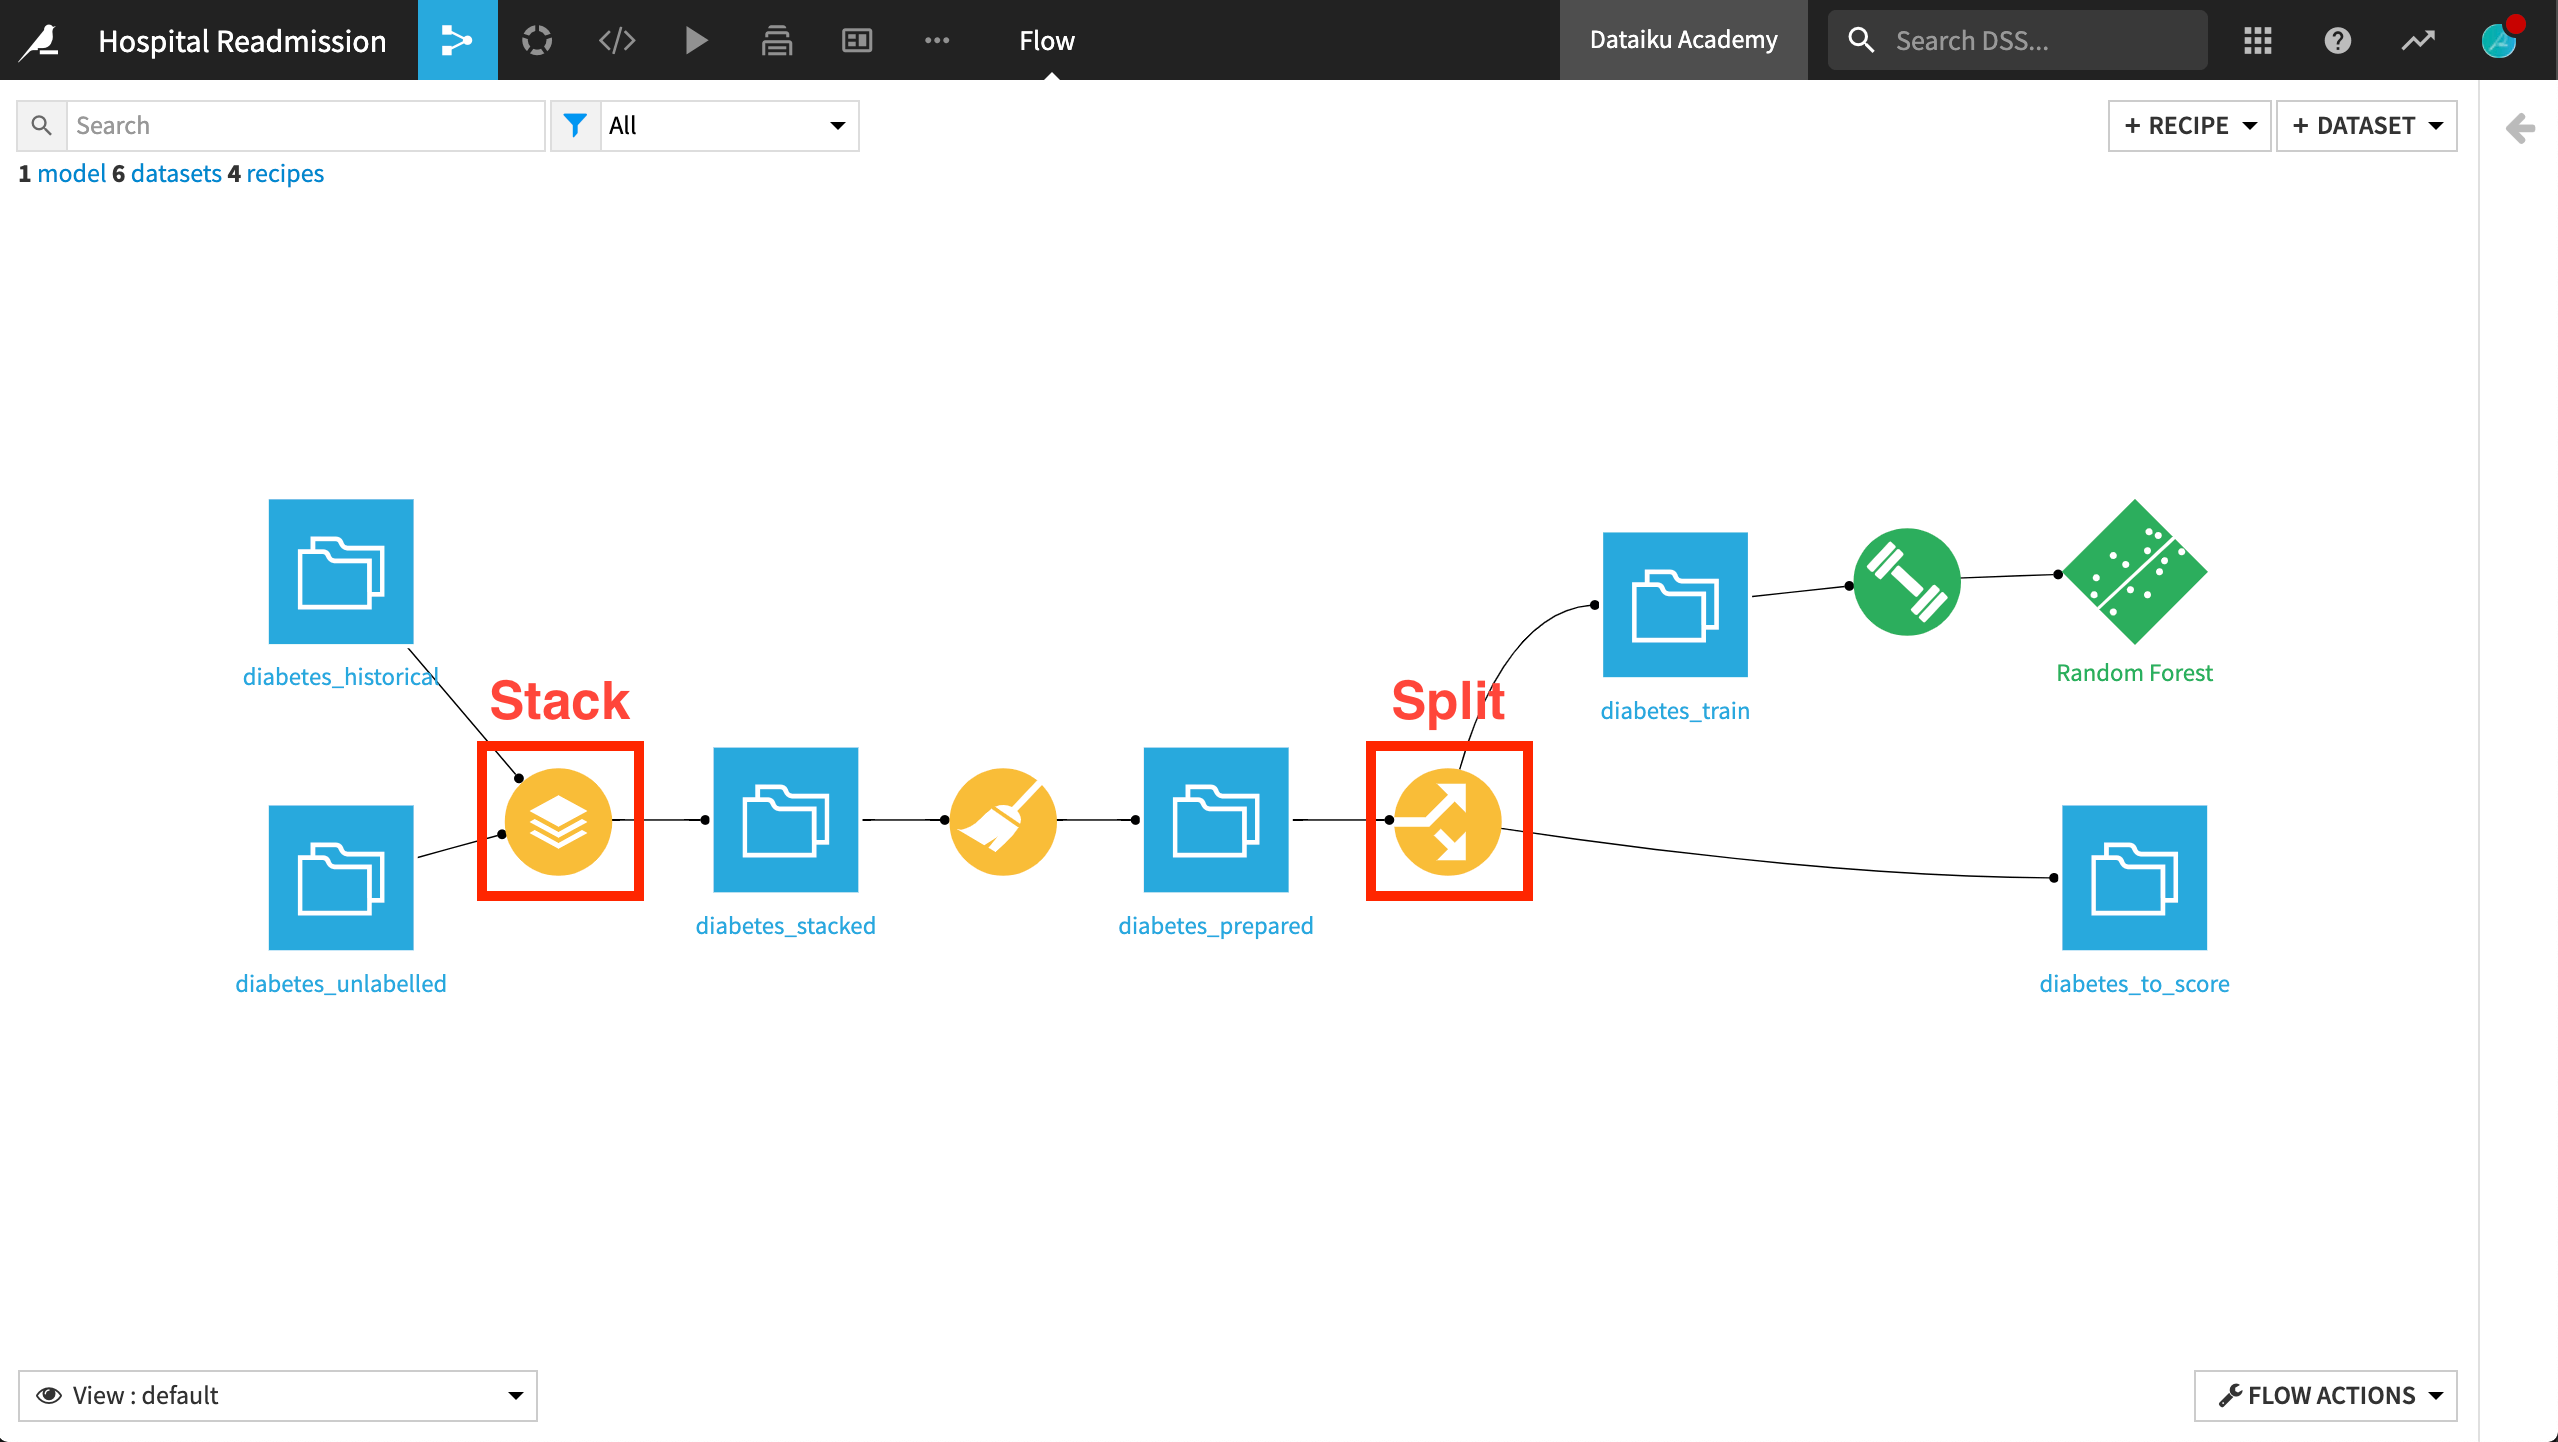
Doing this ensures that features are identical for model training and inference.
The Score Recipe
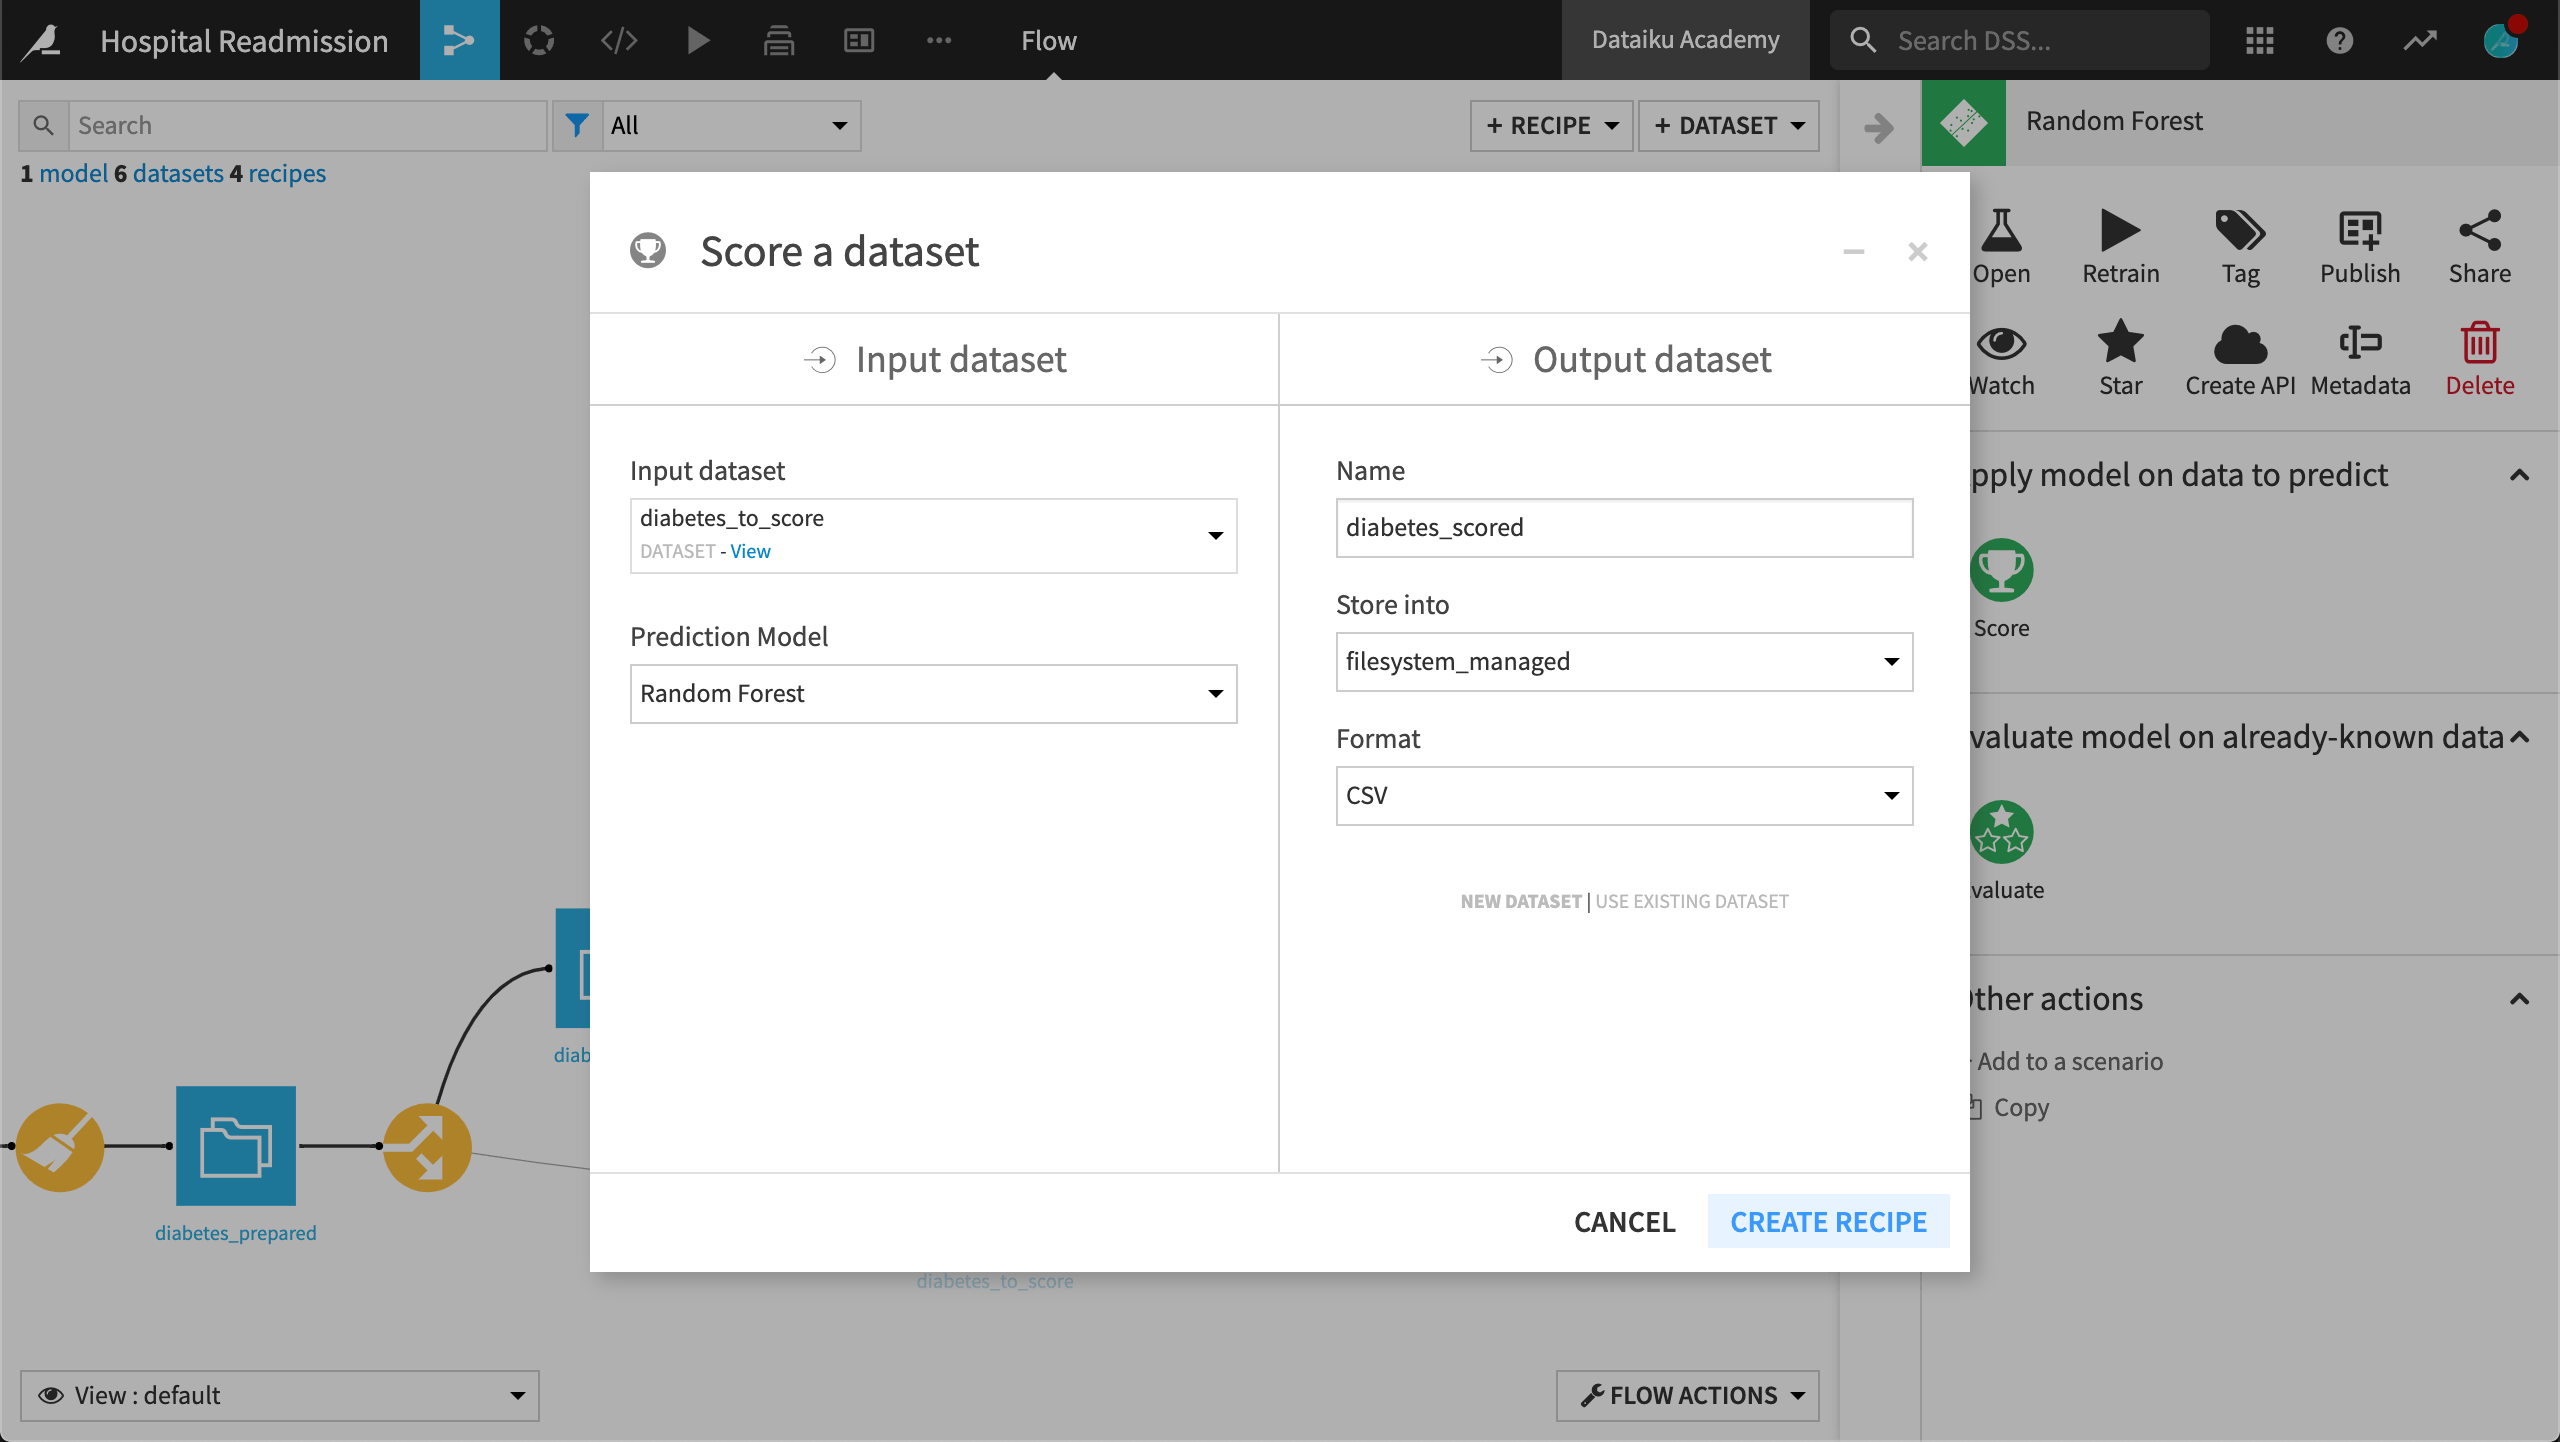
Once the unlabelled dataset is ready to be scored by the deployed model, a Score recipe can be created in the Flow.
The Score recipe takes two inputs: a deployed model and a dataset ready to be scored. It outputs a dataset containing the model predictions.
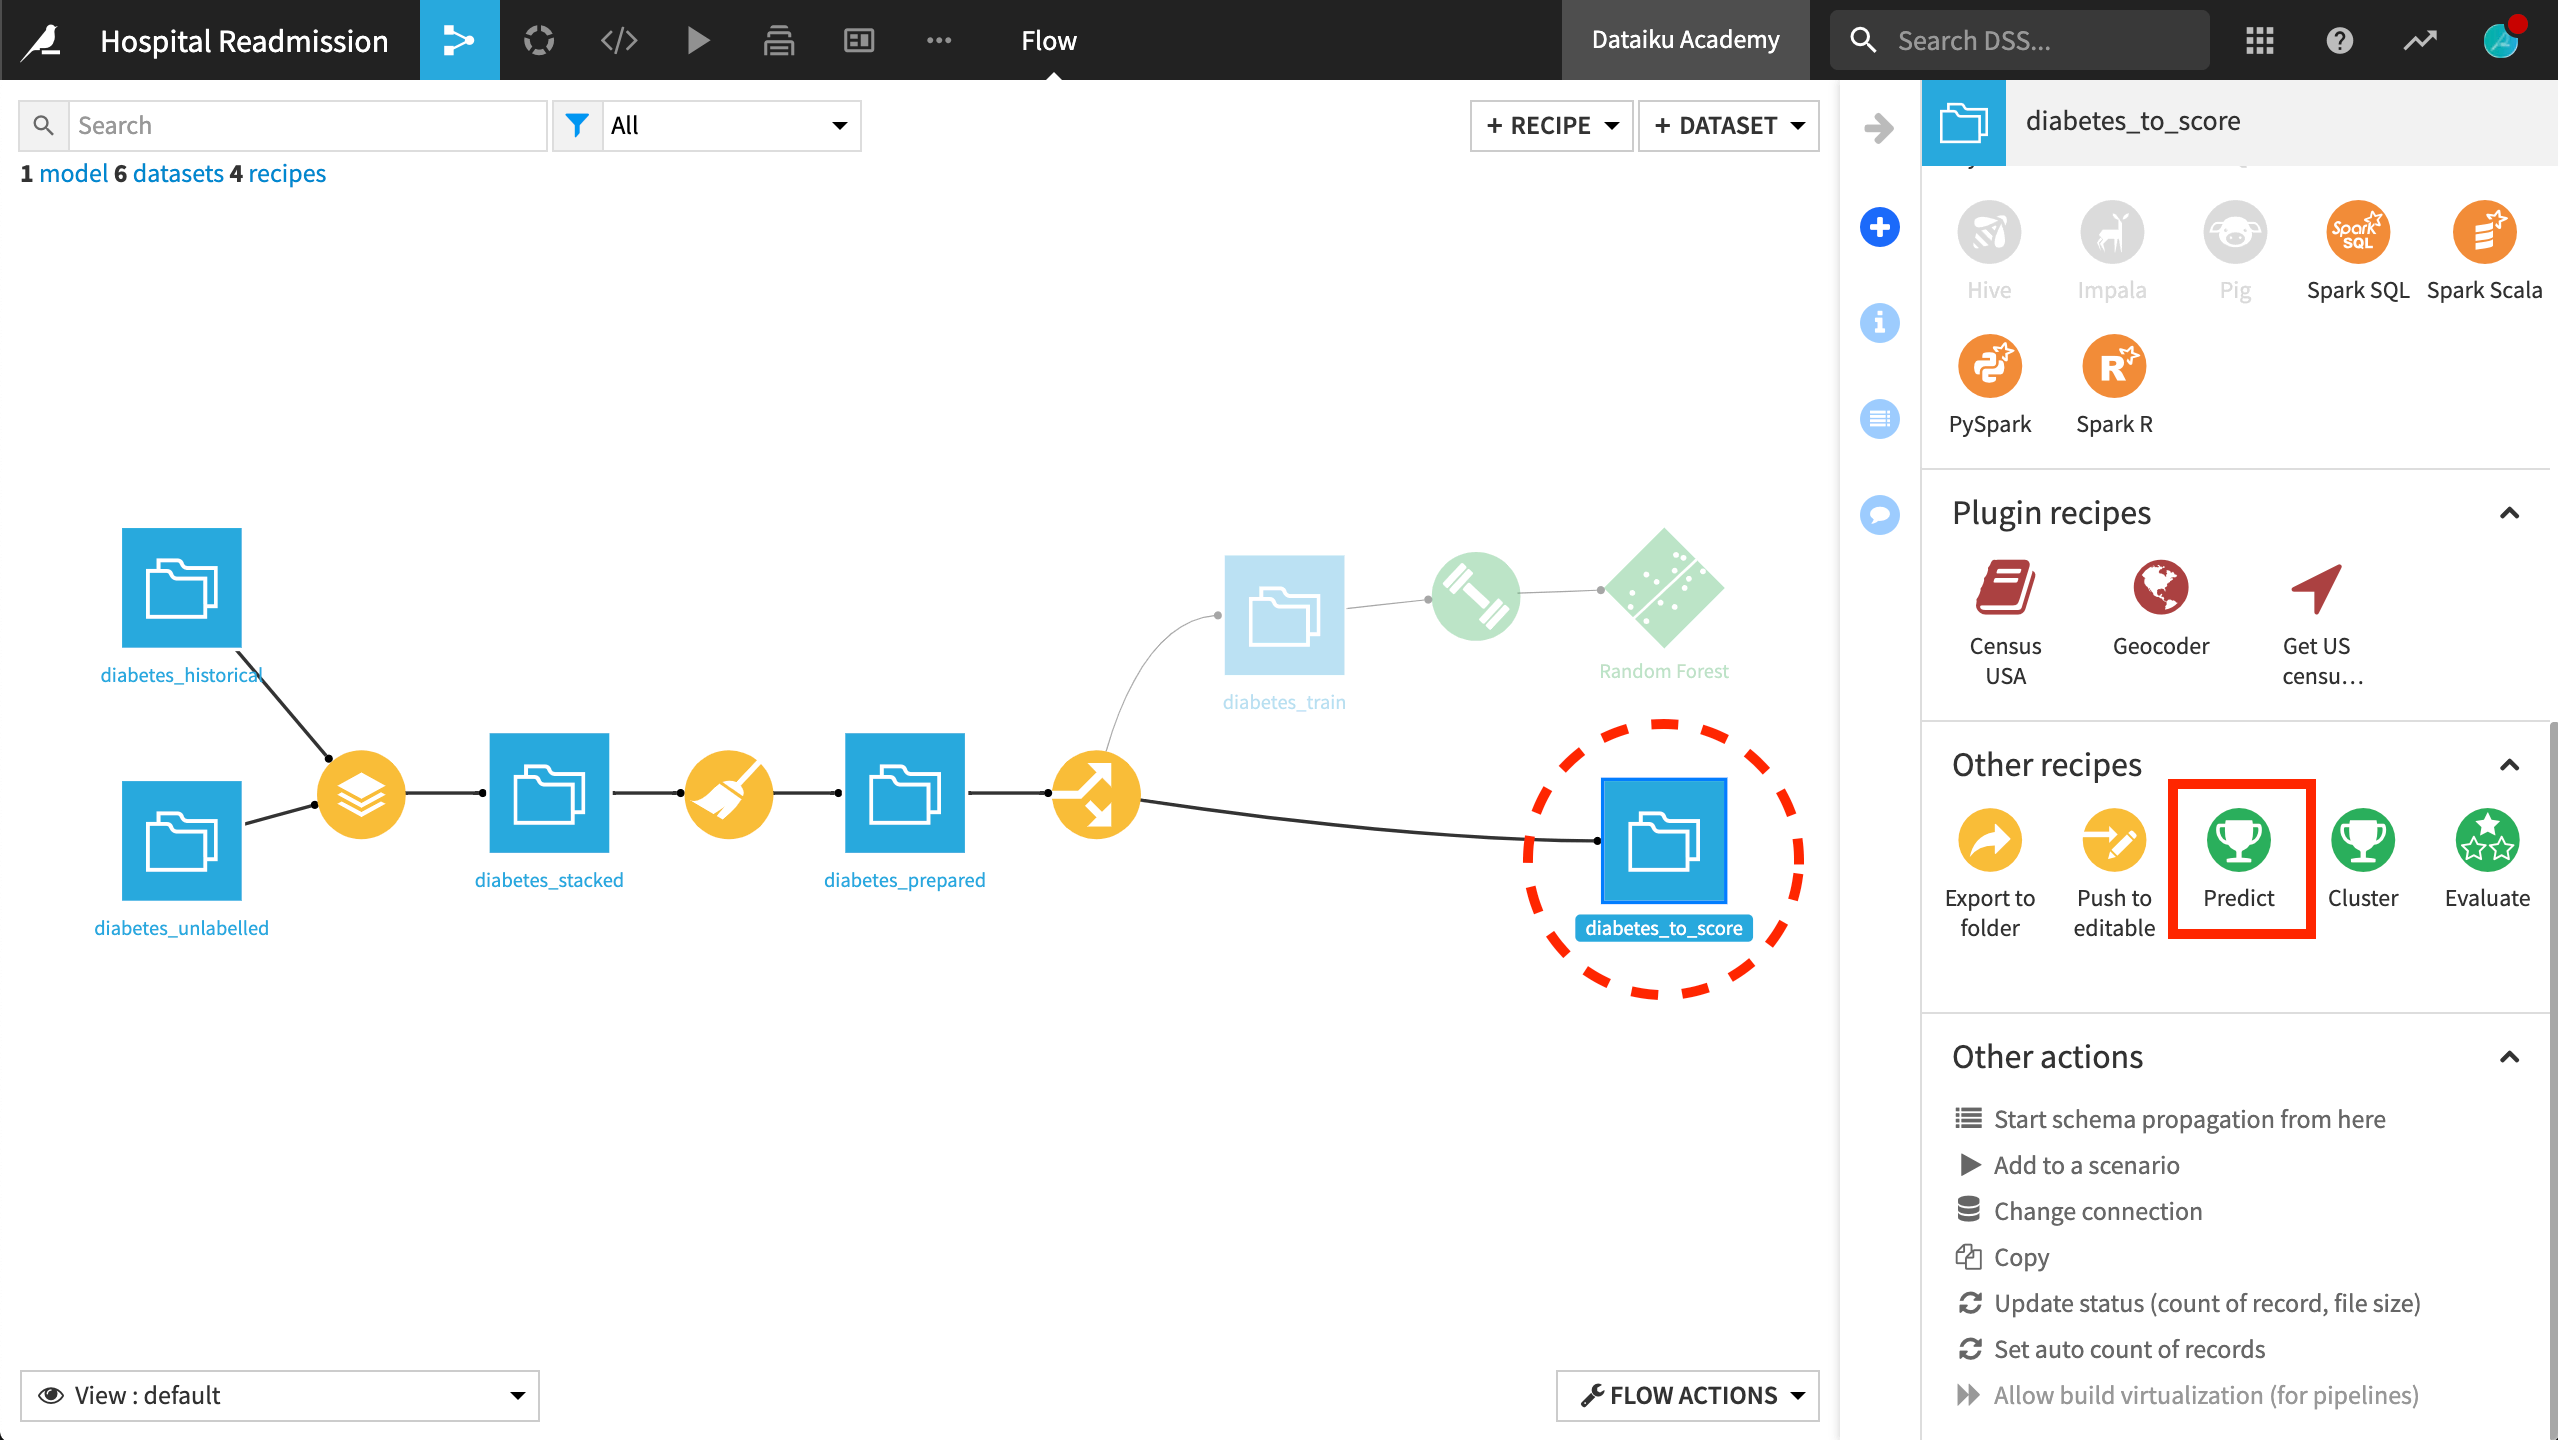
Note that if in the Flow we first select the dataset to be scored instead of the saved model, we’ll find a Predict recipe that allows us to apply a previously created prediction model. This is just a difference of terminology. The following dialog and operation is exactly the same.
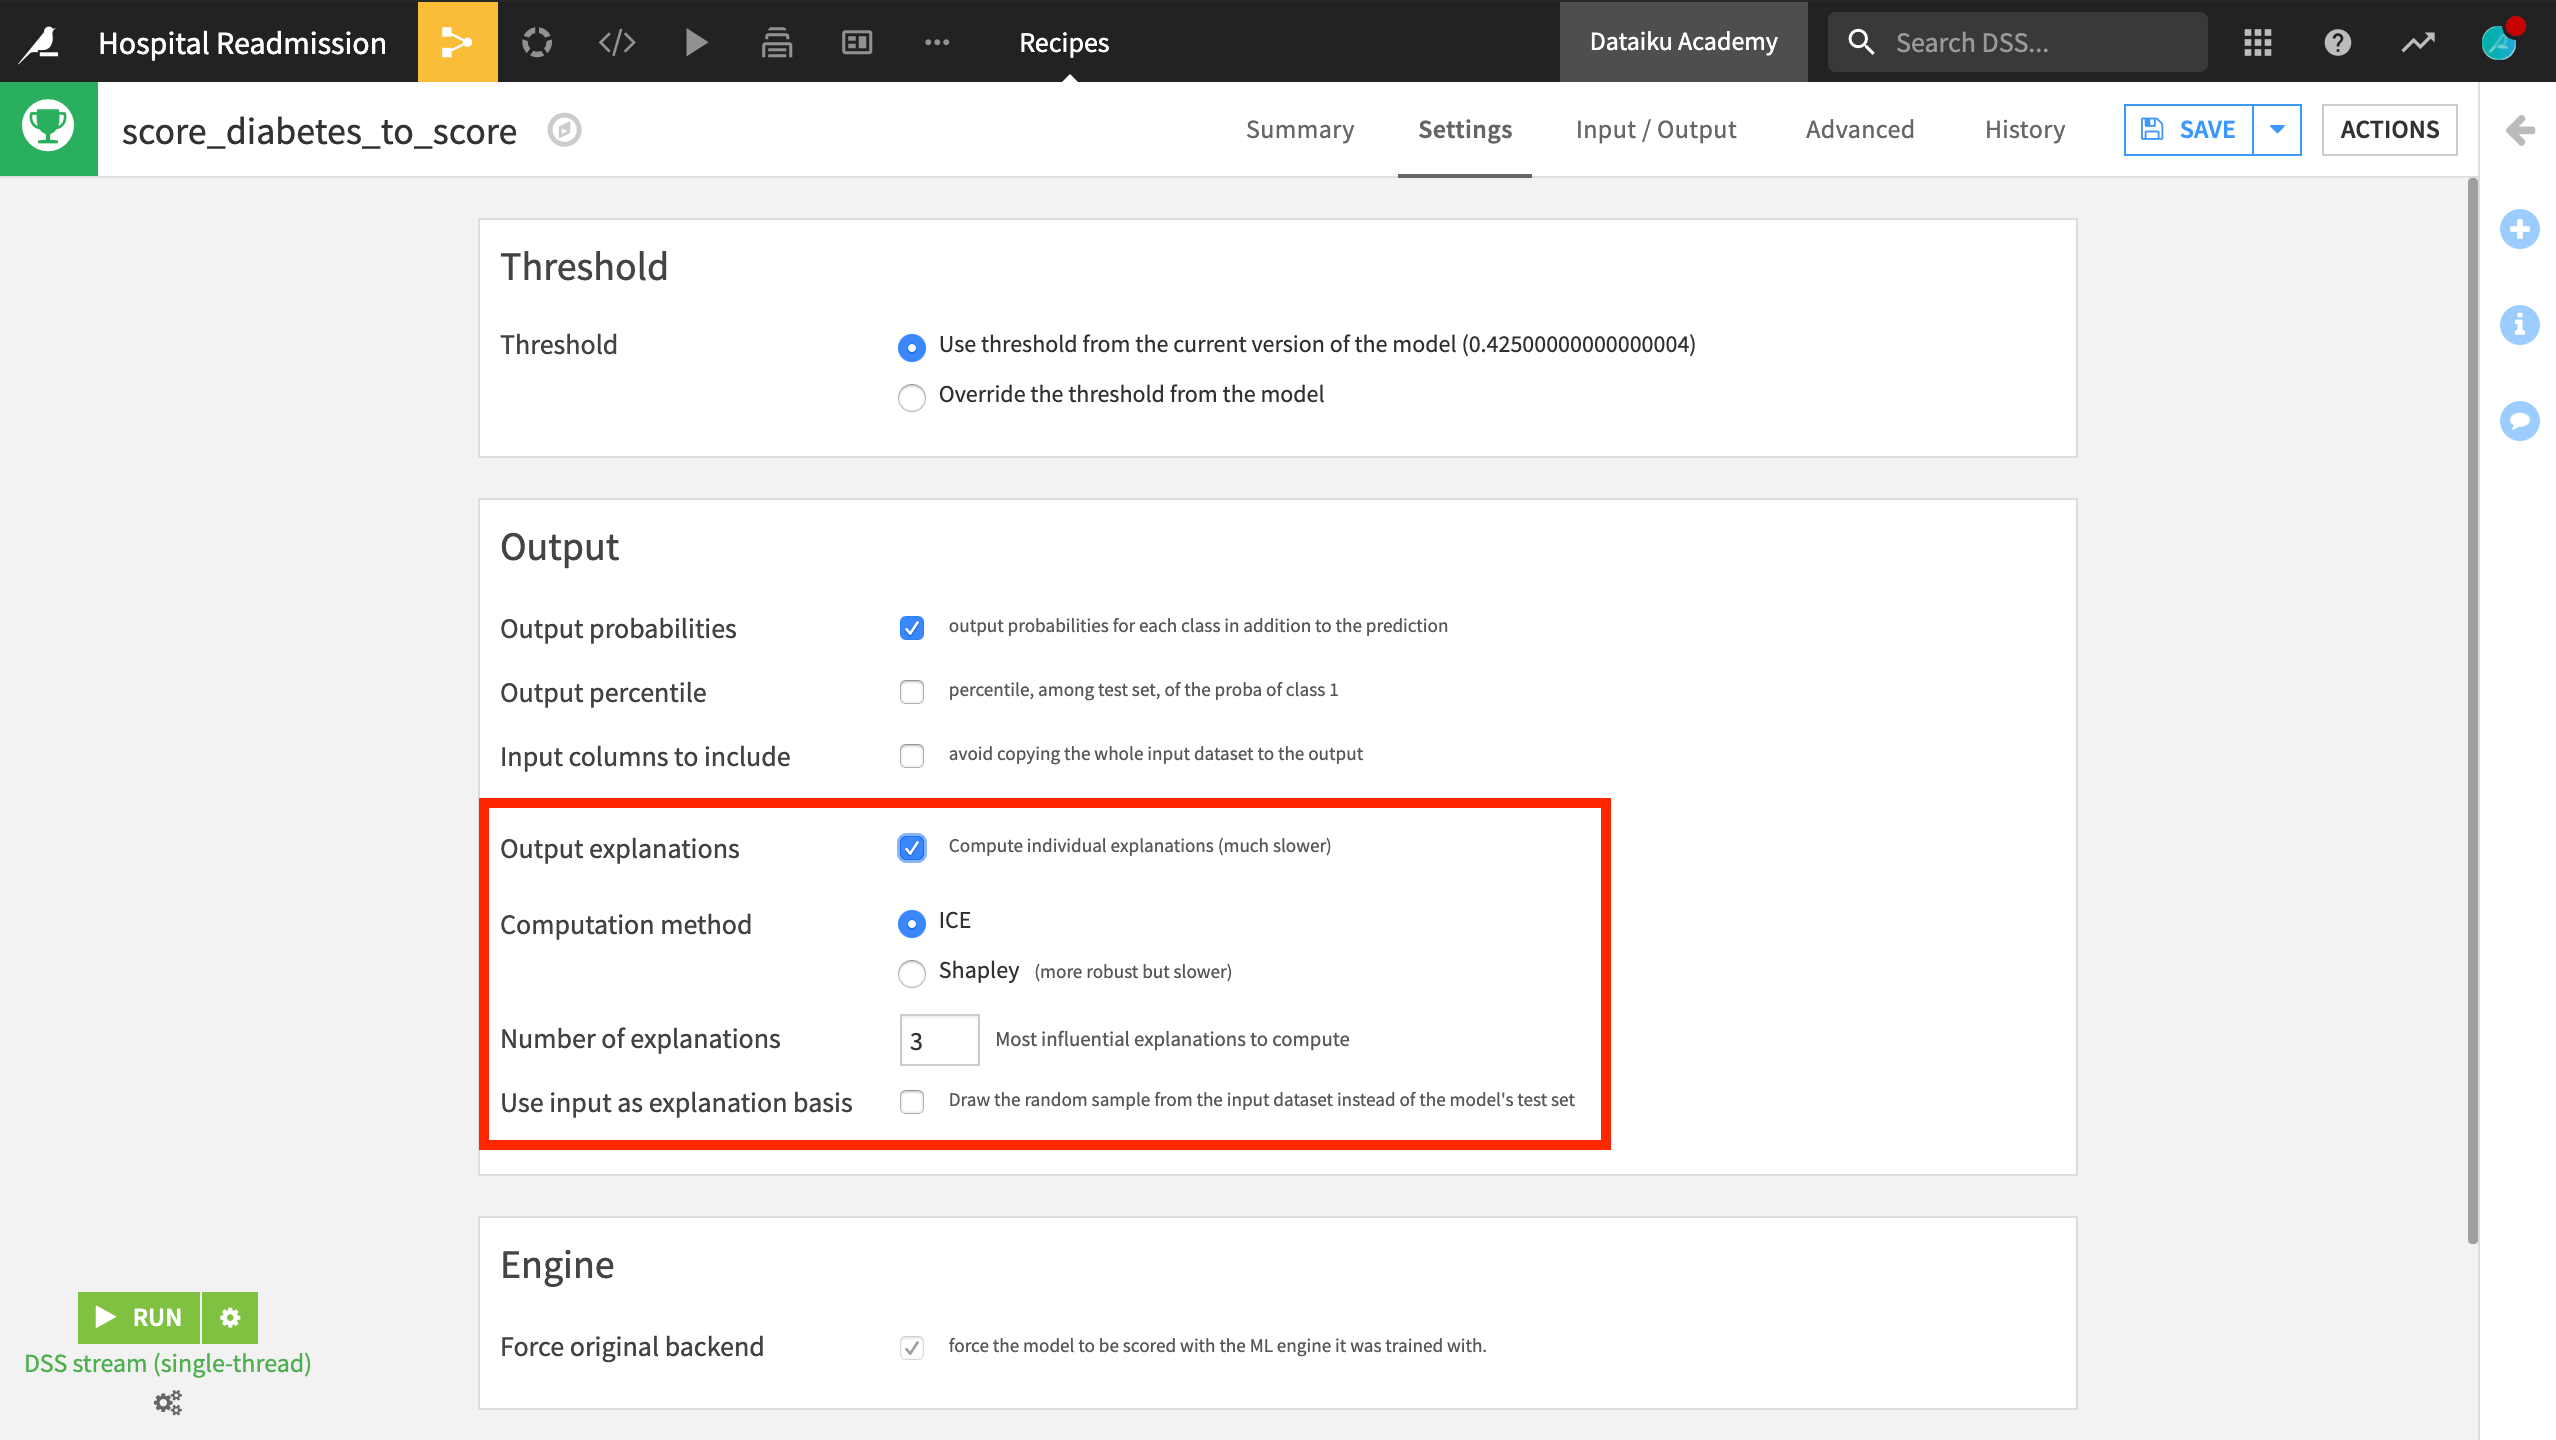
In addition to model predictions, the Score recipe lets you output additional information like individual predictions explanations using ICE or Shapley values. This way, in addition to predicting the probability that a patient will be readmitted to the hospital, we can also provide the features contributing to the prediction to take further action.
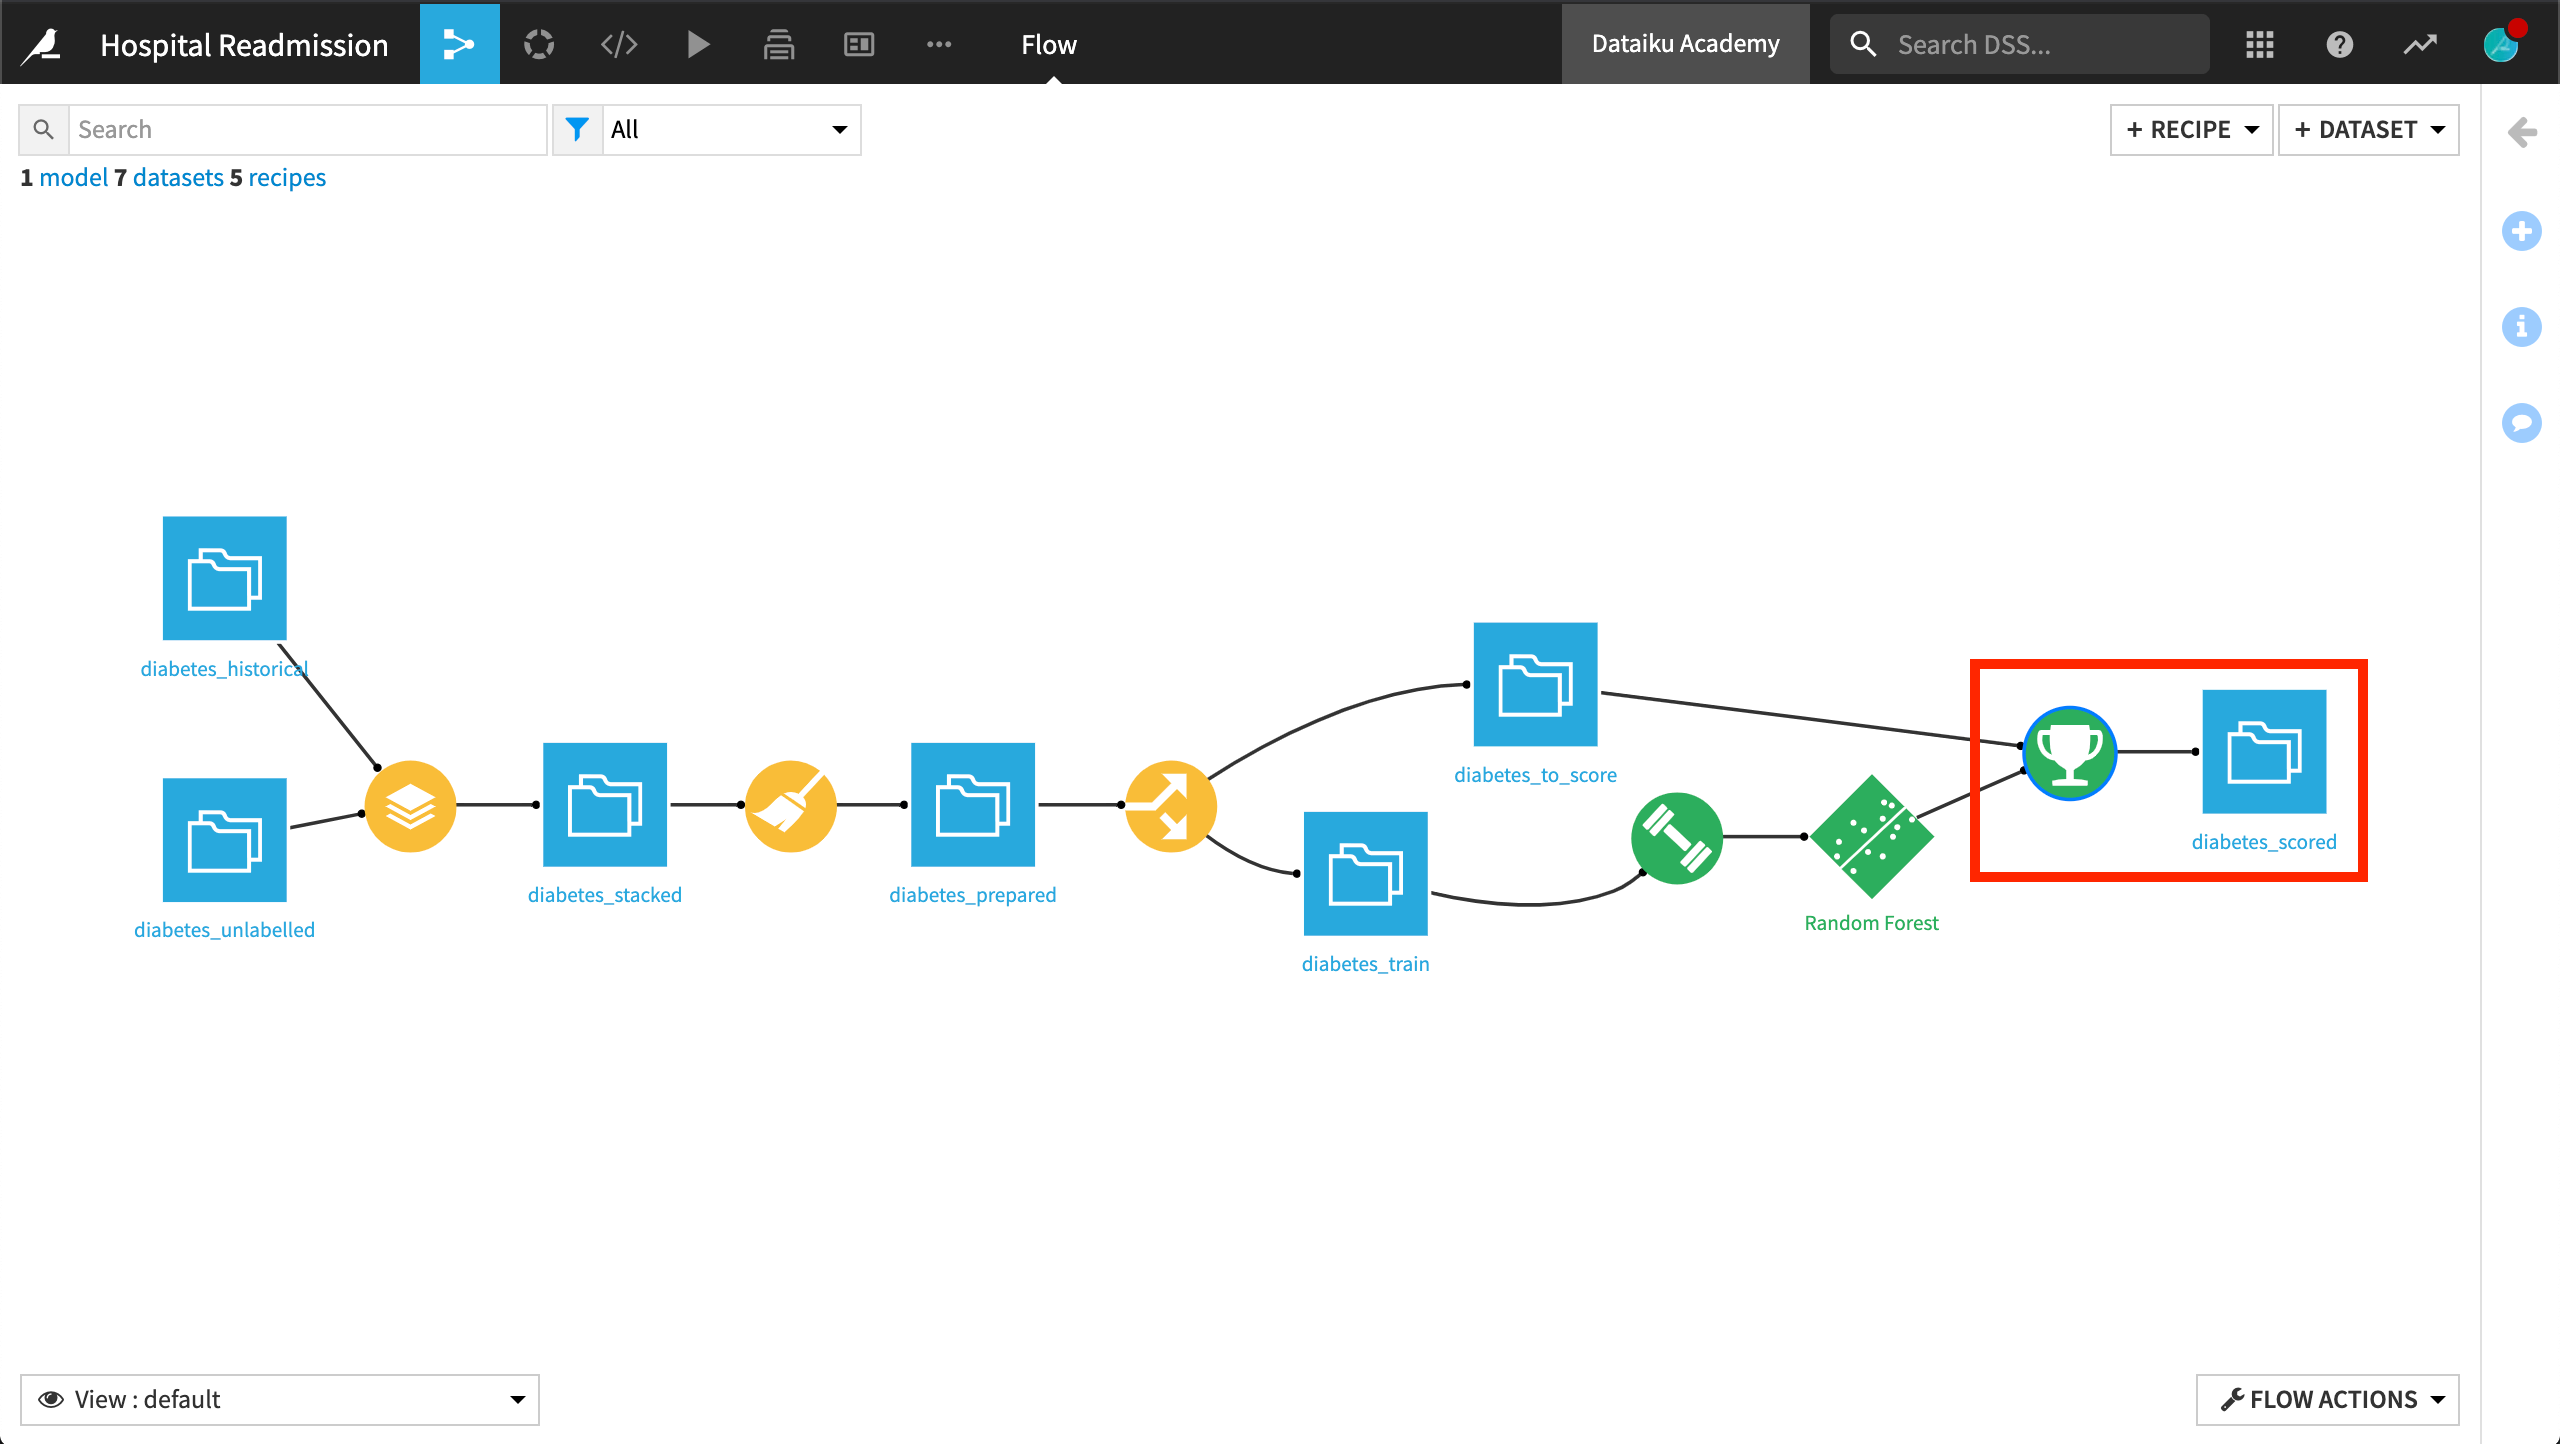
Once the recipe is finished running, it outputs the original dataset along with additional columns containing the model prediction, prediction details, and individual explanations if requested. The number and information provided by these columns will differ based on the prediction type.
Here, our model is performing a binary classification. As a result, the scoring recipe outputs the probabilities for the positive and negative classes and the final prediction based on the optimal classification threshold found during the training phase.
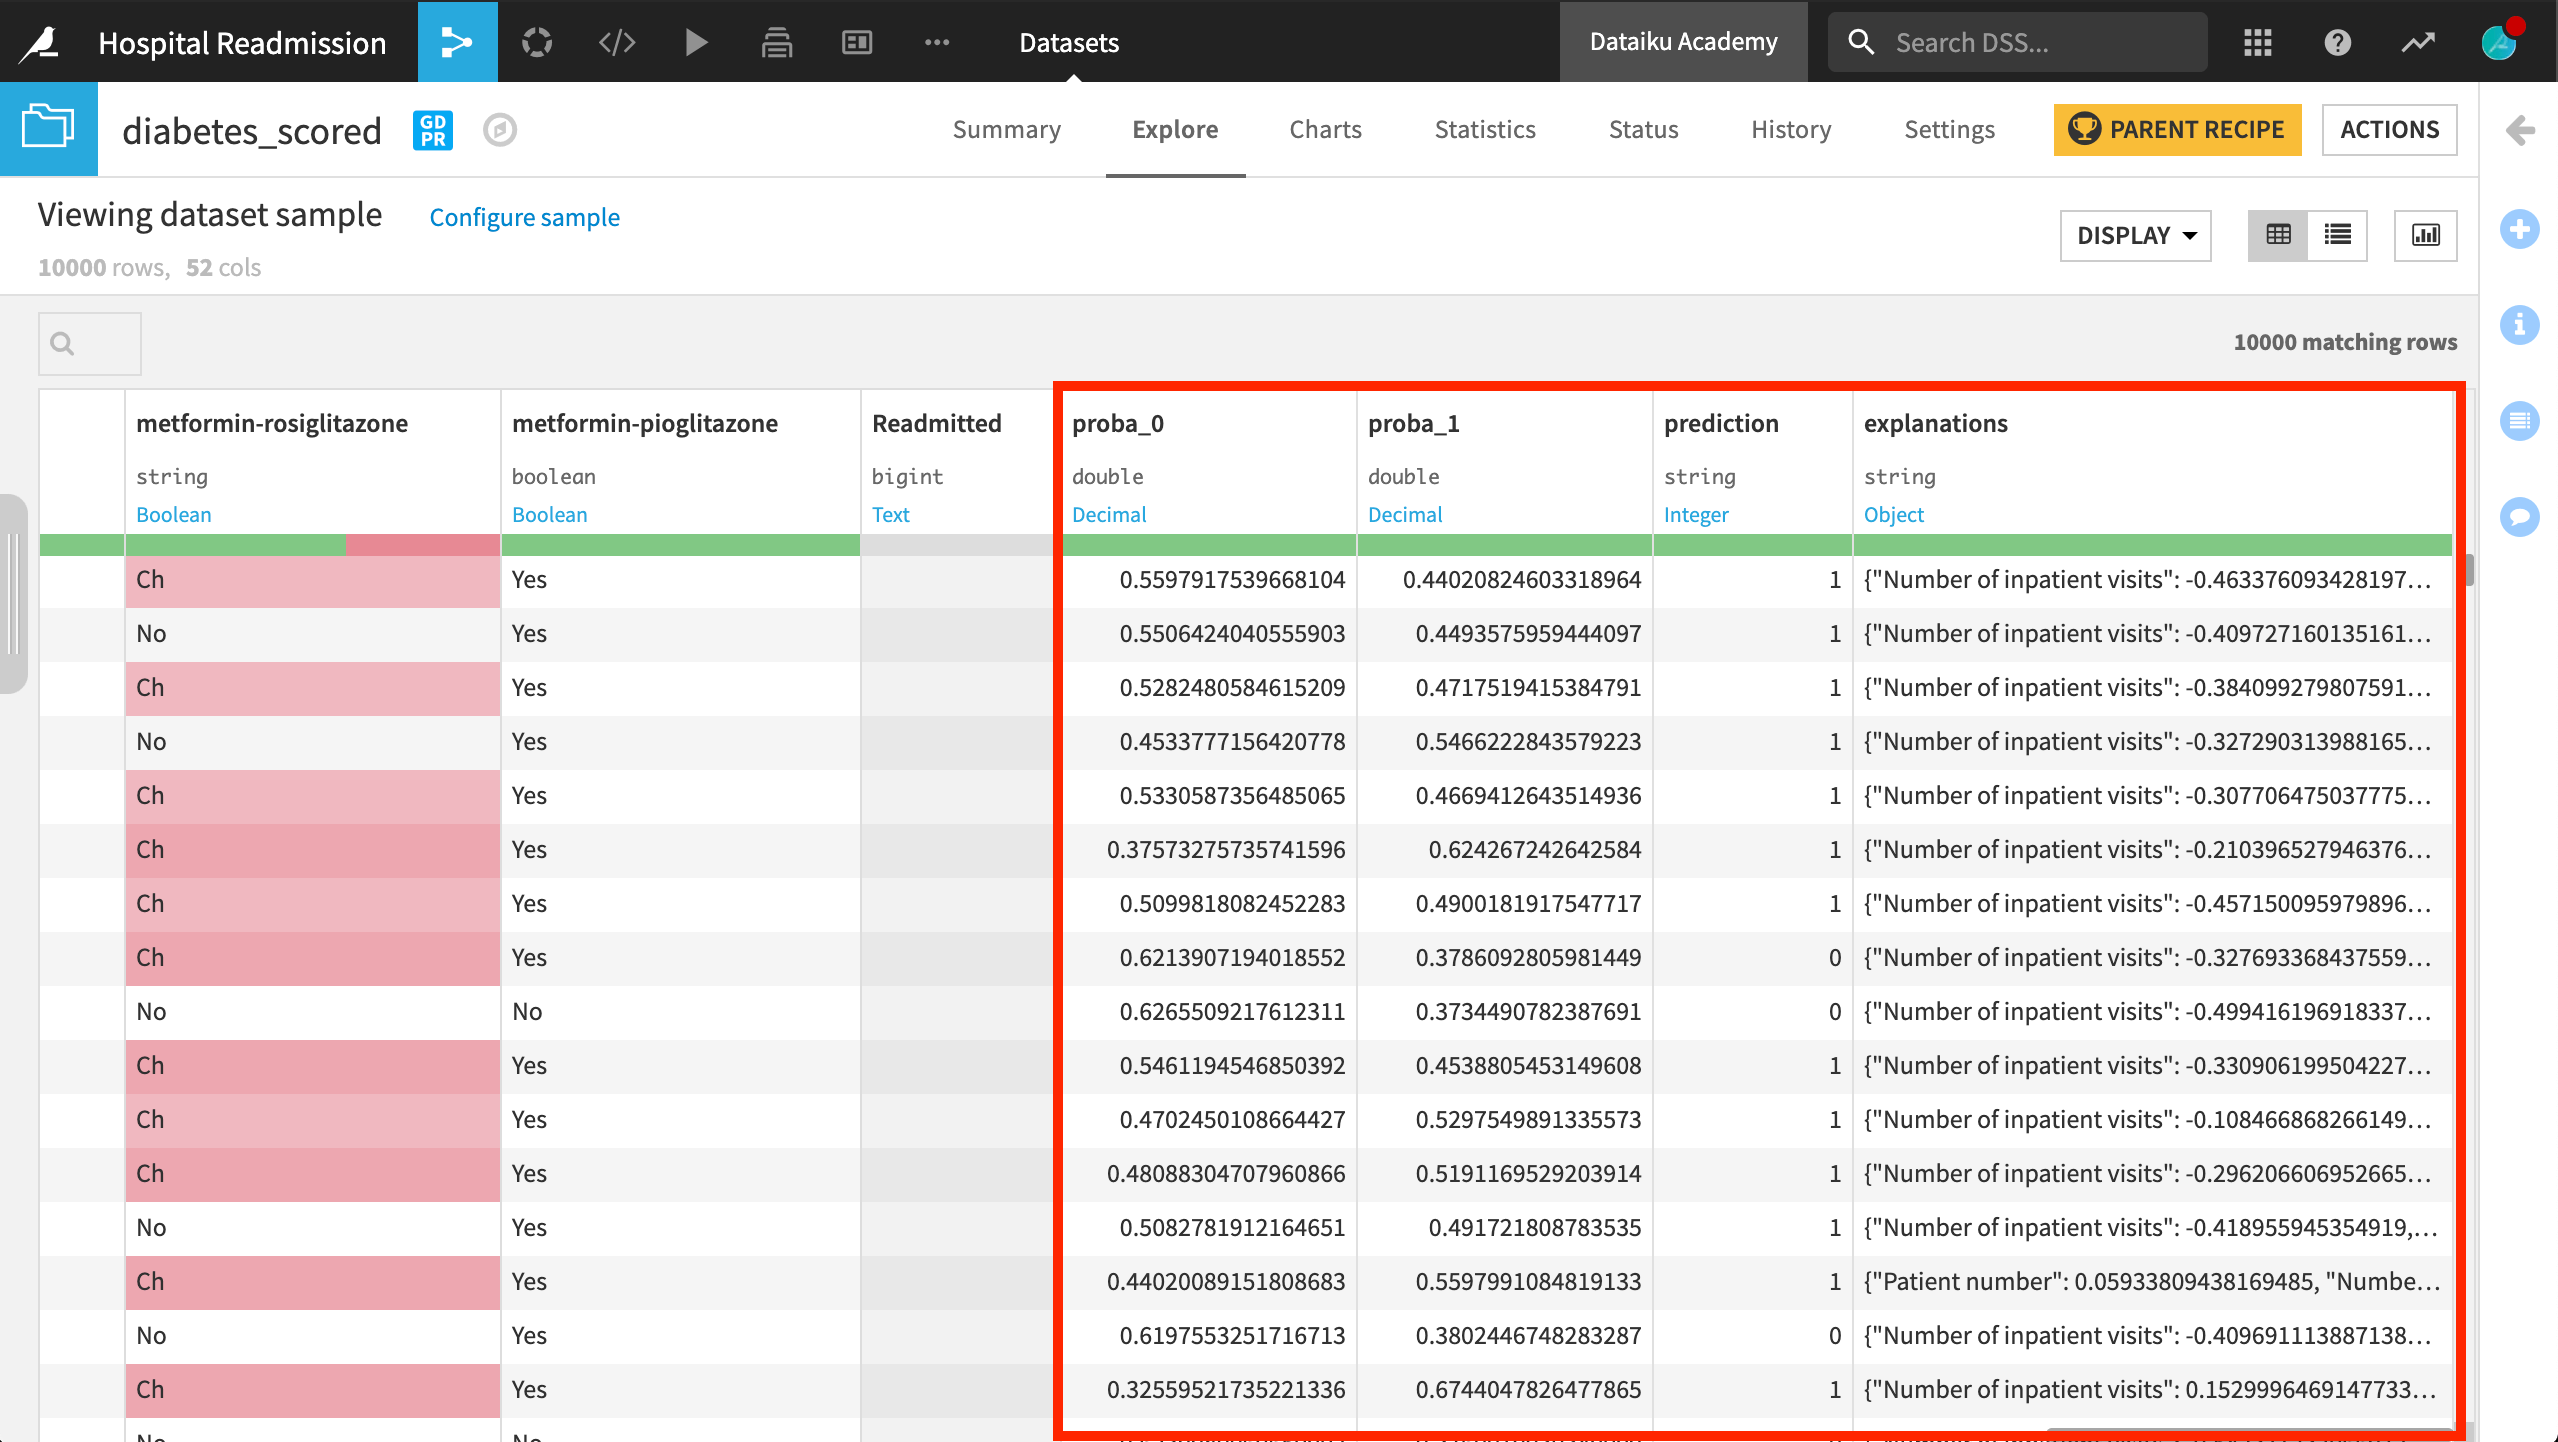
In some cases, we’ll look at the probability of the positive class rather than the binary prediction. For example, we might want to rank patients per probability of being readmitted to take care of those that are the most likely to be readmitted.
What’s next?
That’s it! You’ve applied your first model to unseen data and have successfully predicted which patients are at greatest risk of being readmitted to the hospital!
But our project is not over. In the next section, we’ll look at ways to manage different versions of a model to keep iterating and improving it.