
How-to | Deploy an agentic project#
Agents are built within projects on the Dataiku Design node, along with the datasets and pipelines that power them.
While you can interact with agents from the Design node, publishing agentic projects to the Automation node provides a production environment and allows for a governance process.
See also
If you are unfamiliar with Dataiku’s MLOps architecture, you can review topics in the Knowledge Base or complete the MLOps Practitioner learning path in Dataiku Academy.
Create bundle#
First, you must create a bundle, which packages your project components, then publish it on the Deployer:
From within the project, go to the More Options (
 ) menu > Bundles > + New Bundle.
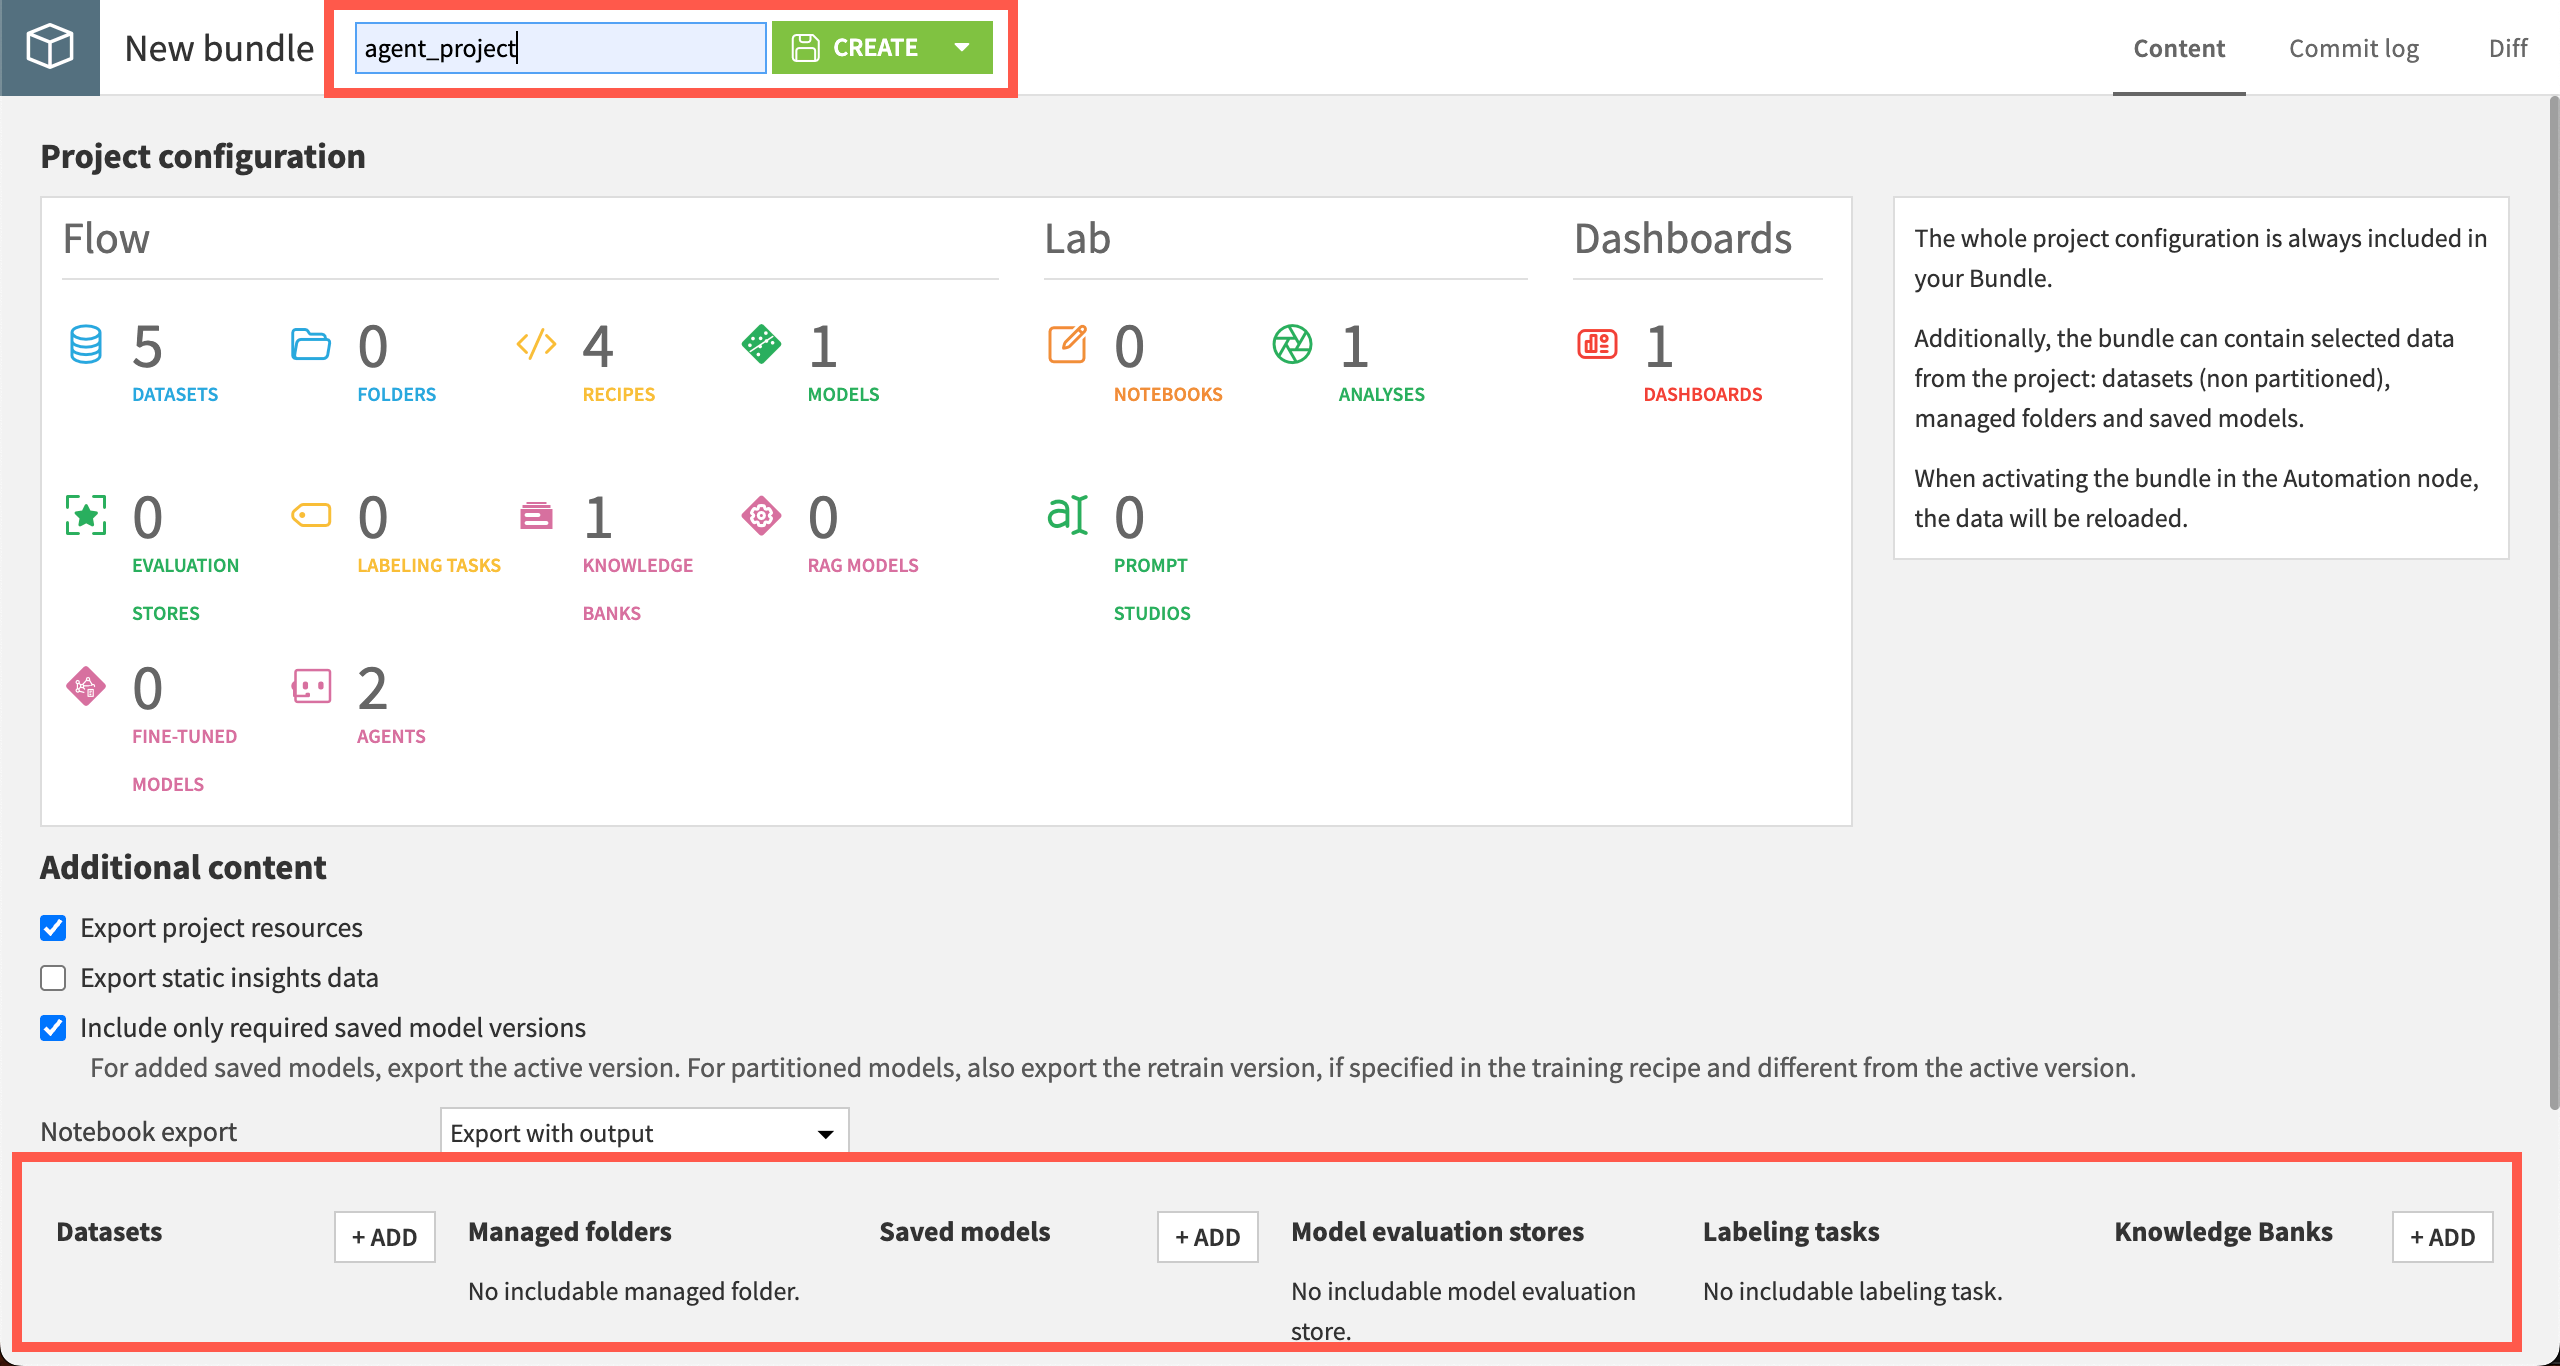
Give the bundle a name in the New bundle id.
Agents are included by default, along with recipes and some other elements. If you want to include content such as data, managed folders, or knowledge banks, do so under the Additional content section.
Important
Projects that include Retrieval-Augmented Generation (RAG) or the knowledge bank search agent tool contain knowledge banks. If you don’t include the knowledge bank(s) in the bundle, you must rebuild them on the Automation node.
Click Create.
After the bundle has been created, click on its name, then Publish on Deployer.
Deploy bundle#
The bundle has been published to the Deployer, and now you can deploy it on the Automation node.
When the bundle has been published, click on Open in Deployer.
Within the Deployer, click on Deploy.
Choose to Create a new deployment or Update an existing deployment, and click OK.
Choose the Target infrastructure.
Click Create.
Important
The deployment process differs depending on instance settings. Your instance might require:
Remapping LLM connections in the Automation node.
Governance and approval of bundles before deployment. See more at Implement AI Governance.
