

How-to | Import a notebook from Git#
To use a Jupyter notebook in Dataiku while keeping its source in a Git repository such as GitHub, import the notebook from Git. Dataiku keeps a reference to the remote repository, so you can later push your changes to it or pull its latest changes.
You will need a Dataiku instance set up to work with git remotes.
Import notebooks#
From the Notebooks page of your project, click + New Notebook > Import from Git.
Enter the URL of the repository (for example,
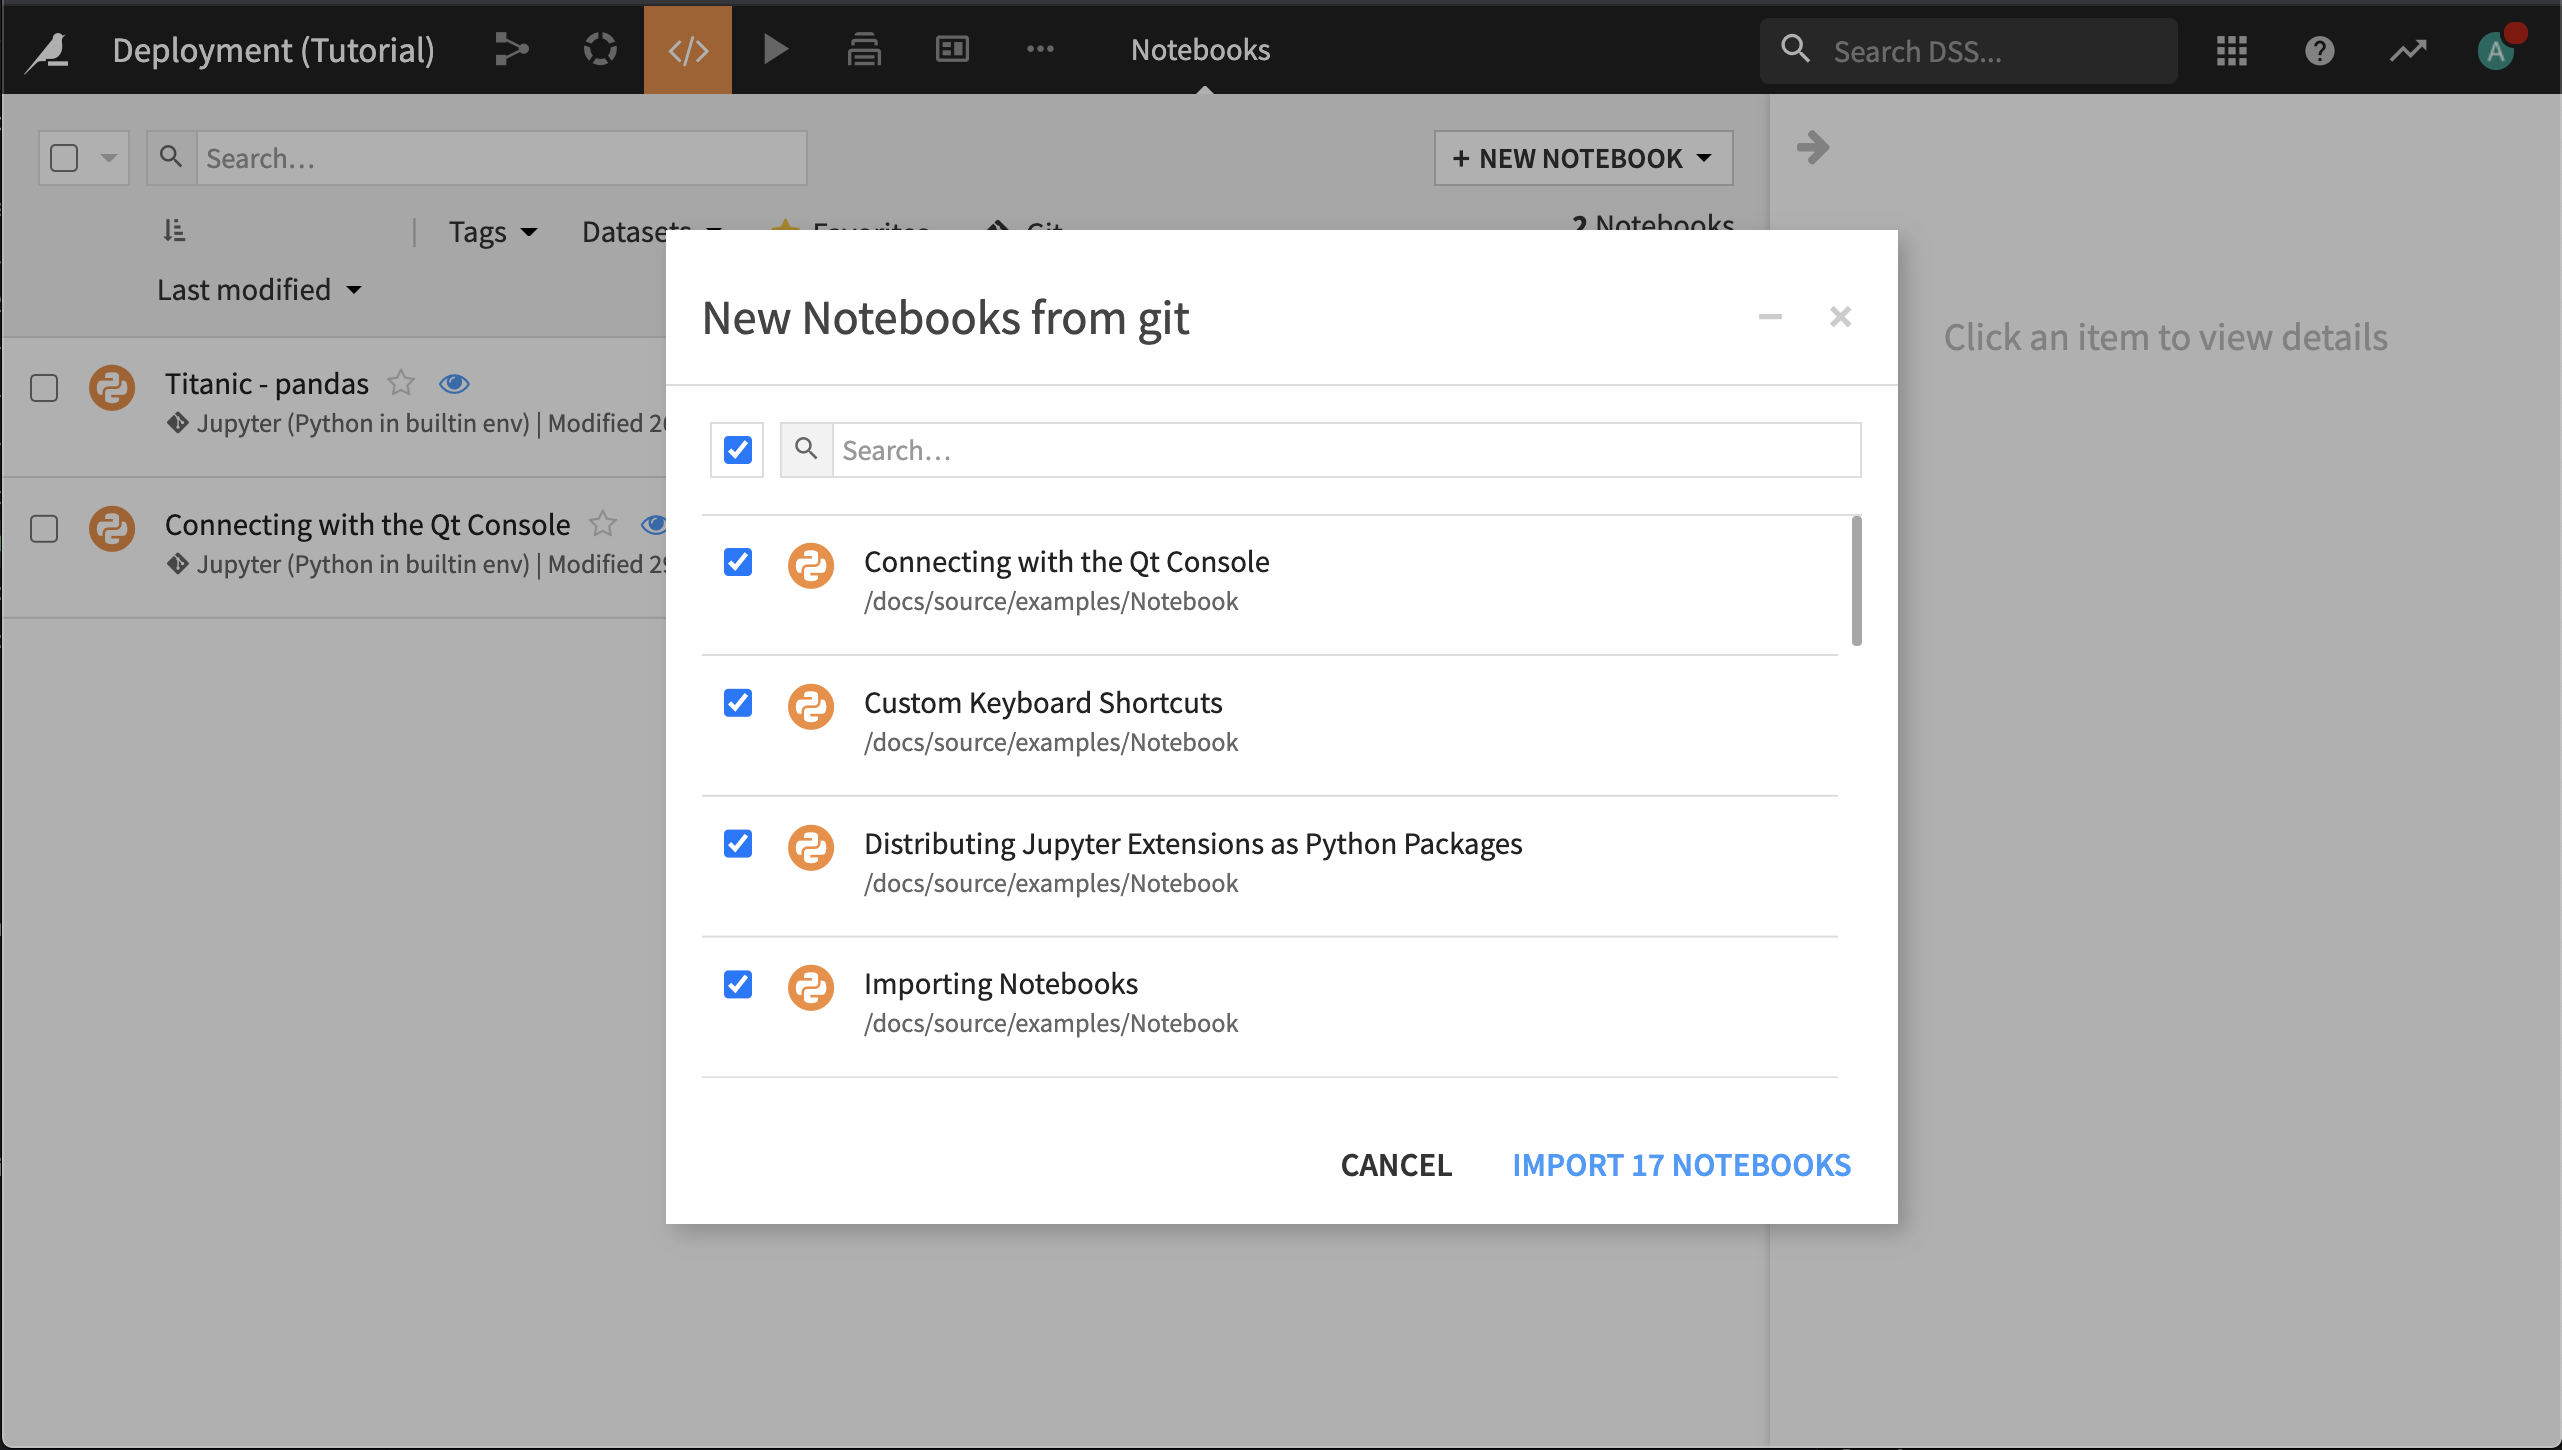
https://github.com/dataiku/academy-samples/) and, optionally, a branch name.Click List Notebooks. Dataiku scans the repository and lists the Jupyter notebooks it contains.
Select the notebooks to import.
Click Import. The button displays the number of selected notebooks.
Note
Before running the notebook, look at the packages that the notebook code imports, and be sure to change the notebook kernel to associate it with a code environment that has those packages installed.
Sync notebooks with the remote repository#
Imported notebooks keep a reference to the remote Git repository. To sync them:
From the Notebooks page of your project, select one or more notebooks.
In the right panel, open the Associated remote Git section of the Actions (
 ) tab.
Click Commit and push to save your local changes to the remote repository, or Pull to retrieve its latest changes.
In the dialog, review the notebooks, and click Push Notebooks or Pull Notebooks to confirm.
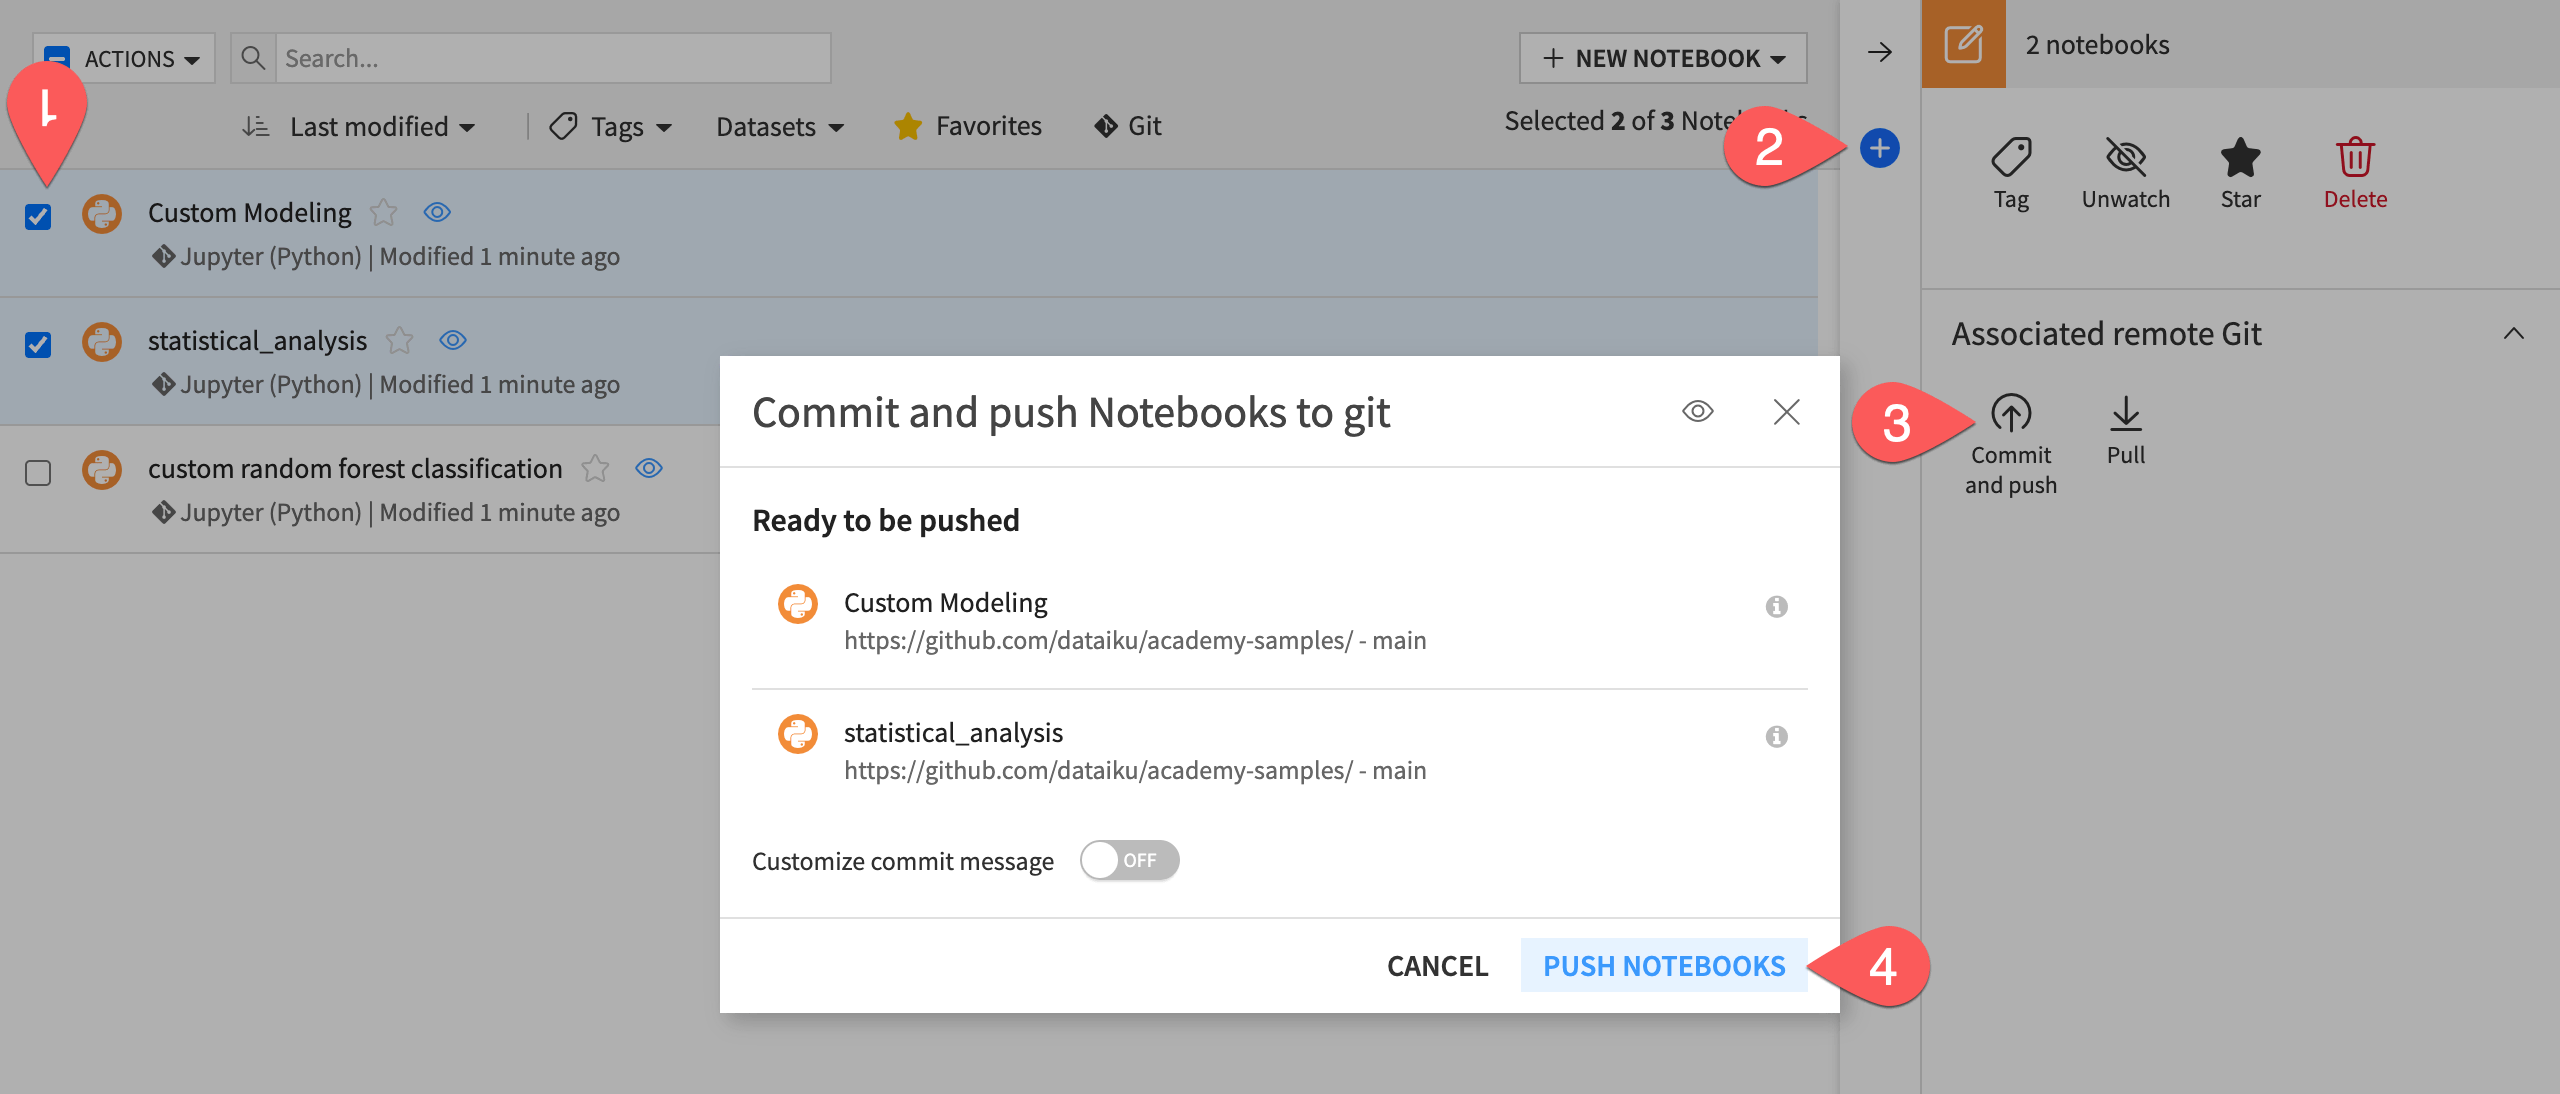
If Dataiku detects a conflict, it proposes to override either the local file or the remote file. Resolve more advanced conflicts outside of Dataiku.
See also
For more information, see Importing Jupyter Notebooks from Git in the reference documentation.