
Tutorial | Gate deployments with Project Standards#
Get started#
Tutorial | Increase project quality through Project Standards demonstrates how instance administrators can define quality assurance checks and how builders can use these checks to advance their projects beyond a sandbox.
If the goal for a project is a production environment, Project Standards can play the role of a gatekeeper within Dataiku’s deployment workflow.
Objectives#
In this tutorial, you will take on the role of an Ops manager and:
Select a policy for how an infrastructure should treat packages with respect to the Project Standards report.
Demonstrate how this policy can warn about or prevent a deployment with unresolved quality assurance checks.
Prerequisites#
Dataiku 14.1 or later.
The Dataiku for Enterprise AI package.
Membership in a group with the Administrator permission.
The ability to deploy a bundle to an Automation node. See the prerequisites in Tutorial | Deploy a project bundle to a production environment for details.
A Dataiku project including a Project Standards report with at least one check in need of review. If you don’t already have this, see Tutorial | Increase project quality through Project Standards.
Review the report in a bundle#
Normally, Flow designers will want to have a clean Project Standards report before trying to deploy. In this case however, you’ll use the checks still needing review to demonstrate how to gate deployment based on this report.
From the More Options (
 ) menu of the top navigation bar, select Bundles.
Click + New Bundle.
Name it
v1.Click Create.
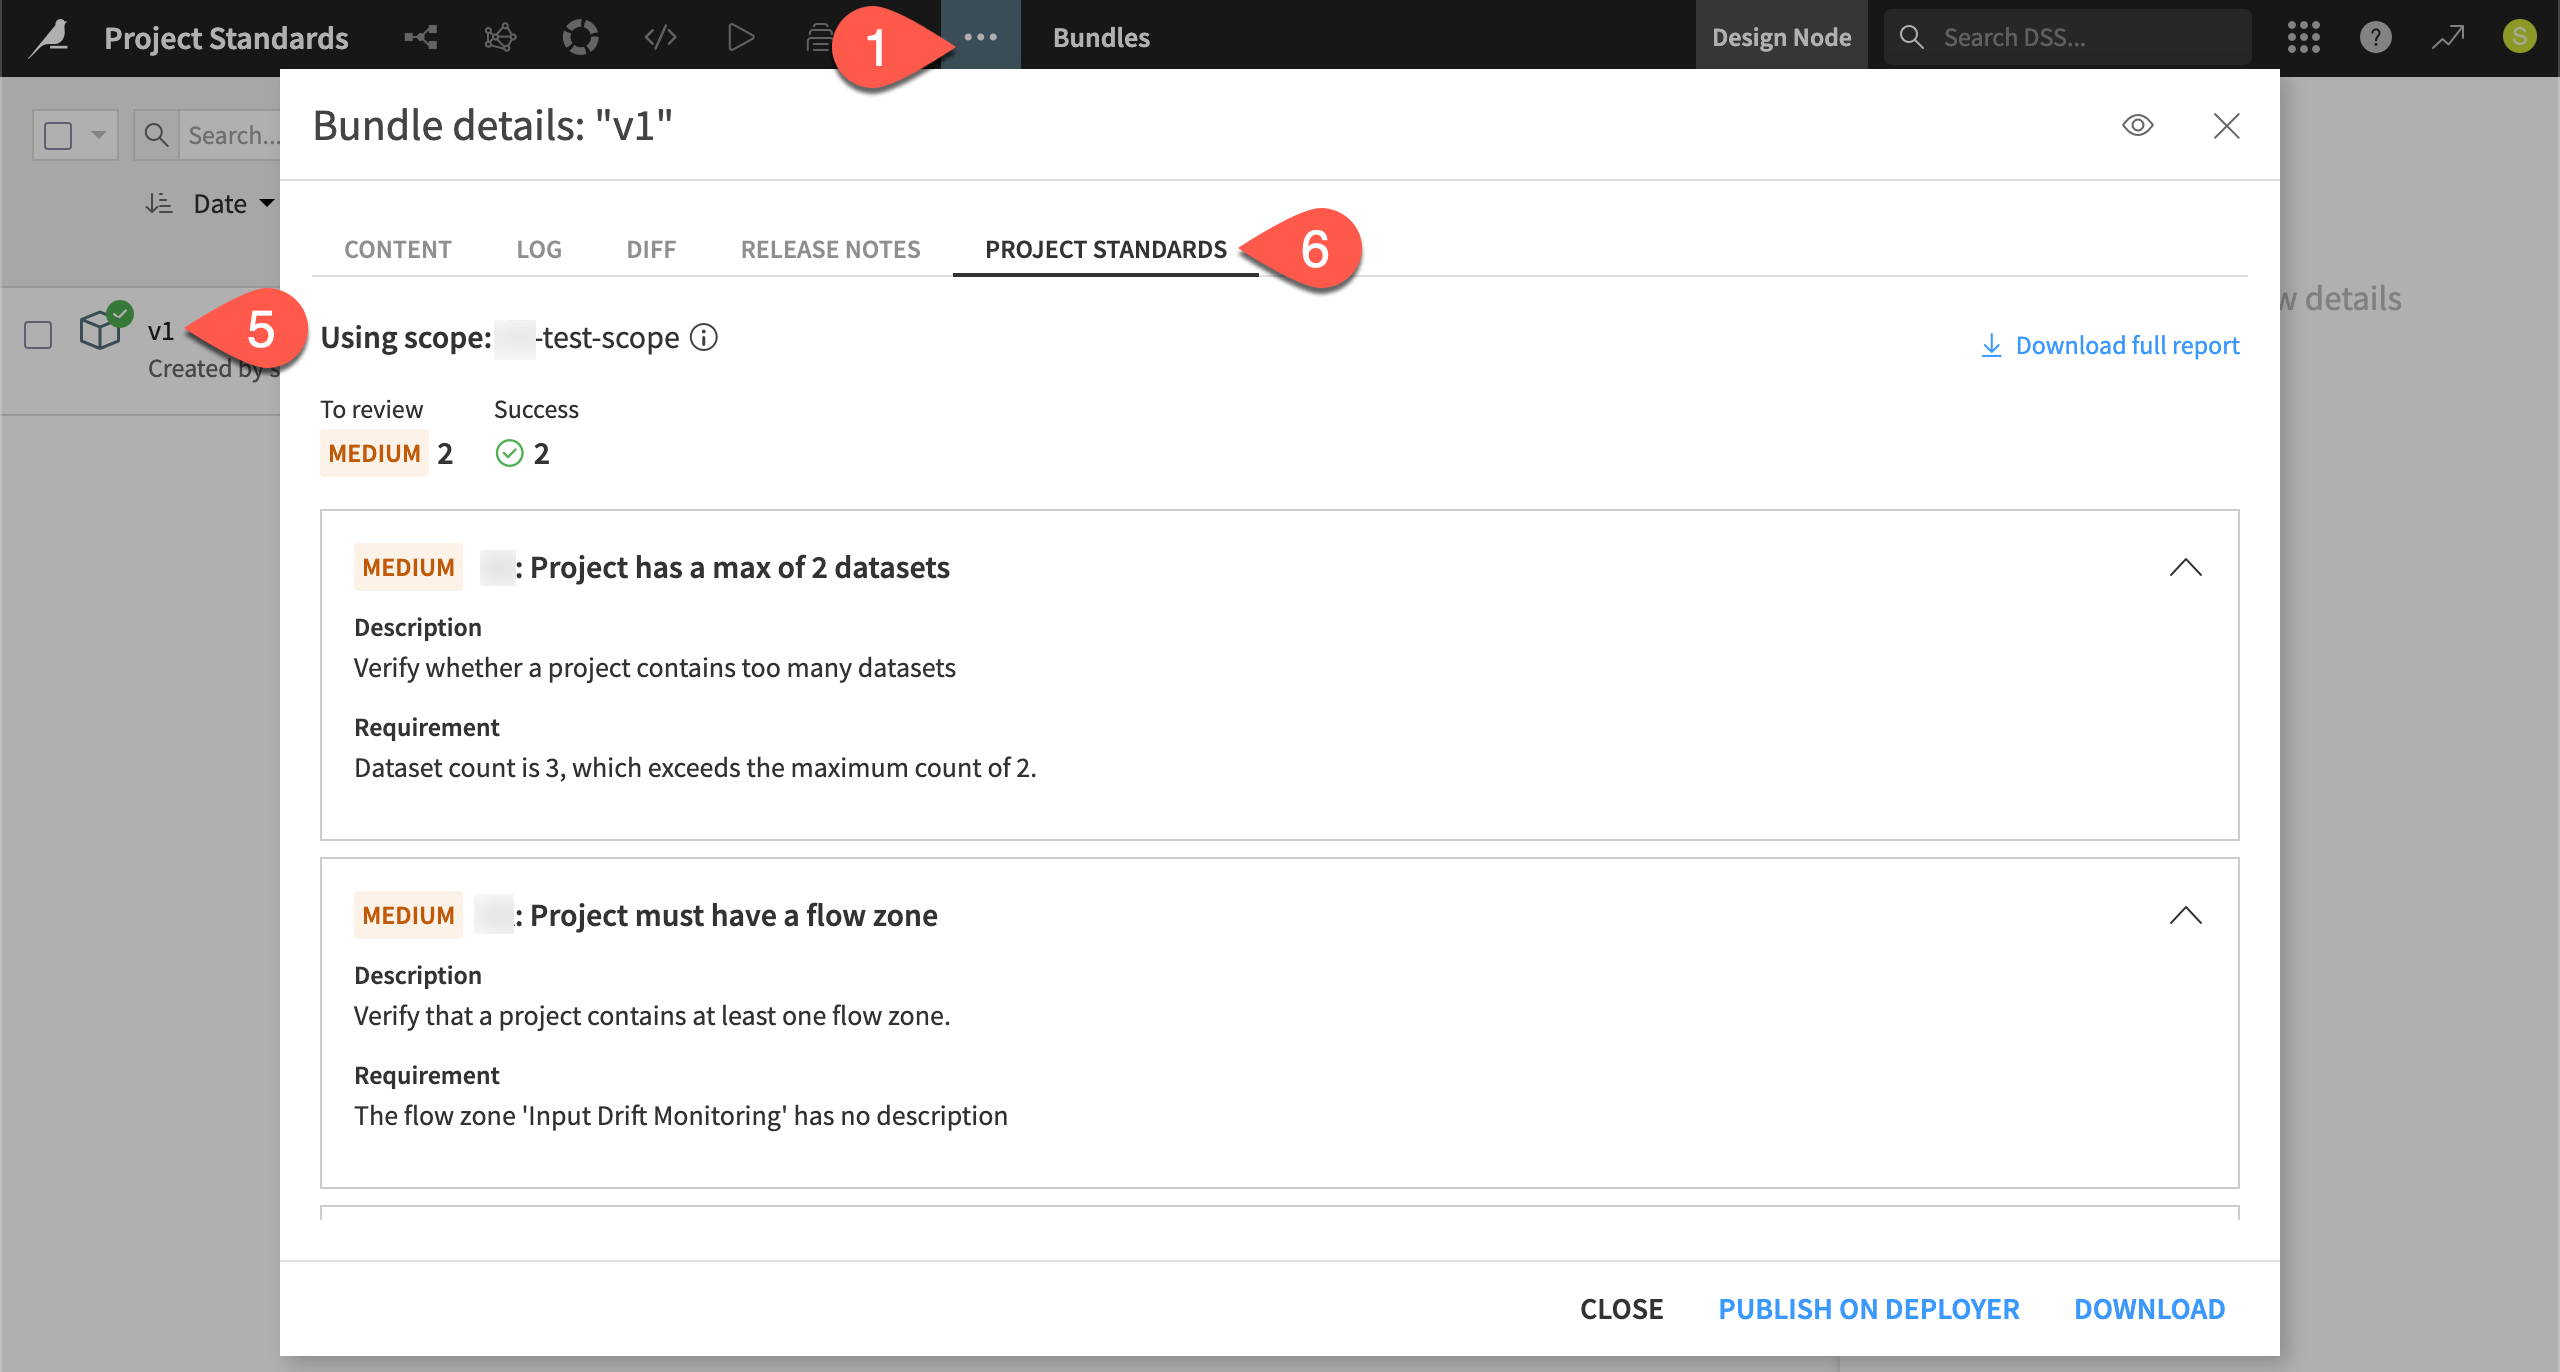
Click on the name of the v1 bundle to view its contents.
Review the Project Standards tab of the bundle details. You should have at least one check in need of review.
Tip
The status of the Project Standards checks shown here is bundled with the bundle. Both represent a snapshot. If you make changes to the project, existing bundles won’t include them. Similarly, the Project Standards report won’t reflect those changes either.
Set a deployment control policy#
You can use sign-offs in the Govern node to warn about or even prevent unapproved deployments. You might consider that a human-in-the-loop answer to the problem of deployment quality assurance.
Alongside those humans, you can use the Project Standards report to automatically enforce your organization’s QA checks. Similar to the Deployment Governance policies for deployment, you define how permissive or restrictive you wish to be with respect to Project Standards, according to each infrastructure.
For example, consider a user that tries to deploy a project with unresolved issues in its Project Standards report. Their ability to deploy can depend on:
The severity of the issue — You might prevent a deployment with critical issues, but only present a warning for those with lesser violations.
The infrastructure — You may have a test infrastructure that produces only a warning and a production infrastructure that blocks the deployment entirely.
In this case, set the deployment control to warn users before deploying for any reported issues from checks in the Project Standards report.
From the waffle (
 ) menu of the top navigation bar, select Local/Remote Deployer (depending on your instance’s setup).
Select Deploying Projects.
From the top navigation bar, select Infrastructures.
Select an infrastructure where you can deploy a project.
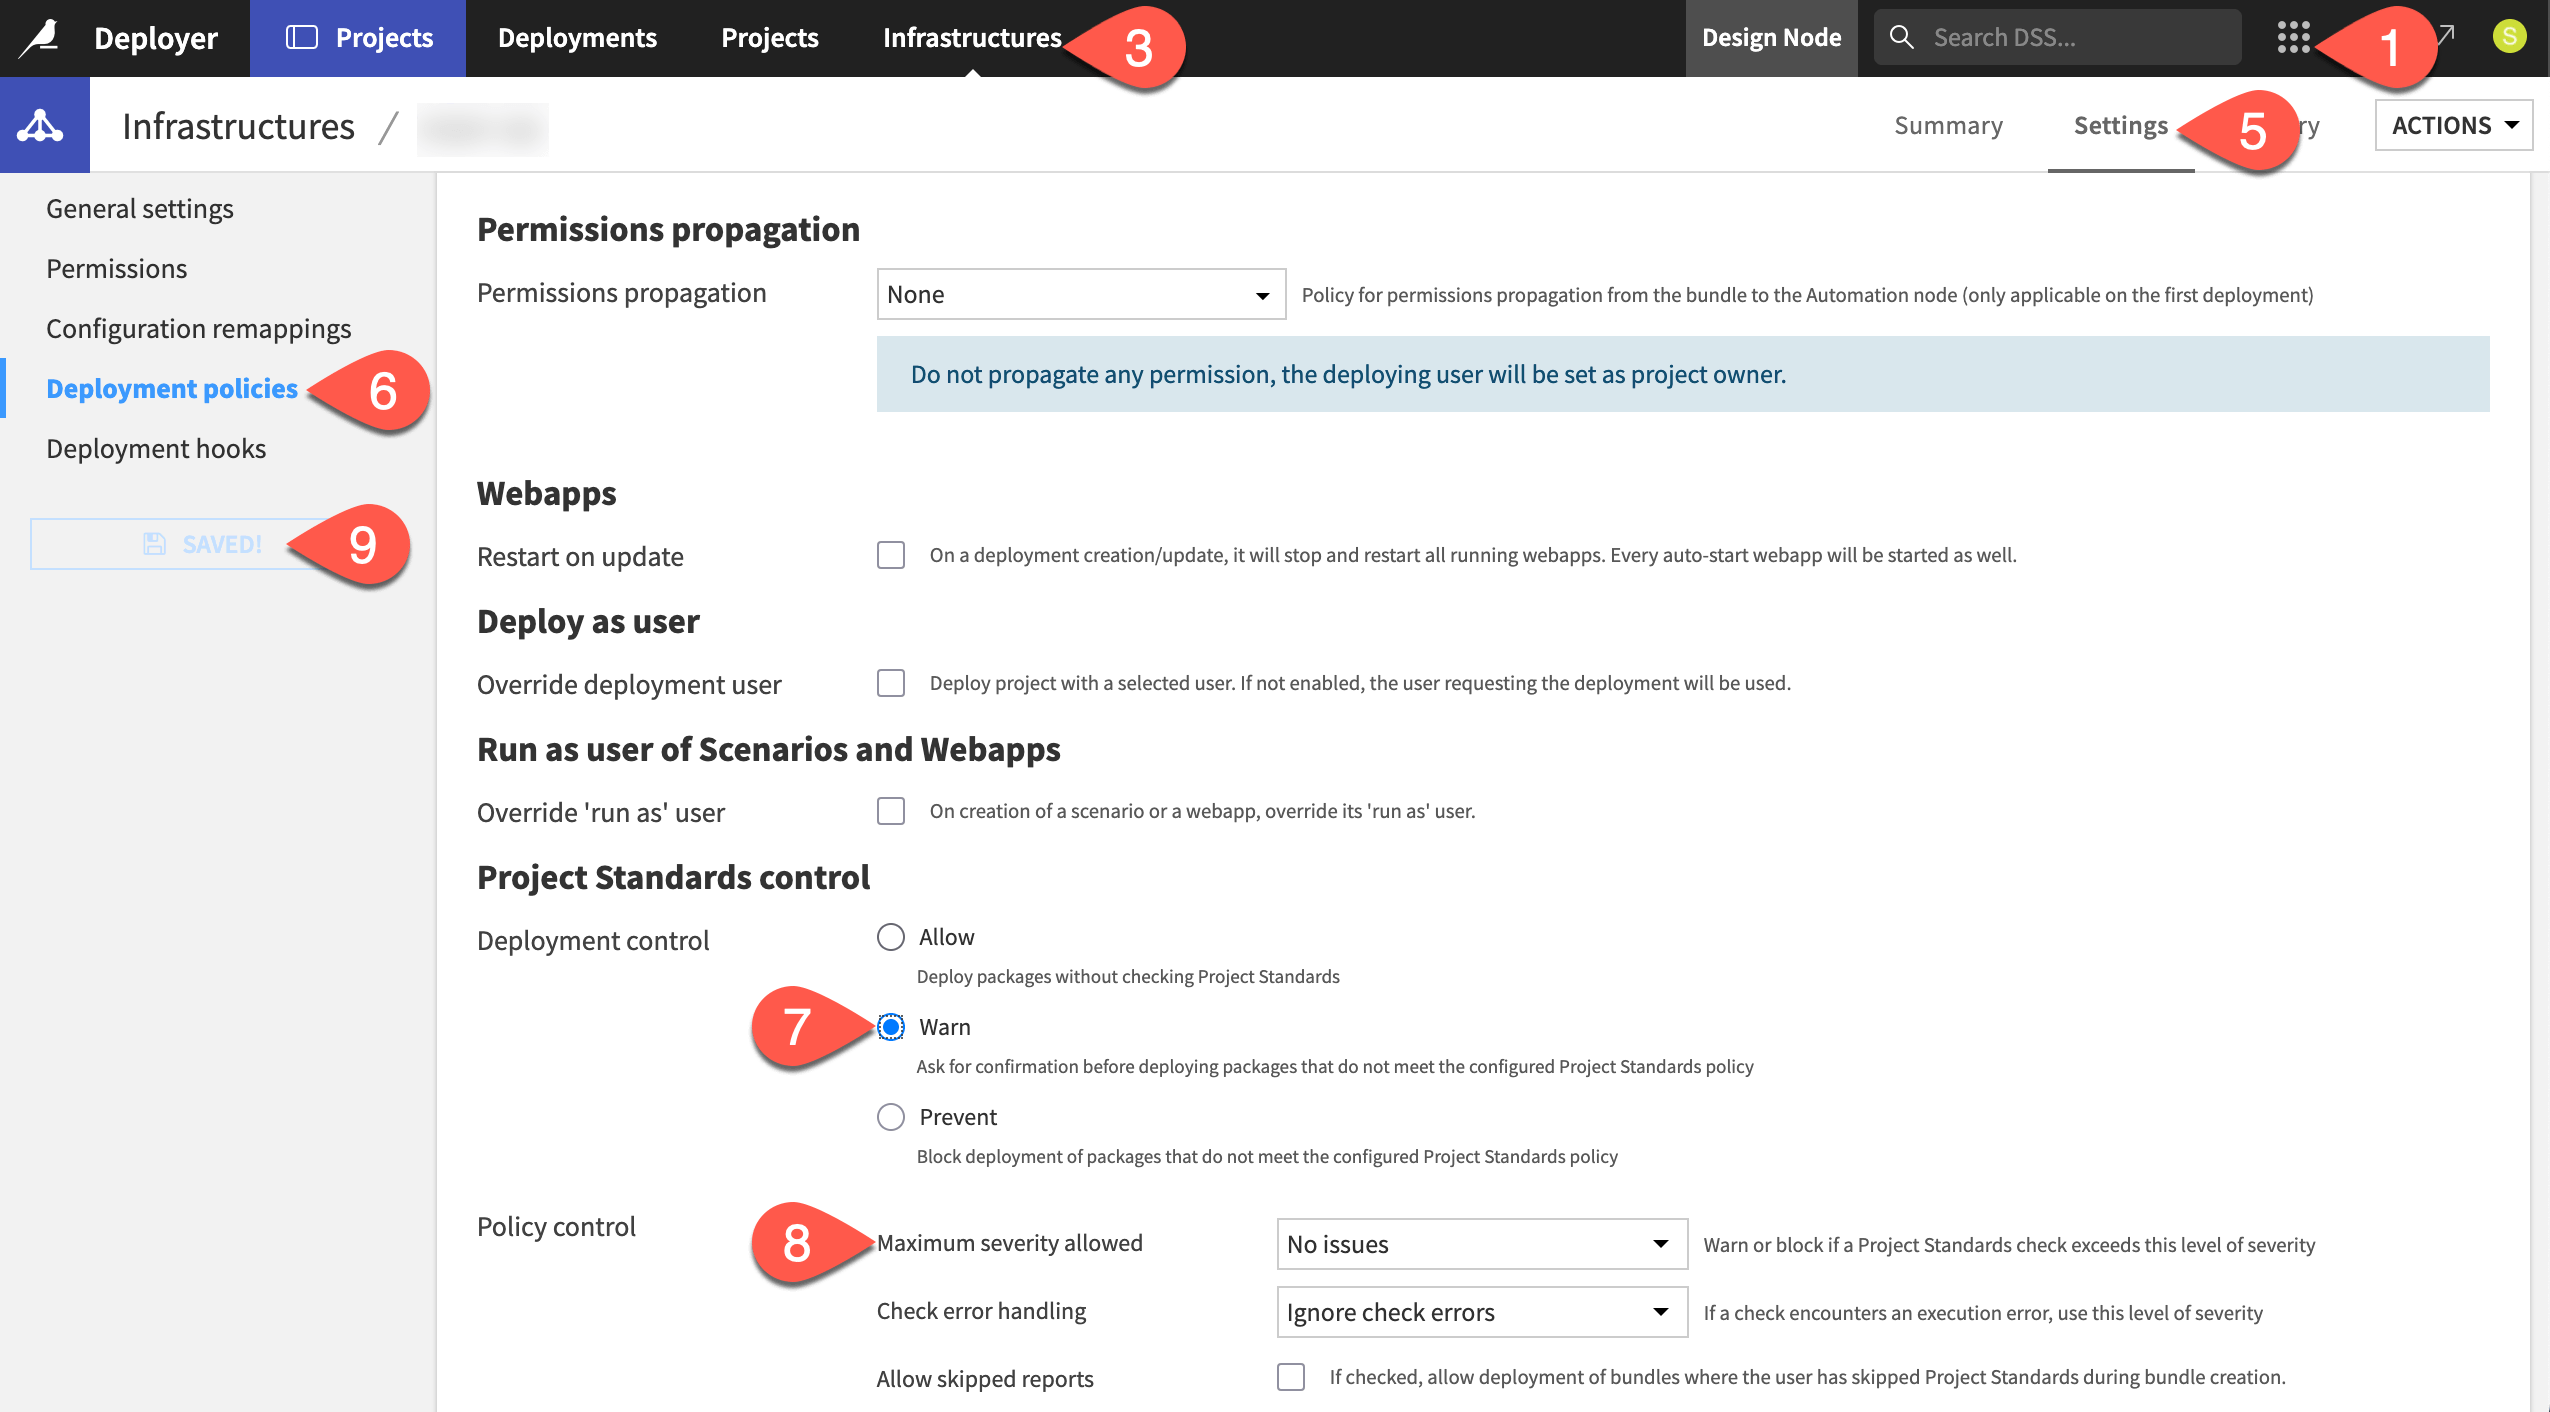
Navigate to the Settings tab for that infrastructure.
Go to the Deployment policies panel.
Under Project Standards control, select Warn as the deployment control.
Leave the Maximum severity allowed to No issues.
Click Save.
Tip
It’s up to your organization to find the correct balance between restrictive and permissive deployment controls. As you begin implementing Project Standards, consider taking a more permissive approach initially. Then, gradually tighten controls as you find the QA checks most important for your organization and the scale of deployments begins to increase.
Attempt to deploy a bundle with unresolved checks#
Having set up this policy, try to deploy a bundle, knowing it contains unresolved checks. Follow the routine deployment process:
Return to the Bundles page of your project on the Design node.
Select your bundle, and click Publish on Deployer. Click Publish on Deployer again to confirm.
Click Open in Deployer.
Review the Project Standards section of the bundle on the Deployer.
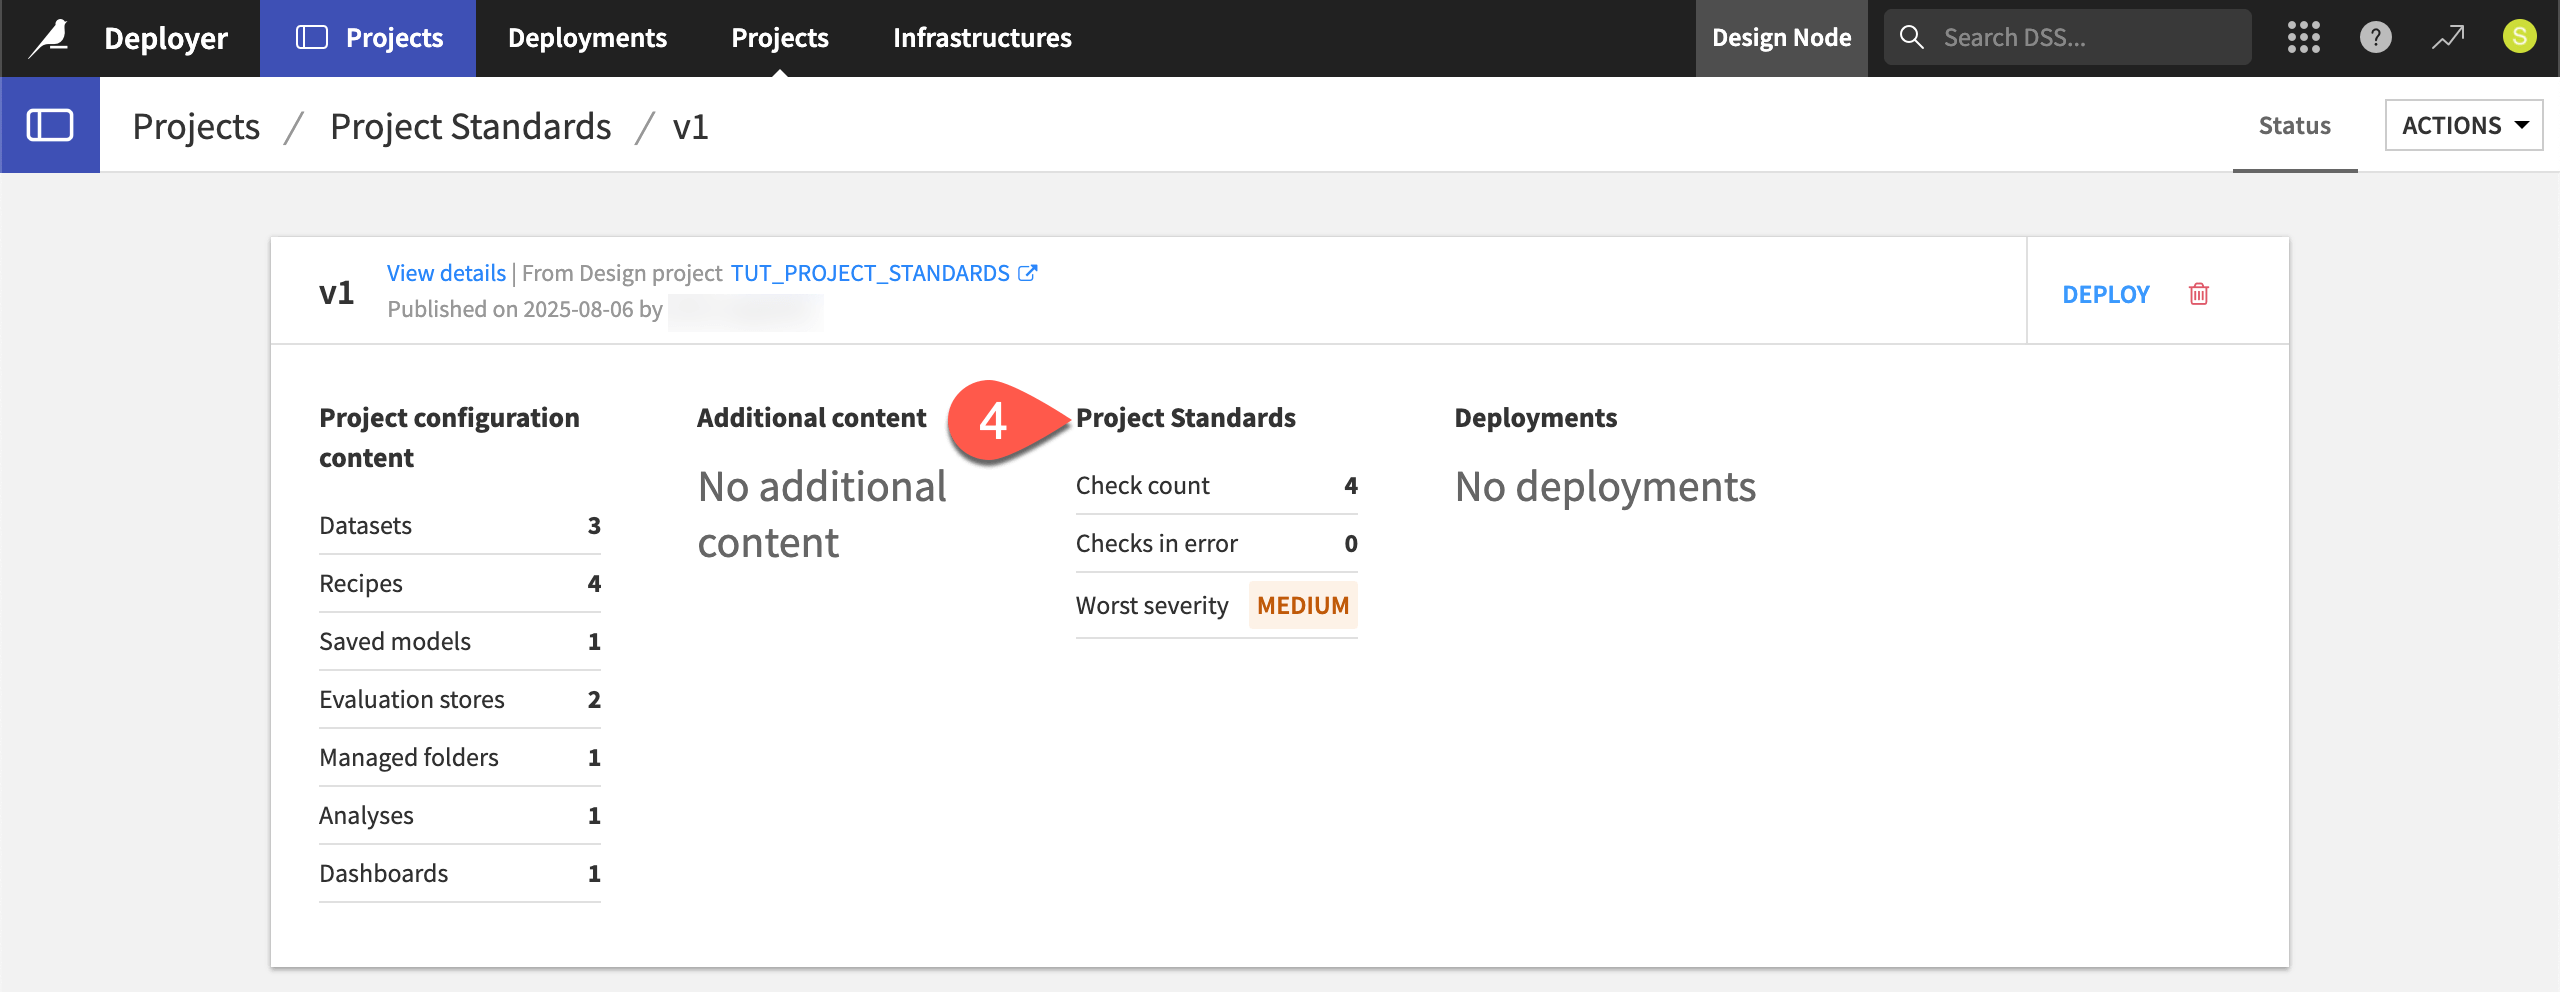
Despite a report including an issue of medium severity, proceed with deploying the bundle.
On the bundle found on the Deployer, click Deploy.
For the Target infrastructure field, select the infrastructure on which you set the deployment control, and immediately see a warning flag.
Ignoring it, click Create.
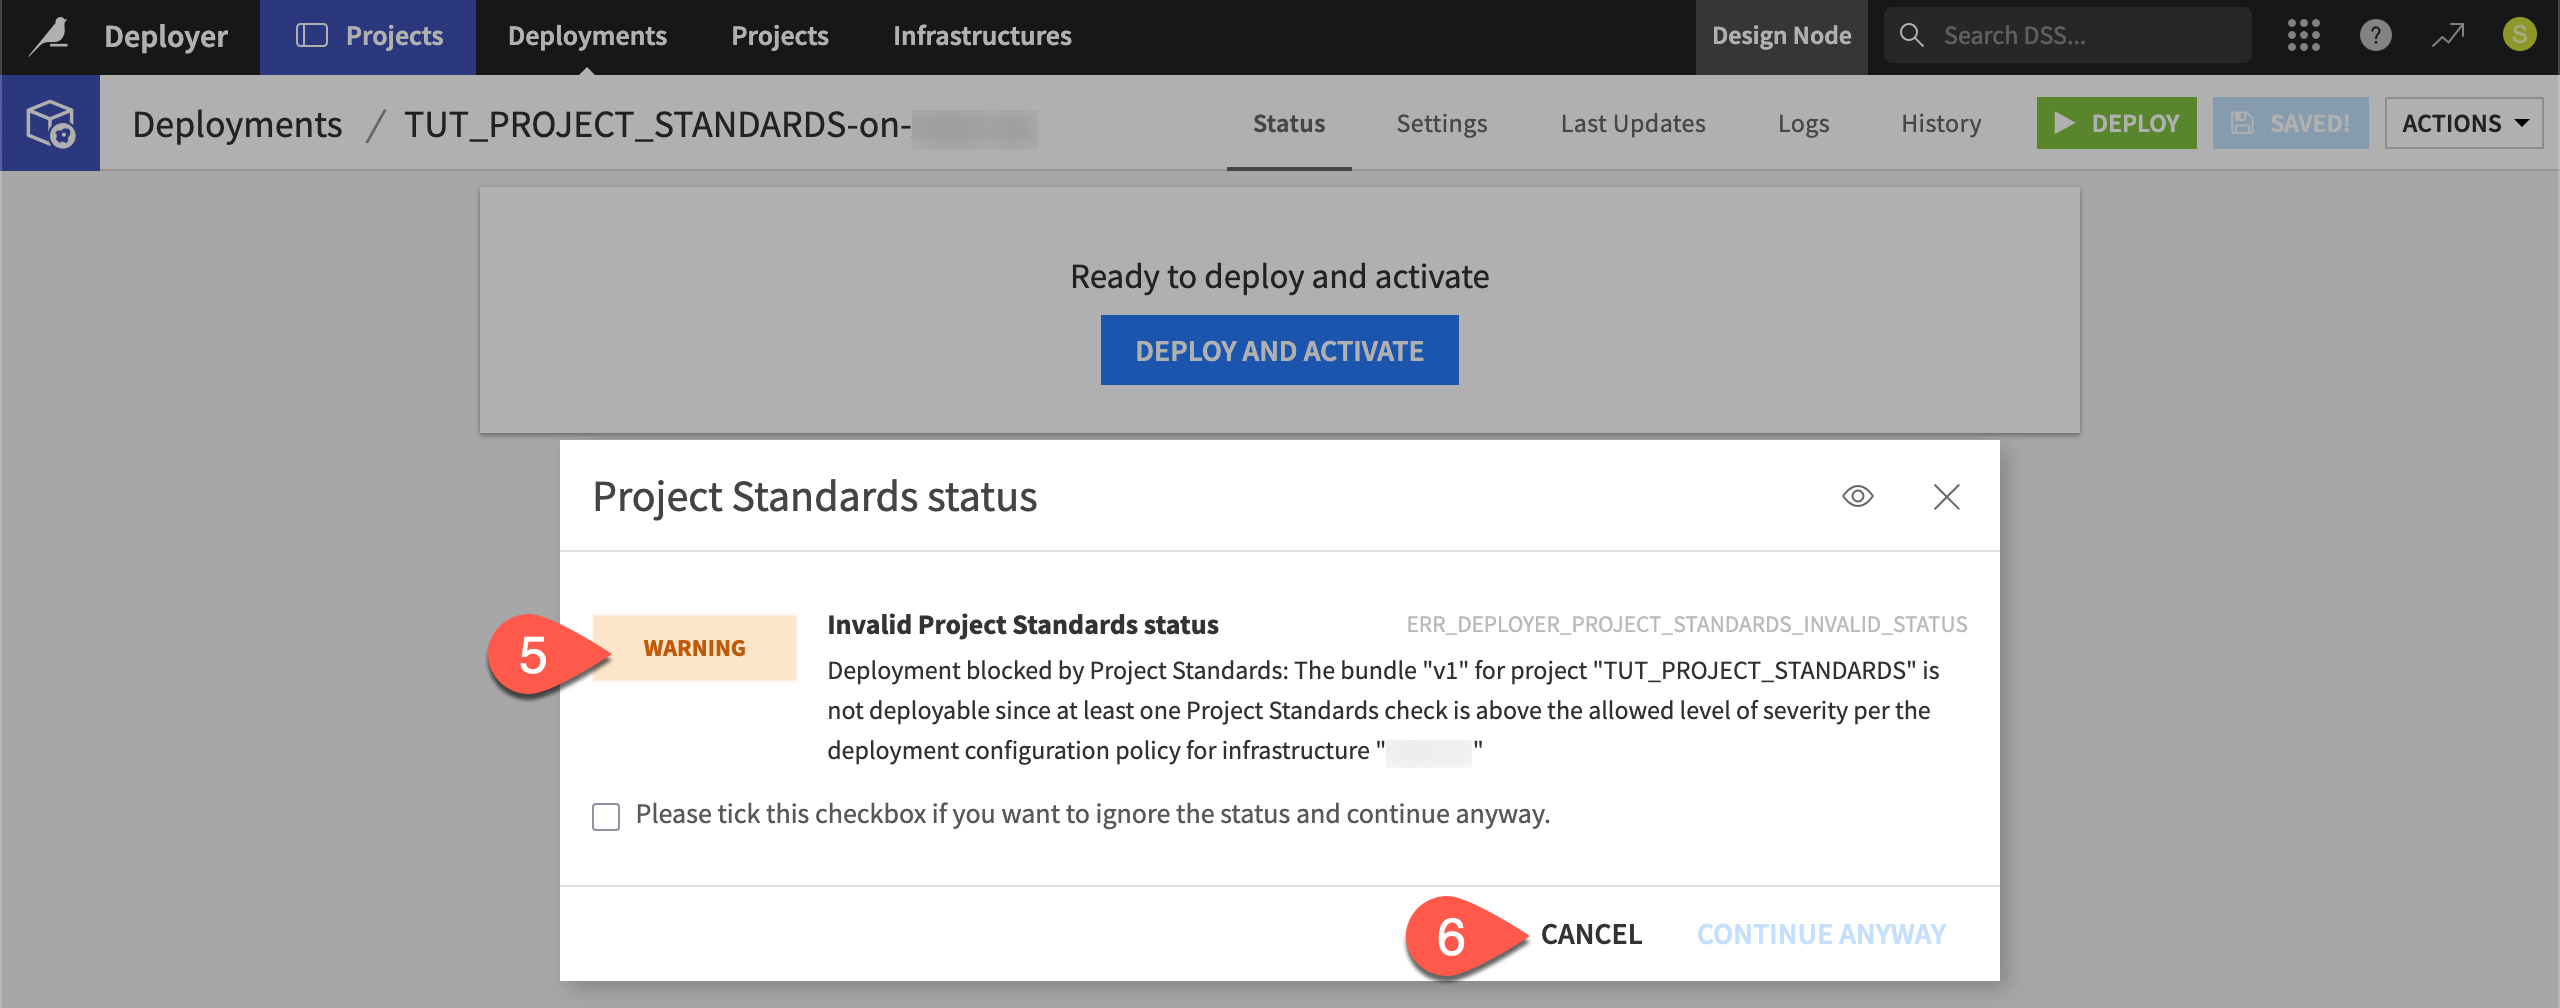
Click Deploy and Activate.
Confirm you receive a warning message that a Project Standards check is above the allowed severity.
Click Cancel to abandon the deployment attempt.
Tip
Project Standards are also surfaced in the Govern node. In a page such as Governable items or the Bundle registry, go to this bundle’s Source Objects (![]() ) tab of the right panel. You’ll find the same results from the Project Standards report.
) tab of the right panel. You’ll find the same results from the Project Standards report.
Next steps#
Congratulations! You should now have an understanding of how your organization can implement pre-deployment quality assurance checks, giving users a clearer path to successful deployments.
Once you no longer need them, take a moment to delete the test checks as a courtesy to those sharing your instance.
Within the Project Standards tab of the Administration page, return to the Scopes panel.
Click the bin (
 ) next to your scope to delete it.
Navigate to the Checks library panel.
Search for your checks, and delete them as well.
Return to the infrastructure settings on the Deployer, and revert the deployment control settings.
On the Deployer, delete your project and bundle.
See also
See Project Standards in the reference documentation for more information.