
Get started#
Are you interested in using Dataiku to collaborate with colleagues of diverse skill sets and responsibilities? You’re in the right place!
Create an account#
To follow along with the steps in this tutorial, you need access to a 12.6+ Dataiku instance. If you don’t already have access, you can get started in one of two ways:
Follow the link above to start a 14 day free trial. See How-to | Begin a free trial from Dataiku for help if needed.
Install the free edition locally for your operating system.
Open Dataiku#
The first step is getting to the homepage of your Dataiku Design node.
Go to the Launchpad.
Within the Overview panel, click Open Instance in the Design node tile once your instance has powered up.
Important
If using a self-managed version of Dataiku, including the locally downloaded free edition on Mac or Windows, open the Dataiku Design node directly in your browser.
Once you are on the Design node homepage, you can create the tutorial project.
Create the project#
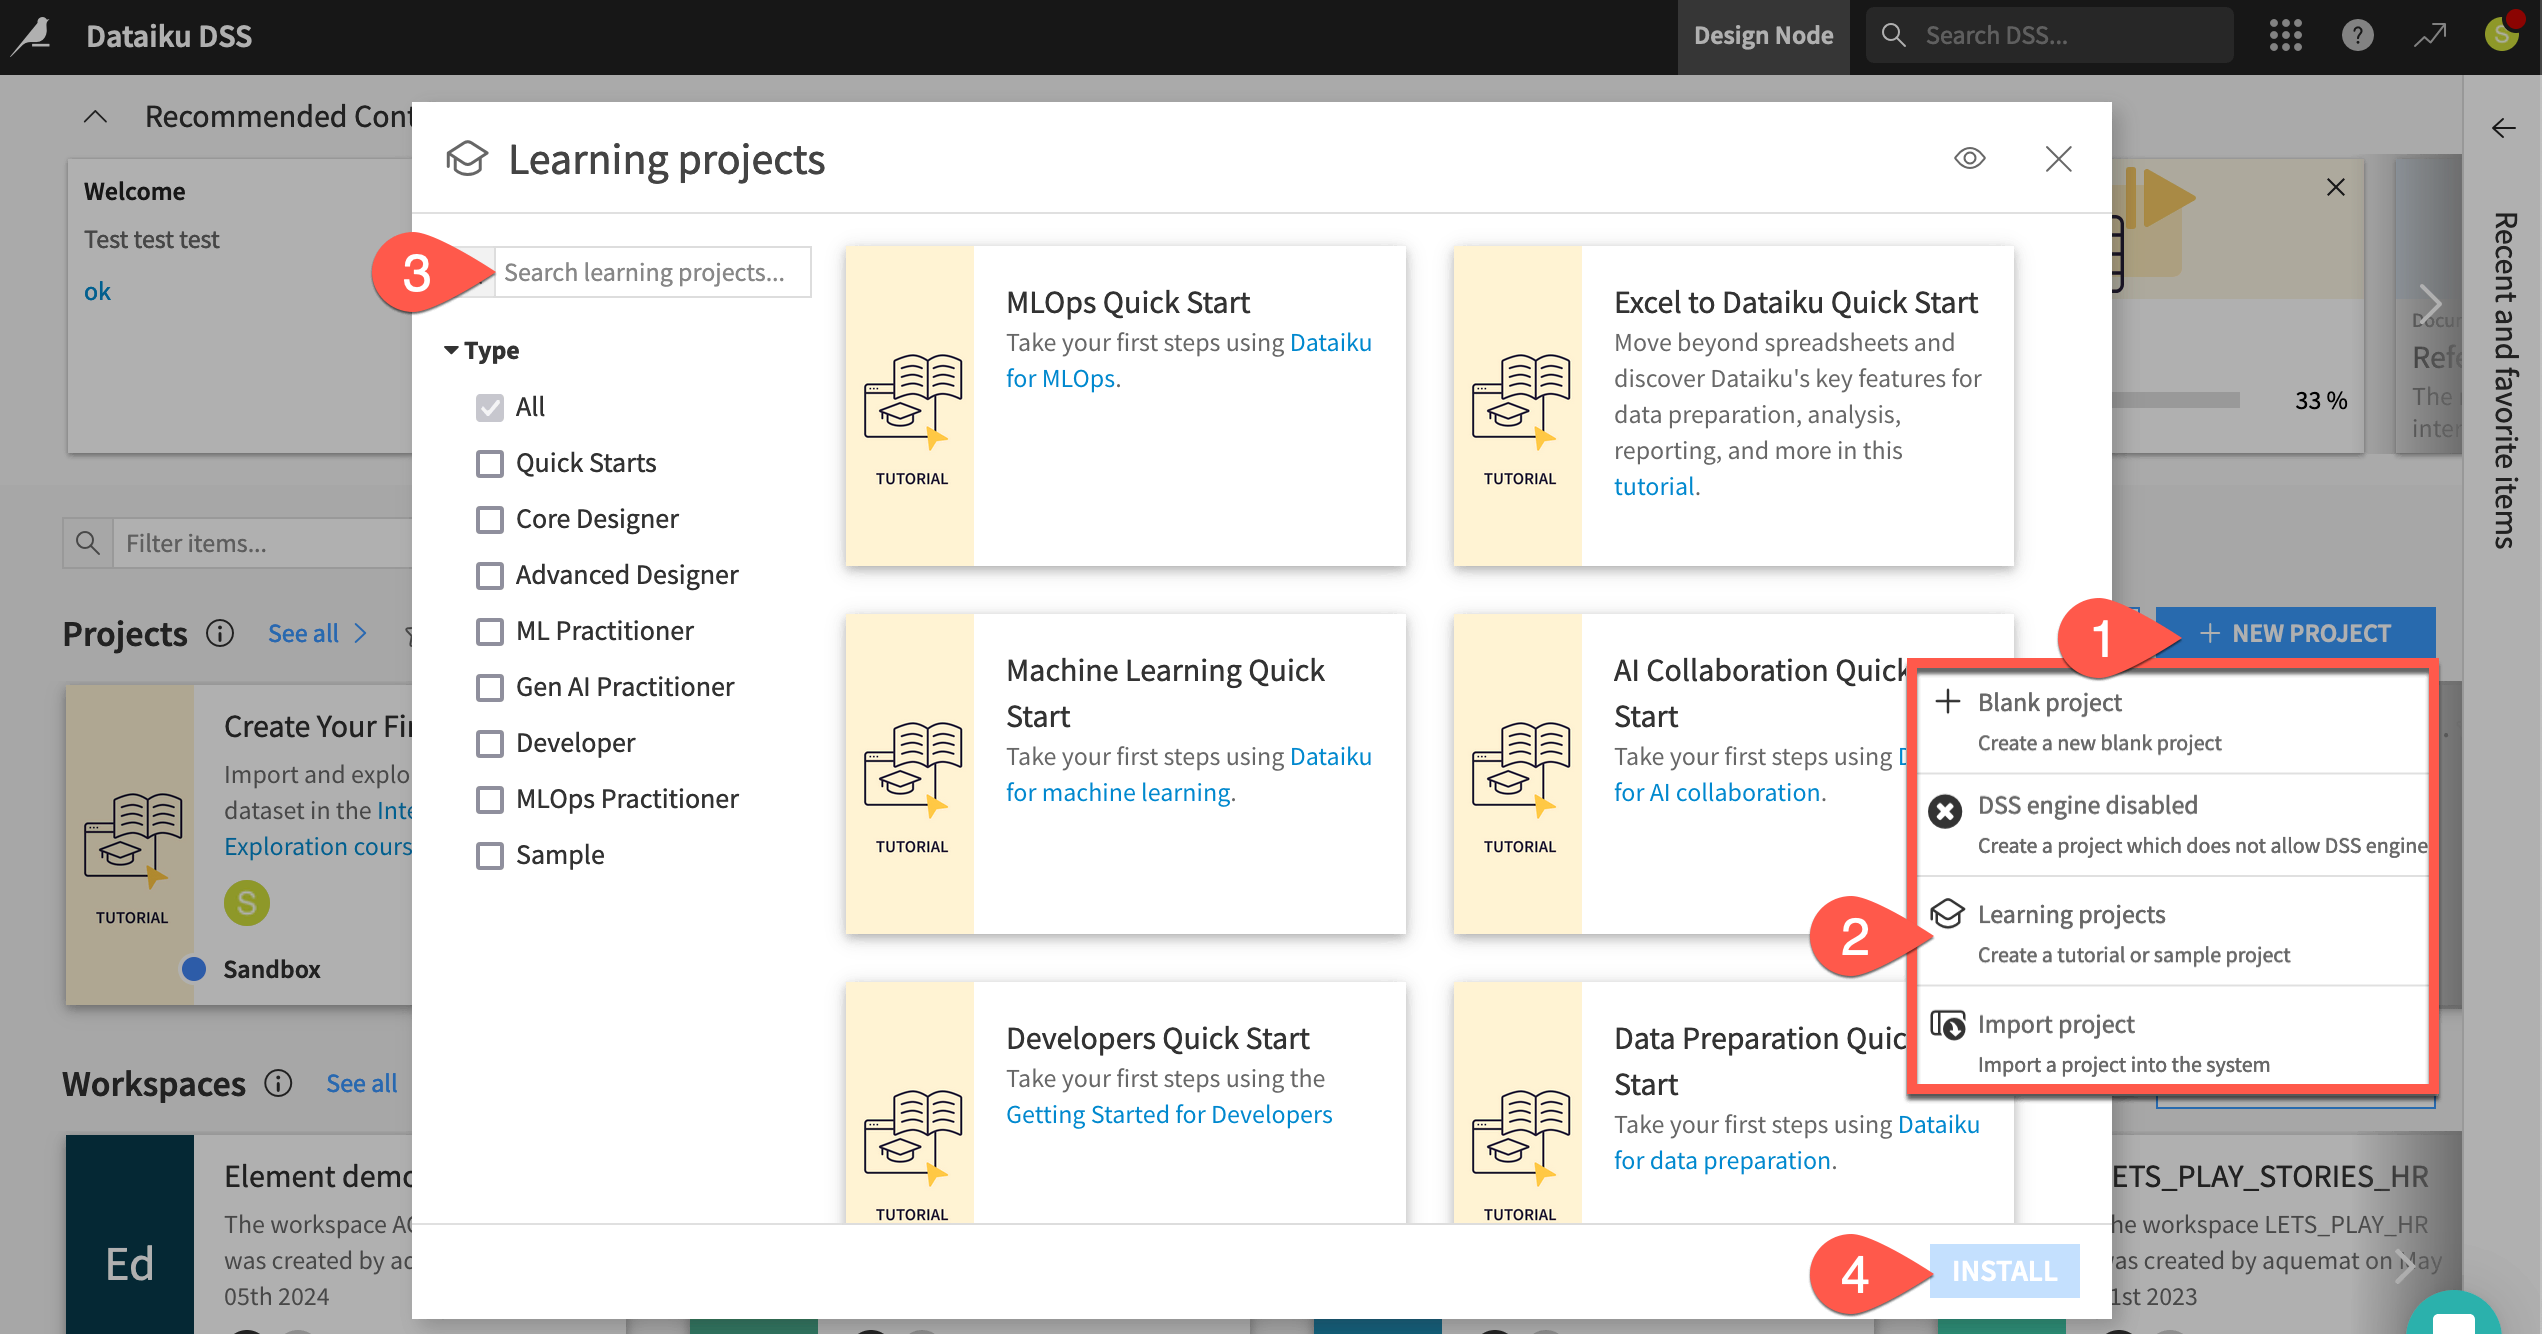
From the Dataiku Design homepage, click + New Project.
Select Learning projects.
Search for and select AI Collaboration Quick Start.
If needed, change the folder into which the project will be installed, and click Create.
From the project homepage, click Go to Flow (or type
g+f).
Note
You can also download the starter project from this website and import it as a ZIP file.
Are you using an AI Consumer user profile?
AI Consumer user profiles don’t include the permission to create a new project. However, as a Designer on a free trial or free edition, you’ll be able to do this on your own!
If using an AI Consumer profile, have your instance administrator follow the steps below so you can complete the quick start:
Create the project above.
Build the Flow.
Assume the role of the Score Data scenario’s last author by making an arbitrary change to the scenario (such as to the trigger) and saving it.
Grant you permission to access the project.