How-to | Edit Dataiku projects and plugins in PyCharm#
Though Jupyter notebooks are integrated into the Dataiku interface, some developers favor PyCharm as an IDE. From within PyCharm, you can:
Install the
dataikuplugin.Configure PyCharm to connect to an existing Dataiku instance.
Pull code from an existing code recipe, plugin, or library into PyCharm.
Edit the code in PyCharm.
Locally run and debug code recipes.
Save the code back to the code recipe or plugin.
Note
This integration allows you to edit existing recipes, plugins, and libraries on your Dataiku instance but doesn’t allow you to create new recipes or plugins. You can, however, create new files and folders within existing plugins and libraries.
Prerequisites#
Familiarity with code recipes or plugins in Dataiku.
Access to a Dataiku instance.
A personal API key to the Dataiku instance.
Install the Dataiku Plugin#
In PyCharm, open Preferences and navigate to the Plugins page.
Search for
dataikuin the marketplace and select Dataiku DSS.
The Dataiku plugin provides commands for connecting to a Dataiku instance and editing recipes on the instance.
Connect to a Dataiku Instance#
In PyCharm, open Preferences and navigate to the Dataiku Dataiku Settings page.
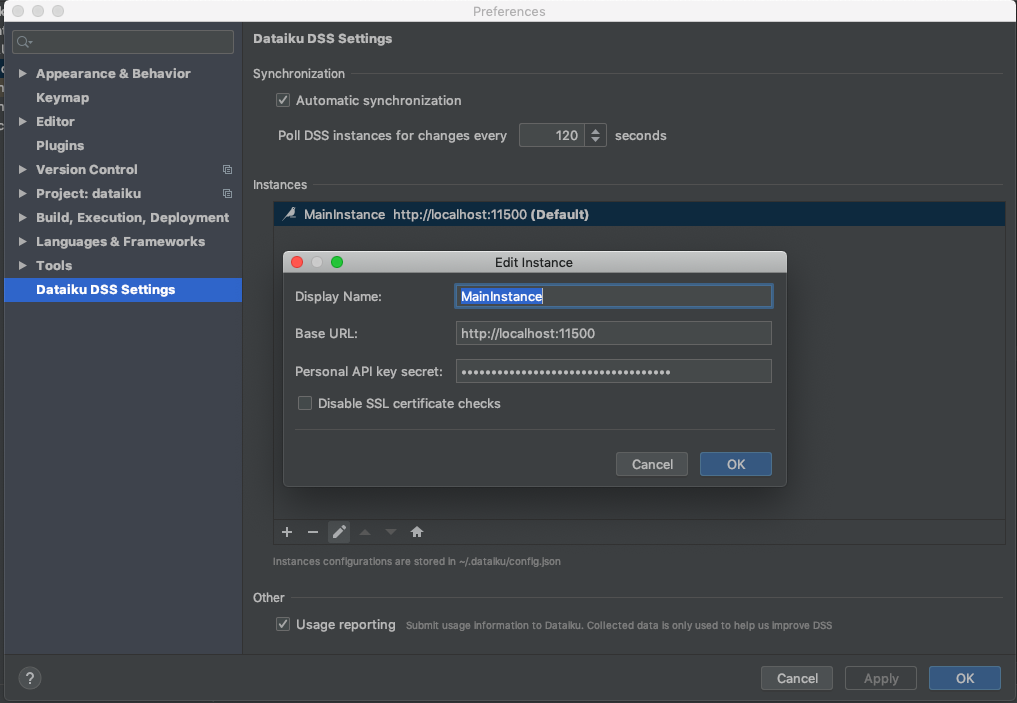
The Synchronization settings specify whether PyCharm should automatically synchronize changes between the local code base and the code on the Dataiku instance.
The Instances settings specify the information necessary to connect to a Dataiku instance. The parameters available for each Dataiku instance are:
Display name. A descriptive name for the Dataiku instance that will be displayed in PyCharm.
Base URL. The base URL of the Dataiku instance, without / at the end.
Personal API key secret. The secret for your personal API key.
Save the settings.
Edit a Dataiku Recipe, Plugin, or Library#
Before opening a Dataiku project, you must first create a project in PyCharm.
Go to File > New Project, confirm settings, then select Create.
To open a Dataiku project, go to File > Open Dataiku DSS. In the dialog, select:
DSS instance. Choose from among the instances you’ve set up on the Dataiku DSS Settings page of PyCharm’s Preferences.
Type. Choose whether you want to edit a Recipe, Plugin, or Library.
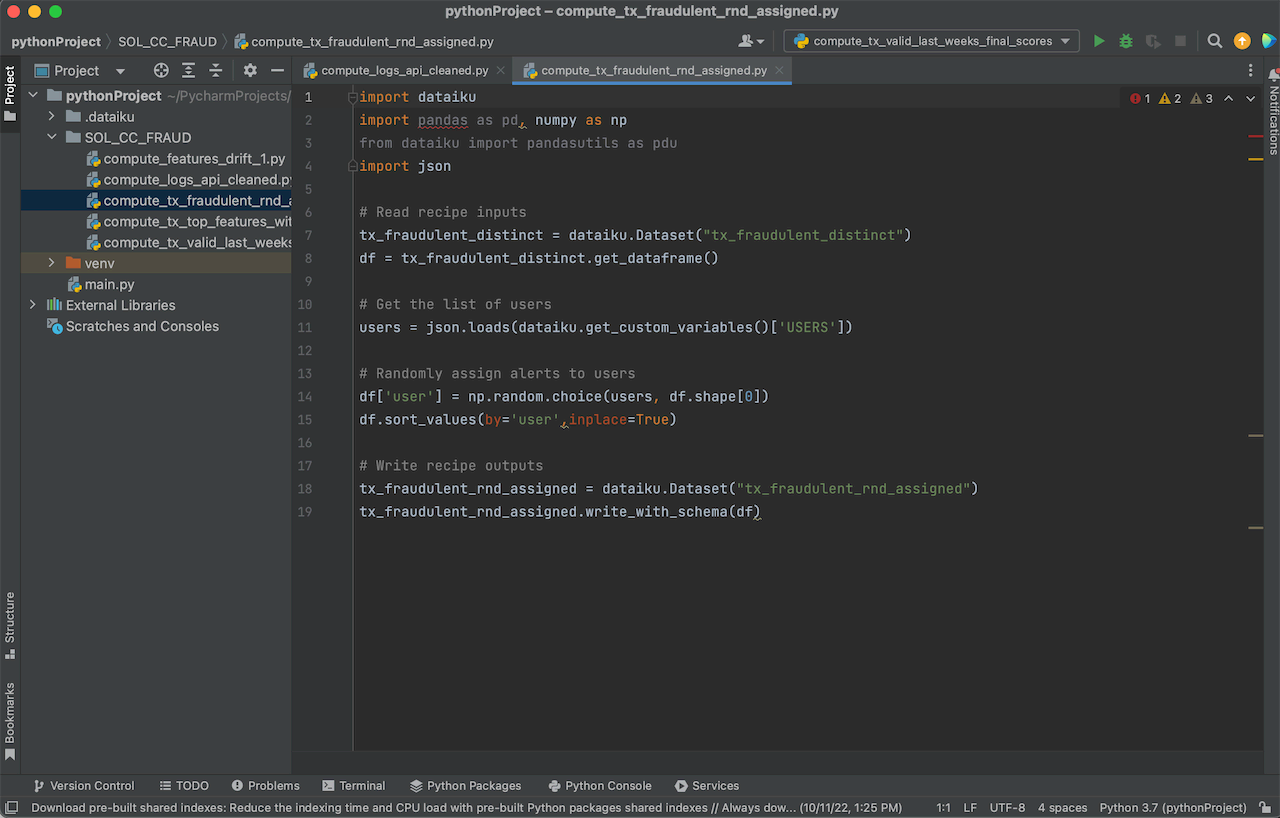
If you choose Recipe, then on the Next screen, you will choose the Project and Python recipe within that Project you want to edit. If you want to locally run and debug the recipe, you may need to click Install to install the Dataiku client library in your virtual environment. If you are using a stock or Conda installation, you must do it manually by following the Dataiku package installation instructions.
If you choose Plugin, then on the Next screen, you will choose the Plugin within that instance you want to edit. The entire folder structure of the Plugin is downloaded locally to PyCharm.
If you choose Library, then on the Next screen, you will choose the Library within that instance you want to edit.
Changes made in PyCharm are synchronized to Dataiku automatically on the schedule defined in the Dataiku DSS Settings page, or when you explicitly choose File > Synchronize with DSS.