
Tutorial | ML assertions#
Get started#
ML assertions are checks that help you to systematically verify whether your model predictions align with the experience of your domain experts. Learn how to use assertions with this tutorial.
Objectives#
In this tutorial, you will learn how to:
Define assertions.
Set assertions in various metrics.
Prerequisites#
Dataiku version 12.0 or above.
Basic knowledge of Dataiku (Core Designer level or equivalent).
Create the project#
From the Dataiku Design homepage, click + New Project.
Select Learning projects.
Search for and select ML Assertions.
If needed, change the folder into which the project will be installed, and click Create.
From the project homepage, click Go to Flow (or type
g+f).
Note
You can also download the starter project from this website and import it as a ZIP file.
Add assertions to a model#
This tutorial uses a dataset of a fictional company’s customers and some demographic and business information about those customers. It includes two models, already trained in the Lab, that predict whether each customer is a high-revenue customer, as indicated in the high revenue column.
Let’s add assertions based on domain knowledge and retrain the models to check our assertions.
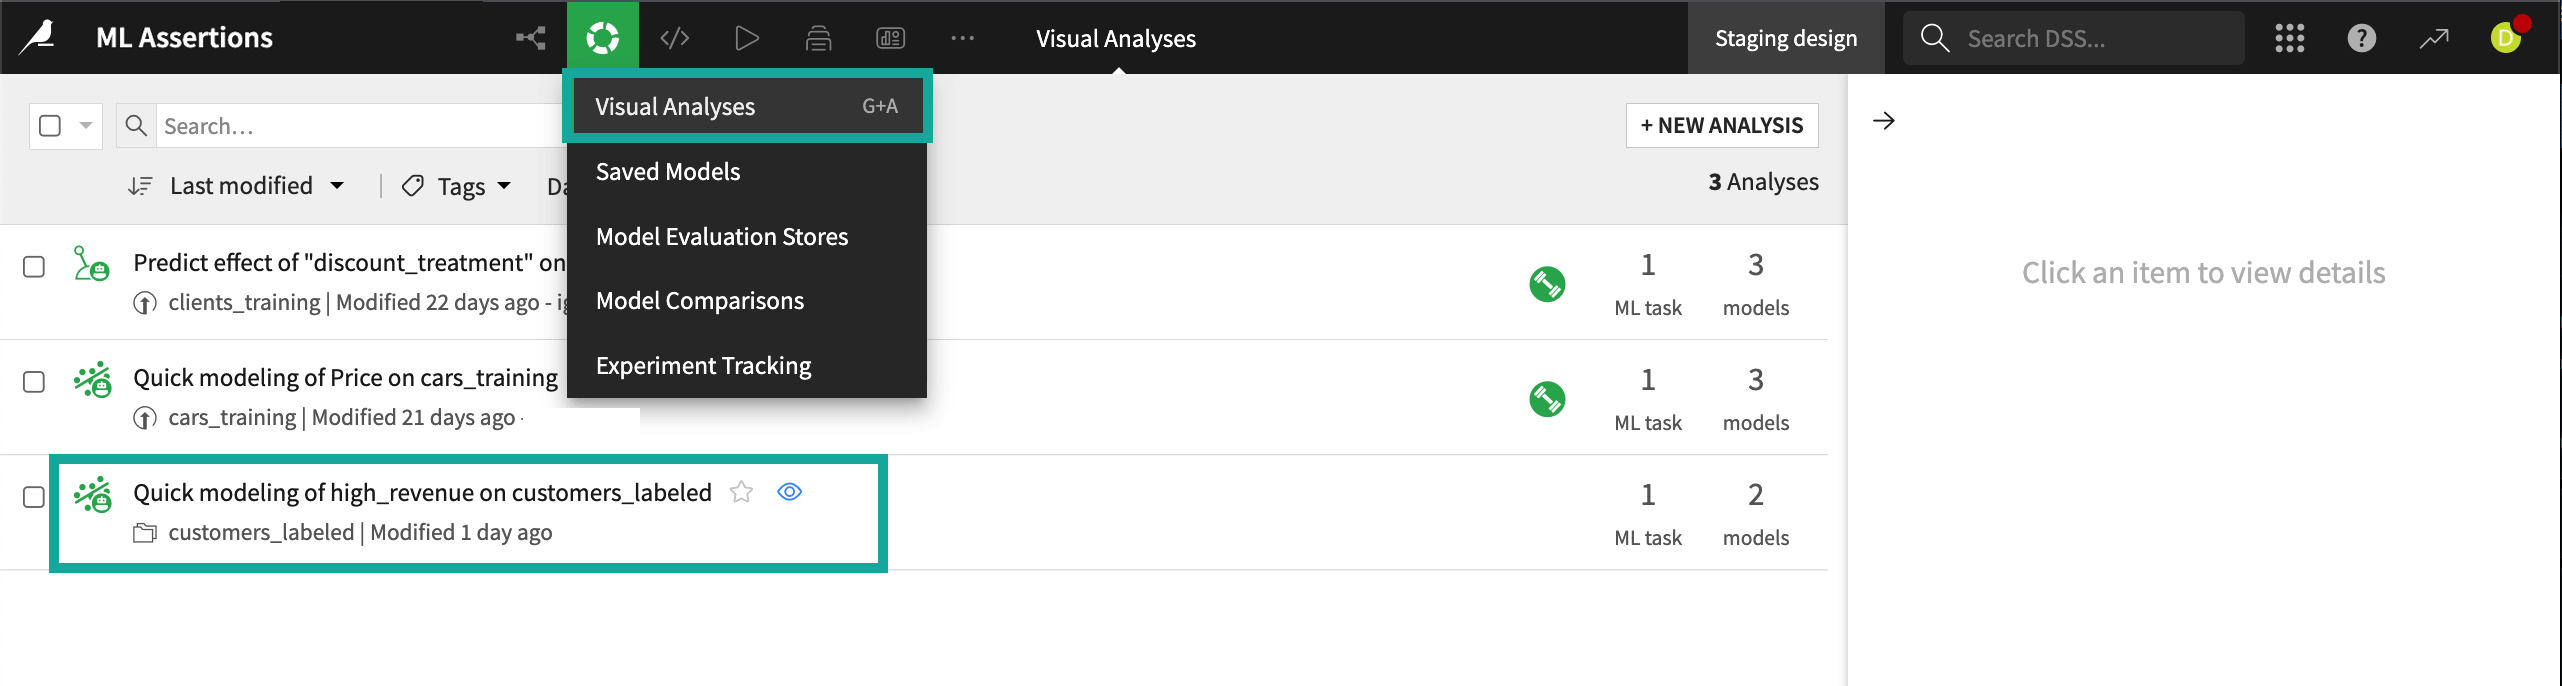
To access the models:
From the ML (
 ) menu of the top navigation bar, click on Visual ML (Analysis).
Select the model Quick modeling of high_revenue on customers labeled.
Defining assertions#
There are no default assertions. You must define them based upon your domain knowledge. After defining assertions, we’ll need to retrain the models so they can evaluate the assertions.
For example, we may know from experience that while 10% of all customers are considered high revenue, those whose first order was made before they turn 30 years old are seldom high revenue.
To create an assertion that captures this knowledge:
From the model Result page, click on the Design tab, then the Basic > Debugging panel on the left.
In the Assertions section, click + Add an Assertion.
Change the name of the assertion from Assertion 1 to
Under 30 not high revenue.Define a condition where age_first_order <
30.Leave the Expected class as False and change With valid ratio to
100%to reflect that we expect none of these customers to be high revenue.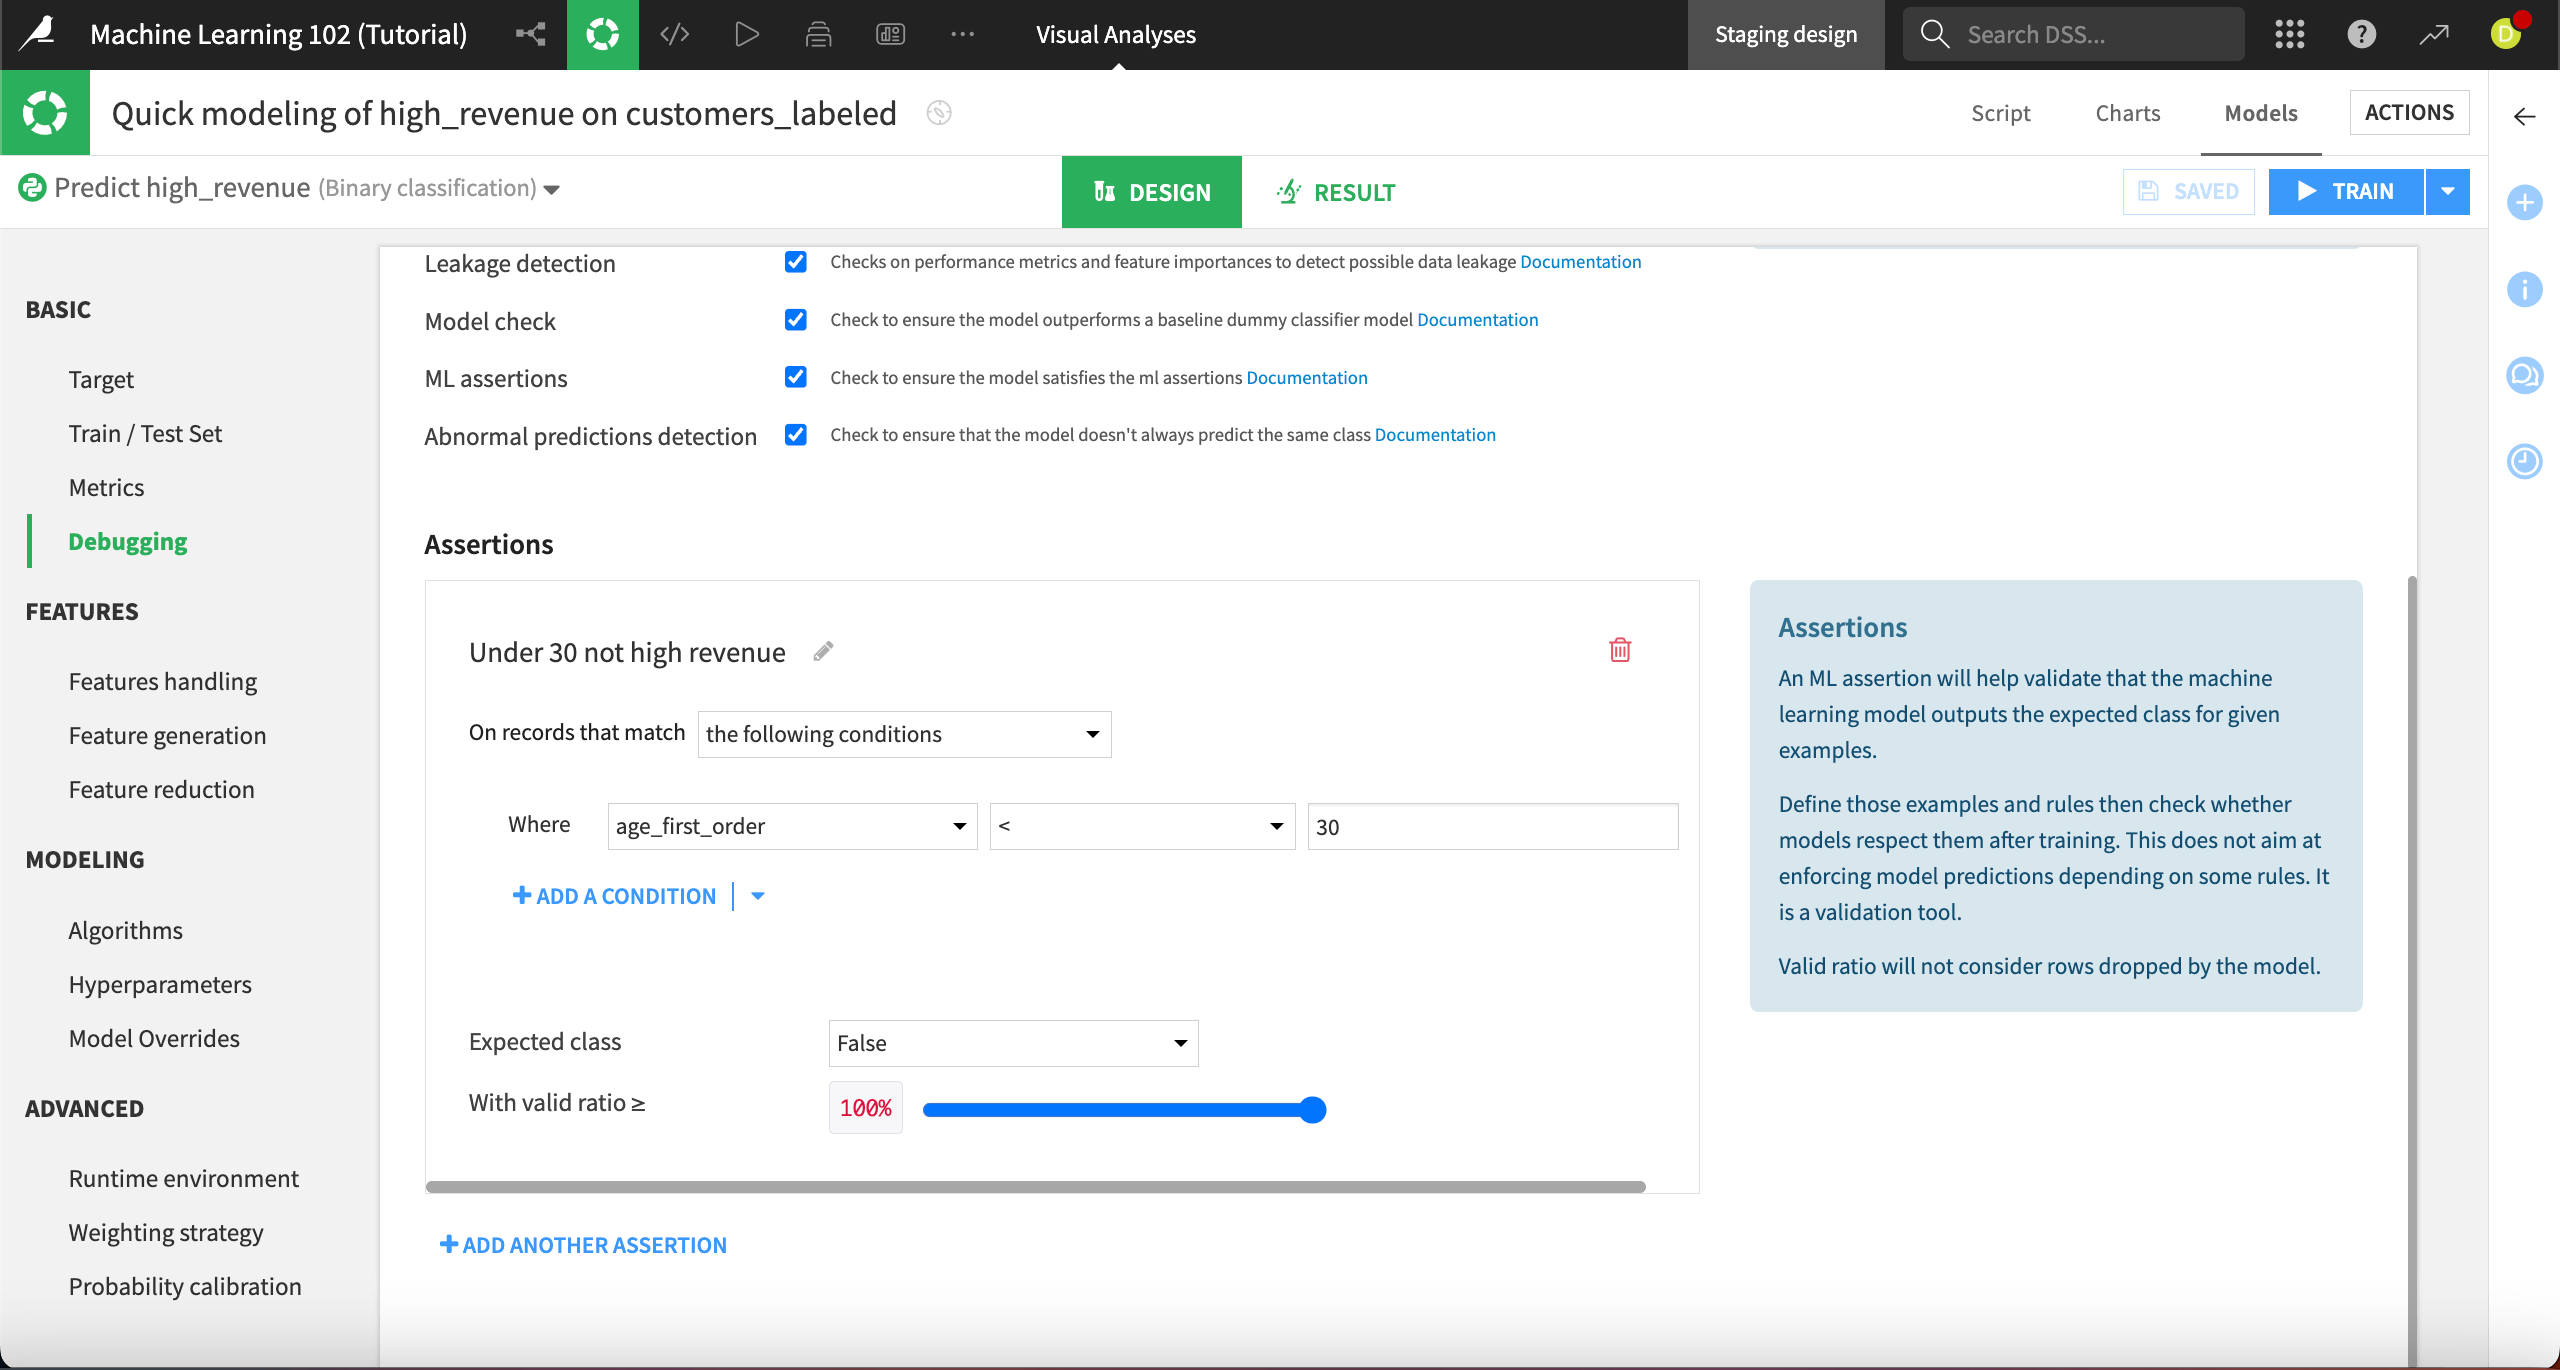
Click Save then Train, then Train again in the info window.
After training is complete, a summary of the diagnostics is available. We can see that there are four diagnostics warnings for the logistic regression model, including one that our assertion failed for that model.
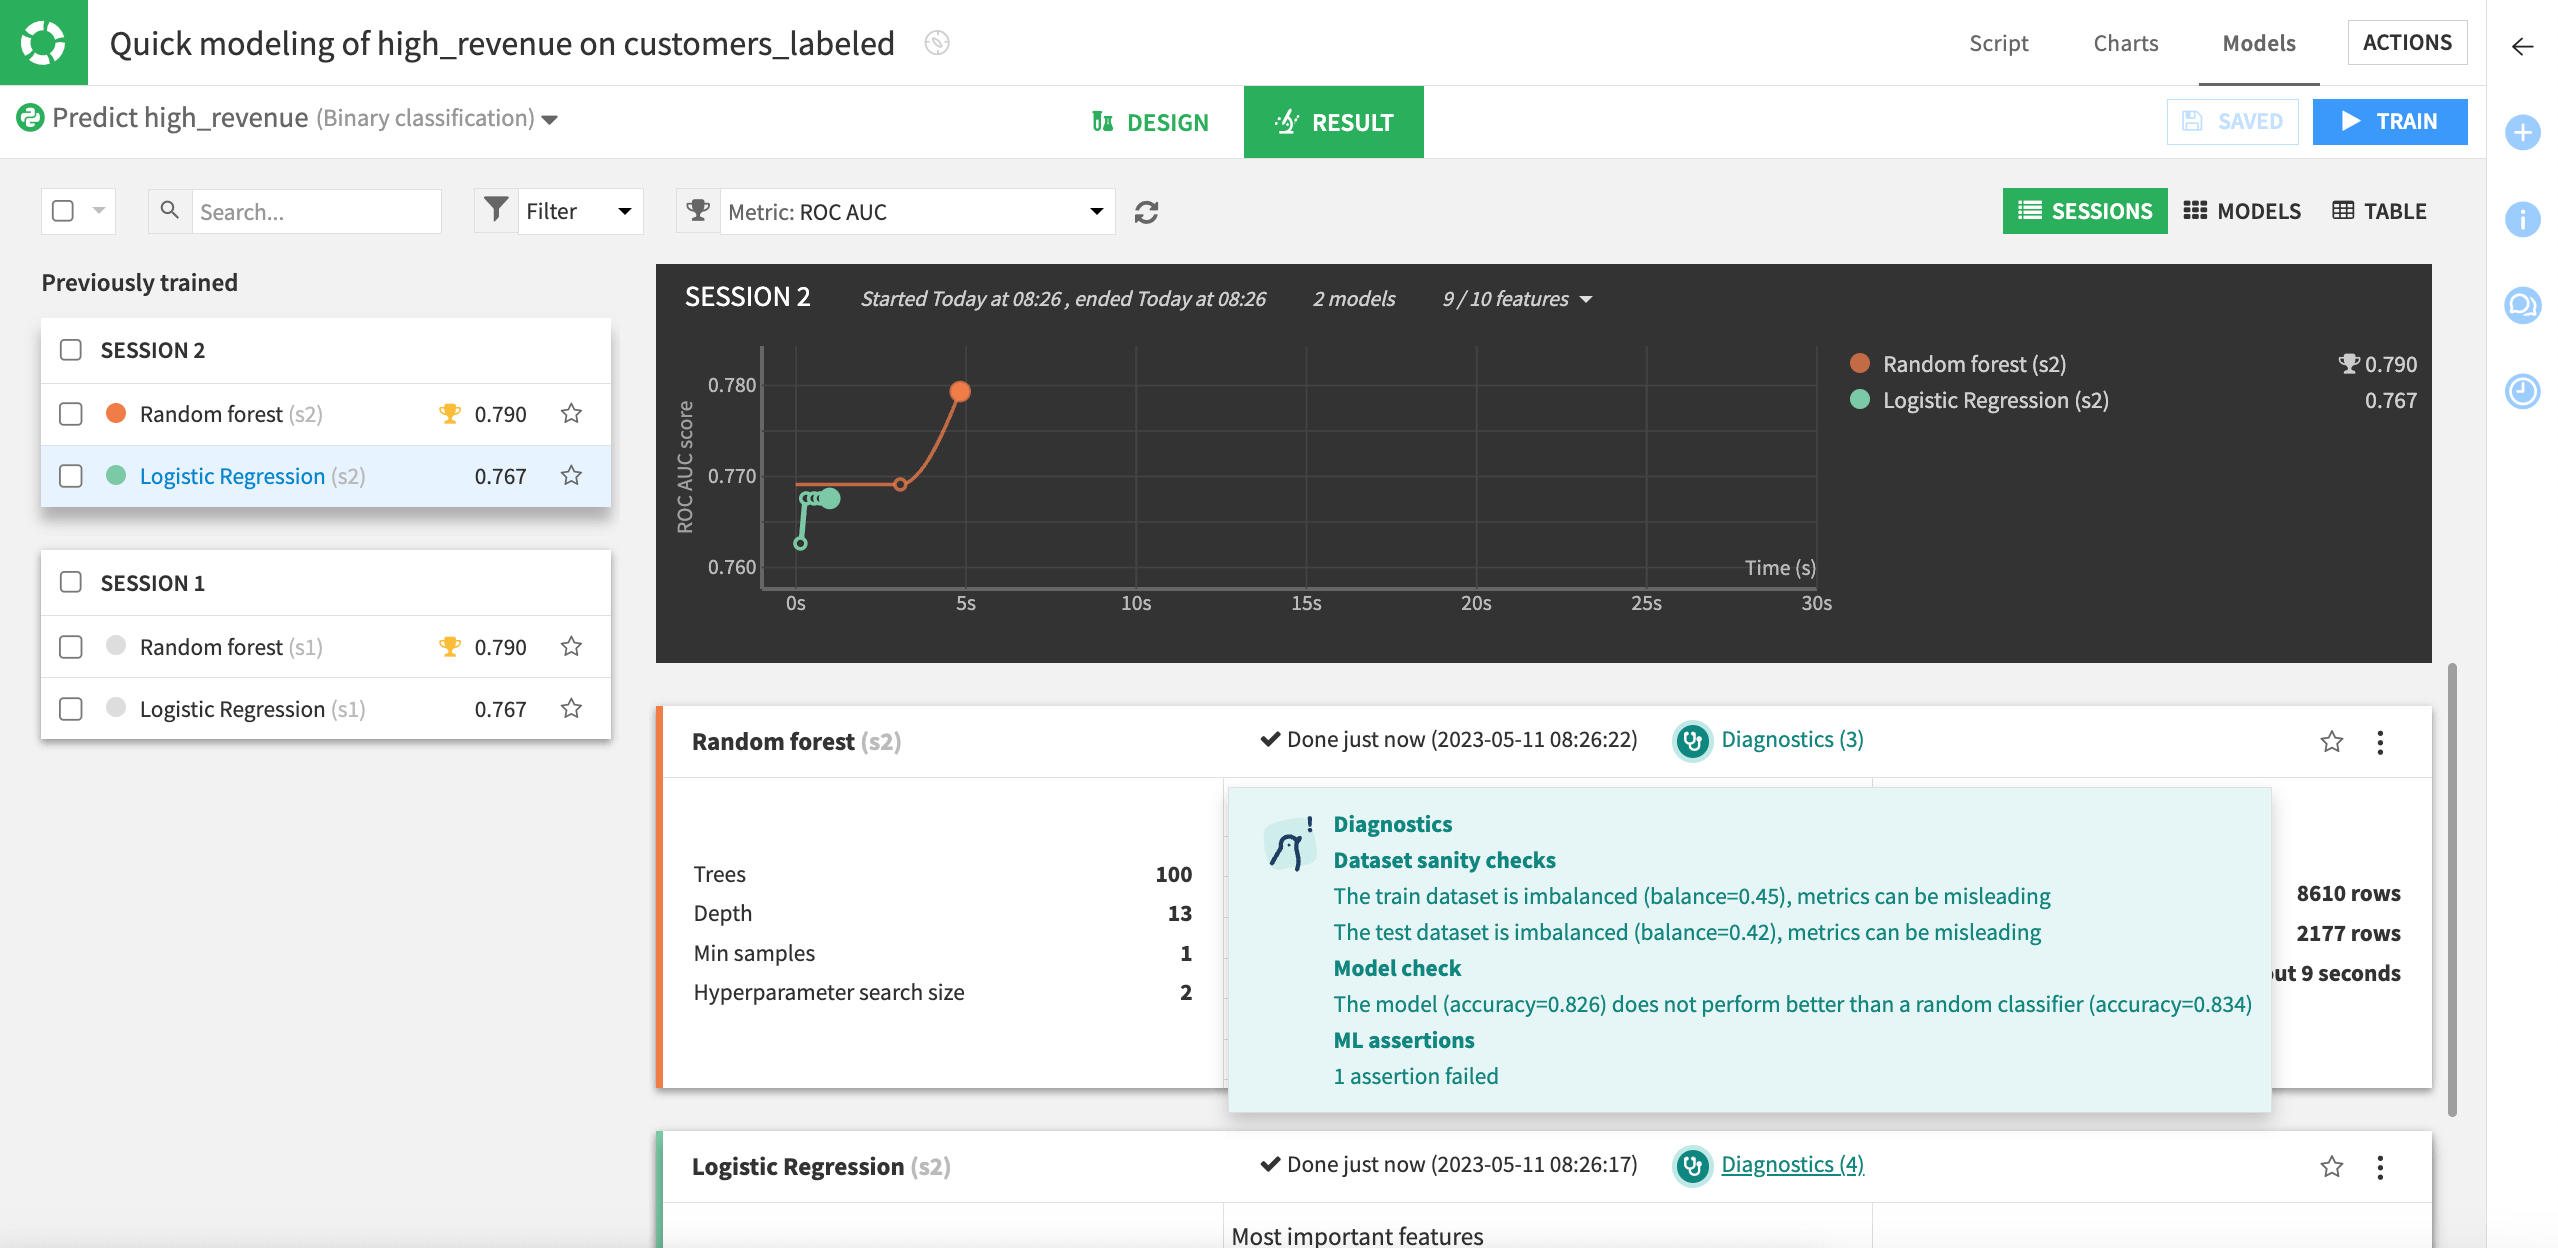
Click Diagnostics for the logistic regression model. This opens the model to the Training Information section.
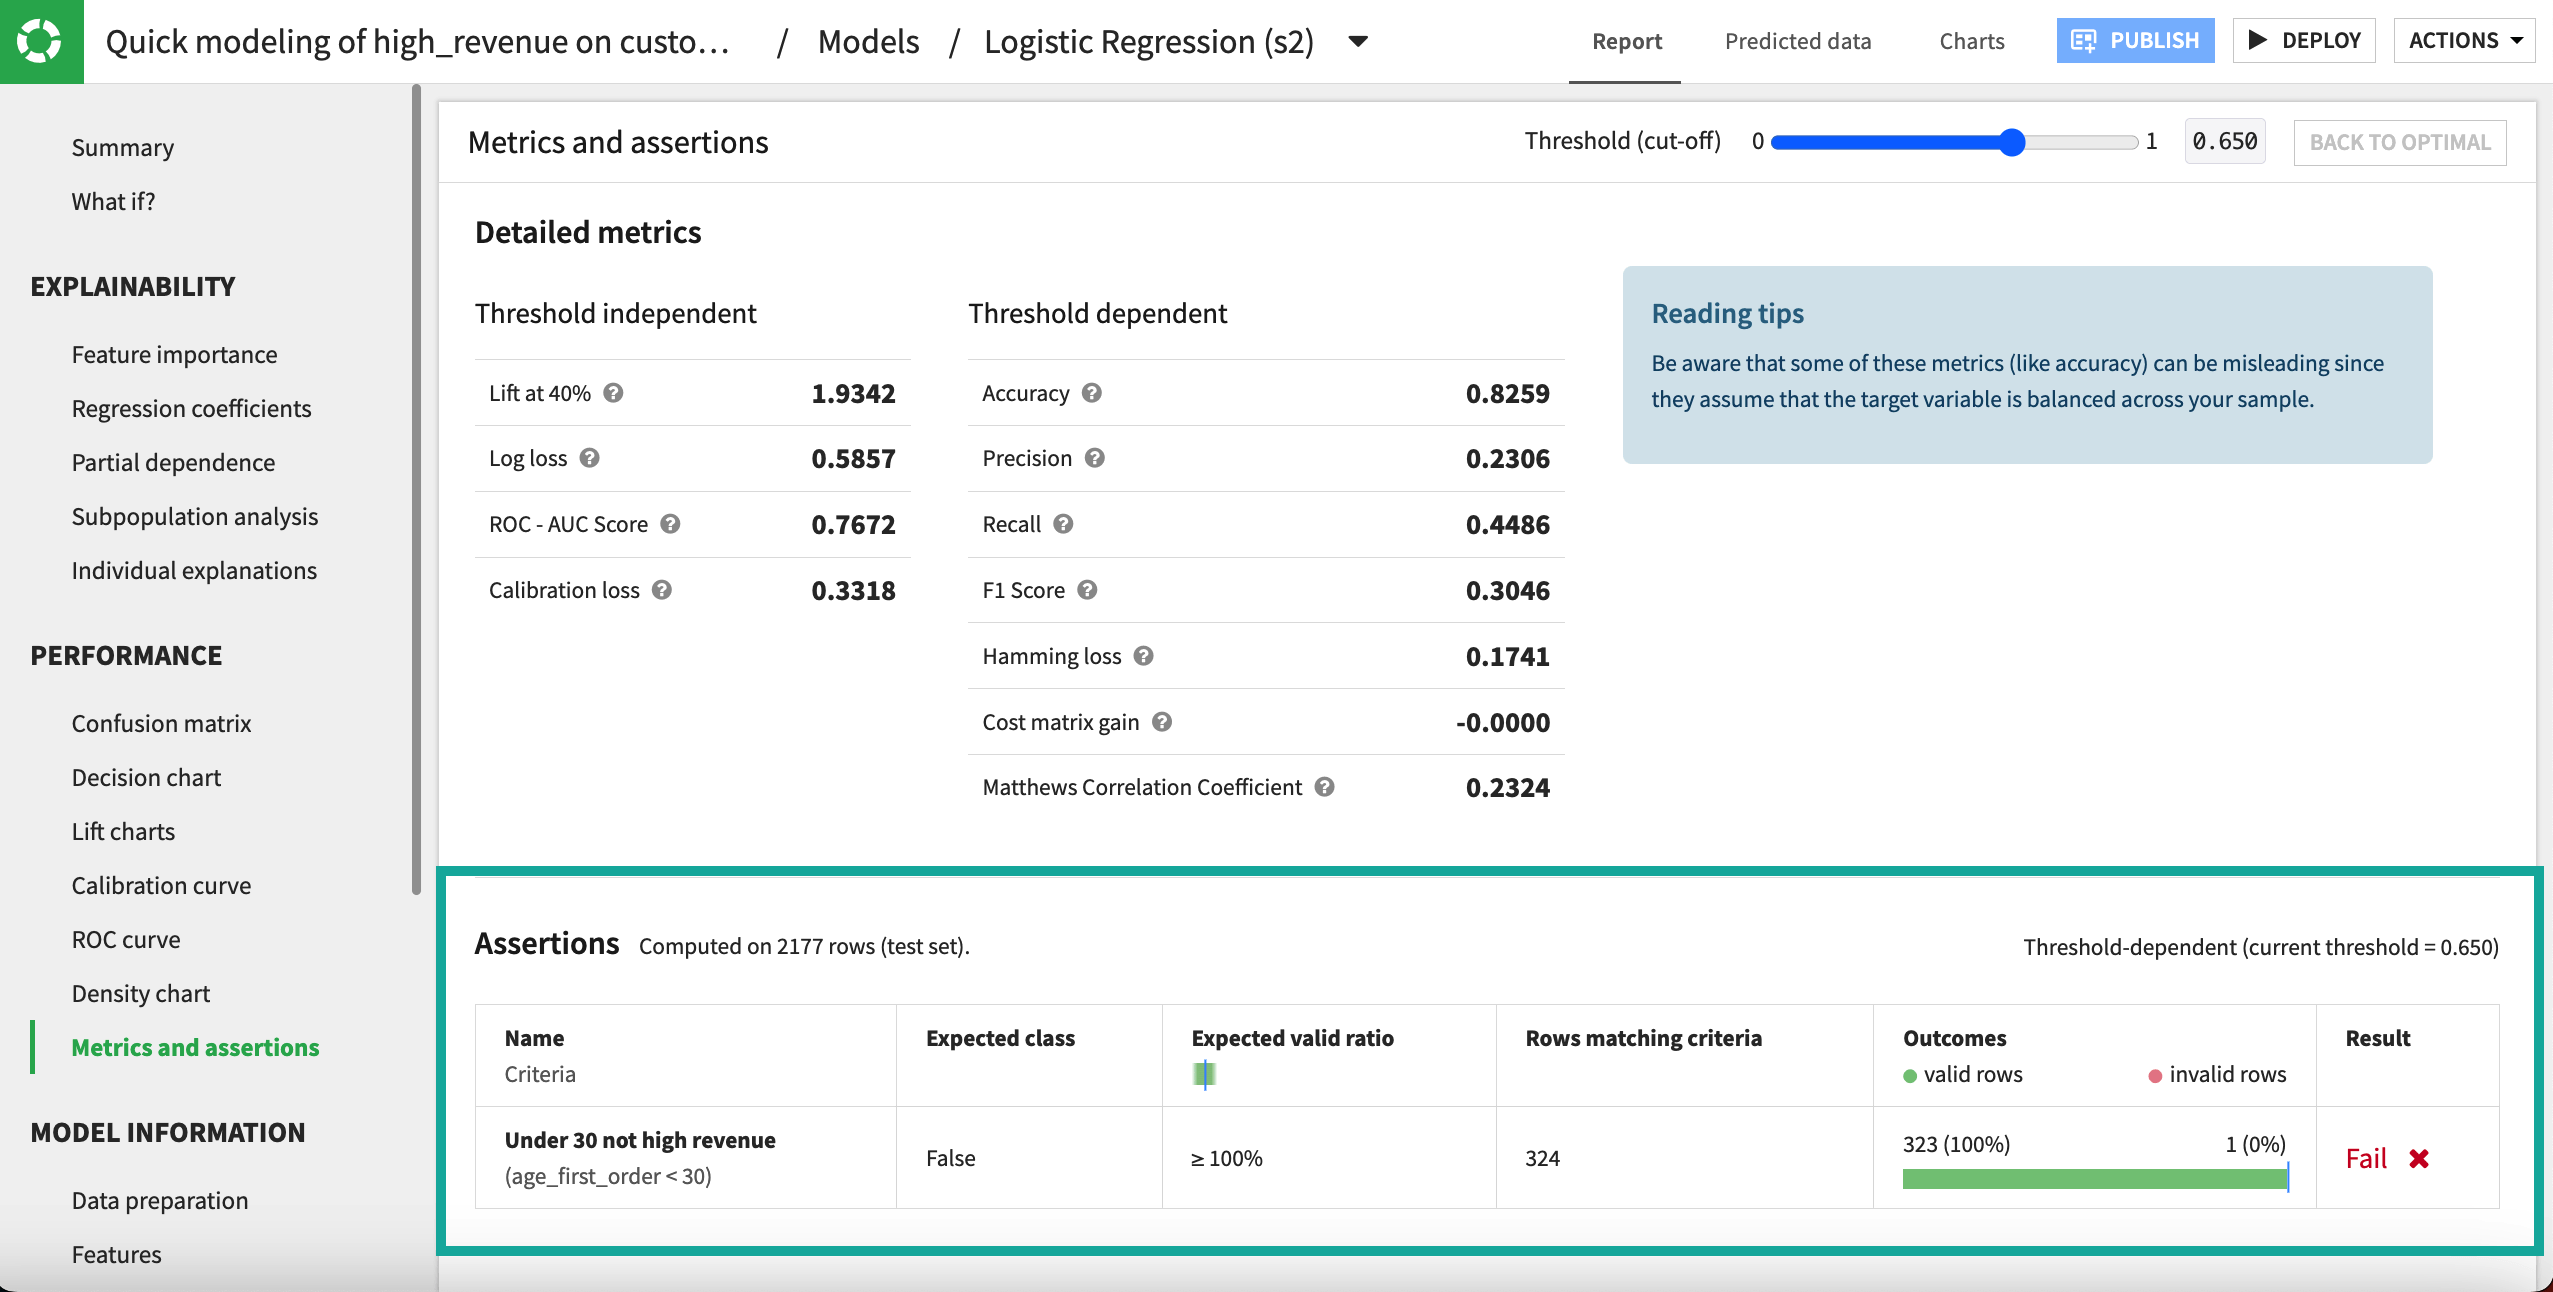
Navigate to the Performance > Metrics and assertions section.
Here we can see that 324 customers in the test set made their first order before the age of 30, and the model predicts that 1 will be a high revenue customer. (Your results may vary depending on your model.) This contradicts our domain knowledge that no such customers should exist and makes us pause before deploying the model.
Assertions in deployed model metrics#
Assertions are incorporated into metrics and checks for models deployed to the Flow. To see these:
In the logistic regression model, click Deploy in the top right, then Create in the info window.
In the Flow, open the deployed model and navigate to the Metrics & Status tab. By default, Build duration is the only metric displayed.
Click the Display button that currently reads 1/13 Metrics.
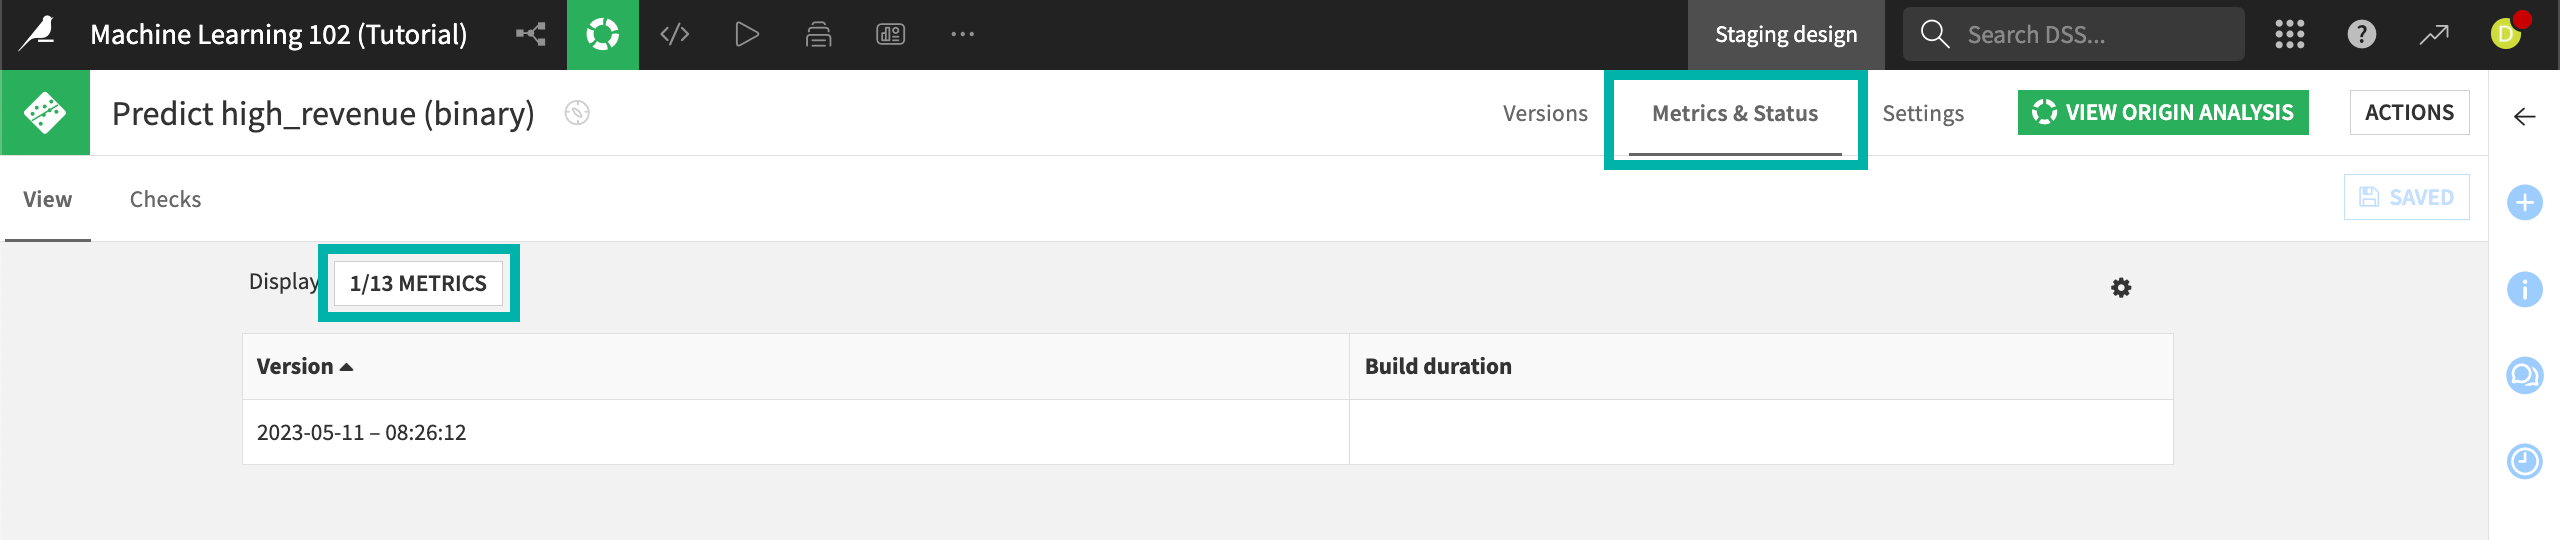
For each assertion, there are three available metrics: the number of dropped rows, the number of rows matching the assertion condition (in this case, customers whose age at first purchase is under 30), and the proportion of rows that are members of the expected class, according to the definition of the assertion.
Add each of these metrics to the display:
Dropped rows: Under 30 not high revenue
Rows matching criteria: Under 30 not high revenue
Valid ratio: Under 30 not high revenue
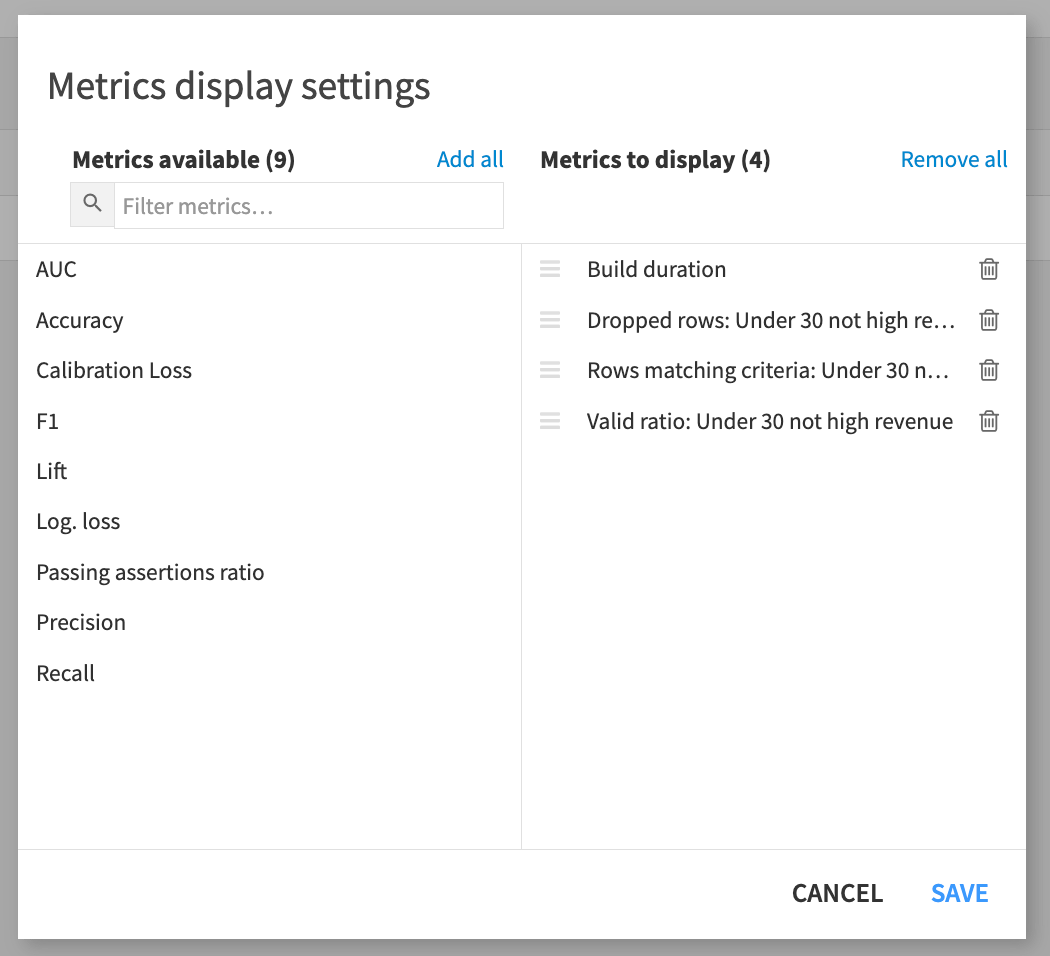
Click Save.
The metrics match what we saw in the original analysis. 324 customers in the test set made their first order before the age of 30, and the model predicts that 323/324 = .9969 won’t be high-revenue customers.
Like any other metrics, you can create checks for these metrics and use those checks in scenarios that rebuild this model. That way, when this project is put into production, you can be automatically notified when the rebuilt model doesn’t pass these checks.

Assertions in evaluation metrics#
ML assertions can also be computed as one of the metrics from an Evaluate recipe. To see this:
From within the deployed model, click Actions and then Evaluate.
In this project, we don’t have an external validation dataset, so for now simply select customers_labeled as the input dataset.
Create customer_scores as the Output dataset and customer_metrics as the Metrics, then click Create Recipe.
By default, the Evaluate recipe computes any ML assertions as part of its output.
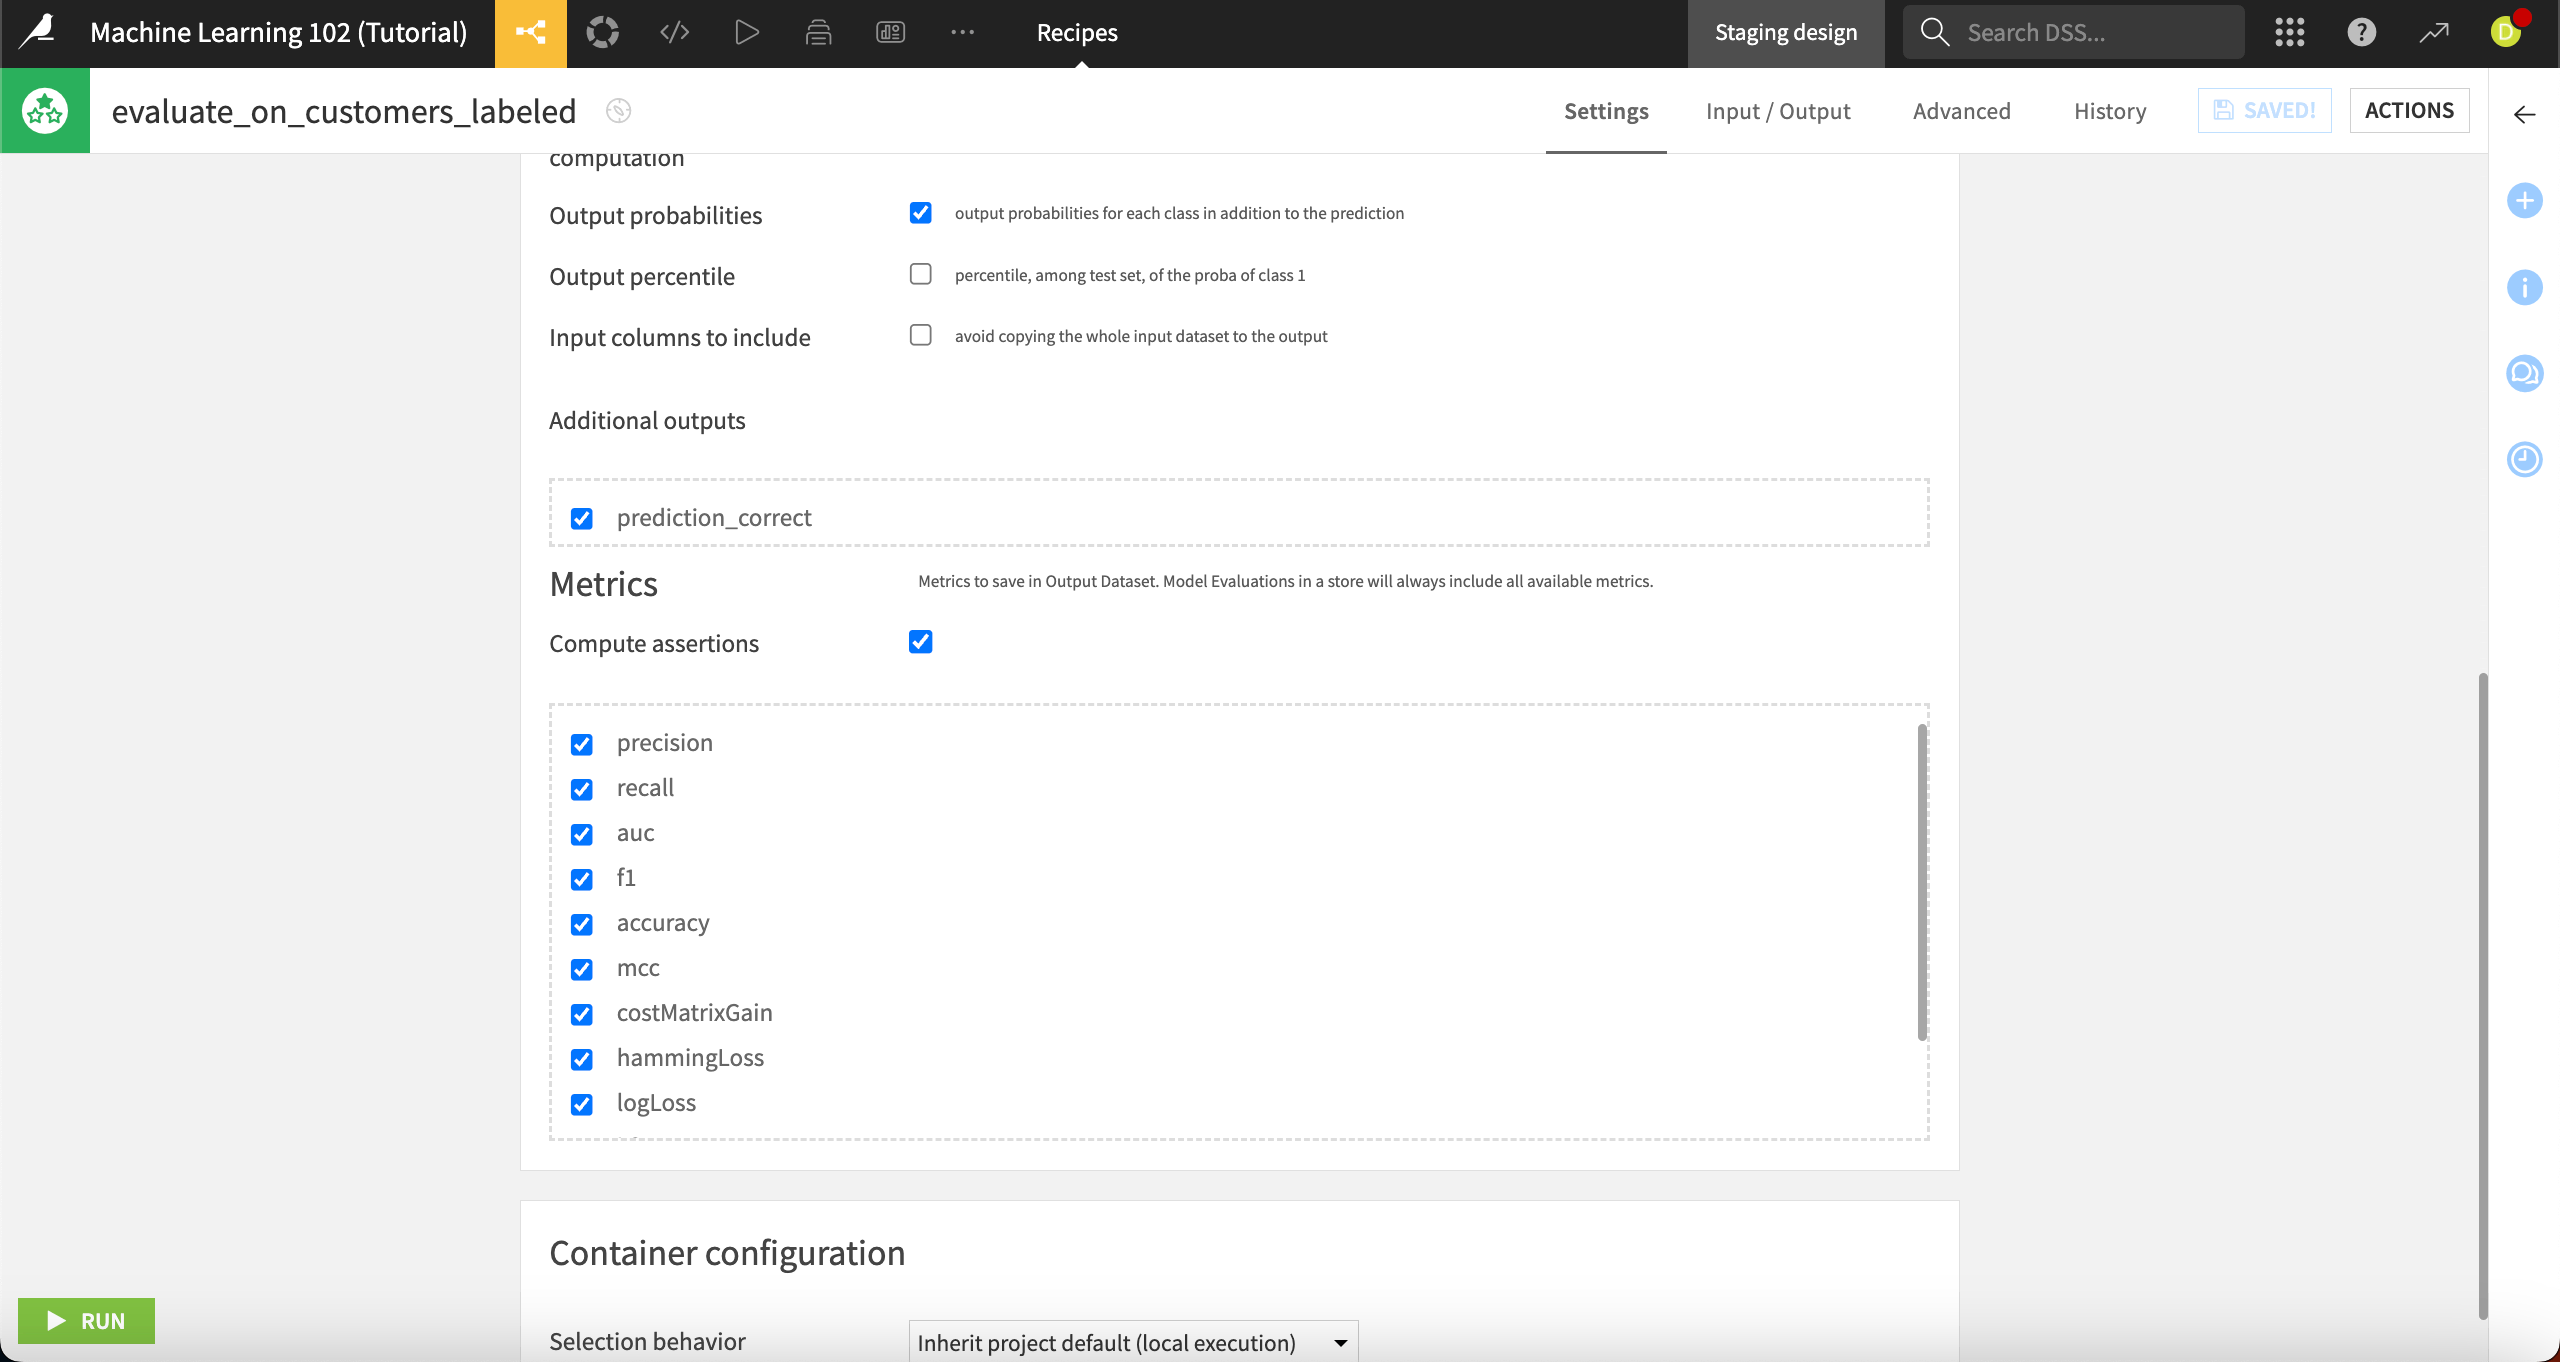
Leave the Compute assertions box checked and click Run.
The resulting metrics dataset has a column called assertionsMetrics, which contains JSON of the form:
{
  "Under 30 not high revenue":
  {
    "result":false,
    "validRatio":0.9993939393939394,
    "nbMatchingRows":1650,
    "nbDroppedRows":0
  }
}
You can parse this with your own code, or use the Unnest object processor in a Prepare recipe to work with this data.
Next steps#
Congratulations! You’ve learned how to define, set, and use machine learning assertions.