
Tutorial | Data transfer with visual recipes#
Get started#
Once you have configured a data connection, you’ll want to learn about visual methods for moving data to a database.
Objectives#
In this tutorial, you will:
Move data to an SQL database via a Sync recipe.
Perform basic preprocessing steps with the Prepare recipe and send the output to an SQL database.
Prerequisites#
Dataiku 12.0 or later.
An available SQL connection. If you don’t have one yet, see Tutorial | Configure a connection between Dataiku and an SQL database.
Create the project#
From the Dataiku Design homepage, click + New Project.
Select Learning projects.
Search for and select Data Transfer.
If needed, change the folder into which the project will be installed, and click Create.
From the project homepage, click Go to Flow (or type
g+f).
Note
You can also download the starter project from this website and import it as a ZIP file.
Use case summary#
The Flow begins from two uploaded CSV files:
Dataset |
Description |
|---|---|
orders |
Order information for t-shirts, including the order’s date, the type of t-shirt, and the customer who placed the order. |
customers_stacked |
Additional information about the customers who have placed a t-shirt order. |
Move data to a database with a Sync recipe#
The Sync recipe is convenient when you need to copy an existing dataset into a database without any data preparation.
Infer storage types#
The orders dataset in the starter project included an uploaded CSV file. CSV files don’t contain any kind of typing information. Therefore, Dataiku assumes by default that all columns have a string storage type.
The Sync recipe maps the storage type in the input dataset to a similar type in the output database. First, set the storage types of numeric columns before syncing the dataset to the database.
One way to handle this is to infer the storage types from the data, and save the updated schema.
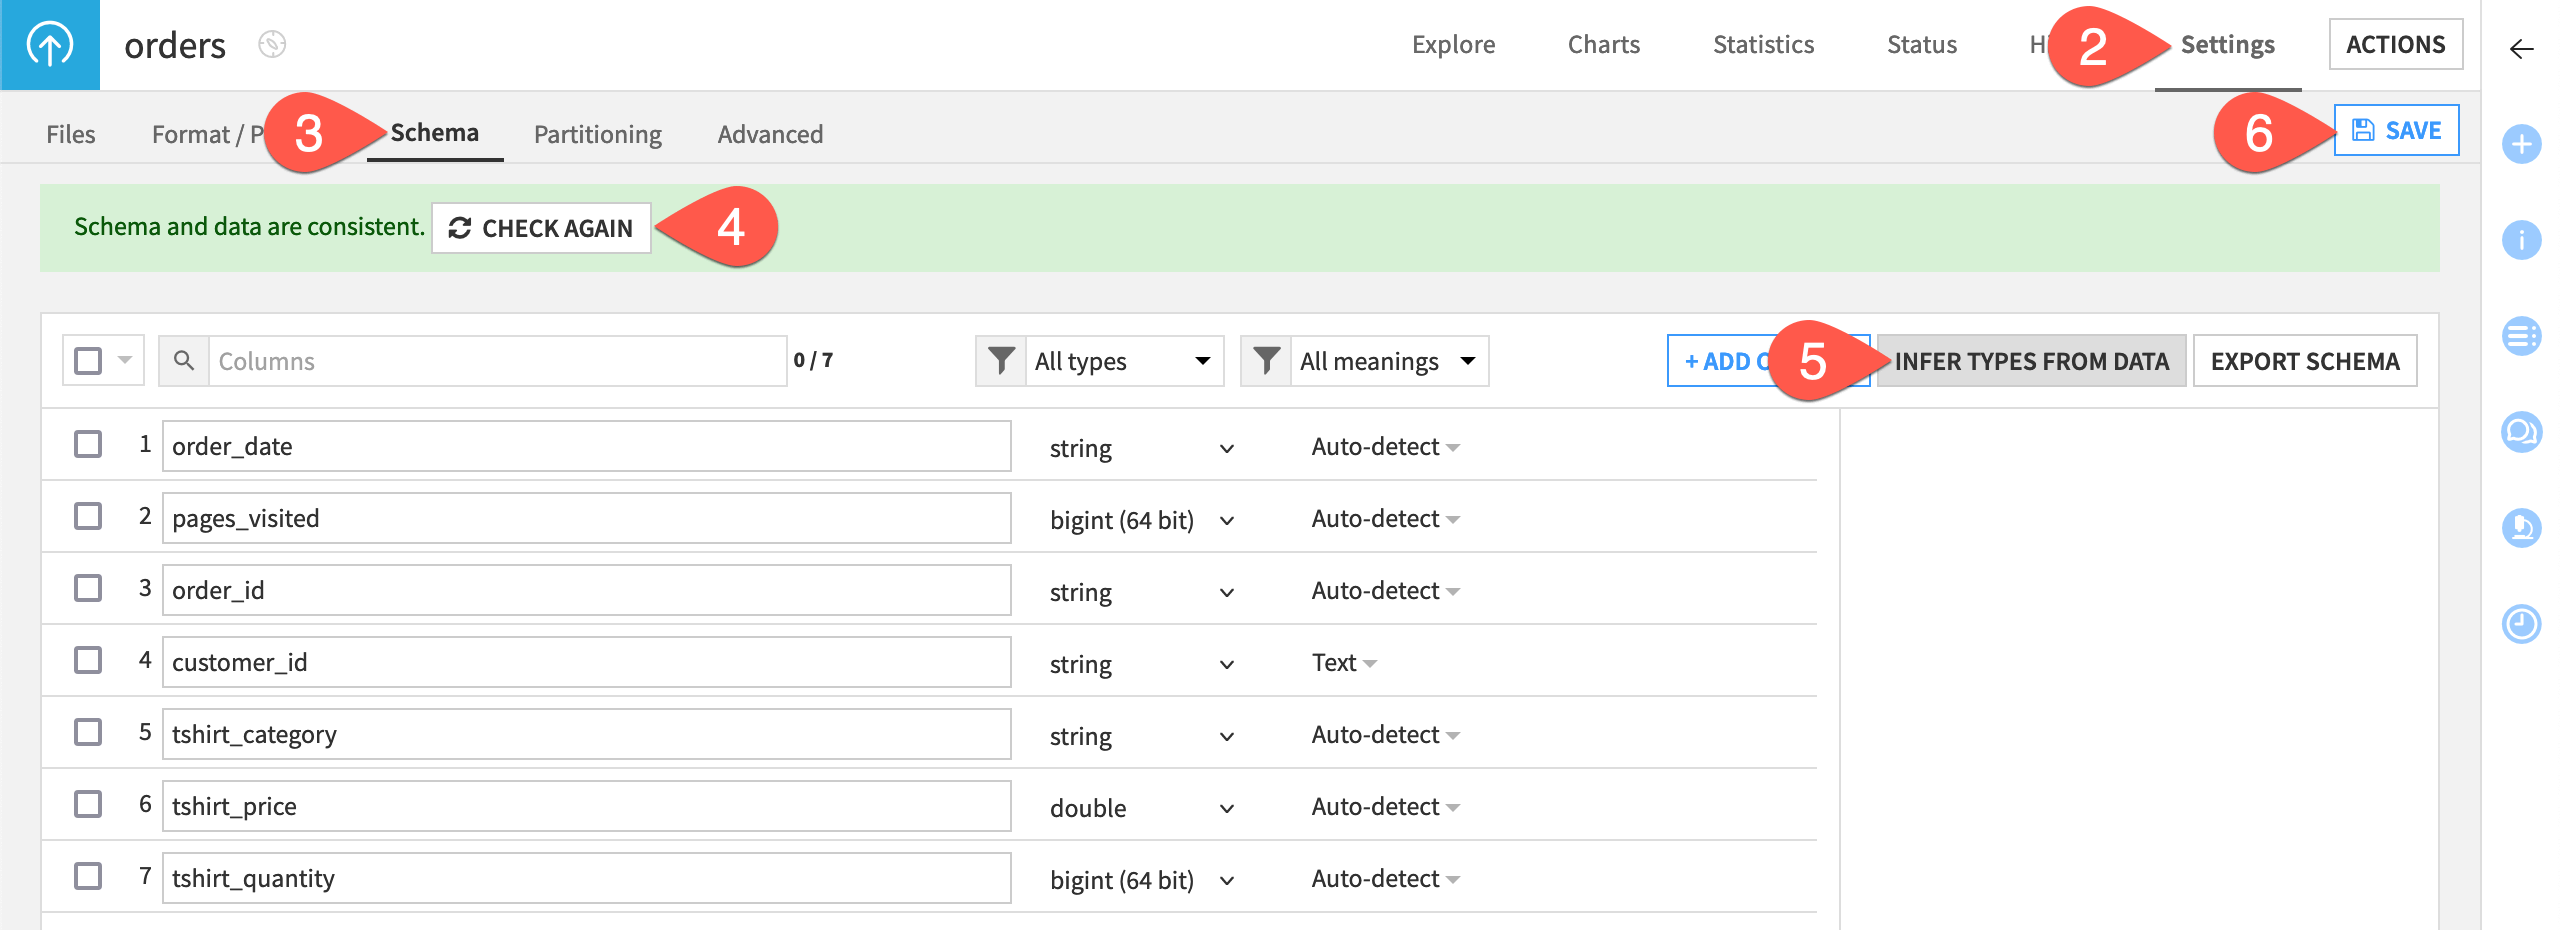
Double click to open the orders dataset.
Navigate to the Settings tab.
Navigate to the Schema subtab.
Click Check Now to confirm the schema and data are consistent.
Click Infer Types from Data and then Confirm.
Click Save, recognizing the change in storage types for numeric columns.
Important
Dataiku performs type inference in this manner using a sample of the data. You should check that the inferred types correspond to your actual data.
Create a Sync recipe#
With the updated storage types, sync the uploaded dataset to the database.
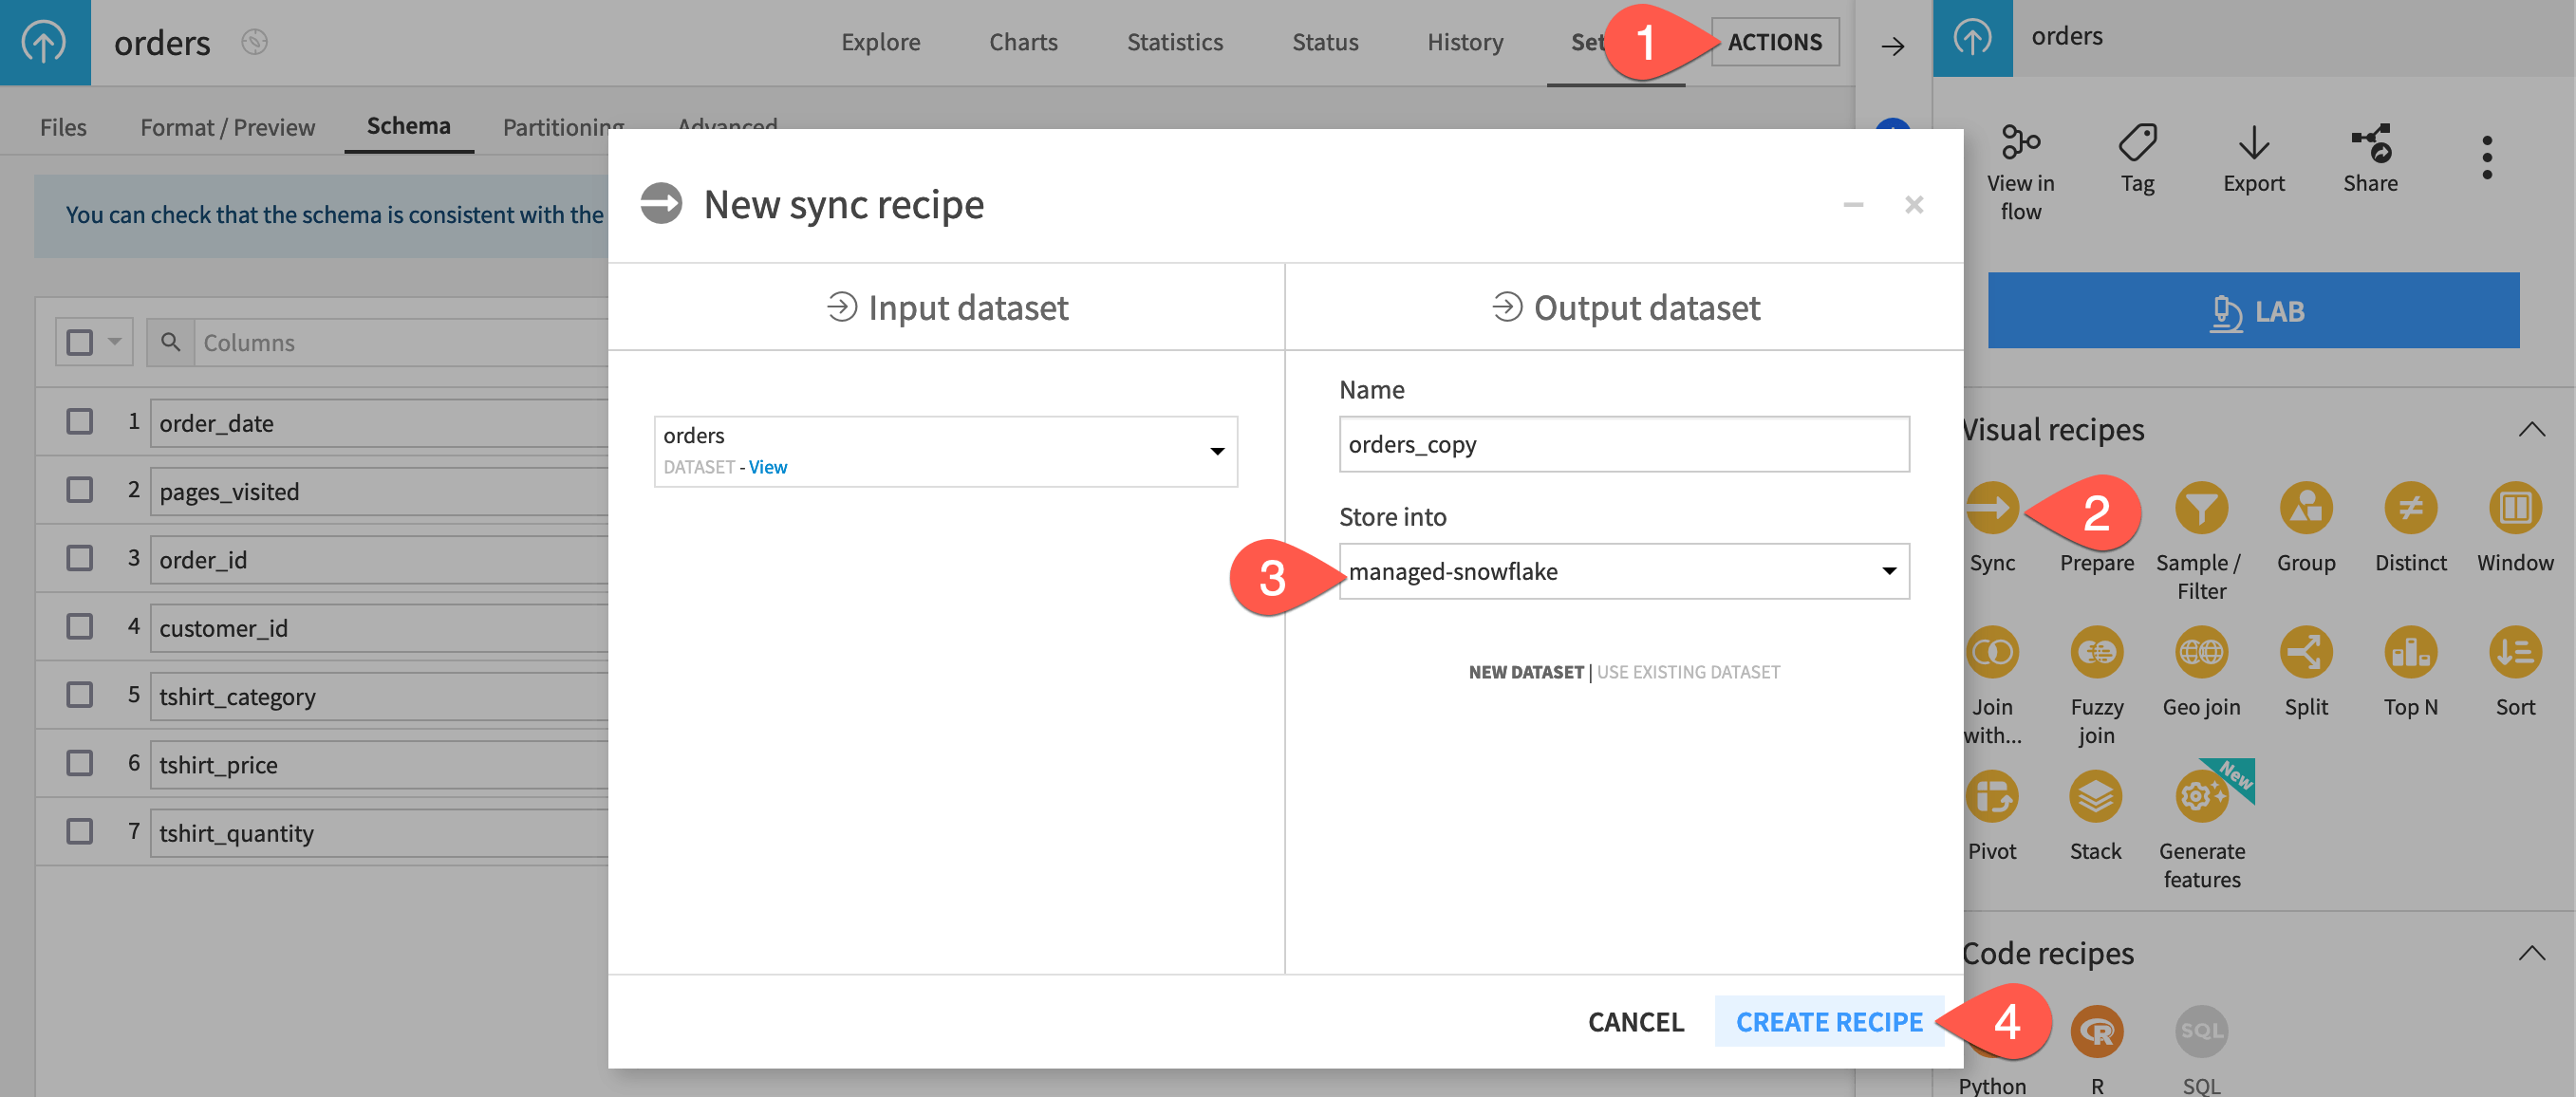
From the orders dataset, open the Actions (
 ) tab of the right panel.
From the menu of visual recipes, select Sync.
If necessary, adjust the storage location of the output to your SQL database (in this example, a Snowflake connection).
Click Create Recipe.
While in the Configuration tab of the recipe, click Run.
Explore the output dataset, which is now stored in the SQL database.
See also
See the reference documentation on Sync: copying datasets for more information about the Sync recipe, including which engines it can use.
Move data to a database with a Prepare recipe#
You may often have some preprocessing to do before loading your data into a database. For these cases, you can use a Prepare recipe instead of a Sync recipe.
Create a Prepare recipe#
Start by creating a Prepare recipe.
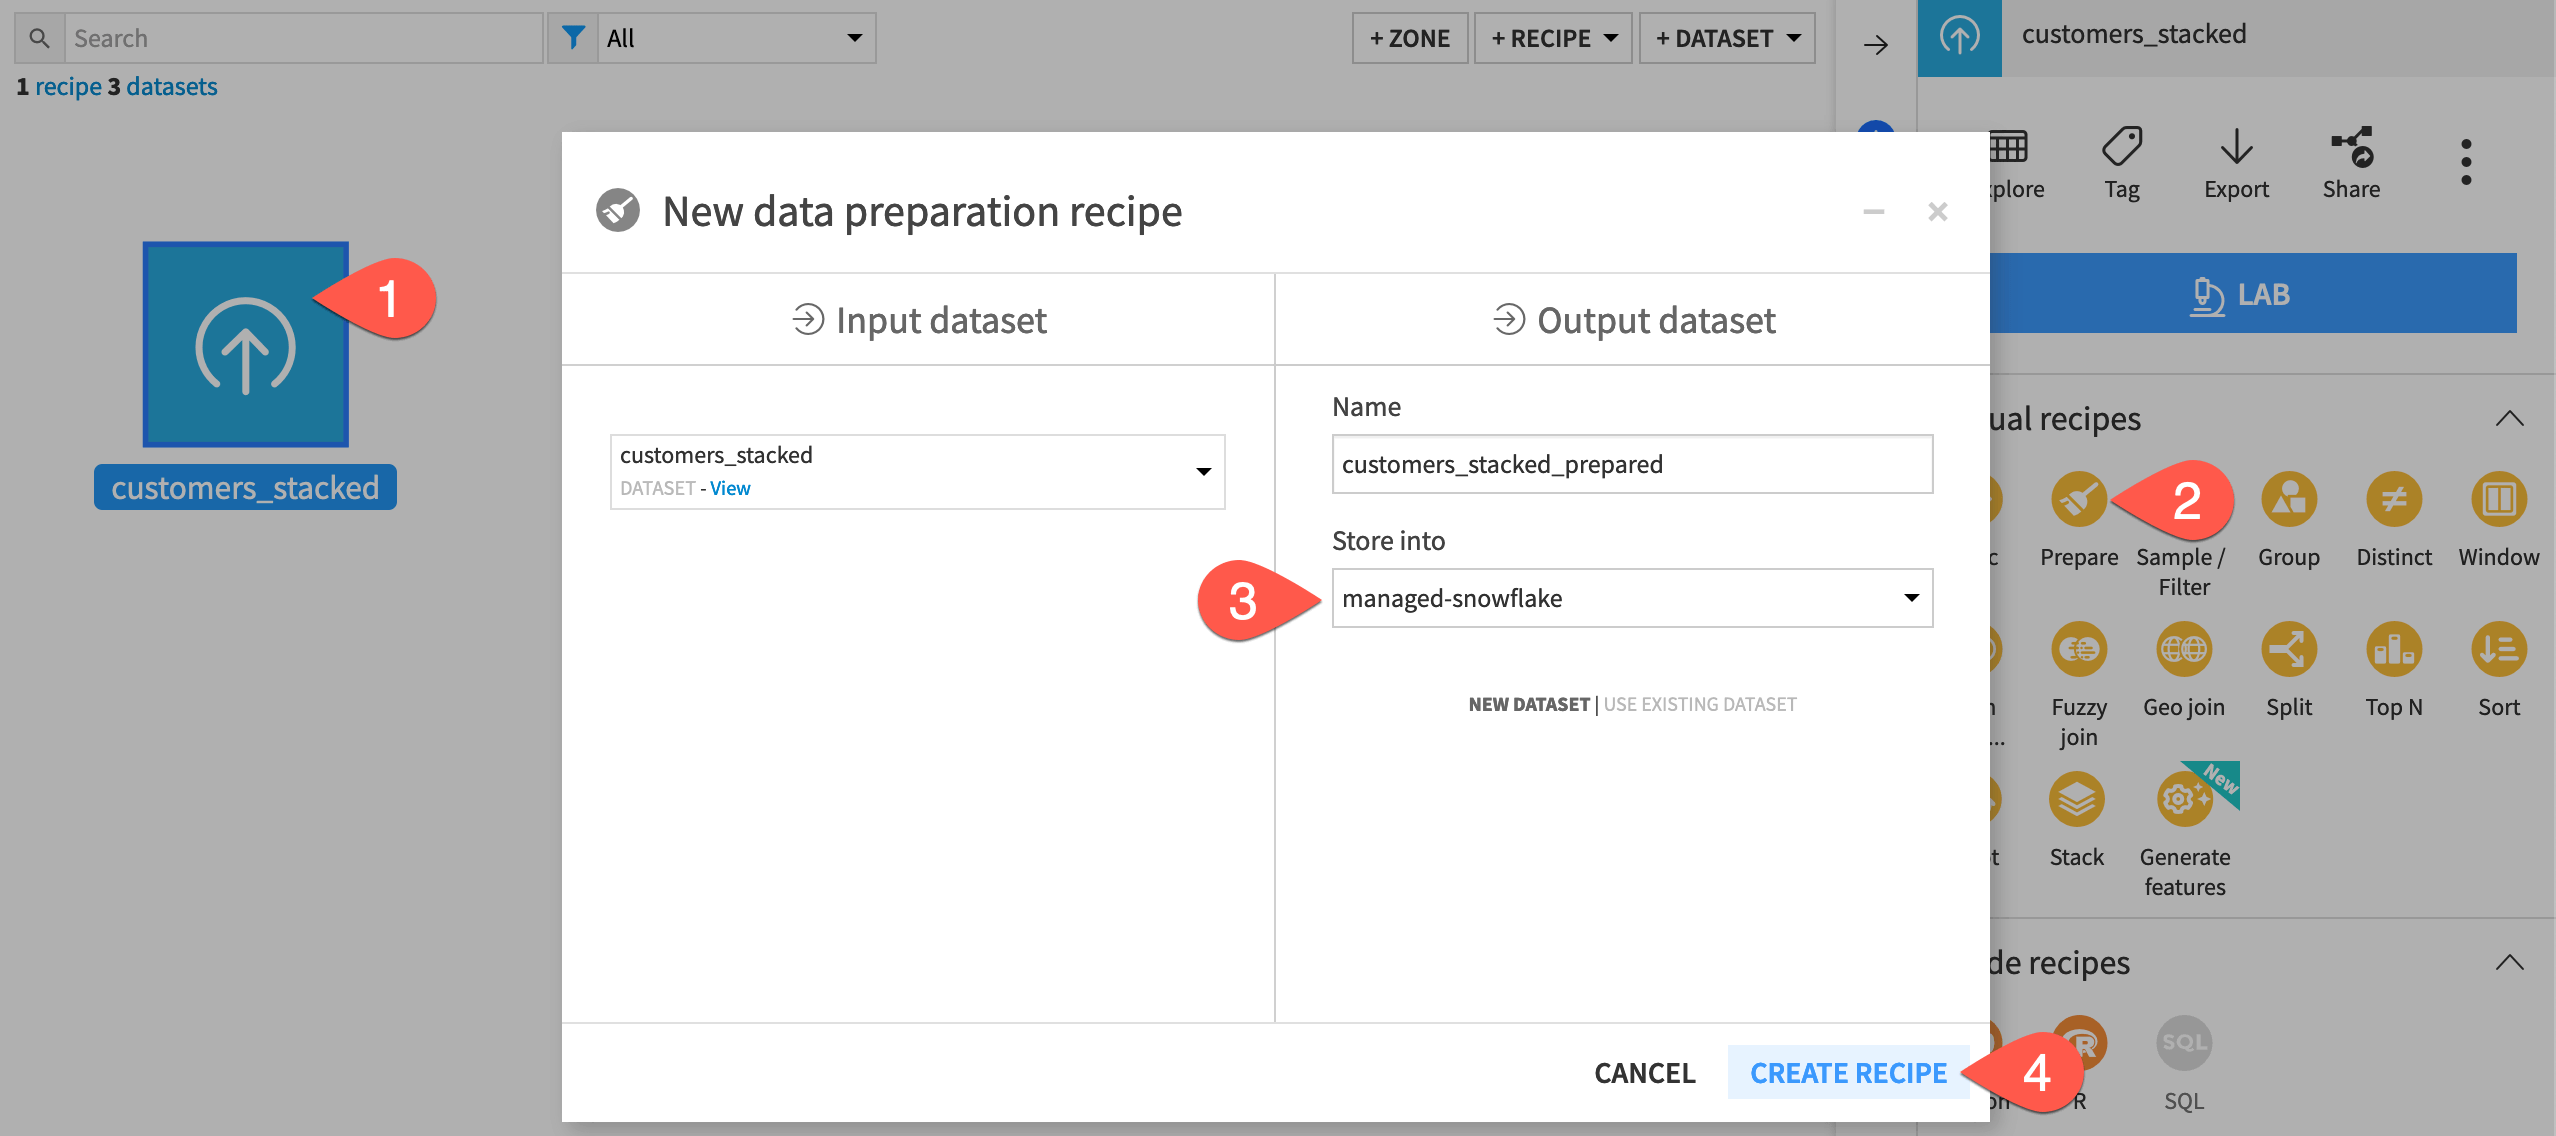
From the Flow, select the customers_stacked dataset.
From the menu of visual recipes in the Actions (
) tab of the right panel, select Prepare.If necessary, adjust the storage location of the output to your SQL database.
Click Create Recipe.
Add data preparation steps#
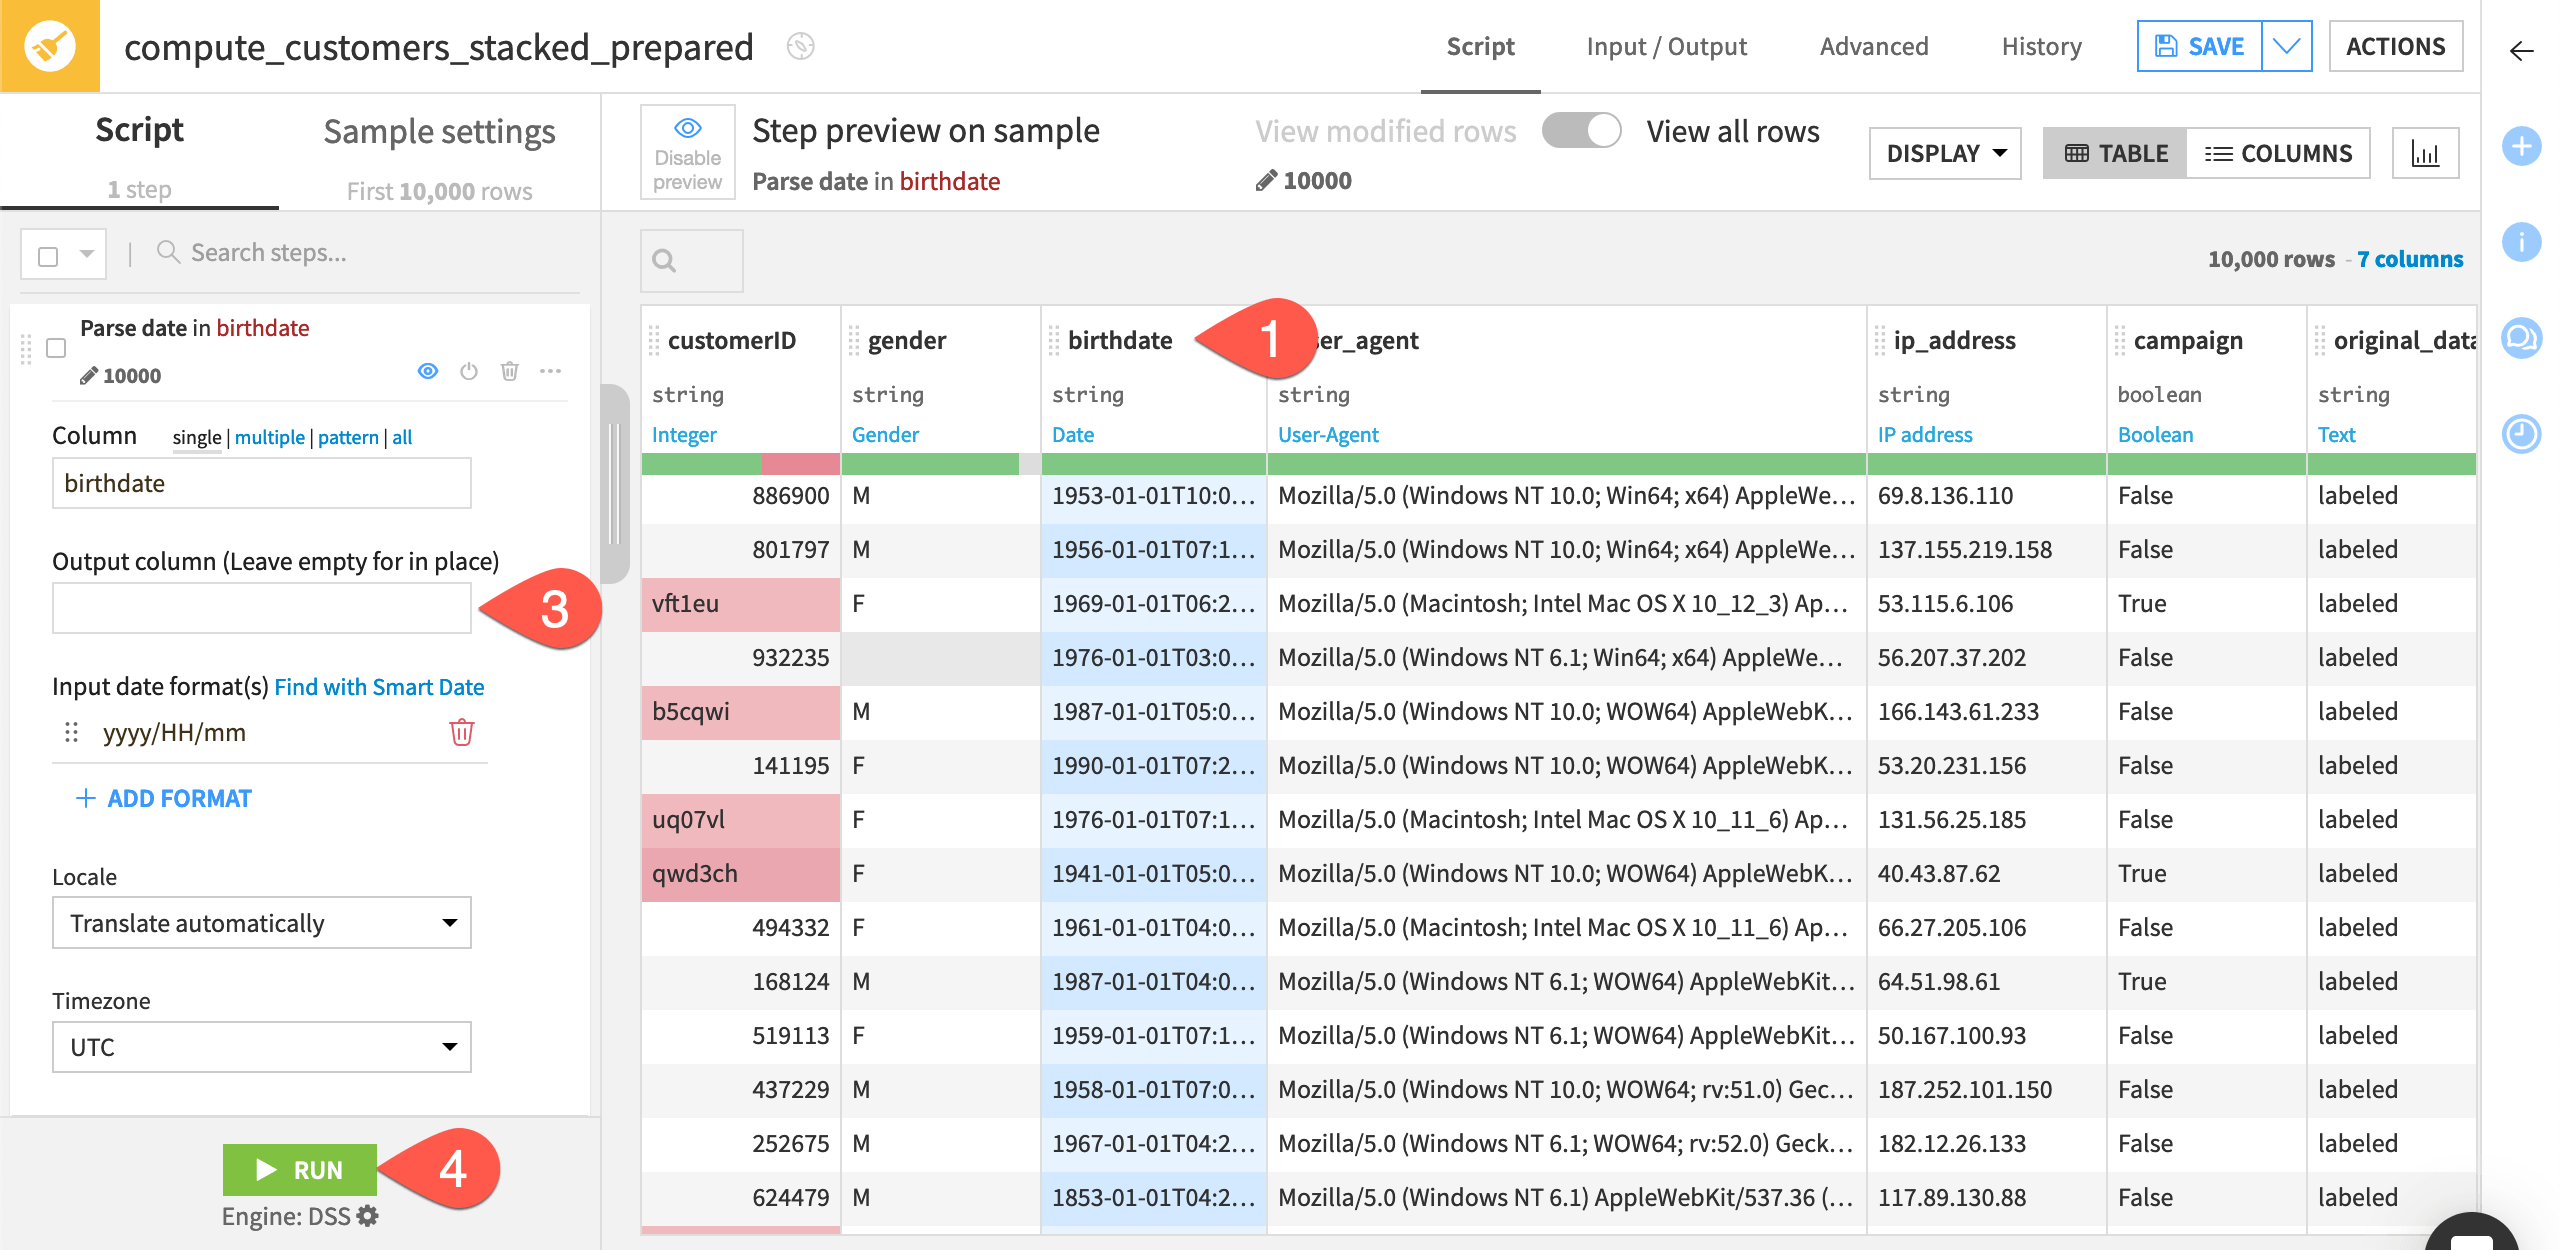
The actual data preparation steps are arbitrary in this case. You could include any number of steps as an example.
Click + Add a New Step.
Search for and select
Parse to standard date format.Provide
birthdateas the column.Use the input date format
yyyy/MM/dd.Click Run.
Important
The DSS engine runs the Prepare recipe operations, and then pushes the data into the database. The reference documentation on Schema for data preparation provides more detail about how the Prepare recipe creates the schema of the output dataset with respect to choosing storage types.
Next steps#
Congratulations! You’ve successfully transferred data to a database using two different visual methods.
Once you are comfortable moving data into databases, you’ll want to understand how to use the in-database engine for other operations, such as data transformation and visualization.
Tip
You can find this content (and more) by registering for the Dataiku Academy course, Dataiku & SQL. When ready, challenge yourself to earn a certification!