Tutorial | Deep learning within visual ML#
Get started#
Deep learning offers extremely flexible modeling of the relationships between a target and its input features, and is used in a variety of challenging use cases, such as image processing, text analysis, and time series — in addition to models for structured data.
Let’s explore how to define a deep learning architecture using the Keras library to build a custom model within Dataiku’s visual ML tool.
Objectives#
In this tutorial, you will:
Build a simple multilayer perceptron (MLP) for classification using Keras code within Dataiku’s visual machine learning.
Deploy it to the Flow as a saved model and apply it to new data.
Prerequisites#
Dataiku 12.0 or later.
A Full Designer user profile.
A code environment with the necessary libraries. When creating a code environment, add the Visual Deep Learning package set corresponding to your hardware.
Some familiarity with deep learning, and in particular, Keras.
Create the project#
From the Dataiku Design homepage, click + New Project.
Select Learning projects.
Search for and select Deep Learning.
If needed, change the folder into which the project will be installed, and click Create.
From the project homepage, click Go to Flow (or type
g+f).
Note
You can also download the starter project from this website and import it as a ZIP file.
You’ll next want to build the Flow.
Click Flow Actions at the bottom right of the Flow.
Click Build all.
Keep the default settings and click Build.
Use case summary#
This project reuses the Flow found in the Machine Learning Basics course. It joins and prepares data of customers and orders in a visual pipeline. The objective is to predict which customers are likely to become high revenue customers.
Instead of building quick prototype models (logistic regression and random forest), let’s build a deep learning model!
Train a deep learning model#
Since the project already contains prepared training and scoring data, we can proceed to create the model.
Create a deep learning task#
We start by creating a prediction task in the Lab — just like any other AutoML model.
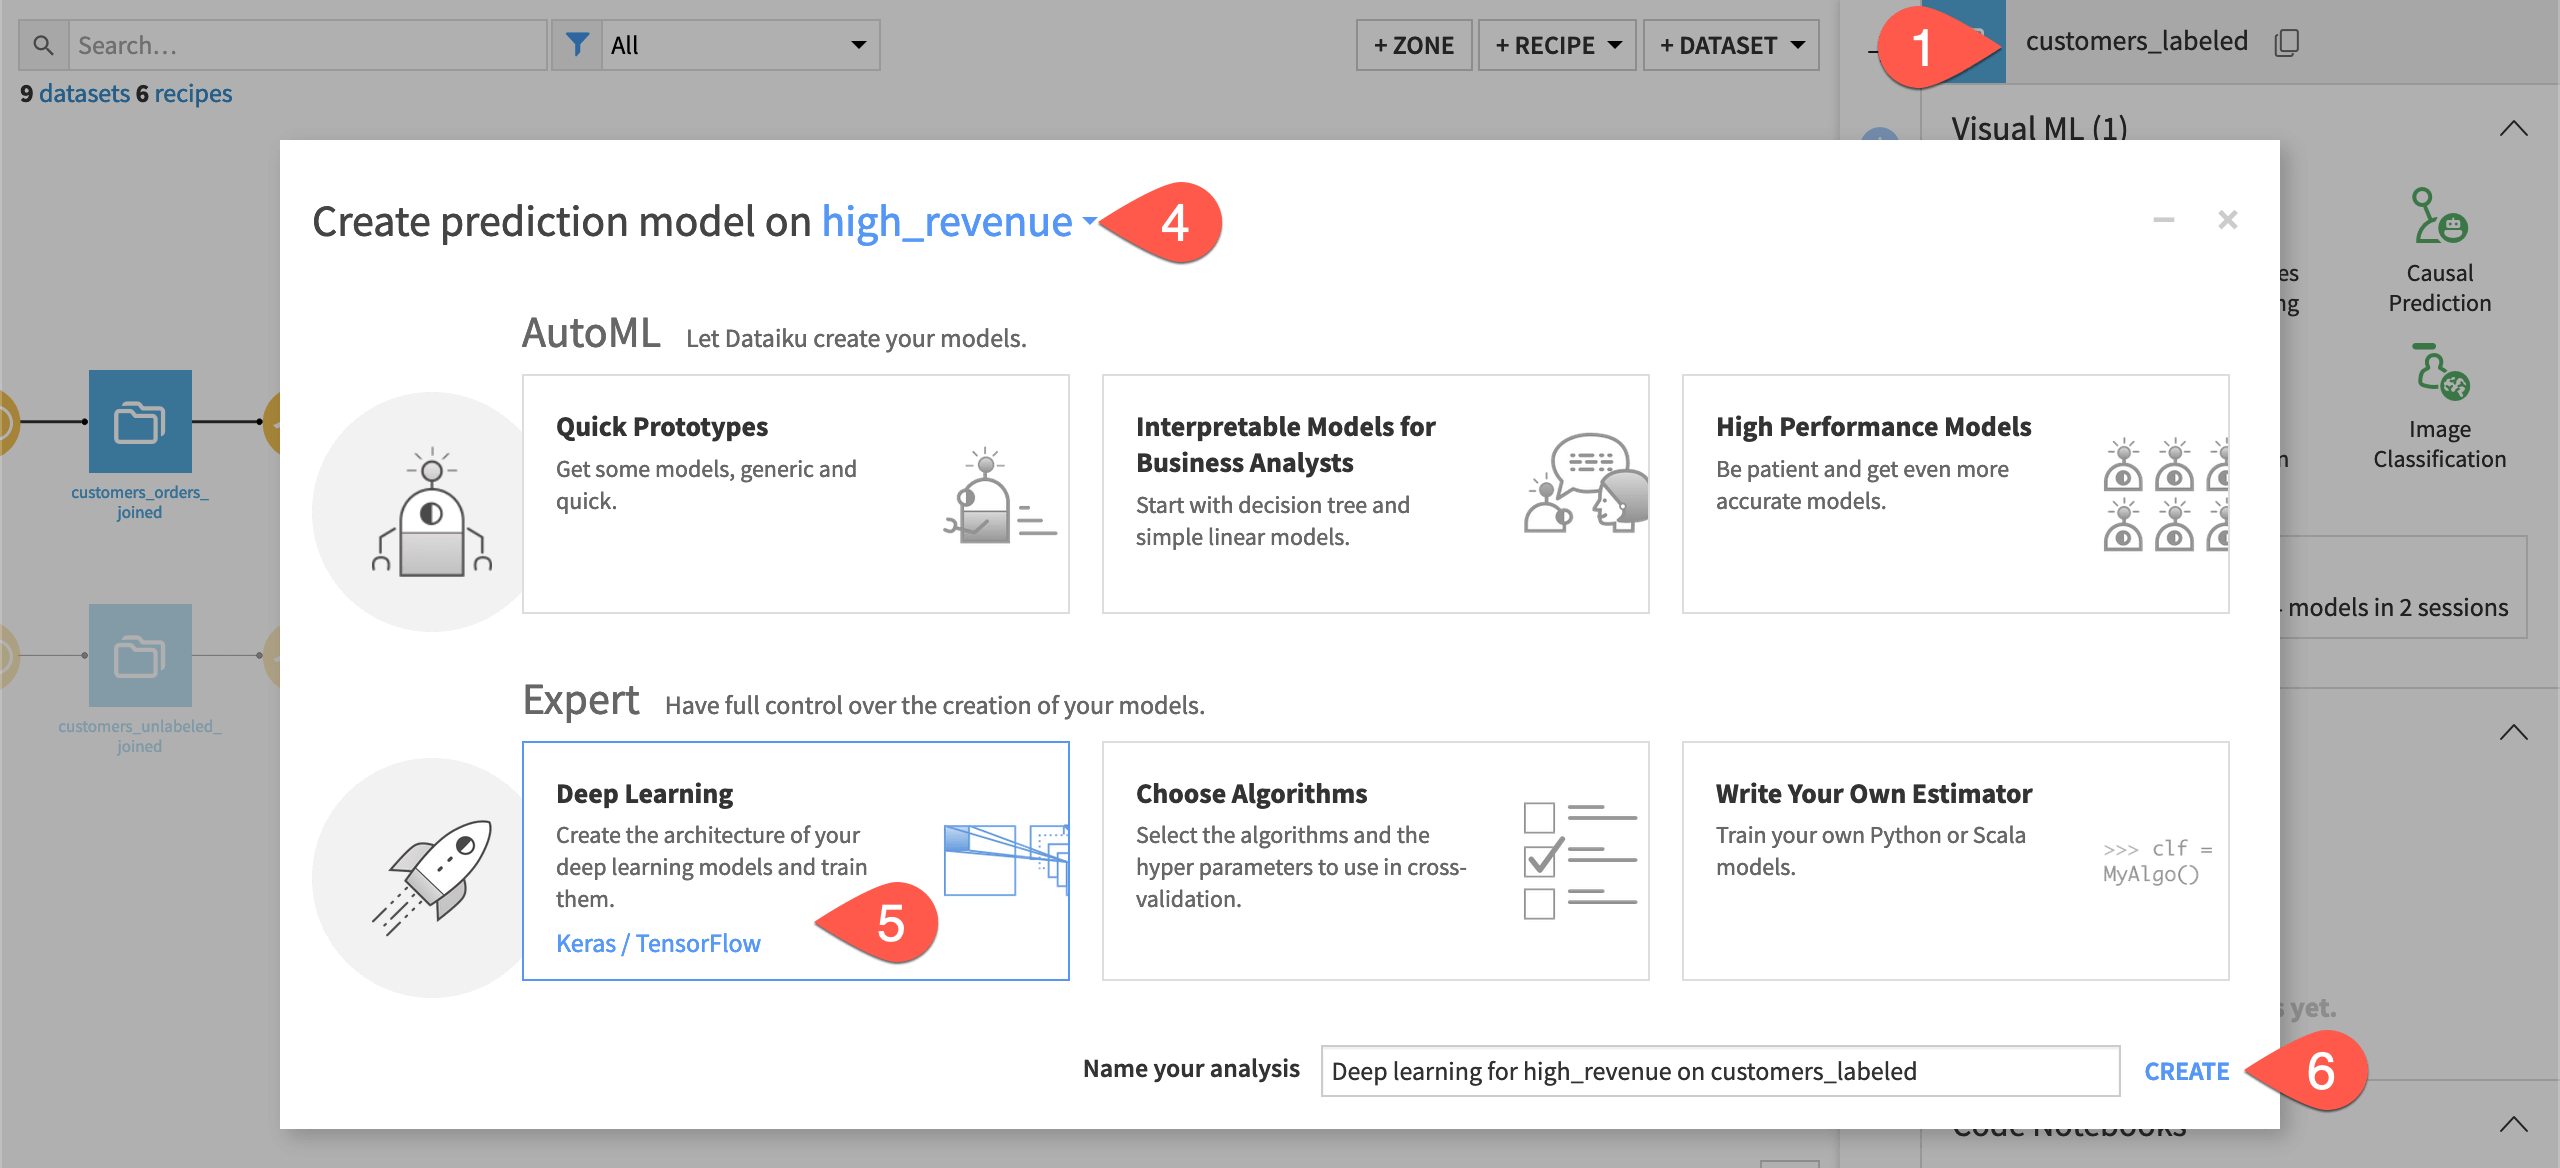
From the Flow, select the customers_labeled dataset.
Navigate to the Lab (
) tab of the right side panel.
Select AutoML Prediction from the menu of visual ML tasks.
Select high_revenue as the feature on which to create the prediction model.
In the Expert section, select Deep Learning.
Click Create.
Note
After creating this task, Dataiku should automatically discover the code environment you’ve created for deep learning, and set it as the Runtime environment for this ML task. If, after creating this ML task, you receive a warning that no deep learning code environment is available, then you need to create one or ensure that you have permission to use the deep learning code environment.
Explore the default deep learning architecture#
Like the ML task you may have worked with in the ML basics tutorial, there are common settings for handling the target, features, train/test set, and evaluation metrics.
What’s different is that the Modeling section where you would specify algorithms settings has been replaced by a Deep Modeling section where you specify the Architecture and Training settings for your deep learning model.
If not already there, navigate to the Architecture panel within the task’s Design tab.
In the Architecture panel, you supply the Keras code that defines the architecture of your deep learning model and then compiles it. This is done through two functions, build_model() and compile_model(), that are used to standardized how deep learning models are handled in the Dataiku implementation.
build_model()#
The build_model() function is where you define the model architecture using the Keras functional API. The Sequential model API isn’t supported.
It has two parameters that help you to define the architecture:
Parameter |
Description |
Purpose |
|---|---|---|
|
A dictionary of the model inputs |
More complex architectures can accept multiple inputs, but for now, we’ll simply work with the main set of inputs that includes all the features. |
|
The number of classes in a categorical target |
Dataiku will supply this number when this function is called during model training; here, we’re simply using it as a variable in the architecture definition. |
The default code provided by Dataiku defines a multilayer perceptron with two hidden layers.
The following snippet defines the input layer, extracting the main input from the dictionary of model inputs:
input_main = Input(shape=input_shapes["main"], name="main")
The following code defines the hidden layers. The first hidden layer is a Dense layer with 64 units, using the rectified linear unit Activation function to transform the input layer. The second hidden layer has similar parameters, but transforms the first input layer.
x = Dense(64, activation='relu')(input_main)
x = Dense(64, activation='relu')(x)
The following code defines the output layer, which is a Dense layer with a number of units equal to the number of classes in the target, using the softmax activation function.
predictions = Dense(n_classes, activation='softmax')(x)
Finally, we construct the Keras model object with the input and output layers, and then return the model as the output of the function.
model = Model(inputs=[input_main], outputs=predictions)
return model
compile_model()#
The compile_model() function is where you specify the loss function to be optimized and the method for performing the optimization. While the Keras compile() method includes metrics for evaluating the model, you don’t need to specify them here because Dataiku will pick them up from the common Metrics panel.
Execute model training#
In the Deep Learning Training panel, you specify the parameters that will be used in the call to the Keras model fit() method.
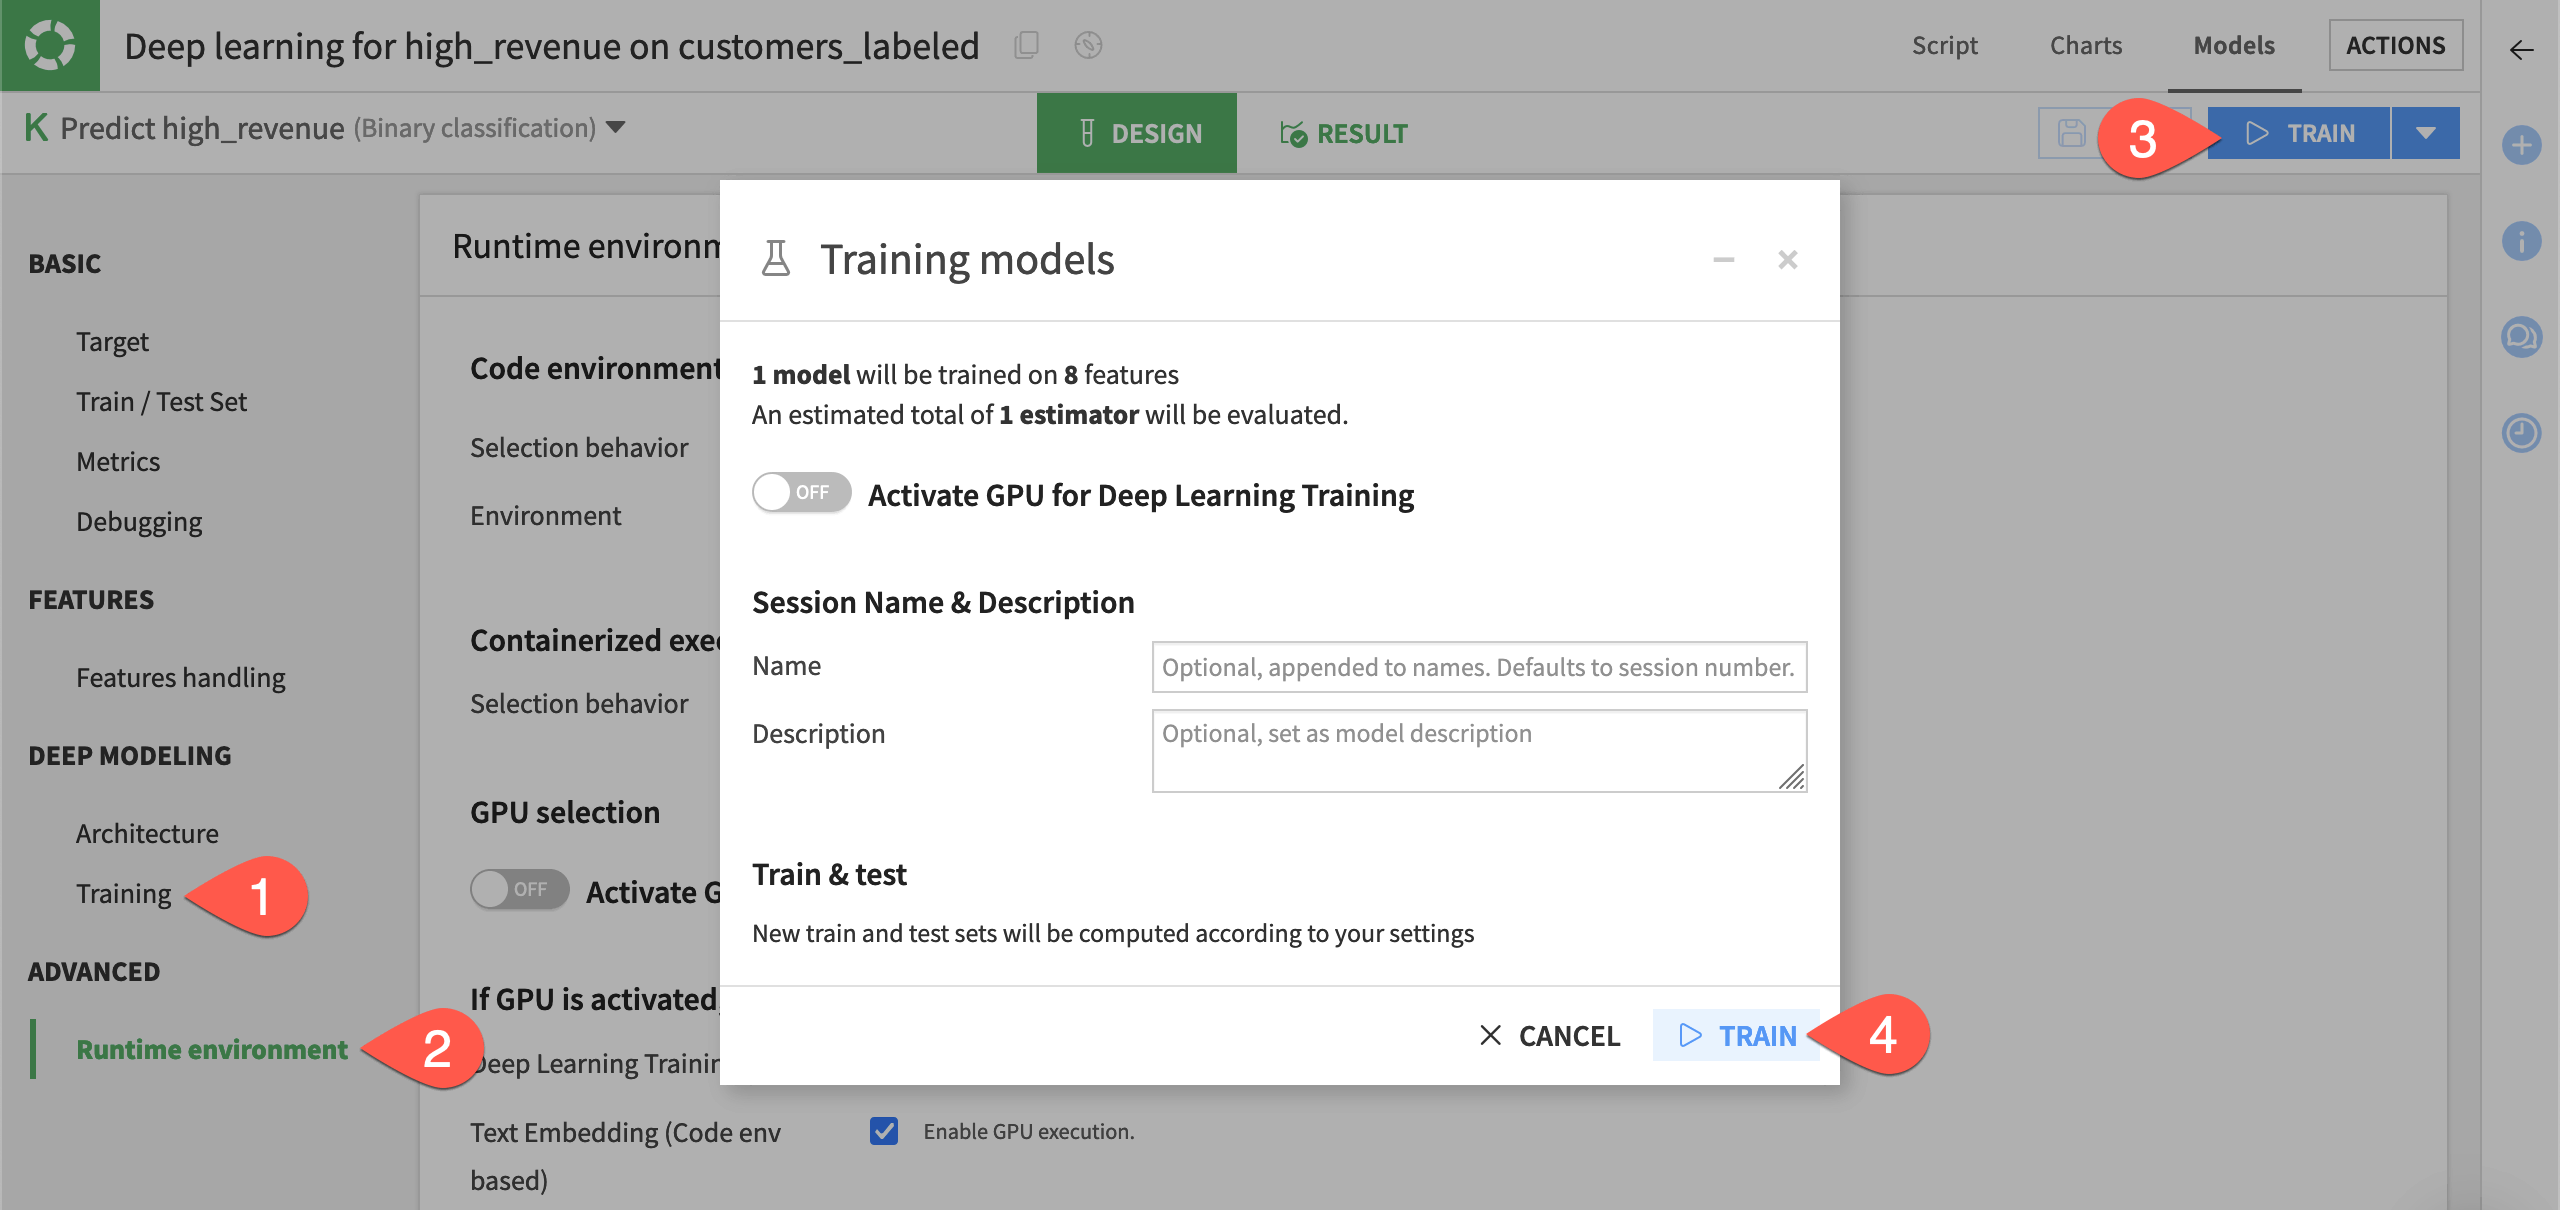
Navigate to the Training panel within the task’s Design tab to observe settings like the number of epochs and batch size.
Check the Runtime environment panel to ensure you have a code environment that supports visual deep learning.
Click Train.
Click Train again to confirm.
Tip
If you need greater control over training, you can click Advanced mode and supply the code specifications you want.
Analyze model results#
When training completes, Dataiku shows the results in a model report as it would for any other machine learning model.
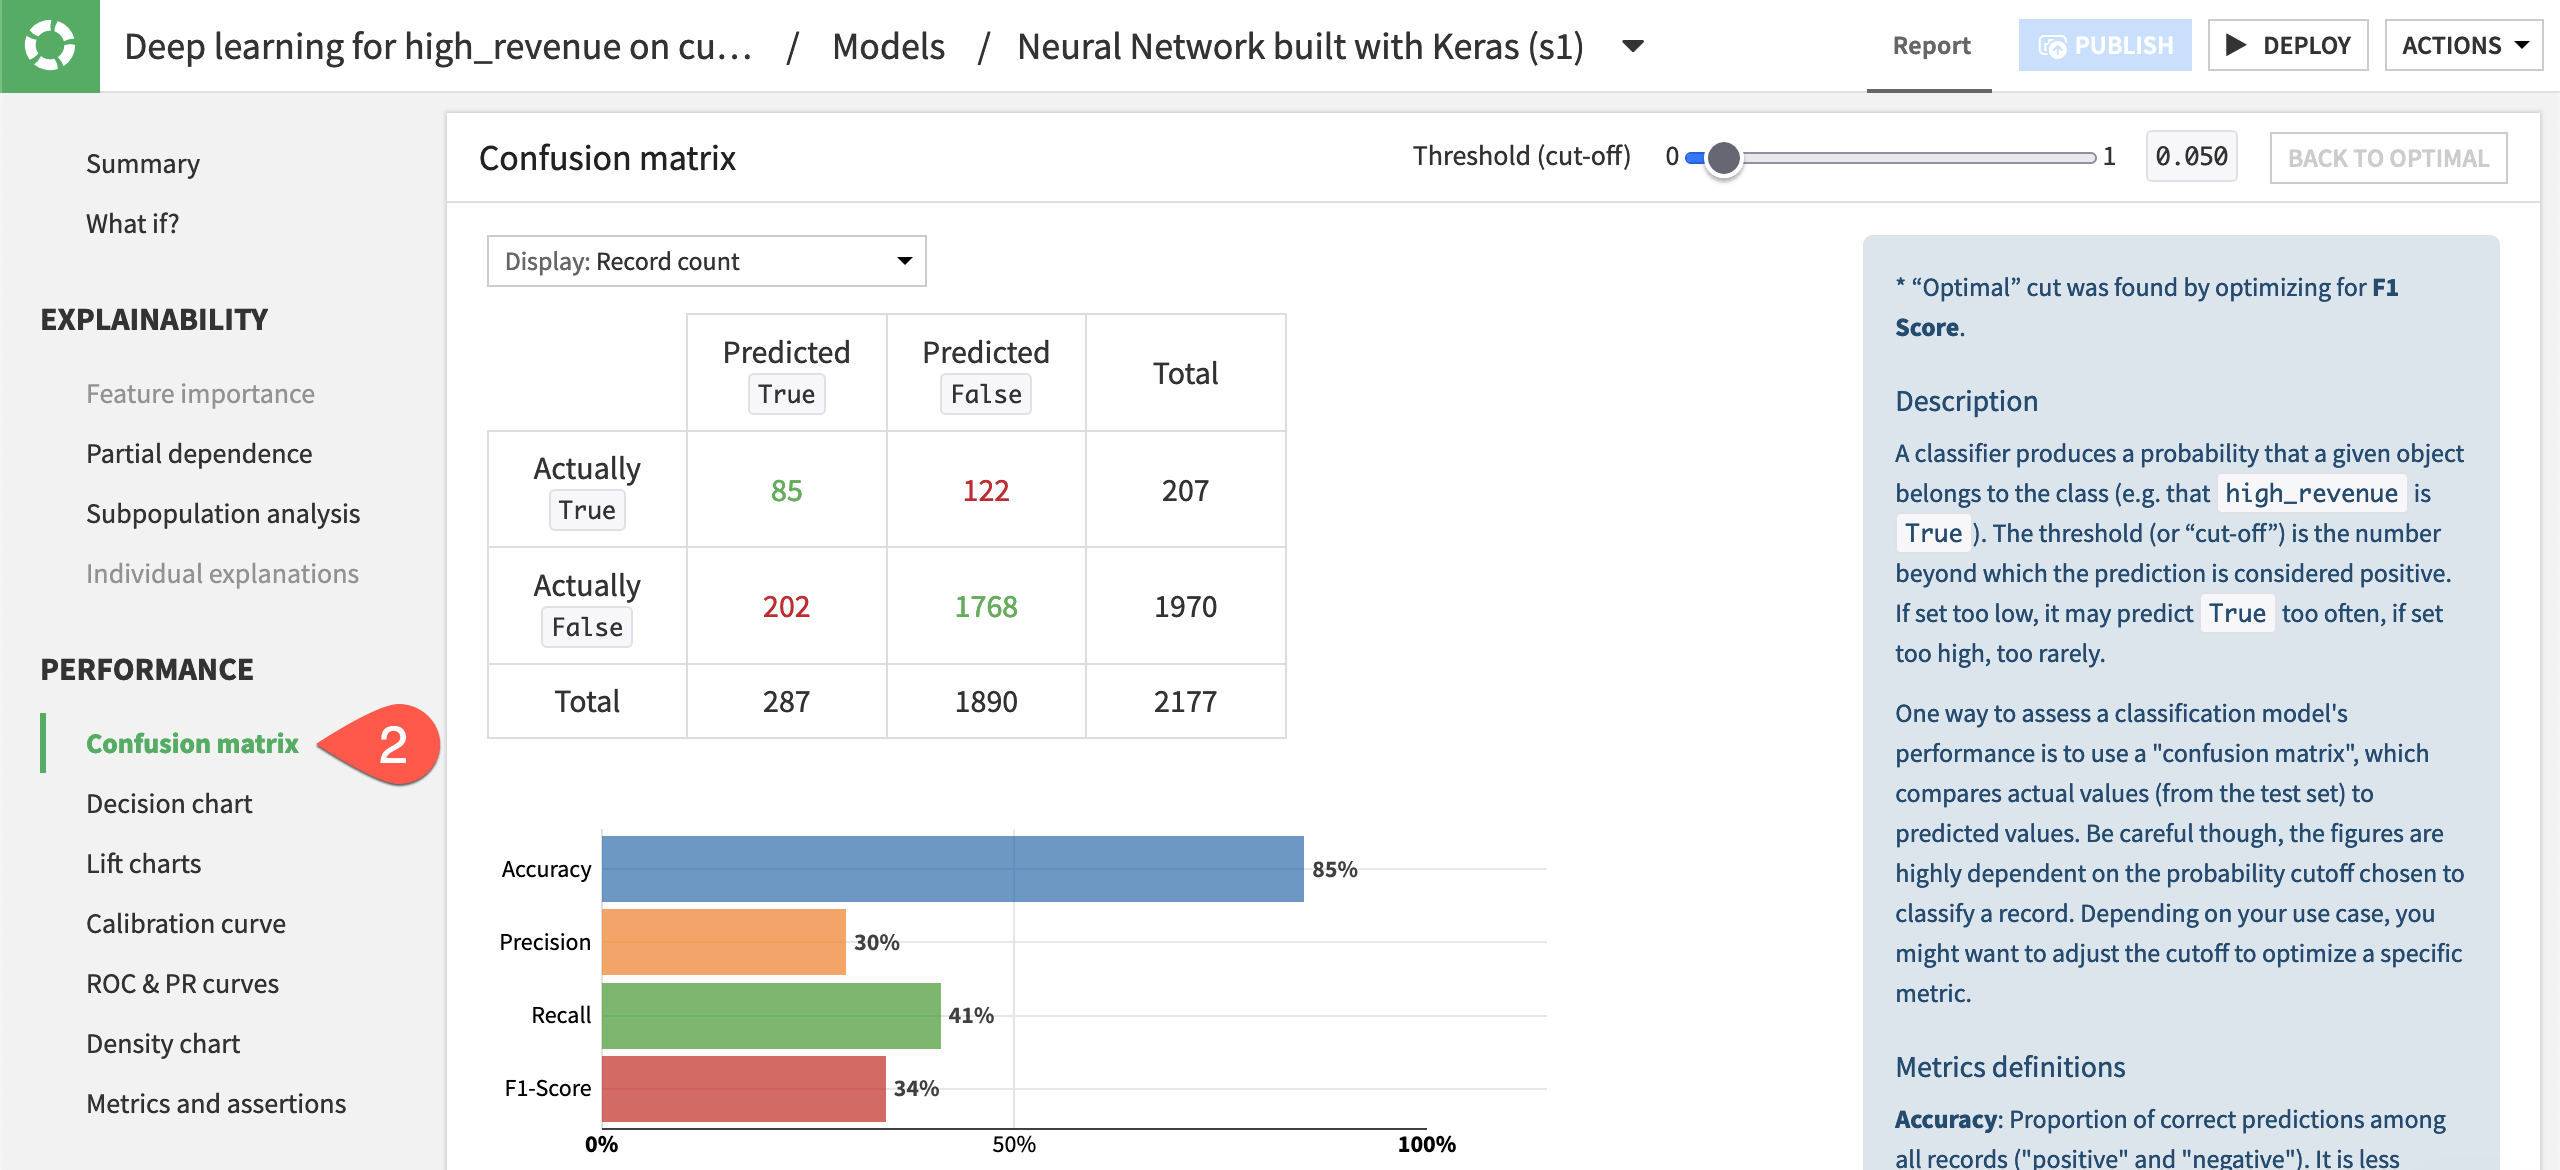
In the Result tab of the task, click on the model name on the left to open the model report.
Explore some of the panels, such as Confusion matrix, to analyze the model’s explainability and performance.
Deploy and apply a deep learning model#
Although this may be a deep learning model, the process for using it is just like that of any other visual model.
Deploy the model#
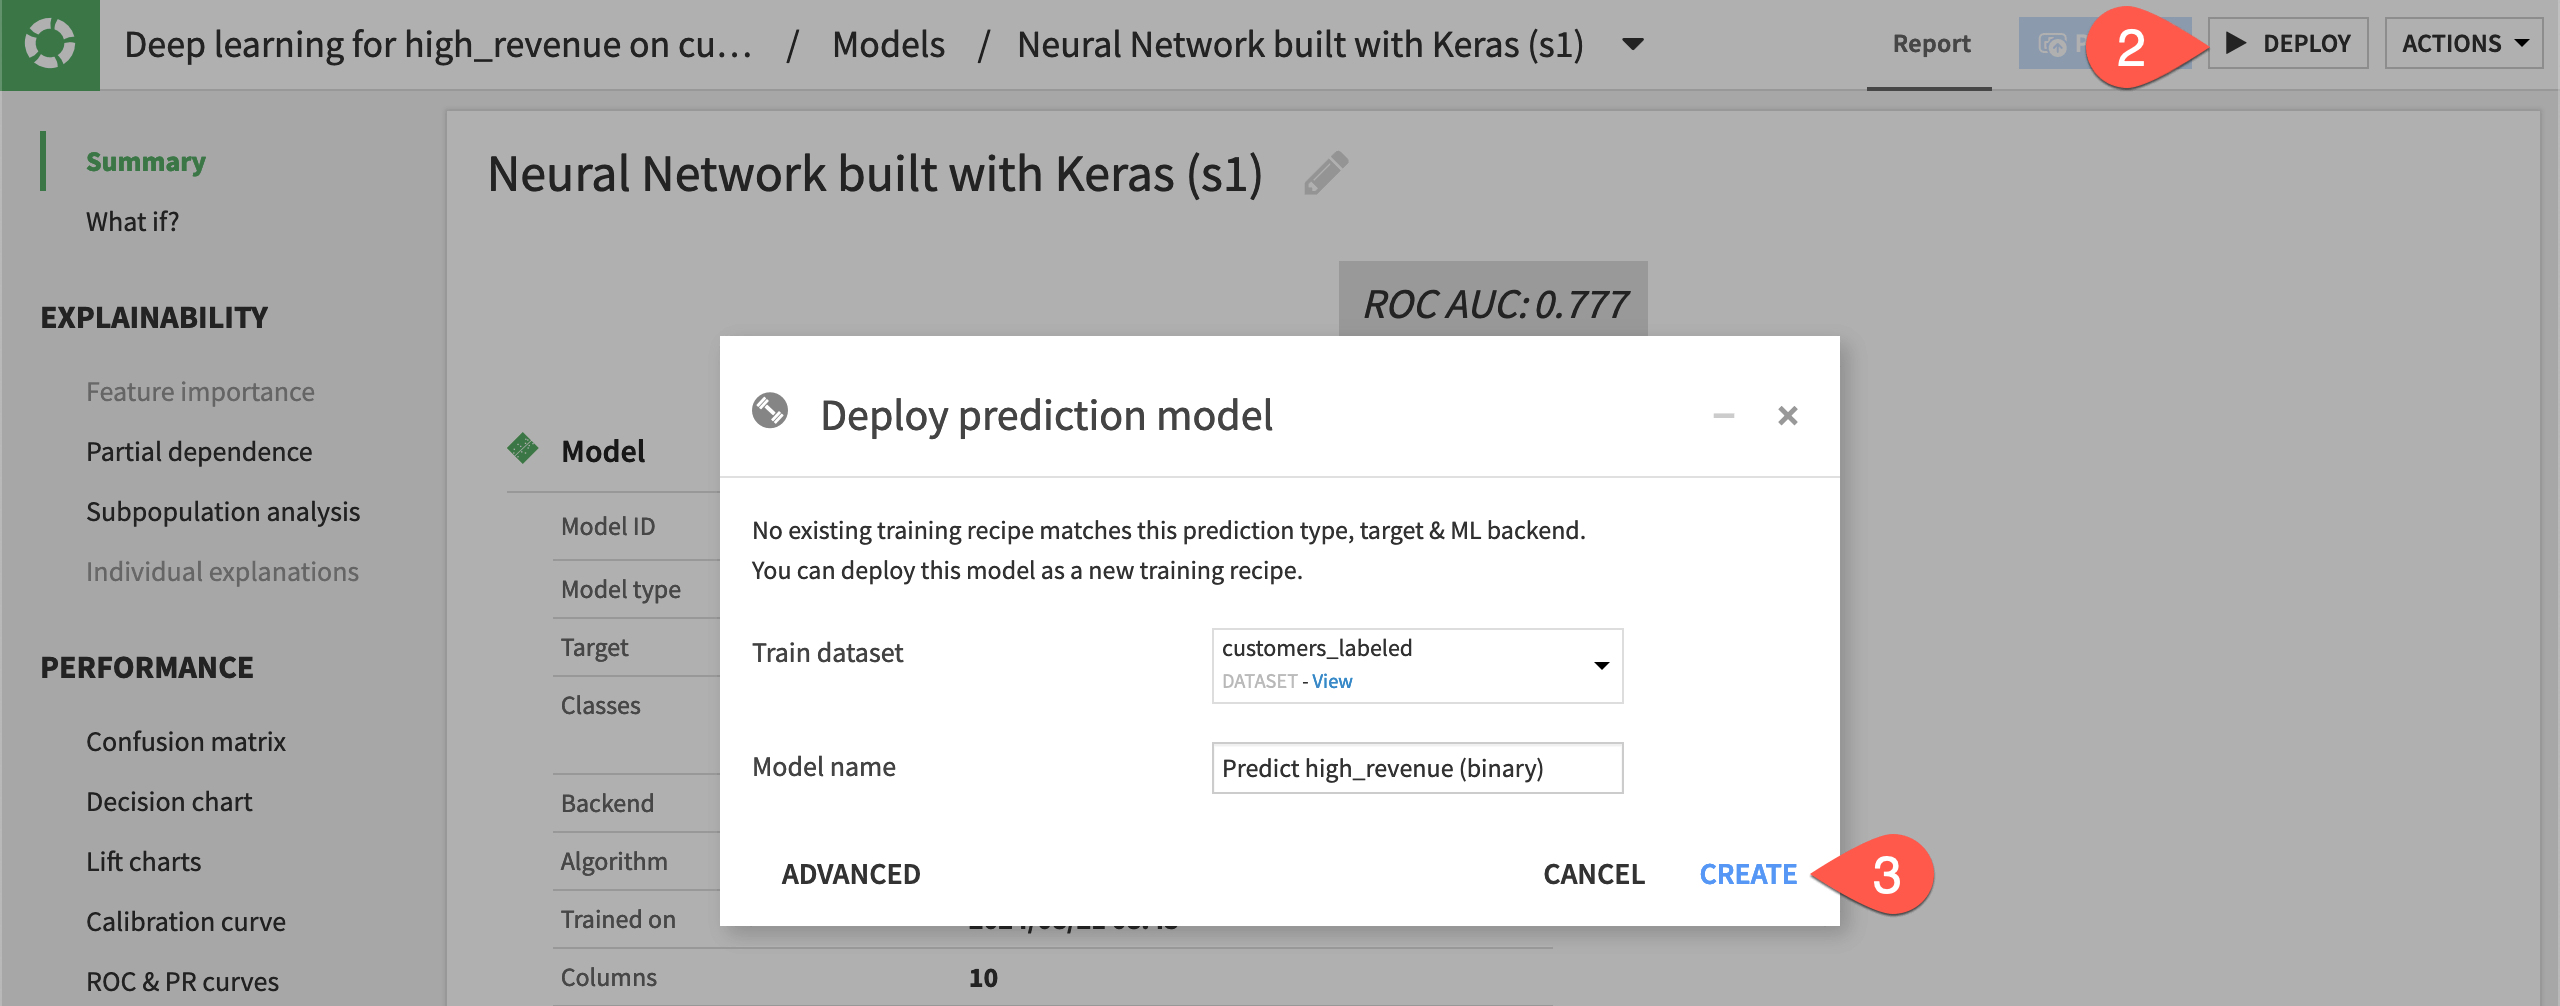
We first deploy it from the Lab to the Flow as a saved model.
Still from the model report, click Deploy.
Click Create.
Apply the model to data#
Let’s now use a Score recipe to apply the model to new data.
From the Flow, select the customers_unlabeled_prepared dataset and the saved model.
From the Actions panel, select the Score recipe.
Click Create Recipe.
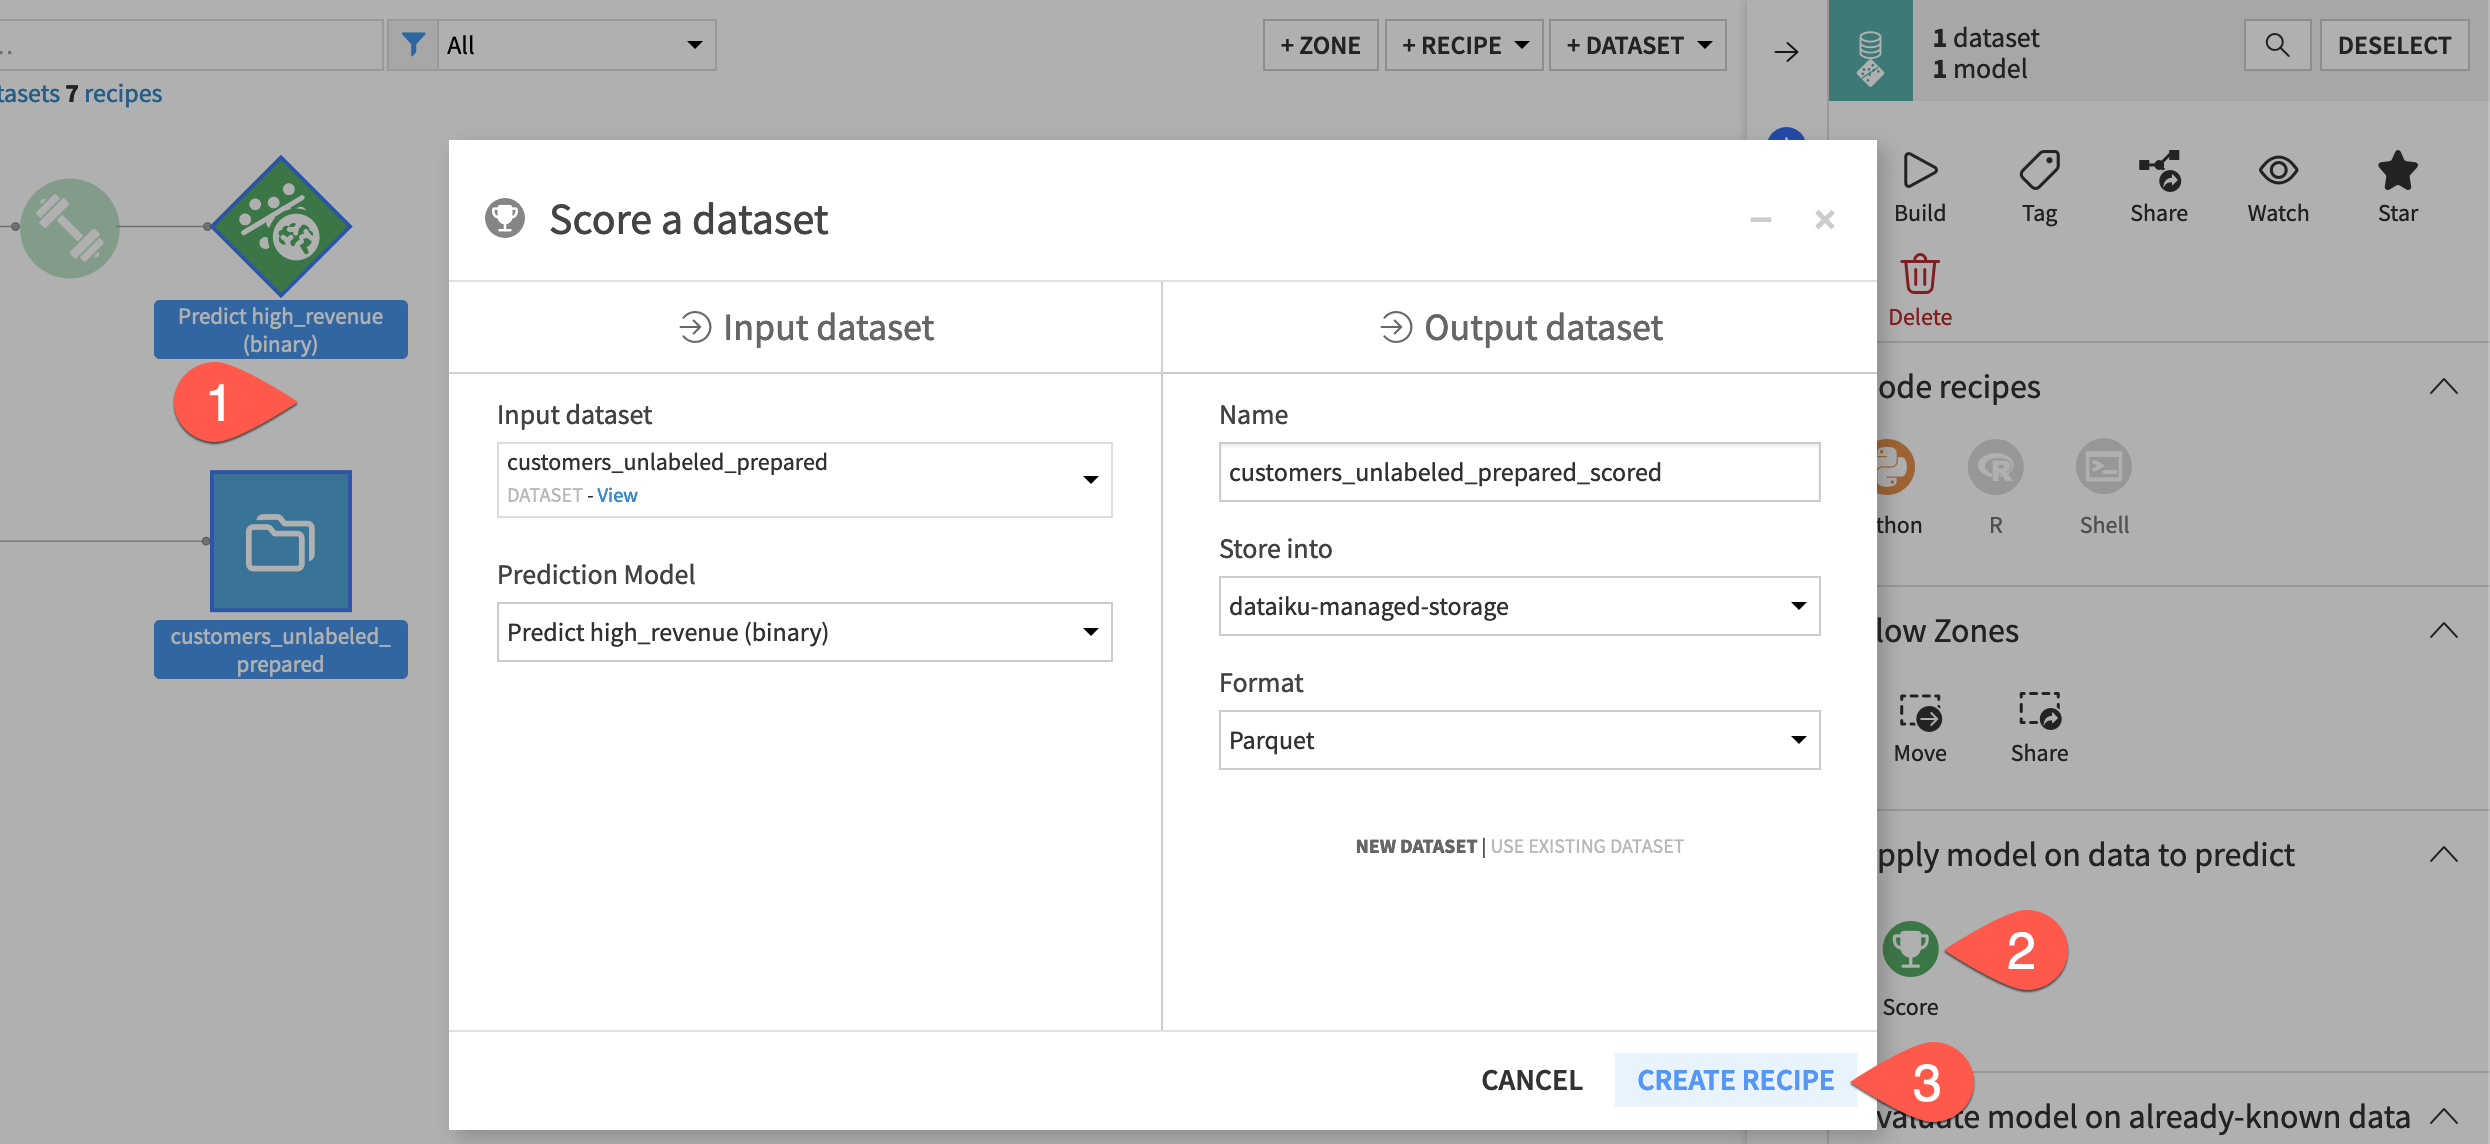
Click Run, and then open the output dataset.
Check the scored data#
In Tutorial | Model scoring basics, we scored the unlabeled customer data with a random forest model. Scoring with a deep learning model produces the same kind of output.
You’ll notice three new columns in the output schema: proba_False, proba_True, and prediction.

Next steps#
Congratulations! You built a deep learning model on structured data with Dataiku’s visual ML tool. You then deployed it to the Flow and used it for scoring like any other visual model.
Next, you might want to build a deep learning model on time series data by following Tutorial | Deep learning for time series.
See also
See the reference documentation on Deep Learning to learn more.

