
Tutorial | Azure pipeline for Dataiku with the Project Deployer#
In this article, we will show how to set up a sample CI/CD pipeline built on Azure for our Dataiku project. This is part of a series of articles regarding CI/CD with Dataiku.
For an overview of the topic and the initial configuration, please refer to the introductory article.
Note
You can find all the files used in this project attached to this article by downloading the ZIP file.
Introduction#
Based on the generic setup described in the introductory article, let’s review this case. We will be using a Dataiku feature called Project Deployer as the centerpiece for deployment.
Project Deployer is a feature released in version 9 of Dataiku allowing you to centrally manage the deployment of bundles to Automation nodes.
If you are using Dataiku version 9 or earlier, or aren’t using the Project Deployer, you can build a Jenkins pipeline for Dataiku without using the Project Deployer.
Our CI/CD environment will be using Azure DevOps as the orchestrator and the Dataiku servers themselves will run as Azure virtual machines.
Architecture#
Let’s start by presenting the different systems we need:
An Azure DevOps account with a project created (in our case, it will be called
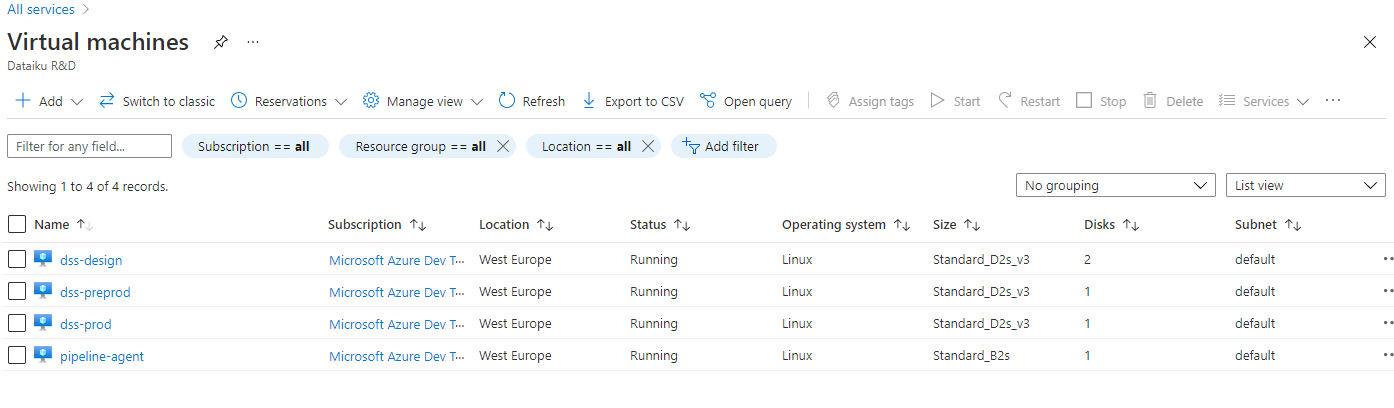
dss-pipeline). We have activated the Pipelines and Repos features (as we will host the code of the Azure pipeline in Azure itself).One Dataiku Design node where data scientists will build their Flows, deployed in an Azure virtual machine.
Two Dataiku Automation nodes, one for pre-production and the other for production. They’re also deployed as Azure virtual machines.
One simple Linux virtual machine configured as an Azure DevOps agent.
Azure configuration#
This article doesn’t aim at explaining Azure DevOps or being a deep-dive on how to configure it. However, we will highlight the minimal setup needed to run this example, with links to the relevant Azure documentation:
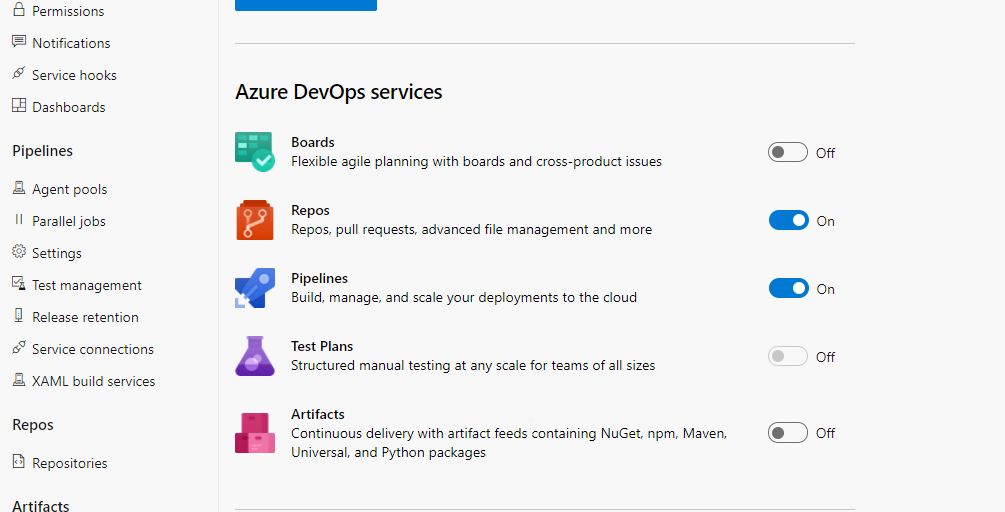
Project features#
On your project, you need to toggle on both the Pipelines & Repos features:
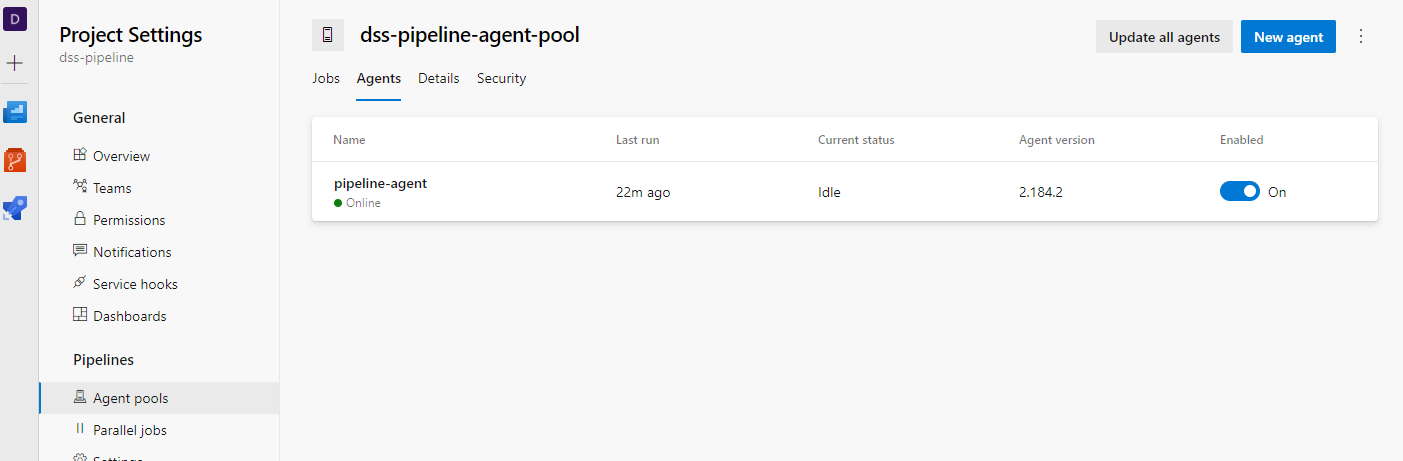
Agent machine#
To execute your code, Azure needs to run it on a machine called an agent. For this example, we will need a self-hosted agent that can access our Dataiku virtual machines.
You will need to create a dedicated machine. It can be rather small (Standard_B2s in our example was more than enough), and follow the instructions in Deploy an Azure Pipelines agent on Linux - Azure Pipelines.
Note
You also need to install Python 3.
In the end, you should see an online agent in the Agent pools of your Azure DevOps project.
Git repository#
You then need to create a Git repository in this project using Create a new Git repository in your project - Azure Repos. Once created, you can upload the content of this sample in it. The resulting repository should look like this:

Create pipeline#
Now that you have the repository configured, you can create a pipeline from it. To do that, go to the Pipelines section of your project, and click New pipeline.

In the next screen, you will need to indicate Azure DevOps which source code repository to use. Select the Git repository you have created just before. Lastly, you can change the parameters in the YAML file to match those of your platform. You can directly click run, and it should work!
As explained in the introductory article, we will use the Dataiku Prediction churn sample project that you need to have deployed and working on your Design node.
Pipeline configuration#
If you didn’t hit run right away, or even if you did and are wondering what this pipeline does, here is an overview.
The parameters are declared in the YAML file (they can be declared in other manners in Azure DevOps, but this approach is the simplest for a sample):
Parameter |
Value |
Description |
|---|---|---|
DSS_PROJECT |
String |
Key of the project we want to deploy (for example, |
DESIGN_URL |
String |
URL of the Design node (for example, |
DESIGN_API_KEY |
Password |
Personal API key to connect to this node. Warning This needs to be a personal API key. Global API keys won’t work. |
AUTO_PREPROD_ID |
String |
ID of the pre-production node as known by Project Deployer (for example, |
AUTO_PREPROD_URL |
String |
URL of the PREPROD node (for example, |
AUTO_PREPROD_API_KEY |
Password |
API key to connect to this node. |
AUTO_PROD_ID |
String |
ID of the production node as known by Project Deployer (for example |
AUTO_PROD_URL |
String |
URL of the PROD node (for example |
AUTO_PROD_API_KEY |
Password |
API key to connect to this node. |
The pipeline contains 5 jobs, executed one after the other:
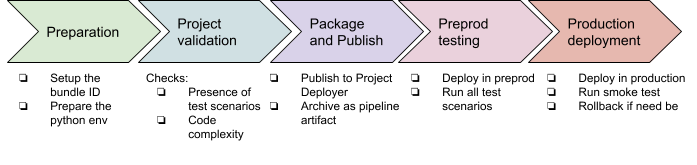
Let’s review those jobs one by one.
PREPARE job#
This stage is used to build a proper workspace. We need to ensure we’re using the exact bundle ID across all our steps so we’re computing it as a variable using a bash script.
The next step is to make sure the Python setup is correct, and then install all packages from the requirements.txt file.
Once done, our environment is ready to execute the good part.
PROJECT_VALIDATION job#
This stage contains one Python script to validate that the project respects internal rules for being production-ready. We’re using the Python Script task for that.
Any check can be performed at this stage, be it on the project structure, setup, or the coding parts, such as the code recipes or the project libraries.
Note
We’re using pytest capability to use command-line arguments by adding a conftest.py.
This is specific to each installation, but here are the main takeaways:
In this project, we will be using the pytest framework to run the tests and the pytest-azurepipelines package that makes test reports available in Azure DevOps. The conftest.py is used to load our command line options. The run_test.py file contains the actual tests, all being Python functions starting with
TEST\_.The checks we have: - There is at least one test DSS scenario (name starts with
TEST\_) and one namedTEST_SMOKE. - Code complexity of Python recipes is in acceptable ranges. We’re using radon for this (using pylint, flake8, or any other code inspection tool is of course also possible).
If this state is OK, we know we have a properly written project, and we can package it.
PACKAGE_BUNDLE job#
The first part of this stage is using a Python script to create a bundle of the project using DSSProject.export_bundle, and then publish it to Project Deployer using DSSProject.publish_bundle.
For archiving purposes, we’re also pushing this file as part of Azure DevOps pipeline artifact by using the dedicated task PublishPipelineArtifact.
PREPROD_TEST stage#
In this stage, we’re deploying the bundle produced at the previous stage on our DSS PREPROD instance, and then running tests.
The bundle deployment is done in import_bundle.py:
We search if the project is already deployed or not. If it’s deployed, we just update the bundle to use, and if it’s not, we create a brand new deployment.
We request Project Deployer to deploy this new bundle using DSSProjectDeployerDeployment.start_update.
In this example, we consider connection mappings to be already valid as Project Deployer allows a default remapping to be defined at Infrastructure level, and this should cover most needs.
The following script run_test.py executes all the scenarios named TEST_XXX and fails if a result isn’t a success.
This pytest configuration has an additional twist. If you have only one test running all the TEST_XXX scenarios, they will be reported as a single test–successful or failed.
Here, we make this nicer by dynamically creating one unit test per scenario. In the final report, we will have one report per scenario executed, making the report more meaningful. This requires some understanding of pytest parameterization. Note that you can perfectly keep one test that will run all your scenarios if you aren’t feeling at ease with this.
DEPLOY_TO_PROD stage#
The previous stage verified we have a valid package. It’s time to move it to production!
We have one Python script that deploys the bundle on the production Automation node, and then executes the TEST_SMOKE scenario. In case of failure, a rollback to the previous bundle is executed. In detail:
Same as for the pre-production deployment, we find or create a deployment on the production node (saving the currently running bundle id in case of update, for the rollback).
We ask Project Deployer to deploy the bundle.
To ensure the new bundle is working, we execute the TEST_SMOKE scenario.
If the deployment or TEST_SMOKE fails, we perform the rollback by re-deploying the previous bundle.
Executing the pipeline#
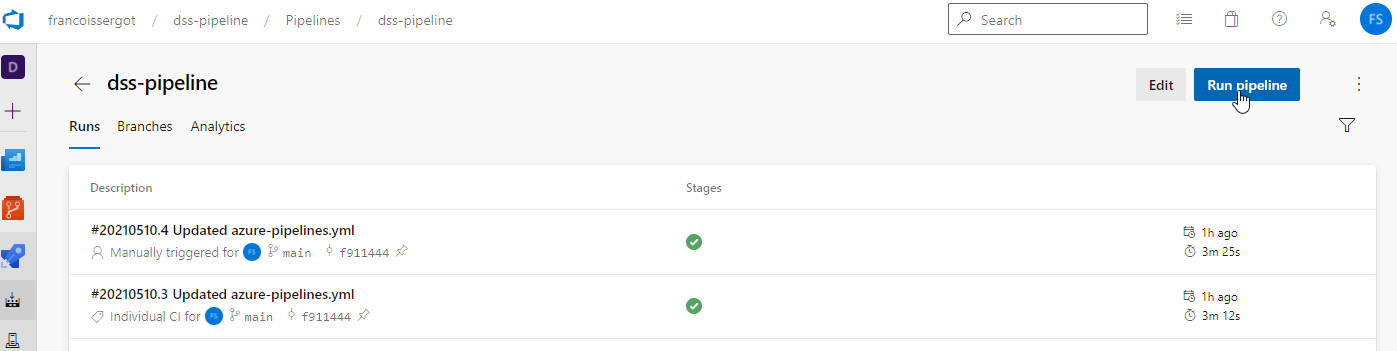
By default, Azure pipelines are executed after each commit in the repository. Alternatively, you can start it manually in the pipeline view by hitting the run button.
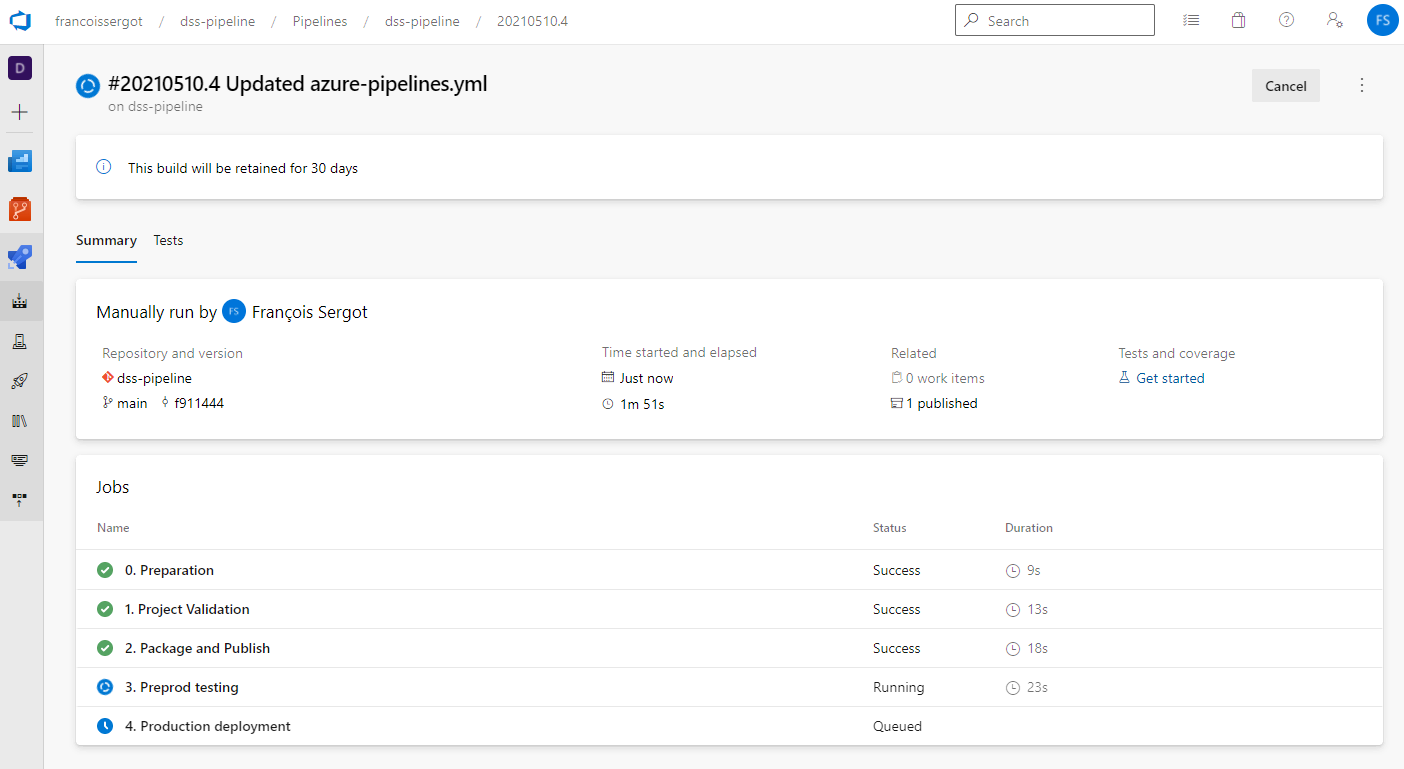
This is what you should see as the pipeline is being executed.
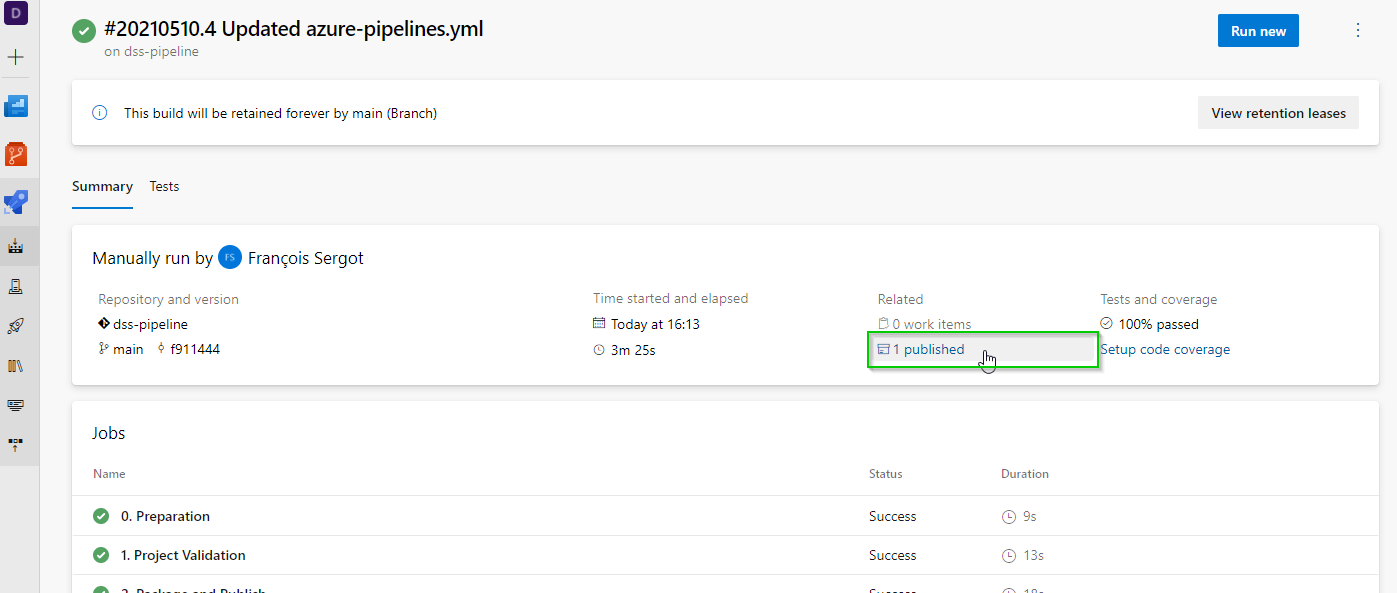
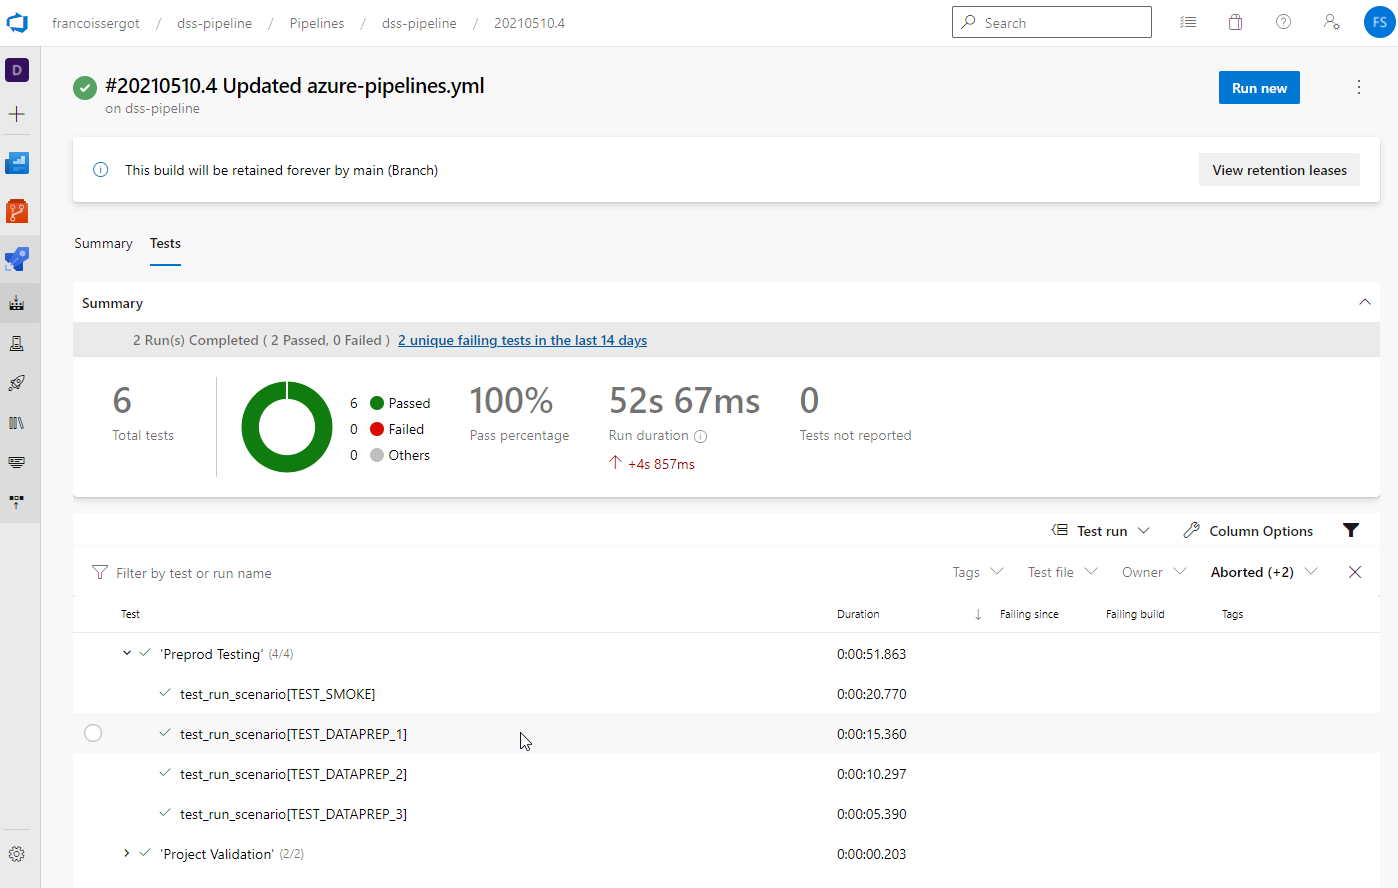
Once finished, you can also see the run results and the details on the tests.
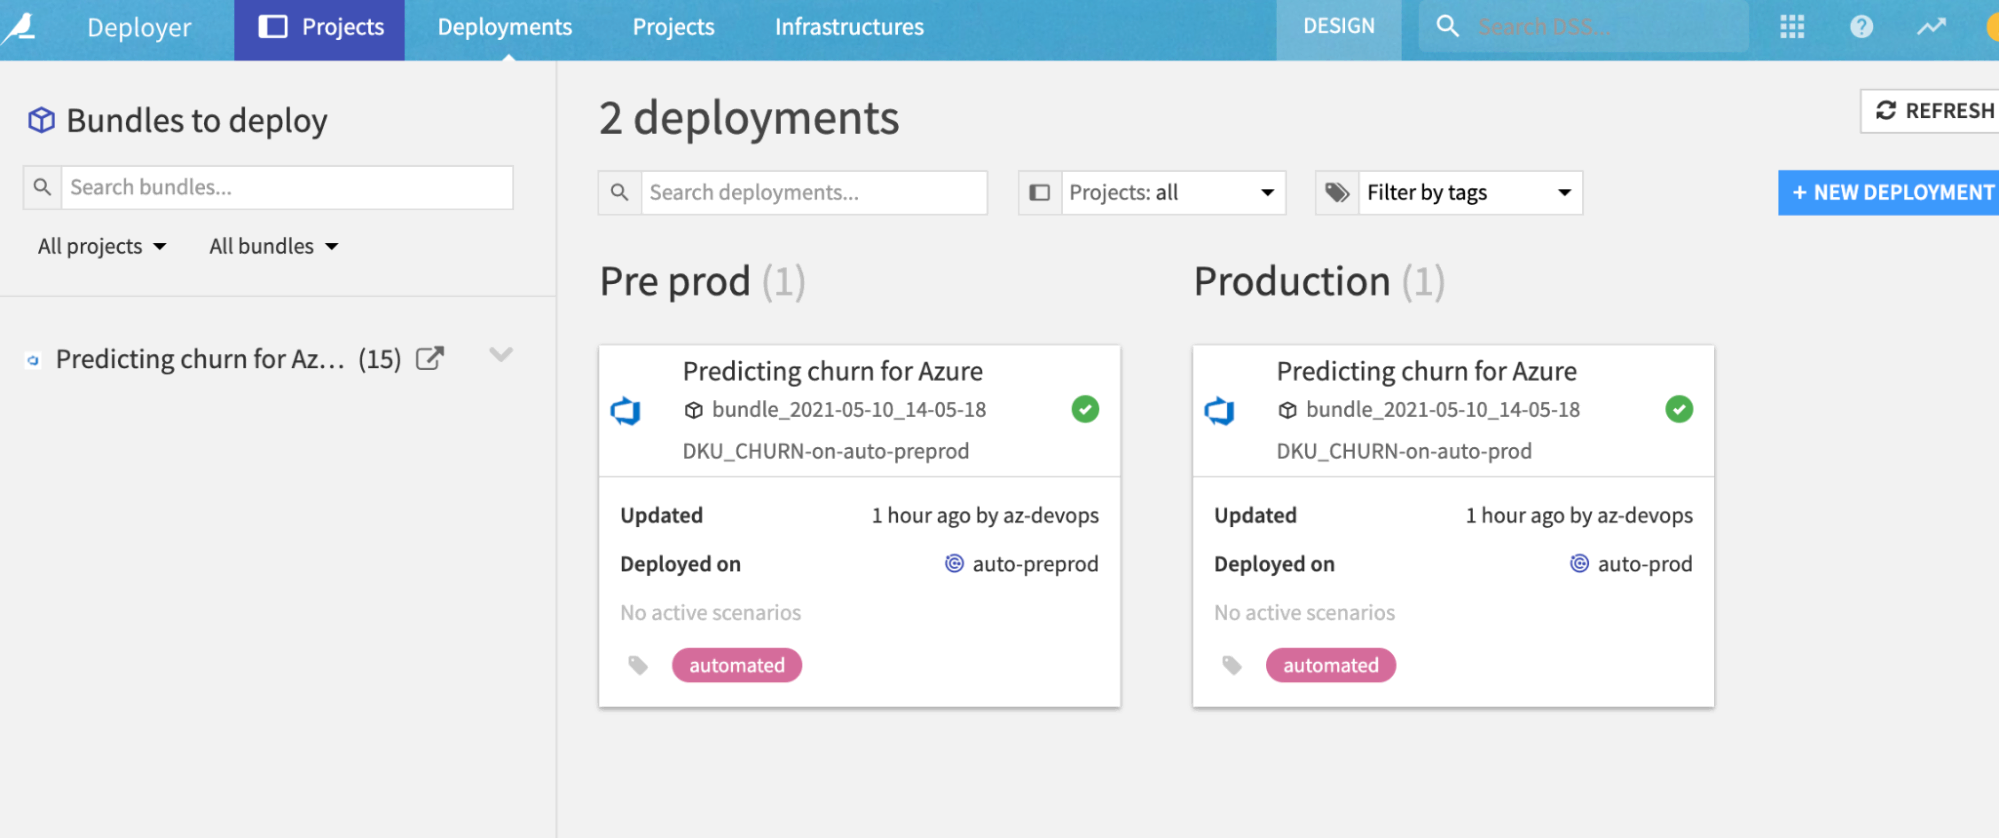
Once executed, we can see those deployments within Dataiku in Project Deployer:
With this, you are done with this sample and can start tailoring it to your needs.