Tutorial | Build modes#
Get started#
Let’s practice using various build modes in Dataiku to recompute datasets and manage schema changes.
Objectives#
In this tutorial, you will:
Build datasets using upstream and downstream builds.
Successfully troubleshoot a failed job.
Build datasets by Flow zones.
Manage schema changes such as adding columns.
Prerequisites#
To reproduce the steps in this tutorial, you’ll need:
Dataiku 12.6 or later.
Basic knowledge of Dataiku (Core Designer level or equivalent).
Create the project#
From the Dataiku Design homepage, click + New Project.
Select Learning projects.
Search for and select Build Modes.
If needed, change the folder into which the project will be installed, and click Create.
From the project homepage, click Go to Flow (or type
g+f).
From the Dataiku Design homepage, click + New Project.
Select DSS tutorials.
Filter by Advanced Designer.
Select Build Modes.
From the project homepage, click Go to Flow (or type
g+f).
Note
You can also download the starter project from this website and import it as a ZIP file.
Use case summary#
The project has three data sources:
Dataset |
Description |
|---|---|
tx |
Each row is a unique credit card transaction with information such as the card that was used and the merchant where the transaction was made. It also indicates whether the transaction has either been:
|
merchants |
Each row is a unique merchant with information such as the merchant’s location and category. |
cards |
Each row is a unique credit card ID with information such as the card’s activation month or the cardholder’s FICO score (a common measure of creditworthiness in the US). |
Build datasets#
Build only this#
Let’s try to build the tx_windows dataset.
In the Data preparation Flow zone, right-click on the tx_windows dataset and select Build.
Keep the default Build only this selection.
Try to Build Dataset.
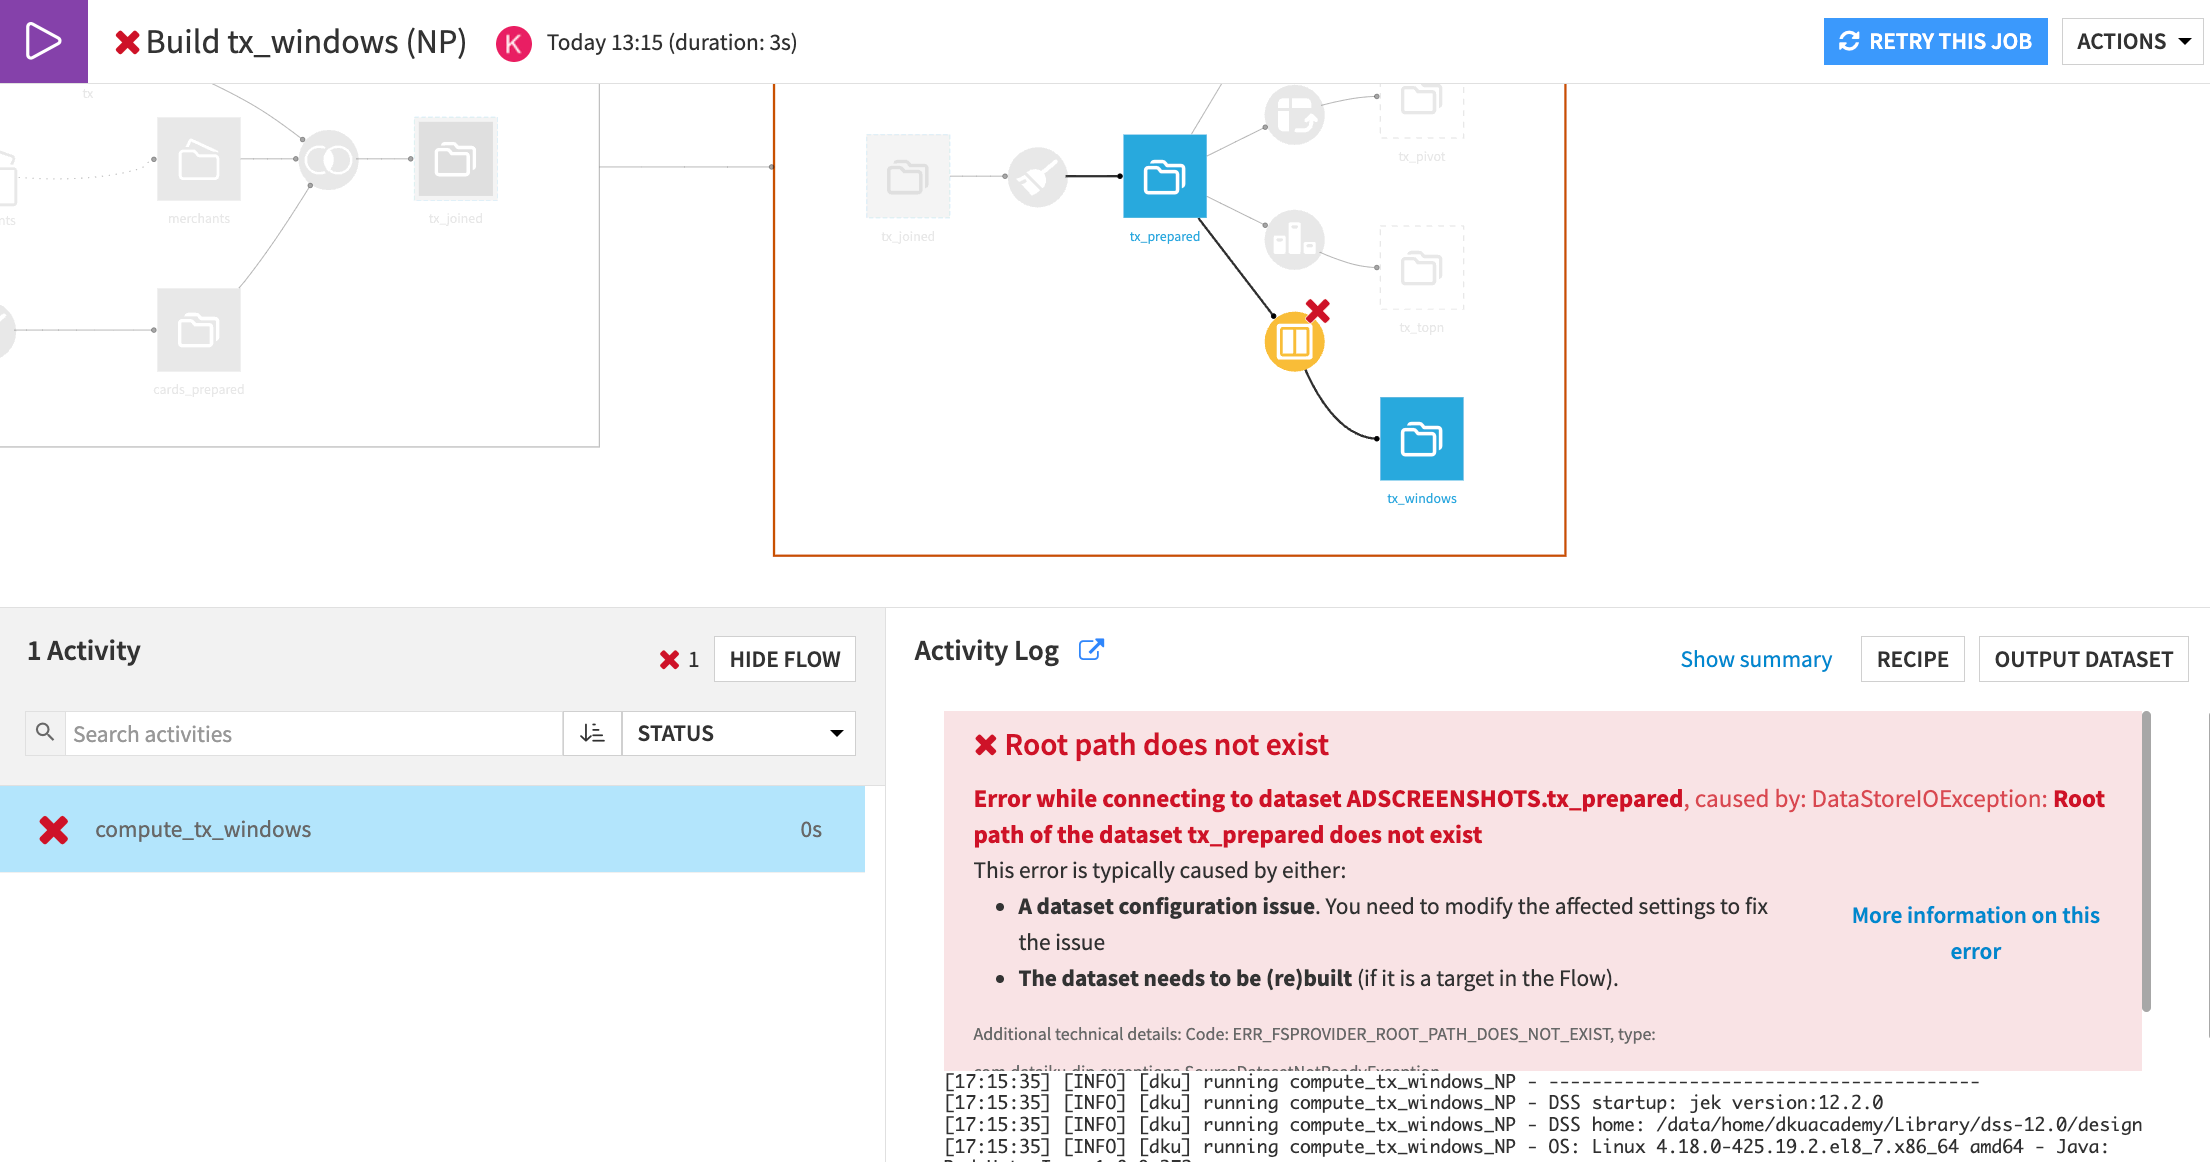
You should see an error message when you try this! You can’t build an item whose upstream datasets aren’t built. Let’s troubleshoot this issue.
Review the job log#
After any job fails, you can look at the job log to figure out what went wrong.
From the top navigation bar, select the Jobs (
) page (or use
g+j).Click on the Build tx_windows (NP) failed job.
Check the failed compute_tx_windows activity.
Important
This dataset’s root path doesn’t exist. This confirms that there was an issue with the upstream path.
Build upstream#
Let’s fix the non-existing root path by instructing Dataiku to build the target dataset, as well as any out-of-date upstream dependencies!
Return to the Flow.
Right click on the tx_windows dataset, and select Build.
Choose to Build upstream and keep the default selections.
Select Preview to see the activities included in the proposed job.
Click Run to start the job.
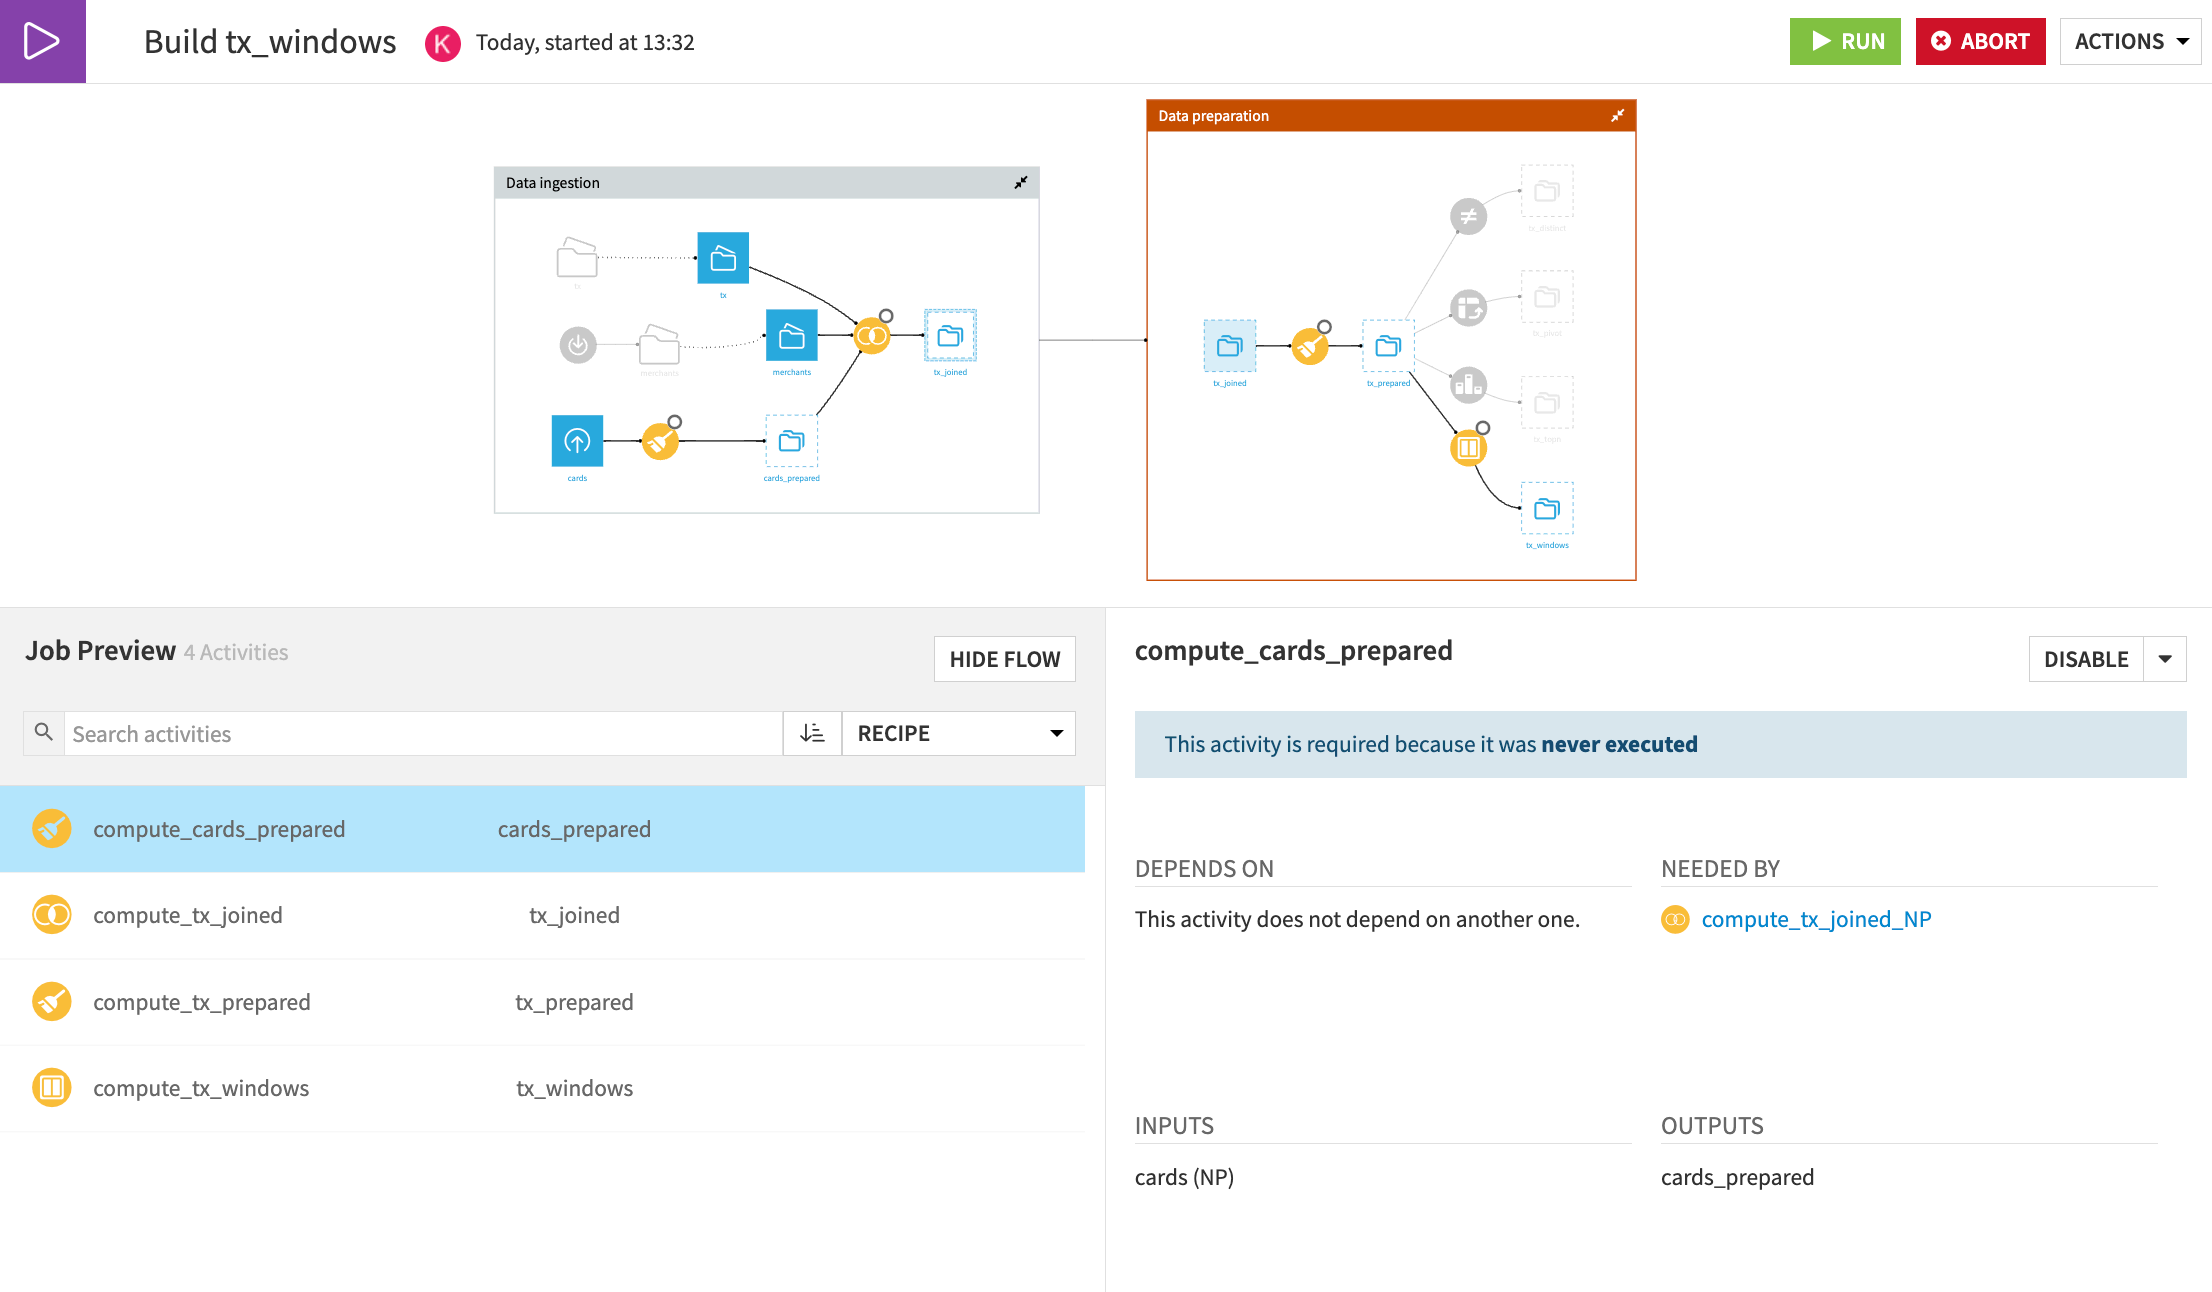
When the job completes, return to the Flow and see that while all data upstream from tx_windows was built, other final branches (such as tx_distinct) weren’t built.
Build a Flow zone#
After building upstream, the other final outputs in the Data Preparation Flow zone remain empty. Let’s build these datasets by instructing Dataiku to build an entire Flow zone.
Click Build at the top right of the Data Preparation Flow zone.
Tip
This opens the same dialog window as when you click Flow Actions > Build all from the Flow. However, it enables the Stop at zone boundary option to restrict the build to the selected Flow zone.
For the purpose of demonstration, select Force-rebuild all dependencies next to Handling of dependencies.
Click Preview.
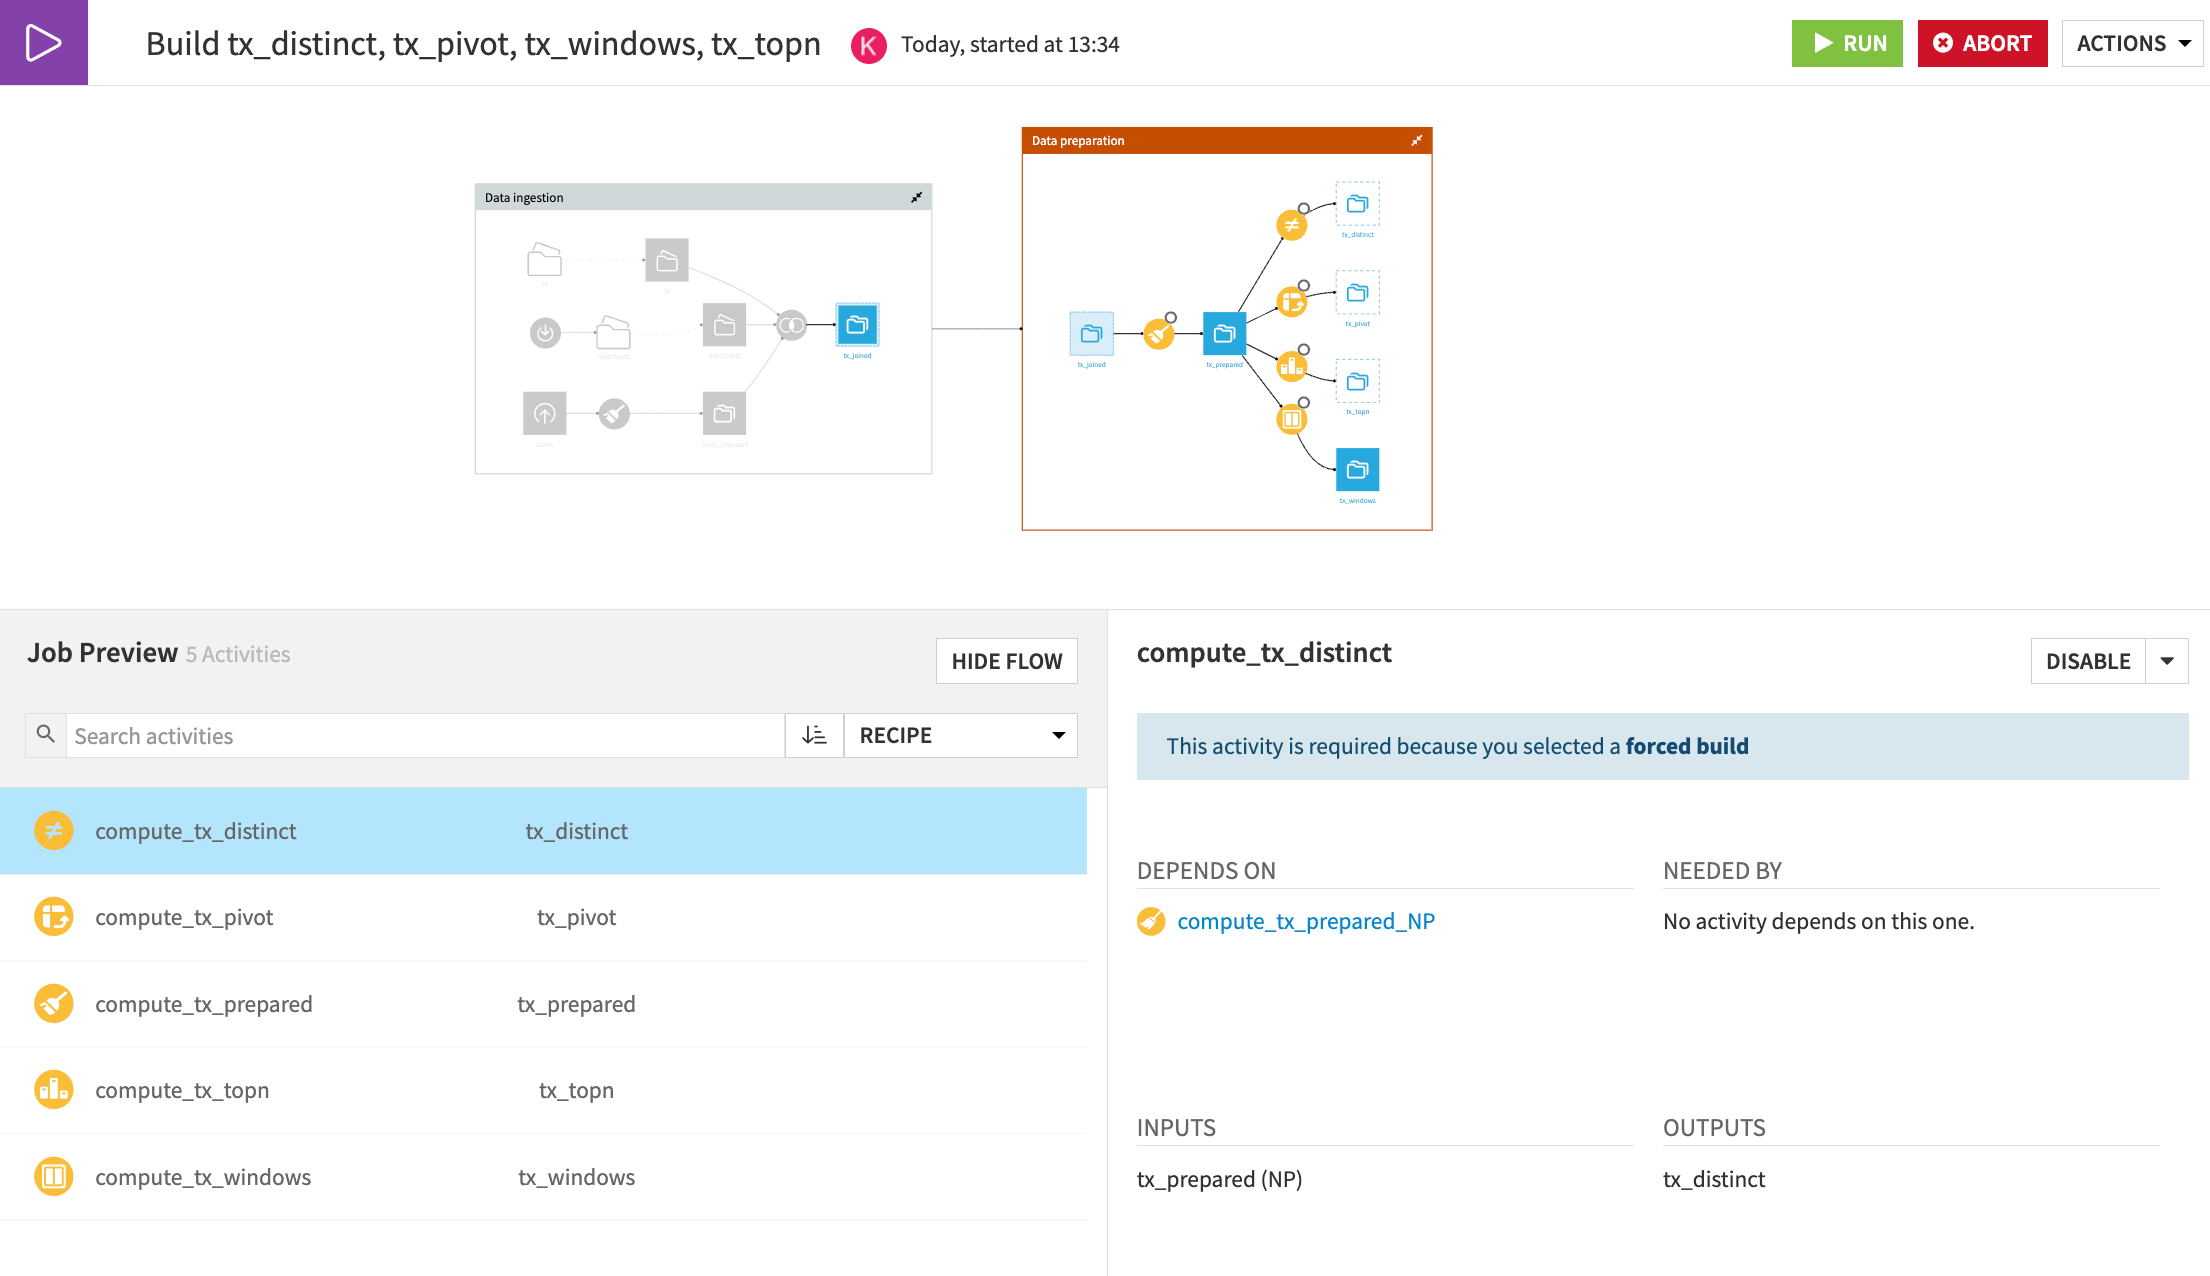
Important
Notice that each recipe in the Data Preparation zone will be built, even though not all datasets are out of date. Also, see how none of the recipes in the Data Ingestion zone are set to run even though the job is force-rebuilding all dependencies.
Click Run to start the job.
Manage schema changes#
It’s important to consider how schema changes will impact datasets downstream in your Flow. Let’s see what happens when adding a column to a dataset early in the Flow.
Add a column#
From the Flow, open the Prepare recipe that creates the cards_prepared dataset.
Click the dropdown arrow next to the first_active_month column and select Parse date.
Keep the default, and click Use Date Format.
Take a moment to review the new first_active_month_parsed column.
Click Run.
Confirm the option Run Downstream is selected.
Click Run once more.
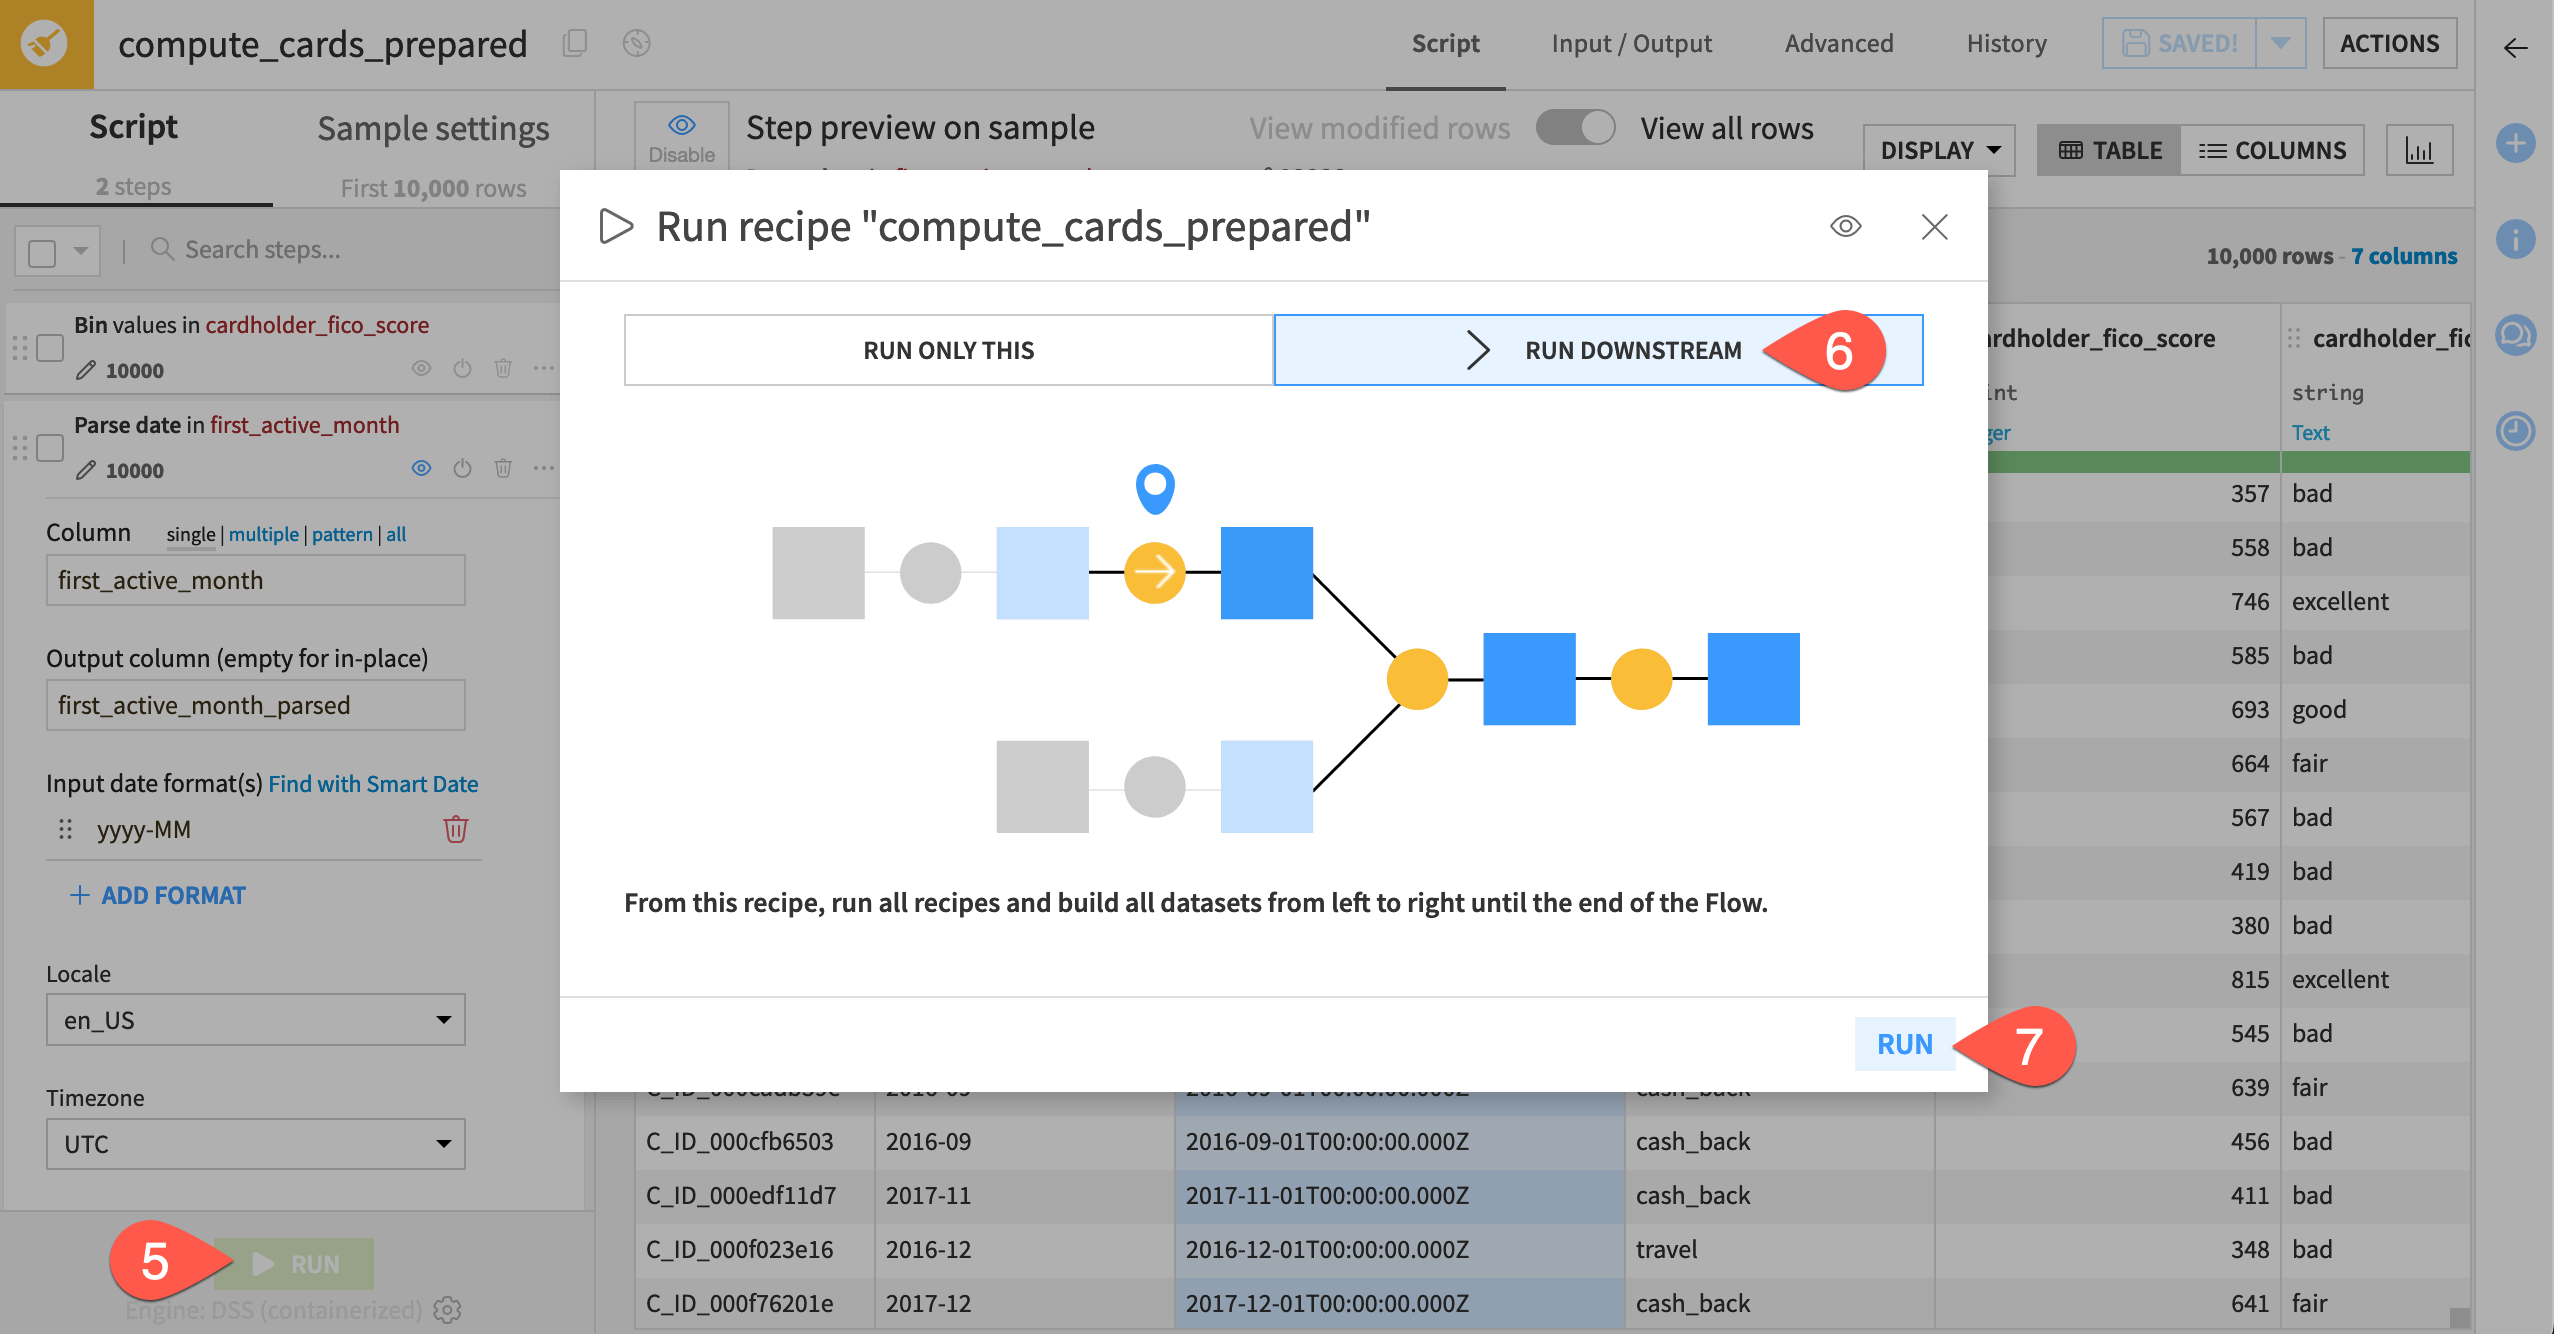
Tip
When executing a job from within a recipe, the default action is to run downstream and update output schemas. This helps to keep schemas updated in the Flow as you’re designing your recipes.
Let’s verify this and review the schemas of the downstream datasets.
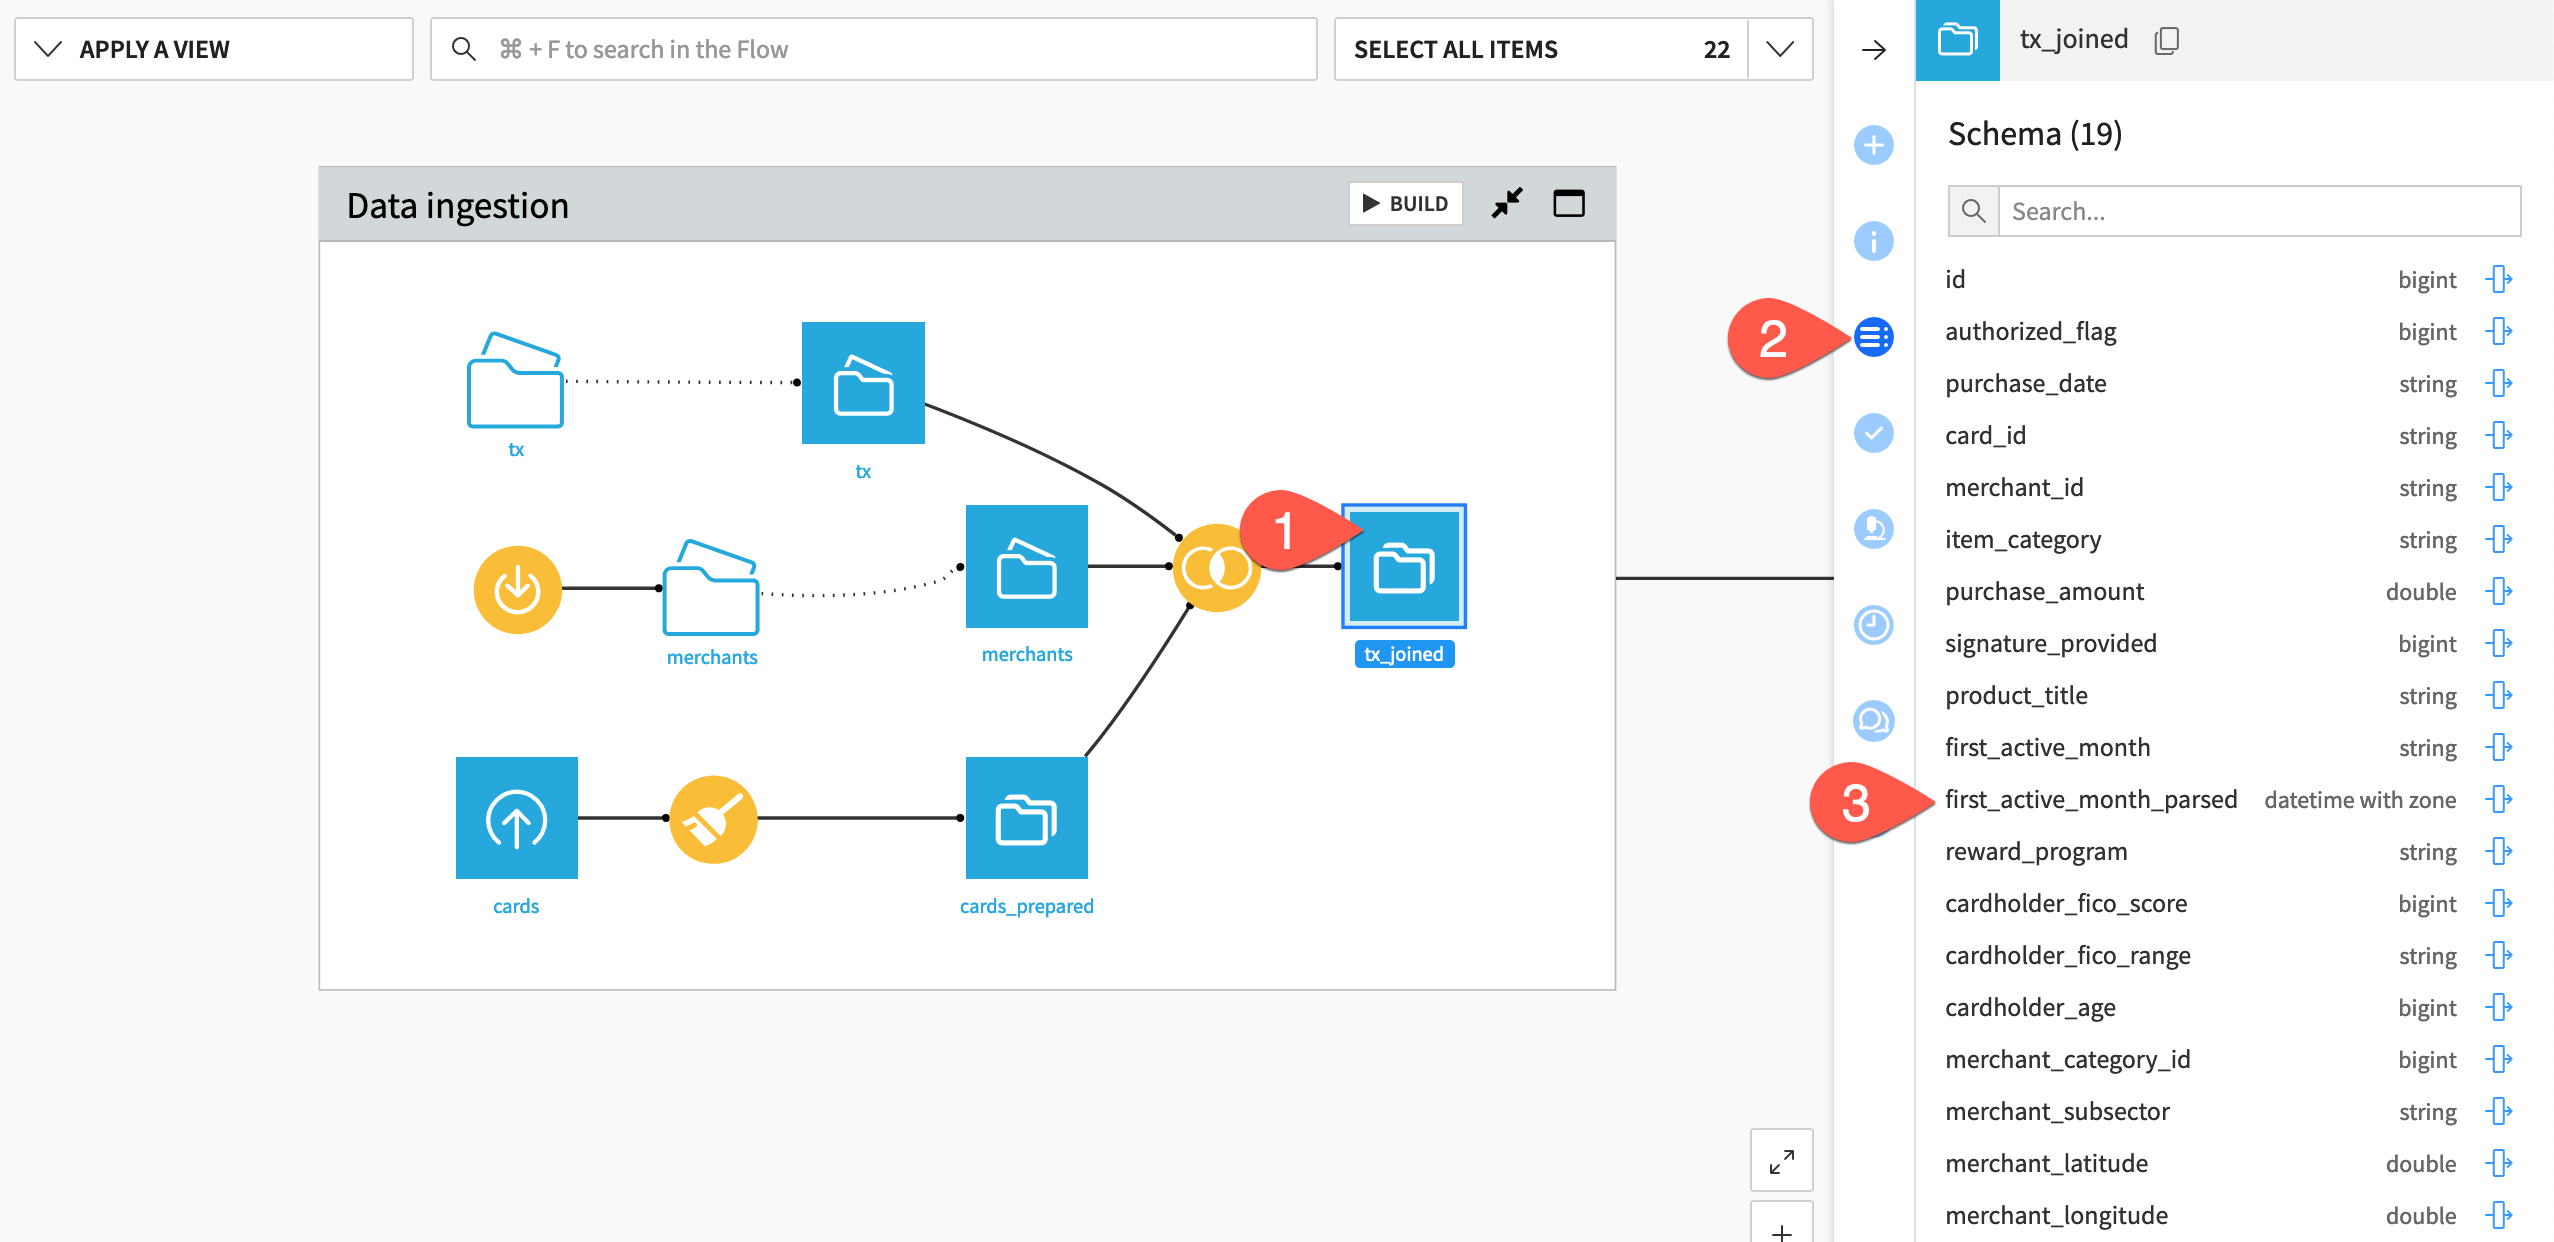
Select tx_joined from the Flow.
Open the Schema (
) tab in the right panel.
Notice that the new first_active_month_parsed column is present.
Select downstream datasets one by one and review whether they include the new column.
Observe schema propagation#
You’re probably wondering why some downstream datasets include the column added upstream, whereas others don’t. Let’s review what happened to each dataset here.
Recipe |
Explanation |
|---|---|
Join |
The tx_joined dataset includes the new column. In a Join recipe, schema propagation will happen if you choose Select all non-conflicting columns or Select all columns. However, a new column won’t be added if you chose Manually select columns for the changed dataset. |
Prepare |
The tx_prepared dataset includes the new column. Users don’t have to explicitly select every column to include it in the output of a Prepare recipe. All new columns are present by default. |
Distinct |
The tx_distinct dataset doesn’t include the new column. Users explicitly select columns in the Distinct recipe. The new column will be available for selection inside the recipe, but Dataiku doesn’t assume that it should be added. |
Pivot |
In the tx_pivot dataset, you don’t see the new column. Because the Pivot recipe generates an entirely new schema from the values of the pivot column, the new column is somewhat irrelevant. The new column is available to add in the Other columns step, but Dataiku doesn’t forcibly add it. |
Top N |
The tx_topn dataset doesn’t include the new column. This is because the Retrieve columns step of the Top N recipe is set to keep only certain columns. If using the default mode of All columns, then the new column would be automatically selected. |
Window |
The tx_windows dataset includes new columns because, in the Window recipe, the aggregation is set to Always retrieve all. However, similarly to other recipes, Dataiku won’t retrieve additional columns if you have manually selected columns. |
Tip
Though we didn’t cover every Dataiku recipe here, you can use what you’ve learned to test how other recipes handle schema changes.
Next steps#
If you’re interested in automating builds, check out the Data Quality & Automation course in the Academy!

