Solution | Reconciliation#
Overview#
Business case#
Organizations across various industries often face reconciliation challenges, particularly when matching and verifying data between multiple datasets. These challenges are frequently managed using Excel spreadsheets, but you can make this approach more robust through the use of Dataiku.
The Reconciliation Solution offers a range of matching capabilities, including perfect join for exact matches, fuzzy join based on customizable criteria, and access to a web application for manual matching.
This combination of automated and manual methods ensures a comprehensive and flexible reconciliation process.
Installation#
From the Design homepage of a Dataiku instance connected to the internet, click + Dataiku Solutions.
Search for and select Reconciliation.
If needed, change the folder into which the Solution will be installed, and click Install.
Follow the modal to either install the technical prerequisites below or request an admin to do it for you.
From the Design homepage of a Dataiku instance connected to the internet, click + New Project.
Select Dataiku Solutions.
Search for and select Reconciliation.
Follow the modal to either install the technical prerequisites below or request an admin to do it for you.
Note
Alternatively, download the Solution’s .zip project file, and import it to your Dataiku instance as a new project.
Technical requirements#
To leverage this Solution, you must meet the following requirement:
Have access to a Dataiku 13.2+* instance.
Data requirements#
The project is initially shipped with all datasets using the filesystem connection.
You should store the input data into two different datasets:
Dataset |
Description |
|---|---|
primary |
Serves as the reference dataset. |
secondary |
Observations from this dataset will be matched to the primary dataset. |
The Solution accepts three types of data: numeric, string, and date.
The corresponding key columns between the two datasets must be of the same type. For example, if you want to match a column containing credit card numbers in both datasets, ensure that the column type is set to string in both cases.
The corresponding key columns between the two datasets don’t need to have the same name, although they can if desired.
Workflow overview#
You can follow along with the Solution in the Dataiku gallery.

The project has the following high-level steps:
Prepare your data in the right format following the data requirements.
Use the Project Setup interface to replace the demo data and setup your own version.
Explore your own results in the dashboard.
Review pending matches in the webapp.
Walkthrough#
Note
In addition to reading this document, it’s recommended to read the wiki of the project before beginning to get a deeper technical understanding of how this Solution was created and more detailed explanations of Solution-specific vocabulary.
Plug and play with your own data and parameter choices#
The Project Setup allows users to customize parameters and use the Solution with their own data through a visual interface.
You can do this in two ways:
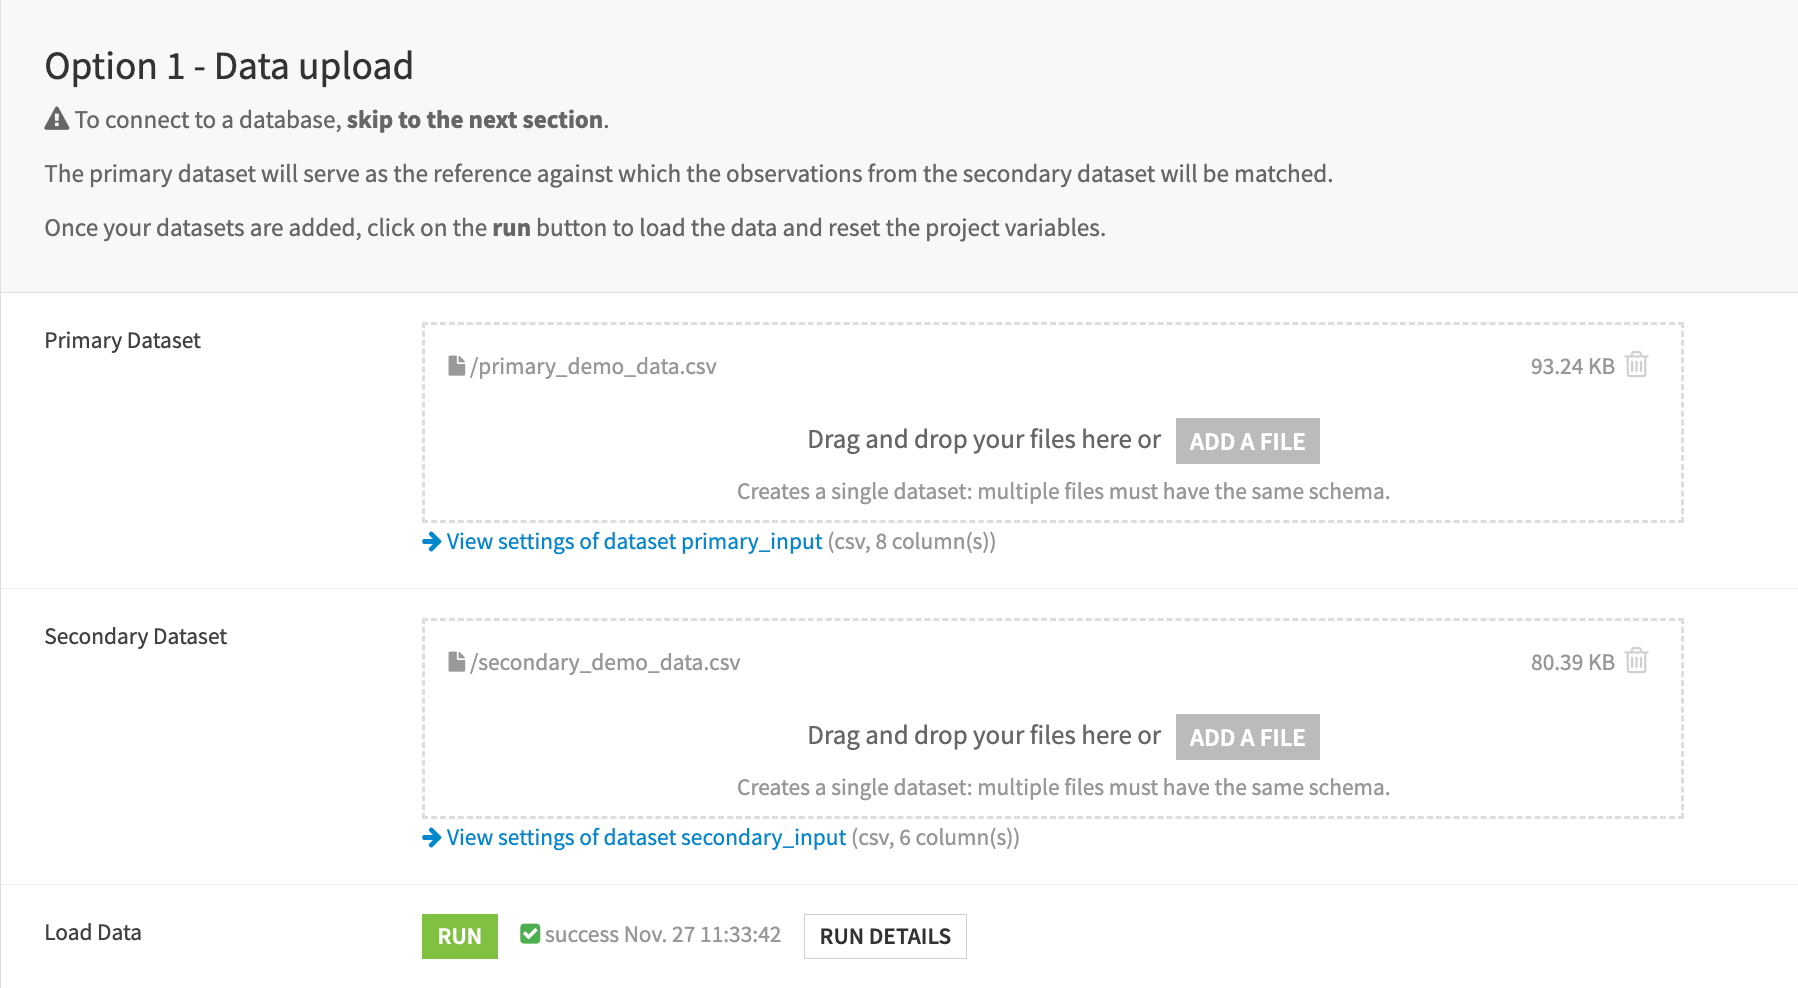
Upload data directly from the filesystem in the first section of the Dataiku app.
Connect to your database of choice by selecting an existing connection.
In both options, users must click the Check button which will load the data and verify the schema.

With the data selected and loaded into the Flow, you can move to the following sections:
Section |
Description |
|---|---|
ID Columns |
The user can decide whether to use their own ID columns or allow the project to generate them automatically. |
Columns Matching |
The corresponding columns (referred to as keys) from each dataset to be matched are selected. In the current version of the project, up to fifteen keys can be used. |
Extra Columns |
Users can choose extra columns (if any) that aren’t part of the keys, but are still important for displaying in the manual matching webapp and the final results, to help with decision-making. |
Automatic Matching |
Allows to establish an automatic matching threshold along with a maximum limit for potential matches. |
Reconciliation |
The last section is where the reconciliation process is launched. |
Important
Be sure to refresh the page so that the app can dynamically take your data into account.
Reconciliation analysis — before manual review#
The Reconciliation Analysis dashboard provides an overview of how records are categorized based on their alignment with the secondary dataset. Records may fall into one of several match types: perfect, automatic, pending, manual, or no match.
On the first run, you can observe that there are no manual matches. This is because all potential manual matches haven’t yet been flagged manually and are still classified as pending matches.

Manual matching#
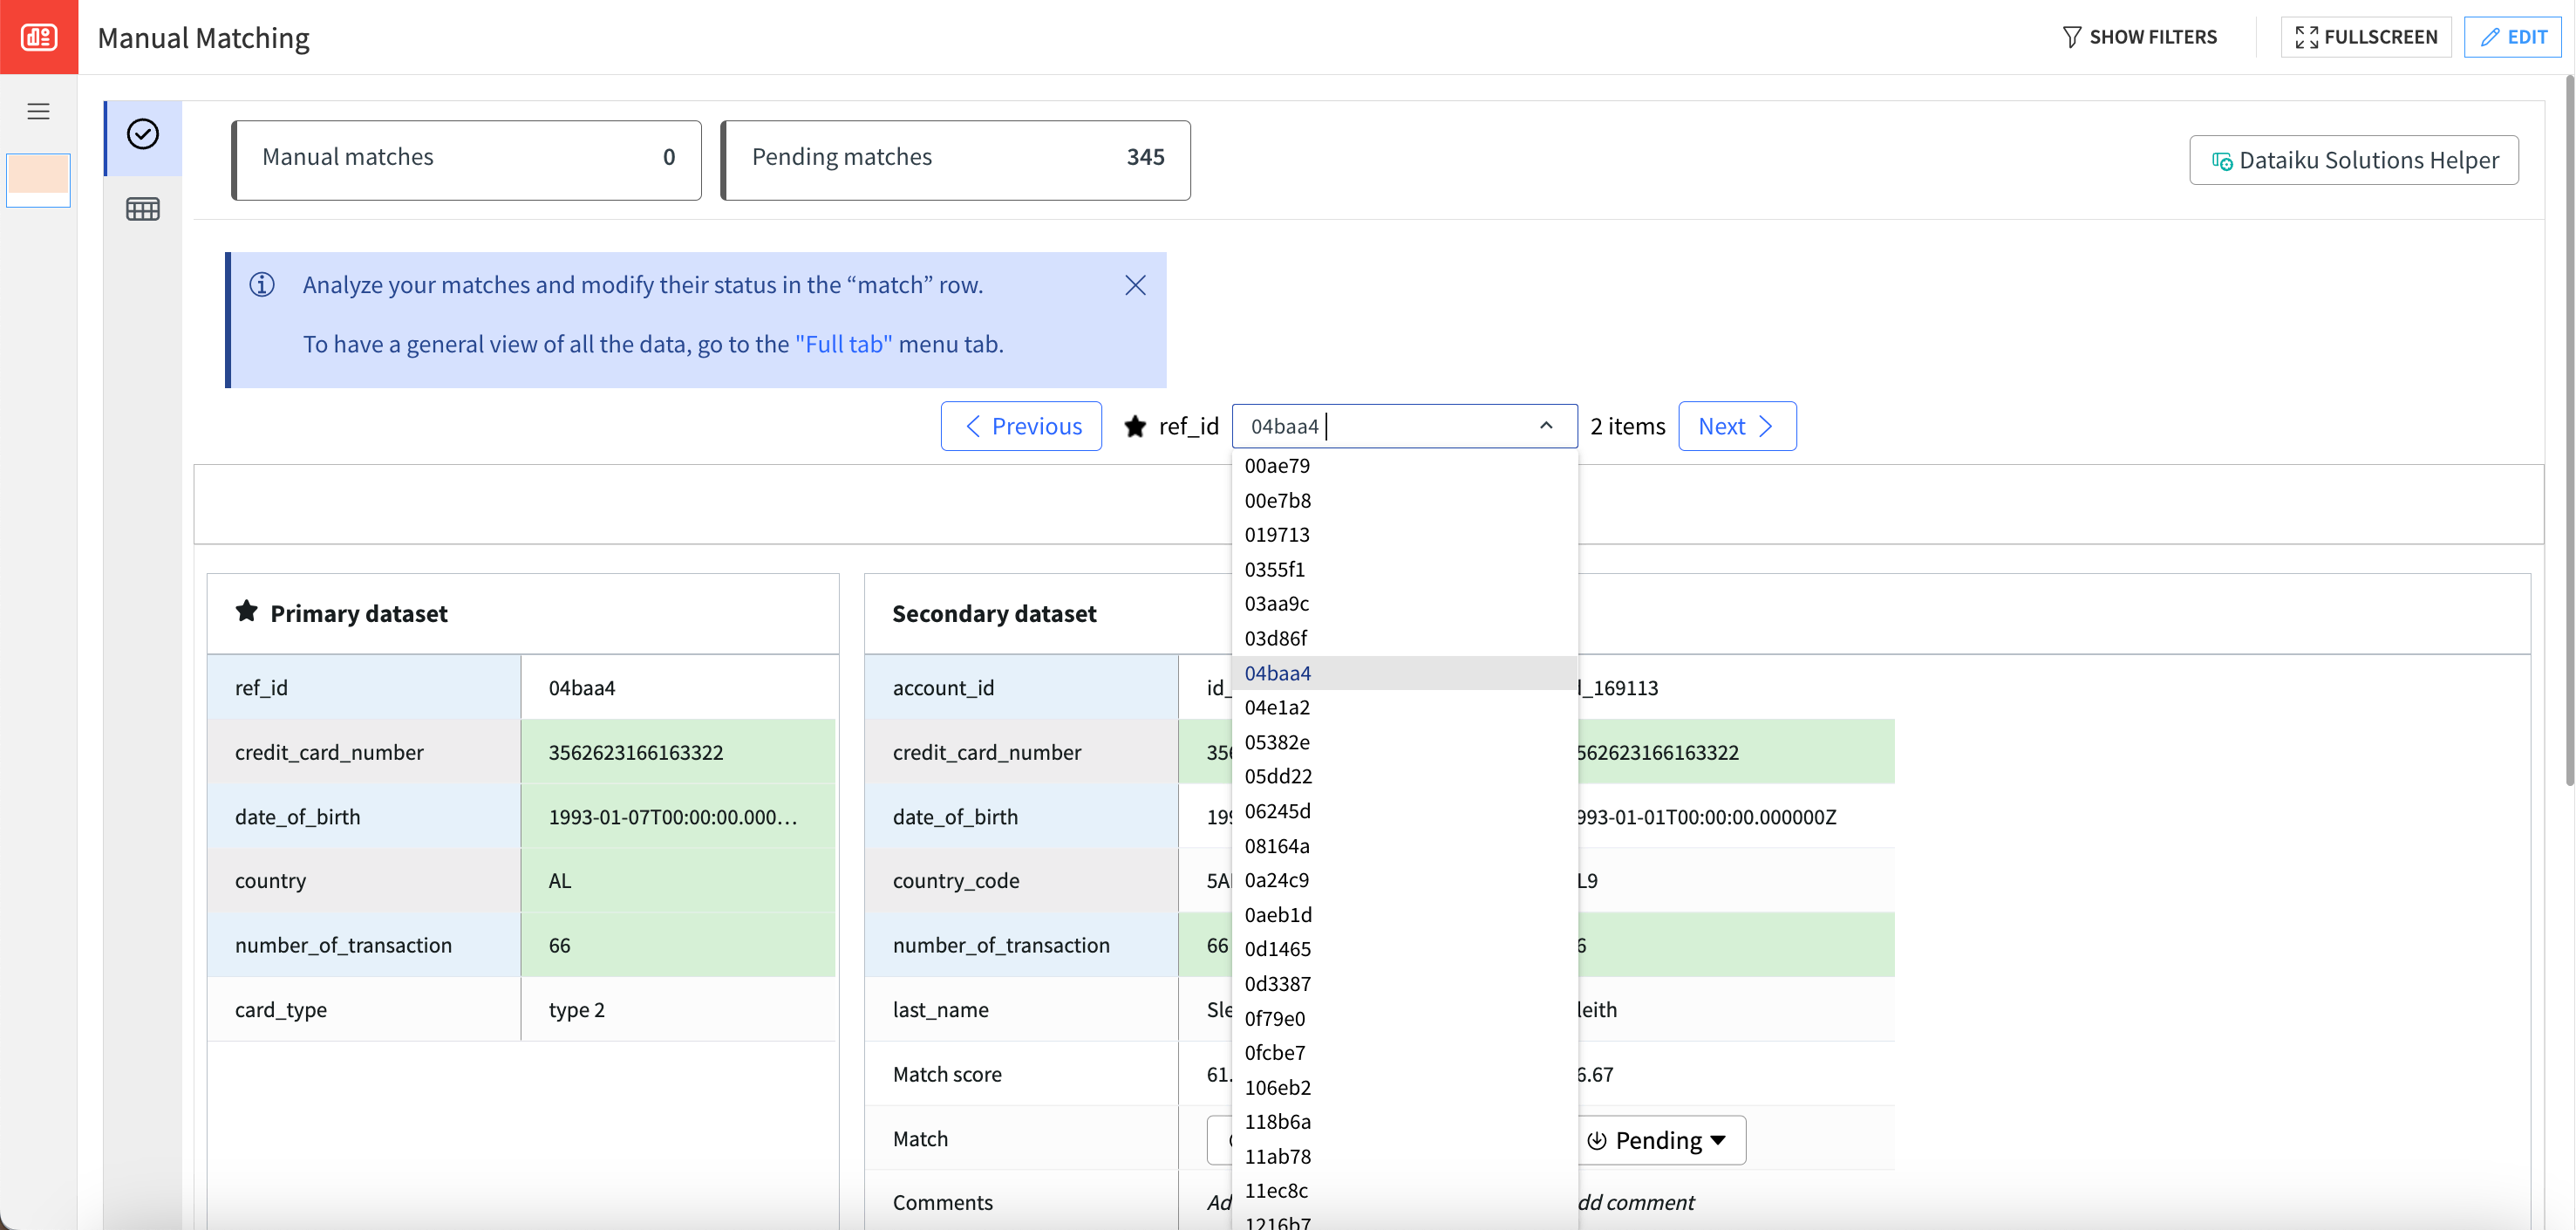
The manual matching webapp enables the manual approval or rejection of pending matches. It offers the option to review each match individually (focus table) or through a more comprehensive view (full table).
In the Focus Table tab, you can select the ID from the primary dataset for review (for example, 04baa4) either by using the dropdown menu or by typing the ID directly. The page will update dynamically based on the selected ID. Then, you can use the dropdown button to flag matches and insert comments if necessary.

In the Full Table tab, users can scroll down to view more matches and click the button in the bottom right to navigate to the next page if needed. If multiple potential matches exist, the observations are grouped together by the primary ID column.

Using one or both tabs, matches can be manually flagged as approved, rejected, or pending. Additionally, users can enter comments to provide more context or information regarding these decisions.
Reconciliation analysis — after manual review#
To update the reconciliation analysis and include the reviews made in the manual matching webapp, click the Update Analysis button, wait a few seconds, and refresh the page.

Following the manual input in the webapp, you can see that some matches are now classified as manual matches. To view details about these matches, you can go to the Manual Matches section.

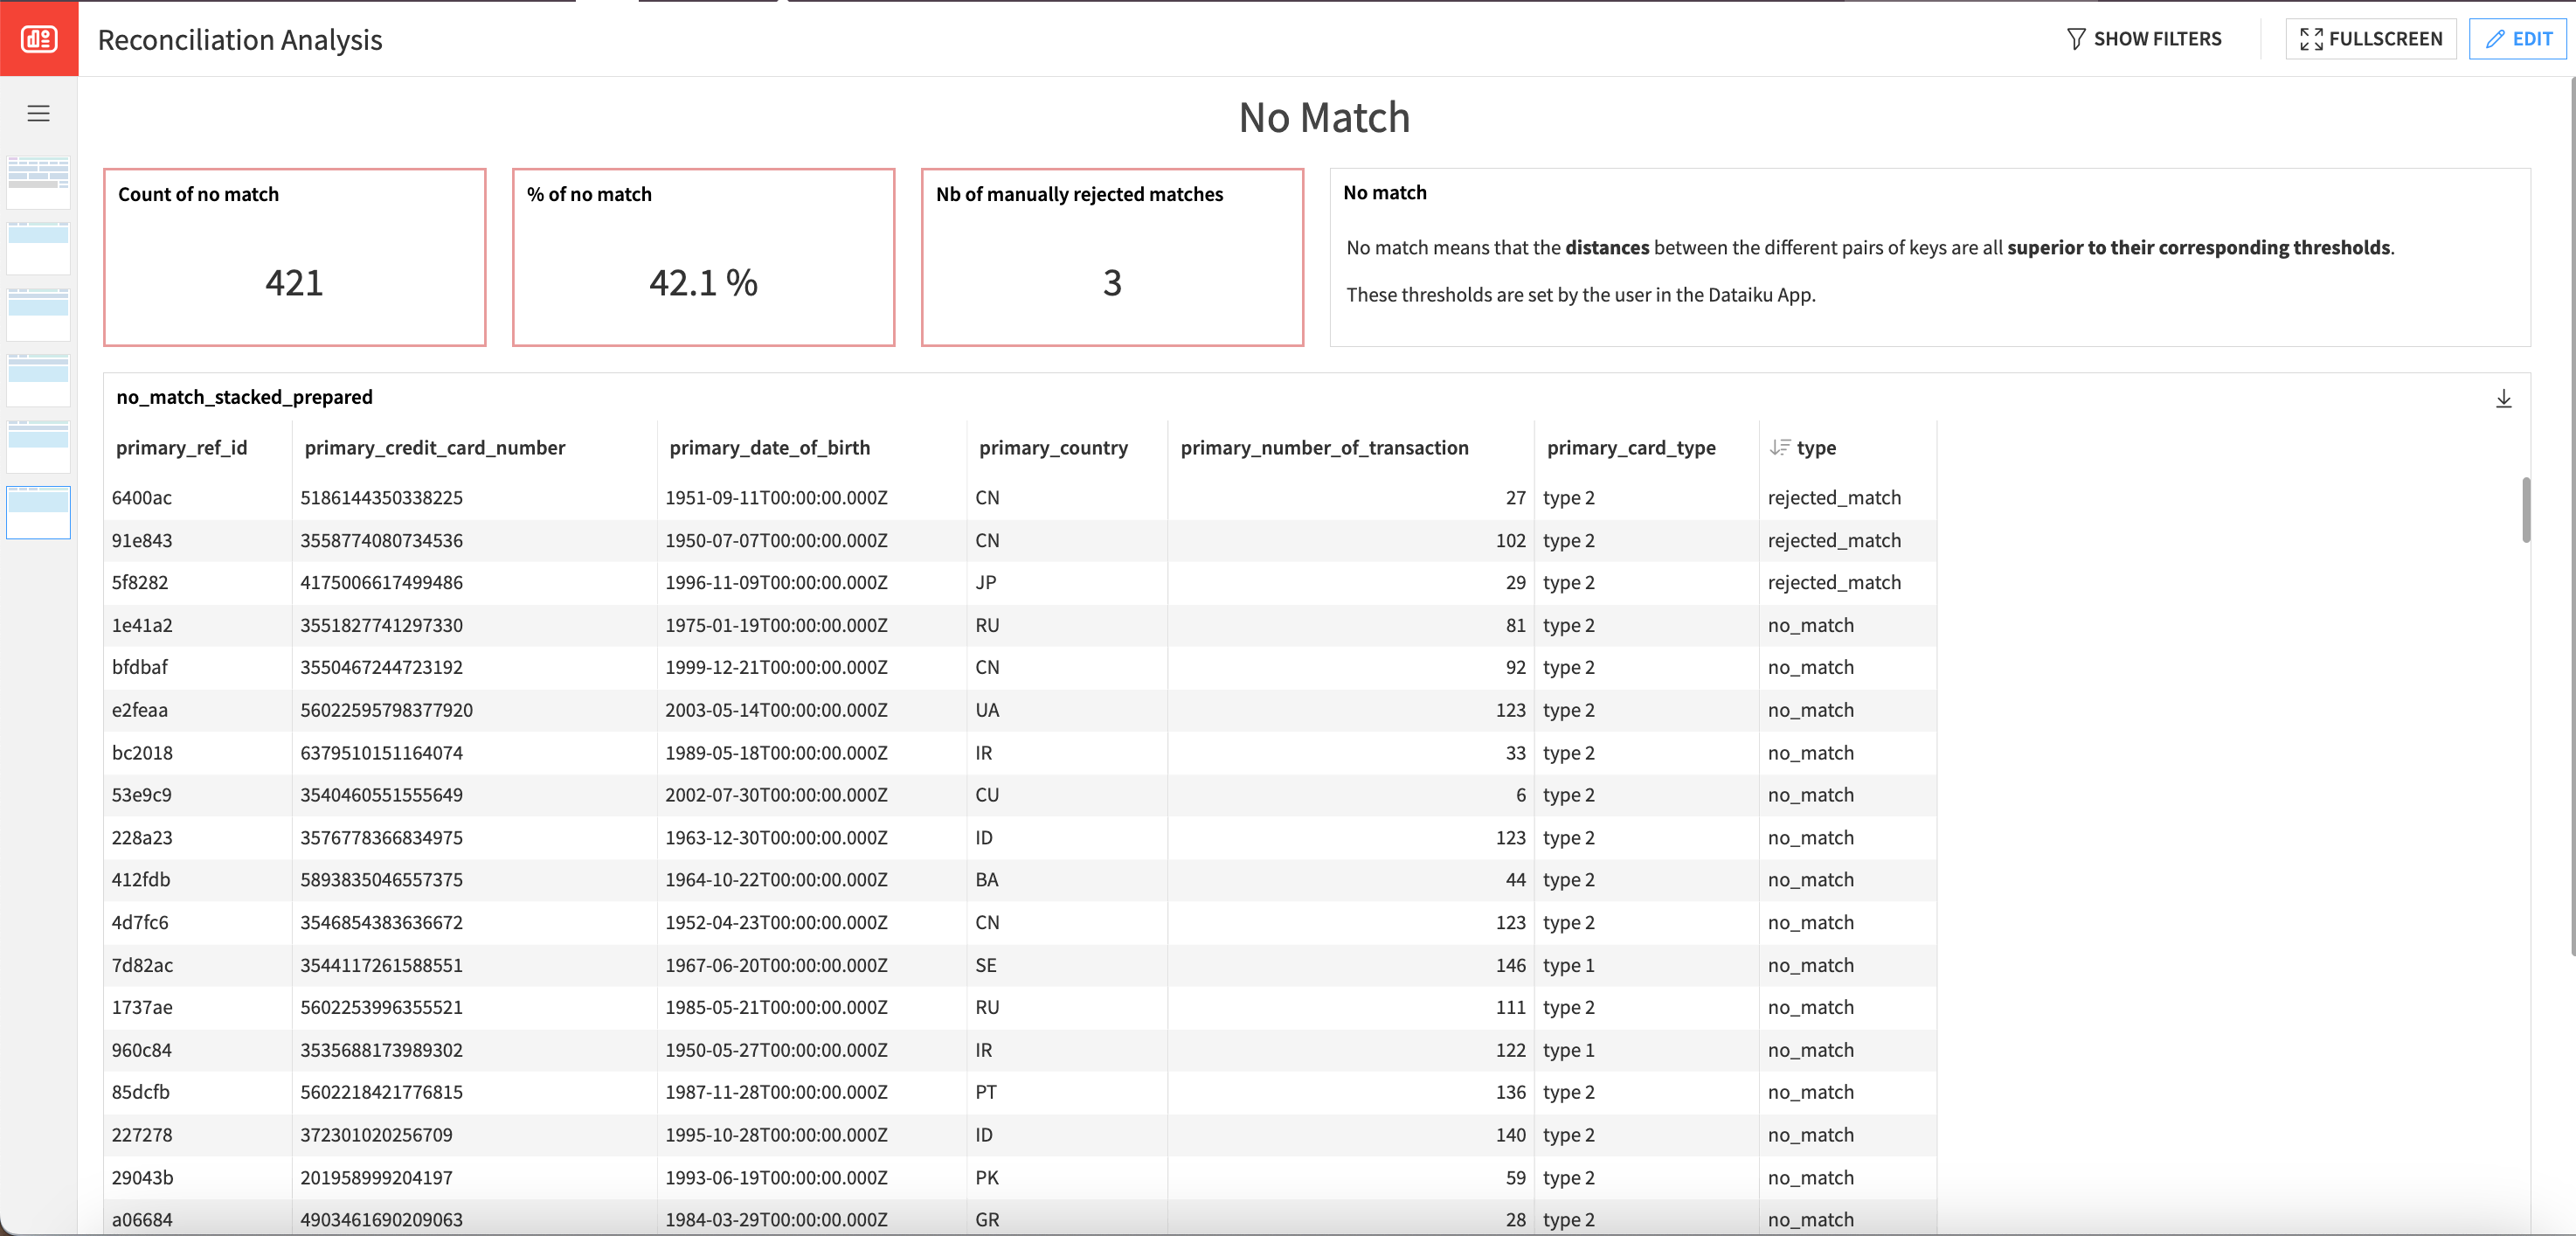
You can also see if any matches were manually rejected in the No Match section of the dashboard.

After completing the reconciliation process, users can either extract and use the reconciled observations or update the project settings to adjust the matching criteria as needed.
Responsible AI considerations#
The Reconciliation Solution is designed to facilitate accurate and efficient data matching across datasets. However, you shouldn’t use it for critical decision-making without proper oversight and validation.
Reproducing these processes with minimal effort for your data#
The intent of this project is to users to understand how Dataiku can match and verify data between two distinct datasets.
This documentation has provided several suggestions on how to derive value from this Solution. Ultimately however, the “best” approach will depend on your specific needs and data. If you’re interested in adapting this project to the specific goals and needs of your organization, Dataiku offers roll-out and customization services on demand.

