
Concept | Governed items#
The result of adding a governance layer to a Dataiku item is a governed item, or, to be more precise a Govern item. The term “Govern item” refers to capital “G” Govern items, as in objects belonging to the Govern node.
Tip
In general usage, you may see references to governed projects, governed models, etc. When a more technical distinction is helpful, you’ll also see references to capital “G” Govern projects, Govern models, etc. Both sets of terminology refer to the same property: an object with a governance layer that belongs to the Govern node.
Finding governed items#
You can browse governed items in two ways:
The Governed projects (
 ) page
The Model (
 ), Bundle (
 ), or GenAI (
 ) registry pages — filtered for governed items
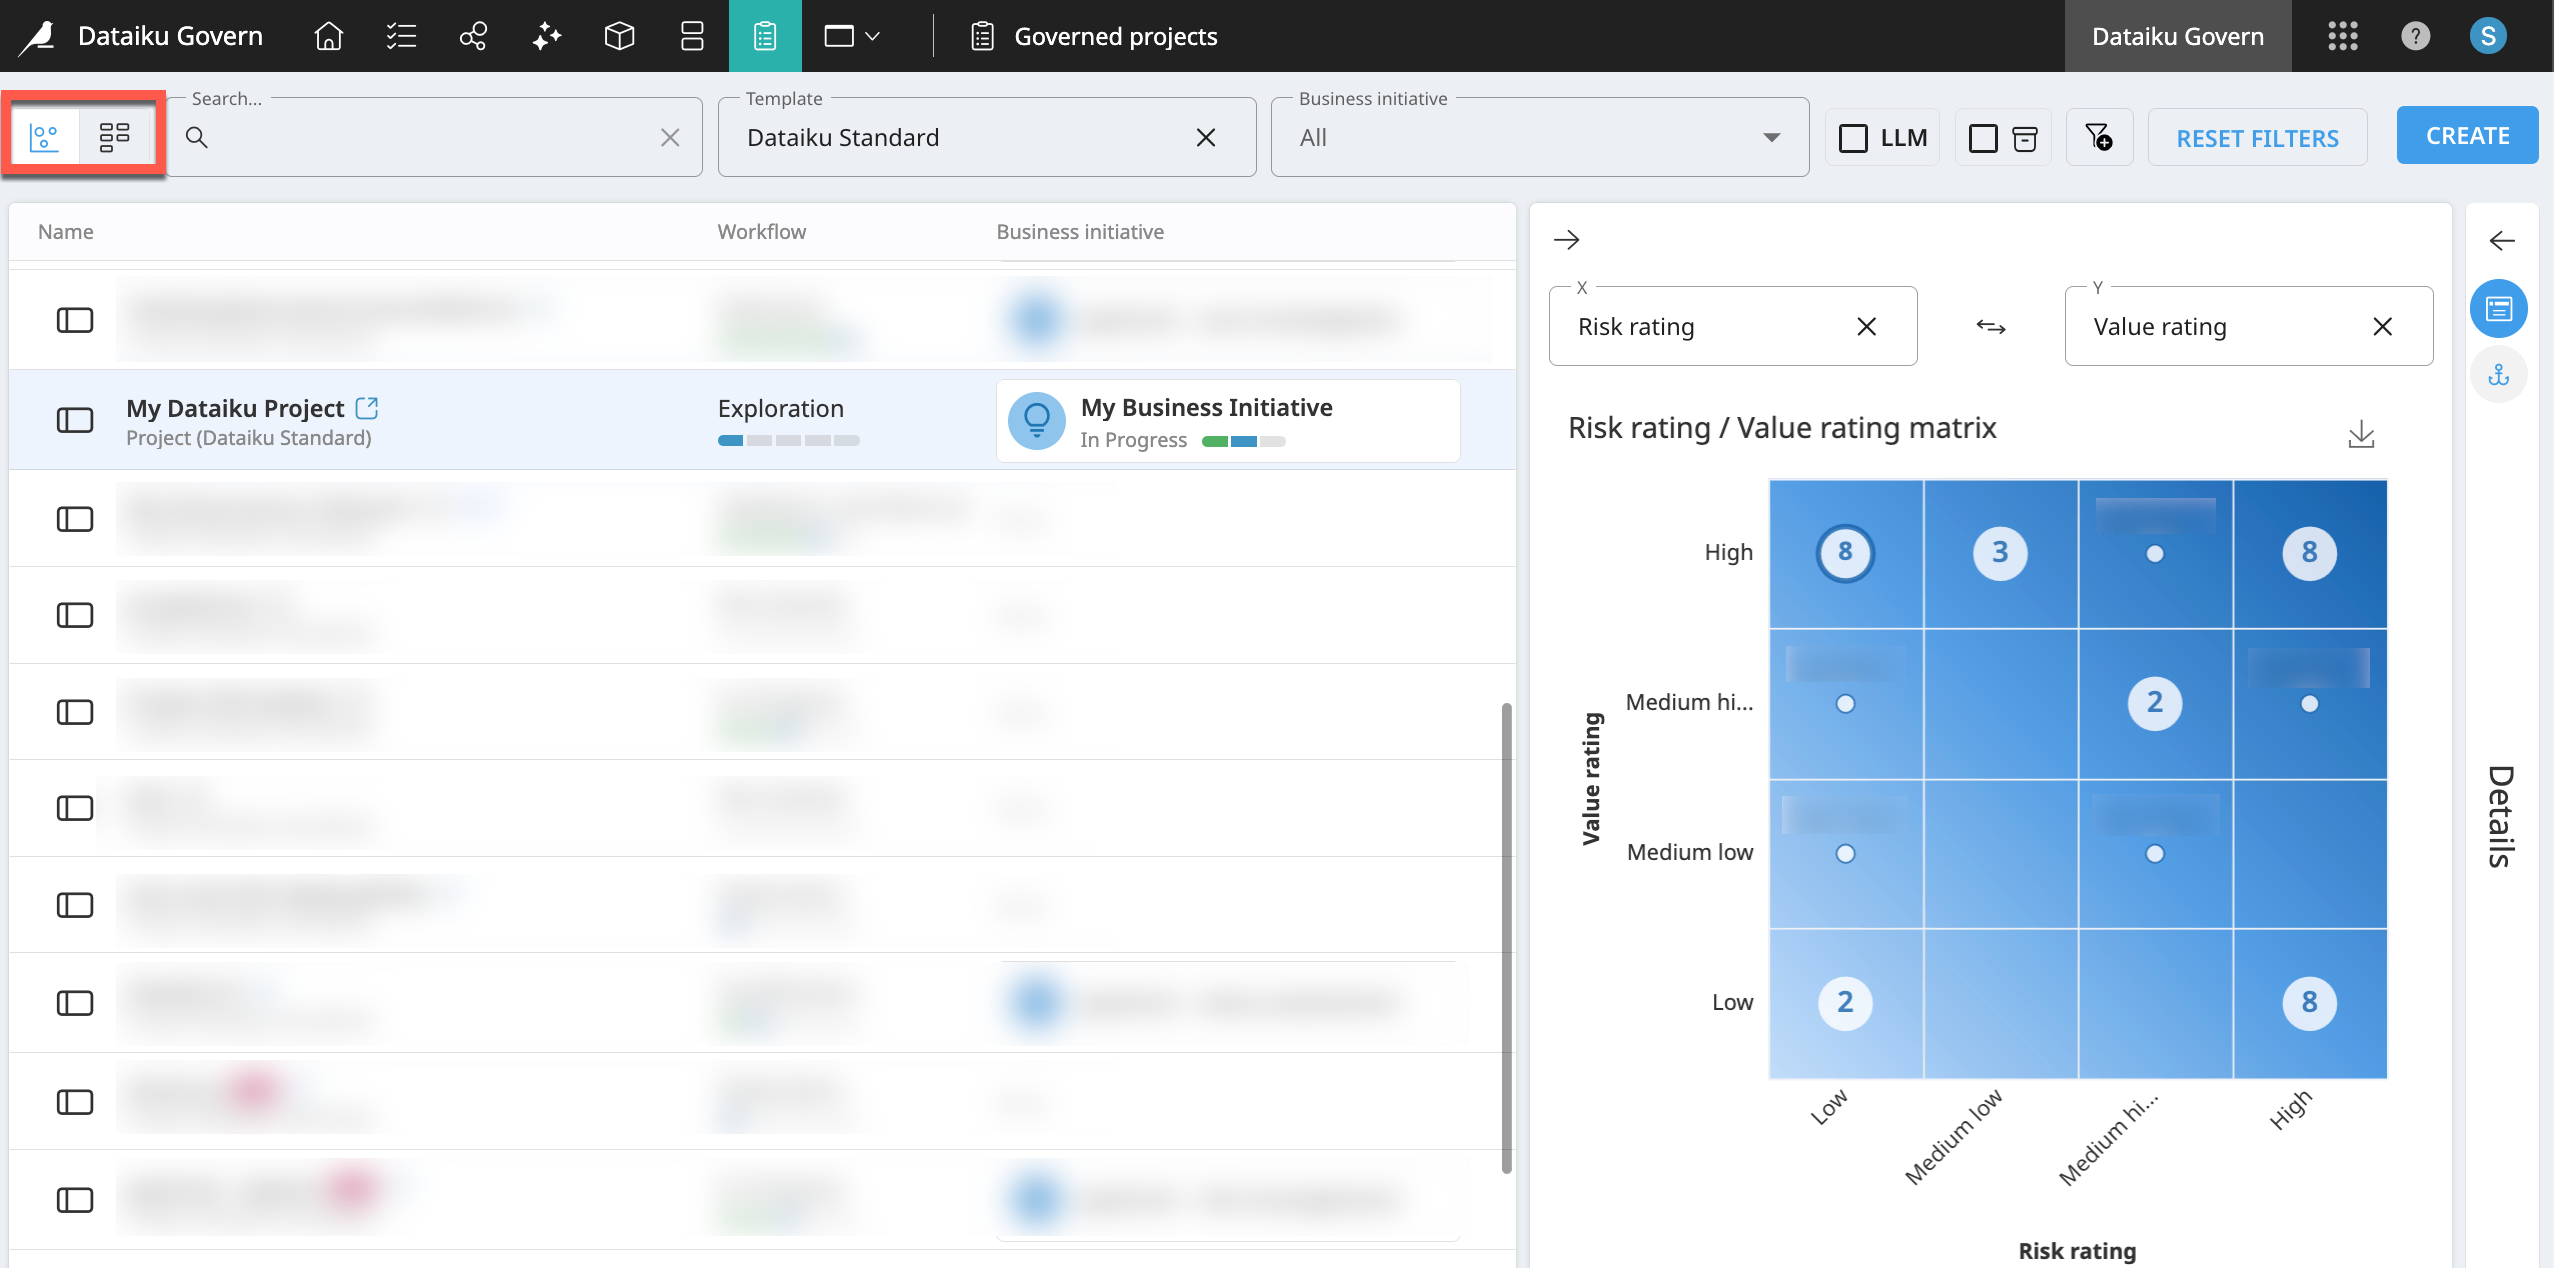
The Governed projects page has both matrix and Kanban views:
The matrix (
 ) view plots governed projects based on adjustable axes, such as risk and value.
The Kanban (
 ) view presents governed projects according to workflow steps.
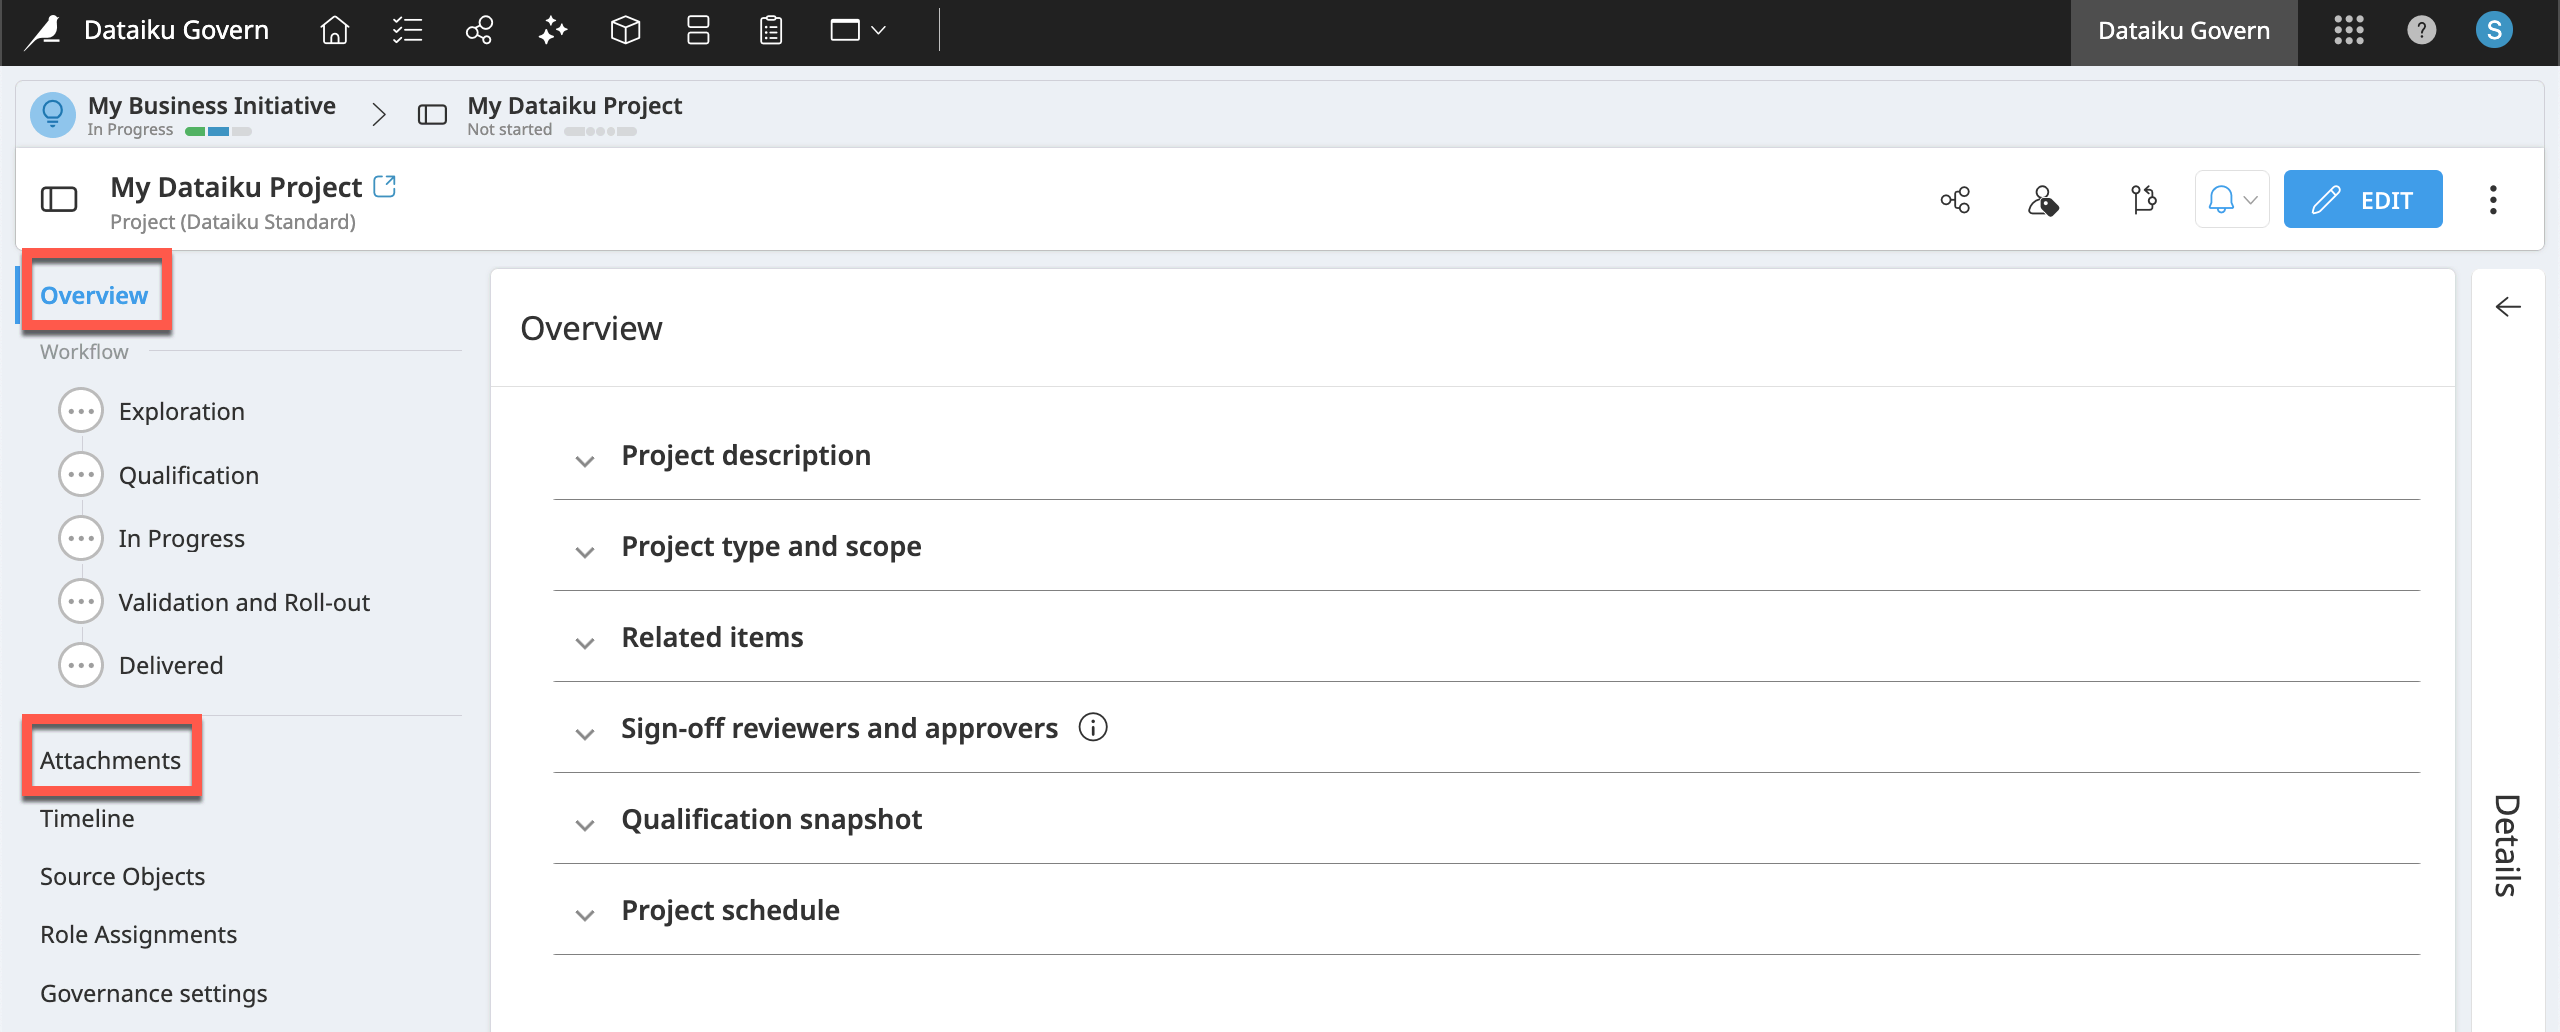
Documenting governed items#
Dataiku projects themselves have a number of tools for documentation. In addition to wikis, most objects inside a Dataiku project include space for descriptions in the Details (![]() ) tab of the right panel.
) tab of the right panel.
Outside of the project’s Design environment, the Govern node allows you to document items for different purposes, for different audiences. For example, in the context of fraud prediction, the project builder may need to document aspects of the model that another stakeholder needs to interpret to perform their compliance role.
Standard Govern items (such as Govern projects, Govern models, etc.) begin with an Overview section. At a minimum, this overview enables you to provide a full description. Overviews for Govern projects allow you to designate sponsors, upload additional files, define geographic and technical scope, assign reviewers, select qualification ratings, and set a schedule.
Going further, the Attachments panel provides a space to upload external files relevant to the governed item.
The Timeline panel automatically records key events in the item’s history.
Advancing Govern items through a workflow#
Your organization may have its own convention for communicating the status of a Dataiku project. For example, project builders might apply a specific tag, move a project to a certain folder, or use the discussion tools to communicate.
Many standard Govern items provide a built-in structure to meet this need through designated workflow steps. A workflow is a sequential series of stages to track the progress of a governed item, such as a project, a bundle, or a model version.
A template defines the steps of a workflow. All users have access to the Dataiku Standard templates. Organizations with advanced licenses have the option to define their own custom items, including custom workflows.
The Dataiku Standard template includes the following workflow steps depending on the type of Govern item:
Govern item |
Standard template workflow steps |
|---|---|
Business initiative |
Ideation, In Progress, Delivered |
Govern project |
Exploration, Qualification, In Progress, Validation and Roll-out, Delivered |
Govern bundle |
Review, Signed-off, Production, Retired |
Govern model version |
Development, Review, Deployment, Production, Offline |
Important
Depending on the template at hand, workflow steps can include a sign-off. You’ll learn more in Concept | Sign-offs in workflows of Govern items.
Tip
Open examples of any of the Govern items above, and browse the fields present in their workflow stages. Explore the remaining sections in the item’s left panel to determine what role they could play in your governance strategy.
Dataiku source items vs. Govern items#
Concept | Increasing AI asset visibility in the Govern node introduces how the Govern node fetches metadata of items from connected Dataiku nodes. By governing a Dataiku item, you add a governance layer to it. In practical terms, on top of a Dataiku source item’s metadata, you’ve created a capital “G” Govern item.
Although connected, items from these two different spheres remain separate entities. The diagram below suggests that many Govern items begin with synced metadata from a Dataiku source item. On top of this base, you apply a governance template. This template provides a structure to enrich the item with additional information such as risk ratings, notes, attachments, workflow steps, reviews, etc.
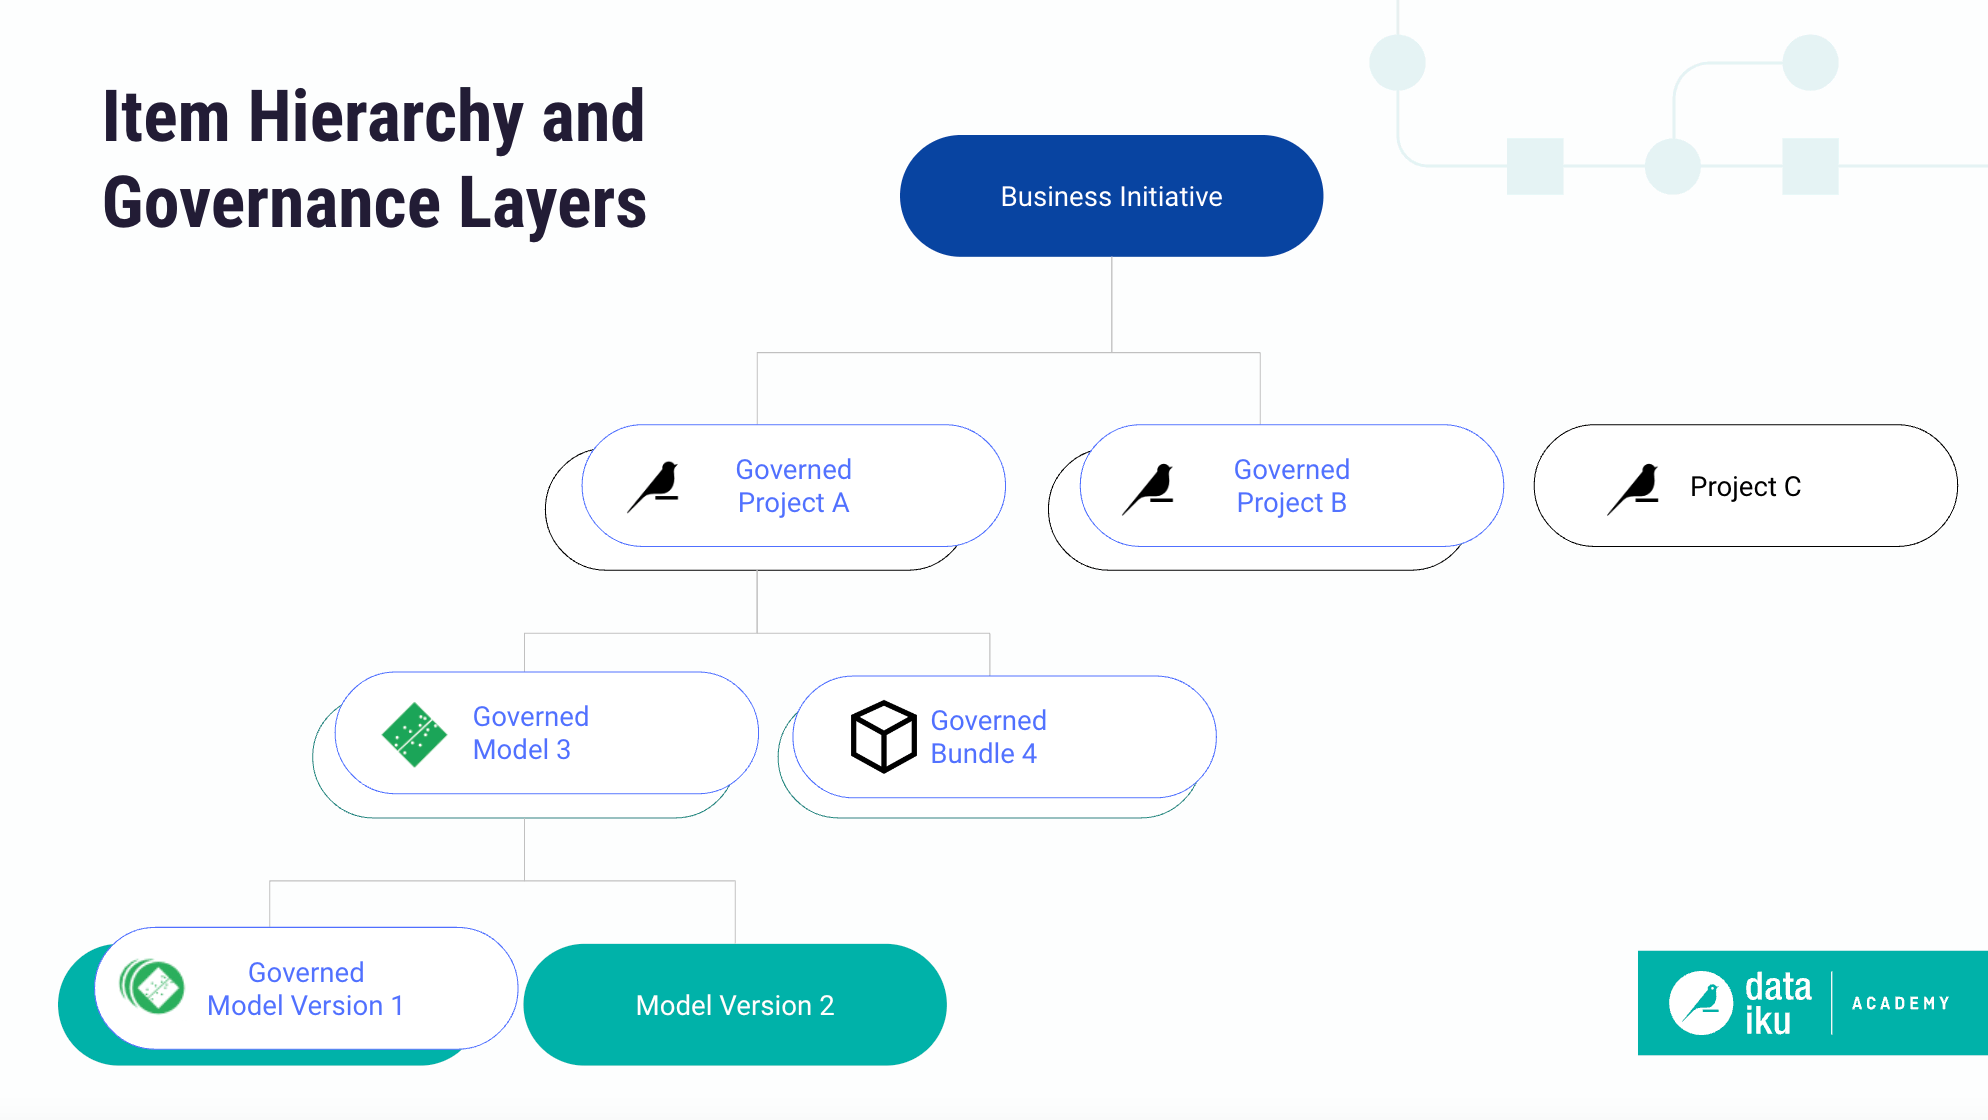
To interpret two examples from this diagram:
Govern Project A has the metadata of Dataiku Project A as its source, but end users enrich it with more information such as risk ratings and reviewer assignments.
Govern Bundle B has the metadata of Dataiku Bundle B as its source, but end users enrich it with more information such as workflow stages and feedback.
Tip
For any Govern item, the Source objects panel details the associated Dataiku item and any related objects.
Pure Govern items#
Not every Govern item must have a Dataiku source object. In the diagram above, Business initiative M and Govern project N don’t have an underlying Dataiku source object. They exist only in the Govern node.
Business initiatives, a container to organize Govern projects, are always purely a Govern item.
You can create Govern projects directly in the Govern node without an associated Dataiku source project. For example, you might pre-qualify proposals in a Govern project before starting work in a Dataiku Design node. If the Govern project earns approval, you can then attach a Dataiku project to the validated Govern project.
If using an advanced license, you might encounter custom items that are also purely Govern items without Dataiku source items. Think of an external model registry, a risk register, or model cards.
Next steps#
Having explored the structure of governed items, try out this process for yourself in Tutorial | Governance basics.